Loading ...
Loading ...
Loading ...
EN -8-
1 2 3
4 7
8
9
10
5
6
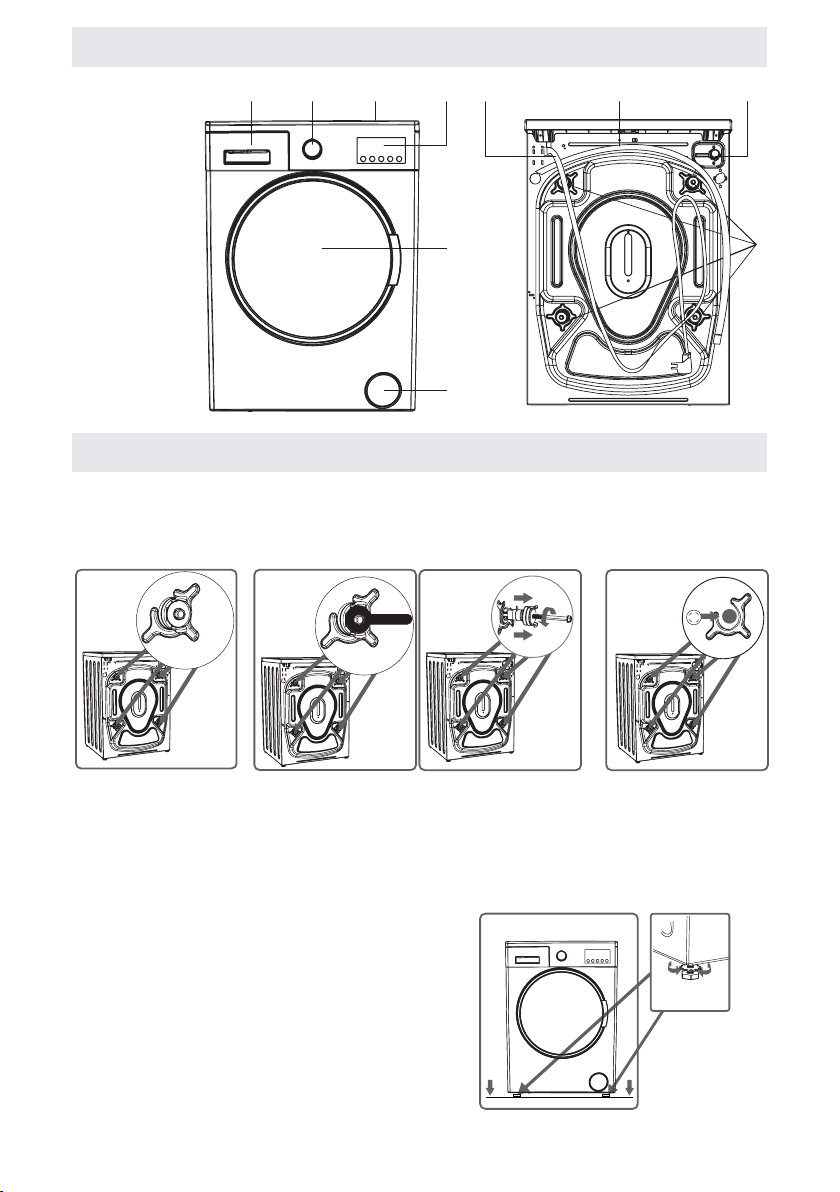
1. Detergent drawer
2. Programme knob
3. Upper Tray
4. Electronic display
5. Container
6. Cover of pump lter
7. Power Cable
8. Discharging Hose
9. Water Inlet Valve
10. Transportation
Safety
CHAPTER -3: INSTALLATION
REMOVING TRANSPORTATION SAFETY SCREWS
Before operating the washing machine, remove the 4 transportation screws and rubber spacers from the back of
the machine. If the screws are not removed, it may cause heavy vibration, noise and product malfunction, (voiding
the guarantee). For this reason, transportation safety screws shall be loosened by being rotated in counter-
clockwise using an appropriate wrench.
X4
X4
X4
Before operating the washing machine, remove the 4 transportation screws and rubber spacers from the back of
the machine. If the screws are not removed, it may cause heavy vibration, noise and product malfunction, (voiding
the guarantee). For this reason, transportation safety screws shall be loosened by being rotated in counter-
clockwise using an appropriate wrench. Transportation screws shall be removed by pulling out. Fit the plastic
transportation screw taps delivered in accessories bag to the palces where transportation screws have been
removed. The transportation safety screws should be stored to be used in case of transportation.
NOTE: You should absolutely remove the transportation screws of your machine before the rst usage. Faults
occurring in the machines operated with transportation screw tted shall be out of scope of warranty.
ADJUSTING ADJUSTABLE STAYS
• Do not install your machine on a carpet or such grounds that
would prevent the ventilation of its base.
• To ensure silent and vibration-free operation of your machine,
it should be deployed on a non-sliding and rm
ground.
• You can adjust the balance of your machine through the stays.
• Loosen the plastic adjustment nut.
CHAPTER -2: OVERVIEW OF YOUR DEVICE GENERAL
APPEARANCE
Loading ...
Loading ...
Loading ...