Leveling your dryer properly reduces excess noise and vibration.
1. Remove cardboard from beneath dryer. Place a level on top edges of dryer, checking each side and front. If not level, tip dryer and adjust feet up or down, repeating as necessary.
2. Grip dryer from top and rock back and forth, making sure all four feet are firmly on floor. Repeat, rocking dryer from side to side. If dryer rocks, adjust leveling feet.
3. If dryer is not level, turn the leveling feet counterclockwise to lower the dryer or clockwise to raise the dryer. Recheck levelness of dryer and that all four feet are firmly in contact with the floor. Repeat as needed.
HELPFUL TIP: You may want to prop up front of dryer about 4" (102 mm) with a wood block or similar object that will support weight of dryer.
COMPLETE INSTALLATION
Check the electrical requirements. Be sure that you have the correct electrical supply and the recommended grounding method. See “Electrical Requirements.”
Check that all parts are now installed. If there is an extra part, go back through the steps.
Check that you have all of your tools.
Dispose of/recycle all packaging materials.
Plug into a grounded outlet, or connect power.
Check dryer operation. Close dryer door. Insert coins in slide and press slide in slowly. Select the Whites and Colors cycle and let the dryer run for at least five minutes. NOTE: Dryer door must be closed for dryer to operate.
Open the dryer door. Check that the inside of the dryer is warm. If the burner does not ignite and you can feel no heat inside the dryer, shut off dryer for five minutes. Check that all supply valve controls are in “ON” position and that the electrical cord is plugged in. Repeat five-minute test.
If drying time is too long, make sure that the lint screen is clean and that there are no obstructions to airflow in the dryer vent system.
Restart the dryer and allow it to complete a full cycle to make sure it is working properly.
REVERSING DRYER DOOR SWING (OPTIONAL)
Remove the Door Assembly
1. Place a towel or soft cloth on top of dryer or work space to avoid scratching of the surface.
2. Remove 3 of the 4 screws that hold the door hinge on the front panel of the dryer. Partially loosen the remaining screw with keyhole opening and lift the door off the screw.
3. Lay the door assembly on a previously prepared flat surface with the inside (inner door assembly) facing up, and remove 6 phillips-head screws to release outer door assembly from inner door assembly.
NOTE: It is important that you remove only the 6 indicated screws.
4. Lift the inner door assembly off outer door assembly.
5. Remove 4 Phillips-head screws to release center insert from outer door ring.
6. Lift and rotate center insert 180 degrees.
7. Reassemble the center insert and outer door ring with the 4 screws
Reverse Hinge
1. Use a small flat-blade screwdriver to remove 2 plug strips from the inner door. Slide the head of the screwdriver under the plugs, without scratching inner door surface, and lift up strip.
2. Remove the 4 screws that attach to inner door hinge.
3. Move hinge to other side. Reinstall 4 screws.
4. Reinstall plug strips on opposite side of the inner door.
5. Check for fingerprints on the glass. Clean if necessary.
Replace the Door Assembly
1. Place the inner door assembly inside the outer door assembly.
2. Reassemble the inner and outer door assemblies with the 6 screws.
Reverse the strike
1. Use a small flat-blade screwdriver to remove plug strip from the dryer door opening. Slide the head of the screwdriver under the plugs, without scratching dryer surface, and lift up strip.
2. Remove the strike using a Phillips screwdriver.
3. Insert strike on the opposite side.
Reinstall the door
1. Partially insert the third screw from the top; then slide the hinge onto this screw while hooking the hinge into the front panel hole. Reattach door to dryer front panel with the remaining three screws.
2. Check for fingerprints on the glass. Clean if necessary.
3. Close door and check that it latches securely.
MAINTENANCE INSTRUCTIONS
■ Clean lint screen before and after each cycle.
■ Removing accumulated lint:
From inside the dryer cabinet:
Lint should be removed every 2 years or more often, depending on dryer usage. Cleaning should be done by a qualified person.
From the exhaust vent:
Lint should be removed every 2 years, or more often, depending on dryer usage.
■ Keep area around dryer clear and free from combustible materials, gasoline, and other flammable vapors and liquids.
■ Keep dryer area clear and free of items that would obstruct the flow of combustion and ventilation air.
IF YOU NEED ASSISTANCE
If you need service, all warranty service is provided exclusively by our authorized Whirlpool Service Providers. In the U.S. and Canada, direct all requests for warranty service to: Whirlpool Customer Experience Center.
In the U.S.A. call 1-800-253-1301. In Canada call 1-800-807-6777.
If outside the 50 United States and Canada, contact your authorized Whirlpool dealer to determine if another warranty applies.
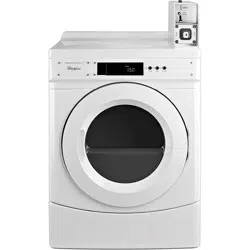
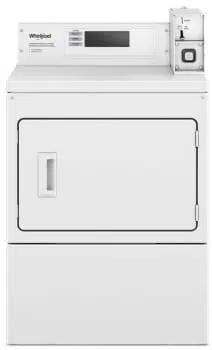
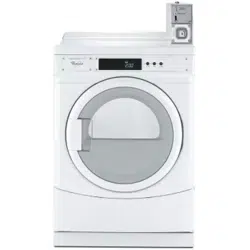
ELECTRONIC CONTROL SETUP INSTRUCTIONS
NOTE: After the dryer has been installed and plugged in, the display will show “0 MINUTES.” After the door has been opened and closed, the display will show the vend price.
General User Information
SCROLLING “OUT OF ORDER” MESSAGE, FOLLOWED BY A FAILURE OR DIAGNOSTIC CODE, SHOWING IN DISPLAY – This condition indicates the dryer is inoperative.
“0 MINUTES” SHOWING IN DISPLAY – This indicates the dryer cannot be operated. Coins dropped or debit inputs during this condition will be stored in escrow but cannot be used until normal operation is restored by opening and closing the door. If a door switch has failed, causing “0 MINUTES” to remain in the display after the door is opened and closed, it must be replaced before normal operation can be restored.
COLD START (Initial first use) – Dryer is programmed at the factory as follows: $1.50 dry price (30 minutes). model only: $0 dry price (45 minutes)
WARM START (after power failure) – A few seconds after power is restored, if a cycle was in progress at the time of the power failure, “RESELECT CYCLE” will flash in the display, indicating the need for a fabric setting button to be pressed to restart dryer.
PRICING – After the door is opened and then closed following the completion of a cycle, the display indicates the cycle price (unless set for free operation, where the display will flash “SELECT CYCLE”). As coins are dropped or debit inputs arrive, the display will change to lead the user through the initiation of a cycle.
There are four (4) types of dryer pricing:
Fixed “Vend” Pricing
A dryer setup for “Fixed Cycle” operation can only accept additional time accumulated by increments equal to the length of a complete dry cycle. A maximum of 99 minutes may be purchased; no additional credit is given for coins dropped with 99 minutes in the display.
Accumulator Pricing
If option d is set to d. 00, and the 6 code is set to one coin 1, then accumulator pricing is in effect. Cycle time can be purchased one coin at a time up to the maximum time of 99 minutes.
Fixed Cycle With Top Off Pricing (available for use with coin drops or card readers only)
A dryer set to offer “Top Off” capability will allow time to be added to an existing dry cycle in increments equal to the number of minutes of dry time per quarter (coin 1), up to 99 minutes, regardless of the cost required to start the dryer. No credit is given for coins or debit inputs entered when the control is displaying 99 minutes.
FREE CYCLES – This is established by setting the cycle price to zero. When this happens, “SELECT CYCLE” will appear rather than a cycle price. Any cycle started as a free cycle will automatically terminate when the door is opened.
DEBIT CARD READY – This dryer is debit card ready. It will accept a variety of debit card systems, but does NOT come with a debit card reader. Refer to the debit card reader manufacturer for proper dryer setup. When a Generation 2 card reader is installed, the dryer is placed in enhanced debit mode.
In Enhanced Debit Mode, the top off price can be set independently (see VALUE OF COIN 2), and the top off time is calculated according to the following equation:
In models converted to a Generation 1 debit card system, debit pulses represent the equivalent of one coin (coin 1).
NOTE: Enhanced debit mode cannot be deselected.
Control Set-up Procedures
IMPORTANT: Read all instructions before operating.
The fabric setting buttons along with the digital display are used to set up the dryer controls.
The display can contain 4 numbers and/or letters and a decimal point. These are used to indicate the set-up codes and related code values available for use in programming the dryer.
How to Use the Buttons to Program the Controls
1. The COTTON/WHITES button is used to adjust the values associated with set-up codes. Pressing the button will change the value by increments. Rapid adjustment is possible by holding down the button.
2. The PERM PRESS button will advance through the set-up codes. Pressing this button will advance to the next available set-up code. Holding down the button will automatically advance through the set-up codes at a rate faster than 1 per second.
3. The COLORS/DELICATES button is used to select or deselect options.
Start Operating Setup
Insert service access door key, turn, and lift to remove service access door.
Dryers with Card Reader Installed:
Once the debit card reader is installed (according to the reader manufacturer’s instructions), the set-up mode can be entered by inserting a manual set-up card (supplied by the reader manufacturer) into the card slot. If manual set-up card is not available, only the diagnostic mode can be entered by removing the service access door.
IMPORTANT: To access set-up mode or diagnostic mode, use a service key (9050 models) to open the service access door. If a card reader is installed, a service card is available for accessing diagnostics. If a service key is not available (9060 models), the AA1 connector must be removed or the Service Access Code described below must be used. The console must not be opened unless power is first disconnected from the dryer. To access connector AA1:
Unplug dryer or disconnect power.
Open console, remove plug on AA1, and close console.
Plug in dryer or reconnect power.
The dryer is now in the set-up mode.
To enter the alternative Service Access Code and enter set-up mode: Press the Left Button, Right Button, Left Button, Right Button, and Right Button.
NOTE: It is not necessary to set up the dryer with the following codes; the dryer is pre-set at the factory. These codes can be used to change settings, if desired.
Set-Up Codes
■ The PERM PRESS button will advance from code to code.
■ The COTTON/WHITES button will change the code value.
■ The COLORS/DELICATES button will select or deselect options.
The set-up code is indicated by the one or two left-hand characters. The set-up code value is indicated by the two or three right-hand characters.
NOTE: The first line of each code indicates the factory default.
TO EXIT FROM SET-UP MODE
1. Close the service access door.
2. Disconnect dryer from power before reinstalling the AA1 connector, if it was removed.
3. Remove the manual set-up card.
4. Wait two minutes without activating any dryer inputs.
5. Disconnect and then reconnect power.
Diagnostic Codes
If the set-up mode is entered and one of the following has previously occurred, the appropriate diagnostic code will be in the display.
Dryer Display
Explanation
d 5
Blocked coin 1 or coin drop UI control circuit failure (coin recognition and customer display disabled while blockage persists).
d 9
Voltage detected below 90 VAC for 8 seconds.
d 13
Blocked coin 2 or coin drop UI control circuit failure (coin recognition and customer display disabled while blockage persists).
d 16
Not receiving communications from installed debit card reader in Enhanced (Generation 2) Debit mode.
F 01
Dryer motor control circuit error (cycles and price display disabled until diagnostic code is manually cleared). The control doesn’t know if the motor relay is bad (stuck on), the motor relay drive circuit is bad (shorted), causing the motor relay to stay on, or the motor relay feedback circuit is bad.
F 22
Exhaust thermistor open, temperature drops below 18°F (>50 kΩ) for 1 minute in Run mode, or immediately in Factory Diagnostic Mode.
F 23
Exhaust thermistor shorted, temperature above 250°F (<500Ω) for 1 minute in Run mode, or immediately in Factory Diagnostic Mode.
F 70
UI is not receiving communications from CCU (cycles and price display disabled while error persists or is manually cleared).
F 71
CCU is not receiving communications from UI (cycles and price display disabled while error persists or is manually cleared).
F 73
UI Microprocessor is not able to read or verify EEPROM (cycles and price display disabled until diagnostic code is manually cleared).
F 74
UI EEPROM memory is a CRC failure (cycles and price display disabled until diagnostic code is manually cleared).
Dryer Diagnostic Mode
This mode is entered by pressing COLORS/DELICATES for one second while in either of the set-up codes 6.xx or 7.xx or with a diagnostic code present. Diagnostic codes are cleared on entry and all display segments should flash. If a diagnostic code persists, it must be corrected before the diagnostic cycle can be entered.
All Models:
With all segments flashing, the diagnostic cycle is started by pressing the PERM PRESS button. The cycle consists of 7 minutes of heat and 1 minute of cooldown.
The COTTON/WHITES button will increment the diagnostic cycle minutes up to 99, then roll over to 2 minutes. The COLORS/DELICATES button will cancel this cycle and exit the diagnostic mode.
Dryer Help Mode
Dryer help mode is entered by pressing the COTTON/WHITES button while in special pricing option 2.XX. In help mode, the software revision is displayed. The help mode is advanced by pressing the PERM PRESS button. See Help Mode Submenu below for the order in which items are displayed. Press the COTTON/WHITES button at any time to exit help mode.
Help Codes
Help Code
Description
71
Generation 2 debit card cycle polling message out of sequence.
74
Generation 2 debit card remaining balance message out of sequence.
75
Generation 2 debit card new card balance message out of sequence.
88
Invalid messaging state found in data acquisition communications comm_ suprv ( ) routine.
Help Mode Submenu
Step
Display Indication
Explanation
1
1h.XX
Help Code 1, where XX is the help code number. *
2
2h.XX
Help Code 2, where XX is the help code number. *
3
3h.XX
Help Code 3, where XX is the help code number. *
4
1.X##
Error history code 1, where X is the F or d code, and ## is the code number. **
5
2.X##
Error history code 2, where X is the F or d code, and ## is the code number. **
6
3.X##
Error history code 3, where X is the F or d code, and ## is the code number. **
7
4.X##
Error history code 4, where X is the F or d code, and ## is the code number. **
8
SC.XX
CCU software revision, where XX is the software revision number.
9
SU.XX
UI software revision, where XX is the software number.
10
EU.XX
UI EEPROM revision, where XX is the EEPROM number.
* To erase the 3 help codes, press COLORS/DELICATES button.
** The Errors displayed in this section are the history errors that have occurred in the dryer (not necessarily an error that is in progress). The current error is displayed in the MANUAL KEY FUNCTION IN DIAGNOSTIC SUB-MODE.
In help mode, other display symbols and elements are mapped to reflect the state of various inputs and outputs as follows: