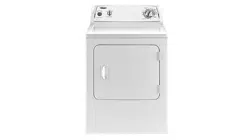

W10454267B
ELECTRIC OR GAS DRYER
USE AND CARE GUIDE
SECADORA A GAS O ELÉCTRICO
MANUAL DE USO Y CUIDADO
Table of Contents
DRYER SAFETY ........................................................................... 2
CHECK YOUR VENT SYSTEM
FOR GOOD AIR FLOW ................................................................ 4
CONTROL PANEL & FEATURES ................................................. 5
SEGURIDAD DE LA SECADORA .............................................. 14
REVISE QUE EL SISTEMA DE VENTILACIÓN
TENGA UN BUEN FLUJO DE AIRE .......................................... 16
PANEL DE CONTROL Y CARACTERÍSTICAS ......................... 17
Índice
CYCLE GUIDE .............................................................................. 6
USING YOUR DRYER .................................................................. 7
DRYER CARE ............................................................................... 9
TROUBLESHOOTING ................................................................ 11
GUÍA DE CICLOS ....................................................................... 18
USO DE SU SECADORA ........................................................... 19
CUIDADO DE LA SECADORA ................................................... 21
SOLUCIÓN DE PROBLEMAS .................................................... 23
2
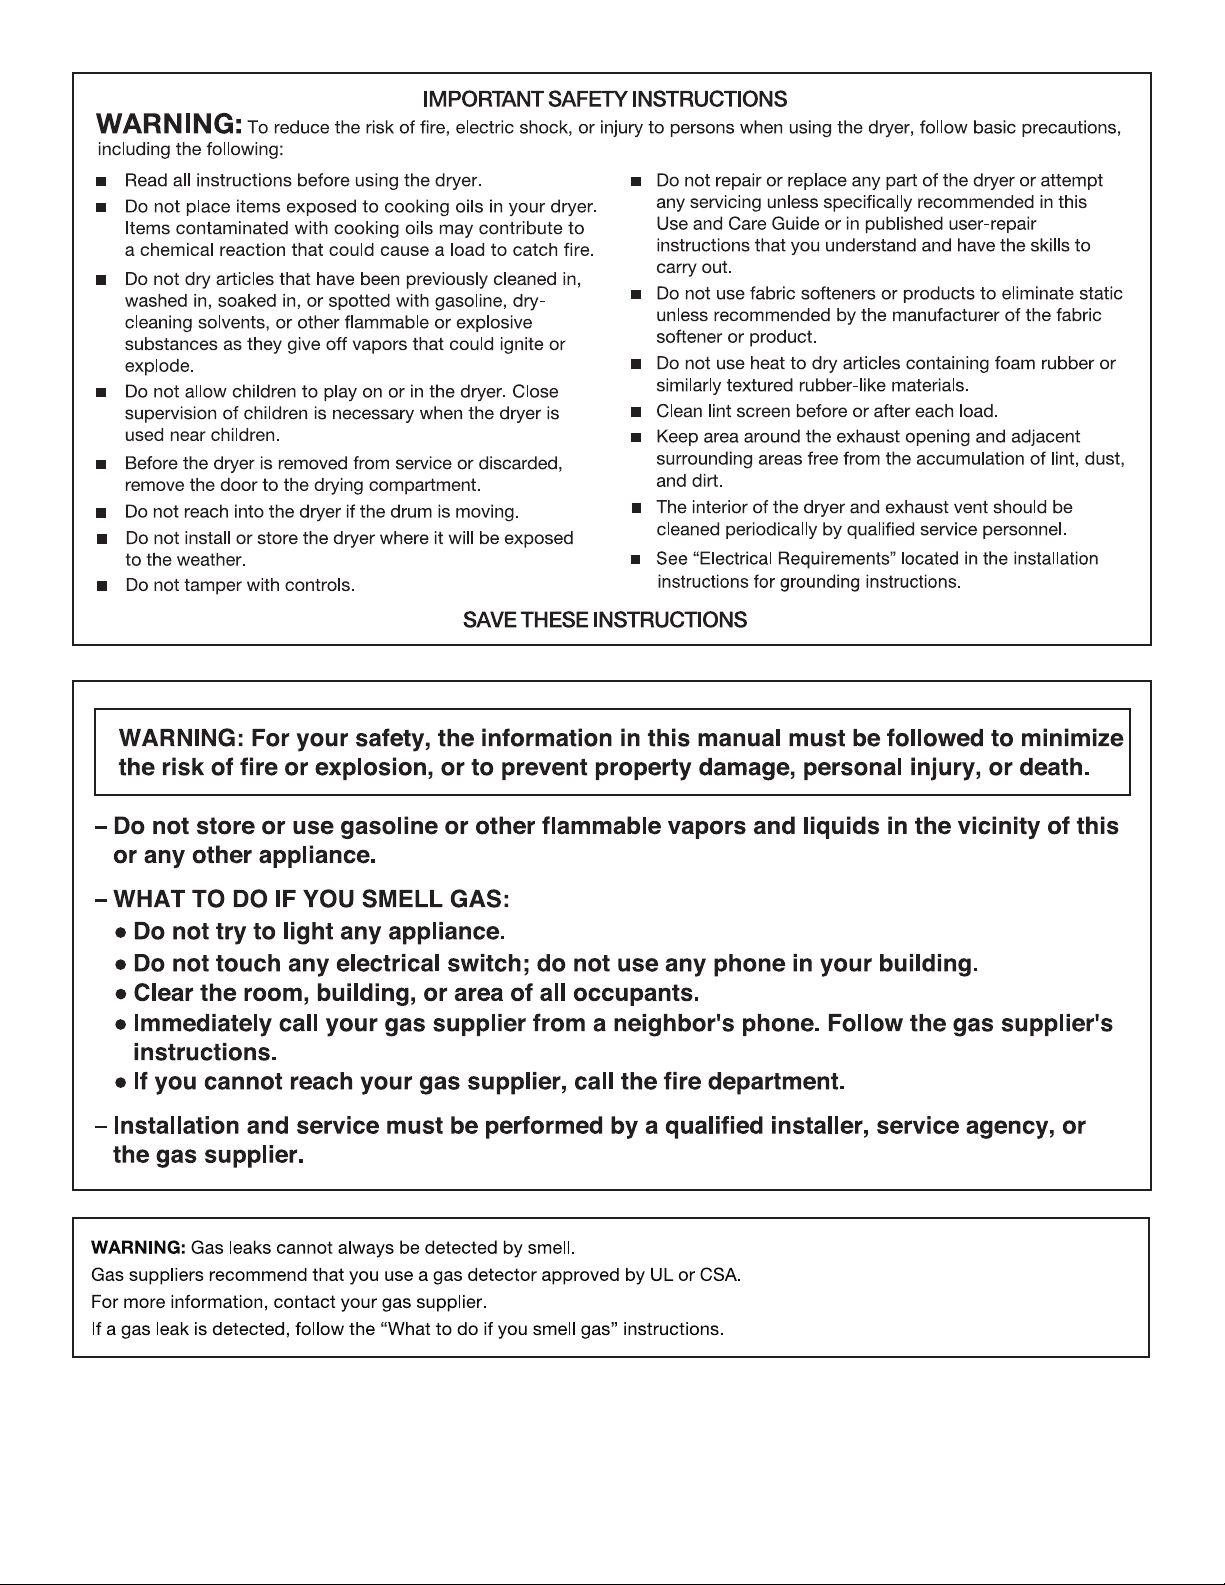
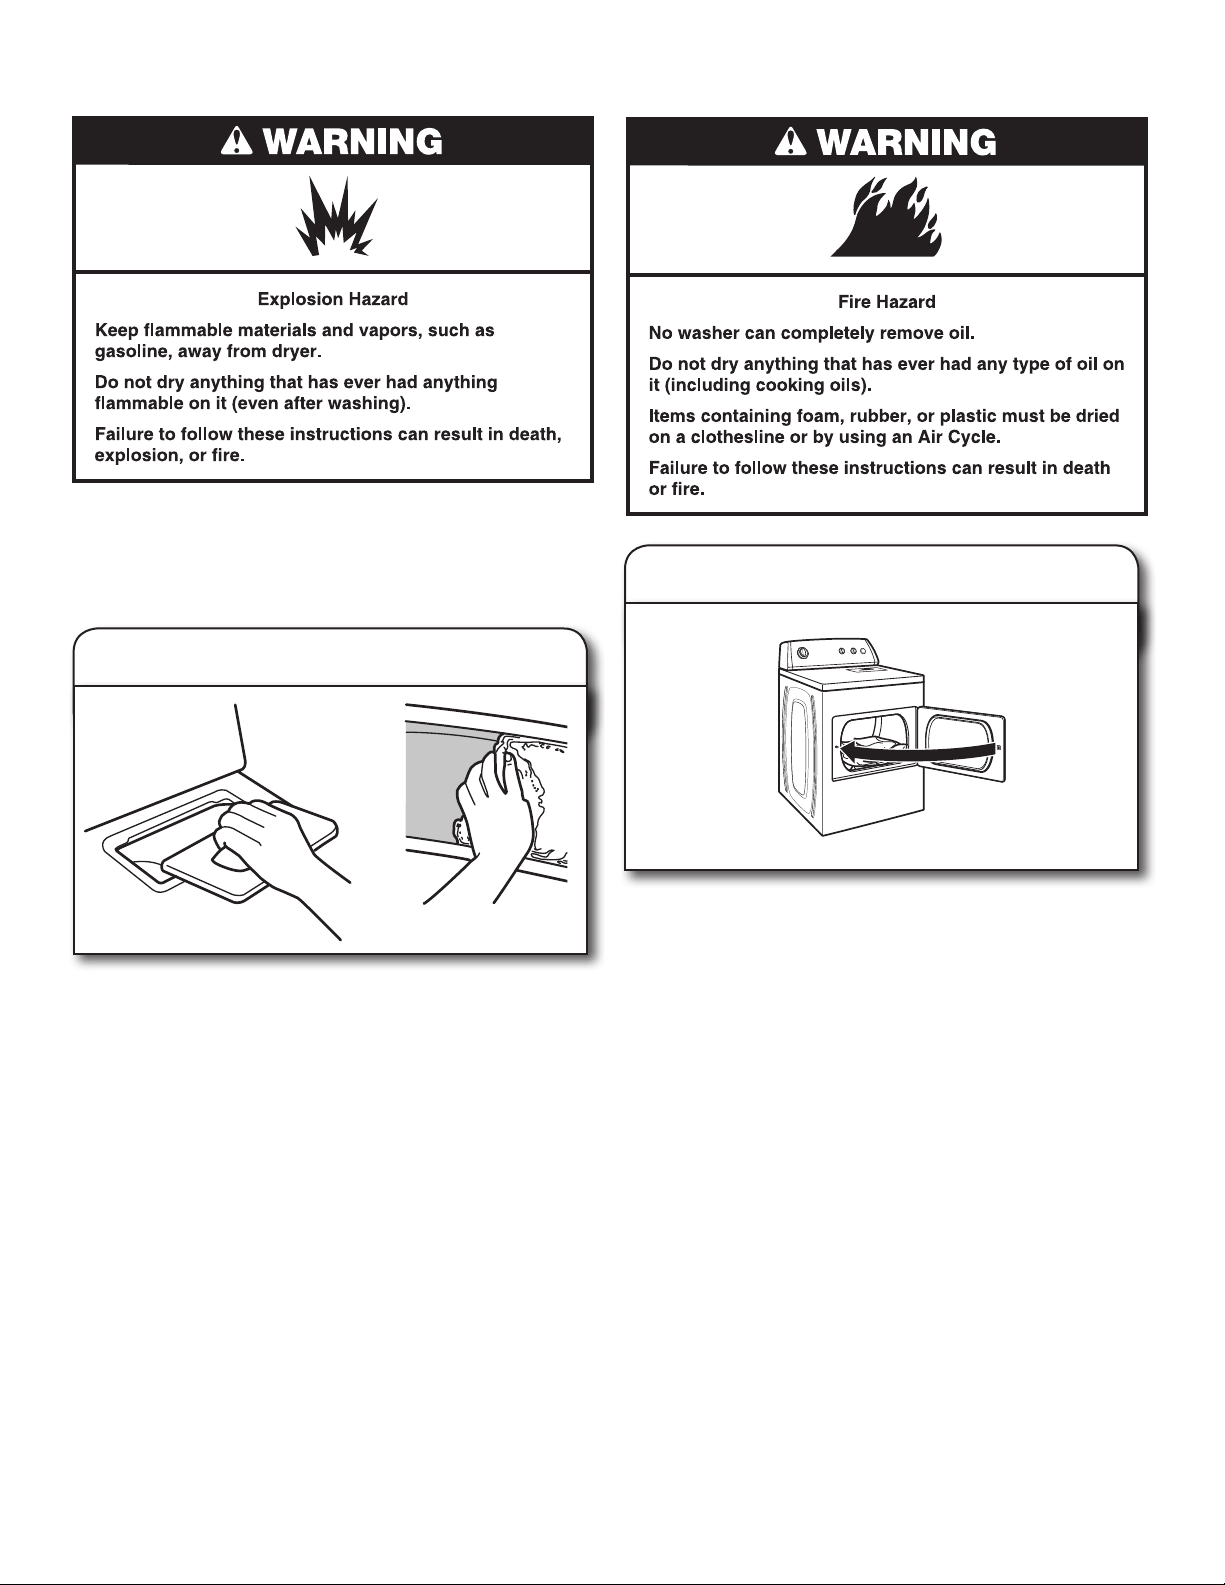
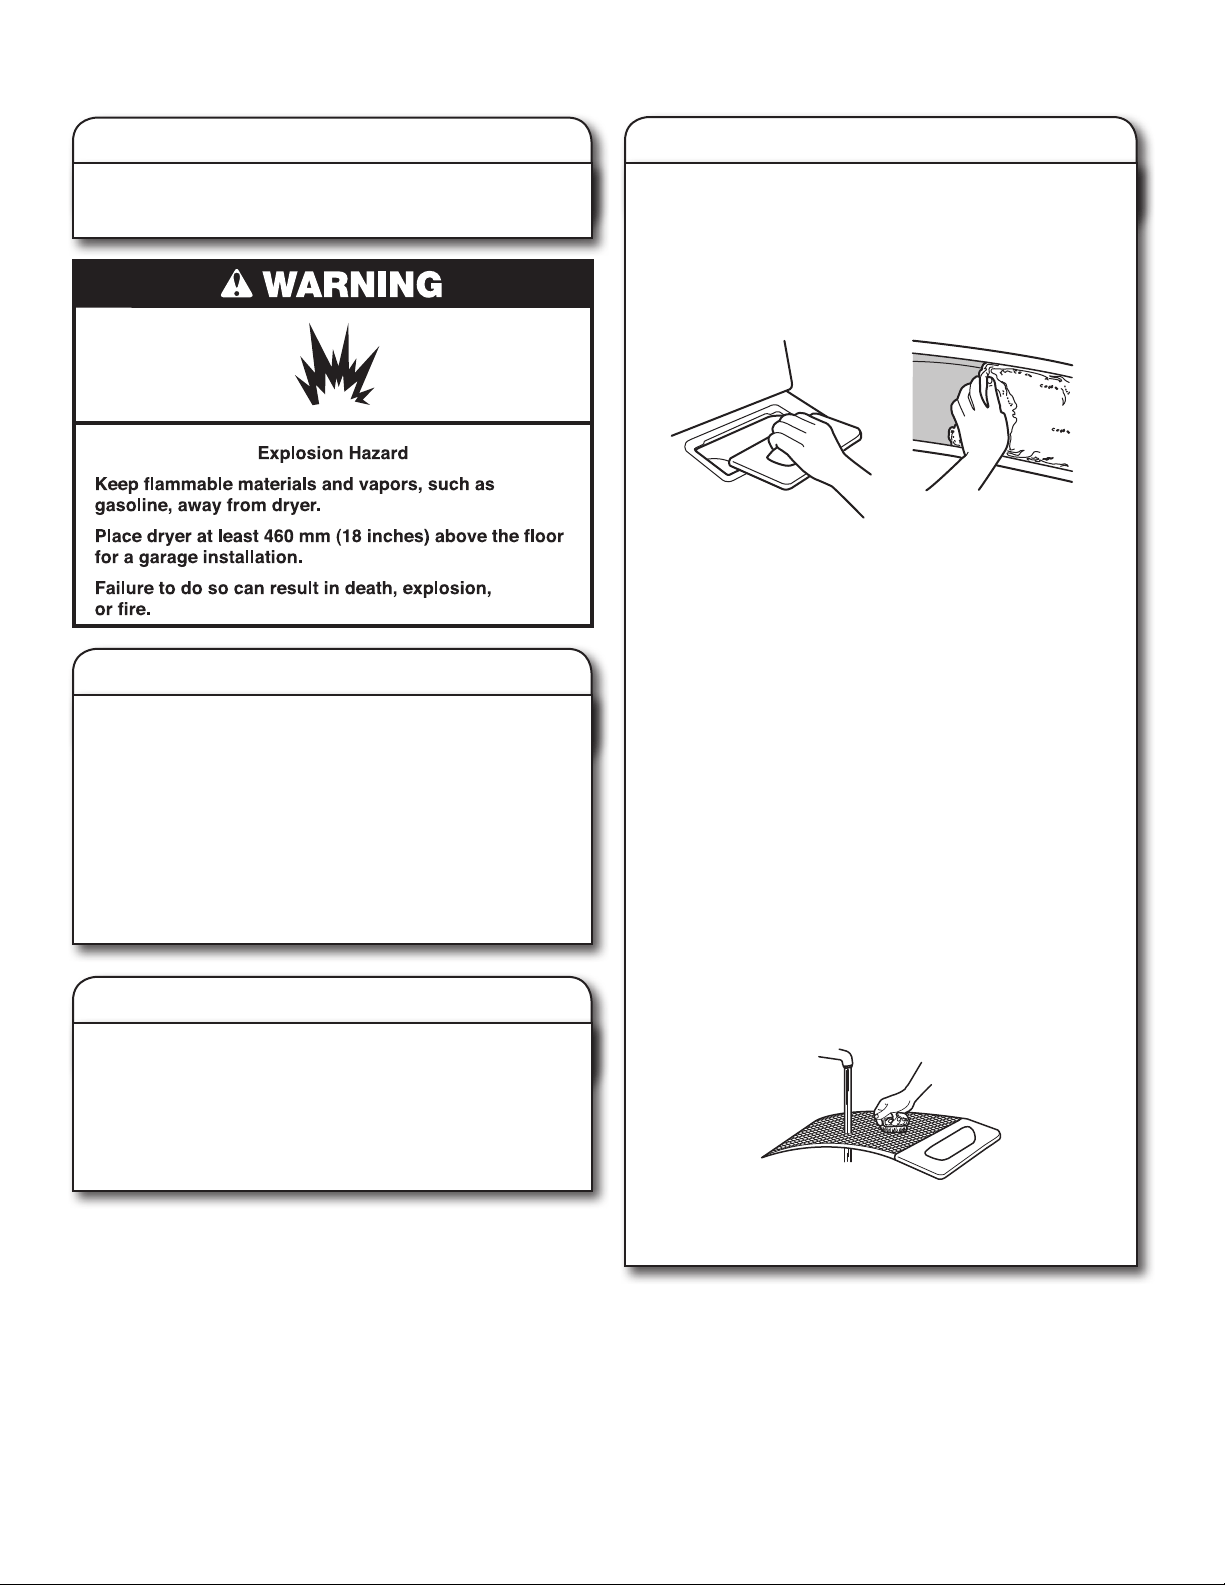
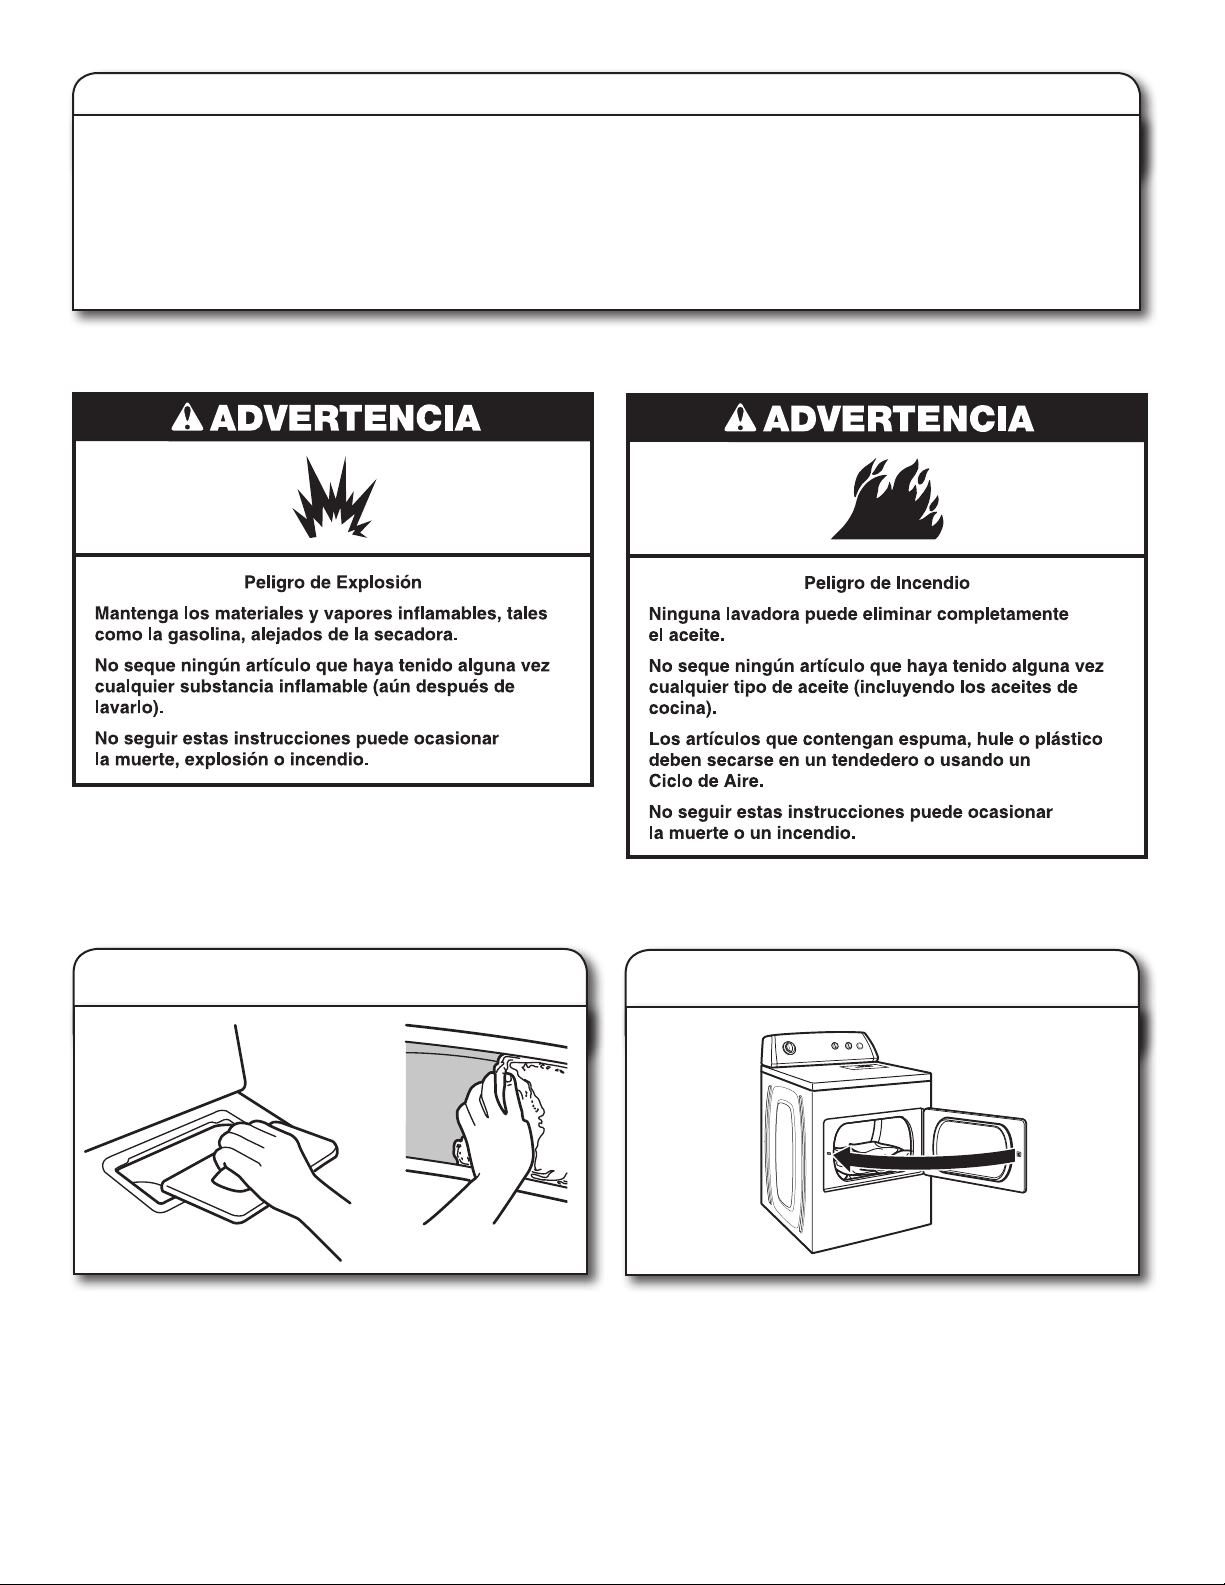
DRYER SAFETY
3
4
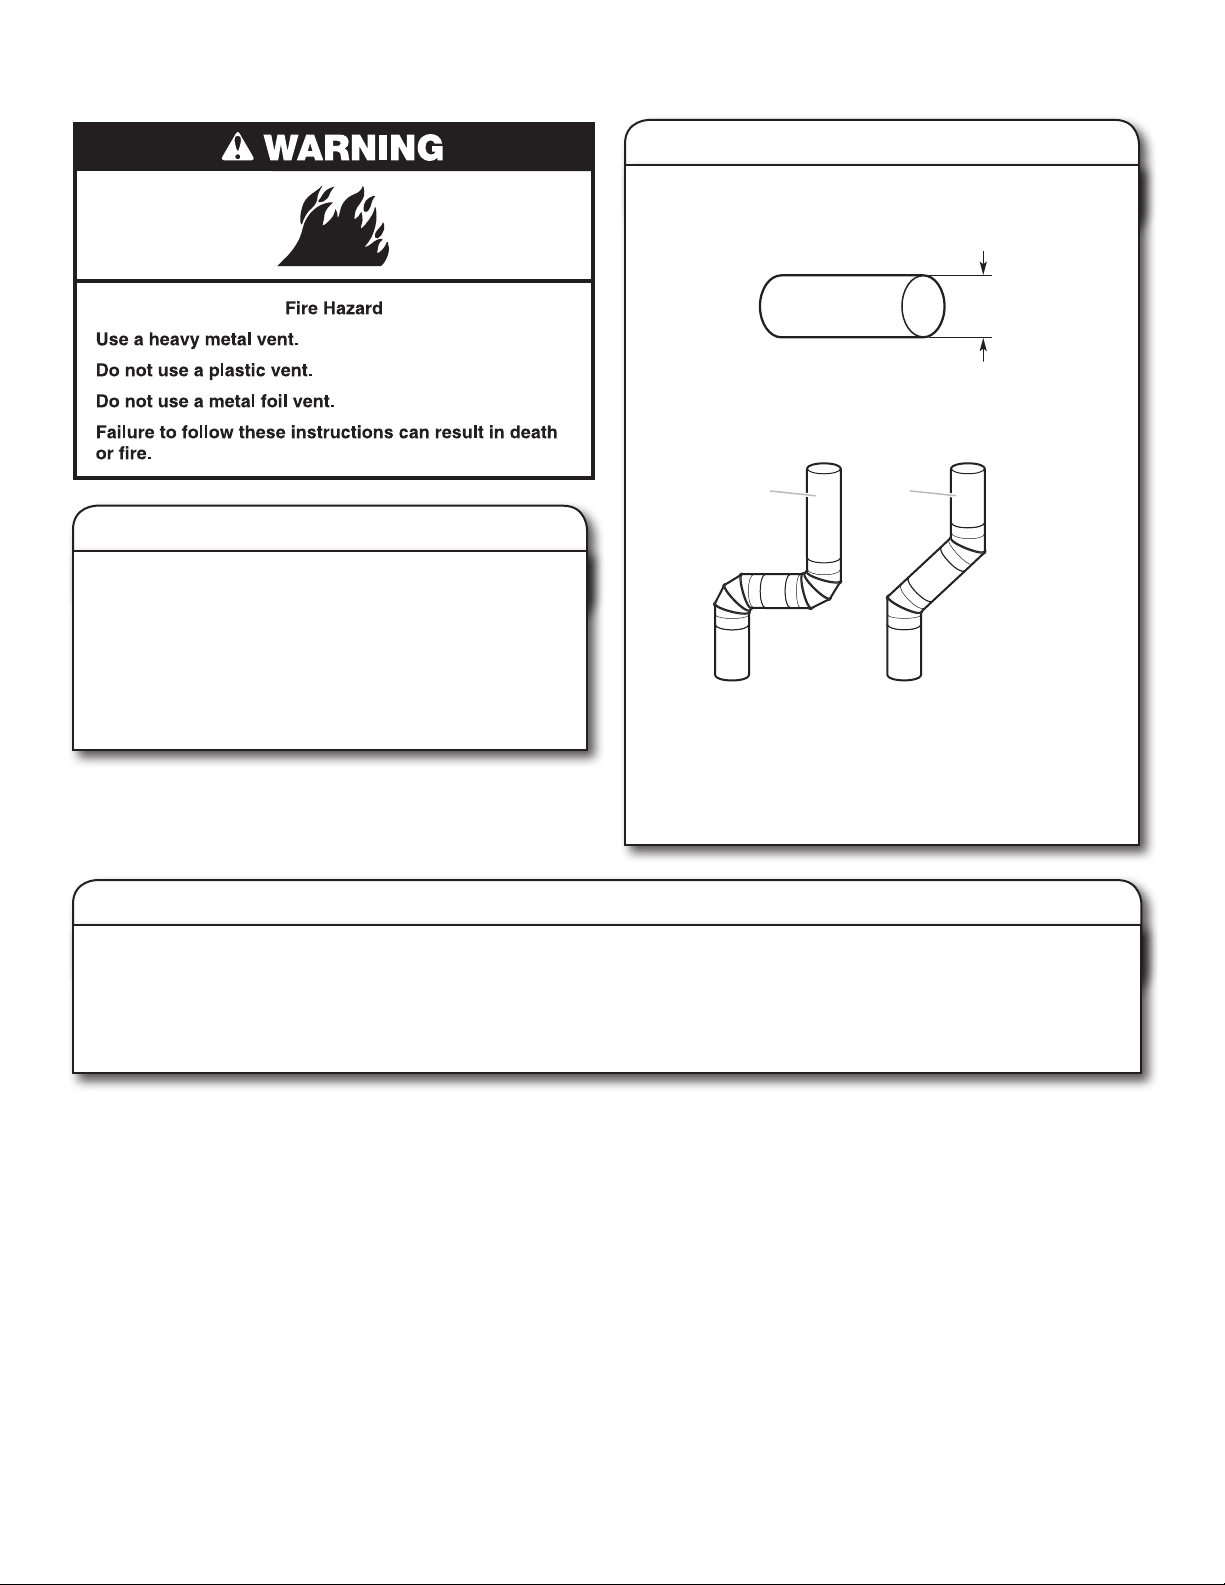
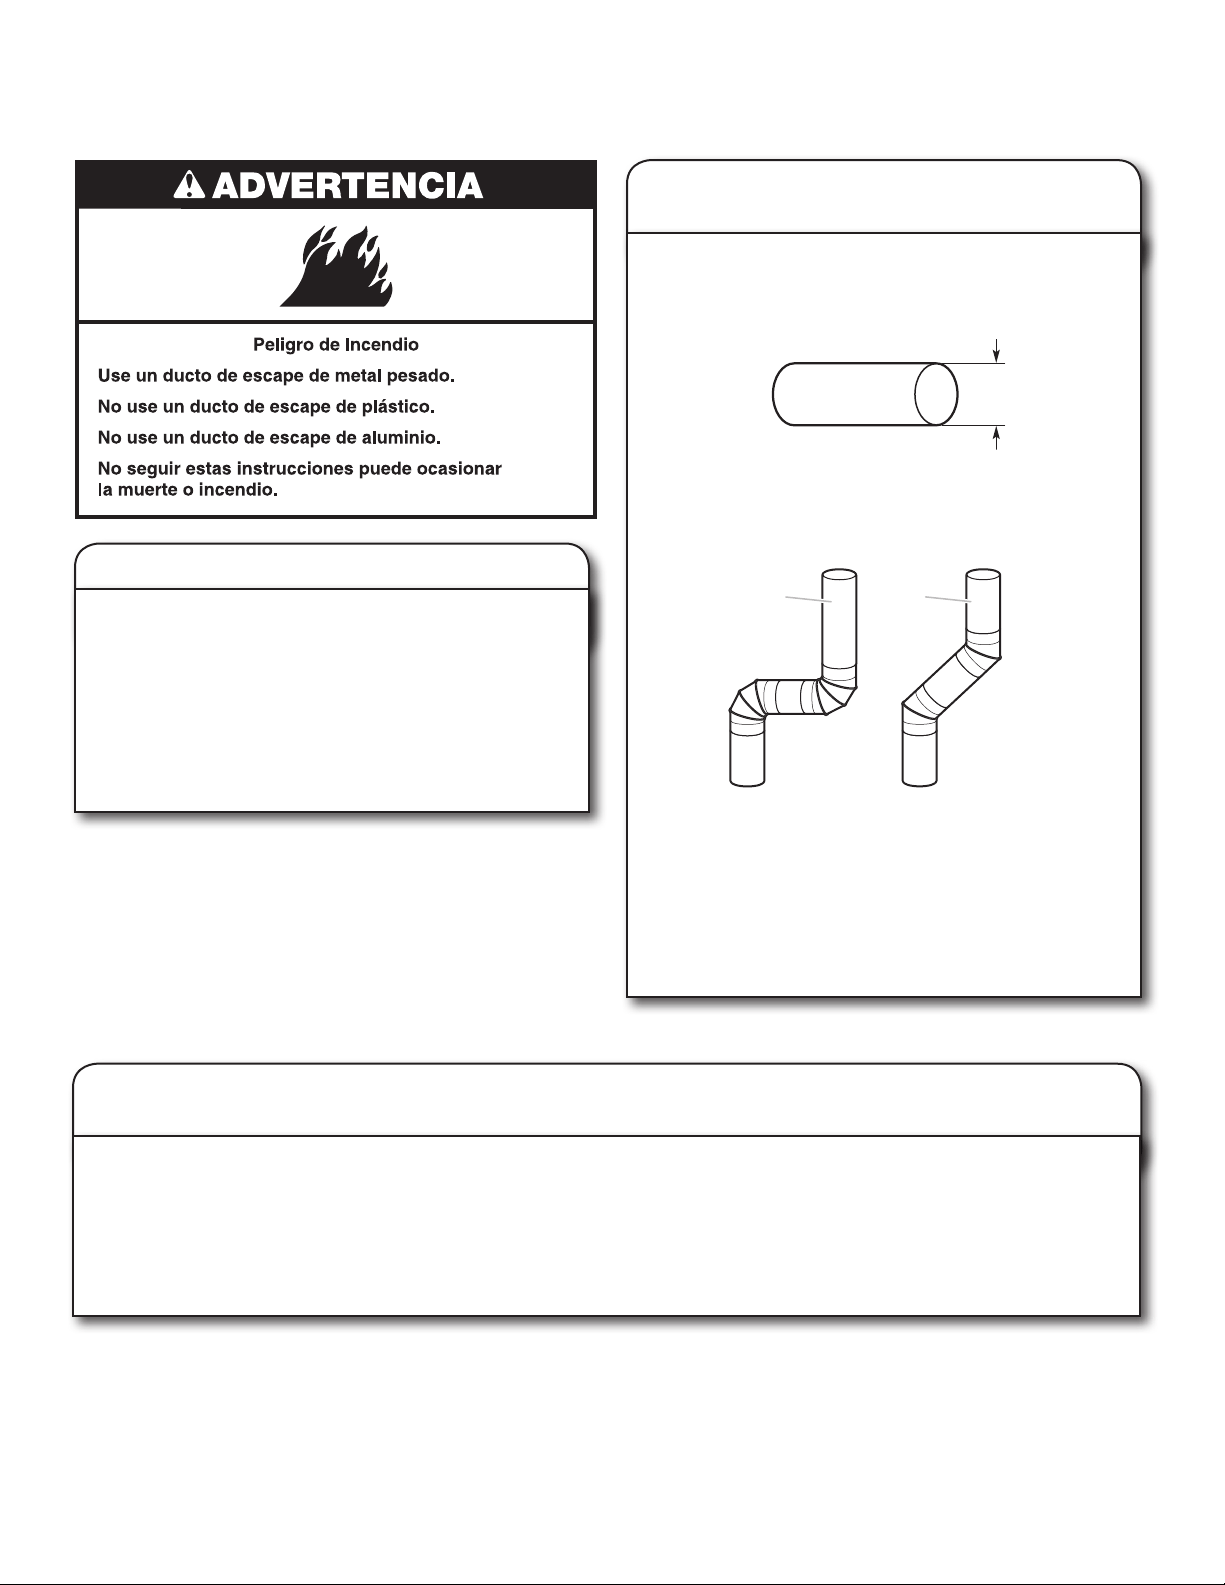
CHECK YOUR VENT SYSTEM FOR GOOD AIR FLOW
Good air ow
Along with heat, dryers require good air ow to efciently
dry laundry. Proper venting will reduce your drying times
and improve your energy savings. See “Installation
Instructions.”
The venting system attached to the dryer plays a big role in
good air ow.
Service calls caused by improper venting are not covered
by the warranty and will be paid by the customer, regardless
of who installed the dryer.
Maintain good air ow by:
Good Better
n
Cleaning your lint screen before each load.
n
Replace plastic or foil vent material with 102 mm (4")
diameter heavy, rigid vent material.
n
Use the shortest length of vent possible.
n
Use no more than four 90° elbows in a vent system;
each bend and curve reduces air ow.
n
Remove lint and debris from the exhaust hood.
n
Remove lint from the entire length of the vent system at
least every 2 years. When cleaning is complete, be sure
to follow the “Installation Instructions” supplied with your
dryer for nal product check.
n
Clear away items from the front the dryer.
102 mm
(
4"
)
Use Automatic Dry Cycles for Better Fabric Care and Energy Savings
Use the Automatic Dry Cycles to provide the most energy savings and enhanced fabric care from the dryer. During Automatic Dry
Cycles, drying air temperature and moisture level are sensed in the load. This sensing occurs throughout the drying cycle and the
dryer shuts off when the load reaches the selected dryness. The dryer will default to Energy Preferred to give you optimal dryness
for your load and save energy.
With Timed Dry, the dryer runs the amount of time set and sometimes results in shrinkage, wrinkling, and static due to over-drying.
Use Timed Dry for the occasional damp load that needs a little more drying time or when using the drying rack.

5
CONTROL PANEL & FEATURES
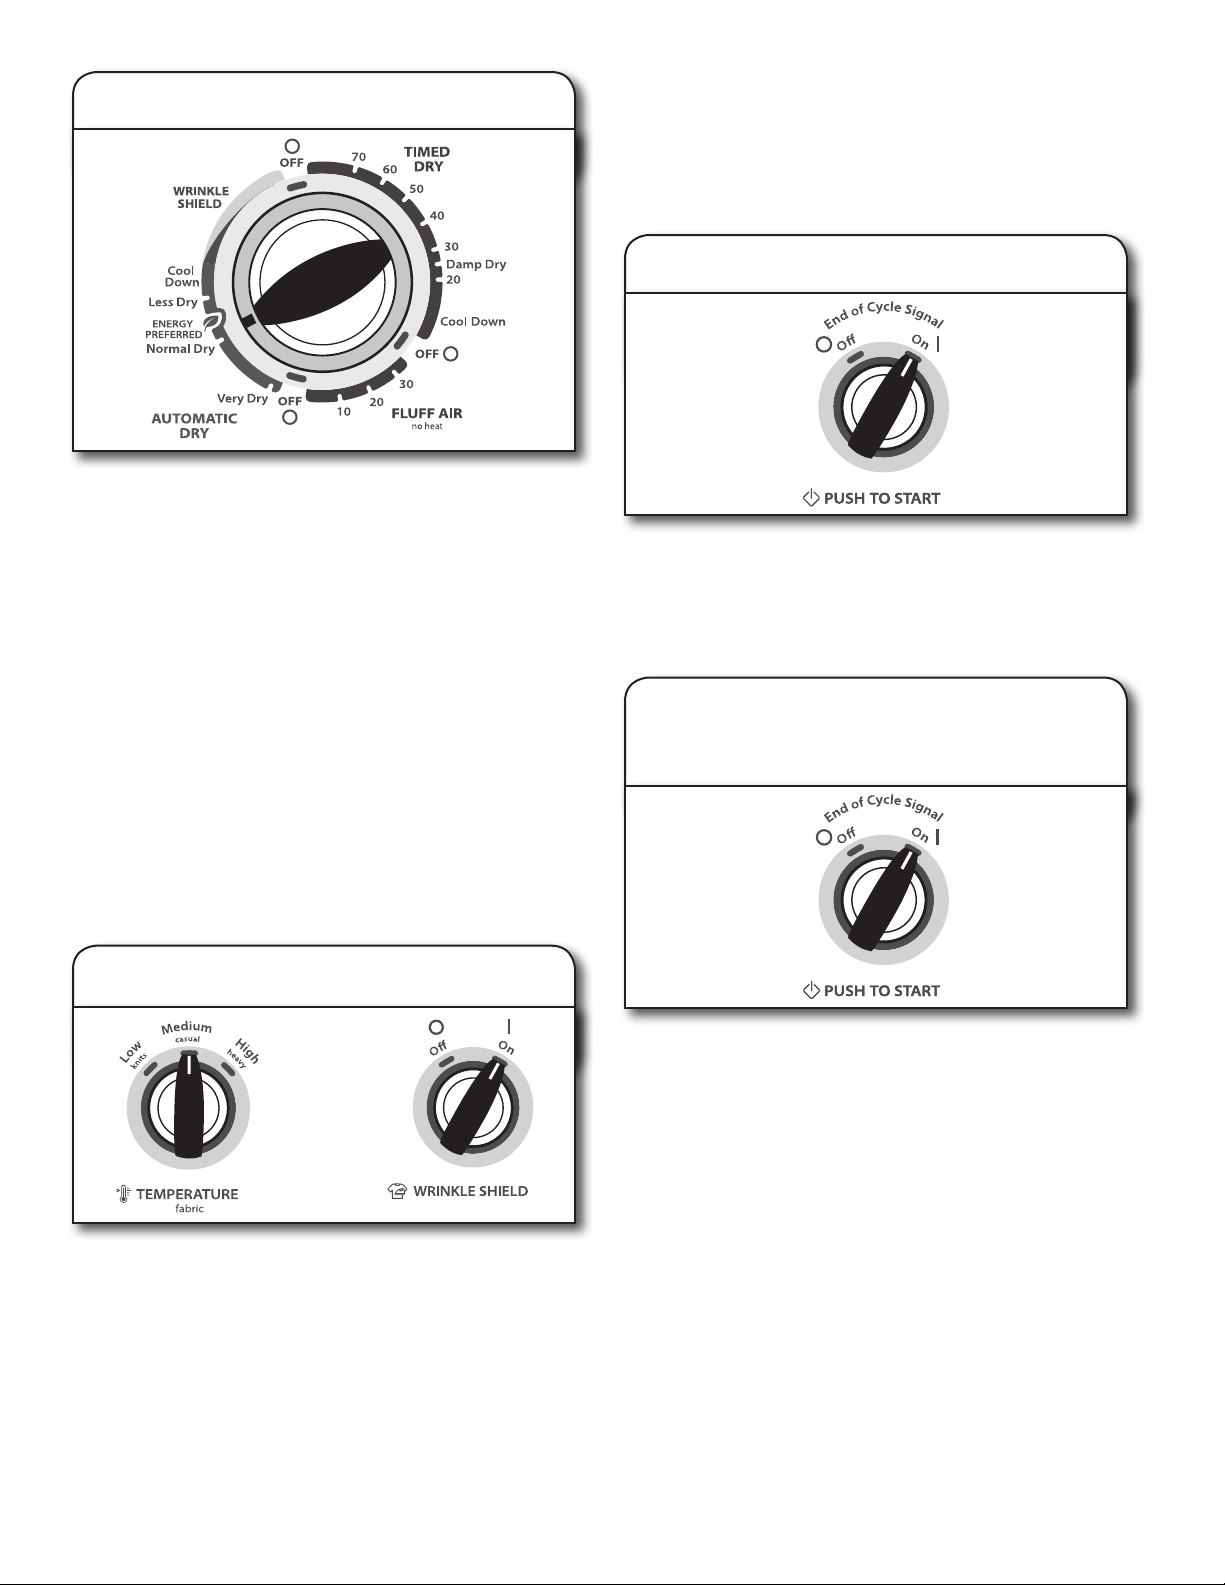
DRYER CYCLE KNOB
Use your Dryer Cycle knob to select available cycles on
your dryer. Turn the knob to select a cycle for your laundry
load. See “Cycle Guide” for detailed descriptions of cycles.
TIMED DRY
Will run the dryer for the specied time on the control.
On models with a selectable temperature knob, you may
choose a setting based on the fabrics in your load. Drying
time and temperature will depend on your dryer model.
AUTOMATIC DRY
Senses moisture in the load or air temperature and shuts
off when the load reaches the selected dryness level.
Gives the best drying in the shortest time. Drying time will
vary based on fabric type, load size, and dryness setting
TEMPERATURE / FABRIC
Select a drying temperature based on the fabrics in your
load. If you are unsure of the temperature to select for a
load, select the lower setting rather than the higher setting.
1
2
3
4
WRINKLE SHIELD OPTION (on some models)
When you are unable to remove a load of clothes from the
dryer as soon as it stops, wrinkles can form. The WRINKLE
SHIELD option periodically tumbles, rearranges, and uffs
the load to help keep wrinkles from forming.
n
To get heat-free, periodic tumbling at the end of a
cycle, turn the WRINKLE SHIELD knob to ON or OFF
at any time before the cycle has ended.
NOTE: This option is available only on Automatic
Cycles.
END OF CYCLE SIGNAL/PUSH TO START
The End of Cycle Signal produces an audible sound when
the drying cycle is nished. Promptly removing clothes at
the end of the cycle reduces wrinkling.
Turn the END OF CYCLE SIGNAL knob to select the
desired setting (On or Off). Press the PUSH to START
knob to start the dryer.
Not all features and options are available on all models.
Appearance may vary.
2 41
2 31
4
6
Not all cycles and settings are available on all models. Settings and options shown in bold are default settings for that cycle.
AUTOMATIC DRY CYCLES - Senses moisture in the load or air temperature and shuts off when the load reaches the selected
dryness level. Choose ENERGY PREFERRED cycle for optimal energy savings.
Items to dry:
Temperature
Fabric:
Available
Options:
Cycle Details:
Temperature / Fabric
Wrinkle Shield *
End of Cycle Signal
CYCLE GUIDE — AUTOMATIC DRY CYCLES
CYCLE GUIDE — TIMED DRY CYCLES
Items to dry: Temperature:Cycle:
Available
Options:
Cycle Details:
Not all cycles and settings are available on all models.
TIMED DRY - Will run the dryer for the specied time on the control.
Large or heavy items
such as thick towels
or robes
Heavy Dry Any Temperature / Fabric
End of Cycle Signal
Choose high to dry large or heavy loads.
*Option available on some models.
NOTE: If loads do not seem as dry as you would like, select Very Dry next time you dry a similar load. If loads seem drier than you
like, select Less Dry next time you dry a similar load.
Casual, shirts, pants,
lightweight items,
synthetics, delicates,
athletic wear
Temperature / Fabric
Wrinkle Shield *
End of Cycle Signal
Setting the Drying Temperature
If your dryer has multiple heat settings:
A High Heavy temperature setting may be used for drying
heavyweight items such as towels and work clothes.
A Low Knits to Medium Casual temperature setting may
be used for drying medium-weight items such as sheets,
blouses, dresses, underwear, permanent press fabrics, and
some knits.
Use the Air Dry/Fluff Air (no heat) setting for foam, rubber,
plastic, or heat-sensitive fabrics.
Line dry bonded or laminated fabrics.
NOTE: If you have questions about drying temperatures for
various loads, refer to the care label directions.
Jeans, heavy work
clothes, towels
Very Dry
Energy Preferred
Less Dry
Very Dry
Energy Preferred
Less Dry
Very Dry
Energy Preferred
Less Dry
Temperature / Fabric
Wrinkle Shield *
End of Cycle Signal
Automatic Dry cycles give the best drying
in the shortest time. Drying time varies
based on fabric type, load size, and
dryness setting.
Select a drying temperature based on
the fabrics in your load. If you are unsure
of the temperature to select for a load,
select the lower setting rather than the
higher setting.
Dryness Level:
High Heavy
Medium Casual
Low Knits
Work clothes, medium
weight fabrics, sheets
Any load Tumble Press
®
Any
Temperature / Fabric
End of Cycle Signal
Use low to medium temperature to
smooth out wrinkles, such as those
found in clothes packed in a suitcase or
in items wrinkled from bang left in the
dryer too long.
*Option available on some models.
Any load Damp Dry Any Temperature / Fabric
End of Cycle Signal
Dries items to a damp level or for items
that do not require an entire drying
cycle.
Rubber, plastic, heat
sensitive fabrics
Air Dry/
Fluff Air
No Heat
Temperature / Fabric
End of Cycle Signal
No heat drying.
7
USING YOUR DRYER
1. Clean the lint screen
Clean the lint screen before each load. Pull the lint screen out of
its holder. Roll lint off the screen with your ngers. Do not rinse or
wash screen to remove lint. Push the lint screen rmly back into
place.
For additional cleaning information, see “Dryer Care.”
2. Load the dryer
Place laundry in the dryer. Close the door. Do not tightly pack
the dryer; clothes should be able to tumble freely.
NOTE: Your model may have a different door than the one
shown. Some models have drop down doors.
WARNING: To reduce the risk of fire, electric shock, or injury to
persons, read the IMPORTANT SAFETY INSTRUCTIONS before
operating this dryer.
Before using your dryer, wipe the dryer drum with a damp cloth
to remove dust from storing and shipping.
8
6. Press PUSH to START to
begin cycle
Push and hold the PUSH to START knob to begin the cycle.
Promptly remove garments after cycle has completed to
reduce wrinkling.
4. Set cycle settings
Select cycle settings by turning the knob to the desired
position.
TEMPERATURE / FABRIC
Turn the TEMPERATURE / Fabric knob to change the drying
temperature setting. See “Setting the Drying Temperature”.
WRINKLE SHIELD (ON SOME MODELS)
n
To get heat-free, periodic tumbling at the end of a cycle,
turn the WRINKLE SHIELD knob to ON or OFF at any
time before the cycle has ended.
NOTE: This option is available only on Automatic Cycles.
3. Select the desired cycle
Select the desired cycle for your load. See the Cycle Guide
for more information about each cycle.
AUTOMATIC DRY Cycles
You can select a different dryness level, depending on your
load, by turning the knob to dryness level.
Selecting Very Dry, ENERGY PREFERRED, or Less Dry
automatically adjusts the dryness level at which the dryer will
shut off. Once a dry level is set, it cannot be changed without
stopping the cycle.
AUTOMATIC DRY cycles give the best drying in the shortest
time. Drying time varies based on fabric type, load size, and
dryness setting.
NOTE: Very Dry removes more load moisture. ENERGY
PREFERRED is used for a starting point for AUTODRY cycles.
Choose ENERGY PREFERRED for optimal energy savings.
Less Dry removes less moisture and used for loads you may
want to put on a hanger to complete drying.
5. Select End of Cycle Signal
(if desired)
Turn the END OF CYCLE SIGNAL knob to select the desired
setting (On or Off). The End of Cycle Signal produces an
audible sound when the drying cycle is nished. Promptly
removing clothes at the end of the cycle reduces wrinkling.
9
DRYER CARE
Keep dryer area clear and free from items that would
block the air ow for proper dryer operation. This includes
clearing piles of laundry in front of the dryer.
Cleaning the lint screen
Every load cleaning
The lint screen is located in the dryer. A screen blocked by
lint can increase drying time.
To clean:
1. Pull the lint screen out of its holder. Roll lint off the
screen with your ngers. Do not rinse or wash screen to
remove lint. Wet lint is hard to remove.
2. Push the lint screen rmly back into place.
IMPORTANT:
n
Do not run the dryer with the lint screen loose,
damaged, blocked, or missing. Doing so can cause
overheating and damage to both the dryer and fabrics.
n
If lint falls off the screen into the dryer during removal,
check the exhaust hood and remove the lint. See
“Venting Requirements.”
As needed cleaning
Laundry detergent and fabric softener residue can build
up on the lint screen. This buildup can cause longer drying
times for your clothes, or cause the dryer to stop before
your load is completely dry. The screen is probably clogged
if lint falls off while the screen is in the dryer.
Clean the lint screen with a nylon brush every 6 months,
or more frequently, if it becomes clogged due to a residue
buildup.
To wash:
1. Roll lint off the screen with your ngers.
2. Wet both sides of lint screen with hot water.
3. Wet a nylon brush with hot water and liquid detergent.
Scrub lint screen with the brush to remove residue
buildup.
4. Rinse screen with hot water.
5. Thoroughly dry lint screen with a clean towel.
Reinstall screen in dryer.
Cleaning the dryer interior
To clean dryer drum
1. Apply a liquid, nonammable household cleaner to the
stained area of the drum and rub with a soft cloth until
stain is removed.
2. Wipe drum thoroughly with a damp cloth.
3. Tumble a load of clean cloths or towels to dry the drum.
NOTE: Garments that contain loose dyes, such as denim
blue jeans or brightly colored cotton items, may discolor the
dryer interior. These stains are not harmful to your dryer and
will not stain future loads of clothes. Dry these items inside
out to avoid drum staining.
Removing accumulated lint
From Inside the Dryer Cabinet
Lint should be removed every 2 years, or more often,
depending on dryer usage. Cleaning should be done
by a qualied servicer.
From the Exhaust Vent
Lint should be removed every 2 years, or more often,
depending on dryer usage.
Cleaning the dryer location
10
Vacation, storage, and moving care
Non-Use or Storage Care
Operate your dryer only when you are at home. If you will
be on vacation or not using your dryer for an extended
period of time, you should:
1. Unplug dryer or disconnect power.
2. (For gas dryers only): Close shut off valve to gas supply
line.
3. Clean lint screen. See “Cleaning the Lint Screen.”
Moving Care
For power supply cord-connected dryers:
1. Unplug the power supply cord.
2. Make sure leveling legs are secure in dryer base.
3. Use tape to secure dryer door.
For direct-wired dryers:
1. Turn off power at fuse or breaker box.
2. Disconnect wiring.
3. Make sure leveling legs are secure in dryer base.
4. Use tape to secure dryer door.
For gas dryers:
1. Unplug or disconnect power to dryer.
2. Close shutoff valve in gas supply line.
3. Disconnect gas supply line pipe and remove ttings
attached to dryer pipe.
4. Cap the open fuel supply line.
5. Make sure leveling legs are secure in dryer base.
6. Use tape to secure dryer door.
Reinstalling the Dryer
Follow the “Installation Instructions” to locate, level,
and connect the dryer.
11
First try the solutions suggested here to possibly avoid the cost of a service call.
If you experience
Possible Causes
Solution
TROUBLESHOOTING
Door not closed completely. Make sure the dryer door is closed completely.
Household fuse is blown or circuit
breaker has tripped.
Electric dryers use 2 household fuses or circuit breakers. The
drum may be turning, but you may not have heat. Replace both
fuses or reset the circuit breaker. If the problem continues, call
an electrician.
Dryer will not run
PUSH TO START knob not pressed
rmly or held long enough.
Incorrect power supply.
Electric dryers require 220-240-volt power supply.
Check with a qualied electrician.
Wrong type of fuse.
Use a time-delay fuse.
Unusual sounds
Dryer had a period of non-use.
If the dryer hasn’t been used for awhile, there may be a
thumping sound during the rst few minutes of operation.
Check the front and rear edges of the drum for small objects.
Clean out pockets before laundering.
Dryer is not level.
The dryer may vibrate if not properly installed.
See “Installation Instructions”.
Coin, button, or paper clip caught
between the drum and front or rear
of the dryer.
Clothing knotted or balled up.
When balled up, the load will bounce, causing the dryer to
vibrate. Separate the load items and restart the dryer.
Press and hold the PUSH TO START knob until you hear the
dryer drum moving.
No heat Household fuse is blown or circuit
breaker has tripped.
The drum may be turning, but you may not have heat. Electric
dryers use 2 household fuses or circuit breakers. Replace both
fuses or reset the circuit breaker. If the problem continues, call
an electrician.
It is a gas dryer.
The gas valve clicking is a normal operating sound.
Supply line valve not open. For gas dryers, is the valve open on the supply line.
Clothes are not drying
satisfactorily, drying
times are too long
Lint screen clogged with lint.
Lint screen should be cleaned before each load.
Has the Fluff Air cycle been
selected.
Select the right cycle for the types of garments being dried.
See “Cycle Guide.”
Load too large and heavy to dry
quickly.
Separate the load to tumble freely.
Exhaust vent or outside exhaust
hood clogged with lint, restricting air
movement.
Run the dryer for 5-10 minutes. Hold your hand under the
outside exhaust hood to check air movement. If you do not feel
air movement, clean exhaust system of lint or replace exhaust
vent with heavy metal or exible metal vent. Make sure vent is
not crushed or kinked. See “Installation Instructions”.
Exhaust vent diameter not the
correct size.
Use 102mm (4") diameter vent material.
Dryer located in a room with
temperature below 7ºC (45ºF).
Proper operation of dryer cycles requires temperatures above
7ºC (45ºF).
Dryer located in a closet without
adequate opening.
Closet doors must have ventilation openings at the top and
bottom of the door. The front of the dryer requires a minimum of
25mm (1") of airspace, and, for most installations, the rear of
the dryer requires 127mm (5"). See “Installation Instructions.”
Exhaust vent not the correct length.
Check that the exhaust vent is not too long or has too many
turns. Long venting will increase drying times. Make sure vent
is not crushed or kinked. See “Installation Instructions”.
Fabric softener sheets blocking
the grill.
Use only one fabric softener sheet, and use it only once.
Incorrect power supply.
Electric dryers require 220-240 volt power supply.
Check with a qualied electrician.
12
First try the solutions suggested here to possibly avoid the cost of a service call.
If you experience
Possible Causes
Solution
TROUBLESHOOTING cont.
Cycle time too short
Automatic cycle ending early. The load may not be contacting the sensor strips. Level the
dryer.
Use Timed Dry for very small loads. Change the dryness level
setting setting on Automatic Dry cycles.
Increasing or decreasing the Dry Level setting will change the
amount of drying time in a cycle.
Lint on load
Lint screen clogged.
Lint screen should be cleaned before each load.
Stains on load or drum
Dryer fabric softener not properly
used.
Add dryer fabric softener sheets at the beginning of the cycle.
Fabric softener sheets added to a partially dried load can stain
your garments.
Drum stains are caused by dyes in clothing (usually blue jeans).
These will not transfer to other clothing.
Loads are wrinkled
Dryer tightly packed.
Dry smaller loads that can tumble freely reduce wrinkles from
forming.
Odors
Recently been painting, staining, or
varnishing in the area where your
dryer is located.
If so, ventilate the area. When the odors or fumes are gone
from the area, rewash and dry the clothing.
Electric dryer being used for the rst
time.
The new electric heating element may have an odor. The odor
will be gone after the rst cycle.
Load is too hot
Laundry items removed from the
dryer before the end of the cycle.
Allow Cool Down cycle to nish before removing laundry from
dryer. All cycles are cooled slowly to reduced wrinkling and
make it easier to handle. Items removed before Cool Down may
feel very warm.
High temperature cycle
used or was TEMPERATURE/Fabric
control set to high.
Select a lower temperature, and use an Automatic Dry cycle.
These cycles sense the temperature or the moisture level in the
load and shut off when the load reaches the selected dryness.
This reduces overdrying.

13
NOTES
14
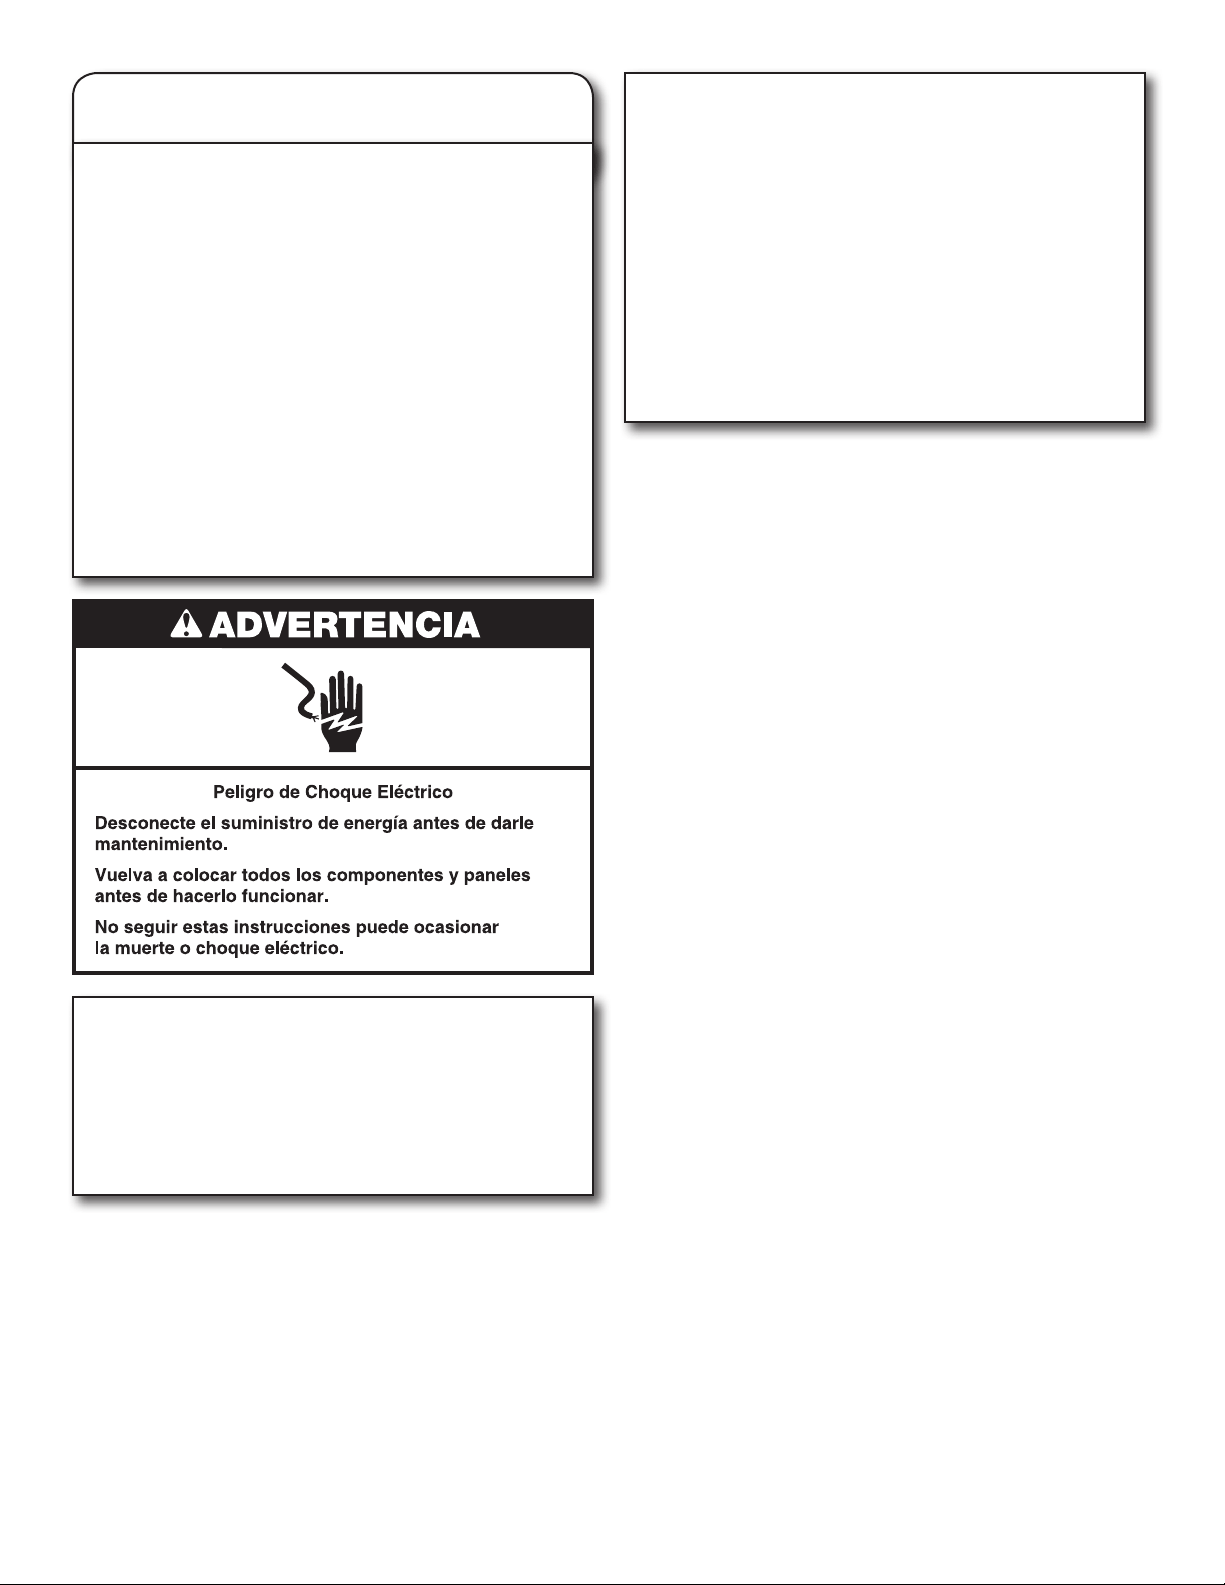
SEGURIDAD DE LA SECADORA
15
16
n
Limpiar el ltro de pelusa antes de cada carga.
n
Reemplazar el material del ducto de plástico u hoja
de metal con uno de metal pesado rígido de 102 mm (4")
de diámetro.
n
Use un ducto con la longitud más corta posible.
n
No utilice más de 4 codos de 90° en un sistema de
ventilación; cada ángulo y curva reduce el ujo
de aire.
n
Quite la pelusa y los desechos de la capota de
ventilación.
n
Quite la pelusa de toda la longitud del sistema de
ventilación al menos cada 2 años. Cuando haya
terminado la limpieza, revise por última vez el producto
asegurándose de seguir las Instrucciones de instalación
que acompañan a su secadora.
n
Retire los artículos que estén frente a la secadora.
REVISE QUE EL SISTEMA DE VENTILACIÓN TENGA
UN BUEN FLUJO DE AIRE
Mantenga un buen ujo de aire
haciendo lo siguiente:
Buen ujo de aire
Además del calor, las secadoras también necesitan un
buen ujo de aire para secar las prendas ecazmente.
La ventilación adecuada reducirá la duración del secado
y mejorará su ahorro de energía. Consulte las Instrucciones
de instalación.
El sistema de ventilación sujeto a la secadora juega un
papel muy importante para el ujo de aire adecuado.
Las visitas de servicio debidas a la ventilación inadecuada
no están cubiertas por la garantía y correrán por cuenta del
cliente, sin importar quién haya instalado la secadora.
Utilice los ciclos de Secado automático (Automatic Dry) para un mejor cuidado
de las telas y ahorro de energía
Utilice los ciclos de Secado automático (Automatic Dry) para obtener el mayor ahorro de energía y un mejor cuidado de las telas
con la secadora. Durante los ciclos de Secado automático (Automatic Dry), se detectan la temperatura del aire de secado y el
nivel de humedad en la carga. Esta detección se realiza durante todo el ciclo de secado y la secadora se apaga cuando la carga
alcanza el nivel de sequedad seleccionado. El ciclo de Ahorro de energía (Energy Preferred) le proveerá el mejor ahorro
de energía.
Con el Secado programado (Timed Dry), la secadora funciona durante el tiempo seleccionado y algunas veces puede dar lugar
a encogimiento, arrugas y estática a causa del exceso de secado. Utilice el Secado programado (Timed Dry) ocasionalmente,
para las cargas húmedas que necesiten un poco más de tiempo de secado o cuando utilice el estante de secado.
Bien
Mejor
102 mm
(
4"
)
17
PANEL DE CONTROL Y CARACTERISTICAS
PERILLA DE CICLOS DE LA SECADORA
Utilice la perilla de ciclos de la secadora para seleccionar
entre los ciclos disponibles en su secadora. Gire la perilla
de ciclos de lavado para seleccionar un ciclo para su carga.
Consulte “Guía de ciclos” para ver descripciones detalladas
de los ciclos.
TIMED DRY (SECADO PROGRAMADO)
Hará funcionar la secadora durante el tiempo
especicado en el control. En modelos con una perilla
para seleccionar la temperatura, puede elegir un
ajuste basado en las telas de su carga. El tiempo y la
temperatura de secado dependerán del modelo de
su secadora.
AUTOMATIC DRY (SECADO AUTOMÁTICO)
Detecta la humedad en la carga o la temperatura del aire
y se apaga cuando la carga alcanza el nivel de sequedad
seleccionado. Le proporciona el mejor secado en el
tiempo más corto. El tiempo del secado variará según
el tipo de tela, el tamaño de la carga y el ajuste
de sequedad.
TEMPERATURE / FABRIC (TEMPERATURA / TELA)
Seleccione una temperatura de secado según las telas de
su carga. Si tiene duda respecto a la temperatura que debe
seleccionar para una carga de ropa, elija el ajuste más bajo
en vez del ajuste más alto.
1
2
3
4
WRINKLE SHIELD
(CARACTERÍSTICA WRINKLE SHIELD)
(EN ALGUNOS MODELOS)
Si no es posible retirar la carga de la secadora tan pronto
como ésta se detenga, se pueden formar arrugas. La
característica de Protección contra arrugas WRINKLE
SHIELD periódicamente da vueltas, acomoda y esponja
la ropa para ayudar a evitar que se formen arrugas.
n
Obtenga rotación periódica sin calor al nal del ciclom,
gire la perilla de WRINKLE SHIELD hacia Encendido (ON)
o Apagado (OFF) en cualquier momento antes de que
termine el ciclo.
NOTA: Esta opción está disponible sólo en los ciclos
automáticos.
END OF CYCLE SIGNAL/PUSH TO START
(SEÑAL DE FIN DE CICLO/EMPUJE
PARA PONER EN MARCHA)
La señal de n de ciclo emite un sonido audible una vez
que el ciclo de secado ha terminado. El quitar la ropa con
prontitud al nal del ciclo reduce la formación de arrugas.
Gire la perilla de la Señal de n de ciclo (END OF CYCLE
SIGNAL) para seleccionar el ajuste deseado (Encendido
– On o Apagado - Off). Presione la perilla de Empuje para
poner en marcha (PUSH to START) para poner en marcha
la secadora.
No todas las características y opciones están disponibles en todos los modelos.
La apariencia puede variar.
2 41
2 31
4
18
No todos los ciclos y ajustes están disponibles en todos los modelos. Los ajustes y las opciones que se muestran en negrita son los
ajustes por defecto para ese ciclo.
CICLOS DE SECADO AUTOMÁTICO - Detecta la humedad en la carga o la temperatura del aire y se apaga cuando la carga alcanza
el nivel de sequedad seleccionado. Elija el ciclo de Ahorro de energía (ENERGY PREFERRED) para un óptimo ahorro de energía.
Artículos
para secar:
Temperatura/Tela : Opciones
disponibles:
Detalles de los ciclos:
GUÍA DE CICLOS – CICLOS DE SECADO AUTOMÁTICO (AUTOMATIC DRY)
GUÍA DE CICLOS – CICLOS DE SECADO PROGRAMADO (TIMED DRY)
No todos los ciclos y ajustes están disponibles en todos los modelos.
Secado programado (TIMED DRY) - Hará funcionar la secadora durante el tiempo especicado en el control.
* Esta opción está disponible en algunos modelos.
NOTA: Si las cargas no parecen estar tan secas como le gustaría, seleccione Muy seco (Very Dry) la próxima vez que seque una
carga similar. Si le parece que las prendas están más secas de lo que las desea, seleccione Menos seco (Less Dry) la próxima vez
que seque una carga similar.
Pantalones de
mezclilla, ropa de
trabajo pesada, toallas
Very Dry
Energy Preferred
Less Dry
Temperature/Fabric
Wrinkle Shield*
End of Cycle Signal
Los ciclos de Secado automático
(Automatic Dry) le proporcionan el
mejor secado en el tiempo más corto.
El tiempo de secado varía según el tipo
de tela, el tamaño de la carga y el ajuste
de sequedad.
Seleccione una temperatura de secado
según las telas de su carga. Si tiene
duda respecto a la temperatura que
debe seleccionar para una carga de
ropa, elija el ajuste más bajo en vez del
ajuste más alto.
Nivel de
sequedad:
High Heavy
(Alta/Pesada)
Ropa informal,
camisas, pantalones,
artículos livianos,
prendas sintéticas,
ropa delicada, ropa
deportiva
Medium Casual
(Media/Informal)
Low Knits
(Baja/Tejidos)
Ropa de trabajo, telas
de peso mediano,
sábanas
Very Dry
Energy Preferred
Less Dry
Temperature/Fabric
Wrinkle Shield*
End of Cycle Signal
Very Dry
Energy Preferred
Less Dry
Temperature/Fabric
Wrinkle Shield*
End of Cycle Signal
* Esta opción está disponible en algunos modelos.
Nivel de sequedad:
Muy seco (Very Dry)
Ahorro de energía (Energy Preferred)
Menos seco (Less Dry)
Opciones disponibles:
Temperatura/Tela (Temperature/Fabric)
Protección contra arrugas (Wrinkle Shield)
Señal de fin de ciclo (End of Cycle Signal)
Artículos
para secar:
Temperatura: Nivel de
sequedad:
Opciones
disponibles:
Detalles de los ciclos:
Artículos grandes o
pesados tales como
toallas gruesas o
batas
Super seco
(Heavy Dry)
Cualquiera Temperature / Fabric
End of Cycle Signal
Elija una temperatura alta para secar
cargas grandes o pesadas.
Cualquier carga Tumble Press
®
Cualquiera
Temperature / Fabric
End of Cycle Signal
Use una temperatura baja a media
para alisar las arrugas, tales como las
de prendas que han quedado en una
maleta o artículos que se han arrugado
por haber estado mucho tiempo en la
secadora.
Cualquier carga Semiseco
(Damp Dry)
Cualquiera Temperature / Fabric
End of Cycle Signal
Seca los artículos hasta dejarlos
húmedos o para artículos que no
necesitan un ciclo completo de secado.
Goma, plástico, telas
sensibles al calor
Secado al aire/
Pelusa aire
(Air Dry/Fluff Air)
Sin calor
Temperature / Fabric
End of Cycle Signal
Secado sin calor.
19
USO DE SU SECADORA
1. Limpie el ltro de pelusa
Limpie el ltro de pelusa antes de cada carga. Jale el ltro de
pelusa fuera del receptáculo. Quite la pelusa enrollándola con
los dedos. No enjuague ni lave el ltro para quitar la pelusa.
Empuje el ltro de pelusa rmemente hasta que quede en
su lugar.
Para obtener más información sobre la limpieza, vea “Cuidado
de la secadora”.
2. Cargue la secadora
Ponga la ropa en la secadora. Cierre la puerta. No cargue la
secadora de manera apretada; las prendas deben poder girar
libremente.
NOTA: Su modelo puede tener una puerta diferente de
la que se muestra. Algunos modelos tienen puertas de
abertura vertical.
ADVERTENCIA: A fin de reducir el riesgo de incendio, choque
eléctrico o daños personales, lea las INSTRUCCIONES
IMPORTANTES DE SEGURIDAD antes de operar esta secadora.
Antes de usar la secadora, limpie el tambor de la misma con un
paño húmedo para quitar el polvo que se acumuló durante el
almacenaje y envío.
Cómo jar la temperatura de secado
Si su secadora tiene múltiples ajustes de calor:
Se puede usar un ajuste de temperatura Alta/Pesada (High
Heavy) para secar artículos pesados tales como toallas y ropa
de trabajo.
Se puede usar un ajuste de temperatura Baja/Tejidos (Low
Knits) a Media/Informal (Medium Casual) para secar artículos
de peso mediano tales como sábanas, blusas, vestidos, ropa
interior, telas de planchado permanente y algunos tejidos de
punto.
Use el ajuste de Pelusa aire, secado al aire (Fluff Air/ Air Dry)
para artículos de espuma, goma, plástico o telas sensibles al
calor.
Seque en el tendedero las telas laminadas o tratadas.
NOTA: Si tiene dudas respecto a la temperatura que debe
seleccionar para distintas cargas de ropa, consulte las
instrucciones de cuidado de las etiquetas.
20
6. Presione Empuje para poner en
marcha (PUSH to START) para
comenzar el ciclo
Empuje y sostenga la perilla de Empuje para poner en marcha
(PUSH to START) para comenzar el ciclo. Saque las prendas en
cuanto se haya completado el ciclo para reducir las arrugas.
4. Fije los ajustes del ciclo
Seleccione los ajustes del ciclo girando la perilla hacia la
posición deseada.
TEMPERATURE/FABRIC (TEMPERATURA/TELA)
Gire la perilla de Temperatura/Tela (TEMPERATURE/Fabric)
para cambiar el ajuste de temperatura de secado. Vea “Cómo
jar la temperatura de secado”.
3. Seleccione el ciclo deseado
Seleccione el ciclo deseado para su carga. Consulte la Guía
de ciclos o la pantalla para obtener más información de cada
ciclo.
Ciclos de Secado automático (AUTOMATIC DRY)
Puede seleccionar un nivel de sequedad diferente, según
la carga, girando la perilla hacia el nivel de sequedad.
Al seleccionar Muy seco (Very Dry), Ahorro de energía
(ENERGY PREFERRED) o Menos seco (Less Dry), se ajusta
automáticamente el nivel de sequedad, en el cual se apagará
la secadora. Una vez que se haya jado el nivel de secado, no
podrá cambiarse si no se detiene el ciclo.
Los ciclos Secado automático (AUTOMATIC DRY) le
proporcionan el mejor secado en el tiempo más corto. El
tiempo de secado varía según el tipo de tela, el tamaño de la
carga y el ajuste de sequedad.
NOTA: Muy seco (Very Dry) quita más humedad de la carga.
El Ahorro de energía (ENERGY PREFERRED) se usa como
punto de partida para los ciclos AutoDry. Elija Ahorro de
energía (ENERGY PREFERRED) para un óptimo ahorro de
energía. Menos seco (Less Dry) quita menos humedad y se
usa para las cargas que desee terminar de secar en una
percha.
5. Seleccione la Señal de n de ciclo
Gire la perilla de la Señal de n de ciclo (END OF CYCLE
SIGNAL) para seleccionar el ajuste deseado (Encendido –
On o Apagado - Off). La señal de n de ciclo emite un sonido
audible una vez que el ciclo de secado ha terminado. El quitar
la ropa con prontitud al nal del ciclo reduce la formación de
arrugas.
WRINKLE SHIELD (CARACTERÍSTICA WRINKLE SHIELD) (en
algunos modelos)
n
Obtenga rotación periódica sin calor al nal del ciclom, gire la
perilla de WRINKLE SHIELD hacia Encendido (ON) o Apagado
(OFF) en cualquier momento antes de que termine el ciclo.
NOTA: Esta opción está disponible sólo en los ciclos
automáticos.

21
CUIDADO DE LA SECADORA
Mantenga el área donde está la secadora despejada y libre
de artículos que pudieran obstruir el ujo de aire para el
funcionamiento adecuado de la secadora. Esto incluye
despejar las pilas de ropa que estén frente a la secadora.
Limpieza del ltro de pelusa
Limpieza de cada carga
El ltro de pelusa está ubicado dentro de la secadora.
Un ltro obstruido con pelusa puede aumentar el tiempo
de secado.
Para limpiar:
1. Jale el ltro de pelusa fuera del receptáculo. Quite la pelusa
del ltro enrollándola con sus dedos. No enjuague ni lave
el ltro para quitar la pelusa. La pelusa mojada es difícil de
quitar.
2. Empuje el ltro de pelusa rmemente de vuelta en
su lugar.
IMPORTANTE:
n
No ponga a funcionar la secadora con un ltro de
pelusa ojo, dañado, obstruido o sin él. El hacerlo
puede causar un sobrecalentamiento y dañar tanto
la secadora como la ropa.
n
Si al quitar la pelusa del ltro, ésta cae en la secadora,
revise la capota de ventilación y quite la pelusa. Vea
“Requisitos de ventilación”.
Limpieza según la necesidad
Los residuos de detergente de lavandería y suavizante
de telas pueden acumularse en el ltro de pelusa. Esta
acumulación puede ocasionar tiempos de secado más
prolongados para su ropa, o hacer que la secadora se
detenga antes de que su carga esté completamente seca.
El ltro está probablemente obstruido si la pelusa se cae
del mismo mientras está dentro de la secadora.
Limpie el ltro de pelusa con un cepillo de nailon cada
6 meses o con más frecuencia si éste se obstruye debido
a la acumulación de residuos.
Para lavarlo:
1. Quite la pelusa del ltro enrollándola con sus dedos.
2. Moje ambos lados del ltro de pelusa con agua
caliente.
3. Moje un cepillo de nylón con agua caliente y detergente
líquido. Talle el ltro de pelusa con el cepillo para quitar
la acumulación de residuos.
4. Enjuague el ltro con agua caliente.
5. Seque meticulosamente el ltro de pelusa con una toalla
limpia. Vuelva a colocar el ltro en la secadora.
Limpieza del interior de la secadora
Para limpiar el tambor de la secadora
1. Aplique un limpiador líquido doméstico no inamable al
área manchada del tambor y frote con un paño suave
hasta que desaparezca la mancha.
2. Limpie el tambor minuciosamente con un paño húmedo.
3. Ponga a funcionar la secadora con una carga de ropa
limpia o toallas para secar el tambor.
NOTA: Las prendas de colores que destiñen tales como
mezclillas o artículos de algodón de colores vivos, pueden
teñir el interior de la secadora. Estas manchas no dañan su
secadora ni mancharán las cargas futuras de ropa. Seque
estos artículos al revés para evitar que se manche el tambor.
Eliminación de pelusa acumulada
En el interior de la carcasa de la secadora
Según el uso de la secadora, se debe quitar la pelusa cada
2años, o con más frecuencia. La limpieza deberá efectuarla
un representante de servicio calicado.
En el ducto de escape
La pelusa debe ser quitada cada 2 años, o con más
frecuencia, de acuerdo con el uso de la secadora.
Limpieza del lugar donde está
la secadora
22
Para secadoras con cableado directo:
1. Apague la electricidad en la caja de fusibles o
cortacircuitos.
2. Desconecte el cableado.
3. Asegúrese de que las patas niveladoras estén jas en
la base de la secadora.
4. Use cinta adhesiva protectora para asegurar la puerta
de la secadora.
Cuidado para las vacaciones, el
almacenaje o en caso de mudanza
Cuidado durante la falta de uso o
el almacenamiento
Ponga la secadora a funcionar sólo cuando esté en casa.
Si va a salir de vacaciones o no va a usar su secadora por
un tiempo prolongado, usted deberá:
1. Desenchufar la secadora o desconectar el suministro
de energía.
2. (Solamente para las secadoras a gas): Cierre la válvula
de cierre a la línea de suministro de gas.
3. Limpiar el ltro de pelusa. Vea “Limpieza del ltro
de pelusa”.
Cuidado para la mudanza
Para secadoras conectadas con cable de suministro
eléctrico:
1. Desenchufe el cable de suministro de energía.
2. Asegúrese de que las patas niveladoras estén jas en
la base de la secadora.
3. Use cinta adhesiva protectora para asegurar la puerta
de la secadora.
Para las secadoras a gas:
1. Desenchufe la secadora o desconecte el suministro de
energía.
2. Cierre la válvula de cierre en la línea de suministro de gas.
3. Desconecte el tubo de la línea de suministro de gas y quite
los accesorios sujetos al tubo de la secadora.
4. Ponga una tapa en la línea abierta del suministro de
combustible.
5. Asegúrese de que las patas niveladoras estén jas en
la base de la secadora.
6. Use cinta adhesiva para asegurar la puerta de la secadora.
Cómo volver a instalar la secadora
Siga las “Instrucciones de instalación” para ubicar, nivelar
y conectar la secadora.

23
Pruebe primero las soluciones aquí sugeridas y posiblemente se evite el costo de una visita de servicio técnico.
Si usted experimenta
lo siguiente
Causas posibles
Solución
SOLUCIÓN DE PROBLEMAS
La puerta no está cerrada por
completo.
Cerciórese de que la puerta de la secadora esté bien cerrada.
Hay un fusible de la casa fundido
o se disparó el cortacircuitos.
Las secadoras eléctricas utilizan 2 fusibles o cortacircuitos
domésticos. El tambor quizás rote pero sin calor. Reemplace
ambos fusibles o reposicione el cortacircuitos. Si el problema
continúa, llame a un electricista.
La secadora no funciona
No se presionó con rmeza o por
suciente tiempo el botón de Empuje
para poner en marcha (PUSH TO
START).
Fuente de suministro eléctrico
incorrecto.
Las secadoras eléctricas requieren un suministro eléctrico
de 220- 240 voltios. Verique con un electricista calicado.
Tipo de fusible equivocado.
Use un fusible retardador.
Sonidos raros
La secadora no se utilizó por cierto
tiempo.
Si la secadora ha estado en desuso por una temporada, podrá
oírse un ruido de golpeteo durante los primeros minutos de
funcionamiento.
Revise los bordes frontales y posteriores del tambor para
vericar si hay objetos pequeños. Limpie los bolsillos antes
del lavado.
Hay una moneda, botón o
sujetapapeles entre el tambor y
la parte frontal o posterior de la
secadora.
Presione la perilla de Empuje para poner en marcha (PUSH
TO START) hasta que escuche el tambor de la secadora
moviéndose.
Es una secadora a gas. El chasquido de la válvula de gas es un sonido de
funcionamiento normal.
Las prendas no se secan
satisfactoriamente, los
tiempos de secado son
demasiado largos
Filtro de pelusa obstruido con
pelusa.
El ltro de pelusa debe ser limpiado antes de cada carga.
Se ha seleccionado el ciclo de
Pelusa aire (Fluff Air).
Seleccione el ciclo correcto para el tipo de prendas que se van
a secar. Vea “Guía de ciclos”.
La carga es demasiado voluminosa
y pesada para secarse con rapidez.
Separe la carga de modo que pueda rotar libremente.
Está obstruido con pelusa el ducto
de escape o la capota de ventilación
exterior, restringiendo el ujo del aire.
Ponga a funcionar la secadora unos 5 a 10 minutos. Ponga su
mano debajo de la capota de ventilación exterior para vericar el
movimiento del aire. Si no lo siente, limpie la pelusa del sistema
de ventilación o reemplace el ducto de escape con uno de metal
pesado o de metal exible. Asegúrese de que el ducto de escape
no esté aplastado ni retorcido. Consulte las “Instrucciones de
instalación”.
El ducto de escape no tiene el
diámetro correcto.
Use un material de ventilación de 102 mm (4") de diámetro.
Está la secadora ubicada en una
habitación cuya temperatura está
debajo de 7º C (45º F).
El funcionamiento apropiado de los ciclos de la secadora
requiere temperaturas superiores a 7ºC (45ºF).
La secadora se encuentra en un
clóset sin la abertura apropiada.
Las puertas del armario deben tener aberturas de ventilación
en la parte superior e inferior de la puerta. La parte anterior de
la secadora necesita un mínimo de 25 mm (1") de espacio y,
para la mayoría de las instalaciones, la parte posterior necesita
127 mm (5"). Vea “Instrucciones de instalación”.
El ducto de escape no tiene el largo
correcto.
Controle el ducto de escape para vericar que no sea
demasiado largo ni dé demasiadas vueltas. Una ventilación
con un ducto largo aumentará el tiempo de secado. Asegúrese
de que el ducto de escape no esté aplastado ni retorcido.
Consulte las “Instrucciones de instalación”.
Las hojas del suavizante de telas
están bloqueando la rejilla.
Use únicamente una hoja de suavizante de telas y úsela una
sola vez.
Si usted experimenta
lo siguiente
Causas posibles
Solución
SOLUCIÓN DE PROBLEMAS (cont.)
El tiempo del ciclo es
demasiado corto
El ciclo automático termina muy
rápido.
Quizás la carga no esté haciendo contacto con las bandas del
sensor. Nivele la secadora.
Use el Secado programado (Timed Dry) para cargas muy
pequeñas. Cambie el ajuste del nivel de sequedad en ciclos
de Secado automático (Automatic Dry).
Aumentar o disminuir el ajuste de nivel de secado cambiará la
cantidad de tiempo de secado en un ciclo.
Pelusa en la carga
El ltro de pelusa está obstruido. El ltro de pelusa debe ser limpiado antes de cada carga.
Manchas en la carga o
en el tambor
No se usó de modo apropiado
el suavizante de telas para
secadoras.
Agregue las hojas del suavizante de telas para secadora al
comienzo del ciclo. Las hojas del suavizante de telas que
se agregan a una carga parcialmente seca pueden manchar
las prendas.
Las manchas en el tambor son causadas por los tintes en las
prendas (habitualmente los pantalones de mezclilla). Éstas no
se transferirán a otras prendas.
Las cargas están
arrugadas
Se sobrecargó la secadora. Seque cargas más pequeñas que puedan girar libremente
y reducir la formación de arrugas.
Olores
Ha estado pintando, tiñendo o
barnizando recientemente en
el área donde se encuentra su
secadora.
Si es así, ventile el área. Cuando los olores y el humo se hayan
ido del área, vuelva a lavar la ropa y luego séquela.
Se está usando la secadora
eléctrica por primera vez.
El nuevo elemento calentador eléctrico puede emitir un olor.
El olor desaparecerá después del primer ciclo.
La carga está demasiado
caliente
Se quitaron los artículos de
lavado de la secadora antes del
nal del ciclo.
Deje que termine el ciclo de Enfriamiento (Cool Down) antes de
quitar las prendas de la secadora. La carga se enfría lentamente
en todos los ciclos para reducir las arrugas y hacer que la carga
sea más fácil de manipular. Es posible que los artículos que se
han quitado antes del Enfriamiento (Cool Down) queden muy
calientes al tacto.
Se ha usado un ciclo con
temperatura alta o se ha jado
el control de Temperatura/Tela
(TEMPERATURE/Fabric) en Alta
(High).
Seleccione una temperatura más baja y use un ciclo de Secado
automático (Automatic Dry). Estos ciclos detectan el nivel de
humedad en la carga y se apagan cuando la carga alcanza el
grado de sequedad seleccionado. Esto reduce el exceso de
secado.
Pruebe primero las soluciones aquí sugeridas y posiblemente se evite el costo de una visita de servicio técnico.
Sin calor
Hay un fusible de la casa fundido
o se disparó el cortacircuitos.
El tambor quizás rote pero sin calor. Las secadoras eléctricas
utilizan 2 fusibles o cortacircuitos domésticos. Reemplace el
fusible o reposicione el cortacircuitos. Si el problema continúa,
llame a un electricista.
Válvula de la línea de suministro
cerrada.
En el caso de secadoras a gas, está la válvula abierta en la línea
de suministro.
Fuente de suministro eléctrico
incorrecto.
Las secadoras eléctricas requieren un suministro eléctrico
de 220-240 voltios. Verique con un electricista calicado.
La secadora no está nivelada. La secadora puede vibrar si no está instalada adecuadamente.
Vea “Instrucciones de instalación”.
La ropa está enredada o hecha
un ovillo.
Si la carga está hecha un ovillo, ésta rebotará haciendo vibrar
a la secadora. Separe los artículos de la carga y reinicie
la secadora.
Sonidos raros (cont.)
W10454267B
© 2012 Whirlpool Corporation 3/12
All rights reserved. Printed in U.S.A.
Todos los derechos reservados Impreso en EE.UU.
® Registered Trademark/
TM
Trademark of Whirlpool, U.S.A.
® Marca registrada/
TM
Marca de comercio de Whirlpool, U.S.A.