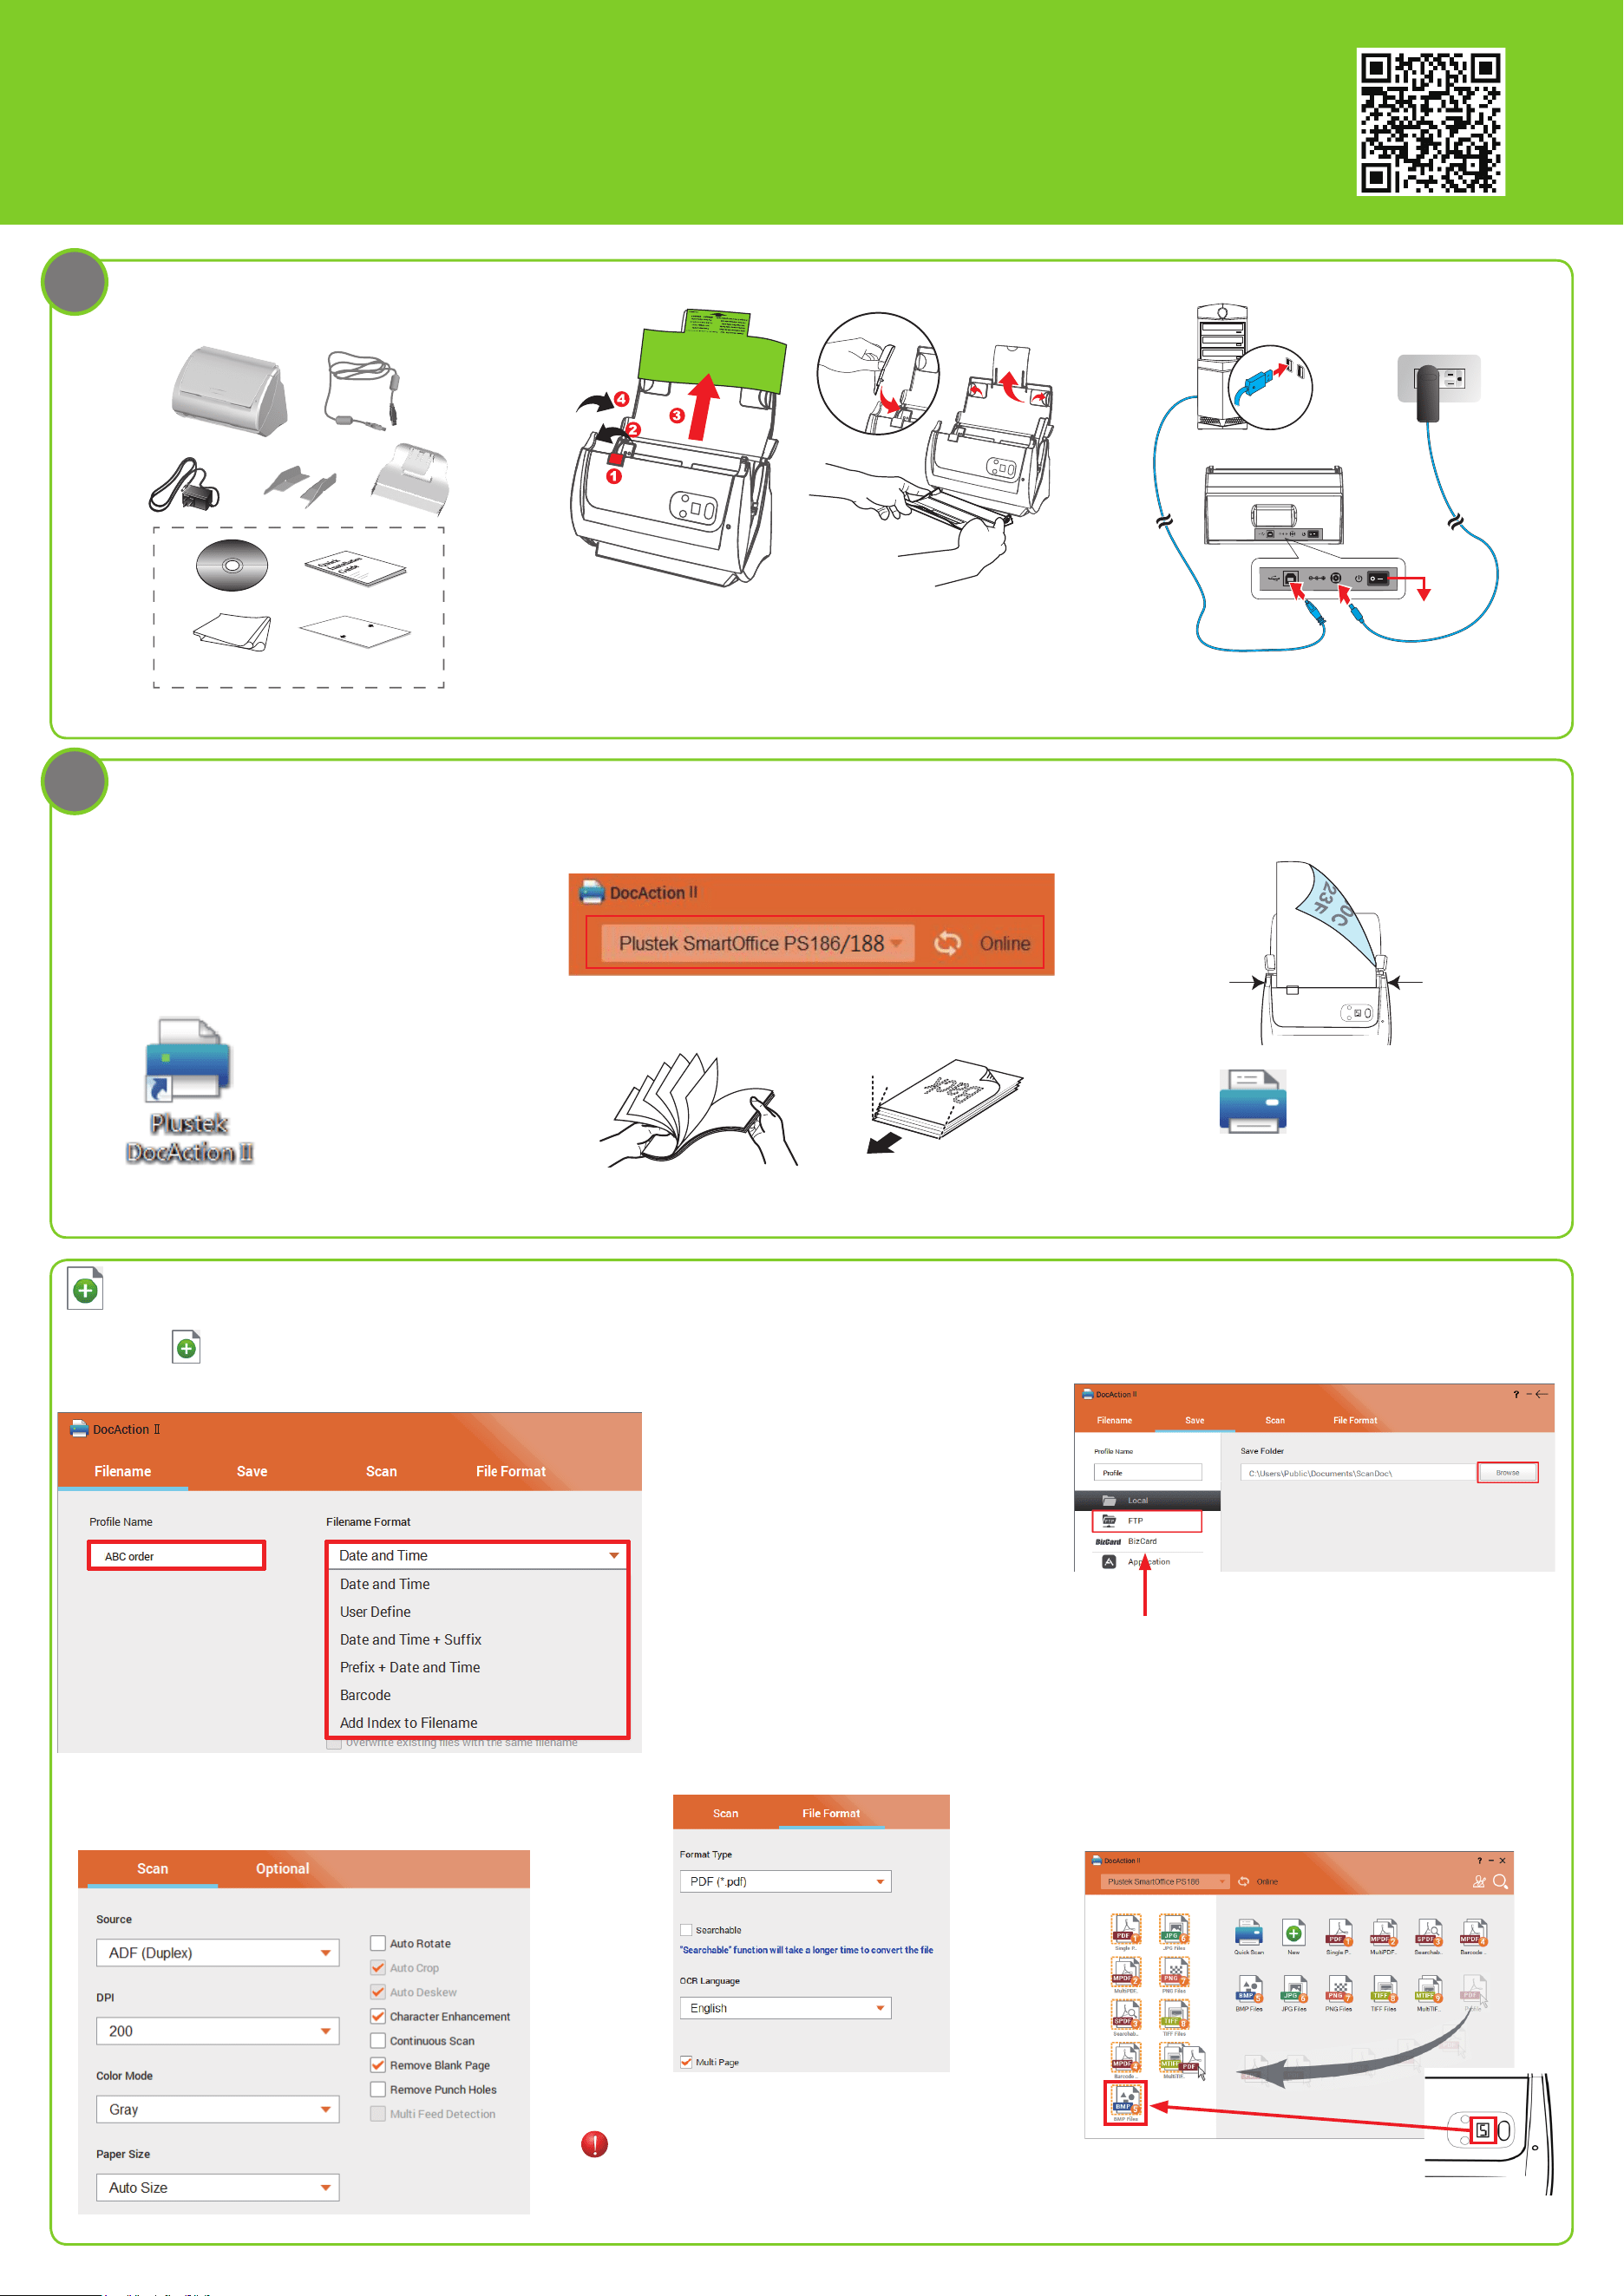
Assemble and Connect
In the Box
Calibration sheet
Accessory bag
Clean Cloth
Open cover and remove all packing material. Close the cover until you
hear it click into place.
Power on
before scan
Connect scanner to computer.
Customize your scan prole
1. Double-click New button. Set Prole Name (e.g., ABC
order) and Filename Format (e.g., Naming by Barcode).
3. Select Resolution (dpi), Color Mode and Paper Size, you may tick
the check box of each function on the right-hand side to optimize
your scan images.
4. Select desired le format from the dropdown list.
● In order to activate image to text conversion, please select
“Searchable” and “OCR Language”.
Enable “Searchable” function need more time for the le
conversion to nish.
● Deselect the “Multi Page” function, then you can save each page
by each PDF le.
2. Select le saving folder
.
You may save the le to FTP folder.
5. Click OK to complete the settings. Double-click the job button you
created to start scanning, or you can drag the buttons to the left
for shortcut.
Install Software and Scan a Document
Insert the setup DVD or download and run the product’s software
package.
Visit Plustek’s support site listed below for your model.
www.plustek.com/SmartOce/Start
(1) Launch scan software
Click
shortcut
(2) Check Scanner status
(3) Fan the stack of paper well to avoid paper jams and misfeeds.
At an angle
Feed direction
(4) Load your papers facedown, top edge rst.
(5) Double-click the Quick Scan button to quickly scan
through the simplify settings.
Adjust Source, Resolution (dpi), Color Mode and Save Path, then
click Scan button. The application starts automatically and your
document is scanned.
1
2
PS186 / PS188
Quick Start Guide
P/NO.: 17-07-2A61040-C
Scan QR code to see tutorial videos
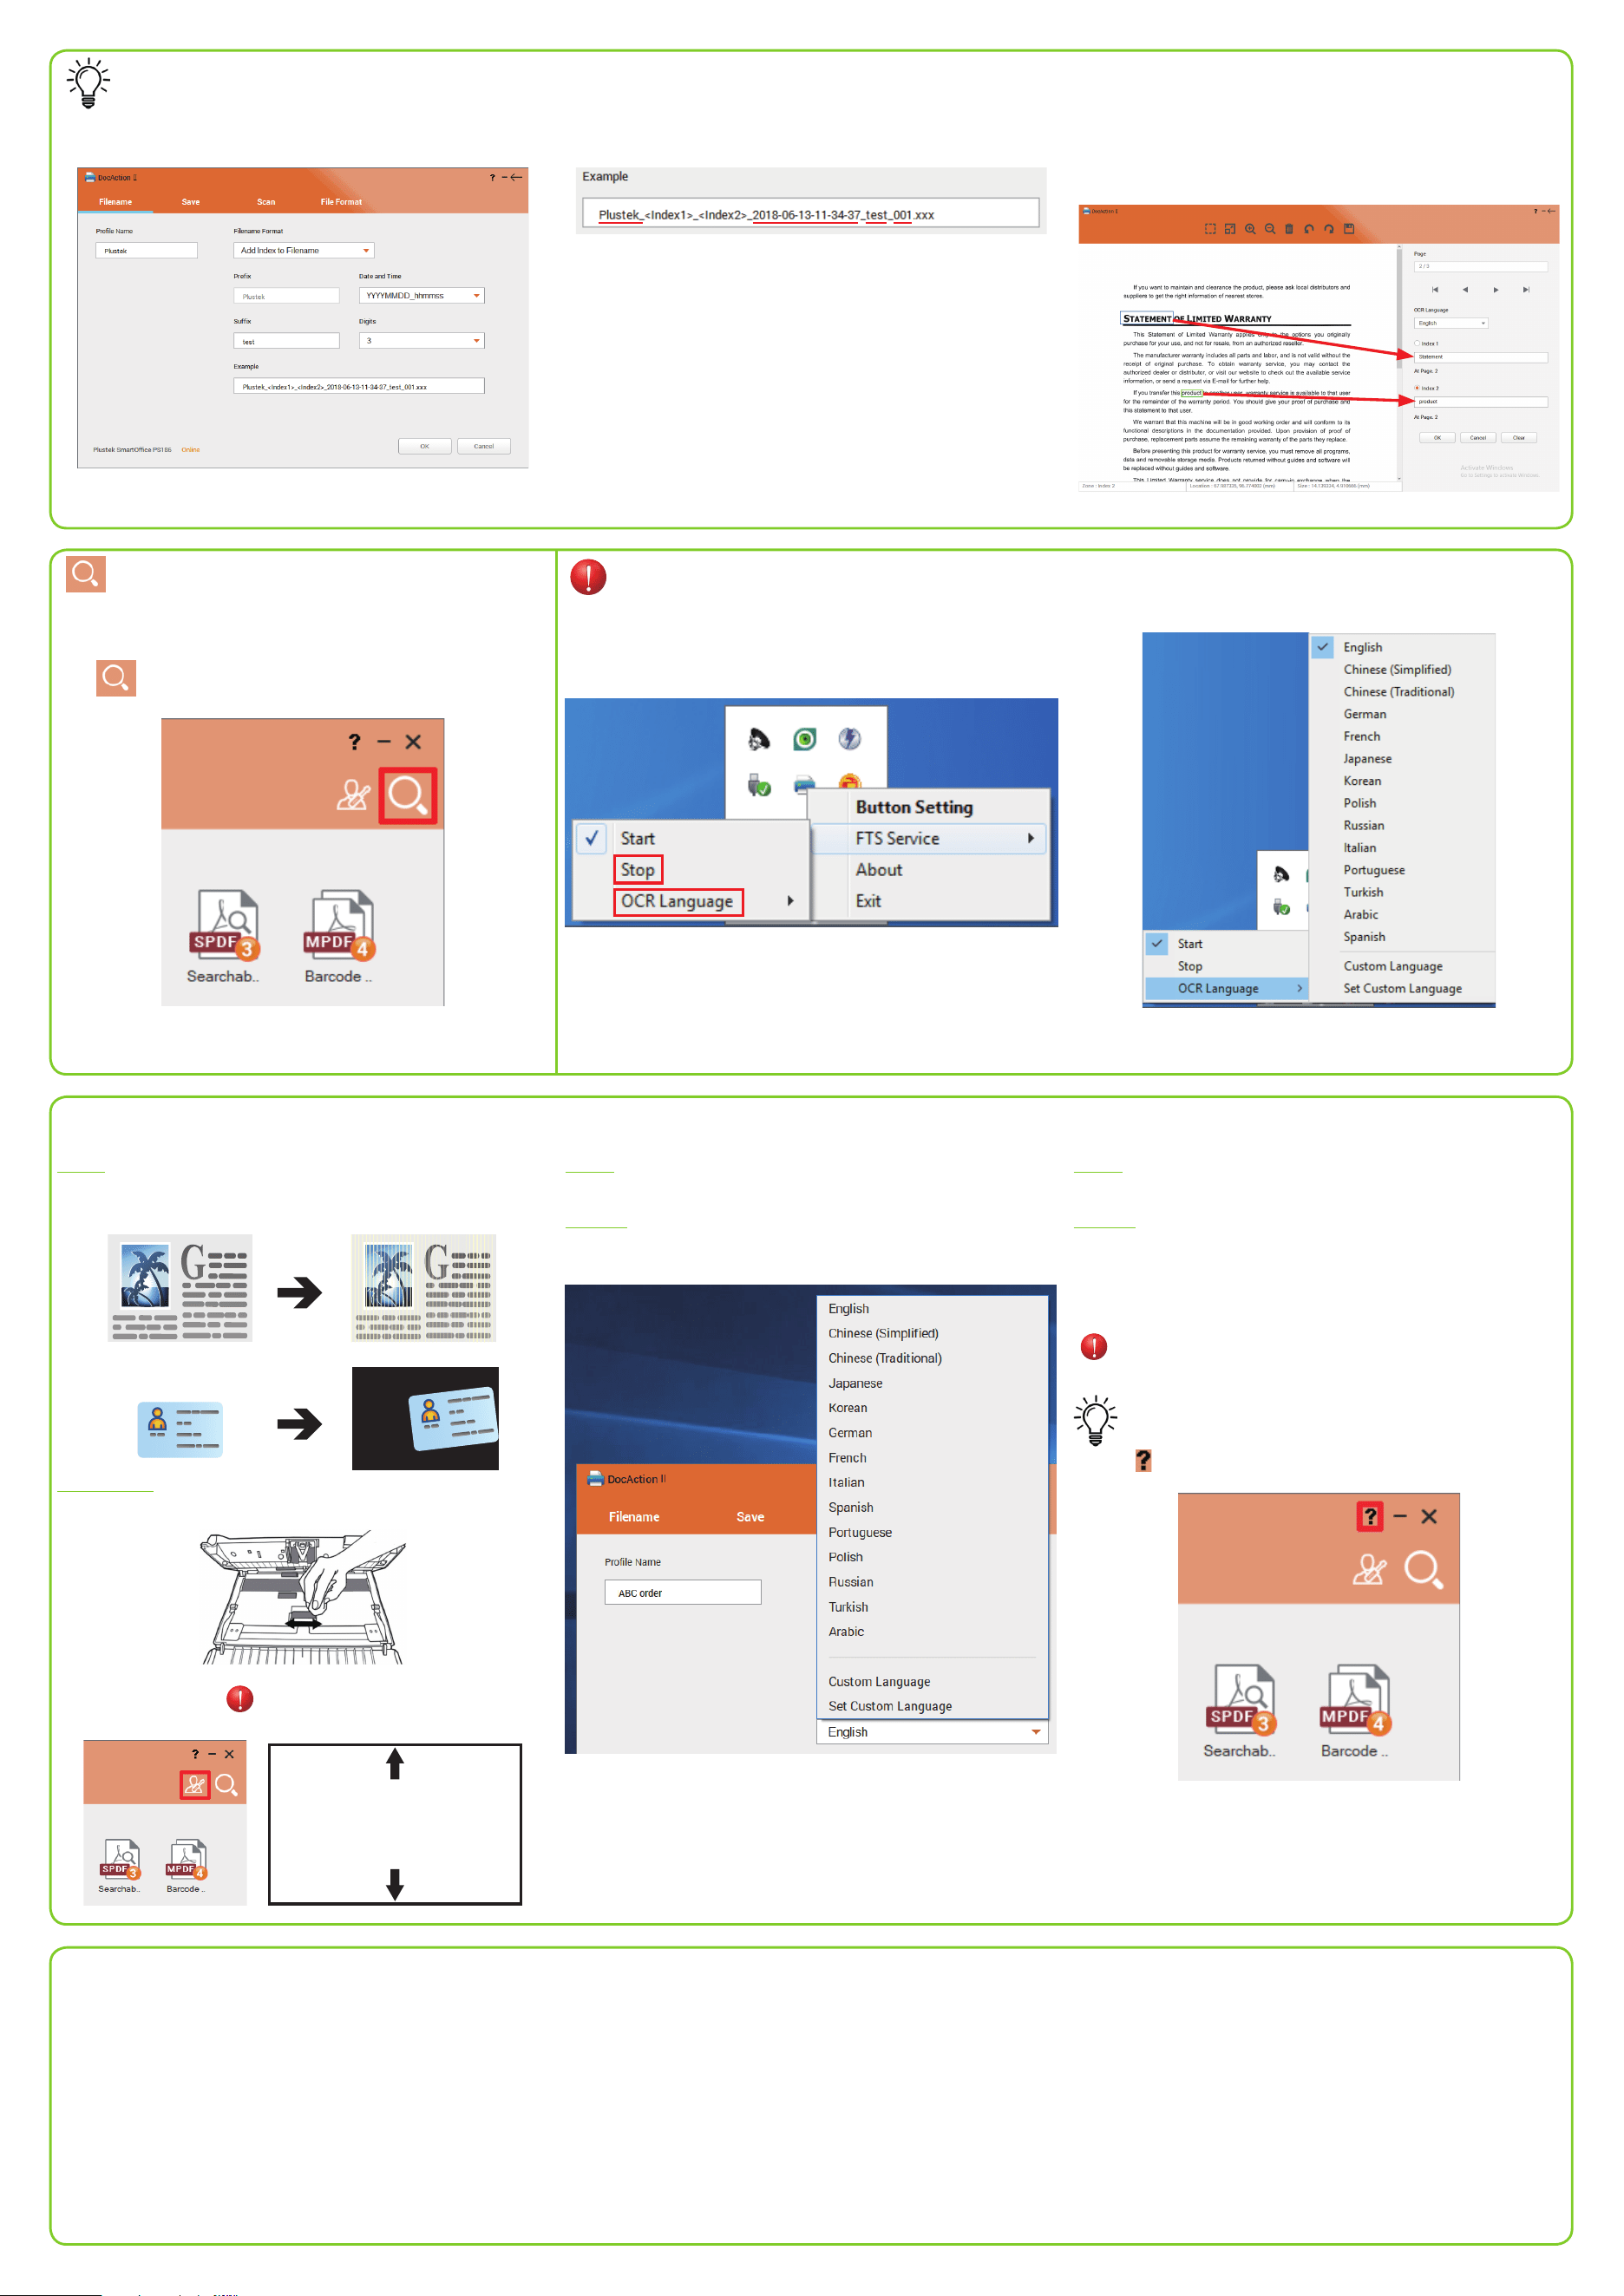
Add index to lename
Add index/keyword to lename in order to describe les easily. The lename will be saved as the Example shown. After scanning, crop the text on the image that you want to set as
index/keyword or manually type the words. Note: maximum 12
characters allowed per index eld.
Technical Support
USA/CA
714-670-7713
9am to 5:30pm, Pacic Time, Monday through Friday
UK
Tel:0125 674 1513
(Monday till Friday 10:00 to 17:00 / Sat. Sun & Bank
Holiday closed)
Full Text Search Stop FTS or Change OCR language
Full Text Search ensures that you can search not only the keyword
and lename, but also the document content.
Click
to open FTS Manager.
Right-click DocAction II icon under system tray and select FTS service
then select stop
. Note: Modication applies from the next scan
batch.
Click “OCR Language” to open OCR language list,
and select language of scan document.
Troubleshooting
FAQ 1: If the color of the scanned images are not correct, please
follow the instruction below:
Original Wrong output images
Instructions:
Clean the scanner
Calibrate the scanner
Please use the calibrate sheet in the
accessory bag of box
Calibration Sheet Calibration Sheet
FAQ 2: When I select searchable PDF as the le format, why the text
cannot be recognized after the scan is completed?
Answer:
Please make sure that the selected OCR language is consistent with
your scanned le.
FAQ 3: When I view the scanned document content under FTS, why is
the preview garbled?
Answer:
When the le format selected for scanning is not searchable pdf,
there may be garbled characters displayed in the FTS preview
window. Please make sure that the selected OCR language of the FTS
is consistent with your scanned le. Regarding how to select OCR
languages, please refer to
“
Stop FTS or Change OCR language”
Find more instructions
Click on
button to access the online help.
Or visit www.plustek.com/ps186 then click FAQ tab.
visit www.plustek.com/ps188 then click FAQ tab.