SWS 16600
EN CZ SK HU PL
USER MANUAL
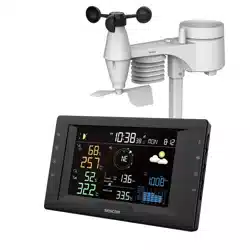
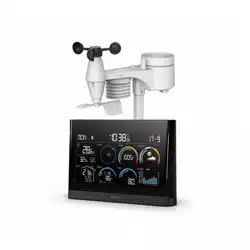
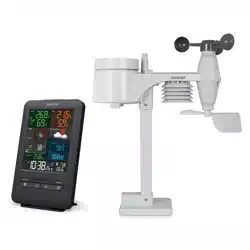
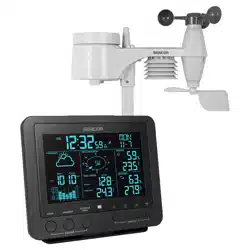
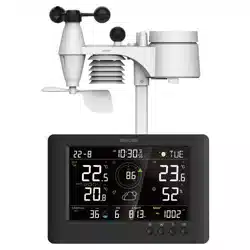
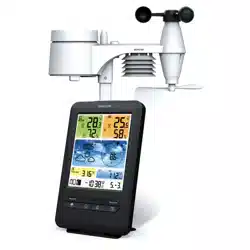
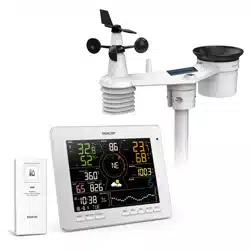
TUYA SMART WEATHER STATION WITH 7-IN-1
PROFESSIONAL SENSOR & HYGRO-THERMO SENSOR
UŽIVATELSKÁ PŘÍRUČKA
CHYTRÁ METEOROLOGICKÁ STANICE TUYA
S PROFESIONÁLNÍM SNÍMAČEM 7-V-1 A SNÍMAČEM
VLHKOSTI A TEPLOTY
NÁVOD NA OBSLUHU
INTELIGENTNÁ METEOROLOGICKÁ STANICA TUYA
S PROFESIONÁLNYM SNÍMAČOM 7-V-1 A SNÍMAČOM
VLHKOSTI A TEPLOTY
HASZNÁLATI ÚTMUTATÓ
TUYA OKOS METEOROLÓGIAI ÁLLOMÁS
PROFESSZIONÁLIS 7 AZ 1-BEN ÉRZÉKELŐVEL ÉS
PÁRATARTALOM- ÉS HŐMÉRSÉKLET-ÉRZÉKELŐVEL
INSTRUKCJA OBSŁUGI
INTELIGENTNA STACJA METEOROLOGICZNA
Z PROFESJONALNYM CZUJNIKIEM 7W1 I CZUJNIKIEM
TEMPERATURY I WILGOTNOŚCI
*Smart phone not included
*Chytrý telefon není součástí příslušenství
*Smartfón nie je súčasťou príslušenstva
*Az okostelefon nem tartozék
*Smartfon nie stanowi elementu akcesoriów

OBSAH
INSTALLING THE SENCOR HOME APP 1
ADD THE SWS 16600 WIFI SH TO THE SENCOR HOME APP 1
RESETTING THE SWS 16600 WIFI SH 3
BASIC DESCRIPTION OF THE APPLICATION 3
AUTOMATIC CONNECTION TO OTHER DEVICES WITH THE SMART LIFE APP 5
ADDITIONAL FEATURES IN SENCOR HOME AND SMART LIFE 6
FOR WEATHERCLOUD (WC) 9
VIEW LIVE WUNDERGROUND AND WEATHERCLOUD DATA 11
VIEW YOUR WEATHER DATA IN WEATHERCLOUD 12
FIRMWARE UPDATES 12
EN – 1
INSTALLING THE
SENCOR HOME APP
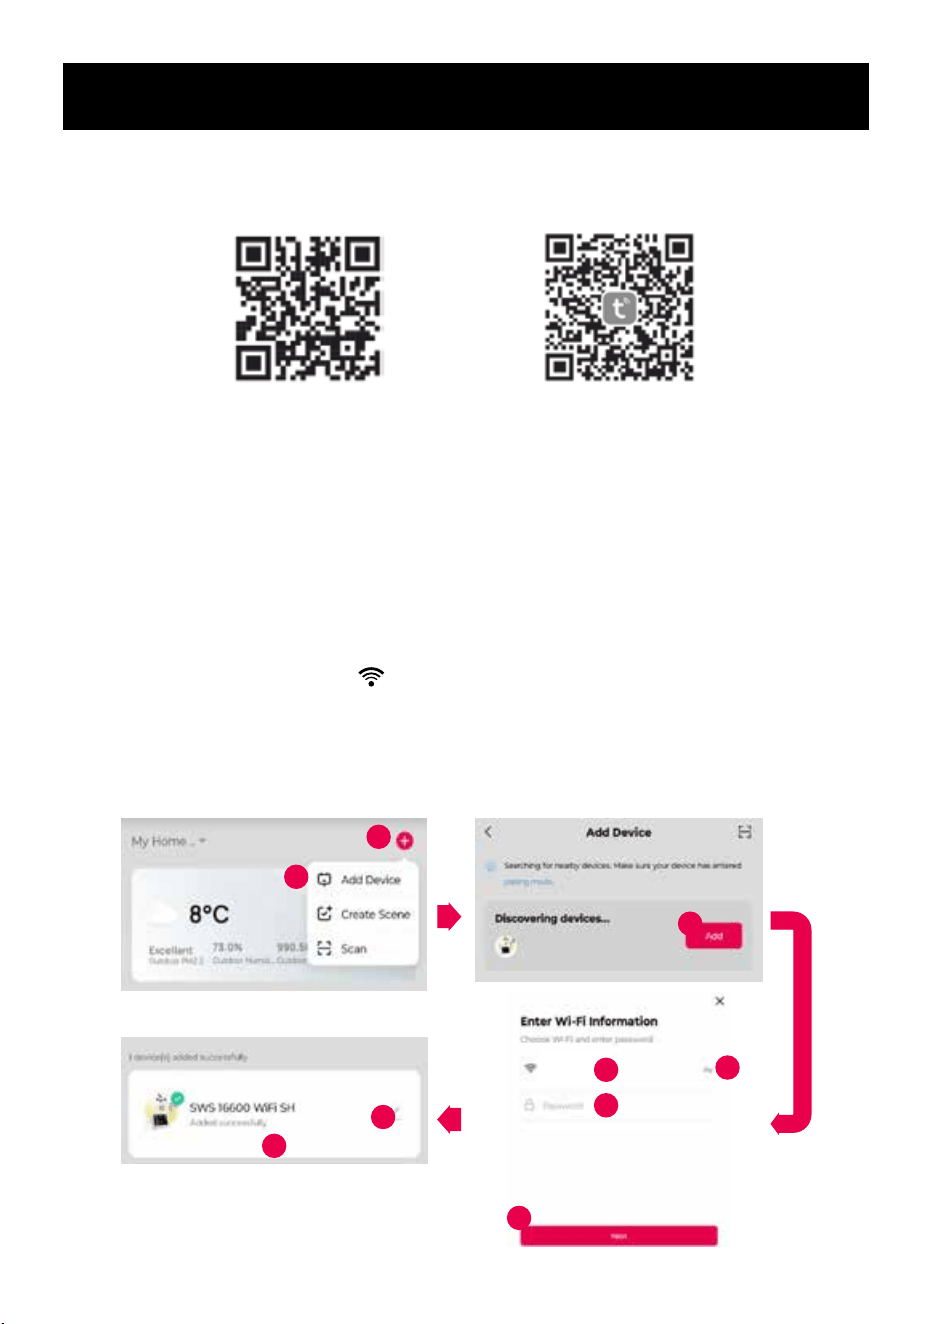
The SENCOR HOME and TUYA SMART apps are available for download on the Play
Store (Android) and AppStore (iOS)
QR code to download the
SENCOR HOME app
QR code to download the TUYA
SMART LIFE app
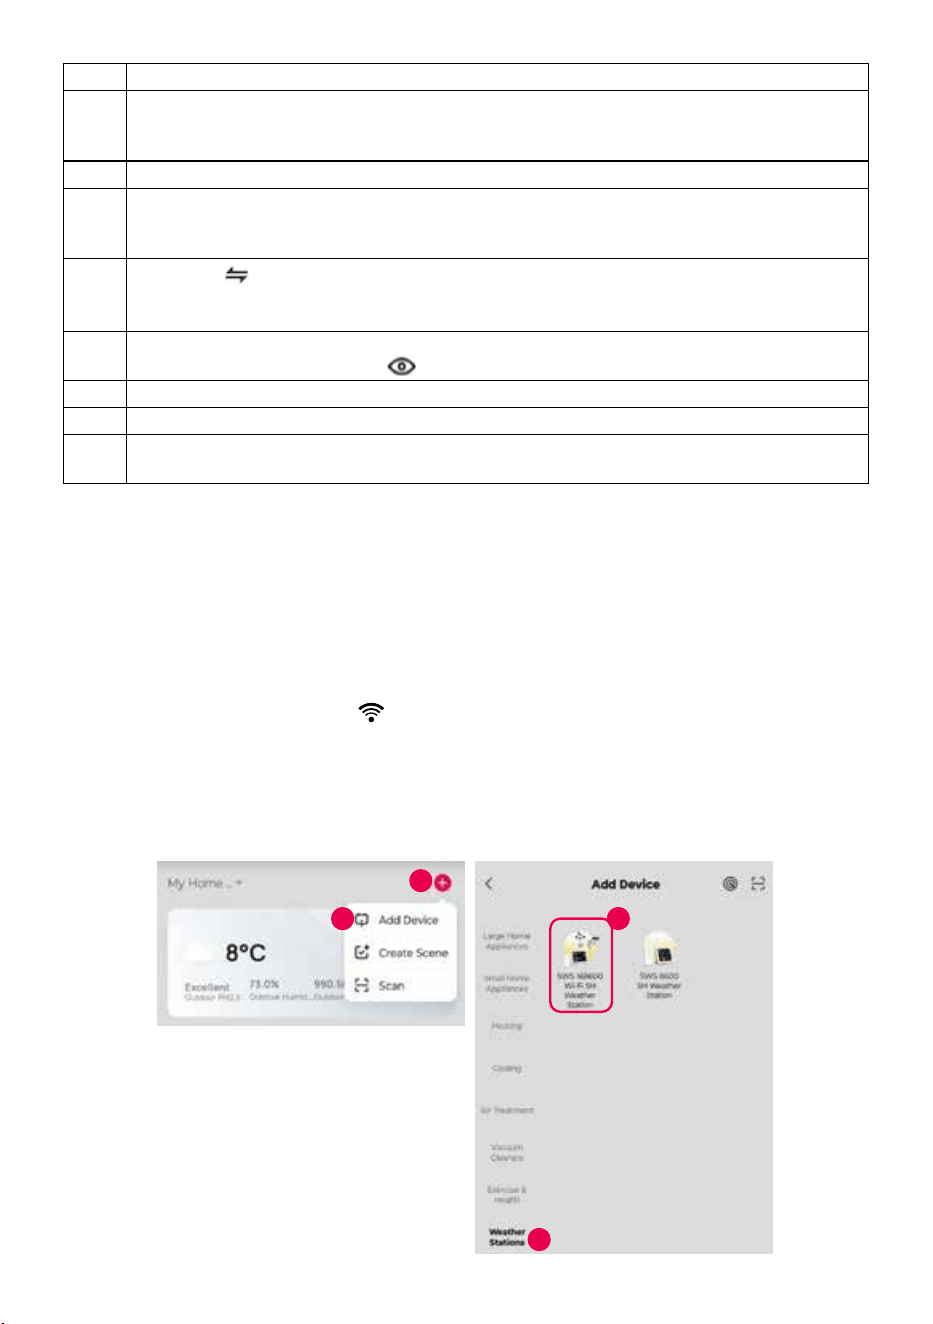
Add the SWS 16600 WiFi SH to the SENCOR HOME app
The SWS 16600 WiFi SH will be found in the app automatically:
1. Put the SWS 16600 WiFi SH into operational mode
1) Plug the SWS 16600 WiFi SH into a network outlet
2) Press and hold the [SENSOR/WI-FI] button on the back of the SWS 16600 WiFi SH
for 8 seconds The AP and icon will start ashing on the display. When the device
is plugged into a network outlet for the rst time, AP mode starts automatically.
2. Launch the already installed SENCOR HOME app and follow the instructions
below:
ϭ
Ϯ
ϯ
^^/
ϰ
ϱ
ϲ
ϳ
ϴ
ϵ
EN – 2
1 Press the “+” button to expand the menu.
2 Add a new device – the app will try to nd all available compatible SENCOR
devices nearby. Select the SWS 16600 WiFi SH device you want to pair with the
application
3 Press the “Add” button.
4 To add a WI-FI network to the SWS 16600 WiFi SH, your mobile phone must
be connected to the WI-FI network* during the setup process, which will be
transferred to the SWS 16600 WiFi SH
5
Press the
icon to go to your smartphone's system to select from the available
WI-FI networks*. The WI-FI network you have selected will then be displayed in
point “4”
6 Enter the password of your home WI-FI network to which the SWS 16600 WiFi SH
will be connected. Press the
button to display your WI-FI network password.
7 Check that the entered WI-FI data is correct and press the “Next” button.
8 Button to change the name of the SWS 16600 WiFi SH device.
9 The SWS 16600 WiFi SH has been successfully added to the “SENCOR HOME”
app
* always choose WI-FI networks that operate at 2 4 GHz
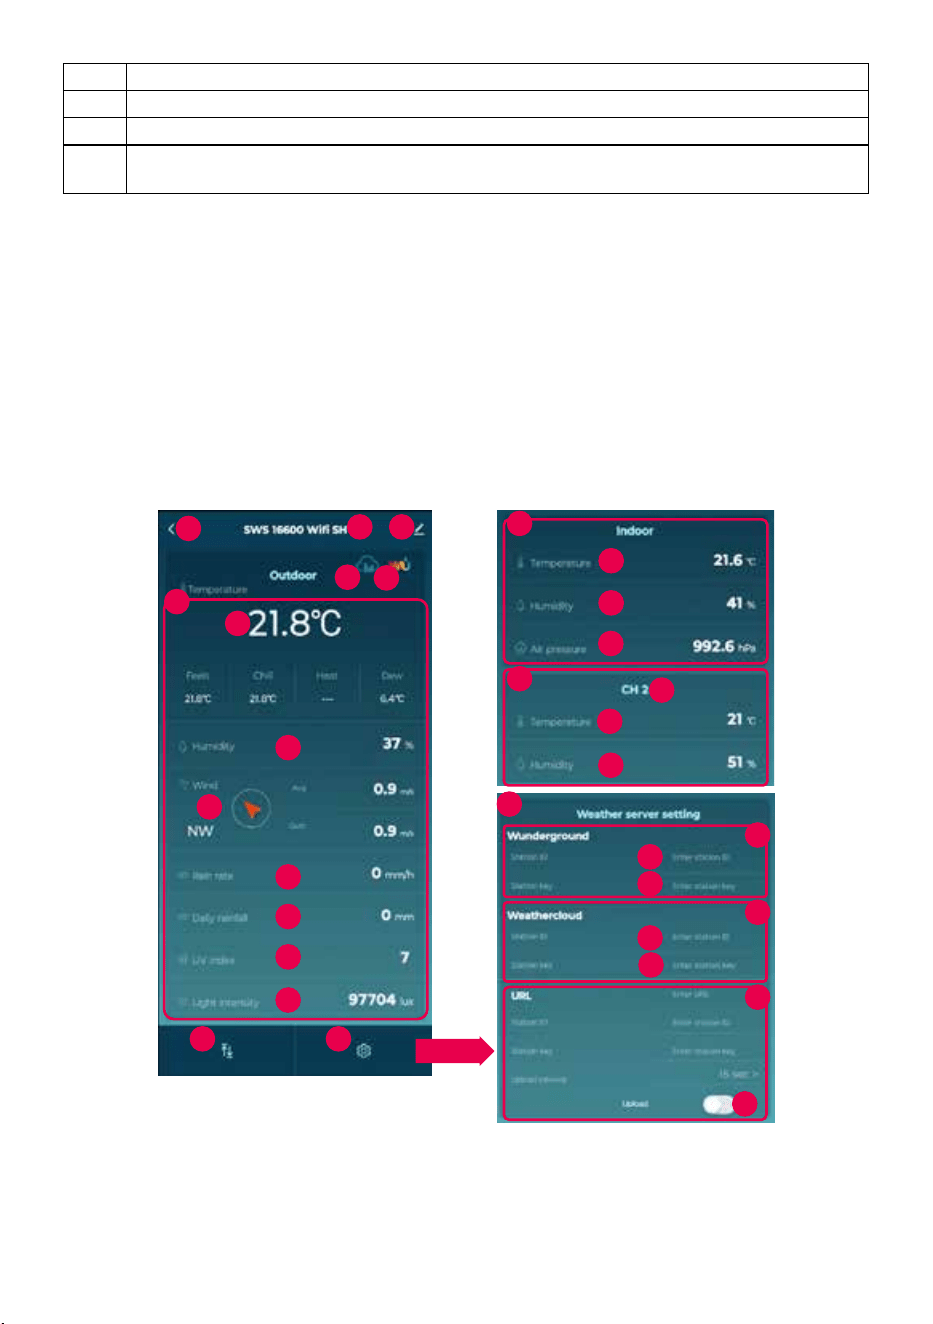
B) Manually add the SWS 16600 WiFi SH to the SENCOR HOME app:
1. Put the SWS 16600 WiFi SH into operating mode
1) Plug the SWS 16600 WiFi SH into a network outlet
2) Press and hold the [SENSOR/WI-FI] button on the back of the SWS 16600 WiFi SH
for 8 seconds The AP and
icon will start ashing on the display. When the device
is plugged into a network outlet for the rst time, AP mode starts automatically.
2. Launch the already installed SENCOR HOME app and follow the instructions
below:
ϭ
Ϯ
ϯ
ϰ
EN – 3
1 Press the “+” button to expand the menu.
2 Add a new device “Add device”.
3 Select the “Weather stations” group
4 Select the device “SWS 16600 WiFi SH” and follow the steps in the connection
wizard
Resetting the SWS 16600 WiFi SH
If the device was previously connected to the SENCOR HOME app, it cannot be
added again to another SENCOR HOME user account Reset pairing with the
SENCOR HOME app is required
RESET is performed in the on state by pressing and holding the “RESET” button on the
back of the SWS 16600 WiFi SH. Successful reset will be announced by an audible tone.
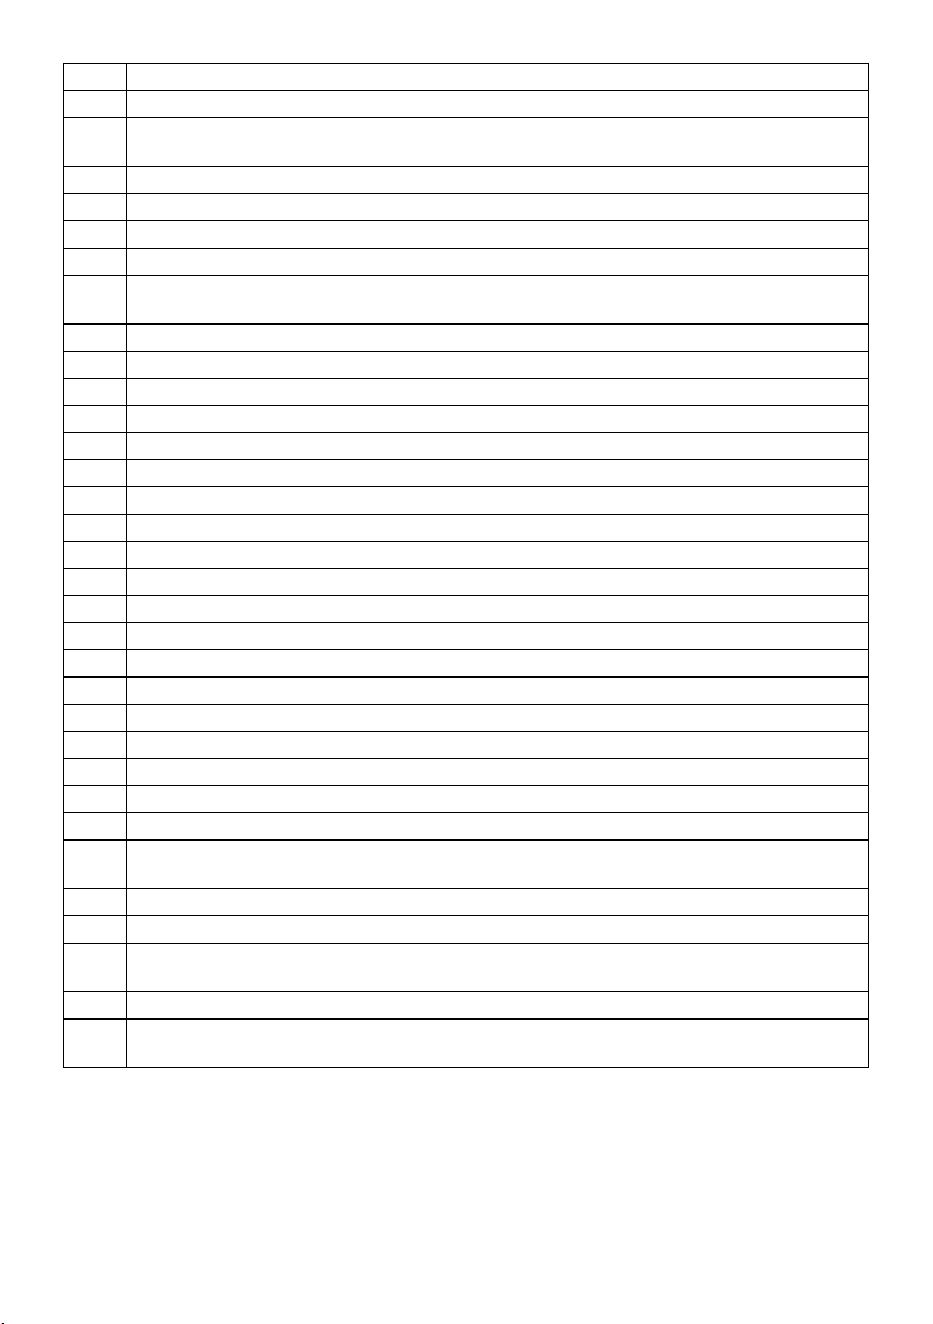
Basic Description of the Application
ϭ
Ϯ ϯ
ϰ
Ă
ď
Ě
Đ
ϭϬ ϭϭ
ϱ
ϲ
Ğ
Ĩ
Ő
ϳ
ϴ
Ă
ď
Đ
Ă
ď
ϵ
ϭϭ
ϭϮ
ϭϯ
ϭϰ
ϭϱ
Ă
ď
Ă
ď
EN – 4
1 “BACK” button – go to the main screen.
2 SWS 16600 WiFi SH device name.
3 Advanced menu – Device information, sharing a device to another account,
updating a device, REMOVING A DEVICE FROM THE ACCOUNT.
4 Quick dial button to app.weathercloud.net cloud
5 Quick dial button to wunderground.com cloud
6 Display of measured values from the outdoor 7-in-1 unit.
a Temperature
4 Display of measured values from the internal unit. Hold down the eld to go to the
chart view.
a Temperature
b Humidity
c Wind (direction and speed)
d Rainfall
e Daily rainfall
f UV index.
g Light intensity
7 Display of measured values from the internal unit.
a Temperature
b Humidity
c Pressure
8 Display of measured values from the additional 2-in-1 sensor.
9 Set sensor communication channel
a Temperature
b Humidity
10 List of measured values from all sensors in one complete list.
11 Settings – settings for display units, cloud server settings.
12 Inserting the parameters generated by the Wunderground cloud.
a Enter the station ID generated by the Wunderground cloud.
b Insert the station key generated by the Wunderground cloud (OBSERVE THE
CHARACTER SIZE)
13 Inserting the parameters generated by the Weathercloud cloud.
a Enter the station ID generated by the Weathercloud cloud.
b Insert the station key generated by the Weathercloud cloud (OBSERVE THE
CHARACTER SIZE)
14 Option to insert parameters of the server you are running.
15 Slide switch to synchronize embedded data with clouds. A green state indicates
that synchronization is enabled – the measured data will be written to the clouds.
EN – 5
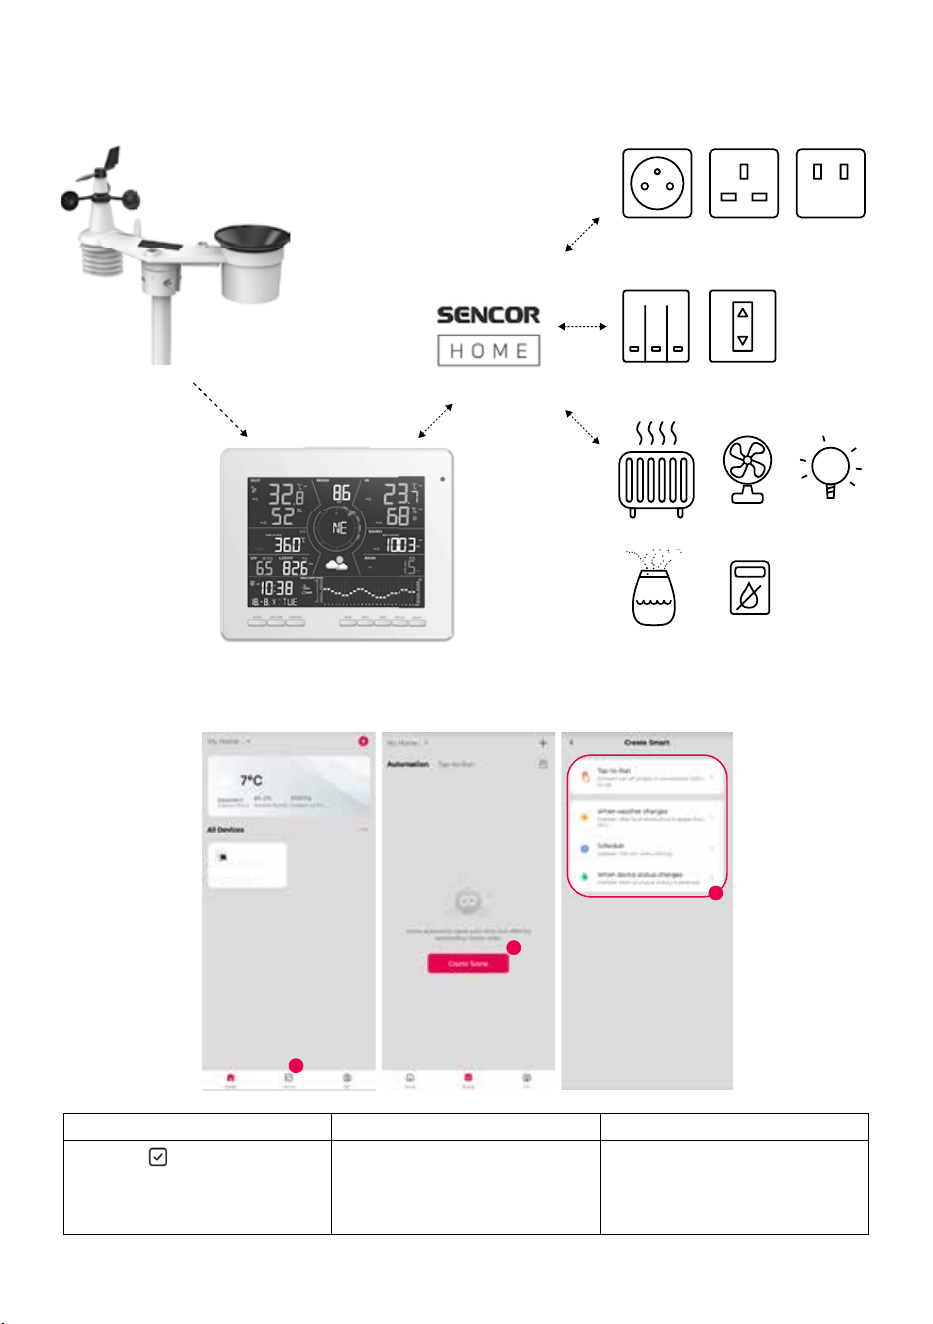
Automatic connection to other devices with the Smart Life app
7in1 wireless sensor
SENCOR HOME
Smart Life
Console
Smart sockets
Smart switching devices
Heating element Fans Light bulbs
Humidier Dehumidier
IoT applications
ϭ
Ϯ
ϯ
^t^ϭϲϲϬϬ^,
ǁϬϭ
1 2 3
Tap the “
Scene” icon on
the home screen and follow
the instructions to set the
condition and task
Tap the “+” or “Create
Scene” icon
Click on one of the labels
below to set dierent trigger
conditions
EN – 6
NOTE:
- Any tasks required or performed by third party devices are the decision and risk of
the user.
- Please be aware that we make no warranty regarding the correctness, accuracy,
timeliness, reliability or completeness of IoT applications.
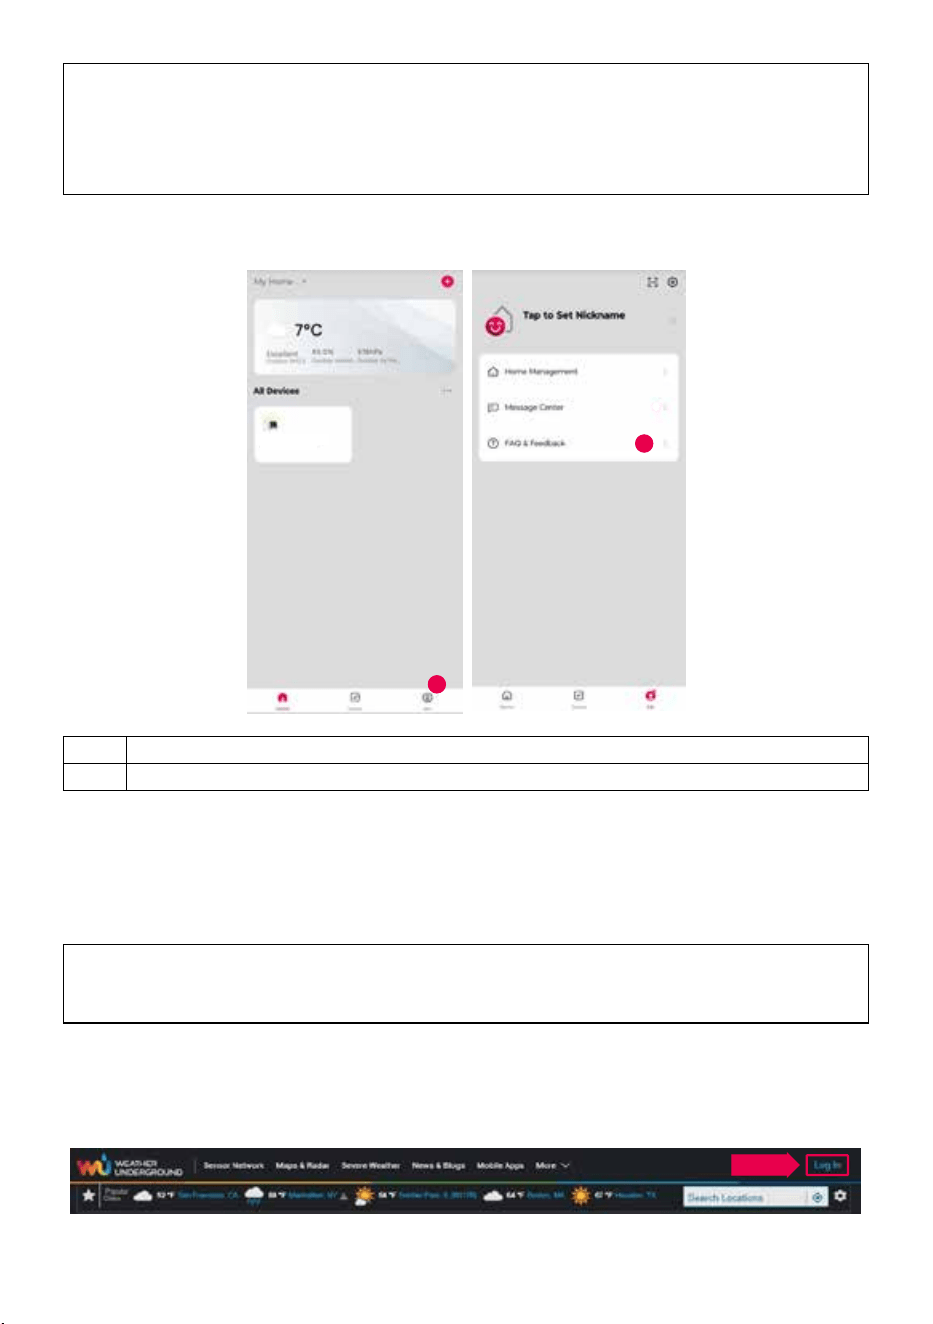
Additional features in SENCOR HOME and Smart Life
ϭ
Ϯ
^t^ϭϲϲϬϬ^,
ǁϬϮ
1 Press the “Me” button.
2 Select FAQ and feedback.
Create a weather server account and add your station
This console allows you to upload weather data to Weather Underground, Weathercloud
or a third-party cloud server via a Wi-Fi router. You can set up your device by following the
steps below.
NOTE:
The addition of a cloud server website and application is subject to change without
notice.
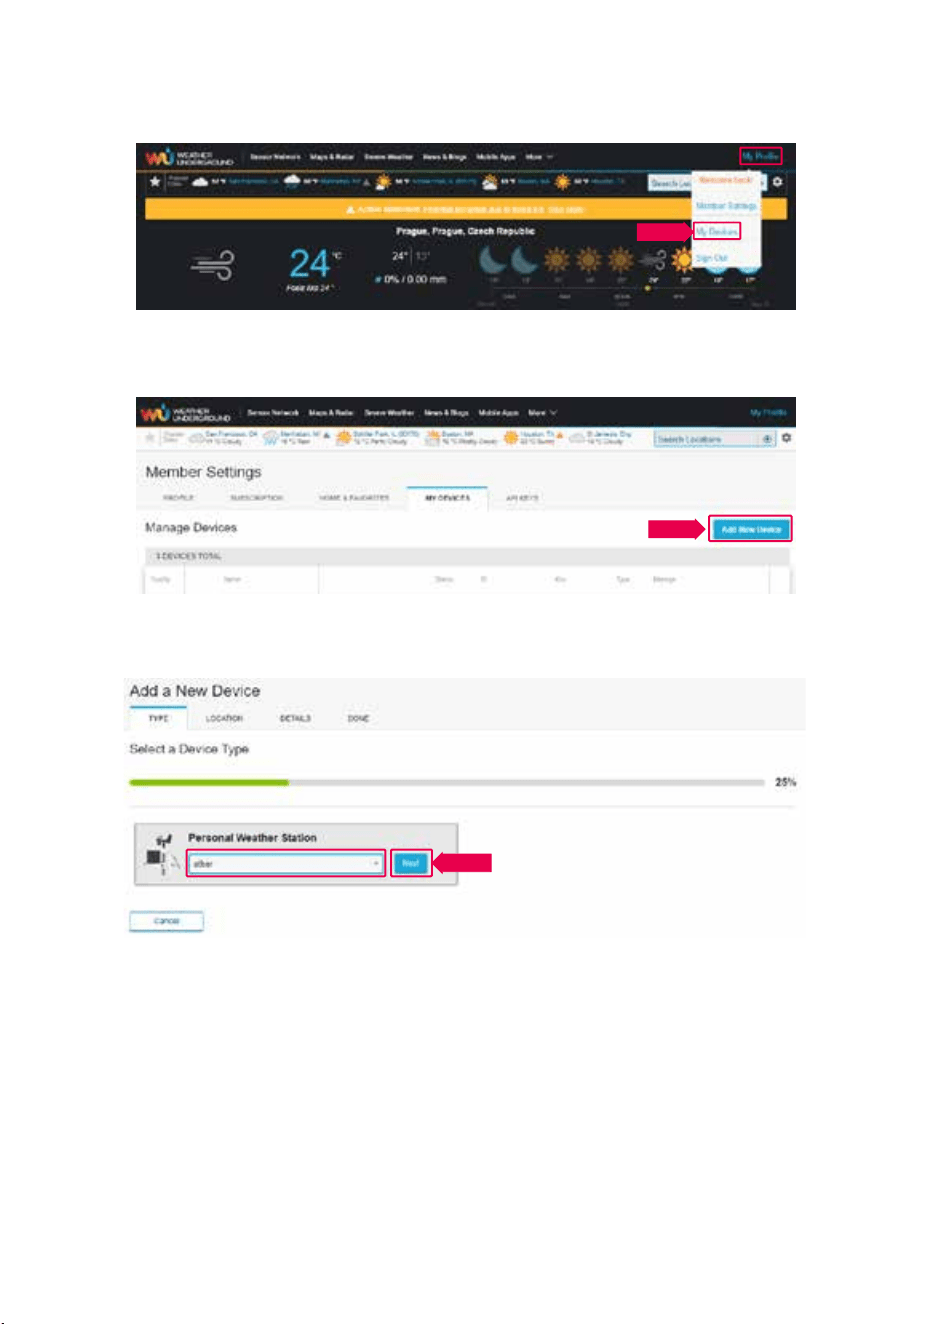
For Weather Underground (WU)
1 On https://www.wunderground.com, click “Join” in the top righthand corner to open the
registration page Follow the instructions to create an account
ϭ
Ϯ
ϯ
EN – 7
2. Once you have created your account and completed email verication, please return to
the WUnderground website and log in. Then click on “My Prole” at the top to open the
drop-down menu and click on “My Devices”
ϭ
Ϯ
ϯ
3. At the bottom of the “My Weather Station” page, click the “Add New Device” button to
add your device.
ϭ
Ϯ
ϯ
4. In the “Select a Device Type” step, select “Other” from the list, and then press the
“Next” button.
ϰ
EN – 8
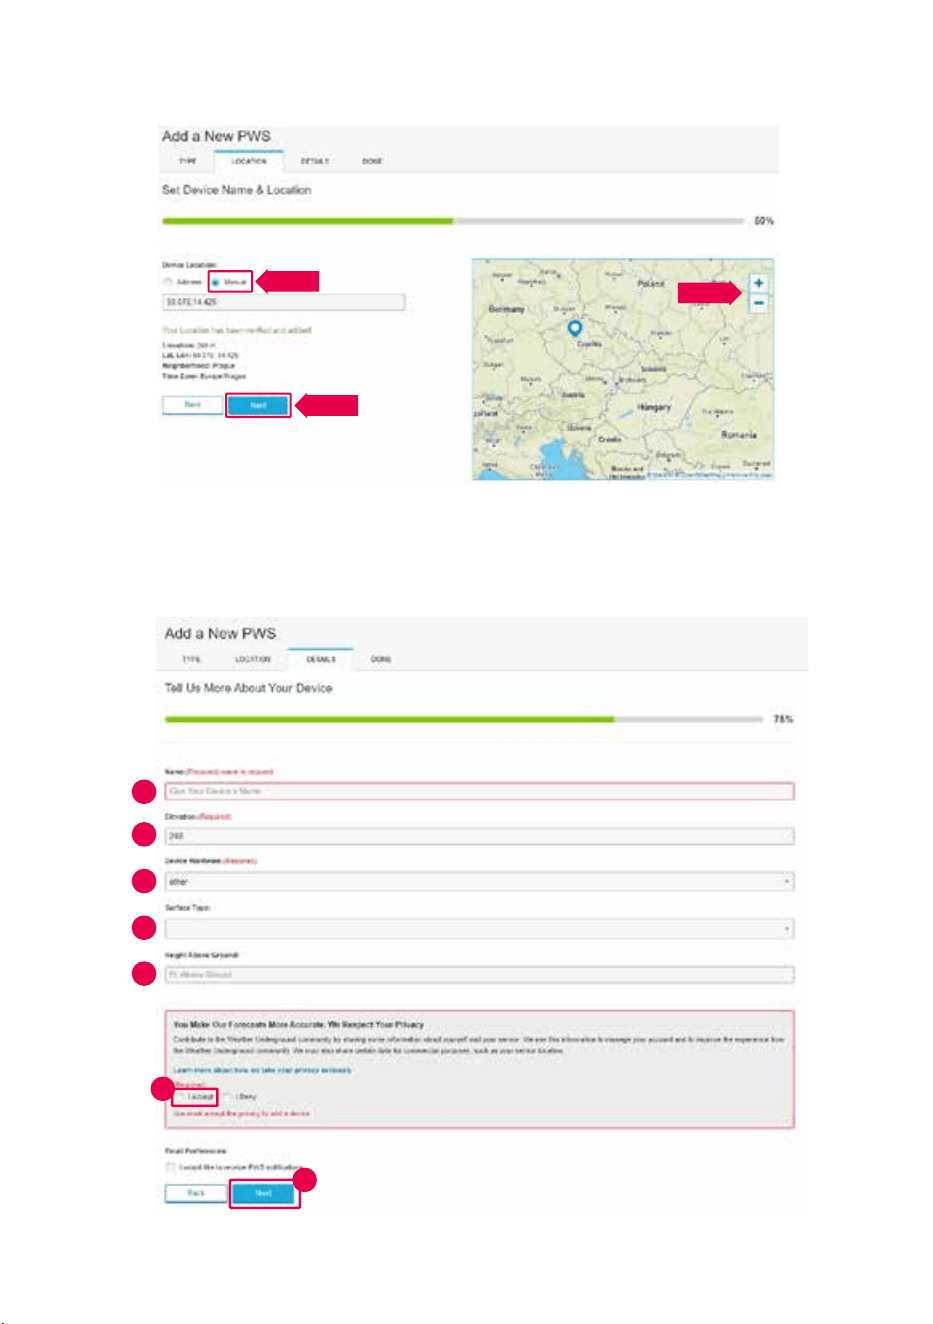
5. In the “Set Device Name & Location” step, select your location on the map and then
press the “Next” button.
ϱ
6. Following the instructions for entering your station information, in the “Tell Us More
About Your Device” step, (1) enter the name of your weather station, etc. (2) select
“other”, (3) select “I Accept” to accept Weather Underground's privacy policy, and (4)
click “Next” to create your station ID and key
ϭ
ϭ
Ϯ
ϭ
ϭ
ϯ
ϰ
ϲ
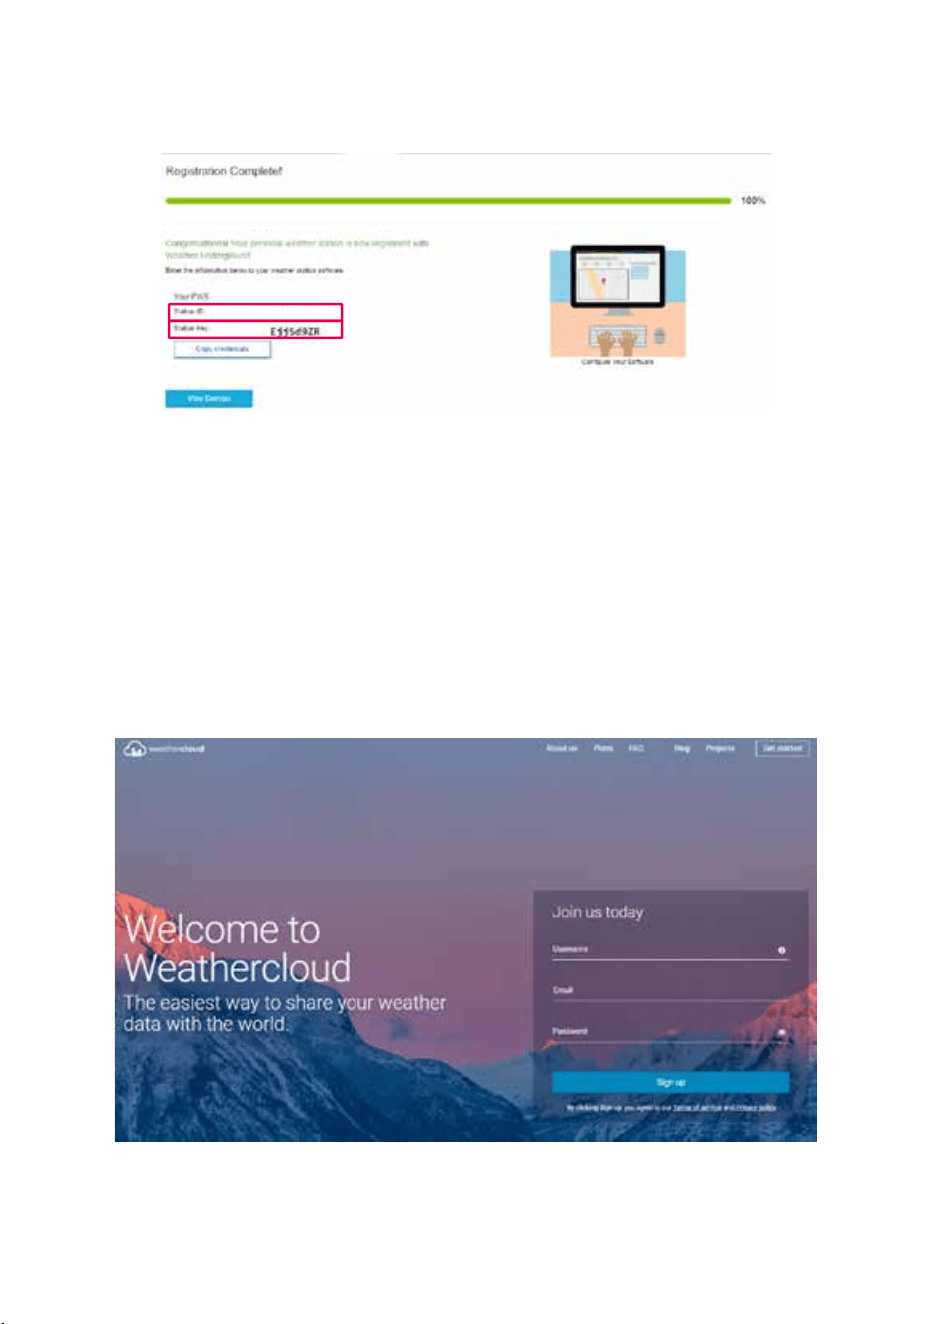
EN – 9
7. Take a note of your “Station ID“ and “Station key“ for the next setup step.
ϳ
8. The basic description of the application (point 12 a/b) shows the location for inserting
the generated ID and key After entering the correct characters and digits and
then enabling synchronization (point 15). the values are automatically sent to the
WUnderground cloud
Warning: when inserting characters, please keep the format as generated. Keep to the
letter size
For Weathercloud (WC)
1 At https://weathercloud.net, enter your information in the “Join us today” section and
then follow the instructions to create your account
ϴ

EN – 10
2. Log in to Weathercloud and then go to the “Devices” page, “Create device” and then go
to “+ New” to create a new device.
ϵ
3 On the Create new device page, enter all information, select “W100 Series” in the
Model* selection box under “CCL”. In the Link type* selection box, select “SETTINGS”.
When you are nished, click Create
ϭ
Ϭ
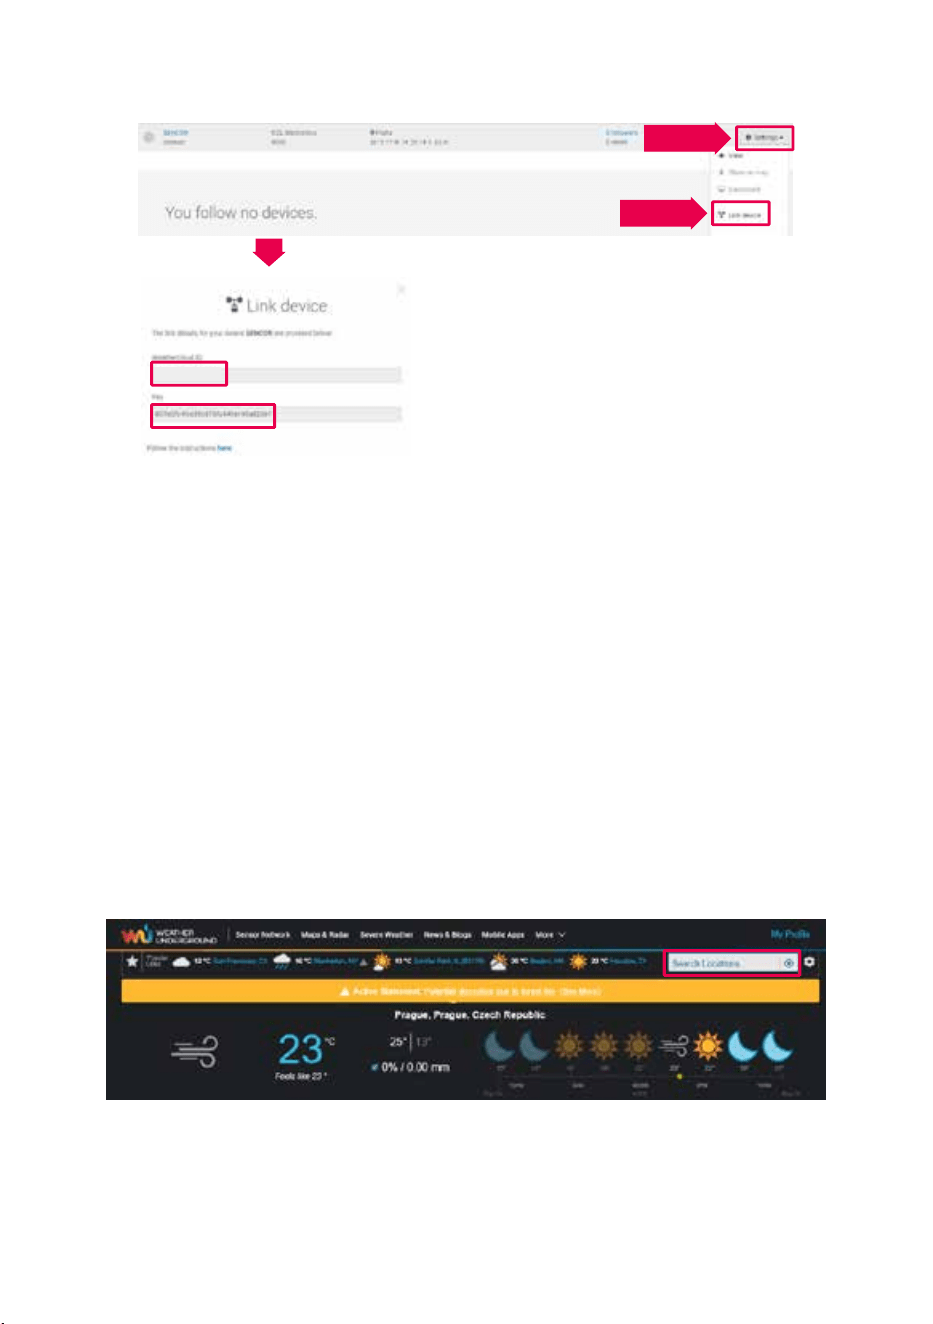
EN – 11
4. Make a note of your ID and key for the next setup step.
ϭ
ϭ
5. The basic description of the application (point 13 a/b) shows the location for inserting
the generated ID and key After entering the correct characters and digits and
then enabling synchronization (point 15), the values are automatically sent to the
Weathercloud cloud
Warning: when inserting characters, please keep the format as generated. Keep to the
letter size
View live Wunderground and Weathercloud data
View your weather data in Wunderground
Log in to your account
To show your weather station’s live data in a web browser (PC or mobile version), please
visit http://www.wunderground.com and enter your “Station ID” in the search eld. Your
meteorological data will be shown on the next page. You can also log in to your account to
view and download your weather station’s recorded data.
ϭ
Ϯ
ϭ
ϯ
ϭ
ϰ
Another way to display your station’s data is entering the following address in the web
browser’s URL bar:
https://www.wunderground.com/dashboard/pws/XXXX
In place of XXXX, enter your station’s Weather Underground ID to directly access the live
view of your station’s data.
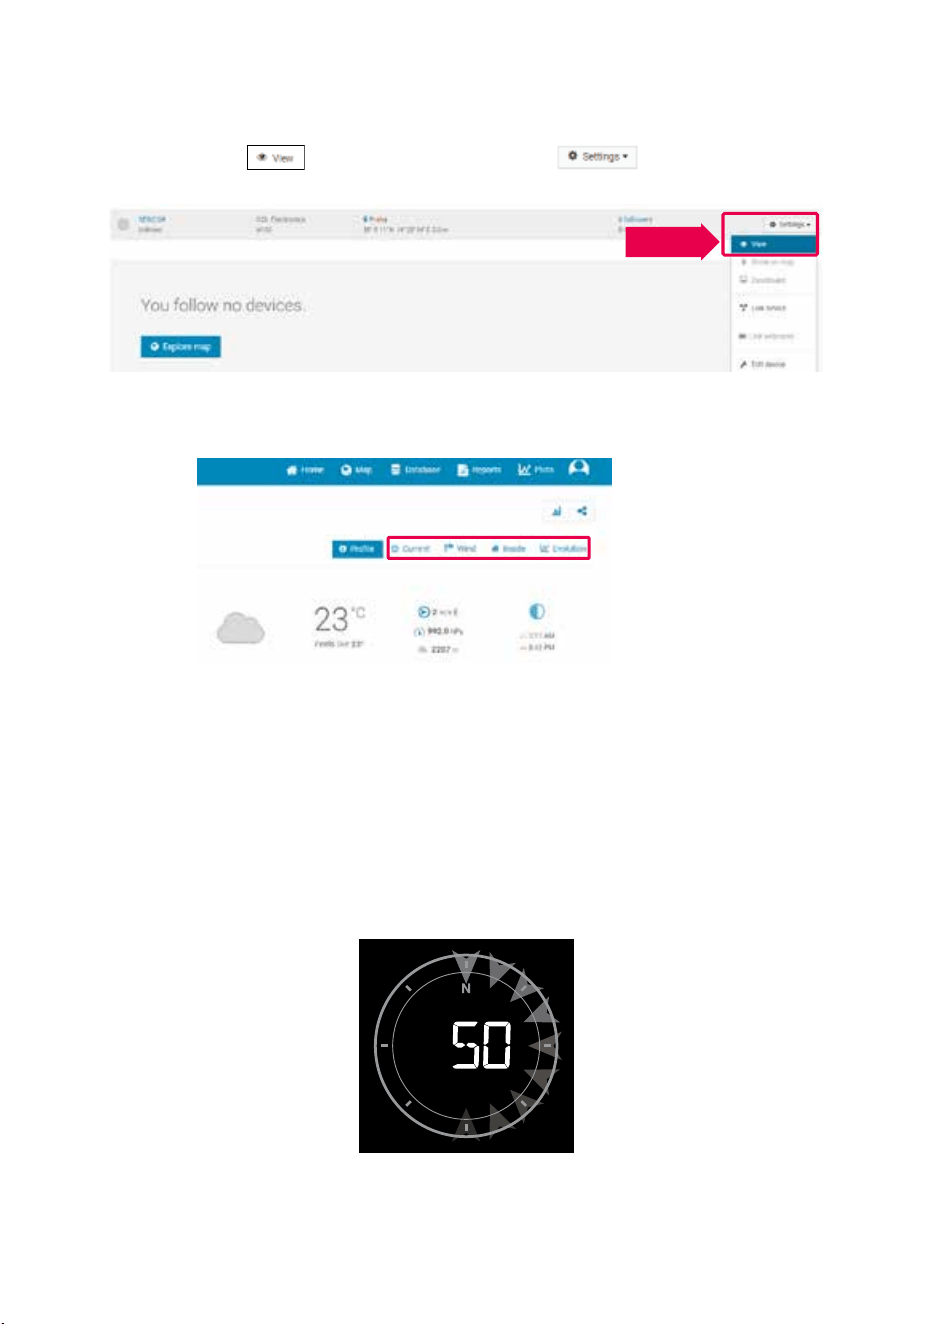
EN – 12
View your weather data in Weathercloud
1 To show your weather station’s live data in a web browser (PC or mobile version),
please visit https://weathercloud.net and log in to your account.
2 Click on the icon
inside the drop-down menu of your station
ϭ
Ϯ
ϭ
ϯ
ϭ
ϰ
3 Click on “Current“, "Wind", “Evolution” or “Inside” to show your weather station’s live
data
ϭ
Ϯ
ϭ
ϯ
ϭ
ϰ
Firmware updates
The console can be updated over a Wi-Fi network. If new rmware is available,
a notication or pop-up message will appear when you open the app on your phone.
Update using the instructions in the app
During the update process, the progress status in percentage will be displayed in the
middle of the screen
When the update is complete, the console screen will restart and return to normal mode.
Please ignore the application update error message if the console can restart and
displays a normal screen after the update process is complete
EN – 13
IMPORTANT NOTES:
- Please do not disconnect power during the update process.
- Please ensure that your console's Wi-Fi connection is stable.
- Once the update process has started, do not use the console until the update is
complete.
- Settings and data could be lost during the update.
- During a rmware update, the console stops uploading data to the cloud server. After
a successful rmware update, it reconnects to your Wi-Fi router and uploads the
data. If the console cannot connect to your router, please open the SETUP page and
redo the settings.
- The rmware update process is a potential risk and therefore we cannot guarantee
100% success. If the update fails, please do it again using the step above.
- If the rmware update fails, press and hold the [] and [] buttons simultaneously
for 10 seconds to return to the original version, and then perform the update
procedure again.
Reset and hard reset to factory settings
To reset the console and turn it back on, press the [ RESET ] button once or remove the
backup battery and then disconnect the adapter. To restore the factory settings and erase
all data, press and hold the [RESET] button for 6 seconds.
EN – 14
INSTRUCTIONS AND INFORMATION ON DISPOSAL OF USED PACKAGING
MATERIAL
Dispose of used packaging material at the location designated by the municipality for
waste disposal
DISPOSAL OF USED ELECTRICAL AND ELECTRONIC EQUIPMENT
This symbol on products or original documents means that used electric or
electronic products must not be added to ordinary municipal waste. For proper
disposal and recycling of these products, deliver them to designated collection
points. Alternatively, in some European Union states or other European countries
the products can be returned to the local retailer when buying an equivalent
new product. By properly disposing of this product, you help preserve valuable
natural resources and contribute to preventing potential negative impacts on
the environment and human health resulting from improper waste disposal. For
further details, contact your local authorities or the nearest collection point. Fines
may be imposed for improper disposal of this type of waste in accordance with
national regulations
For Business Entities in European Union States
To dispose of electric or electronic equipment, request necessary information from
your retailer or supplier
Disposal in Other Countries Outside the European Union
This symbol is valid in the European Union. If you wish to dispose of this product,
request the necessary information about the correct disposal method from the
local council or from your retailer
The product meets the EU requirements
The text, design and technical specications may be changed without prior notice and we
reserve the right to make these changes.
The original version is in the Czech language.
Manufacturer: FAST ČR, a.s., U Sanitasu 1621, Říčany 251 01, Czech Republic
FAST ČR, a.s. hereby declares that the radio device type SWS 16600 WiFi SH conforms to
the 2014/53/EU directive.
For the full version of the EU declaration of conformity, please refer to:
www sencor cz

EN – 15
EN
Warranty conditions
Warranty card is not apart of the device packaging.
This product is warranted for the period of 24 months from the date of purchase to the end-user. Warranty
is limited to the following conditions. Warranty is referred only to the customer goods using for common
domestic use. The claim for service can be applied either at dealer’sshop where the product was bought, or
at below mentioned authorized service shops. The end-user is obligated to set up aclaim immediately when
the defects appeared but only till the end of warranty period. The end user is obligated to cooperate to certify
the claiming defects. Only completed and clean (according to hygienic standards) product will be accepted.
In case of eligible warranty claim the warranty period will be prolonged by the period from the date of claim
application till the date of taking over the product by end-user, or the date the end-user is obligated to take it
over. To obtain the service under this warranty, end-user is obligated to certify his claim with duly completed
following documents: receipt, certificate of warranty, certificate of installation.
This warranty is void especially if apply as follows:
Defects which were put on sale.
Wear-out or damage caused by common use.
The product was damaged by unprofessional or wrong installation, used in contrary to the applicable
instruction manual, used in contrary to legal enactment and common process of use or used for another
purpose which has been designed for.
The product was damaged by uncared-for or insufficient maintenance.
The product was damaged by dirt, accident of force majeure (natural disaster, fire, and flood).
Defects on functionality caused by low duality of signal, electromagnetic field interference etc.
The product was mechanically damaged (e.g. broken button, fall).
Damage caused by use of unsuitable media, fillings, expendable supplies (batteries) or by unsuitable
working conditions (e.g. high temperatures, high humidity, quakes).
Repair, modification or other failure action to the product by unauthorized person.
End-user did not prove enough his right to claim (time and place of purchase).
Data on presented documents differs from data on products.
Cases when the claiming product cannot be indentified according to the presented documents (e.g. the
serial number or the warranty seal has been damaged).
Manufacturer:
FAST ČR, a.s., U Sanitasu 1621, Říčany 251 01, Czech Republic
Visit www.sencor.com for detailed information about authorized service centers.
The original version of the instructions is in the Czech language, other language versions are made by the
appropriate translation.