GB
Revision 3
WFR-39

01
Table of Contents
1. IMPORTANT SAFETY INSTRUCTIONS .............. 03
2. Introduction ....................................................03-04
Overview of the main unit ............................ 03-04
3. Getting started .............................................. 04-05
Finding a suitable location for the radio .......... 04
Powering the radio ............................................. 04
Operation on USB power ......................................04
Operation on battery power....................................04
Charging the unit ................................................... 04
Performing the radio's initial setup...............04-05
Setting the menu language ..................................04
The mobile app's privacy policy..............................04
Configuring the network connection ................. .....05
Turning the radio on / off ................................... 05
Navigating the radio menus .............................. 05
Controlling the radio using the AirMusic Control
app ........................................................................05
4. The configuration menu ...............................05-07
5. Listening to Internet Radio ............................ 08-09
Tuning into internet radio stations ................... 08
Local radio menu ..................................................08
Internet Radio menu ......................................... .....08
Storing preset / favorite internet stations.....08-09
Recalling preset / favorite internet stations ..... 09
6. Listening to podcasts ........................................09
Storing preset / favorite podcasts ....................09
Recalling preset / favorite podcasts ..................09
7. Spotify Connect .............................................. .....09
8. Listening to DAB radio .................................09-10
Tuning into DAB stations....................................09
Storing preset DAB stations ..............................09
Recalling preset DAB stations ........................... 10
9. Listening to FM radio ..........................................10
Tuning into FM stations ......................................10
Performing an automatic scan .............................10
Manually tuning into FM stations ...................... .....10
Storing and recalling preset FM stations ..........10
10. Listening to music using the radio's media
center features ...............................................10-11
Podcasts .............................................................10
Audio playback via cloud music services ....... 10
Audio playback via UPnP server ...................10-11
Setting up a UPnP server and playing audio using
Windows Media Player .....................................10-11
Using UPnP server on Mac or Linux .....................11
Supported formats ............................................ .....11
11. Listening to music using the headphones jack....
...............................................................................12
12. Troubleshooting ..................................................12
13. Specifications ......................................................13
02
GB
14
15
16
1
4
5
3
10 8 7 69111213
2
03
GB
1. IMPORTANT SAFETY INSTRUCTIONS
1.
Do not install near any heat sources such as radiators,
heat registers, stoves or other apparatus (including
amplifiers) that produce heat.
2.
Only use attachments / accessories specified by the
manufacturer.
3.
To reduce the risk of fire or electric shock, do not
expose this appliance to rain or moisture.
4.
Apparatus shall not be exposed to dripping or
splashing liquids and no objects filled with liquids,
shall not be placed on the apparatus.
5.
The batteries shall not be exposed to excessive heat
such as sunshine, fire or the like.
6.
Any changes or modifications not expressly approved
by the party responsible for compliance could void the
user’s authority to operate the equipment and warranty.
7. CAUTION:
Risk of explosion if the battery is replaced
by an incorrect type.
8.
Do not allow your radio to be exposed to water, steam
or sand.
9.
Do not leave your radio where
excessive heat could cause damage.
10.
The following safety relevant information should be
considered as applicable:
● minimum distances around the apparatus for
sufficient ventilation;
● the ventilation should not be impeded by covering
the ventilation openings with items, such as
newspaper, table-cloths, curtains, etc.;
● no naked flame sources, such as lighted candles,
should be placed on the apparatus;
● attention should be drawn to the environmental
aspects of battery disposal;
● the use of apparatus in tropical and / or moderate
climates.
11. CAUTION:
Danger of explosion if battery is incorrectly
replaced. Replace only with the same or equivalent type.
12.
If an apparatus is provided with a replaceable lithium
battery, the following applies:
● if the battery is intended to be replaced by the user,
there shall be a warning close to the battery or in
both the instruction for use and service instructions.
Warning:
Please do not attempt to remove or replace the
built-in lithium battery. Unauthorized replacements may
also void the warranty.
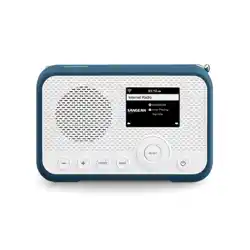
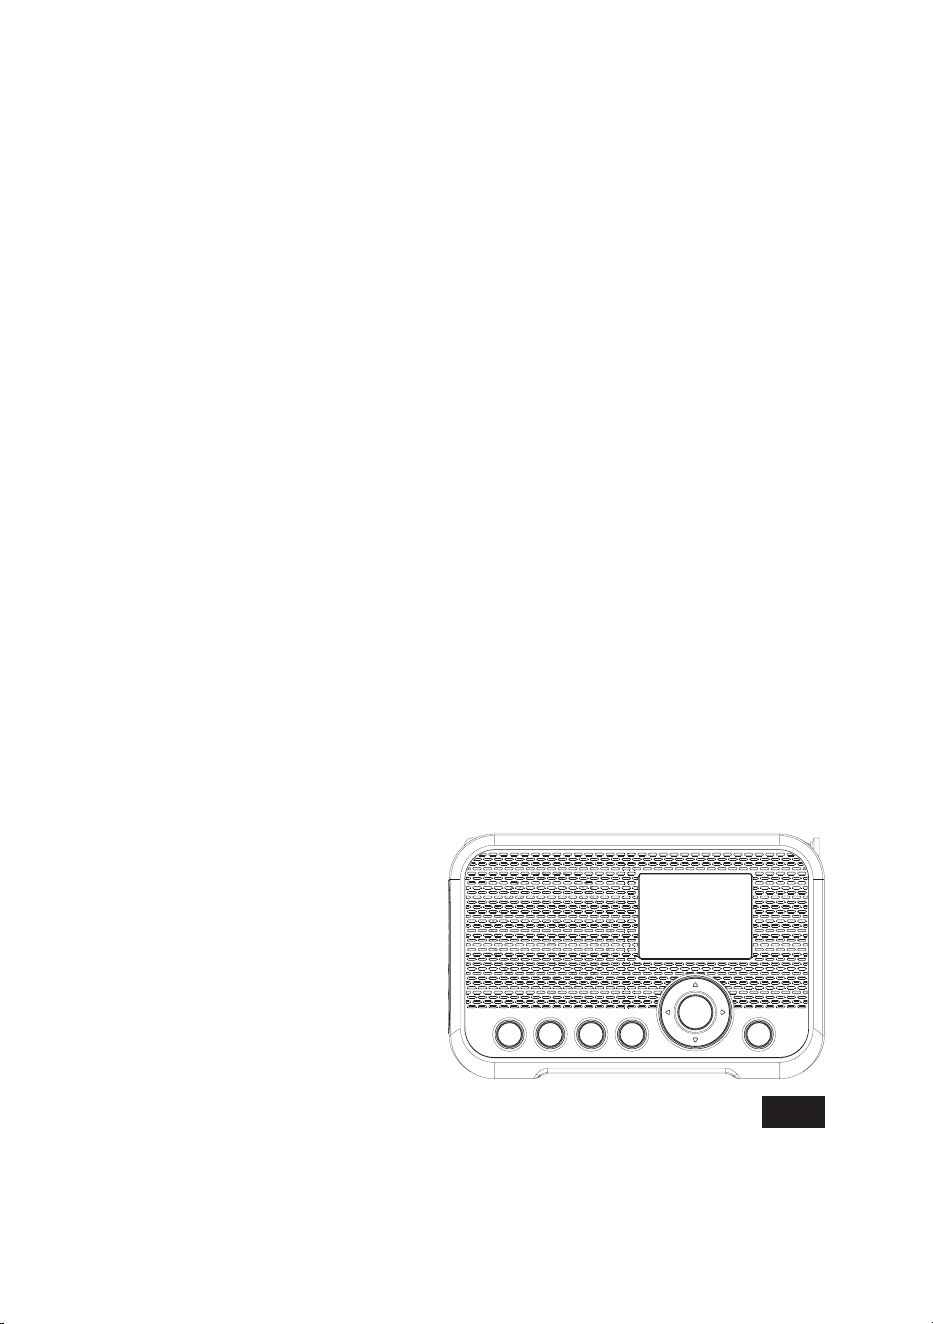
2. Introduction
Overview of the main unit
1
DAB / FM antenna
● Position and extend the antenna correctly to
improve the radio's DAB / FM reception.
2
Speaker
3
LCD display
4
Up button
● Press to navigate in the radio's menus or change
the current character while inputting text.
● While in FM mode, press to increase the frequency.
● While playing from a UPnP server, press to go to
the previous track.
5
Right button
● Press to navigate in the radio's menus or select
the next character while inputting text.
● While in FM mode, press to increase the frequency.
● While in FM mode, press and hold to automatically
scan from the current frequency for a station with a
higher frequency.
● While playing from a UPnP server, press to watch
track cover.
● While playing from a UPnP server, press and hold
to go to the next track.
6
Power button
● When connected to a USB power source, press
this button to turn on the radio or switch to the
Standby mode.
● When not connected to a USB power source,
press this button to turn the radio on or off.
7
Select button
● Press the button to go forward one step in menus
or to confirm the selected item.
● While in FM mode, press this button to perform an
automatic scan.
8
Down button
● Press to navigate in the radio's menus or change
the current character while inputting text.
● While in FM mode, press to decrease the frequency.
● While playing from a UPnP server, press to go to
the next track.
9
Left button
● Press to navigate in the radio's menus or select
the previous character while inputting text.
● While in FM mode, press to decrease the frequency.
● While in FM mode, press and hold to automatically
scan from the current frequency for a station with a
lower frequency.
● While playing from a UPnP server, press and hold
to go to the previous track.
10
Home button
● Press this button to go back to the radio's main
menu.
11
Preset button
● In the Internet radio, Podcast, DAB and FM
modes, quickly press and release this button to go
to the preset list for the selected mode.
● In the Internet radio, Podcast, DAB and FM
modes, press and hold this button to save the
station you are tuned into to a preset number.
12
+ button
● Press this button to increase the radio's volume
setting.

04
GB
13
- button
● Press this button to decrease the radio's volume
setting.
14
Headphones socket
● 3.5mm socket for connecting a pair of headphones.
15
DC IN socket (USB Type-C)
● Connect a USB Type-C cable to this port to power
the radio and charge the battery.
16
Battery charging indicator
● The Battery charging indicator will light up green
when the battery is being charged and will light
up red to indicate the battery is low when using
battery power.
3. Getting started
Follow the instructions in this chapter to get your WFR-39
up and running in no time.
Finding a suitable location for the radio
After unpacking the radio from the box, take the following
guidelines into account when finding a suitable location
for the radio:
● Place the radio on a flat, even surface such as a table.
● Do not place the radio near heat sources.
● Make sure there is sufficient space available around the
radio for proper ventilation.
● If you are planning to connect the radio to your Wi-
Fi network, make sure to place the radio in a location
where Wi-Fi reception is good.
● Avoid placing the radio near appliances that can
interfere with Wi-Fi reception, such as microwaves.
Powering the radio
The WFR-39 can be powered using the radio's internal
Lithium-ion battery or by connecting a USB power source
to the radio's DC IN socket.
Operation on USB power
To use the radio on USB power, connect the supplied
USB cable to the radio's DC IN socket and a USB power
source supplying 5V / 2.4A while the radio is turned off.
After connecting the cable, the radio will automatically turn
on and the Battery charging indicator will light up green
to indicate that the radio's battery is being charged. Press
the Power button to switch the radio to the Standby mode.
The radio will power off by disconnecting the radio from
the USB power source when radio is in standby mode.
Operation on battery power
To use the radio on battery power, disconnect the USB
cable, make sure the battery is charged and then press
and hold the Power button. To turn off the radio, press the
Power button. The radio's Battery charging indicator will
light up red when the radio is low on battery. At this point
the USB cable needs to be connected to recharge the
internal Lithium-ion battery.
Note:
Reduced power, distortion and a "stuttering sound"
or a red battery charging indicator are all signs that the
batteries need to be replaced or recharged. Instructions
on recharging the batteries can be found below.
Charging the unit
The WFR-39 features a built-in Lithium-ion battery that
can be recharged by either using a USB charging port or
a USB power adapter (not included) with a rated output of
DC 5V / 2.4A.
The first time you use your WFR-39, connect it to a USB
charging port or USB power adapter and fully charge the
battery. While the battery is being charged, the Battery
charging indicator will be solid green. After the battery is
fully charged, the green Battery charging indicator will turn
off.
Note:
You can start using your WFR-39 while charging. In
this case, please make sure that the USB power source
provides 5V / 2.4A of electrical current. Otherwise, it may
damage the USB power source.
1.
Connect the supplied USB cable to the radio's DC IN
socket and a USB power source supplying 5V / 2.4A.
2.
When the battery is charging, the Battery charging
indicator will be solid green.
When the indicator turns off, the battery is fully charged,
and charging is stopped.
Note:
When the radio is not connected to a USB power source,
the battery charging indicator will turn red to indicate the
radio's battery is low. Connect the radio to a USB power
source to charge it.
If the battery charging indicator turns red while the radio is
connected to a USB power source, this indicates that an
error is detected.
Performing the radio's initial setup
After the radio has been supplied with power, it will
automatically turn on. "SANGEAN" will be displayed on
the radio's display and a bar below this text will indicate
the progress of the startup process.
Once the radio has finished starting up, it will immediately
switch over to the initial setup process. During the initial
setup process, the startup wizard will guide you through
the configuration of the language of the on-screen menus
and the network configuration of the radio.
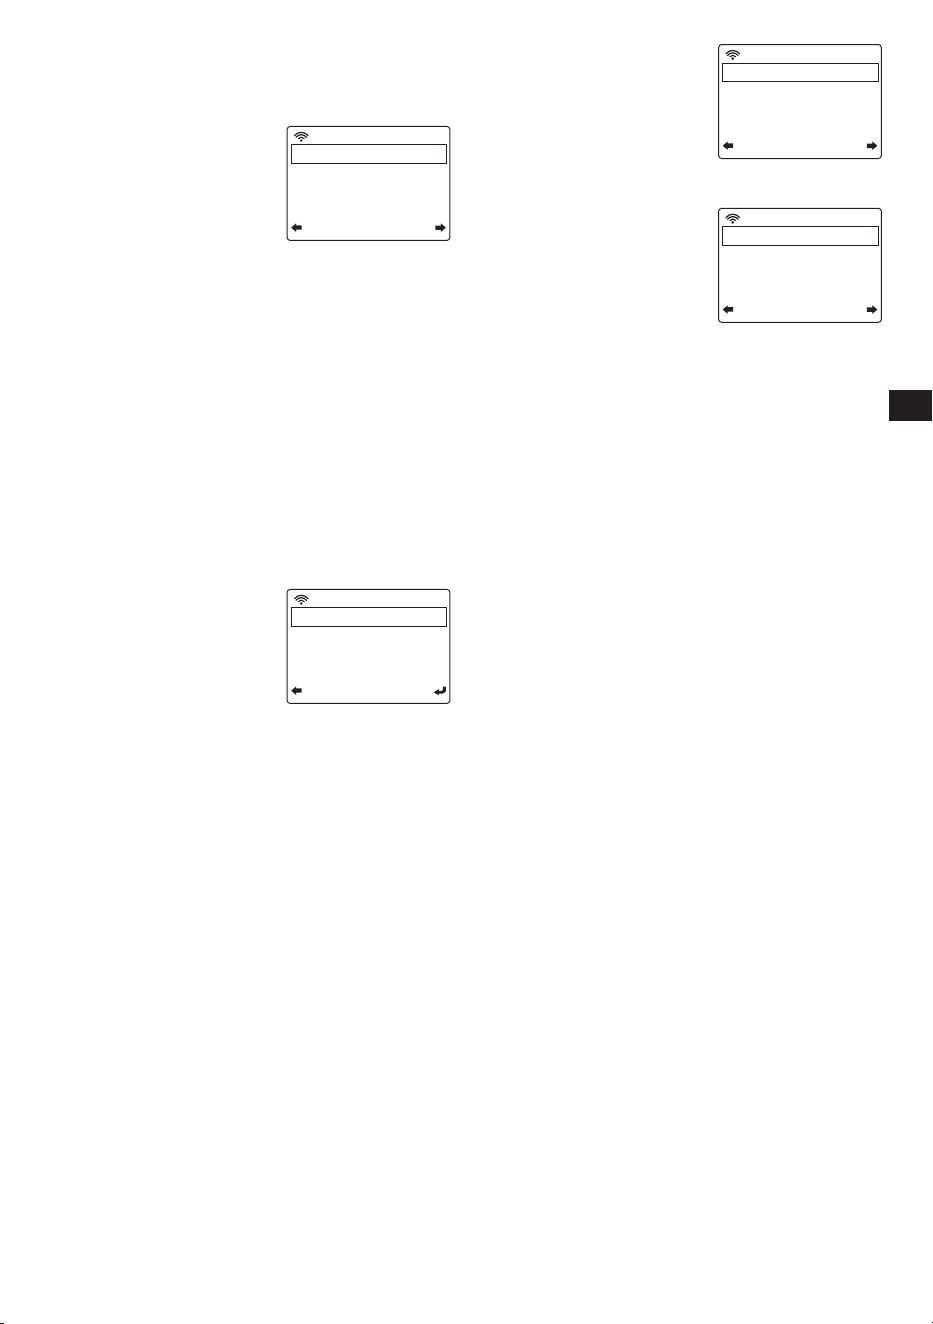
Setting the menu language
Once the language selection menu appears on the
display. The English language is the default language
and is therefore highlighted by default. Select the desired
language using the Up and Down button and confirm your
choice by pressing the Select button.
The mobile app's privacy policy
Next, the radio will display a QR code and the URL
https://www.mediayou.net/policy.php to direct you to the
Privacy Policy.
Be sure to read this Policy before using the online
functionality of the radio and only use the internet radio
feature if you agree to all terms and conditions in the
Privacy Policy. If you do not agree, do not use the internet
radio feature and use the radio for playback in other
modes instead.
Press the Select button to continue setting up the radio
using the setup wizard.

05
GB
Conguring the network connection
When configuring the network connection, the first
question the setup wizard will ask is whether you want it
to check for network connections when your turn the radio
on. There are two options here:
1.
[Yes]:
The radio will automatically scan for Wi-Fi
networks when it is turned on and it is not or cannot
connect to networks it has previously connected to.
2.
[No]:
The radio will not automatically scan for Wi-Fi
networks when it is turned on and is not already connected
to a network that it has previously connected to. In this
case, you will have to connect to a network manually using
the radio's menu.
Next, the wizard will ask if you want to configure the
network now. There are four options to choose from here:
(1)
[Yes]:
The radio will scan for nearby Wi-Fi networks.
After scanning has completed, select your network
from the list using the Up, Down and Select button
and then enter the password using the Up and
Down buttons to select a character, the Left and
Right buttons to go to the previous or next character
and Select to confirm the input. After entering the
password, the radio will connect to the network. The
setup wizard has now been completed and the radio
will switch over to the main menu.
(2)
[APP]:
This option will display a QR code that,
when scanned, takes you to a page with instructions
on how to install the AirMusic Control mobile app
on your Android or iOS device and how to then
connect the radio to your Wi-Fi network. Follow
these instructions to successfully connect the radio
to your Wi-Fi network. After the radio has been
connected to the network, the setup wizard has
been completed and the radio will switch over to the
main menu.
(3)
[WPS]:
If your router supports WPS (refer to the
instruction manual of your router), you can also use
the WPS feature to connect the radio to your Wi-Fi
network. After selecting WPS, press the WPS button
on your router within 120 seconds to establish
a connection between the 2 devices. Once the
connection is established, the setup wizard is now
completed and the radio will switch over to the main
menu.
(4)
[No]:
Select no if you do not want to connect the
radio to the Wi-Fi network at this point in time. When
not connected to a Wi-Fi network, the radio can still
be used to play FM and DAB radio. In addition, the
radio can be connected to a Wi-Fi network at any
time by using the menus on the radio.
After finishing this step, the setup wizard is completed.
The radio's time and date will automatically be set if you
have connected to a Wi-Fi network, your radio is now
ready for use.
Turning the radio on / off
When the WFR-39 is turned off, simply connect it to
a USB power source to turn it on. While the radio is
connected to a USB power source, press the Power
button to switch it to the Standby mode or disconnect it
from the USB power source to turn off the radio.
To use the radio on battery power, make sure the radio is
disconnected from the USB power source and press and
hold the Power button to turn on the radio. To turn off the
radio, press the Power button.
Note:
When the radio is turned on, the radio's boot up
process and connecting to a Wi-Fi network can take a
short period of time. After the radio has connected to a
Wi-Fi network, the Wi-Fi icon on the radio's display will
indicate the strength of the wireless connection.
Navigating the radio menus
The radio's menus can be navigated using the Up, Down,
Left, Right and Select buttons.
In horizontally displayed menus (such as the main menu
and the menus that are displayed during the setup
wizard), an item or submenu can be highlighted by
pressing the Left or Right button and then pressing the
Select button to confirm.
In vertically displayed menus (most other menus), the Up
and Down buttons can be used to highlight an item, while
pressing the Select button it can be used to confirm your
choice. The Left button can now be used to go back to the
previous menu and the Right button can be used to go to
the next menu.
In cases where text or numbers need to be inputted, the
Up and Down buttons can be used to select the required
character, while the Left and Right buttons can be used to
go to the previous of next character respectively.
Controlling the radio using the AirMusic
Control app
The AirMusic Control app connects the WFR-39 to your
phone through a Wi-Fi network and allows you to control
the radio from the palm of your hand. The app features an
intuitive user interface, facilitates text input and allows you
to control most of the radio features.
AirMusic Control is available for both Android and iOS and
can be downloaded from Google Play or the App Store.
Note:
In order to use the AirMusic Control app, your phone
and radio must be connected to the same Wi-Fi network.
When using USB power and the DAB / FM service
following function is off, or when the device is powered
by battery, the Wi-Fi connection will be terminated when
switching to FM or DAB mode on the radio to optimize
reception. The AirMusic control app will also be disabled
from controlling the radio.
4. The configuration menu
After completing the setup wizard and setting the location,
in most cases there is no need to go back into the radio’s
configuration menu.
If you would like to change the location, time, the options
that are displayed in the main menu or other settings,
you can access the configuration menu and customize all
settings to your liking.
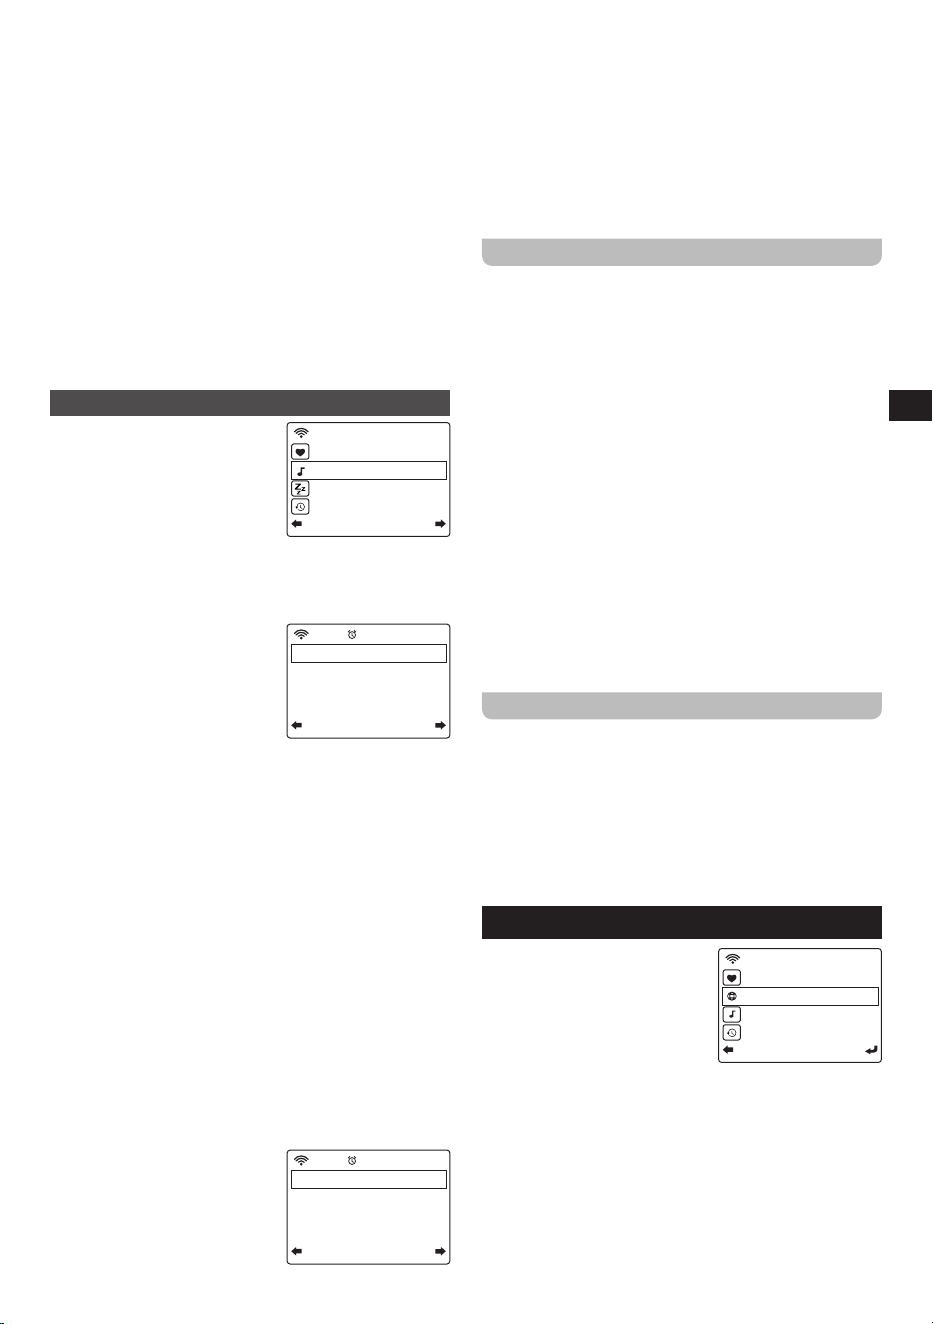
The configuration menu can
be opened by simply selecting
Configuration
in the radio’s
main menu.
Below is a description of all
settings that can be found in the
configuration menu:
09:32
PM
1/21
Time Display
Scheduled Playing
Network
Date & Time
06
GB
1. [Time Display]:
Select this item to choose between
digital and analog time display. If digital time display is
chosen, an additional list appears for the selection of
the color of the digits.
2. [Network]:
Select this item
to configure the device’s
network related settings.
After selecting a Network, a
menu appears with several
new options:
(1) [Wireless Network
Configuration]:
Select this item and then
select
[Enable]
to have the radio scan for Wi-
Fi networks. After the scan has completed select
a Wi-Fi network and enter the associated Wi-Fi
password to connect to it.
(2) [Wireless Network (APP)]:
Select this item to
display the QR code that guides you to a page with
instructions on how to install the AirMusic Control
app for Apple or Android devices and instructions
on how to use this app to connect the radio to your
Wi-Fi network.
(3) [Wireless Network (WPS PBC)]:
Select this item
to connect your radio to your Wi-Fi network using
the WPS feature. Before selecting this option,
make sure your Wi-Fi router supports the WPS
feature. Press the WPS button on the router within
120 seconds of selecting the item on the radio.
(4) [Manual Configuration]:
Select this item to go to
a next menu with options
for manually configuring
and managing the radio’s
Wi-Fi connections. After
selecting
[Wireless]
, a
screen with the following options appears:
(a) [DHCP]:
Select this item to specify whether the
radio should connect to a DHCP server on the
Wi-Fi network. If DHCP (Off) is selected, you
will have to manually enter an IP address on
the network.
(b) [Enter SSID]:
Select this item to manually
enter the SSID of a Wi-Fi network.
(c) [Manage]:
Select this item to get an overview
of the Wi-Fi networks the radio has previously
connected to. Wi-Fi networks and their
associated passwords can be deleted from the
radio’s memory by selecting them and then
selecting Yes.
Note:
It is recommended not to use the Manual
Configuration item unless you are familiar with
computer networks.
(5) [Check network when Power On]:
Select this
item to specify whether the radio should scan for
Wi-Fi networks when it is turned on and is not or
cannot connect to any known Wi-Fi network.
(6) [Setup PIN for APP]:
Select this item to set a PIN
code that users have to input when connecting to
the radio through the AirMusic Control app.
3. [Date & Time]:
Select this item to manually configure
all date and time settings. After selecting this item, a
submenu containing the following items appears:
(1) [Set Time Format]:
Select this item to
choose between the 12-
and 24-hour time format.
(2) [Set Date Format]:
Select this item to set the
date format. The available options are:
YYYY / MM
/ DD
,
DD / MM / YYYY
, and
MM / DD / YYYY
.
4. [Scheduled Playing]:
Select
this item to have the radio play
every day during a specified
period. After selecting this
item and then selecting
[Turn
on]
, a submenu containing
the following items appears:
(1) [Repeat]:
Select this item in order to select
when scheduled playing should be activated. A
list of checkboxes will appear in which you can
select
[Everyday]
,
[Once]
, or check / uncheck
the different days of the week to customize the
settings.
(2) [Time]:
Select this item to set the time during
which scheduled playing should be active.
(3) [Sound]:
Select this option to choose which mode
you want to use for scheduled playing.
Note:
When enabled, the Scheduled Playing feature will only
be activated if the radio is turned on or switched to the
Standby mode. It will not be activated if the radio is
turned off.
5. [Language]:
Select this item to set the language that
the radio’s menus are displayed in.
6. [Dimmer]:
Select this item to configure the dimmer
setting. In the menu that appears, you can either
select
[Power Saving]
to change the display’s
brightness level or select
[Turn On]
to change the
brightness level of the display in the power on mode
when connected to a USB power source.
7. [Display]:
Select this item to choose between the
[Color]
or
[Monochrome]
display mode.
8. [Power Management]:
Select this item to set when
the radio automatically powers off when being idle.
The available options are:
[Turn off]
,
[5 minutes]
,
[15
minutes]
, and
[30 minutes]
.
9. [Sleep Timer]:
Select this item to configure the
sleep timer. The available options are:
[Turn off]
,
[15
minutes]
,
[30 minutes]
,
[60 minutes]
,
[90 minutes]
,
[120 minutes]
,
[150 minutes]
, and
[180 minutes]
.
When a sleep timer is active, the remaining sleep time
will be shown in the upper right corner of the radio’s
display.
10. [DAB / FM Setup]:
Select this item to open the DAB /
FM Setup submenu containing the following items:
[FM Mode]:
Select this item to configure playback
in the FM mode. Select
[Set Mono]
to force mono
playback or select
[Set Stereo]
for stereo playback.
Forcing mono playback can help reduce hiss from
weak FM signals.
(1) [FM Sensitivity]:
Select this item to configure the
FM radio scan sensitivity. The available options
are:
[Strong]
,
[Default]
, and
[Weak]
.
09:32
PM
1/6
Wireless Network Configuration
Wireless Network (APP)
Wireless Network (WPS PBC)
Manual Configuration
09:33
PM
1/3
DHCP
Enter SSID
Manage
16:45
1/3
Set Time Format
Set Date Format
09:34
PM
1/3
Repeat: Everyday
Time: 12:00AM-12:00AM
Sound: Internet Radio
07
GB
(2) [DAB Sensitivity]:
Select this item to configure
the DAB radio scan sensitivity. The available
options are:
[Strong]
,
[Default]
, and
[Weak]
.
(3) [Service following (FM
/ Wi-Fi)]:
Select this item
to enable / disable the
Service following feature.
This feature allows the
radio to switch from
an FM broadcast to an
internet stream of the same broadcast when using
USB power and FM reception is poor.
When this item is enabled, press and hold the
Select button to switch from an FM broadcast to
an internet stream of the same broadcast while the
icon is shown on the display.
(4) [Service following
(DAB / Wi-Fi)]:
Select
this item to enable /
disable the Service
following feature. This
feature allows the radio
to switch from a DAB
broadcast to an internet stream of the same
broadcast when using USB power and DAB
reception is poor.
When this item is enabled, press and hold the
Select button to switch from a DAB broadcast to
an internet stream of the same broadcast while the
icon is shown on the display.
11. Local Radio Setup:
Select this item to go to a
submenu where you can manually set up your location
for Local radio or allow the radio to Auto Detect your
location.
12. Playback Setup:
Select this item to configure the
repeat or shuffle mode when playing music in the
Media Center mode. The available options are:
[Off]
,
[Repeat all]
,
[Repeat one]
, and
[Shuffle]
.
13. [Equaliser]:
Select this item to select 1 of the 9
available equalizer modes. The available equalizer
modes are:
[Normal]
,
[Flat]
,
[Jazz]
,
[Rock]
,
[Soundtracks]
,
[Classical]
,
[Pop]
,
[News]
, and
[my
EQ]
. Select
[my EQ]
and then use the Right button
to configure the bass and treble level yourself and to
enable or disable the radio’s loudness feature.
14. [Resume When Power On]:
Select this item to
configure whether the radio should continue playing
when it is turned on. If this setting is set to
[On]
, the
radio will continue playing the content it was playing
from internet radio before it was turned off.
15. [Device]:
Select this item to
open the device submenu
containing the following
items:
(1) [System Information]:
Select this item to view
the software version,
wireless information (network status, MAC
address, network SSID, IP address, Subnet,
Gateway, DNS1, and DNS2).
(2) [Rename]:
Select this item to change the name
of the radio. The radio’s name is used when
connecting to it using the AirMusic Control app.
(3) [APP]:
Select this item to display a QR code that,
when scanned, guides you to a page with links to
the radio’s companion app, AirMusic Control, in the
App Store and Google Play.
(4) [Privacy]:
Select this item to display a QR code
that, when scanned, takes you to the Magic
system Privacy Policy.
16. [Software Update]:
Select this item to update the
radio’s software. If no updates are detected, the radio
will display the message “No update available”.
VERY IMPORTANT:
When updating the radio’s software, do not switch off
the power to the radio until the update operation has
completed and the radio has restarted, otherwise it
may become permanently damaged.
17. [Reset to Default]:
Select this item to reset the radio
to the default settings. Please note that selecting this
item and subsequently selecting
[Yes]
will reset the
radio to its factory settings and all information stored
on the radio will be deleted. This includes all settings,
Wi-Fi passwords, and stored presets / favorites.
After the radio has been reset to the default settings, the
radio will restart and the setup wizard will run once again
to help setting up the most important radio settings.
5. Listening to Internet Radio
The WFR-39 is capable of receiving tens of thousands of
internet stations from around the globe when the radio is
connected to the internet through a Wi-Fi network.
In this chapter, you will learn how to tune to internet radio
stations, how to store these stations as presets / favorite
stations and how to recall preset / favorite stations.
Tuning into internet radio stations
To tune into internet radio stations, first turn on the radio
and then select
[Local Radio]
or
[Internet Radio]
.
[Local
Radio]
is intended for tuning into local radio stations,
while the
[Internet Radio]
submenu allows you to tune
into stations from all around the world.
Local radio menu
After selecting
[Local Radio]
from the main menu, a submenu
will appear in which there are
several ways of selecting a local
internet radio station:
1. [Your country / DAB (Wi-Fi)]:
Select this item to go to a list
of all DAB radio stations from your country ("Germany"
in the image above) that are also broadcasting their
signal through the internet.
2. [Your country / Top10]:
Select this item to go to a list
with the 10 most popular internet radio stations in your
country ("Germany" in the image above).
3. [Your country / All]:
Select this item to go to a list with
all internet radio station from your country ("Germany"
in the image above).
4. [Your country / Genre]:
Finally, there are still several
options to go to genre-specific lists of radio stations.
Simply choose the item corresponding to your favorite
Tune/Seek Auto
104.90Mhz
PBS National
Transportation Netw
08:13
List
BBC Radio 1
BBC Radio 1
DAB
08:06
01:19
1/4
System Information
Rename (WFR-39)
APP
Privacy
09:36
PM
1/46
United Kingdom/DAB (Wi-Fi)
United Kingdom/Top10
United Kingdom/All
United Kingdom/Adult Contempo
08
GB
genre (for example, rock) to go to a list with all internet
stations in your country ("Germany" in the image above)
broadcasting music of that genre.
5.
More options are available by using the Down button on
the radio.
To tune into a station, simply highlight it in the list and
then press the Select button.
Note:
The items in the above menu depend on your
location. Due to different broadcasting systems being
used around the world, European users will see the DAB
(Wi-Fi) item, while users in the US and the Americas will
see the HD (Wi-Fi) and / or FM (Wi-Fi) items.
Note:
If you have not set the radio’s location prior to
accessing the Local Radio menu, the radio will first show
the location selection menu. Use the menu to auto detect
your location or to set it manually using the Left, Right,
Up, Down and Select buttons.
Internet Radio menu
The Internet Radio menu
features more options than the
Local Radio menu:
1. [My favorite]:
Select this item to go to the list with your
favorite stations. These are the presets that you've set
on the radio, as well as any station that you have saved
as a favorite station.
2. [Radio Station / Music]:
Select this item to go to the
submenu where you can
select internet radio stations
from around the globe. The
following items are available
in this submenu:
(1) [Global Top 20]:
Select this item to go to a list of
the 20 most popular internet radio stations around
the globe.
(2) [Genre]:
Select this item to search for radio stations
around the world that are broadcasting a specific
genre. After selecting a genre, you can browse
through either the most popular stations in this
genre or through the stations by country.
(3) [Country / Location]:
Select this item to search
for internet radio stations by country. After selecting
a continent and country, you will be directed to the
Local Radio menu (described above) for that country.
(4) [Highlight]:
Select this item to go to a list with
recommended internet radio stations.
3. [Sleep Radio]:
Select this item to go to a list with radio
stations that broadcast ambient sounds that will help
you to relax or fall asleep.
4. [History]:
Select this item to look at the history of the
stations that you have tuned into.
5. [Service]:
Select this item to
go to a submenu to add new
internet radio stations that
might not be listed in any of
the other lists or stations that
you simply cannot find.
(1) [Search Radio Station]:
Select this item to search
for an internet radio station by name.
(2) [Add New Radio Station]:
Select this item to add
an internet radio station using a URL.
(3) [APP]:
Select this item to have the radio display a
QR code guiding you to the download location of the
AirMusic Control app (the radio's companion app).
Simply scan the QR code to go to the page with more
information about the download locations for the app.
Storing preset / favorite internet stations
The WFR-39 can store up to 250 presets / favorite stations.
To store an internet station as a preset / favorite station,
follow these steps:
1.
Turn on the radio.
2.
Select
[Internet radio]
or
[Local Radio]
from the
main menu, go to any internet radio station listed and
highlight or tune into an internet station.
3.
Press and hold the Preset button for 2-3 seconds then
release to enter the preset setting menu, where you can
use the Up, Down and Select buttons to select and confirm
the required preset number.
4.
Alternatively, after highlighting a radio station, you can
also press the Right button and then in the next menu
select the
[Add to My Favorite]
item.
5.
Repeat this procedure as needed for the remaining
presets.
Note:
Presets / favorite stations that have been added
to the preset / favorite list cannot be added again to a
different preset / favorite number.
Recalling presets / favorite internet stations
Preset / favorite internet stations can be recalled in two
ways:
● Select
[Internet Radio]
from the radio's main menu,
press the Preset button and then select the desired
station using the Up, Down and Select buttons.
● Select
[Internet Radio]
from the radio's main menu,
select
[My Favorite]
in the next menu and then select the
desired station using the Up, Down and Select buttons.
6. Listening to podcasts
The WFR-39 is also capable
of tuning into many different
podcasts from around the world.
To tune into podcasts, turn on
the radio and then select the
[Podcast]
item in the radio’s
main menu. The Podcast menu
featuring the following items will now appear on the radio’s
display:
1. [My Favorite]:
Select this item to go to the list with your
favorite podcasts. These are the presets that you’ve set
on the radio, as well as any station that you have saved
as a favorite station.
2. [Country / Location]:
Select this item to search for
podcasts by country. After selecting a country and a
genre, you can select the podcast and episode that you
want to listen to.
iRadio
2/5
My Favorite
Radio Station
Sleep Radio
History
iRadio
1/4
Global Top 20
Genre
Country/Location
Highlight
iRadio
1/3
Search Radio Station
Add New Radio Station
APP
2/5
My Favorite
Country/Location
Genre
History
16:49

09
GB
3. [Genre]:
Select this item to search for podcasts based
on a specific genre. After selecting the genre, select a
country and select the desired podcast and episode.
4. [History]:
Select this item to look at the history of the
podcasts that you have tuned into.
5. [Search]:
Select this item to have the radio display
a QR code that, when scanned, will take you to the
download page of the AirMusic Control app. After
downloading and installing this app, you can search for
radio station or podcast by name with the app.
Storing preset / favorite podcasts
The WFR-39 can store up to 99 presets / favorite podcasts.
To store a podcast as a preset / favorite podcast, follow
these steps:
1.
Turn on the radio.
2.
Select
[Podcast]
from the main menu, go to any
podcast list and highlight or tune into a podcast.
3.
Press and hold the Preset button for 2-3 seconds then
release to enter the preset setting menu, where you
can use the Up, Down and SelectÛuttons to select and
confirm the required preset number.
4.
Alternatively, after highlighting a podcast, you can also
press the Right button and then in the next menu select
the
[Add to My Favorite]
item.
5.
Repeat this procedure as needed for the remaining
presets.
Note:
Presets / favorite podcasts that have been added
to the preset / favorite list cannot be added again to a
different preset / favorite number.
Recalling presets / favorite podcasts
Presets / favorite podcasts can be recalled in two ways:
● Select
[Podcast]
from the radio’s main menu, press the
Preset button and then select the desired podcast using
the Up, Down and Select buttons.
● Select
[Podcast]
from the radio’s main menu, select
[My
Favorite]
in the next menu and then select the desired
podcast using the Up, Down and Select buttons.
7. Spotify Connect
The Spotify Software is subject to
third party licenses found here:
https://www.spotify.com/connect/third-party-licenses
Use your phone, tablet or computer as a remote control
for Spotify. Go to spotify.com/connect to learn how.
8. Listening to DAB radio
Tuning into DAB stations
To tune into DAB stations, first turn on the radio and then
select
[DAB / DAB+]
from the radio's main menu. The
radio will now automatically scan for DAB stations and a
counter will be shown on the display to indicate how many
stations have been found.
After the scan had completed, the radio will show a list
with all found stations. Use the Up and Down buttons to
highlight a station and then press the Select button to tune
into the station. Press the Left or Right button to scan for
stations again or press the Home button to go back to the
radio's main menu.
Note:
Before selecting the DAB radio mode and performing
a scan, make sure the DAB / FM antenna at the back of the
radio has been fully stretched out and positioned upright.
Storing preset DAB stations
The WFR-39 features 99 memory presets for DAB radio.
To store a DAB station as a preset / favorite DAB station,
follow these steps:
1.
Turn on the radio.
2.
Select
[DAB / DAB+]
from the main menu and tune into
the required radio station as previously described.
3.
Press and hold the Preset button for 2-3 seconds then
release to enter the preset setting menu.
4.
Select a preset number using the Up and Down buttons
and press the Select button to save the station under
the chosen preset number.
5.
Repeat this procedure as needed for the remaining
presets.
Note:
Preset / favorite stations that have been added
to the preset / favorite list cannot be added again to a
different preset / favorite number.
Recalling preset DAB stations
To recall preset stations in the DAB radio mode, simply
turn on the radio, select
[DAB / DAB+]
from the main
menu, press the Preset button and then select the desired
preset station using the Up, Down and Select button.
9. Listening to FM radio
Tuning into FM stations
To tune into FM stations, first turn on the radio and then
select
[FM]
from the radio’s main menu. You can now
perform an automatic scan to search for FM stations or
manually tune into an FM station.
Performing an automatic scan
Follow these steps to perform an automatic scan of the
FM band:
1.
Press the Select button.
2.
Select
[Yes]
on the screen that appears asking if the
radio should perform an Auto scan.
3.
The radio will now automatically scan the full waveband
for FM radio stations and store the stations it finds as
preset stations.
Manually tuning into FM stations
To manually tune into FM radio stations, follow these steps:
1.
Press and hold the Left or Right button to automatically
tune into an FM station with a lower or higher frequency
respectively. Your radio will stop scanning when it finds
a station of sufficient strength. The radio’s display will
show the frequency that the radio is currently tuned into
and the signal strength will be shown next to the radio
icon in the upper left corner of the radio’s display.
10
GB
2.
To fine-tune to a certain frequency, press the Left or
Down button to decrease the frequency or press the
Right or Up button to increase the frequency.
3.
Repeat steps 1 and 2 to tune into other radio stations.
Note:
Before selecting the FM radio mode and tuning into
stations, make sure the DAB / FM antenna at the back of
the radio has been fully extended and positioned upright.
Storing and recalling preset FM stations
The WFR-39 features 99 memory presets for FM radio.
After selecting the FM radio mode, the procedure for
storing and recalling preset stations in the FM radio mode
is identical to the procedure in the DAB radio mode.
Please refer to the instruction in the previous chapter for
details on how to store and recall preset stations.
10. Listening to music using the radio's
media center features
Aside from Spotify Connect, the WFR-39 also allows you
to connect to various other cloud music services and
UPnP servers via the
[Media Center]
item in the radio's
main menu.
Podcasts
Select the
[Podcasts]
item to search for regular podcasts
through various lists or a search feature and add podcasts
to a favorites list. A detailed description of this feature can
be found in chapter 6 "Listening to podcasts".
Audio playback via cloud music services
The WFR-39 has support for various cloud music services.
After selecting "Media Center" in the main menu, select
"Cloud Music" in the Media Center submenu. A list of
available cloud music services will appear on the display:
1. Amazon Music:
Amazon Music is an online music
streaming service that requires a paid subscription to log in
and use on this radio. Refer to https://music.amazon.com/
for more information regarding the use of this service.
2. Deezer:
Deezer is an online music streaming service
that requires you to have a paid subscription, log in and
use on this radio. Refer to https://www.deezer.com for
more information regarding the use of this service.
3. Napster:
Napster is an online music streaming service
that requires you to have a paid subscription to log in
and use on this radio. Refer to https://www.napster.com
for more information regarding the use of this service.
4. Qobuz:
Qobuz is an online music streaming service
that requires you to have a paid subscription to log in
and use on this radio. Refer to https://www.qobuz.com/
for more information regarding the use of this service.
5. TIDAL:
TIDAL is an online music streaming service that
requires you to have a paid subscription to log in and
use on this radio. Refer to https://tidal.com/ for more
information regarding the use of this service.
Audio playback via UPnP server
The WFR-39 also support playback from files hosted on
a UPnP server. In most cases, computers will be used as
UPnP servers. The most common and most convenient
UPnP server application is Windows Media Player (version
10 or later), as Windows is the most popular operating
system for home computers and Windows Media Player is
built into the Windows operating system.
Setting up a UPnP server and playing audio
using Windows Media Player
Follow these steps to set up a UPnP server using
Windows Media Player (version 10 or later):
1.
Turn on your PC and make sure it is connected to the
same network as your WFR-39.
2.
Make sure the WFR-39 is turned on as well and the
[UPnP]
item is selected in the
[Media Center]
menu.
3.
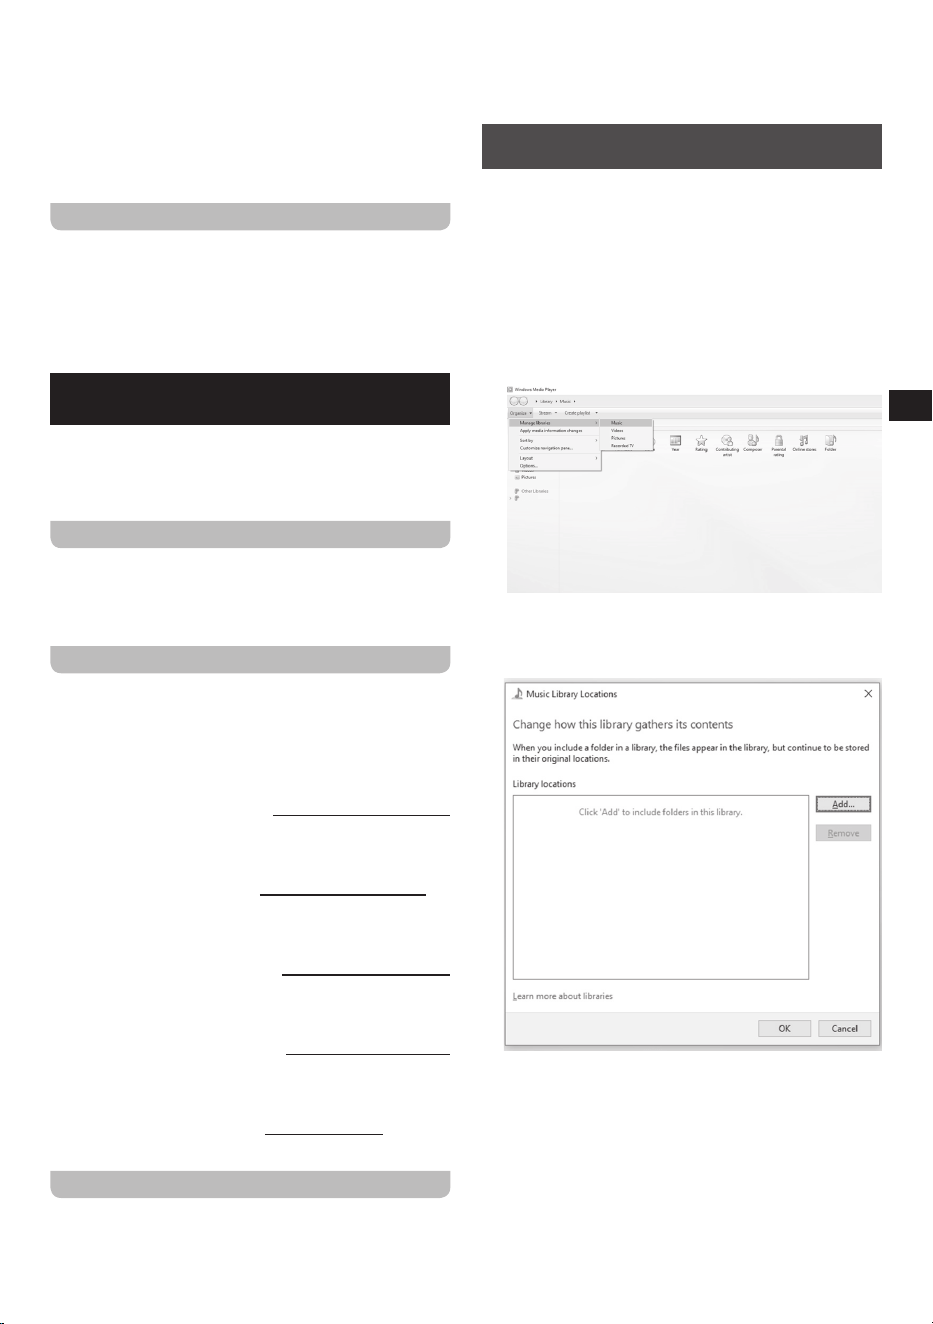
Add the music files, and folders that you want to share
with the radio to your Windows Media Player library by
clicking
Organize
>
Manage libraries
>
Music
on the
computer.
4.
Click on the
Add…
button in the window that appears
on the computer to add folders and / or files and click
on the OK button after adding all your files and folders
to your music library.
5.
After completing setting up your music library, click
on
Stream
>
Turn on media streaming…
on the
computer.
WFR-39
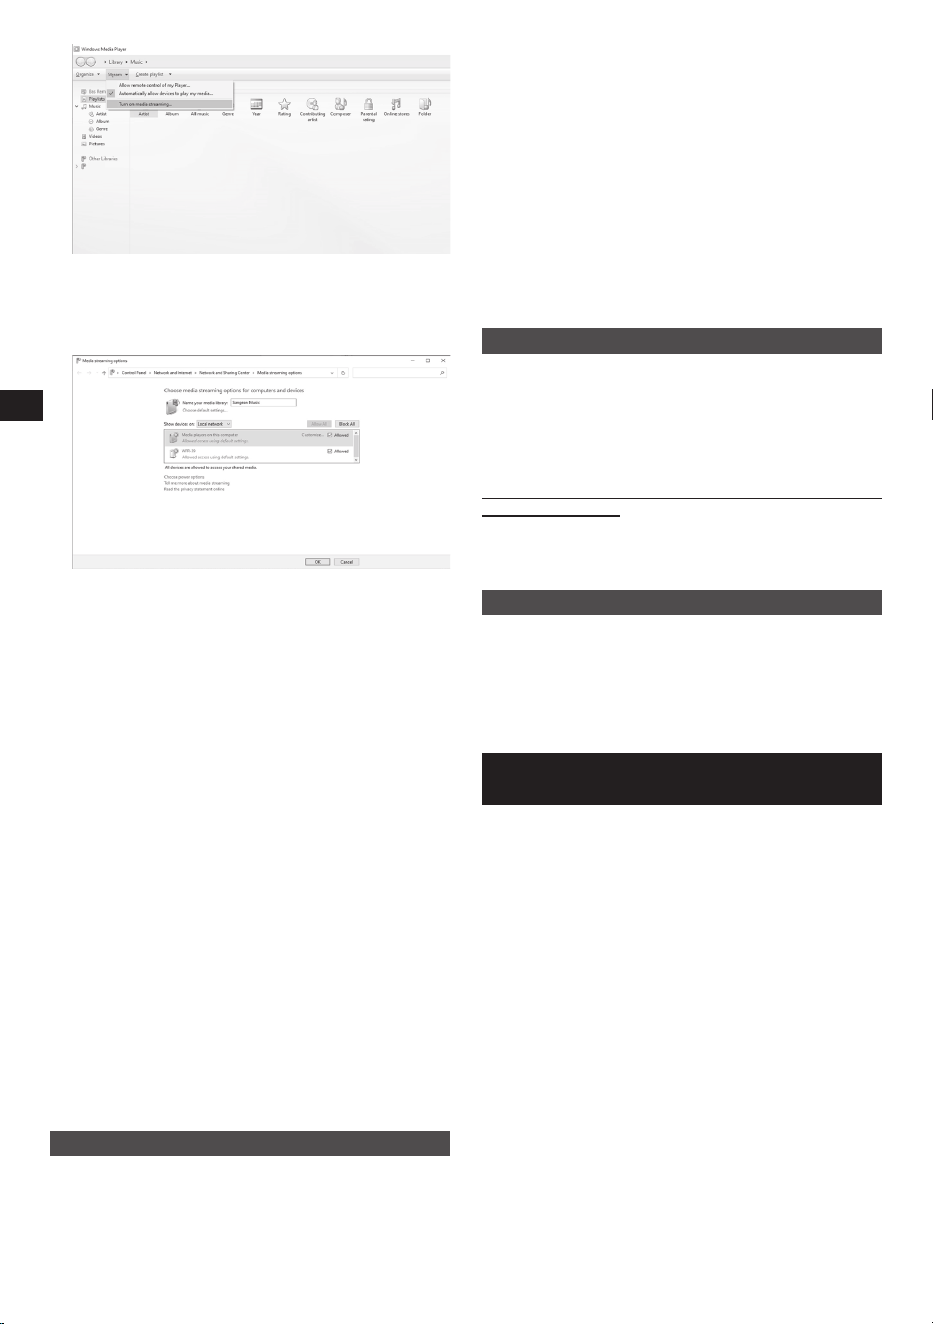
11
GB
6.
After turning on media streaming, a new window will
appear in which you can configure which devices
have access to the media library. Make sure the radio
("WFR-39" in the screenshot below) is allowed access
to the media library and click
OK
on the computer.
7.
The radio will now be able to browse through the
media library shared on the PC. Simply select the file
or playlist that you want to play on the radio to enjoy
your PC's music library through your radio's speaker.
8.
When you first set up sharing with a UPnP server,
not all of your files will be available immediately. The
UPnP server must look inside each file to identify the
artist and album information from 'tags' embedded
in them. The server may also need time to access
the Internet to obtain additional information such as
'album art', which it can display when you examine
your music library on your PC. For a library of many
files this can take some time.
If the display shows "empty", please leave the UPnP
mode first, wait 3 to 5 minutes for the device to search
for files on the UPnP server, and then enter the UPnP
mode again.
9.
After playback has started, the display will show the
"Now Playing" screen with cover art (if available),
the artist’s name, the title name, the album name,
the composer’s name and the playback progress.
Repeatedly press on the Right button to zoom in on
the cover art or view it in full screen.
10.
Playback can be controlled by pressing the Select
button to play / pause playback, pressing the Down
button or pressing and holding the Right button to
go to the next track and pressing the Up button or
pressing and holding the Left button to go to the
previous track.
Casting music to the radio
Windows Media Player also allows users to cast music to
the radio. This can be convenient when you are working
on your PC and want to play songs through the radio's
speaker without having to actually control the radio.
Follow these steps to cast songs to the WFR-39:
1.
Make sure all steps from the previous section have
been followed, that the radio is still in the UPnP mode
and that both the PC and the radio are still connected to
the same network.
2.
Go to your music library in Windows Media Player and
right click on a song, album, genre, or playlist and then
select Cast to > WFR-39.
3.
The song (s) will now be cast to the radio and
automatically played through the radio's speaker.
Note:
Some Windows security software can prevent
correct operation of the 'Play to' / 'Cast to Device' function.
Such software may have updates or configuration options
which will permit 'Play to' / 'Cast to Device' to operate
correctly - please consult your anti-virus software supplier.
Using UPnP server on Mac or Linux
Although this manual only describes how to set up a
UPnP server on Windows using Windows Media Player,
there are similar applications available for macOS and
Linux.
A list of UPnP server applications for your platform can be
found at
https://en.wikipedia.org/wiki/List_of_UPnP_AV_media_
servers_and_clients.
Please refer to the documentation that is provided with
these applications for more information on how to set up
the server.
Supported formats
MP3 (bit rate up to 320kbits/s, sampling rate up to 48kHz)
AAC / AAC+ (bit rate up to 320kbits/s, sampling rate up to
48kHz)
WMA (bit rate up to 320kbits/s, sampling rate up to 48kHz)
WAV / FLAC (sampling rate up to 48kHz)
11. Listening to music using the
headphone jack
The WFR-39 is equipped with a Headphones socket at
the back of the radio, which can be used to connect a
pair of headphones with a 3.5mm plug. To connect the
headphones, simply plug the 3.5mm jack into the socket.
The radio will then automatically detect that a pair of
headphones have been connected and it will disable its
internal speaker.
We recommend turning the volume down before
connecting the headphones and raising it slowly to a
suitable level after connecting the headphones to avoid
loud sounds and damaging your hearing.
Note:
Excessive sound pressure from earphones and
headphones can cause hearing loss. To prevent possible
hearing damage, do not listen at high volume levels for
long periods of time.
WFR-39

12
GB
12. Troubleshooting
Observation Possible cause / solution
The radio is
not functioning
properly.
● Try performing a factory reset.
● Turn off the radio, disconnect it from
the power source, wait 1 minute and
then reconnect the radio to the power
source and turn it on.
No Internet
Connection
● Ensure that Wi-Fi has been enabled
in settings and that the correct
password has been entered for the
Wi-Fi network.
● Try performing a factory reset and
then try reconnecting to the Wi-Fi
network.
● Turn off the radio, disconnect it from
the power source, wait 1 minute and
then reconnect the radio to the power
source and turn it on.
13
GB
13. Specifications
Built-in Lithium-ion Battery
3.65V / 2.6A
USB Power Cable
USB Type-A to Type-C (included)
Power Adapter
DC 5V / 2.4A (Not included)
Battery life
approx. 7 hours of listening at normal volume level
Charging time
approx. 5.5 hours in standby mode
approx. 13 hours in power on mode
Frequency range
DAB band: 174.928-239.2 MHz
FM band: 87.5-108 MHz
Wi-Fi
The frequency and maximum
transmitted power
2412MHz ~ 2472MHz for 11b / g / n (HT20) / 11n (HT40): 17.291dBm
802.11b / g / n (WLAN) Encryption WEP, WPA, WPA 2 (PSK), WPS
Electronic features
Loudspeaker 2.25” 8ohm
Output Power 1W
Headphone socket 3.5mm diameter Stereo Output
Operating temperature range
0°C to +40°C
※
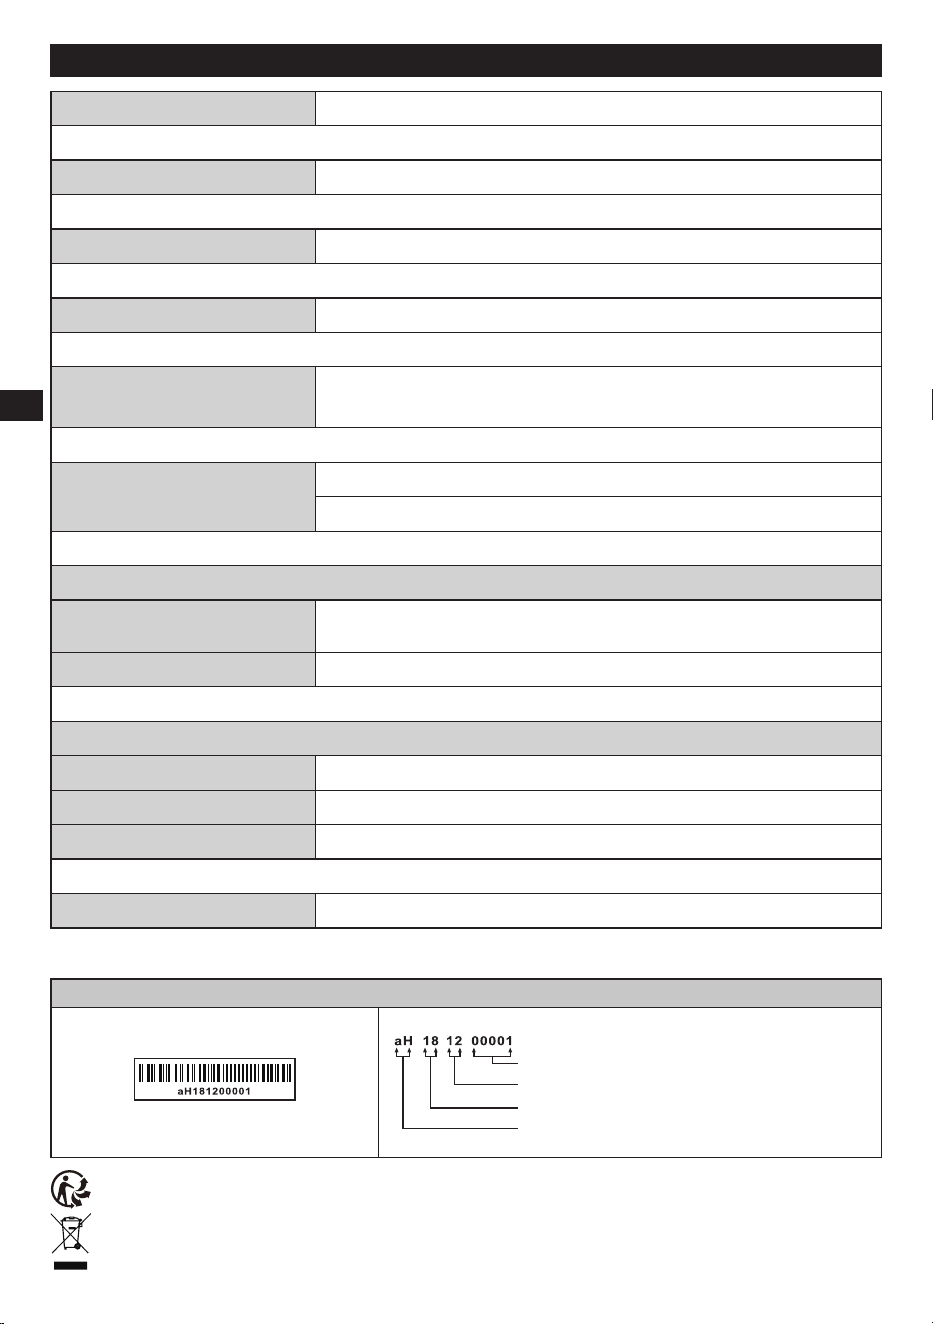
The barcode label on the product is defined as below:
Serial number
Production month
Production year
Product code
Sangean reserves the right to amend the specifications without notice.
RECYCLING This product bears the selective sorting symbol for Waste electrical and electronic equipment
(WEEE). This means that this product must be handled pursuant to European directive 2012/19/EU in order to be
recycled or dismantled to minimize its impact on the environment.
