
GB
Version 3
WFR-32
01
b
a
c
t
v
s
r
q
p
o
n
m
l
d
f
e
g
k
j
i
h
u
1 32 4
11 12 11
5 6
10 9
13
17 18
1415
8 7
16 19

02
GB
The Bluetooth
®
word mark and logos are registered trademarks owned by Bluetooth SIG, Inc. and any use of such marks
by Sangean is under license.
Table of Contents
1. IMPORTANT SAFETY INSTRUCTIONS .............. 03
2. YOUR WFR-32 RADIO ....................................03-05
INTRODUCTION ...................................................03
WHAT'S IN THE BOX ........................................... 03
CONTROLS AND CONNECTIONS ................. 04-05
MAIN UNIT ............................................................ 04
REMOTE CONTROL ...................................... 04-05
3. BEFORE USING THE RADIO .........................05-06
FINDING A SUITABLE LOCATION
FOR THE RADIO .................................................. 05
INSTALLING BATTERIES IN THE
REMOTE CONTROL ............................................05
NAVIGATION AND TEXT INPUT.....................05-06
NAVIGATING THE RADIO MENUS ......................05
ENTERING CHARACTERS .............................05-06
4. GETTING STARTED........................................06-08
CONNECTING THE AC POWER ADAPTER ....... 06
INITIAL SETUP .....................................................06
SETTING THE MENU LANGUAGE ...................... 06
THE MOBILE APP'S PRIVACY POLICY ...............06
CONFIGURING THE NETWORK
CONNECTION ...................................................... 06
SETTING THE DATE AND TIME ..........................07
SETTING THE LOCATION ................................... 07
USING THE ALARMS AND TIMERS ..............07-08
SETTING THE ALARMS ..................................07-08
SETTING THE ALARM VOLUME .........................08
WHEN AN ALARM IS ACTIVATED ...................... 08
DEACTIVATING AN ALARM ................................ 08
SETTING THE SLEEP TIMER..............................08
SETTING THE TIMER ..........................................08
THE AIRMUSIC CONTROL APP ......................... 08
5. THE CONFIGURATION MENU .......................08-11
6. LISTENING TO INTERNET RADIO.................11-13
TUNING INTO INTERNET RADIO
STATIONS ........................................................11-12
LOCAL RADIO MENU ...........................................11
INTERNET RADIO MENU ...............................11-12
ADJUSTING THE VOLUME.................................. 12
USING PRESET / FAVORITE STATIONS ............ 12
STORING PRESET / FAVORITE STATIONS
USING THE RADIO CONTROLS ......................... 12
STORING PRESET / FAVORITE STATIONS
USING THE REMOTE ..........................................12
RECALLING PRESET / FAVORITE
STATIONS ........................................................12-13
7. SPOTIFY CONNECT AND MEDIA CENTER
FEATURES ......................................................13-14
AUDIO PLAYBACK VIA SPOTIFY CONNECT .... 13
MEDIA CENTER FEATURES ............................... 13
Podcasts ..............................................................13
AUDIO PLAYBACK VIA CLOUD MUSIC
SERVICES ............................................................13
AUDIO PLAYBACK VIA UPNP SERVER .......13-14
AUDIO PLAYBACK VIA USB STORAGE
DEVICE ................................................................. 14
8. LISTENING TO MUSIC VIA USB DEVICE .......... 15
PLAYBACK FROM A USB DEVICE .....................15
SUPPORTED FILE FORMATS.............................15
USING THE USB CHARGING PORT FOR
CHARGING A USB DEVICE ................................15
9. LISTENING TO MUSIC VIA BLUETOOTH
STREAMING .................................................... 15-16
PAIRING YOUR BLUETOOTH DEVICE FOR
THE FIRST TIME .............................................15-16
AUDIO PLAYBACK IN THE BLUETOOTH
MODE ...................................................................16
AUDIO PLAYBACK FROM A PREVIOUSLY-
PAIRED BLUETOOTH DEVICE ...........................16
DISCONNECTING YOUR BLUETOOTH
DEVICE ................................................................. 16
10. LISTENING TO MUSIC USING THE AUX IN
JACK .................................................................... 16
11. LISTENING TO MUSIC USING THE
HEADPHONES JACK .......................................... 17
12. SPECIFICATIONS ................................................ 18
DISPOSAL OF YOUR OLD PRODUCT ...............18
03
GB
1. IMPORTANT SAFETY INSTRUCTIONS
1. Read and understand all safety and operating
instructions before the radio is operated.
2. Retain instruction: The safety and operating
instructions should be retained for future reference.
3. Heed warnings. All warnings on the appliance and
operating instructions should be followed.
4. Follow all operations and use instructions.
5. Water and moisture: The appliance should not
be used near water. Do not use near a bathtub,
washbowl, laundry tub, kitchen sink, wet basement,
swimming pool, etc.
6. Unplug the radio from the AC power outlet before
cleaning. Use only a damp cloth for cleaning the
exterior of the radio.
7. Do not place the radio on an unstable cart, stand,
bracket or table. The radio may fall, causing serious
personal injury and damage to the radio.
8. Ventilation: This radio should be situated so that its
location or position does not interfere with its proper
ventilation. For example, the radio should not be used
on a bed, sofa, rug or other soft surfaces that may
block the ventilation openings. It should not be placed
in a built-in situation like a cabinet that may reduce air
ow through the ventilation openings.
9. Power sources: The radio should be operated
only from the type of power source indicated on the
marking label. If you are not sure of the type of power
supply to your home, consult your radio dealer, Power
Company or Sangean.
10. AC adaptor: The AC adaptor should be positioned
so it is not walked on, pinched, or items placed on
top of it. Pay particular attention to wires at plugs,
convenience receptacles, and the point where they
exit from the unit. Unplug the AC adaptor by gripping
the adaptor, not the wire. Operate the radio using only
the current type of power source indicated. If you are
not sure of the type of power supply to your home,
consult your dealer, local power company or Sangean.
11. Do not overload wall outlets or extension cords. This
can result in a risk of fire or electrical shock. Never
insert objects of any kind into the radio through any
openings. The objects may touch dangerous voltage
points or short out parts. This could cause a fire or
electrical shock and damage the radio.
12. If the radio is left unattended or unused for long
periods of time, unplug it from the wall outlet. This will
prevent damage caused by lightning or power line
surges.
13. If the radio is left unattended and unused for a long
period of time, remove the batteries. The batteries
may leak and damage furniture of your radio.
14. Do not attempt to service the radio yourself. Removing
the cover may expose you to dangerous voltage and
will void the warranty.
15. Never push objects of any kind into this radio through
openings as they may touch dangerous voltage points
or short-out parts that could result in a re or electric
shock and damage the radio. Never spill liquid of any
kind on the product.
16. The appliance should be serviced by qualied service
personnel only when:
A. The AC power supply cord or the plug has been
damaged.
B. Objects have fallen or liquid has been spilled into
the radio.
C. The radio has been exposed to rain or water.
D. The radio does not appear to operate normally or
exhibits a marked change in performance.
E. The radio has been dropped, or the enclosure is
damaged.
2. YOUR WFR-32 RADIO
INTRODUCTION
Thank you for purchasing the Sangean WFR-32 radio.
This radio provides the following range of features:
● Access to more than 40,000 internet radio stations
around the globe
.
● A total of 250 presets for your favorite stations.
● Easy to control using remote control or companion app.
● Support for USB, UPnP, Bluetooth and Aux-in playback.
● Automatic internet time and date synchronization.
● Compatible with Spotify Connect, Tidal Connect,
Amazon Music and more.
● USB charging port for charging USB devices.
Before using this device, please make sure to read and
understand all parts of the manual.
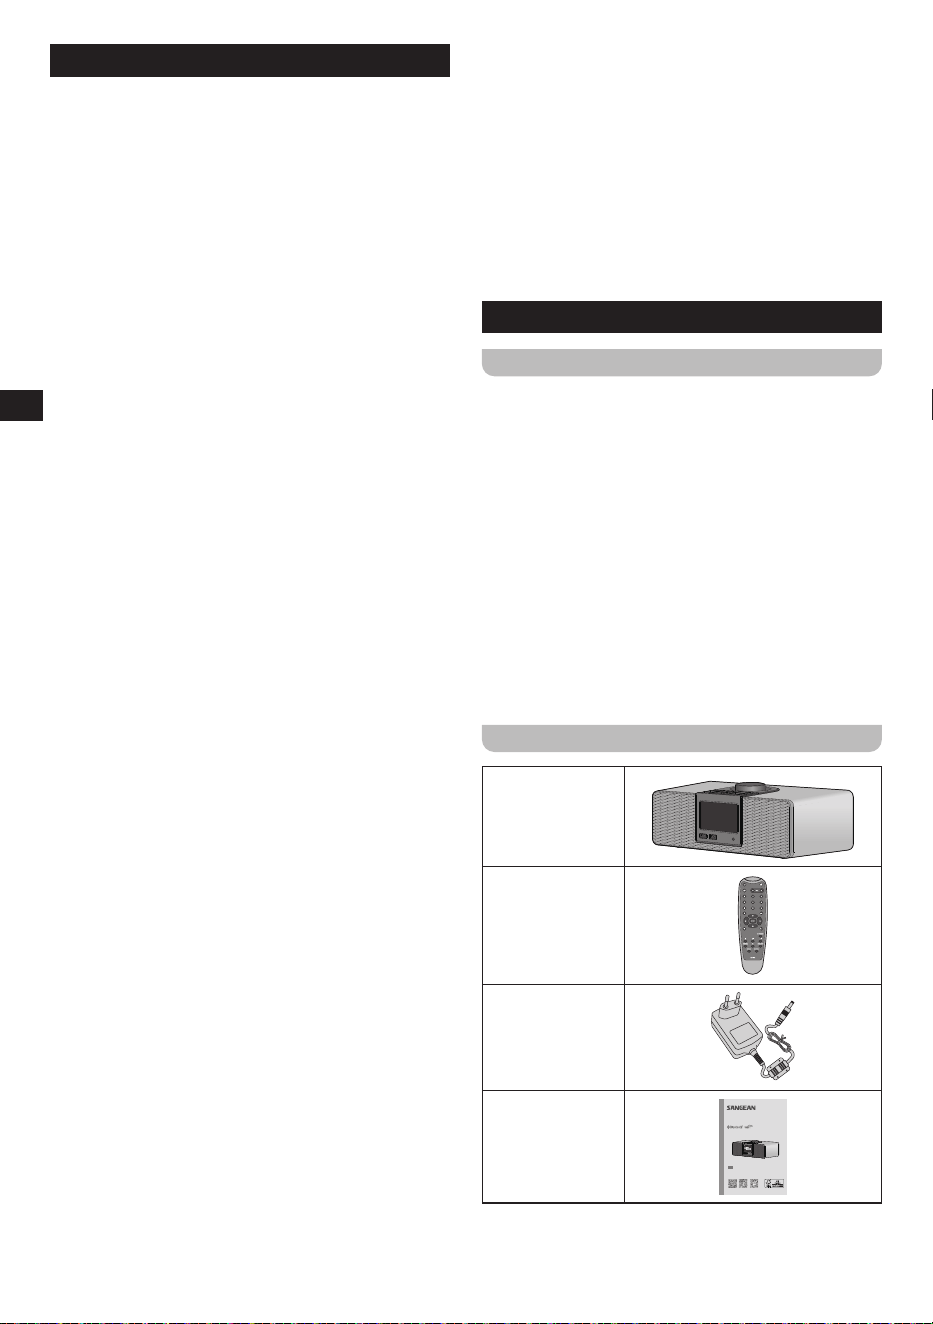
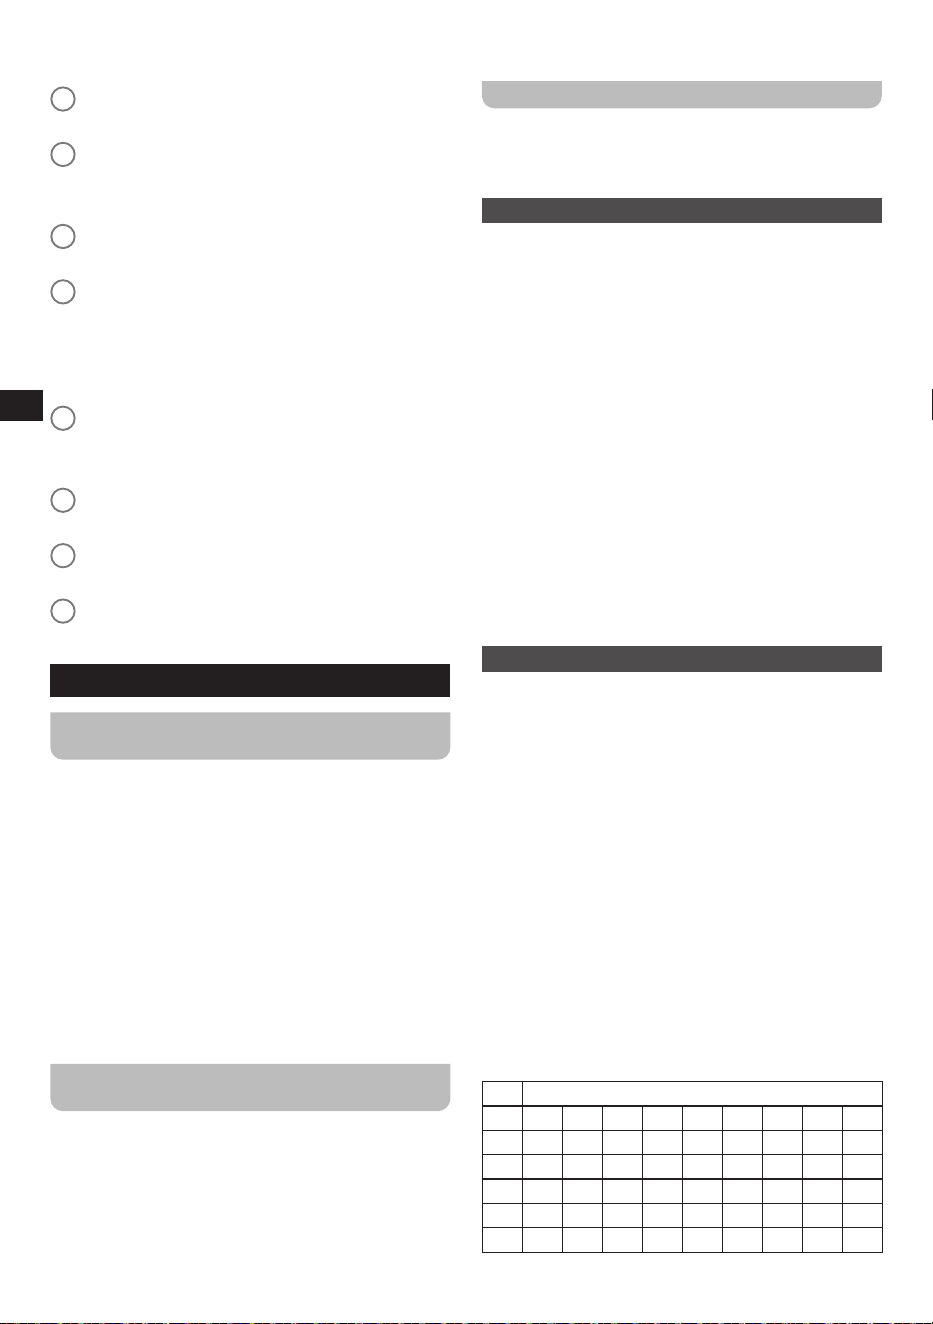
WHAT’S IN THE BOX
WFR-32
Remote control
Power adapter
Quick start guide
In
te
r
n
e
t R
a
di
o
0
3
:1
2
3A87dX1100GB0
For full documentation on all of the WFR-32's functionality, please scan the QR code
below or visit the website below to download the full manual of the internet radio.
http://www.sangean.com
GB
Quick Start Guide
WFR-32
Internet Radio / AUX / Bluetooth / AirMusic App
Digital Wooden Radio

04
GB
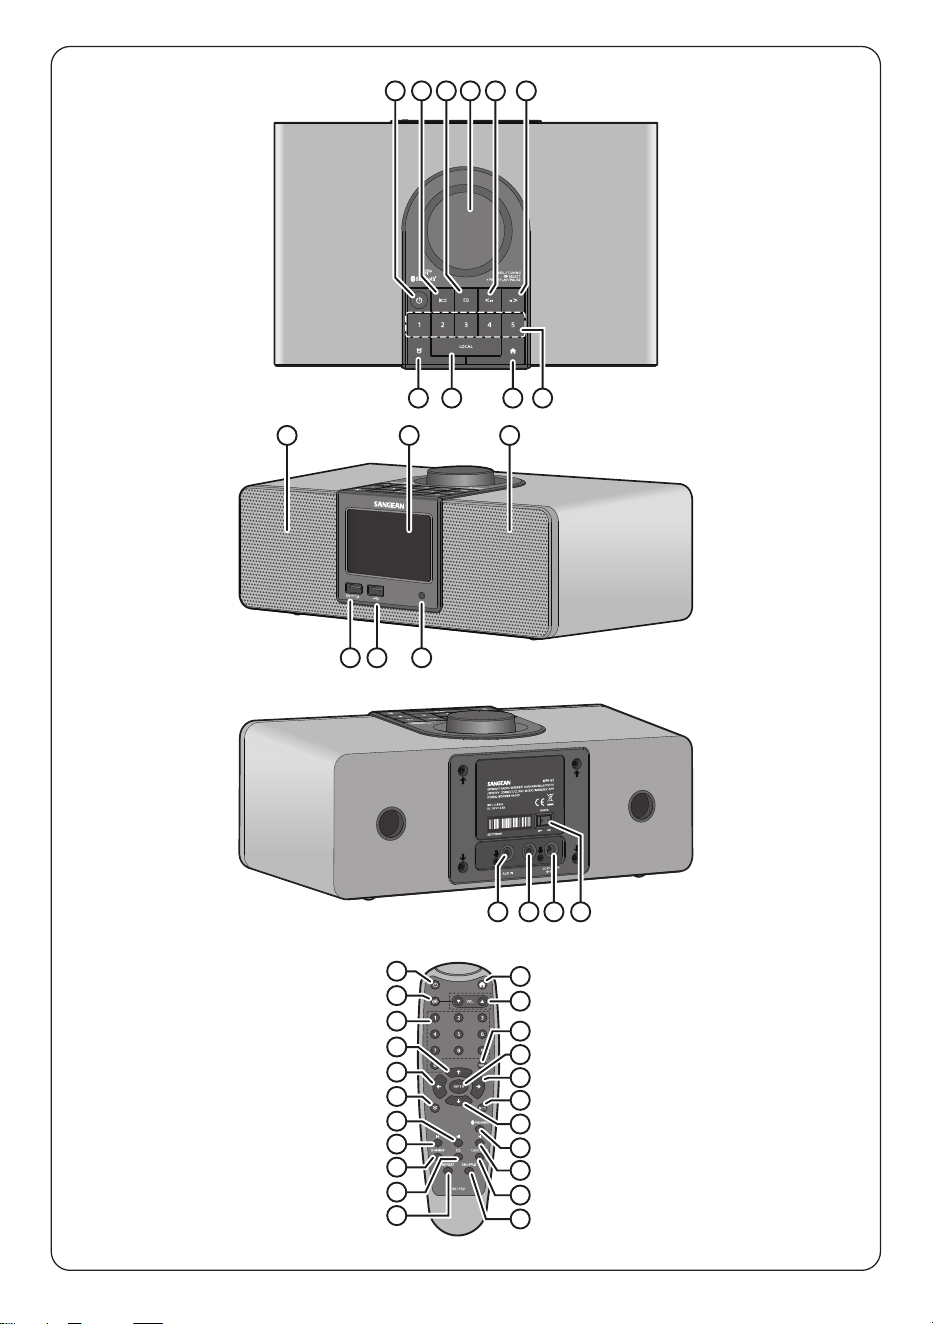
CONTROLS AND CONNECTIONS
MAIN UNIT
1
Power button / Standby
● Turn the radio on / o
2
Sleep timer button
● Set the sleep timer
3
EQ button
● Set the EQ mode
4
Volume control
● Set the volume
● Select character
● Select menu items
● Conrm menu selection
● Conrm text input
5
Previous button
● Go to previous track in Bluetooth mode
● Go to previous menu in Bluetooth mode
● Delete selected character and go to previous
character
6
Next button
● Go to next track
● Go to next menu
● Input character and go to next character or move
cursor to next character
7
Preset buttons (1-5)
● Recall preset 1-5
● Save station to preset 1-5
8
Home button
● Go to Main menu
9
Local button
● Go to Local Radio menu
10
Alarm button
● Go to Alarm menu
11
Speaker
12
Display
13
IR sensor
● Infrared sensor for receiving remote control input
14
USB playback port
● Connect an external USB device to playback
music in the USB mode
15
USB charging port
● Connect an external USB device to charge it
16
Aux in jack
● 3.5mm jack for audio input from external device
17
Headphones jack
● 3.5mm jack for stereo audio output to headphones
18
DC in socket
● Jack for 9V 2.5A power DC adapter, center pin
positive
19
Power Switch
● Switch the device on or off here. The device is
disconnected from the power supply unit in the
OFF position
REMOTE CONTROL
a
Power button / Standby
● Turn the radio on / o
b
Mute button
● Enable / disable the radio’s mute feature
c
Numeric buttons (1-0)
● Recall favorite stations
● Select and enter character
d
Up button
● Select menu item
● Select character
e
Left button
● Select menu item
● Go to previous menu
● Delete selected character and go to previous
character
f
Alarm button
● Go to Alarm menu
g
Play / Pause button
● Start / pause playback in Media Center / Bluetooth
/ USB mode
h
Previous Track button
● Go to previous station in station list
● Go to previous track in Media Center / Bluetooth /
USB mode
i
Dimmer button
● Change dimmer setting
j
EQ button
● Set EQ mode
k
Repeat button
● Congure repeat mode in Media Center / Bluetooth
/ USB mode
l
Shuffle button
● Enable / disable shuffle mode in Media Center /
Bluetooth / USB mode
m
Local Radio button
● Go to Local Radio menu
n
Next Track button
● Go to next station in station list
05
GB
● Go to next track in Media Center / Bluetooth / USB
mode
o
Pairing button
● Switch to Bluetooth pairing mode
p
Down button
● Select menu item
● Select character
q
Sleep timer button
● Set the sleep timer
r
Right button
● Select menu item
● Go to next menu
● Input character and go to next character or move
cursor to next character
s
Enter button
● Conrm selection
● Conrm text input
t
Fav.+ button
● Open favorites list
u
Volume up / down buttons
● Raise / lower the volume
v
Home button
● Go back to Main menu
3. BEFORE USING THE RADIO
FINDING A SUITABLE LOCATION FOR THE
RADIO
After unpacking the radio from the box, take the following
guidelines into account when finding a suitable location
for the radio:
● Place the radio on a at, even surface such as a table.
● Do not place the radio near heat sources.
● Make sure there is sucient space available around the
radio for proper ventilation.
● If you are planning to connect the radio to your Wi-
Fi network, make sure to place the radio in a location
where Wi-Fi reception is good.
● Avoid placing the radio near appliances that can
interfere with Wi-Fi reception, such as microwaves.
INSTALLING BATTERIES IN THE REMOTE
CONTROL
The radio’s remote control requires two AAA batteries (not
included) to operate. To place the batteries:
1. Open the battery compartment on the back of the
remote control.
2. Insert two AAA batteries in the battery compartment with
polarities as shown in the diagram inside the battery
compartment.
3. Close the battery compartment again.
NAVIGATION AND TEXT INPUT
Before connecting the radio to the power supply and
configuring the radio, it is important to understand how to
navigate menus on the radio and how to input text in order
to ensure the radio can be set up and used smoothly.
NAVIGATING THE RADIO MENUS
The radio’s menus can be navigated using either a
combination of the Volume control (4) and Previous
(5) and Next (6) buttons on the radio itself or the arrow
buttons (d, e, p, and r) and Enter button (s) on the remote
control.
In horizontally displayed menus (such as the menus
that are displayed during the setup wizard and the main
menu), an item or submenu can be highlighted by either
rotating the Volume control (4) or pressing the Previous (5)
and Next (6) buttons on the radio or using the Left (e) and
Right (r) buttons on the remote and then pressing either
the Volume control (4) on the radio or the Enter button (s)
on the remote to confirm.
In vertically displayed menus (most other menus), the
Volume control (4) on the radio and Up (d) and Down (p)
buttons on the remote can be used to highlight an item,
while pressing the Volume control (4) on the radio or the
Enter button (s) on the remote can be used to confirm
your choice. The Previous button (5) on the radio and the
Left button (e) on the remote can now be used to go back
to the previous menu and the Next button (6) and Right
button (r) can be used to go to the next menu.
ENTERING CHARACTERS
In some cases, you will have to input characters on
the radio, for instance when connecting to a password
protected Wi-Fi network or when entering the date and
time. In this case, both the buttons on the radio and the
buttons on the remote control can be used as well.
When using the buttons on the radio, rotate the Volume
control (4) to select the desired character and when
it is displayed, press the Next button (6) to go to the
next character. The Previous button (5) can be used to
move the cursor back one step and delete the selected
character, while pressing the Volume control (3) confirms
the input.
When using the remote, characters can be input in the
same way, using the Up (d) and Down (p) buttons to
select the character, while the Left (e) and Right (r) are
used to go to previous or next character. The remote also
offers a faster alternative for inputting characters using
the numeric buttons (c), however. The table below shows
which numeric button corresponds to which characters.
Cycle through the characters by repeatedly pressing a
button. Confirm input by pressing the Enter button (s).
1 Special characters (@, !, ", etc.)
2 A B C a b c
3 D E F d e f
4 G H I g h i
5 J K L j k l
6 M N O m n o
7 P Q R S p q R s
06
GB
8 T U V t u v
9 W X Y Z w x Y z
4. GETTING STARTED
CONNECTING THE AC POWER ADAPTER
The WFR-32 can be powered using the supplied power
adapter. Before connecting the AC power adapter to a
wall socket, please ensure that the voltage that the socket
supplies is within the supported range (100~240 Vac,
50/60Hz).
If the wall socket does supply a voltage that is within the
supported range, first connect the small plug of the power
cord to the DC IN socket (18) on the radio, then connect
the AC power adapter to the wall socket and turn on the
Power Switch (19) at the back of the radio.
INITIAL SETUP
After the radio has been supplied with power, it will
automatically turn on. “Sangean” will be shown on the
radio’s display (12) and a bar below this message will
indicate the progress of the startup process.
Once the radio has finished starting up, it will immediately
switch over to the initial setup process. During the initial
setup process, the startup wizard will guide you through
the configuration of the language of the on-screen menus
and the network configuration of the radio.
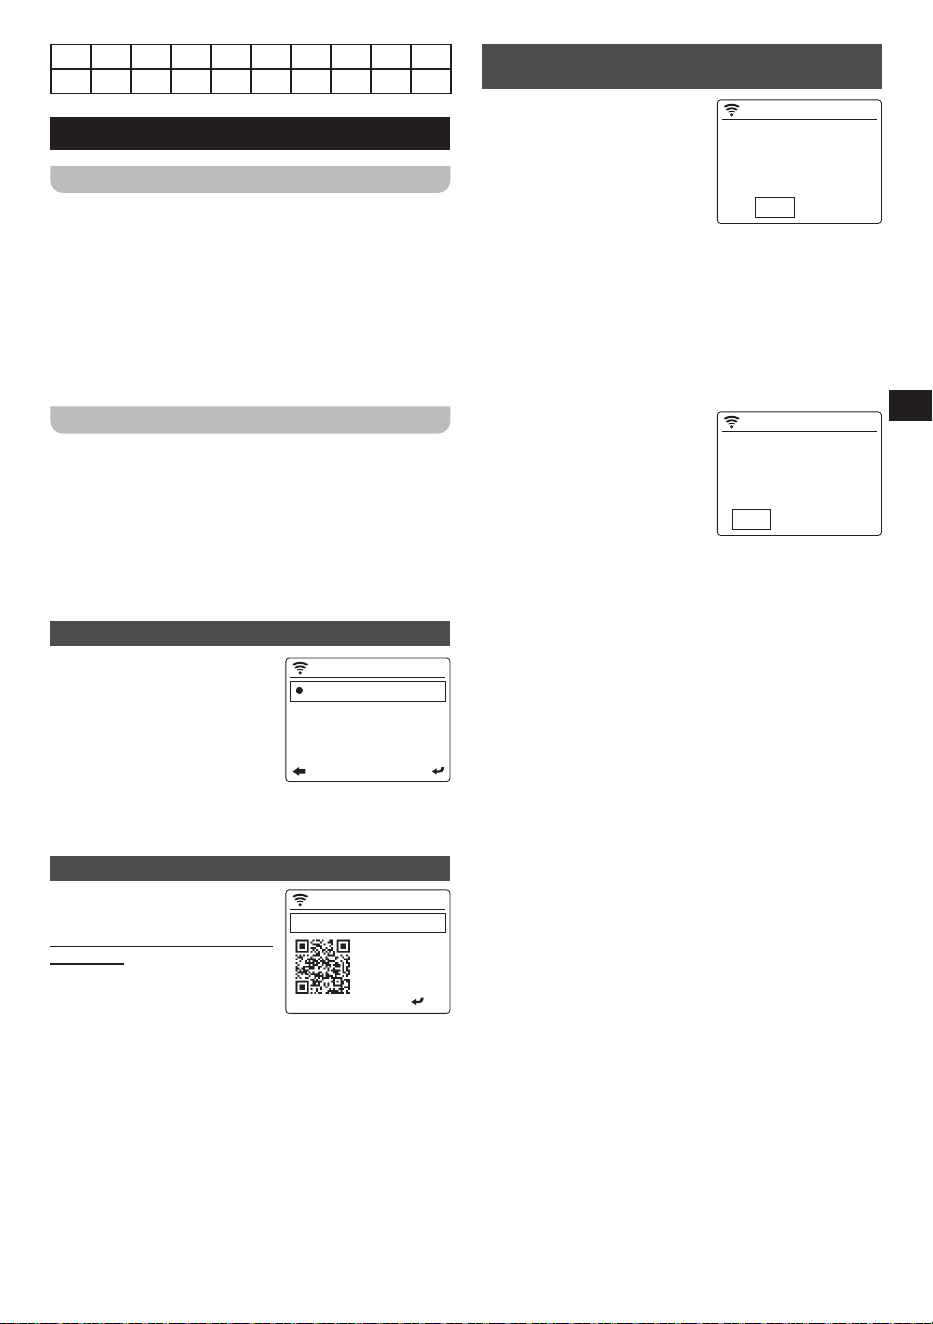
SETTING THE MENU LANGUAGE
Once the language selection
22:36
1/18
English
Deutsch
Español
Français
menu appears on the display.
The English language is the
default language and is
therefore highlighted by default.
Select the desired language as
described previously in the
“NAVIGATION AND TEXT
INPUT” section in chapter 3. After selecting the desired
language, the radio will display all menus in the selected
language.
THE MOBILE APP’S PRIVACY POLICY
Next, the radio will display a QR
12:00AM
Scan QR code or Visit:
WWW.mediayou.net
/policy.php
Privacy
:OK
code and the URL
https://www.mediayou.net/
policy.php to direct you to the
Privacy Policy.
Be sure to read this Policy
before using the online
functionality of the radio and only use the internet radio
feature if you agree to all terms and conditions in the
Privacy Policy. If you do not agree, do not use the internet
radio feature and use the radio for playback in other
modes instead.
Press the Volume control (4) or Enter button (s) to
continue setting up the radio using the setup wizard.
CONFIGURING THE NETWORK
CONNECTION
When configuring the network
12:00AM
Enable ’Check Network
when Power On’ ?
No
Yes
connection, the first question
the setup wizard will ask is
whether you want it to check for
network connections when your
turn the radio on. There are two
options here:
1. Yes: The radio will automatically scan for Wi-Fi
networks when it is turned on and it is not or cannot
connect to networks it has previously connected to.
2. No: The radio will not automatically scan for Wi-
Fi networks when it is turned on and is not already
connected to a network that it has previously connected
to. In this case, you will have to connect to a network
manually using the radio’s menu.
Next, the wizard will ask if you
12:00AM
Would you like to
configure Network now?
YesAPP WPSNo
want to configure the network
now. There are four options to
choose from here:
1. Yes: The radio will scan for
nearby Wi-Fi networks. After
scanning is completed, select
your network from the list and enter the password as
previously described. After entering the password, the
radio will connect to the network. The setup wizard has
now been completed and the radio will switch over to
the main menu.
2. APP: This option will display a QR code that, when
scanned, takes you to a page with instructions on
how to install the AirMusic Control mobile app on your
Android or iOS device and how to then connect the
radio to your Wi-Fi network. Follow these instructions
to successfully connect the radio to your Wi-Fi network.
After the radio has been connected to the network, the
setup wizard has been completed and the radio will
switch over to the main menu.
3. WPS: If your router supports WPS (refer to the
instruction manual of your router), you can also use the
WPS feature to connect the radio to your Wi-Fi network.
After selecting WPS, press the WPS button on your
router within 120 seconds to establish a connection
between the 2 devices. Once the connection is
established, the setup wizard is now completed and the
radio will switch over to the main menu.
4. No: Select no if you do not want to connect the radio
to the Wi-Fi network at this point in time. When not
connected to a Wi-Fi network, the radio can still be
used to playback audio in both the Bluetooth and the
Aux in mode. In addition, the radio can be connected to
a Wi-Fi network at any time by using the menus on the
radio.
After finishing this step, the setup wizard is completed.
The radio’s time and date will automatically be set if you
have connected to a Wi-Fi network and your radio is
now ready for use.

07
GB
SETTING THE DATE AND TIME
If you have connected the radio to your Wi-Fi network
during the initial setup process, the date and time
have already been automatically set using the internet
connection. if you want to change the time and date,
follow these instructions:
1. Turn on the radio using the Power button (1) on the
radio or the Power button (a) on the remote.
2. Select the Conguration menu from the radio’s main
menu as previously described.
3. In the Configuration menu, select the Date & Time
Option.
4. Next, select the Set Date and Time Option.
5. To set the time and date, now select the Manual Setup
Option.
6. Use the Volume control (4) and the Previous (5) and
Next (6) buttons on the radio or the arrow buttons (d, e,
p, and r) and numeric buttons (c) on the remote control
to set the date and time.
7. Press the Volume control (4) on the radio or the Enter
button (s) on the remote to conrm the date and time.
Note: The Date & Time submenu can also be
used for setting the time format, date format, and
Daylight Saving Time (DST). More information about
these features can be found in chapter 5 “THE
CONFIGURATION MENU”.
Wi-Fi is needed for consistent time calibration
accuracy.
SETTING THE LOCATION
The radio’s location is not automatically set after
completing the setup wizard and must be set manually
in order for you to quickly browse and search for local
internet radio stations.
After the initial setup, the radio’s location can be set either
by selecting the Local Radio item in the radio’s main
menu or by following these steps:
1. Turn on the radio using the Power button (1) on the
radio or the Power button (a) on the remote.
2. Select the Conguration menu from the radio’s main
menu as previously described.
3. In the Configuration menu, select the Local Radio
Setup item.
4. Next, select the Set Location item.
5. Now select either Auto Detect (Country) to
automatically detect and set the country or choose
one of the Manual Setup items to set your location by
country, state, city, or US zip code (for the US).
Note:
A Wi-Fi connection is required for setting the radio’s
location. If the radio is not connected to a Wi-Fi
network, the location setting can be accessed, but
auto detecting a location or selecting a location by US
zip code will not be possible and the county, state and
city list will show as “Empty”.
USING THE ALARMS AND TIMERS
The WFR-32 features 3 alarms (alarm 1, alarm 2 and
NAP alarm), a sleep timer and a regular timer. Follow the
instructions below to use the alarms and timers.
SETTING THE ALARMS
All 3 alarms can be set through the Alarm submenu of the
radio’s Configuration menu.
1. Turn on the radio using the Power button (1) on the
radio or the Power button (a) on the remote.
2. Select the Conguration menu from the radio’s main
menu as previously described.
3. In the Conguration menu, select the Alarm item.
4. Next, select the alarm you want to set (Alarm 1, Alarm
2 or NAP Alarm).
If you have selected Alarm 1 or Alarm 2 in step 4,
follow these steps:
(1) After selecting the alarm, select Turn On.
(2) Next, select the Time item.
(3) Use the Volume control (4) and the Previous (5) and
Next (6) buttons on the radio or the arrow buttons (d,
e, p and r), numeric buttons (c) and Enter button (s)
on the remote control to set and conrm the alarm
time.
(4) Select the Repeat item.
(5) Select when you want to alarm to activate by
selecting either Everyday or Once, or by checking
/ unchecking the checkboxes in front of the dierent
days of the week using the Volume control (4) on
the radio, the Enter button (s) on the remote, or the
Right button (r) on the remote control. Press the
Previous button (5) on the radio or Left button (e)
on the remote control to conrm and go back to the
previous menu.
(6) Select the Sound item.
(7) Select the alarm sound that you want to wake up
to. You can choose from Beep, Melody, Internet
Radio, USB or Spotify. If USB is selected, you can
select a desired le on the USB device to wake up
to.
(8) If the selected alarm sound is unavailable at the
time of the alarm (in case of Internet Radio, USB
or Spotify), the radio will use the Melody sound
instead.
(9) You have now completed setting up the alarm.
Press the Previous button (5) on the radio or the
Left button (e) on the remote twice to go back to the
alarm menu or press the Home button (8) on the
radio or the Home button (v) on the remote to go
back to the radio’s main menu.
If you have selected NAP Alarm in step 4, follow this step:
5. Select one of the preset durations for the NAP Alarm
timer. You can choose from Turn off, 5 minutes, 10
minutes, 20 minutes, 30 minutes, 60 minutes, 90

08
GB
minutes, and 120 minutes. The NAP alarm will be
activated after this time has elapsed.
Note:
You can also press the Alarm button (10) on the
radio or the Alarm button (f) on the remote control to
directly go to the Alarm submenu. This works both
when the radio is in standby mode and when the radio
is turned on.
SETTING THE ALARM VOLUME
The alarm volume for all alarms can be set in the Alarm
submenu of the radio’s Configuration menu as well.
Follow these steps to set the alarm volume:
1. Follow steps 1 to 3 from the previous section.
2. Select the Alarm Volume item.
3. Rotate the Volume control (4) or press the Previous
(5) or Next (6) buttons on the radio or press the arrow
buttons (d, e, p, and r) on the radio to set the alarm
volume.
4. Press the Volume control (4) on the radio or Enter
button (s) on the remote to conrm the alarm volume.
WHEN AN ALARM IS ACTIVATED
STOPPING AN ALARM
When an alarm is activated, press the Power button (1) or
Alarm button (10) on the radio or the Power button (a) or
Alarm button (f) on the remote control to stop the activated
alarm.
USING THE SNOOZE FEATURE
When an alarm is activated, press any button on the radio
or the remote (except the Power button (1) / Alarm button
(10) / Volume control (4) on the radio or the Power button
(a) / Alarm button (f) / Volume buttons (u) on the remote)
to snooze the alarm for 5 minutes. This procedure can
be repeated during the alarm period. While the snooze
feature is activated, the display will show the message
“SNOOZE….” and the remaining time the snooze feature
is active.
DEACTIVATING AN ALARM
To deactivate an alarm, follow steps 1 to 4 described in
the SETTING THE ALARMS section and then select the
Turn Off item.
SETTING THE SLEEP TIMER
The sleep timer allows you to automatically turn off the
radio after a preset time has elapsed. It can be set from
15 to 180 minutes using the radio’s Configuration menu
or by repeatedly pressing either the Sleep timer button (2)
on the radio or the Sleep timer button (q) on the remote
control.
Follow these steps to set up the sleep timer using the
Configuration menu:
1. Turn on the radio using the Power button (1) on the
radio or the Power button (a) on the remote.
2. Select the Conguration menu from the radio’s main
menu as previously described.
3. In the Configuration menu, select the Sleep Timer
item.
4. Now select the time in which you want the radio to turn
o. Select the Turn O item to turn o the sleep timer
and to continue using the radio.
SETTING THE TIMER
The timer can be set through the Configuration menu
to alert you when a certain period of time has elapsed.
The timer can be set from 1 second to 99 minutes and 59
seconds. Follow the steps below to set the timer:
1. Turn on the radio using the Power button (1) on the
radio or the Power button (a) on the remote.
2. Select the Conguration menu from the radio’s main
menu as previously described.
3. In the Conguration menu, select Timer.
4. Use the Previous (5) and Next (6) button on the radio or
the arrow buttons (d, e, p, and r) on the remote control
to set the desired time. Hold one of the buttons to
increase the speed with which the timer value changes.
5. Press the Volume control (4) on the radio or Enter
button (s) on the remote to conrm.
6. The timer will start running immediately and when the
set time has elapsed the radio will activate an alarm.
Press any button on the radio or the remote to stop the
alarm.
THE AIRMUSIC CONTROL APP
The AirMusic Control app connects the WFR-32 to your
phone through a Wi-Fi network and allows you to control
the radio from the palm of your hand. In order to use the
AirMusic Control app, your phone and radio must be
connected to the same Wi-Fi network. The app offers an
intuitive user interface, facilitates text input and allows you
to control most of the radio features.
AirMusic Control is available for both Android and iOS and
can be downloaded from Google Play or the App Store.
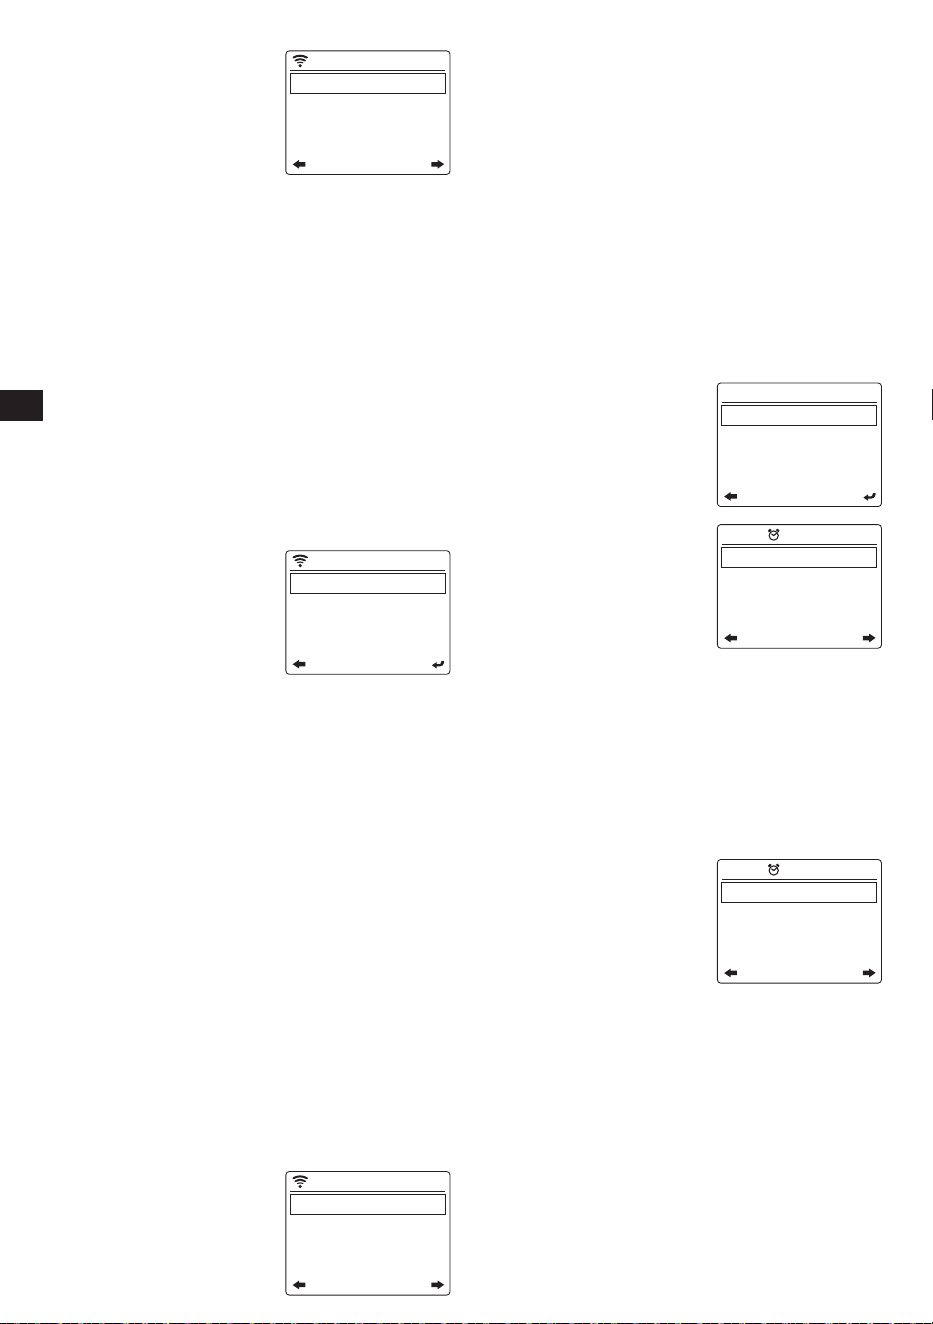
5. THE CONFIGURATION MENU
After completing the setup wizard and setting the location,
in most cases there is no need to go back into the radio’s
configuration menu.
If you would like to change the location, time, options
which are displayed in the main menu or other settings,
you can access the configuration menu and customize all
settings to your likings.
The configuration menu can be opened by simply
selecting Configuration in the radio’s main menu.
Below is a description of all
12:00AM
1/19
Time Display
Network
Date & Time
Alarm
settings that can be found in the
configuration menu:
1. Time Display: Select this
item to choose between
digital and analog time
display. If digital time display
is chosen, an additional list appears for the selection
of the color of the digits.
09
GB
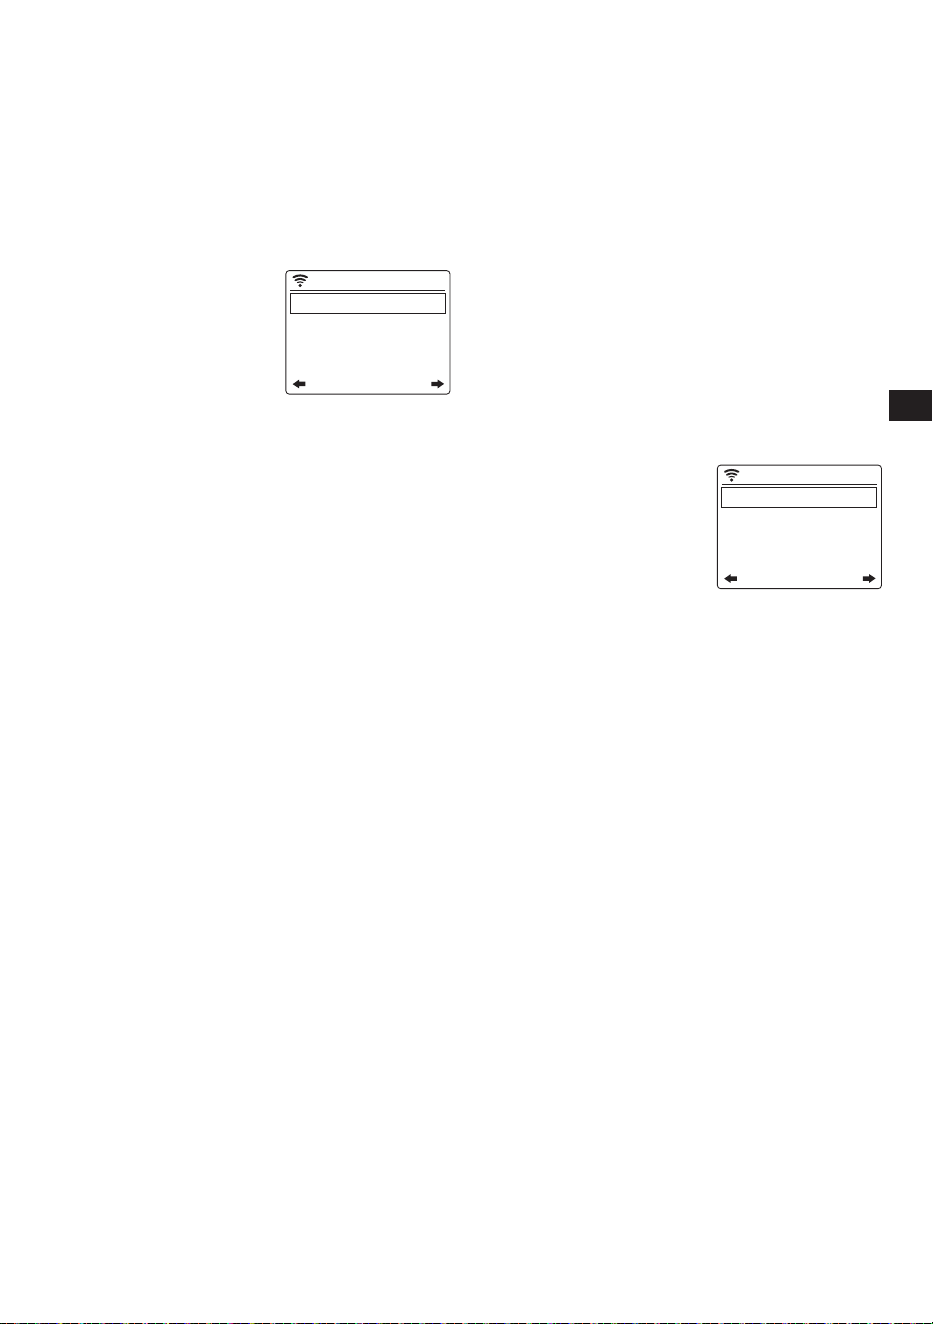
2. Network: Select this item to
09:32PM
1/6
Wireless Network Configur ation
Wireless Network (APP)
Wireless Network (WPS PBC)
Manual Configur ation
configure the device’s
network related settings.
After selecting Network, a
menu appears with several
new options:
(1) Wireless Network
Conguration: Select this option and then select
“Enable” to have the radio scan for Wi-Fi networks.
After the scan has completed select a Wi-Fi
network and enter the associated Wi-Fi password
to connect to it.
(2) Wireless Network (APP): Select this option to
display the QR code that guides you to a page with
instructions on how to install the AirMusic Control
app for Android devices and instructions on how
to use this app to connect the radio to your Wi-Fi
network.
(3) Wireless Network (WPS PBC): Select this option
to connect your radio to your Wi-Fi network using
the WPS feature. Before selecting this option,
make sure your Wi-Fi router supports the WPS
feature. Press the WPS button on the router within
120 seconds of selecting the item on the radio.
(4) Manual Configuration:
09:33PM
1/3
DHCP
Enter SSID
Manage
Select this option to go
to a next menu with
options for manually
configuring and
managing the radio’s Wi-
Fi connections:
● DHCP: Select this option to specify whether the
radio should connect to a DHCP server on the
Wi-Fi network. If DHCP (Off) is selected, you
will have to manually enter an IP address on the
network.
● Enter SSID: Select this option to manually enter
the SSID of a Wi-Fi network.
● Manage: Select this option to get an overview
of the Wi-Fi networks the radio has previously
connected to. Wi-Fi networks and their
associated passwords can be deleted from the
radio’s memory by selecting them and then
selecting Yes.
Note: It is recommended not to use the Manual
Configuration item unless you are familiar with
computer networks.
(5) Check network when power on: Select this
option to specify whether the radio should scan for
Wi-Fi networks when it is turned on and is not or
cannot connect to any known Wi-Fi network.
(6) Setup PIN for APP: Select this option to set a PIN
code that users have to input when connecting to
the radio through the AirMusic Control app.
3. Date & Time: Select this
16:45
1/3
Set Date and Time
Set Time Format
Set Date Format
option to manually congure
all date and time settings.
After selecting this item, a
submenu containing the
following items appears:
(1) Set Date and Time: Select this option to choose
between setting the date and time manually or
automatically detecting the time.
(2) Set Time Format: Select this option to choose
between the 12- and 24-hour time format.
(3) Set Date Format: Select this option to set the date
format. The available options are: YYYY / MM /
DD, DD / MM / YYYY, and MM / DD / YYYY.
(4) Daylight Saving Time (DST): Select this option to
turn Daylight Saving Time on or o after choosing
‘Manual Setup’.
Note:
Refer to the “SETTING THE DATE AND TIME
” section in chapter 4 for more information
regarding setting the date and time.
4. Alarm: Select this option to
1/4
Alarm 1 (Turn Off)
Alarm 2 (Turn Off)
NAP Alarm (Turn Off)
Alarm Volume
congure the various alarms
and the alarm volume. After
selecting this item, a
submenu containing the
following items appears:
(1) Alarm 1: Select this
16:46
1/3
Repeat: Everyday
Time: 00:00
Sound: Melody
option to enable or
disable alarm 1. Enabling
the alarm will take you to
the submenu containing
the following items:
● Repeat: Select this option in order to select
when the alarm should be activated. A list
of checkboxes will appear in which you can
select Everyday, Once, or check / uncheck
the dierent days of the week to customize the
settings.
● Time: Select this option to set the alarm time.
● Sound: Select this option to select the alarm
sound. The available options are: Beep,
Melody, Internet Radio, USB, and Spotify.
(2) Alarm 2: Select this
16:46
1/3
Repeat: Everyday
Time: 00:00
Sound: Melody
option to enable or
disable alarm 2. Enabling
the alarm will take you to
the submenu containing
the following items:
● Repeat: Select this
option in order to select when the alarm should
be activated. A list of checkboxes will appear
in which you can select Everyday, Once, or
check / uncheck the dierent days of the week
to customize the settings.
● Time: Select this option to set the alarm time.
● Sound: Select this item to select the alarm
sound. The available options are: Beep,
Melody, Internet Radio, USB, and Spotify.
(3) NAP Alarm: Select this option to set the NAP
alarm. The NAP alarm is an alarm that allows
you to take a quick nap and is activated after the
selected preset time has elapsed. The available
10
GB
options for setting the NAP alarm are: Turn o, 5
minutes, 10 minutes, 20 minutes, 30 minutes,
60 minutes, 90 minutes, and 120 minutes.
(4) Alarm Volume: Select this option to set the alarm
volume.
Note:
Refer to the “USING THE ALARMS AND TIMERS”
section in chapter 4 for more information
regarding setting the alarms.
5. Timer: Select this option to set a timer.
6. Scheduled Playing: Select
09:34PM
1/3
Repeat: Everyday
Time: 12:00AM-12:00AM
Sound: Internet Radio
this option to have the radio
play every day during a
specified period. After
selecting this item, a
submenu containing the
following items appears:
(1) Repeat: Select this option in order to select when
scheduled playing should be activated. A list of
checkboxes will appear in which you can select
Everyday, Once, or check / uncheck the dierent
days of the week to customize the settings.
(2) Time: Select this option to set the time during
which scheduled playing should be active.
(3) Sound: Select this option to choose which mode
you want your alarm to play.
7. Language: Select this item to set the language that
the radio’s menus are displayed in.
8. Dimmer: Select this item to configure the dimmer
setting. In the menu that appears, you can either select
Power Saving to change the display’s brightness level
or select Turn On to change the brightness level of the
display in the power on mode.
Note:
The dimmer level can also be set directly by
repeatedly pressing the Dimmer button (i) on the
remote control.
9. Display: Select this option to choose between the
Color and Monochrome display mode.
10. Power Management: Select this option to set when
the radio automatically powers off after being idle.
The available options are: Turn off, 5 minutes, 15
minutes, and 30 minutes.
11. Sleep Timer: Select this item to congure the sleep
timer. The available options are: Turn o, 15 minutes,
30 minutes, 60 minutes, 90 minutes, 120 minutes,
150 minutes, and 180 minutes.
Note:
The sleep timer can also be set directly by
repeatedly pressing the Sleep Timer button (2)
on the radio or the Sleep Timer button (q) on the
remote control. The selected sleep timer duration
will be shown in the right upper part of the display.
12. Local Radio Setup: Select this option to go to a
submenu where you can manually set up your location
for Local radio or allow the radio to Auto Detect your
location.
13. Playback Setup: Select this option to configure the
repeat or shuffle mode when playing music in the
Media Center / USB mode. The available options are:
O, Repeat-All, Repeat One, and Shue.
14. Menu: Select this option to control which items are
displayed in the radio’s main menu. After selecting this
option, a list will appear containing all available main
menu items with a checkbox in front of them. Simply
check the checkboxes of the items that you want to
show in the main menu to customize it to your likings.
15. Equalizer: Select this option to select 1 of the 9
available the equalizer modes. The available equalizer
modes are: Normal, Flat, Jazz, Rock, Soundtracks,
Classical, Pop, News, and My EQ.
Note:
The My EQ mode can also be set using the Next
button (6) on the radio or the Right button (r) on
the remote control.”
16. Resume When Power On: Select this option to
set whether the radio should continue playing when
it is turned on. If this setting is set to On, the radio
will continue playing the content it was playing from
internet radio before it was turned o.
17. Device: Select this option to
09:35PM
1/4
System Information
Rename (WFR-32)
APP
Privacy
open the device submenu
containing the following
items:
(1) System Information:
Select this option to
view the software
version, wireless information (network status,
MAC address, network SSID, IP address, Subnet,
Gateway, DNA1, and DNS2), and Bluetooth
version.
(2) Rename: Select this option to change the name
of the radio. The radio’s name is used when
connecting to it using the MusicAir Control app or
when pairing in the Bluetooth mode.
(3) APP: Select this option to display a QR code that,
when scanned, guides you to a page with links to
the radio’s companion app, MusicAir Control, in
the App Store and Google Play.
(4) Privacy: Select this option to display a QR code
that, when scanned, takes you to the system
Privacy Policy.
18. Software Update: Select this option to update the
radio’s software. If no updates are detected, the radio
will display the message “No update available”.
VERY IMPORTANT:
When updating the radio’s software, do not
switch off the power to the radio until the update
operation is complete and the radio has restarted,
otherwise the unit may become permanently
damaged.
19. Reset to Default: Select this option to reset the radio
to the default settings. Please note that selecting this
option and subsequently selecting Yes will reset the
radio to its factory settings and all information stored
on the radio will be deleted. This includes all settings,
Wi-Fi passwords, and stored presets / favorites.
After the radio has been reset to the default settings,
the radio will restart and the setup wizard will run
11
GB
once again to help setting up the most important radio
settings.
6. LISTENING TO INTERNET RADIO
The WFR-32 Internet Radio is capable of receiving tens of
thousands of internet stations and podcasts from around
the globe when the radio is connected to the internet
through a Wi-Fi network.
In this chapter, you will learn how to tune to internet radio
stations, how to store these stations as preset / favorite
stations and how to recall preset / favorite stations.
TUNING INTO INTERNET RADIO STATIONS
To tune into internet radio stations, first turn on the radio
using the Power button (1) on the radio or the Power
button (a) on the remote control and then select Local
Radio, Internet Radio or local stations (Wi-Fi) from the
radio’s main menu. Local Radio is intended for tuning into
local radio stations, while the Internet Radio submenu
allows you to tune into stations from all around the world.
Since the first option in the Local Radio menu contains
the same station list that can be found under local stations
(Wi-Fi), please refer to the Local Radio menu for more
information about this menu item.
LOCAL RADIO MENU
After selecting Local Radio
09:36PM
1/46
United Kingdom/DAB (Wi-Fi)
United Kingdom/Top10
United Kingdom/ALL
United Kingdom/Adult Contempo
from the main menu, a submenu
will appear in which there are
several ways of selecting a local
internet radio station:
1. United Kingdom / DAB (Wi-
Fi): Select this item to go to
a list of all DAB radio stations from the UK that are also
broadcasting their signal through the internet.
2. United Kingdom / Top10: Select this item to go to a list
with the 10 most popular internet radio stations in the
UK.
3. United Kingdom / All: Select this item to go to a list
with all internet radio station from the UK.
4. United Kingdom / Genre: Finally, there are still several
options to go to genre-specific lists of radio stations.
Simply choose the item corresponding to your favorite
genre (for example, rock) to go to a list with all UK
internet stations broadcasting music of that genre.
Note:
The items in the above menu depend on your location.
Due to different broadcasting systems being used
around the world, European users will see the DAB
(Wi-Fi) item, while users in the US and the Americas
will see the HD(Wi-Fi) and / or FM (Wi-Fi) items.
To tune into a station, simply highlight it in the list
and then press the Volume control (4) on the radio or
Enter button (s) on the remote control.
Note:
If you have not set the radio’s location prior to
accessing the Local Radio menu, the radio will first
show the location selection menu. Please refer to the
“SETTING THE LOCATION” section in chapter 4 for
more information on setting the radio’s location.
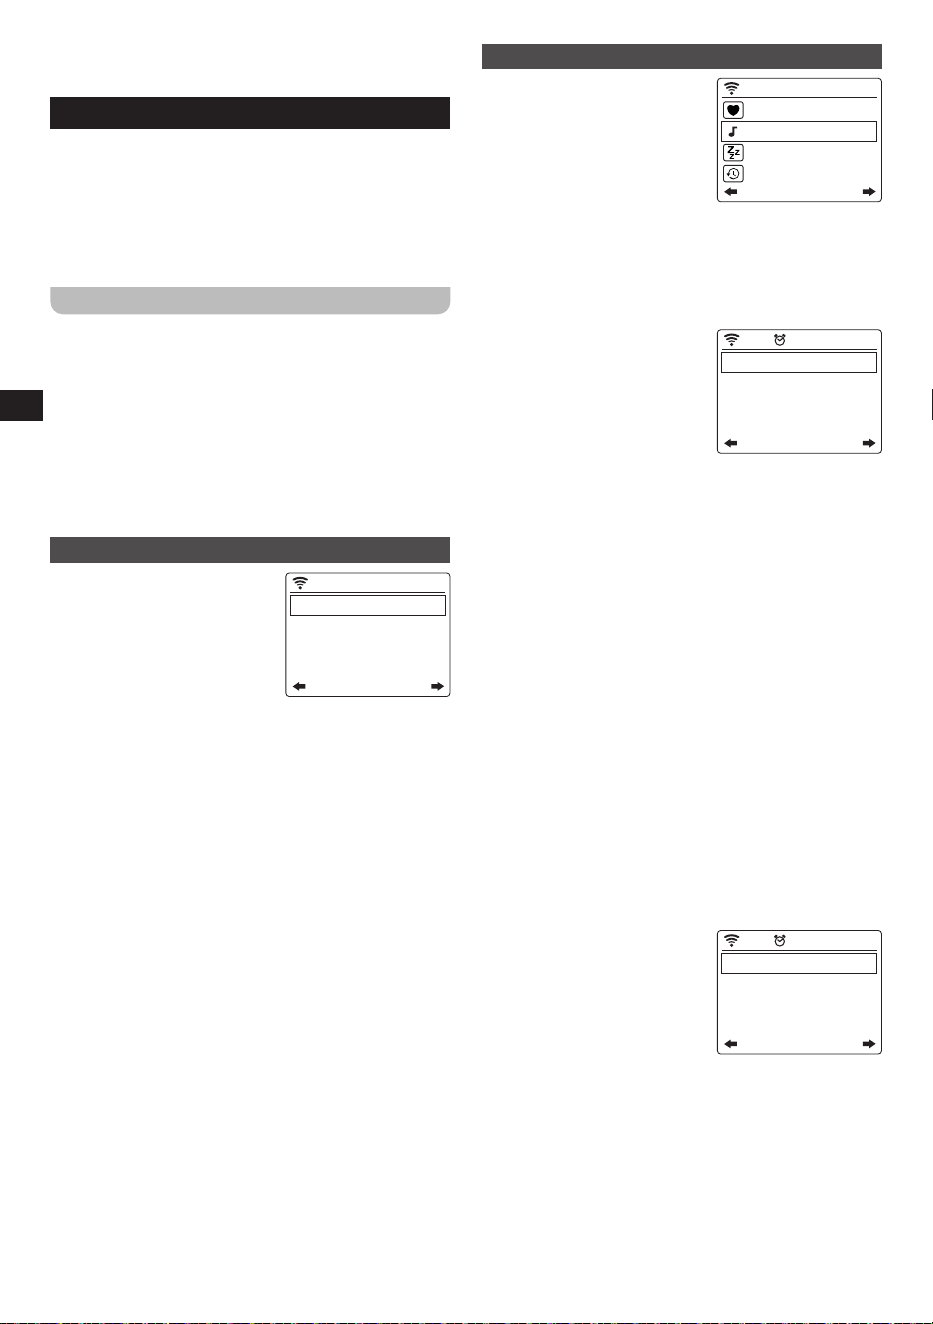
INTERNET RADIO MENU
The Internet Radio menu has
iRadio
2/5
My Favorite
Radio Station
Sleep Radio
History
more options than the Local
Radio menu:
1. My favorite: Select this
option to go to the list with
your favorite stations. These
are the presets that you’ve set
on the radio, as well as any station that you have saved
as a favorite station. Refer to the “USING PRESET /
FAVORITE STATIONS” section later in this chapter for
more information about savings and recalling presets
and favorite stations.
2. Radio Station / Music:
iRadio
1/4
Global Top 20
Genre
Country/Location
Highlight
Select this option to go to the
submenu where you can
select internet radio stations
from around the globe. The
following items are available
in this submenu:
(1) Global Top 20: Select this option to go to a list of
the 20 most popular internet radio stations around
the globe.
(2) Genre: Select this option to search for radio
stations around the world that are broadcasting
a specific genre. After selecting a genre, you can
browse through either the most popular stations in
this genre or through the stations by country.
(3) Country / Location: Select this option to search
for internet radio stations by country. After selecting
a continent and country, you can browse through
either the most popular stations or all stations from
that country.
(4) Highlight: Select this option to go to a list with
recommended internet radio stations.
3. Sleep Radio: Select this option to go to a list with radio
stations that broadcast sounds that will help put you to
sleep safe and sound.
4. History: Select this item to look at the history of the
stations that you have tuned into.
5. Service: Select this option to
iRadio
1/3
Search Radio Station
Add New Radio Station
APP
go to a submenu to add new
internet radio stations that
might not be listed in any of
the other lists or stations that
you simply cannot nd.
(1) Search Radio Station:
Select this option to search for an internet radio
station by name.
(2) Add New Radio Station: Select this option to add
an internet radio station using a URL.
(3) APP: Select this option to have the radio display a
QR code guiding you to the download location of
the AirMusic Control app (the radio’s companion
app). Simply scan the QR code to go to the page
with more information about the download locations
12
GB
for the app.
ADJUSTING THE VOLUME
The volume of the radio can be increased by rotating the
Volume control (4) on the radio clockwise or pressing the
Volume up button (u) on the remote control. The radio
volume can be decreased by rotating the Volume control
(4) on the radio counterclockwise or pressing the Volume
down button (u) on the remote.
The radio’s audio output can be muted by pressing the
Mute button (b) on the remote control. Normal audio can
be resumed by pressing the Mute button (b) or either of
the Volume buttons (u) on the remote control again or by
rotating the Volume control (4) on the radio.
USING PRESET / FAVORITE STATIONS
The WFR-32 can store up to 250 favorite stations.
The procedure for storing preset stations using the
controls on the radio and the remote control is slightly
different., so please follow the correct procedure when
storing internet radio stations as favorites.
STORING PRESET / FAVORITE STATIONS
USING THE RADIO CONTROLS
The radio controls can only be used to save the first 5
favorite stations, which are also the radio presets. Below
are the instructions for using the radio controls to store
stations as preset stations:
1. Turn on the radio using the Power button (1).
2. Tune into the radio station that you want to store in
preset memory as described earlier.
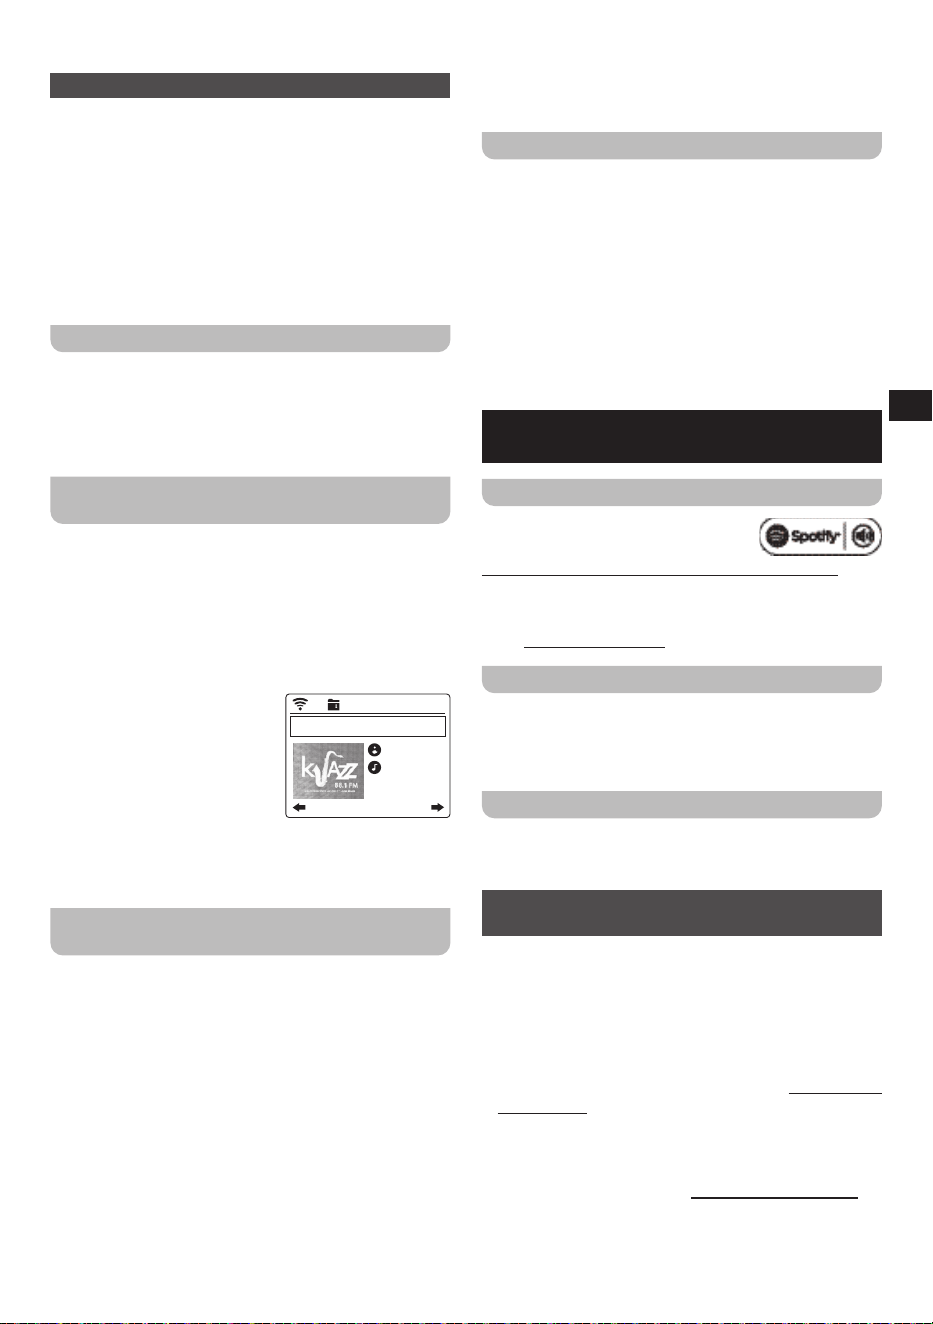
3. Press and hold the Preset
02:28PM
John Klemmer
My Love Has
Butterfly Wings
KKJZKJazz 88.1
button (7) while listening to a
station you want to store A
folder will appear on the
display indicating that the
station was stored.
Note:
Preset / favorite stations that have been added to
the preset / favorite list cannot be added again to a
different preset / favorite number.
STORING PRESET / FAVORITE STATIONS
USING THE REMOTE
The procedure for storing stations using the remote is
slightly different. Follow these steps to store stations using
the remote:
1. Turn on the radio using the Power button (a) on the
remote.
2. Go to any radio station list, highlight a radio station and
then press the Right button (r) on the remote.
3. In the menu that now appears on the radio’s display (12),
select the Add to My Favorite item.
4. The favorite list will now appear on the radio’s display
(12). Use the Up (d) and Down (p) buttons on the
remote to select the desired favorite position for the
radio station. By default, the station will be added to the
end of the list.
Note:
Preset / favorite stations that have been added to
the preset / favorite list cannot be added again to a
different preset / favorite number.
RECALLING PRESET / FAVORITE STATIONS
Stations can be recalled in three easy ways:
● To recall any of the first five favorites (the preset
stations), simply briey press the corresponding Preset
button (7) on the radio.
● From the main menu, go to the Internet Radio -> My
Favorite and select the station you want to listen to
from the list.
● Press and release the Fav.+ button (t) on the remote
control and select the station you want to listen to from
the list.
7. SPOTIFY CONNECT AND MEDIA
CENTER FEATURES
AUDIO PLAYBACK VIA SPOTIFY CONNECT
The Spotify Software is subject to third
party licenses found here:
https://www.spotify.com/connect/third-party-licenses
Use your phone, tablet or computer as a remote control
for Spotify.
Go to spotify.com/connect to learn how.
MEDIA CENTER FEATURES
Aside from Spotify Connect, the WFR-32 also allows you
to connect to various other Cloud Music services, UPnP
servers and USB devices via the Media Center item in
the radio’s main menu.
Podcasts
Select the Podcasts item to search for regular podcasts
through various lists or a search feature and add podcasts
to a favorites list.
AUDIO PLAYBACK VIA CLOUD MUSIC
SERVICES
The WFR-32 has support for various cloud music
services. After selecting “Media Center” in the main menu,
select “Cloud Music” in the Media Center submenu. A
list of available cloud music services will appear on the
display:
1. Amazon Music Amazon Music is an online music
streaming service that requires a paid subscription
to log in and use on this radio. Refer to https://music.
amazon.com/ for more information regarding the use of
this service.
2. Deezer: Deezer is an online music streaming service
that requires you to have a paid subscription, log in and
use on this radio. Refer to https://www.deezer.com for
more information regarding the use of this service.
3. Napster: Napster is an online music streaming service
that requires you to have a paid subscription to log in
13
GB
and use on this radio. Refer to https://www.napster.com
for more information regarding the use of this service.
4. Qobuz: Qobuz is an online music streaming service
that requires you to have a paid subscription to log in
and use on this radio. Refer to https://www.qobuz.com/
for more information regarding the use of this service.
5. TIDAL: TIDAL is an online music streaming service that
requires you to have a paid subscription to log in and
use on this radio. Refer to https://tidal.com/ for more
information regarding the use of this service.
AUDIO PLAYBACK VIA UPNP SERVER
The WFR-32 also support playback from files hosted on
a UPnP server. In most cases, computers will be used as
UPnP servers. The most common and most convenient
UPnP server application is Windows Media Player (version
10 or later), as Windows is the most popular operating
system for home computers and Windows Media Player is
built into the Windows operating system.
SETTING UP A UPNP SERVER AND PLAYING
AUDIO USING WINDOWS MEDIA PLAYER
Follow these steps to set up a UPnP server using
Windows Media Player (version 10 or later):
1. Turn on your PC and make sure it is connected to the
same network as your WFR-32.
2. Make sure the WFR-32 is turned on as well and the
UPnP item is selected in the Media Center menu.
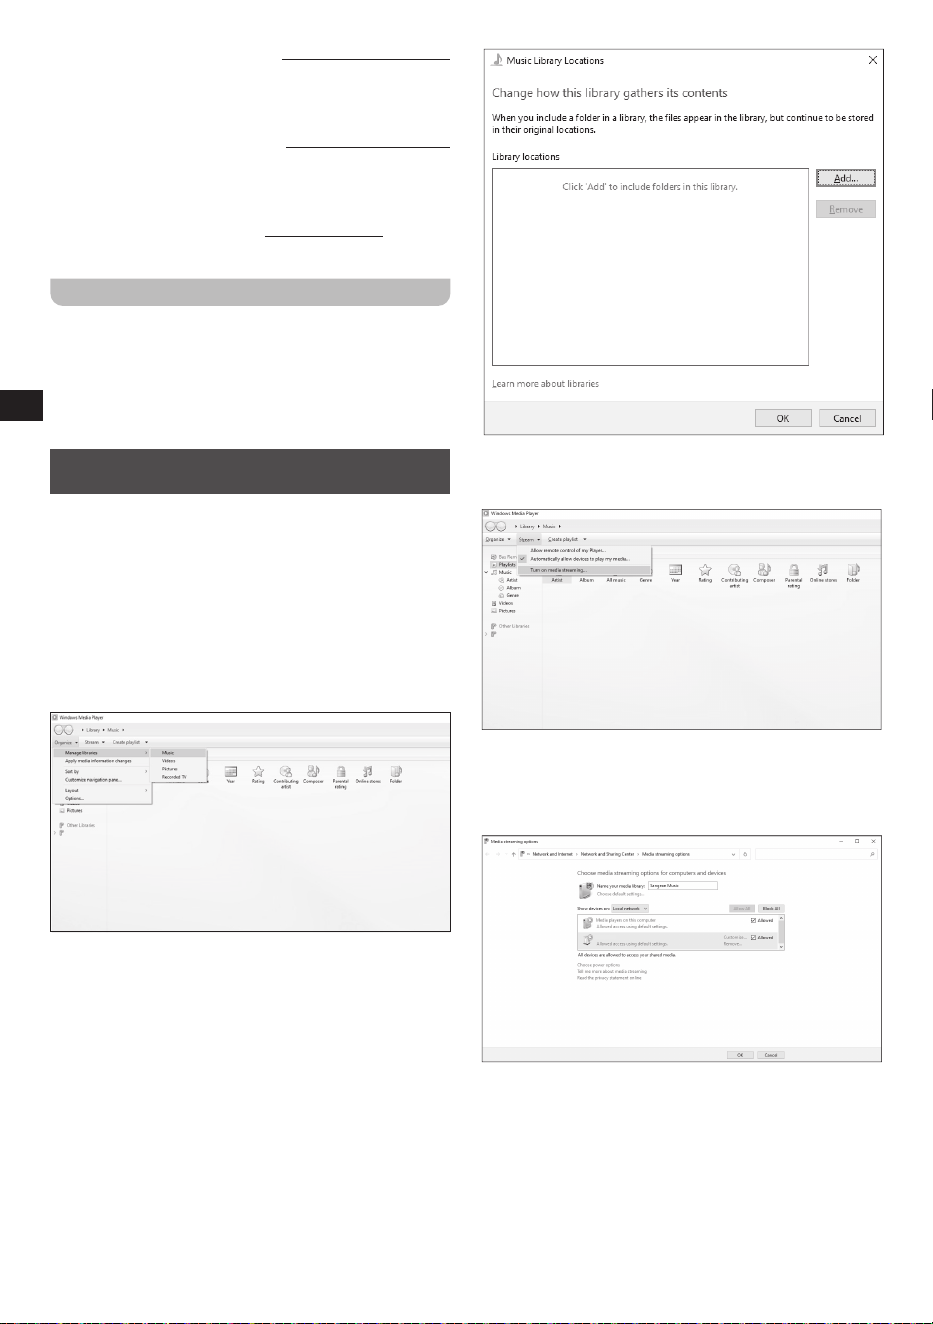
3. Add the music les, and folders that you want to share
with the radio to your Windows Media Player library by
clicking Organize > Manage libraries > Music on the
computer.
WFR-32
4. Click on the Add… button in the window that appears
on the computer to add folders and / or les and click
on the OK button after adding all your les and folders
to your music library.
5. After completing setting up your music library, click
on Stream > Turn on media streaming… on the
computer.
WFR-32
6. After turning on media streaming, a new window will
appear in which you can configure which devices
have access to the media library. Make sure the radio
(“WFR-32” in the screenshot below) is allowed access
to the media library and click OK on the computer.
WFR-32
7. The radio will now be able to browse through the
media library shared on the PC. Simply select the le
or playlist that you want to play on the radio to enjoy
your PC’s music library through your radio’s speaker.
8. When you first set up sharing with a UPnP server,
not all of your les will be available immediately. The
UPnP server must look inside each le to identify the
artist and album information from ‘tags’ embedded in
them. The server may also need time to access the
Internet to obtain additional information such as ‘album

14
GB
art’, which it can display when you examine your
music library on your PC. For a library of many les
this can take some time.
If the display shows “empty”, please leave the UPnP
mode first, wait 3 to 5 minutes for the device to search
for files on the UPnP server, and then enter the UPnP
mode again.
9. After playback has started, the display will show the
“Now Playing” screen with cover art (if available), the
artist’s name, the title name, the album name, the
composer’s name and the playback progress. Press
the repeatedly on the Next button (6) on the radio or
Right button (r)on the remote control to zoom in on the
cover art or view it in full screen.
10. Playback can be controlled using the remote
controlled using the Play / Pause (g), Next track (n),
Previous track (h), Repeat (k), and Shue (l) buttons
on the remote control.
CASTING MUSIC TO THE RADIO
Windows Media Player also allows users to cast music to
the radio. This can be convenient when you are working
on your PC and want to play songs through the radio’s
speaker without having to actually control the radio.
Follow these steps to cast songs to the WFR-32:
1. Make sure all steps from the previous section have
been followed, that the radio is still in the UPnP mode
and that both the PC and the radio are still connected to
the same network.
2. Go to your music library in Windows Media Player and
right click on a song, album, genre, or playlist and then
select Cast to > WFR-32.
3. The song (s) will now be cast to the radio and
automatically played through the radio’s speaker.
Note:
Some Windows security software can prevent correct
operation of the ‘Play to’ / ’Cast to Device’ function.
Such software may have updates or configuration
options which will permit ‘Play to’ / ’Cast to Device’
to operate correctly - please consult your anti-virus
software supplier.
USING UPNP SERVER ON MAC OR LINUX
Although this manual only describes how to set up a
UPnP server on Windows using Windows Media Player,
there are similar applications available for macOS and
Linux.
A list of UPnP server applications for your platform can be
found at https://en.wikipedia.org/wiki/List_of_UPnP_AV_
media_servers_and_clients.
Please refer to the documentation that is provided with
these applications for more information on how to set up
the server.
SUPPORTED FORMATS
MP3 (bit rate up to 320 Kbits / s, sampling rate up to 48
KHz)
AAC / AAC+ (bit rate up to 320Kbits / s, sampling rate up
to 48 KHz)
WMA (bit rate up to 320 Kbits / s, sampling rate up to 48
KHz)
WAV / FLAC (sampling rate up to 48 KHz)
AUDIO PLAYBACK VIA USB STORAGE
DEVICE
As the option for USB playback is also available from the
main menu, more information about USB playback can be
found in the next chapter.
8. LISTENING TO MUSIC VIA USB
DEVICE
The WFR-32 is equipped with two USB ports, one for
charging USB devices and one for USB playback. If you
want to listen to music using a USB device, make sure
you connect the USB device to the USB playback port (14).
PLAYBACK FROM A USB DEVICE
Follow these steps to playback music from a USB device:
1. Insert the USB device into the USB playback port.
2. Turn on the radio using the Power button (1) on the
radio or the Power button (a) on the remote.
3. Select the USB menu from the radio’s main menu.
4. The radio’s display will now show all les and folders on
the USB device. Use the radio’s controls or the remote
control to select the le or playlist that you want to play
on the radio.
5. After playback has started, the display will show cover
art (if available), the artist’s name, the track name and
the playback progress. repeatedly press the Next button
(6) on the radio or Right button(r) on the remote control
to zoom in on the cover art or view it in full screen.
Note:
The radio only supports the FAT, FAT32, and exFAT
file systems, so make sure your USB device has been
formatted using the file system. Your radio is unable
to play from media formatted using the NTFS file
system.
Important:
Your radio is only designed to work with USB flash
memory devices. It is not intended to be connected to
hard disk drives or any other type of USB device.
The WFR-32 has been tested to support USB memory
devices with a capacity of up to 256GB. However,
there are many different memory devices available
and not all memory devices can be guaranteed to
work with the WFR-32.
Playback does not support files encoded using WMA
lossless, WMA Voice, WMA 10 professional, nor files
of any format which have DRM protection.
Unless you have only a few files on the USB memory
device, do not store all files in the same root folder.
The number of items (files / sub-folders) in any folder
should be less than 1000.
Searching and playback will be more responsive if
the number of files in any one folder is limited (we
suggest no more than 200).
It is recommended that the USB memory is
reformatted in your computer before adding your

15
GB
music files.
The maximum depth of folder nesting permitted is 8
folder levels (but playback is only from the currently
selected level).
Cautions:
In order to minimize the risk of damage to your radio
and your USB memory device, please place the unit
in such a manner that the device cannot easily be
knocked while it is inserted in the socket.
Remove the USB device before carrying the unit or
if not using the USB feature for a prolonged period.
Press the power button on the radio (1) or press the
power button on the remote (a) to enter Standby mode
when removing your USB memory device.
SUPPORTED FILE FORMATS
MP3 (bit rate up to 320 Kbits / s, sampling rate up to 48
KHz)
AAC / AAC+ (bit rate up to 320Kbits / s, sampling rate up
to 48 KHz)
WMA (bit rate up to 320 Kbits / s, sampling rate up to 48
KHz)
WAV / FLAC (sampling rate up to 48 KHz)
USING THE USB CHARGING PORT FOR
CHARGING A USB DEVICE
If you want to charge a USB device (such as your
smartphone), connect the device to the USB charging port
(15) using a suitable USB cable (not supplied) and make
sure the radio is connected to the mains supply.
Note:
The USB charging port (15) supports a maximum
output power of 5V / 1A.
9. LISTENING VIA BLUETOOTH
STREAMING
In order to stream Bluetooth music to your radio, you need
to pair your Bluetooth device with your WFR-32. Pairing
creates a ‘bond’ so two devices can recognize each other.
PAIRING YOUR BLUETOOTH DEVICE FOR
THE FIRST TIME
1. Turn on the radio using the Power button (1) on the
radio or the Power button (a) on the remote.
2. Select the Bluetooth option in the radio’s main menu to
switch to the Bluetooth mode.
3. Activate Bluetooth on your Bluetooth device (refer to the
manual of the Bluetooth device if you are unsure about
how to active Bluetooth).
4. Go to the Bluetooth list on your Bluetooth device
and select the device named “WFR-32” (if you
have changed the name of the radio in the radio’s
Configuration menu, search for the name you have
given the radio instead).
Note:
On some Bluetooth devices with Bluetooth version
2.1 or earlier, you might be requested to enter a pass
code. If this is the case, enter the pass code “0000”.
5. After the devices have paired and connected, a
confirmation tone will be played on the radio and the
white bar near the top of the radio’s display will show
the message “Bluetooth Connected”.
You can now play music on your Bluetooth device and
stream the music through the radio’s speaker.
Notes:
● If 2 Bluetooth devices are pairing for the rst time,
both must search for your radio, it will show its
availability on both devices. However, if one device
links with this unit first, then the other Bluetooth
device won’t nd it on the list.
● If you take your Bluetooth device out of range,
the connection between your device and the radio
will be temporarily disconnected. Your radio will
automatically reconnect if the Bluetooth device is
brought back into range. Be aware that during the
period of disconnection, no other Bluetooth device
can pair or link with your radio.
● If “WFR-32” shows up in your Bluetooth device list,
but your Bluetooth device cannot connect with it,
please delete the item from your list and pair the
Bluetooth device with the radio again following the
steps described previously.
● The effective operation range between the radio
and the paired Bluetooth device is approximately 10
meters (30 feet). Any obstacle between the system
and the device can reduce the operational range.
● Bluetooth connectivity performance may vary
depending on the connected Bluetooth device.
Please refer to the Bluetooth capabilities of your
device before connecting it to your radio. Not all
features may be supported, depending on the
Bluetooth device used.
● With some mobile phones, making / receiving
calls, text messages, e-mails or any other activities
unrelated to audio streaming may mute the
Bluetooth audio streaming or even temporarily
disconnect from your device. Such behavior is
a function of the Bluetooth device and does not
indicate a problem with your WFR-32.
AUDIO PLAYBACK IN THE BLUETOOTH
MODE
When you have successfully connected your radio with
the chosen Bluetooth device you can start to play your
music using the controls on your connected Bluetooth
device.
1. Once playback has started, the display will show cover
art (if available), the connected Bluetooth device name,
the artist’s name, the track name, the album name and
the playback progress. repeatedly press the Next button
(6) on the radio or Right button (r) on the remote control
to zoom in on the cover art or view it in full screen.
2. Adjust the volume to the required setting using the
Volume control (4) on the radio, the Volume buttons (u)
on the remote control or on your Bluetooth device.
3. Use the controls on your Bluetooth source device to
play / pause and select tracks. Alternatively, playback

16
GB
can be controlled using the remote control using the
Play / Pause (g), Next track (n), and Previous track
(h) buttons on the remote control or by pressing and
holding the Previous (5) and Next (6) buttons on the
radio to go to the previous or next track.
Note:
Not all player applications or devices may respond to
all of these controls.
AUDIO PLAYBACK FROM A PREVIOUSLY
PAIRED BLUETOOTH DEVICE
The WFR-32 can memorize up to 8 sets of paired
Bluetooth devices. Once more than 8 devices have been
connected, the earliest device with which the radio was
paired will be overwritten in the radio’s memory.
If your Bluetooth source device has previously paired with
the WFR-32 previously, the radio will still remember your
Bluetooth device and attempt to reconnect with the device
that was last connected. If the last connected Bluetooth
device is not available, the radio will try to connect to the
second last Bluetooth device.
DISCONNECTING YOUR BLUETOOTH
DEVICE
To disconnect your Bluetooth device, either turn off
Bluetooth on the Bluetooth device or switch to another
mode on the radio, for instance by tuning into an internet
radio station. If you disconnect the Bluetooth device
when the radio is in the Bluetooth mode, the white bar
near the top of the radio’s display will show “Bluetooth
Disconnected” and the radio will be available for pairing
again.
To connect to a different device, press the pair button on
the remote or apply a long press on the volume control on
the radio.
10. LISTENING TO MUSIC USING THE
AUX IN JACK
You can listen to the sound of an external device through
your WFR-32’s speaker. To do this, follow these steps.
1. Connect the external device (such as iPod, MP3 player
or CD player) to the radio’s Aux-in port (16) using a
3.5mm audio cable (not supplied).
2. Make sure both the radio and the external device are
turned on.
3. Select the AUX option in the radio’s main menu.
4. The audio output of the external device will now be
played through the speaker of your WFR-32. The
volume can be adjusted using the radio’s Volume
Control (4) or the Volume buttons (u) on the remote
control.
11. LISTENING TO MUSIC USING THE
HEADPHONE JACK
The WFR-32 is equipped with a Headphone jack (17)
on the back of the radio, which can be used to connect
a pair of headphones with a 3.5mm plug. To connect the
headphones, simply plug the 3.5mm jack into the socket.
The radio will then automatically detect that a pair of
headphones has been connected and it will disable its
internal speaker.
We recommend turning the volume down before
connecting the headphones and raising it slowly to a
suitable level after connecting the headphones to avoid
loud sounds and damaging your hearing.
Note:
Excessive sound pressure from earphones and
headphones can cause hearing loss. To prevent
possible hearing damage, do not listen at high volume
levels for long periods of time.
Troubleshooting
Observation Potential Cause / Solution
No Power / function
● Check if the power switch
has been turned to the
ON position.
● Check if the power
adaptor is properly
connected to the power
outlet.
Function disturbance
● Try performing a factory
reset.
● Turn the power switch to
the OFF position. Leave
it there for 1 minute and
switch the radio back on
again.
No Internet Connection
● Ensure Wi-Fi mode is
selected in settings and
that the correct password
has been entered for the
network.
● Try performing a factory
reset and then try
reconnecting.
● Turn the power switch to
the OFF position. Leave
it there for 1 minute and
switch the radio back on
again.
Time or date are wrong
● Check the Clock settings
and set the time once
again.
17
GB
SPECIFICATIONS
AC Power Adapter Requirements DC 9V / 2.5A Center Pin Positive (+)
Included Remote Control Battery 2 x 1.5V Size "AAA" / UM-4 / R03
Wi-Fi
The frequency and maximum transmitted
power
2412MHz ~ 2472MHz for 11b / g / n (HT20) / 11n (HT40): 17.96dBm
802.11b / g / n (WLAN) Encryption WEP, WPA, WPA2 (PSK), WPS
Bluetooth
Bluetooth Specification Bluetooth
®
Ver 5.0
Profile Support A2DP v1.3, AVRCP v1.6
Bluetooth Audio Codec SBC / AAC
Transmitting Power Class 2
Line of Sight Range 10meters / 30feet
The frequency and maximum transmitted
power
2402MHz ~ 2480MHz
:
2.66dBm (Bluetooth EDR)
Loudspeaker 2.5” 8ohm x 2 full range
Output Power 3W + 3W
USB Type-A Ports
USB-L (
): 5V / 1A;
USB-R (
): 5V / 1A
Headphone Socket 3.5mm diameter Stereo Output
Auxiliary Socket 3.5mm diameter Stereo Input
Operating Temperature Range 0°C to +35°C
Information on Power Consumption
Off mode
This device does not have a standby mode, and its power consumption
in the off mode is less than 0.3W.
Bluetooth mode
In Bluetooth mode, when there is no signal output, the idle power
consumption is 3.7W after 15 minutes.
AUX mode
In AUX mode, when there is no signal output, the idle power
consumption is 3.4W after 15 minutes.
※
The barcode label on the product is defined as below:
Serial number
Production month
Production year
Product code
SANGEAN reserves the right to amend the specifications without notice.
DISPOSAL OF YOUR OLD PRODUCT
If at any time in the future you should need to dispose of this product please note that: Waste electrical products
should not be disposed of with household waste. Please recycle where facilities exist. Check with your Local
Authority or retailer for recycling advice. (Waste Electrical and Electronic Equipment Directive)
