
GB
Version 1
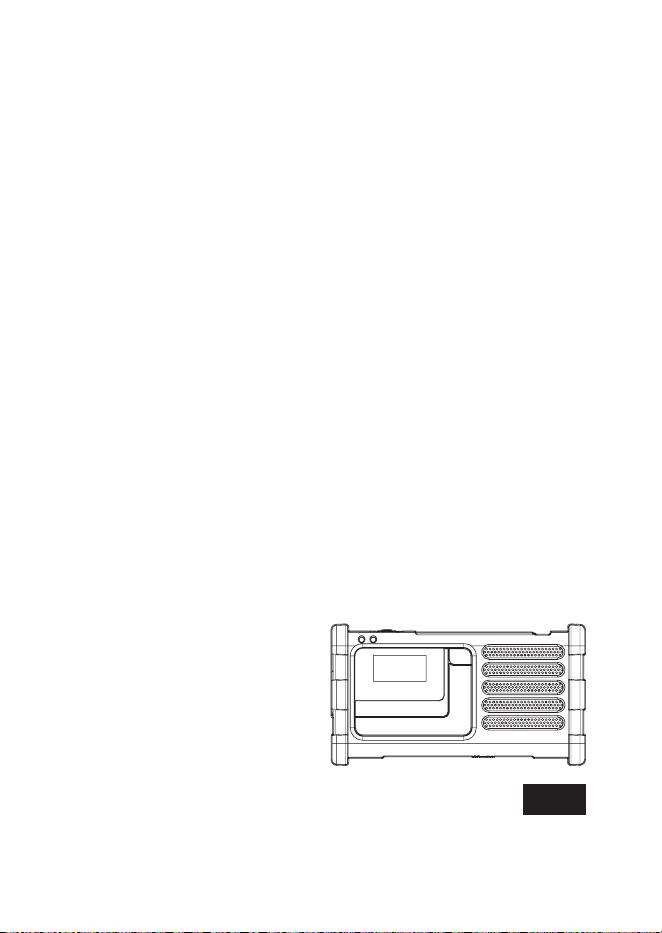
MMR-88DAB

1
Important safety instructions
1. Please read these instructions carefully.
2. Please keep these instructions for future reference.
3. Heed all warnings.
4. Follow all instructions.
5. Do not use this apparatus near water.
6. Clean only with dry cloth.
7. Do not block any ventilation openings. Install in accordance with the
manufacturer's instructions.
8. Do not install near any heat sources such as radiators, heat
registers, stoves or other apparatus (including amplifiers) that
produce heat.
9. Do not defeat the safety purpose of the polarized or grounding-type
plug. A polarized plug has two blades with one wider than the other.
A grounding type plug has two blades and a third grounding prong.
The wide blade or the third prong are provided for your safety. If the
provided plug does not t into your outlet, consult an electrician for
replacement of the obsolete outlet.
10. Protect the power cord from being walked on or pinched particularly
at plugs, convenience receptacles and the point where they exit from
the apparatus.
11. Only use attachments/accessories specied by the manufacturer.
12. Use only with the cart, stand, tripod, bracket or table specied by the
manufacturer or sold with the apparatus. When a cart is used, use
caution when moving the cart/apparatus combination to avoid injury
from tip-over.
13. Unplug this apparatus during lightning storms or when unused for a
long period of time.
14. Refer all servicing to qualified service personnel. Servicing is
required when the apparatus has been damaged in any way, such
as power-supply cord or plug is damaged, liquid has been spilled
or objects have fallen into the apparatus, the apparatus has been
exposed to rain or moisture does not operate normally or has been
dropped.
15. Apparatus shall not be exposed to dripping or splashing and no
objects filled with liquids, such as vases, shall be placed on the
2
GB
apparatus.
16. To reduce the risk of fire or electric shock, do not expose this
apparatus to rain or moisture.
17. The battery shall not be exposed to excessive heat such as
sunshine, re or the like.
18. CAUTION: Danger of explosion if battery is incorrectly replaced.
Replace only with the same or equivalent type.
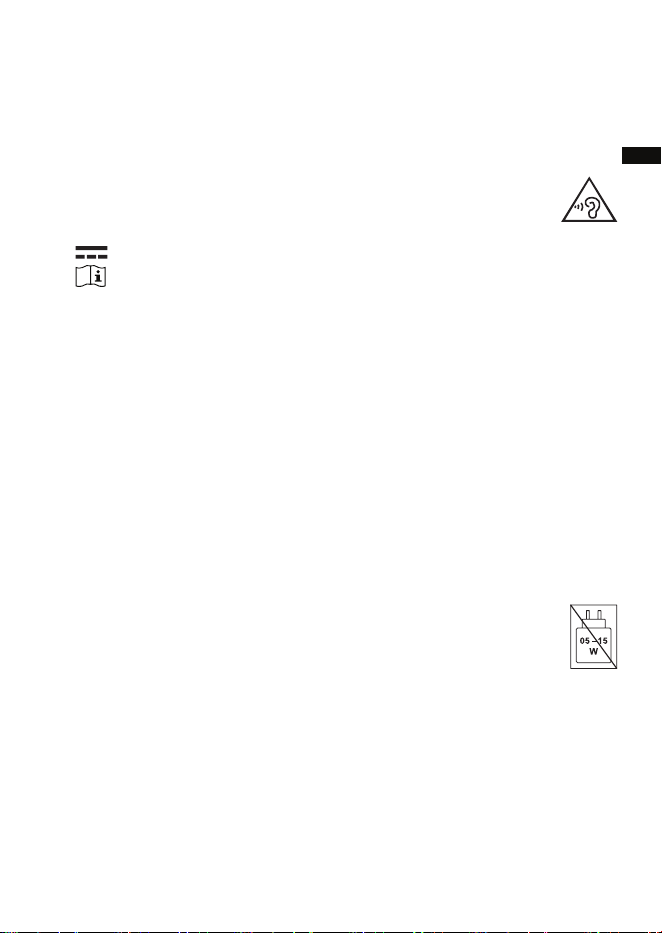
19. To prevent possible hearing damage, do not listen at high
volume levels for long periods.
20. The symbol indicates DC voltage.
21. Use only power supplies listed in the user instructions.
22. Replacement of a battery with an incorrect type that can defeat a
safeguard (for example, in the case of some lithium battery types).
23. Disposal of a battery into re or a hot oven, or mechanically crushing
or cutting of a battery, that can result in an explosion.
24. Leaving a battery in an extremely high temperature surrounding
environment that can result in an explosion or the leakage of
ammable liquid or gas.
25. A battery subjected to extremely low air pressure that may result in
an explosion or the leakage of ammable liquid or gas.
CAUTION:
To reduce the risk of the electric shock, do not perform any servicing
other than that contained in the operating instructions unless you are
qualied to do so.
Important Notes:
1. It is recommended to purchase an adapter from SANGEAN that
matches the power range indicated on the gift box.
2. When using a non-SANGEAN adapter, the functionality of the
radio may be aected, such as the reception of radio stations.
3. When using an adapter that does not fall within the power range
indicated on the gift box, please pay attention to the following:
(a) A higher-power PD adapter may be used, but the radio
functionality, such as receiving radio stations, may be impacted.
(b) A lower-power adapter should not be used to avoid unforeseen
risks.
3

4
GB
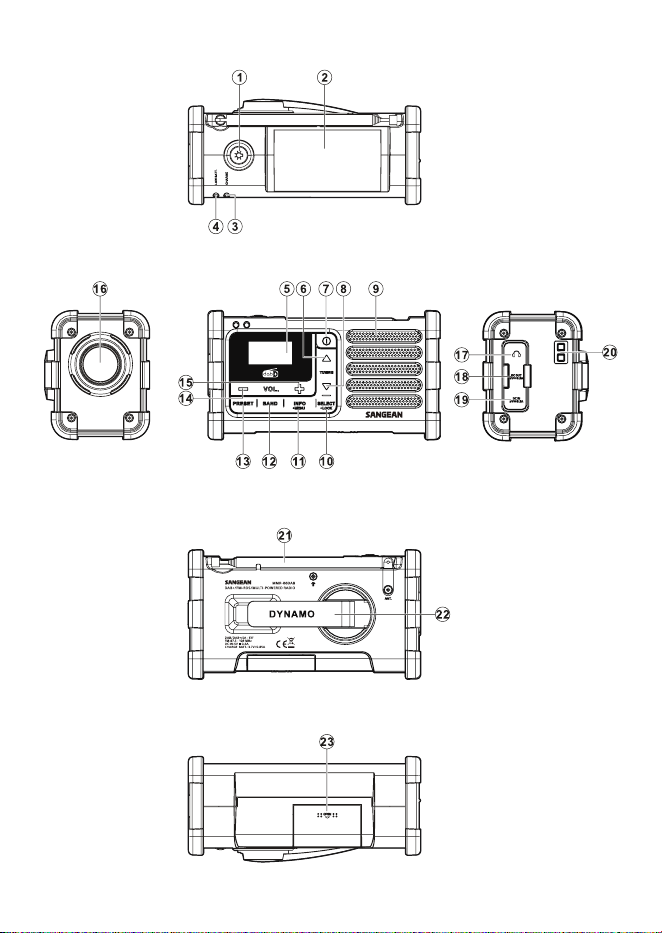
Controls
LED Flashlight button
Solar charging panel
Charging indicator
Low battery indicator
LCD display
Tuning up button
Power button
Tuning down button
Speaker
Select/Lock button
Info/Menu button
Band button
Preset button
Volume Control -down
Volume Control - up
LED Flashlight
3.5 mm headphone socket
DC OUT USB-A charging socket
DC IN USB-C charging socket
Carrying strap holder
Telescopic antenna
Dynamo power hand crank
Battery compartment
The MMR-88DAB is powered by the supplied 850mAh rechargeable
lithium-ion battery. Before using the radio for the rst time, ensure
that the battery is fully charged.
Inserting the supplied rechargeable battery
1. Open the battery compartment on the bottom of the unit by pushing
the battery door following the arrow direction.
2. Insert the supplied rechargeable battery into the space in the
compartment. Make sure the battery is inserted with correct polarity as
shown in the compartment.
23
22
21
19
20
18
17
16
15
14
13
12
11
10
9
8
7
6
5
4
3
2
1

5
Charging the radio
Please use one of the following methods to charge your radio.
Using the DC IN socket
The radio is powered by the supplied lithium-ion battery, which can
be recharged by connecting a USB power source to the radio's DC IN
charging socket.
Use a USB power source that supplies 5V/0.5A to ensure proper
charging and prevent battery issues.
Signs that the battery needs recharging include reduced power, audio
distortion, stuttering sounds, or illumination of the low battery indicator.
To charge the battery:
1. Connect the USB-C end of the supplied charging cable to the USB-C
socket on the right-hand side of the radio.
2. Connect the other end of the cable to a USB-A power source, such as
a PC, USB charger, or power bank.
● When the radio is turned on, a charging animation appears on the
display and the charging indicator lights up. Once fully charged, the
animation stops and the charging indicator turns o.
● When the radio is turned off, only the charging indicator lights up
during charging and turns o once the battery is fully charged. If no
rechargeable battery is inserted into the battery compartment, the
red charging indicator will ash.
Charging time is approximately 2 hours for a full charge. When fully
charged, the radio can play for approximately 10 hours.
Using Dynamo power
1. Make sure the telescopic antenna is in the rest position before rotating
the dynamo handle.
2. Take the Dynamo power handle from its rest position.
3. Rotate the Dynamo power handle approx. 120 rotations per minute,
either clock-wise or counter-clock wise until the charging LED indicator
appears red.

6
GB
4. Under normal listening conditions, one minute of charging from
Dynamo power will allow you to listen to the radio for approx. 5-7
minutes.
5. Make sure the handle is in its rest position after charging is completed.
Using solar power
Important:
The radio does not need to be switched on in order for the solar panel to
operate.
1. In order to recharge your MMR-88DAB battery using solar power,
position the radio so that the solar panel receives direct sunlight. The
more direct sunlight that shines on the solar panel, the more electricity
it can generate to power the radio.
2. Adjust the position of the radio to achieve maximum brightness of the
CHARGE indicator LED.
3. It takes approx.15 hours to fully charge the battery under direct
sunlight.
Note:
The best performance of the solar panel will be achieved when the sun
is directly overhead, and the sunlight is unobstructed by clouds, foliage,
curtains etc. In certain situations and poor light conditions, the solar
panel may not be eective and should not be relied upon as the primary
energy source for standard usage. The solar panel is designed as a
supplementary energy source which under suitable light conditions is
able to contribute up to 100% of the radio energy requirements.
The solar panel will charge the battery only under natural sunlight. It will
not deliver a charge in articial light.
DO NOT attempt to charge the battery by placing the solar panel directly
under any kind of sun-lamp, this will cause irreversible damage to the
radio and may damage the casing. (Doing so will void all warranties.)

7
Initial operation-DAB
1. Carefully straighten up the antenna and press the Power button to turn
on the radio.
2. The display will show “Welcome to Digital Radio” and start to scan
the entire DAB channel range and stop at the first found station. If
the radio has been used before, the last used station will be selected.
Press the Select button to play the station.
3. Press the Tuning up/down button to display station list and nd desired
station. Press the Select button to select the station. The radio will
tune to the station and display the station name.
4. Adjust the volume control for comfortable listening.
Note:
Due to the conductivity of the human body the reception of DAB stations
may not be possible or become unstable when the antenna touches your
body or is very close to your body.
Service information-DAB
The Service Information display – Technical information on the current
status of the station being broadcast.
While listening to DAB, press and release the Info/Menu button to cycle
through information on:
a. Radio text-Displays text messages such as the artist or track name,
phone in number, trac alerts, etc.
b. Signal error/strength-Displays the signal error for the station being
listened to. A low error number indicates a better quality of radio
signal. The signal strength graph can be used when positioning the
radio or its antenna. For good reception the graph should occupy three
or more blocks.
c. Program type (PTY)-Displays the type of station being listened to
such as Pop, Classic, News etc.
d. Multiplex Name-Displays the name of the DAB multiplex to which the
current station belongs as well as its broadcast frequency.
e. Channel and frequency-Displays the channel number and frequency
for the current DAB radio station.
f. Bit rate and audio type-Displays the digital bit rate and audio coding
information for the station being listened to.
g. Format-Displays the format for the station being listened to.
h. Date-Displays the current date.

8
GB
Menu functions-DAB
Press the Power button to turn on the radio. Press and hold the Info/
Menu button to enter DAB menu list.
Then press the Tuning up/down button to scroll through the following
options: Full Scan/Manual tune/DRC value/Station order/Prune/System.
Press the Select button to conrm your selection.
A) Full scan:
Scan the whole DAB network in your area. Radio will tune to the rst
station found after the scanning is completed.
B) Manual tune:
Press the Tuning up/down button to scroll through the whole DAB
channel. Press the Select button to select required channel.
C) DRC (Dynamic Range Control): GB
The DRC facility can make quieter sounds easier to hear when your
radio is used in a noisy environment. Use the Tuning up/down button
to highlight the required DRC setting.
DRC O: DRC is switched o, broadcast DRC will be ignored.
DRC High: DRC is set as sent by broadcaster.
DRC Low: DRC level is set to 1/2 that sent by broadcaster.
Note:
Not all DAB broadcasts are able to use the DRC function. If the
broadcast does not support DRC, then the DRC setting in the radio
will have no eect.
D) Station order:
Your radio has 2 station order settings from which you can choose.
The station order settings are as following.
Alphanumeric: sorts the station list alpha-numerically 0…9…A…Z.
Ensemble: organizes the station listed by DAB multiplex.
The current setting is indicated by an asterisk.

9
E) Prune:
If you move to a different part of the country, some of the stations
which were listed may no longer be available. Also, from time to time,
some DAB services may stop broadcasting, or may change location
or frequency. Stations which cannot be found, or which have not
been received for a very long time are shown in the station list with
a question mark. The Prune stations function will delete the marked
DAB stations from your station list.
1) Press the Select button to enter prune station function.
2
)
Press the Tuning up/down button to select “YES” or “NO” and press
the Select button to conrm the setting. Select “YES” to cause the
stations lists to be pruned, eliminating unavailable stations. If you
do not wish to prune stations, select “NO” and the display will revert
to the previous menu.
F) System:
Press the Select button to select from the following settings.
● Time/Date
Manual setting the clock
1) Press the Tuning up/down button until ‘Time/Date’ is highlighted. Then
press the Select button to enter the setting.
2) Press the Tuning up/down button until ‘Set Time/Date’ is highlighted.
Then press the Select button to enter the time setup. The day digits
will ash.
3) Press the Tuning up/down button until the correct day is shown on
the display. Press the Select button to conrm the setting. The month
digits will then ash. Press the Tuning up/down button to select the
correct month. Press the Select button to confirm the setting. The
year digits will then ash. Press the Tuning up/down button to select
the correct year. Press the Select button to conrm the setting.
4) Follow the same procedure above for the hour/ minute setting. If the
radio has been set to use a 12 hour format, there will be an option for
setting AM or PM for the clock time.
Automatically updating the clock
1) Press the Tuning up/down button until ‘Time/Date’ is highlighted. Then
press the Select button to enter the setting.
2) Press the Tuning up/down button until ‘Auto update’ is highlighted.
Then press the Select button to enter the auto-update menu.
3) Press the Tuning up/down button to choose an update option from
‘Update from Any’, ’Update from DAB’, ‘Update from FM’, ‘No update.’
Press the Select button to conrm your choice.

10
GB
Setting the clock format:
The clock display can be set to 12 or 24 hour format.
1) Press the Tuning up/down button until ‘Time/Date’ is highlighted. Then
press the Select button to enter the setting.
2) Press the Tuning up/down button until ‘Set format’ is highlighted on
the display. Press the Select button to enter the clock format setting.
The current clock format is marked with asterisk.
3) Press the Tuning up/down to select either 12 or 24 format. Press the
Select button to conrm your choice.
● Contrast: the contrast of the display can be adjusted.
Press the Tuning up/down button to adjust the contrast. The contrast
level indication on the screen will change at the same time. When you
nd the setting that gives the best legibility for the location in which
the radio is used, press the Select button to save the setting.
● Language: your radio can be congured to a dierent language.
Press the Tuning up/down button until your required language is
highlighted on the display. Press the Select button to confirm your
choice.
● Factory reset: by performing a factory reset, all users entered
settings will be erased.
Press the Tuning up/down button to select “YES” or “NO”. If you do
not wish to carry out a system reset, select “NO” and press the Select
button. Select “YES” to erase all saved settings and all settings will
revert to factory default. Press the Select button to conrm the setting.
● Software upgrade
Software updates for your radio may be available in the future. When
available, the update software and instructions can be found at:
www.sangean.com
For further information, please contact our Head Oce at:
IMPORTANT:
Do not perform software updates unless instructed by our technician.
● SW version: The software display cannot be altered and is just for
your reference Press the Select button to view the software version
installed in the radio. Press the Select button again to revert to the
previous menu.

11
Operating your radio-FM (Manual tuning)
1. Carefully straighten the antenna and turn on the radio by pressing the
Power button.
2. Press the Band button to select FM radio mode.
3. Press the Tuning up/down button to control the frequency that the
radio will tune to. The frequency will change in steps of 50KHz. When
the end of the waveband is reached the radio will recommence tuning
from the opposite end of the waveband.
4. Press the Volume buttons to adjust the sound level as needed.
5. To switch o your radio, press the Power button.
Scan tuning-FM
1. Press and hold the Tuning up/down button.
2. The radio will search in an upwards or downwards direction until
it finds a station of sufficient signal strength. If the signal is strong
enough and there is RDS data present then the radio will display the
station name. When the waveband end is reached, your radio will
recommence tuning from the opposite waveband end.
Service information-FM RDS
Your radio has a range of display options when in FM mode:
1. Press and release the Info/Menu button to cycle through the dierent
options.
a. Radio text-Displays scrolling text messages such as artist/track
name, phone in number etc.
b. Program type-Displays the information for the station being listened
to e.g. Pop, Classic. News, etc.
c. Frequency-Displays the frequency of the FM signal.
d. Audio type-Displays the audio type of the station being listened to.
e. Date-Displays the current date.
Note:
If no RDS information is available, the radio will be unable to display the
station name, radio text and program type information.
The radio only provides displays when there is information available.
The stereo speaker display shows that the radio is receiving a stereo
broadcast.

12
GB
Menu functions-FM
Press and hold the Info/Menu button to enter FM menu list. Then press
the Tuning up/down button to scroll through the following options: FM
Scan zone/FM audio/System (for the functions of System, please refer to
the above sections described in DAB mode). Press the Select button to
conrm your selection.
A) FM scan zone:
Your radio includes a local/distant option for the auto-scan function.
By setting the radio to the 'local' scan option, weaker signals from
more distant transmitters can be ignored by the radio, making
stronger signals easier to nd.
Press the Tuning up/down button to choose between ‘Local’ (Strong
stations only) and ‘Distant’ (All stations including distant radio
stations) options. Then press the Select button to conrm the setting.
The current setting is indicated with an asterisk.
B) FM audio:
If the FM radio station being listened to has a weak signal, some hiss
may be audible. It is possible to reduce this hiss by forcing the radio
to play the station in mono rather than auto.
Press the Tuning up/down button to select the options between ‘Mono’
and ‘Auto’. Then press the Select button to conrm your selection.

13
Presetting stations-FM/DAB
You may store your preferred DAB and FM radio stations to the preset
station memories. There are 40 memory presets in your radio 20 for DAB
and 20 for FM. Presets are remembered by your radio in the event of a
power failure.
1. Tune to the required station following the above steps.
2. Repeatedly press and release the Preset button until ‘MEM Store’ is
shown at the bottom of the display.
3. Press the Tuning up/down button to select your required preset
number “Px”. The preset number flashes on the display indicating
the preset is still empty. Press the Select button to store the currently
tuned station. The display will show ‘Saved’ when the station is stored
to the preset station memory. Repeat this procedure for the remaining
presets. Alternatively, you can simply press the Select button (without
the use of Tuning up/down button to select your required preset
number) to preset the currently tuned station. The station will be
stored in the remaining empty preset in sequence (i.e. if preset 1 to 4
are used, the station required to be preset will be stored in preset 5
automatically).
Note:
Stations stored in preset memories may be overwritten by following the
above procedure.
Recalling a preset station-FM/DAB
1. Press the Band button to select the required mode.
2. Repeatedly press and release the Preset button until ‘MEM Browse’ is
shown at the bottom of the display.
3. Press the Tuning up/down button to select your required station.
Note:
The display will only show the preset number which has preset stored.

14
GB
Using the LED Flashlight
• When the radio is on:
Press the Flashlight button to cycle through the following modes:
High → Low → Blinking → SOS (Morse code distress signal: three
short ashes, three long ashes, three short ashes) → O.
Press and hold the Flashlight button at any time to turn off the
ashlight.
• When the radio is o:
Press the Flashlight button to toggle between High and O.
Listening with Headphones
Plug the headphones into the headphone socket for private listening.
This will disconnect the external speaker.
Important:
Excessive volume levels from earphones and headphones may cause
damage to your hearing.
Note:
Never use the headphone socket in rainy or moist conditions to prevent
moist from entering the radio. Always keep the rubber cover well closed
under these conditions.
Charging USB devices
This radio features a USB-A socket on the right-hand side for charging
low-voltage devices using the supplied lithium-ion battery.
Note: The USB-A charging socket supplies a maximum current of 0.3A
and may not charge devices that require a higher minimum current.
To charge an external USB device:
1. Ensure that the radio is turned o.

15
2. Connect the device using the supplied USB charging cable. Charging
will begin automatically.
Note: If the radio is turned on during charging, USB charging will be
automatically disabled.
Strap holder
You may attach the supplied carrying strap into the strap holder for easy
transport.
Conditional water resistance
This radio is water-resistant, not waterproof. Please ensure that the
rubber cover is securely closed over the headphone, USB-A, and USB-C
ports when they are not in use.
Key lock
The key lock function is used to prevent unintentional operation of the
radio.
1. Press and hold the Select/Lock button until ‘Keys Locked’ is shown on
the display. The power button and all other buttons will be disabled to
prevent accidental operation.
2. To disable the key lock function, press and hold the Select/Lock button
again until ‘Keys Unlocked’ is shown on the display.
Supplied accessories
● 3.7V 850mAh rechargeable lithium-ion battery
● USB-A to USB-C charging cable
● Hand strap
16
GB
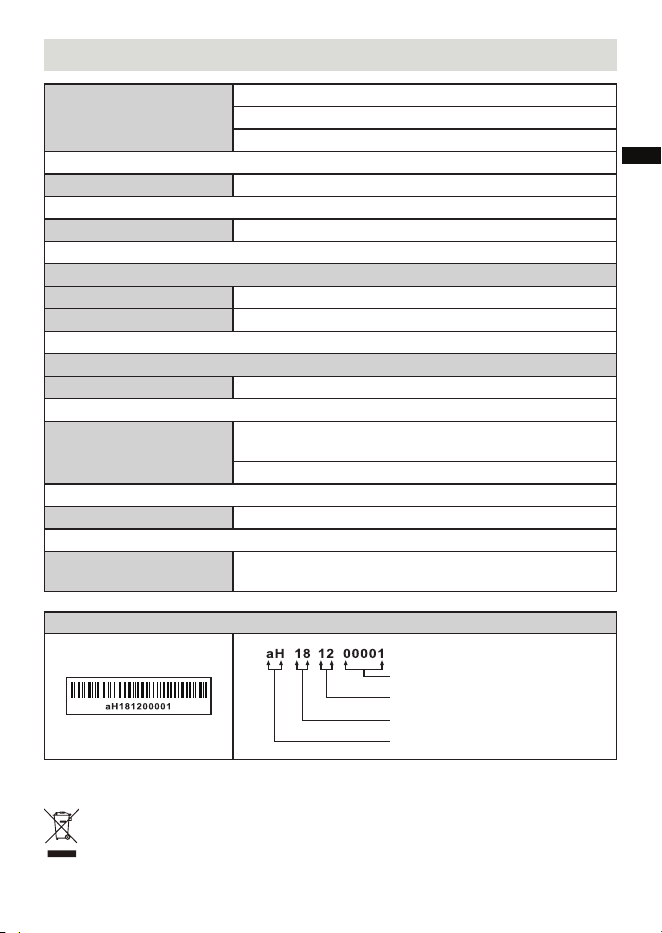
Specications
Power Supply
850mAh rechargeable Lithium-ion battery (supplied) x 1
Dynamo-charging to rechargeable Lithium battery
Solar panel-charging to rechargeable Lithium battery
Optional Power Supply AC power adaptor with USB-C connector (not included)
Audio Output 400mW
Frequency Coverage
FM 87.50-108 MHz
DAB+ Band III 5A-13F
Antenna
Telescopic antenna FM / DAB
DC Socket
DC OUT: USB-A 5V / 0.3A (Not compatible with most
USB-C charging cables due to low output current.)
DC IN: USB-C 5V / 0.5A
Headphone Jack 3.5 mm in diameter, Stereo, 32 ohm Impedance
Operating Temperature
Range
0°C to 40°C
※
The barcode label on the product is dened as below:
Serial number
Production month
Production year
Product code
Sangean reserves the right to amend the specications without notice.
RECYCLING This product bears the selective sorting symbol for Waste
electrical and electronic equipment (WEEE). This means that this product
must be handled pursuant to European directive 2012/19/EU in order to be
recycled or dismantled to minimize its impact on the environment.
