
SIM 2500BK
EN
ICE MAKER
Translation of the original manual
SIM 2500BK
A
1
2
3
4
10
11
12
5
6
7
8
9
14
15
13
16
17
B
1
2
3
4
5
C

- 1 -
12/2024
2024, .
EN
Ice Maker
User Manual
Important Safety Instructions
READ CAREFULLY AND STORE FOR FUTURE USE.
• This appliance may be only used by children aged 8
years and older and by persons with physical, sensory or
mental impairments or lack of experience and knowledge,
if they are supervised or have been instructed on the safe
use of the appliance and understand the potential hazards.
• Children aged 3 to 8 years can insert and remove ice
cubes into and out of the ice maker.
• Children must not play with the appliance. Cleaning and
maintenance must not be performed by children without
supervision.
• If the power cord is damaged, have it replaced in
aprofessional service centre in order to prevent
adangerous situation. It is forbidden to use the appliance
with the power cord damaged.
• The appliance is not intended to be permanently
connected to the water supply and is not intended for
camping or similar use. The appliance is intended for
domestic and indoor use only.
Warning:
Fill with potable water only.
ICE MAKER
- 2 -
12/2024
2024, .
Warning:
The ventilation openings inthe cover of the
appliance or inits construction must be kept clear.
Warning:
Do not use mechanical devices or means other
than those recommended by the manufacturer to
accelerate the defrosting process.
Warning:
Do not damage the cooling circuit. There is arisk of
fire, explosion or injury to persons. It is forbidden to
use the appliance if the cooling circuit is damaged.
Warning:
Do not use electrical appliances inside the appliance
unless they are of the type recommended by the
manufacturer.
• This appliance is intended for domestic use only. It is also
suitable for personal non-commercial use in spaces such
as:
– kitchenettes in shops, offices and other workplaces;
– hotel, motels and other residential areas;
– bed and breakfast establishments;
– catering and similar non-retail environments.
WARNING:
When placing the appliance, make sure that the
power supply cord is not trapped or damaged.
- 3 -
12/2024
2024, .
WARNING:
Do not place multiple portable sockets or portable
extension cords on the rear of the appliance.
• This appliance is intended to be free standing. Do not use it
as abuilt-in appliance.
• Keeping the lid open for along time may cause
asignificant increase in the temperature inside the
appliance.
• Regularly clean surfaces that may come into contact
withfood andaccessible drainage systems.
• Clean the water tanks if they have not been used for
48hours; flush the water system connected to the water
supply if the water has not flown for 5days.
• If arefrigeration appliance is left empty for along period of
time, turn it off, defrost, clean, dry and leave the lid open to
prevent mould from forming inside the appliance.
. . . . . . . . . . . . . . . . . . . . . . . . . . . . . . . . . . . . . . . . . . . . . . . . . . . . . . . . . . . . . . . . . . . . . . . . . . . . . . . . . . . . . . . . . . . . . . . . . . . . . . . . . . . . . . . . . . . . . . . . . . . . . . . . . . . . . . . . . . . .
• Before plugging the power cord plug into the mains socket, make sure that the voltage at your mains socket matches the voltage indicated on the
rating plate of the appliance.
• Do not remove any safety, warning or other elements from the appliance. Do not modify the appliance.
• The appliance is intended only for domestic and indoor production of ice cubes. Do not use it for purposes other than those for which it was
designed. Do not use it in commercial surroundings or outdoors.
• The appliance must be grounded. Only plug the power plug into aproperly grounded power socket.
• Do not use extension cords. We recommend connecting the appliance to an independent circuit.
• Do not place the appliance on aplace with atablecloth, towel or other cloth that achild could accidentally pull on and knock the appliance over.
• Do not expose the appliance to direct sunlight. Do not place the appliance on or near aheat source.
• Do not store explosive substances, such as sprays with flammable propellant, in this appliance. Do not store or use any explosive substances near
the appliance.
• To ensure correct operation of the appliance, leave at least 20 cm of free space on all sides. Do not block the ventilation openings or insert objects
into them.
• Do not let the power cord hang over the edge of atable or worktop, touch hot surfaces, or become tangled. Do not place heavy objects on the power
cord.
• Only use accessories specifically recommended by the manufacturer. It is forbidden to use other than the recommended accessories with this
appliance.
• Do not touch the cooling element while the appliance is in operation.
• To prevent electric shock, fire or explosion, do not immerse the appliance, its power cord or plug in water or other liquids.
• Switch off the appliance by pressing the on/off button and then disconnect the power cord plug from the mains socket.
• Never touch or control the appliance with wet hands.
• Always turn off the appliance, disconnect it from the power socket when not be using it, when leaving it without supervision, and before assembling,
disassembling, cleaning or moving it.
• Do not use flammable substances to clean the appliance. Fumes may cause afire or explosion.
• Do not turn the appliance upside down. If the appliance tips over, leave it in ahorizontal position for about 2 hours. During this time, do not switch it
on or plug it into amains socket.
• If you are moving the appliance fromavery cold room, allow the appliance to warm up to room temperature for several hours.
- 4 -
12/2024
2024, .
• Do not leave the appliance unattended when in use.
• This appliance is not intended for operation through an external timer switch or aremote control.
• When cleaning, follow the instructions inthis manual.
• Do not repair the appliance by yourselves. It does not contain user serviceable parts. All repairs should be carried out only by an authorised service
centre.
Special instructions concerning the refrigerant
WARNING:
Fire or explosion hazard. Use of flammable coolant.
• Only have the appliance repaired by aqualified service centre.
• Dispose of the appliance according to valid codes. Otherwise, there is arisk of fire, explosion or personal injury.
• Use the appliance according to the instructions in this manual. Otherwise, there is arisk of personal injury.
• This appliance contains approximately 14 g of R600a refrigerant gas. It is arefrigerant gas that meets European environmental protection directives.
• Do not drill holes into any part of the cooling circuit.
• The room in which this appliance is installed, operated or stored must be such as to prevent the containment of any escaped refrigerants which
could cause an explosion or fire as aresult of the refrigerant igniting when electric stoves, cookers or other ignition sources are switched on.
• The appliance must be stored in such amanner that its mechanical damage is prevented.
• Persons working with or repairing cooling circuits must have the appropriate authorisation issued by an authorised institution that certifies this
person'scompetence to work with refrigerants in accordance with the specific assessment of the association for this sector.
• Maintenance tasks must be performed solely on the basis of the recommendations of this appliance'smanufacturer. Maintenance and repair tasks
that required the contribution of other qualified expert personnel may only be performed under the supervision of specialists in the flammable
refrigerants sector.
• Check the rating label for the type of refrigerant gas used in your appliance.
. . . . . . . . . . . . . . . . . . . . . . . . . . . . . . . . . . . . . . . . . . . . . . . . . . . . . . . . . . . . . . . . . . . . . . . . . . . . . . . . . . . . . . . . . . . . . . . . . . . . . . . . . . . . . . . . . . . . . . . . . . . . . . . . . . . . . . . . . . . .
- 5 -
12/2024
2024, .
• Thank you for purchasing our SENCOR product; we hope it will serve
to your satisfaction.
• Before using this appliance, please familiarise yourself with the user
manual, even if you are already familiar with using similar types of
appliances. Use the appliance only as described in this user manual.
Keep the manual for future reference.
• It is recommended to keep the original packaging, packing material,
receipt and confirmation of the extent of the seller'sliability or warranty
certificate at least for the duration of the legal right of defective
performance or quality guarantee. When transporting the appliance,
we recommend packaging it again in the original box provided by the
manufacturer.
. . . . . . . . . . . . . . . . . . . . . . . . . . . . . . . . . . . . . . . . . . . . . . . . . . . . . . . . . . . . . . . . . . . .
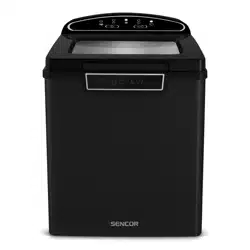
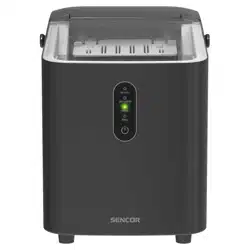
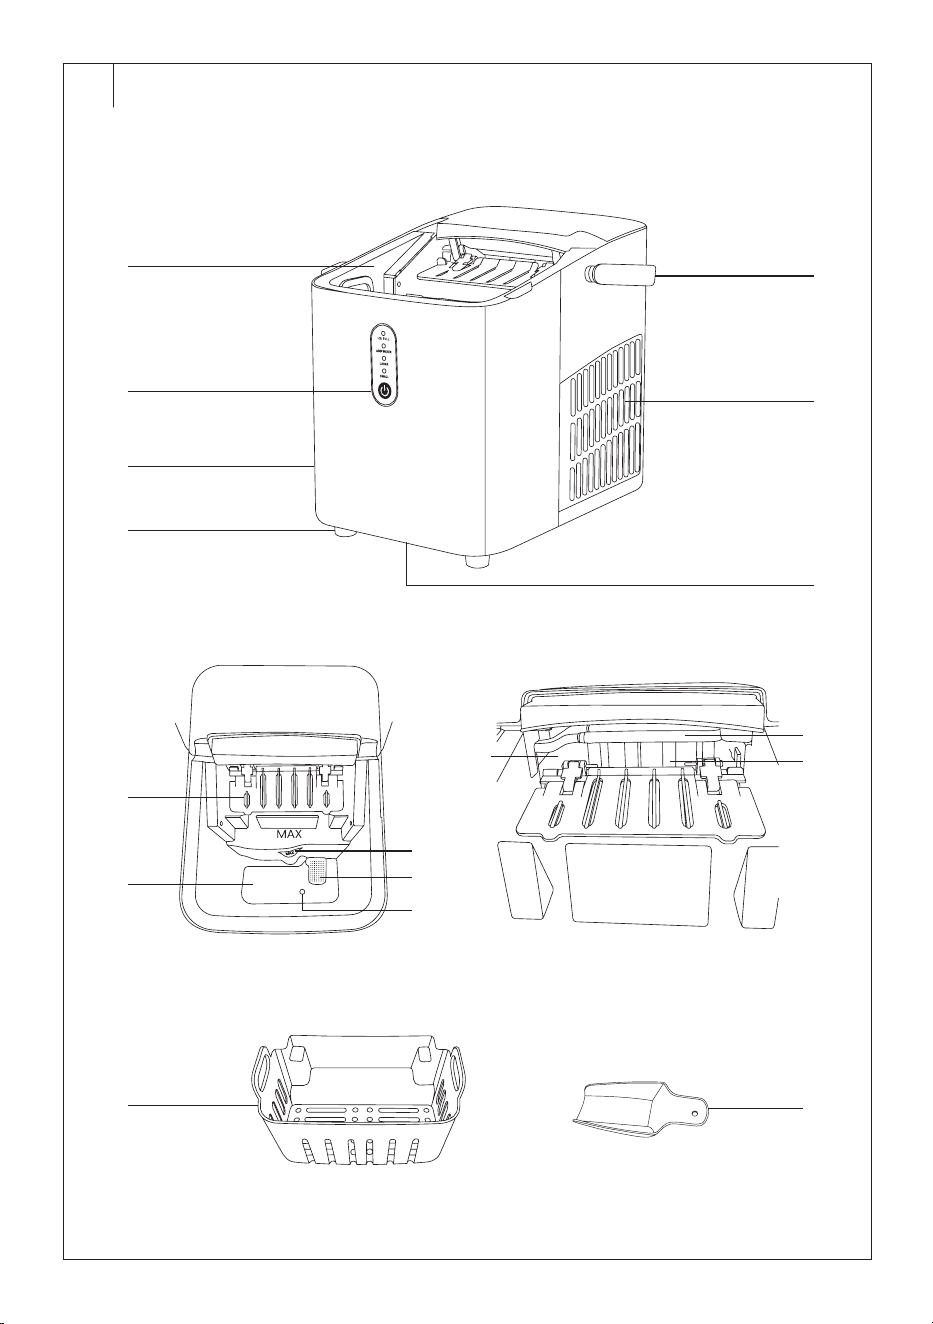
DESCRIPTION OF THE APPLIANCE
A1 Transparent lid
A2 Control panel
A3 Ice maker body
A4 Antiskid feet
A5 Handle
A6 Ventilation openings
A7 Drain valve with plug (located
at the bottom)
A8 Moving ice tray arm
A9 Water tank
A10 MAX mark
A11 Removable filter and filling
hole (located under the filter)
A12 Drain hole
A13 Ice tray (located under the ice
moulds)
A14 Cooling element
A15 Ice moulds
A16 Ice basket
A17 Scoop
. . . . . . . . . . . . . . . . . . . . . . . . . . . . . . . . . . . . . . . . . . . . . . . . . . . . . . . . . . . . . . . . . . . .
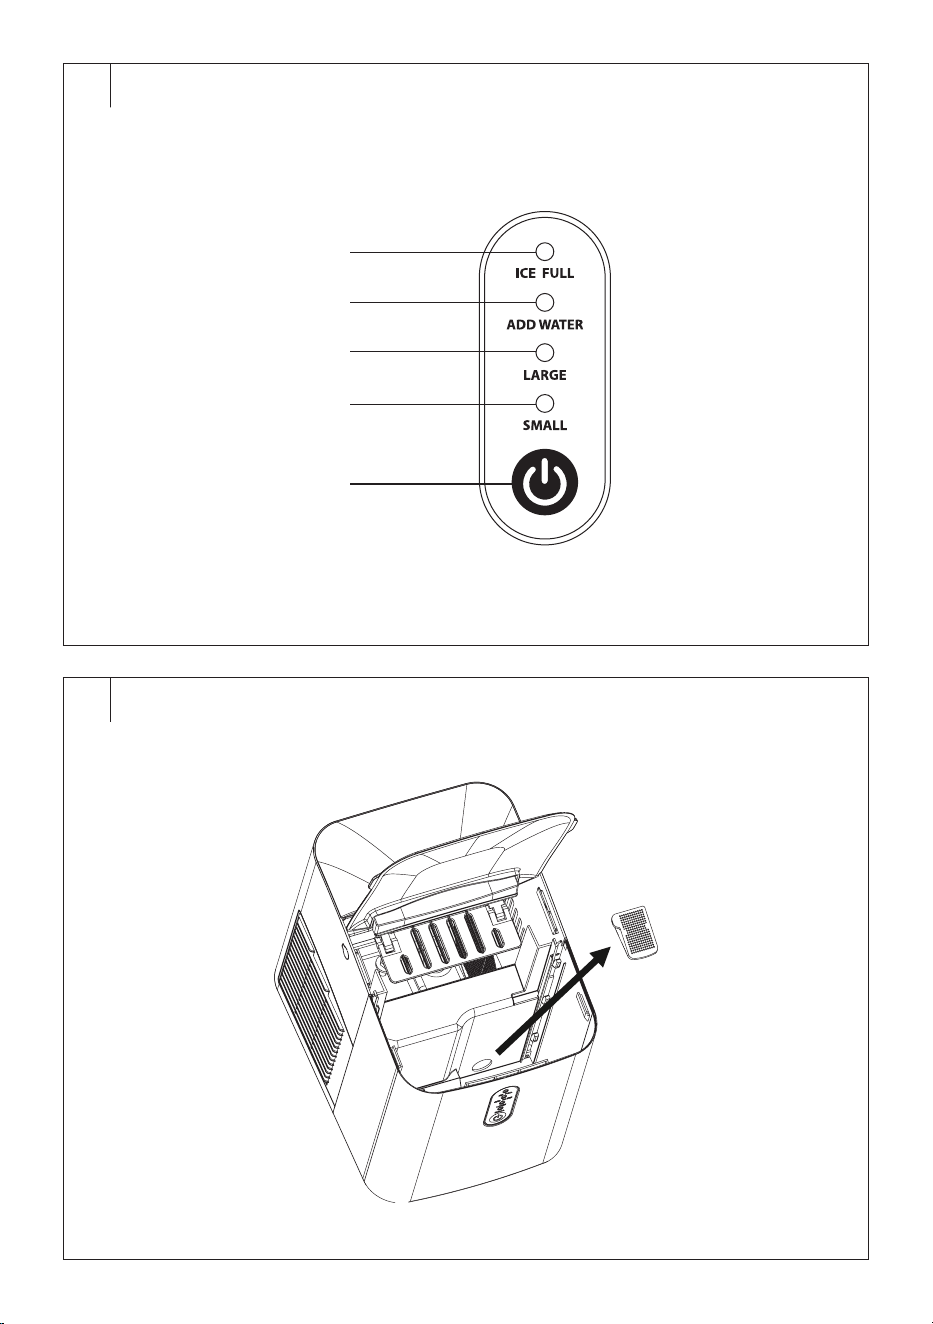
DESCRIPTION OF THE CONTROL PANEL
B1 ICE FULL indicator (full ice
basket)
B2 ADD WATER indicator (empty
water tank)
B3 LARGE indicator (large ice
cubes)
B4 SMALL indicator (small ice
cubes)
B5 On/Off button
. . . . . . . . . . . . . . . . . . . . . . . . . . . . . . . . . . . . . . . . . . . . . . . . . . . . . . . . . . . . . . . . . . . .
PURPOSE OF USE
• The Sencor SIM 2500BK ice maker is designed to produce hat-
shaped cubes from drinking water.
. . . . . . . . . . . . . . . . . . . . . . . . . . . . . . . . . . . . . . . . . . . . . . . . . . . . . . . . . . . . . . . . . . . .
BEFORE FIRST USE
• Before first use, remove the appliance and its accessories form the
packaging and discard all promotional labels and tags. Check that
neither the appliance nor any of its components is damaged.
• Wipe the outer surface of the ice maker with asoft sponge slightly
moistened in warm water. Wipe dry with aclean cloth.
• Open the lid andremove the ice basket andscoop. Wipe the inner
space with asoft sponge dipped inwarm water withalittle vinegar.
Wipe again with asoft sponge dipped inclean warm water and wipe
dry with aclean cloth.
• Wash the ice basket and scoop in warm water with alittle dishwashing
liquid. Rinse and wipe dry.
• Insert the ice basket back into the inside area of the ice maker.
Warning:
If the ice maker is tilted or tipped over during transport,
place it on afirm, level surface and let it stand for
about 2 hours. During this time, the refrigerant flows
back into the cooling circuit. If you switch on the ice
maker immediately, it may be irreversibly damaged.
There is arisk of fire or explosion.
However, for safety reasons, we recommend leaving
the ice maker standing for about 2 hours before
plugging it into the mains socket and turning it on,
even if it has not been tilted or tipped over during
transport.
If you move the ice maker, let it stand for about
30minutes.
Placement of the Ice Maker
Place the ice maker on aclean, level and firm surface well away from the
mains socket.
Make sure that there is sufficient free space around the ice maker, at least
20cm on each side.
Ensure that the air supply is not blocked by afixed obstacle, hinge, etc.
Damage to the appliance might occur if ventilation is insufficient.
Do not use the ice maker in avery cold room (below 5°C).
Note:
Ambient temperature can affect the rate of ice formation.
The higher the ambient (room) temperature, the longer the
ice formation.
. . . . . . . . . . . . . . . . . . . . . . . . . . . . . . . . . . . . . . . . . . . . . . . . . . . . . . . . . . . . . . . . . . . .
OPERATION
Using the Ice Maker
• Before switching on the ice maker, make sure that the drain valve
andplug are properly secured in thebody of the ice maker.
• Open the lid and remove the ice basket.
• Fill the tank with clean cold water up to the MAX mark. Put the basket
back in and close the lid.
• Plug the power cord into the mains socket.
• The SMALL indicator will start flashing green. Long press the button
and the SMALL andLARGE indicators will light up alternately.
• To prepare small ice cubes, press the button when the SMALL
indicator is lit. To prepare large ice cubes, press the button when the
LARGE indicator is lit. The difference between Small and Large is the
thickness of the cubes. This affects the speed of their formation.
• The indicator of the selected ice cube size will light up and the ice
maker will start.
• Water will be pumped through the filling hole into the ice tray. The
cooling element is designed so that ice will form around the ice
moulds that are immersed in water. The ice formation process can
take 7–15 minutes depending on the temperature in theroom, the
initial water temperature as well asthe size selection.
• Once the ice is formed, the ice tray tilts backwards, the ice falls off the
moulds and the moving arm moves the ice cubes over the edge into
the ice basket. This movement brings the ice tray back to its starting
position and the excess water flows into the water tank. After that,
anew ice formation process will start.
• Once enough ice has been made, press and hold the button for 3
seconds until the SMALL indicator flashes to stop making ice. The ice
maker will switch to the standby mode. Then, unplug the power cord
from the mains socket. Remove the ice cubes from the basket and
store them in afreezer.
• Open the lid and allow the ice maker to warm up to room temperature
before cleaning.
EN
Ice Maker
User Manual
- 6 -
12/2024
2024, .
Note:
Dependingon the room temperature, the ice in the ice
maker will last up to 18 hours. However, we recommend
moving it to the freezer as soon as the preparation is
complete. Store the ice only in thefreezer.
Warning:
Never use hot or warm water to prepare ice.
Warning:
During use, the outer surface of the machine around
the compressor may heat up. Take extra care when
coming into contact with heated surfaces.
Note:
During the first three cycles of ice production, it may
happen that the cubes will not be regular andwill be small.
This is anormal phenomenon that will disappear with
further production.
Note:
The compressor starts approximately 3 minutes after the
machine has been interrupted, e.g. the water in the tank has
run out. This is anormal phenomenon that does not affect
the functionality of the appliance.
Note:
As aresult of rapid freezing, the ice cubes can become
dull. This is air trapped in the water. This does not affect the
quality or taste of the ice.
Full Ice Basket
As soon as the ice basket is full, the ICE FULL indicator will light up on
the control panel and the ice formation process will be automatically
interrupted. Open the lid and carefully remove the ice from the basket with
ascoop. To resume theprocess automatically, close the lid. Transfer the
ice to afreezer immediately.
Refilling the Water Tank
If the ADD WATER indicator lights up on the control panel, it is necessary
to refill the water tank. The ice formation process will stop automatically.
Remove the ice basket andrefill with clean cold water. Put the basket
back andpress the button to resume the ice formation process.
. . . . . . . . . . . . . . . . . . . . . . . . . . . . . . . . . . . . . . . . . . . . . . . . . . . . . . . . . . . . . . . . . . . .
CLEANING AND MAINTENANCE
• Before cleaning, disconnect the power plug from the mains socket and
allow the appliance to warm up to room temperature.
• The appliance must be properly cleaned after each use.
• Do not use abrasive cleaning agents, solvents, etc. to clean any parts
of the appliance, as these could damage the surface of the appliance.
None of the components of this appliance are dishwasher safe.
Warning:
To prevent the risk of electric shock, do not immerse
the appliance, power cable, or plug into water or any
other liquid.
Draining water
Before draining the water, make sure the machine is switched off and the
mains plug is disconnected from the mains socket.
Slide the ice maker to the edge of the worktop so that the drain valve can
be released to easily drain the water from the tank.
Place acontainer under the drain valve into which the water will flow.
Release the valve andwait for all water to drain from the tank. Then
replace it firmly.
Note:
Empty the water tank after each use. Do not allow water to
remain init for more than 2 days.
Cleaning the Ice Maker
Remove the ice basket. Wash the ice basket and scoop in warm water
with alittle dishwashing liquid. Rinse and wipe dry.
Wipe the inside of the ice maker with asoft sponge dipped inwarm water
withalittle vinegar. Wipe again with asoft sponge dipped inclean warm
water and wipe dry with aclean cloth.
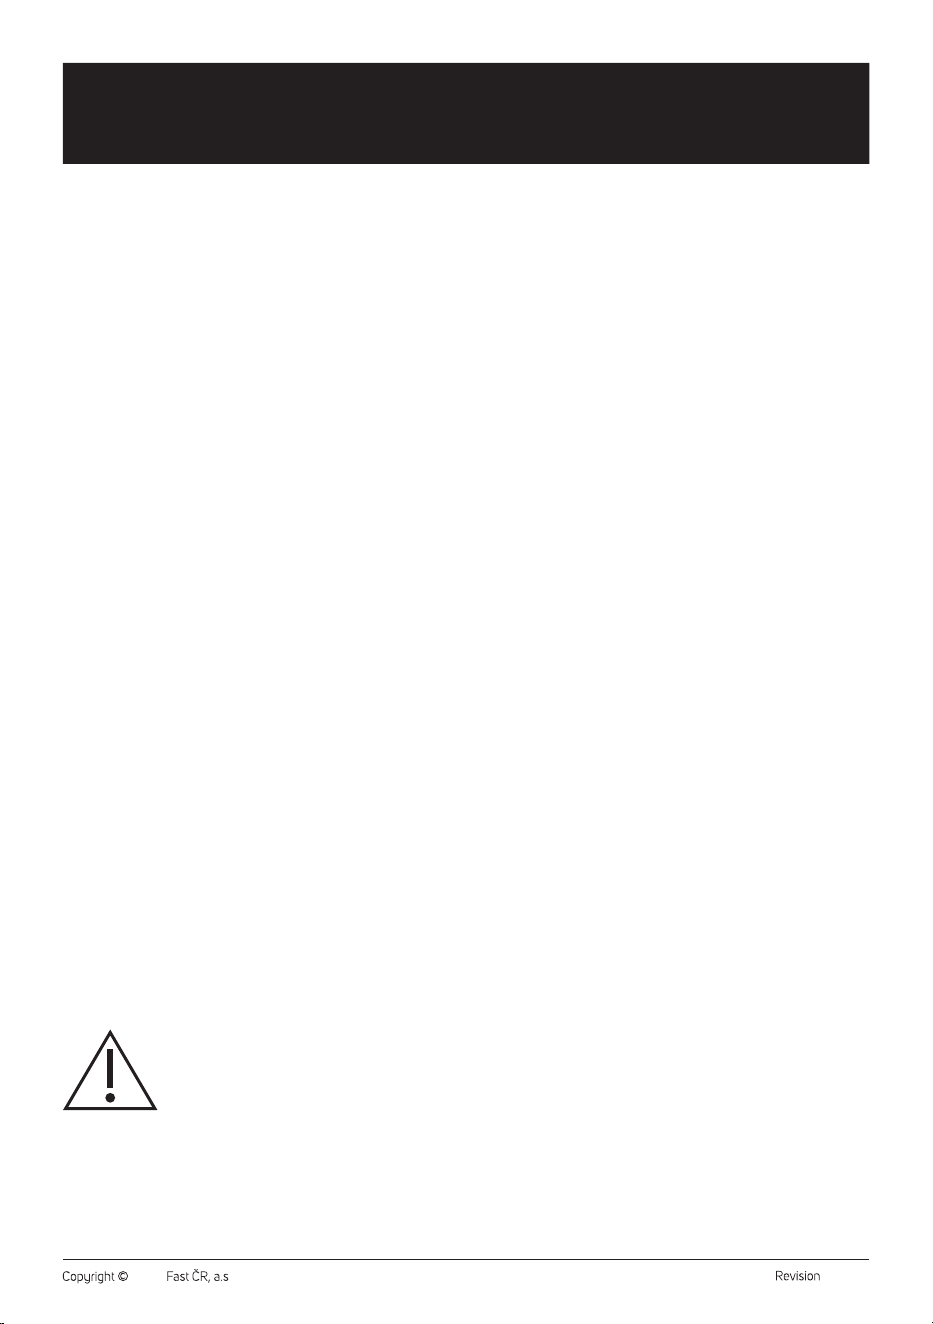
Remove the filter and clean it with asoft brush – see Figure C. Wipe the
area under the filter and the filling hole.
Leave the lid open to allow the inside of the appliance to dry sufficiently.
Note:
Avoid contact with the cooling element when cleaning.
Cleaning Function
• The ice maker is equipped with acleaning function to help facilitate
cleaning of the machine.
• Pour water into the water tank up to the MAX line andswitch on the
ice maker.
• Hold down the button for about 2 seconds. The cleaning function
will turn on andall four indicators will gradually flash.
• After starting the cleaning process, the machine first melts all the ice.
The water is then pumped into the inner circuit, the inner circuit is
flushed and the water is drained.
• The machine performs atotal of 5 cleaning cycles, where one cycle
usually lasts 50 seconds.
Warning:
Pour only clean water into the tank. Do not use any
cleaning agents, chemicals, etc.
• If you have not used the ice maker for along time, run the cleaning
function before making ice.
• Allow the ice maker to complete the cleaning function. As soon as the
SMALL indicator flashes, the cleaning function is completed.
. . . . . . . . . . . . . . . . . . . . . . . . . . . . . . . . . . . . . . . . . . . . . . . . . . . . . . . . . . . . . . . . . . . .
STORAGE
• When not using the appliance for an extended period of time,
disconnect the power plug from the power socket and clean it
according to the instructions provided above.
• Before storing, ensure that the appliance and all accessories are
thoroughly clean and dry. Make sure there is no water in the tank.
• Store the appliance in adry, clean, and well-ventilated place away
from extreme temperatures and out of the reach of children or pets.
. . . . . . . . . . . . . . . . . . . . . . . . . . . . . . . . . . . . . . . . . . . . . . . . . . . . . . . . . . . . . . . . . . . .
- 7 -
12/2024
2024, .
TROUBLESHOOTING
If apower outage occurs or you press the button during the ice production cycle, small ice crystals may form, which may get caught on the moving
arm and cause it to block. If this occurs, turn off the ice maker, gently push the arm backwards andremove the ice crystals.
If the moving arm cannot move the ice into the basket, check that the machine is located on an even surface. If it is not, move the machine to aflat
surface.
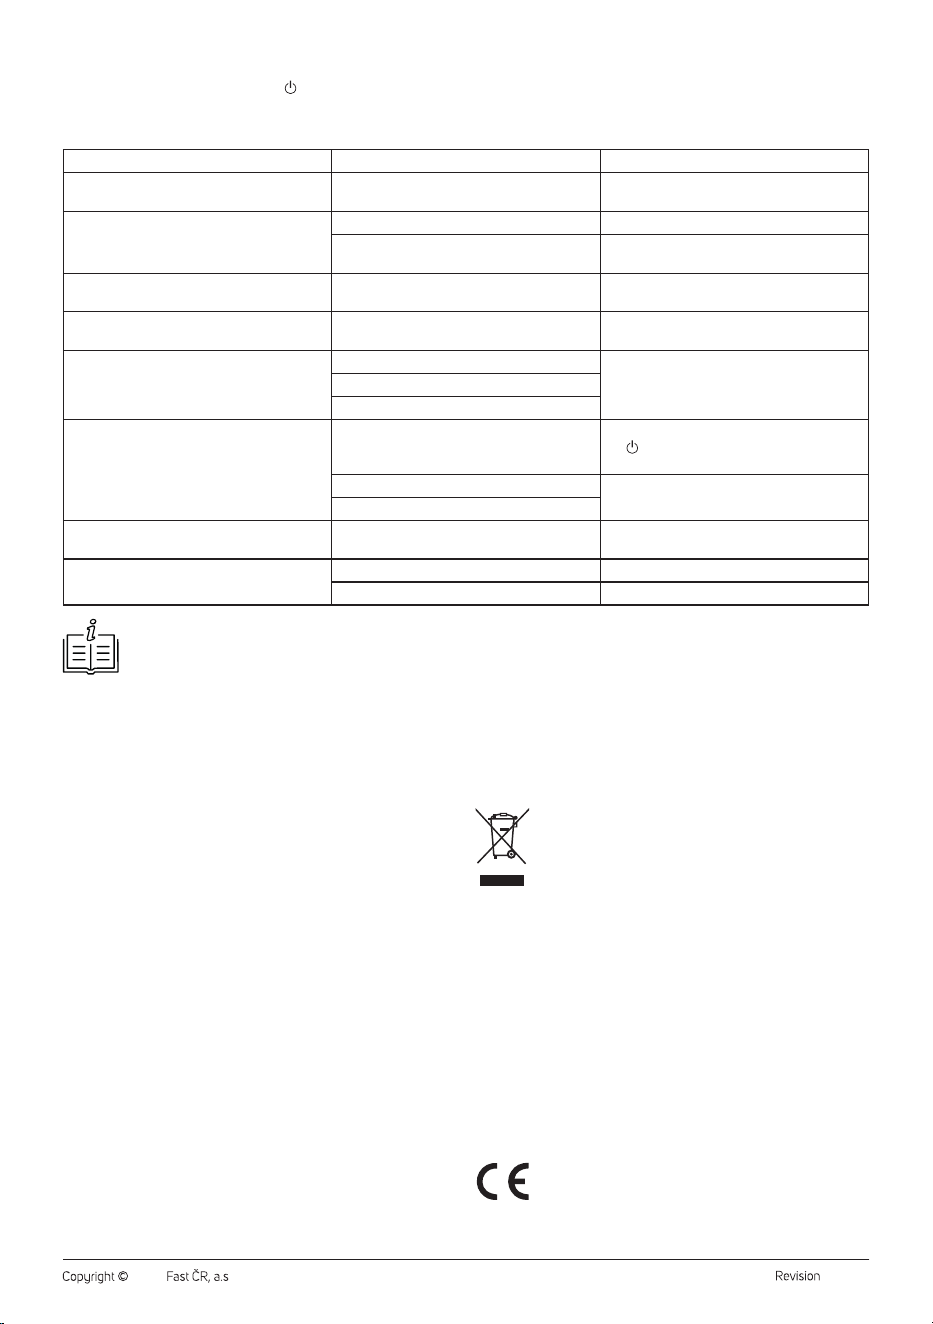
Problem Possible Cause Solution
The compressor is unusually noisy. The mains voltage is lower than recommended. Stop using the machine until the mains voltage
is restored.
The ADD WATER indicator is lit. There'sno water in the tank. Refill the water tank.
The pump is full of air. Turn off the ice maker and turn it on again after
awhile.
The ice maker won't turn on. The power cord plug is incorrectly inserted in
the mains socket.
Plug the power plug into the mains socket.
The ice cubes are too big andstick together. The ice cubes from the previous preparation
were left on the moulds.
Remove the ice fromthe moulds before further
preparation.
Ice cubes do not form evenwhen the ice maker
is running.
No refrigerant. Contact an authorised service centre.
The compressor is damaged.
The motor fan is damaged.
All indicators are blinking simultaneously. The ice basket is blocked by ice cubes. Remove the ice cubes with ascoop. Press
the button to resume the operation of the
machine.
The drive unit is blocked, misses or is damaged. Contact an authorised service centre.
The microswitch is damaged.
The machine is turned on, but the water is
heating up.
The solenoid valve is damaged. Contact an authorised service centre.
The ice bin is full, but the ICE FULL indicator
won't light up.
The sensor of the full ice bin is damaged. Contact an authorised service centre.
The sun is shining on the sensor of afull basket. Relocate the ice maker.
Note:
If your problem is not listed in the table or persists, turn off the ice maker, unplug the power cord from the mains socket andstop using the
ice maker. Contact an authorised service centre.
. . . . . . . . . . . . . . . . . . . . . . . . . . . . . . . . . . . . . . . . . . . . . . . . . . . . . . . . . . . . . . . . . . . . . . . . . . . . . . . . . . . . . . . . . . . . . . . . . . . . . . . . . . . . . . . . . . . . . . . . . . . . . . . . . . . . . . . . . . . .
TECHNICAL SPECIFICATIONS
Rated voltage range ..............................................................................220−240 V~
Rated frequency ...................................................................................................50 Hz
Rated input ............................................................................................................ 120 W
Rated current ................................................................................................................ 1 A
Refrigerant / amount of refrigerant .................................................... R600a/ 14 g
Insulation blowing gas ..............................................................Cyclopentane C5H10
Climatic class..........................................................................................................SN, N
Water tank capacity .....................................................................................................1 l
Noise level ......................................................................................................<50 dB(A)
Quantity of ice produced.........................................................................12 kg / 24 h
Ice basket capacity ..............................................................................................600 g
Dimensions (including handle) ..........................................268 × 217 × 282 mm
Weight ......................................................................................................................6.1 kg
The declared noise emission level of the appliance is 50 dB(A), which
represents alevel Aof acoustic power with respect to areference acoustic
power of 1 pW.
. . . . . . . . . . . . . . . . . . . . . . . . . . . . . . . . . . . . . . . . . . . . . . . . . . . . . . . . . . . . . . . . . . . .
INSTRUCTIONS AND INFORMATION ON DISPOSAL OF USED
PACKAGING MATERIAL
Dispose of used packaging material at the location designated by the
municipality for waste disposal.
DISPOSAL OF USED ELECTRICAL AND ELECTRONIC EQUIPMENT
Used electrical andelectronic products must not be added to
ordinary municipal waste. For proper disposal and recycling
of these products, deliver them to designated collection
points. Alternatively, in some European Union states or other
European countries the products can be returned to the local
retailer when buying an equivalent new product. By properly
disposing of this product, you help preserve valuable natural
resources and contribute to preventing potential negative
impacts on the environment and human health resulting
from improper waste disposal. For further details, contact
your local authorities or the nearest collection point. Fines
may be imposed for improper disposal of this type of waste
in accordance with national regulations.
For Business Entities in European Union States
To dispose of electric or electronic equipment, request necessary
information from your retailer or supplier.
Disposal in Other Countries Outside the European Union
This symbol is valid in the European Union. To dispose of this product
elsewhere, request necessary information on the correct disposal method
from local authorities or your retailer.
The product meets all the basic requirements of the
applicable EU directives.
. . . . . . . . . . . . . . . . . . . . . . . . . . . . . . . . . . . . . . . . . . . . . . . . . . . . . . . . . . . . . . . . . . . .
Changes to text and technical parameters are reserved.
info@sencor.com