SIC 3000WH
EN
ICE CREAM MAKER
Translation of the original manual
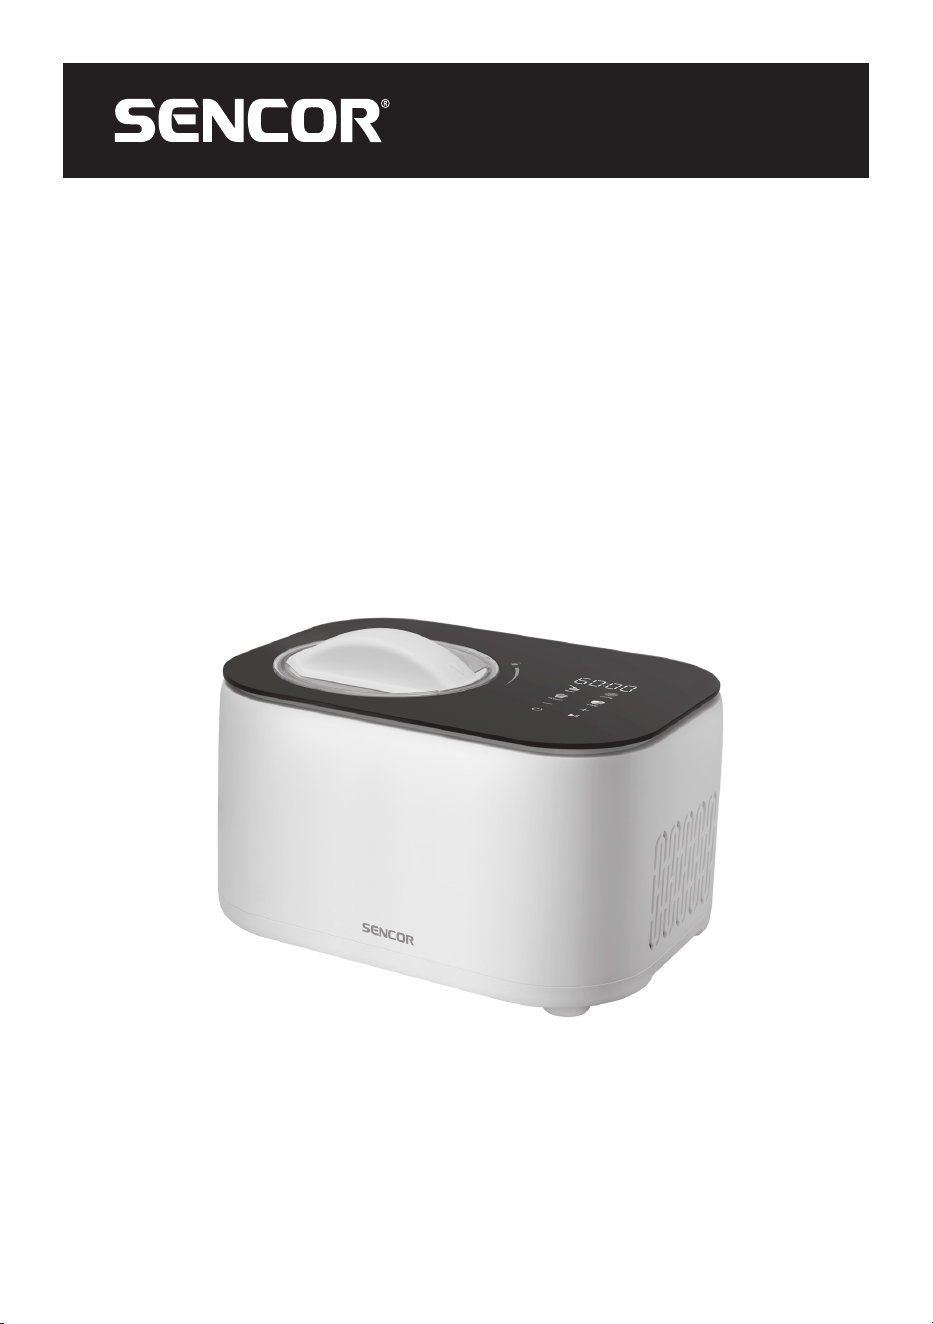
SIC 3000WH
A
1
2
3
4
5
6
7
8
9
B
1
2
3
4
5
6
7
8
9
C1
D1
C2
D4
D2 D3
D5
E1
E2


- 1 -
01/2025
2025, .
EN
Ice cream maker
User Manual
Important Safety Instructions
READ CAREFULLY AND STORE FOR FUTURE USE.
• This appliance may be only used by children aged 8
years and older and by persons with physical, sensory or
mental impairments or lack of experience and knowledge,
if they are supervised or have been instructed on the safe
use of the appliance and understand the potential hazards.
• Children between the ages of 3 and 8 can load andunload
food fromrefrigeration appliances.
• Children must not play with the appliance. Cleaning and
maintenance must not be performed by children without
supervision.
• If the power cord is damaged, have it replaced in
aprofessional service centre in order to prevent
adangerous situation. It is forbidden to use the appliance
with the power cord damaged.
• This appliance is designed for domestic and indoor use
only. Must not be used outdoors.
• When installing, operating, servicing andhandling the
appliance, follow the instructions inthis manual.
WARNING:
The ventilation openings inthe cover of the
appliance or inits construction must be kept clear.
- 2 -
01/2025
2025, .
WARNING:
Do not use mechanical devices or means other
than those recommended by the manufacturer to
accelerate the defrosting process.
WARNING:
Do not damage the cooling circuit.
WARNING:
Do not use electrical appliances inside.
• The volume of the ice cream maker is 1 l. The maximum
volume of ingredients is approximately 2/3 of thetotal
volume of the vessel. Never overfill the container.
• Do not store explosive substances, such as sprays with
flammable propellant, in this appliance.
• This appliance is intended for domestic use only. It is also
suitable for personal non-commercial use in spaces such
as:
– kitchenettes in shops, offices and other workplaces;
– hotels, motels and other residential environments;
– bed and breakfast establishments;
– catering and similar non-retail environments.
WARNING:
When placing the appliance, make sure that the
power supply cord is not trapped or damaged.
WARNING:
Do not place multiple portable sockets or portable
extension cords on the rear of the appliance.

- 3 -
01/2025
2025, .
• This appliance is intended to be free standing. It is not
designed forinstallation.
• The appliance container is not designed forstoring food.
The appliance is equipped with aKeep Cool function
withatimer for 1hour. Then it is necessary to transfer the
food to the refrigerator or freezer.
. . . . . . . . . . . . . . . . . . . . . . . . . . . . . . . . . . . . . . . . . . . . . . . . . . . . . . . . . . . . . . . . . . . . . . . . . . . . . . . . . . . . . . . . . . . . . . . . . . . . . . . . . . . . . . . . . . . . . . . . . . . . . . . . . . . . . . . . . . . .
Additional Important Safety Instructions forUse of the Appliance
• Before plugging the power cord plug into the mains socket, make sure that the voltage at your mains socket matches the voltage indicated on the
rating plate of the appliance.
• Do not remove any safety, warning or other elements from the appliance. Do not modify the appliance.
• The appliance is intended only for domestic and indoor production of ice cream, sorbet, yoghurt etc. Do not use it for purposes other than those for
which it was designed. Do not use it in commercial surroundings or outdoors.
• The appliance must be grounded. Only plug the power plug into aproperly grounded power socket.
• Do not use extension cords. We recommend connecting the appliance to an independent circuit.
• Do not place the appliance on aplace with atablecloth, towel or other cloth that achild could accidentally pull on and knock the appliance over.
• Do not expose the appliance to direct sunlight. Do not place the appliance on or in the vicinity of aheat source.
• Do not store explosive substances, such as sprays with flammable propellant, in this appliance. Do not store or use any explosive substances near
the appliance.
• To ensure correct operation of the appliance, leave at least 20 cm of free space on all sides. Do not block the ventilation openings or insert objects
into them.
• Do not let the power cord hang over the edge of atable or worktop, touch hot surfaces, or become tangled. Do not place heavy objects on the power
cord.
• Only use accessories specifically recommended by the manufacturer. It is forbidden to use other than the recommended accessories with this
appliance.
• Do not touch the cooling element while the appliance is in operation.
• To prevent electric shock, fire or explosion, do not immerse the appliance, its power cord or plug in water or other liquids.
• Switch off the appliance by pressing the on/off button and then disconnect the power cord plug from the mains socket.
• Never touch or handle the appliance withwet hands. This is especially true after the ice cream or sorbet is finished.
• Always turn off the appliance, disconnect it from the power socket when not be using it, when leaving it without supervision, and before assembling,
disassembling, cleaning or moving it.
• Do not use flammable substances to clean the appliance. Fumes may cause afire or explosion.
• Do not turn the appliance upside down. If the appliance tips over, leave it in ahorizontal position for about 2 hours. During this time, do not switch it
on or plug it into amains socket.
• If you are moving the appliance fromavery cold room, allow the appliance to warm up to room temperature for several hours.
• Do not leave the appliance unattended when in use.
• This appliance is not intended for operation through an external timer switch or aremote control.
• When cleaning, follow the instructions inthis manual.
• Do not repair the appliance by yourselves. It does not contain user serviceable parts. All repairs should be carried out only by an authorised service
centre.

- 4 -
01/2025
2025, .
Special instructions concerning the refrigerant
WARNING:
Fire or explosion hazard. Use of flammable coolant.
• Only have the appliance repaired by aqualified service centre.
• Dispose of the appliance according to valid codes. Otherwise, there is arisk of fire, explosion or personal injury.
• Use the appliance according to the instructions in this manual. Otherwise, there is arisk of personal injury.
• This appliance contains approximately 18 g of R600a refrigerant gas. It is arefrigerant gas that meets European environmental protection directives.
• Do not drill holes into any part of the cooling circuit.
• The room in which this appliance is installed, operated or stored must be such as to prevent the containment of any escaped refrigerants which
could cause an explosion or fire as aresult of the refrigerant igniting when electric stoves, cookers or other ignition sources are switched on.
• The appliance must be stored in such amanner that its mechanical damage is prevented.
• Persons working with or repairing cooling circuits must have appropriate authorisation issued by an authorised institution that certifies this
person'scompetence to work with refrigerants in accordance with the specific assessment of the association for this sector.
• Maintenance tasks must be performed solely on the basis of the recommendations of this appliance'smanufacturer. Maintenance and repair
tasks that required the contribution of other qualified expert personnel may only be performed under the supervision of specialised experts in the
flammable refrigerants sector.
• Check the rating label for the type of refrigerant gas used in your appliance.
. . . . . . . . . . . . . . . . . . . . . . . . . . . . . . . . . . . . . . . . . . . . . . . . . . . . . . . . . . . . . . . . . . . . . . . . . . . . . . . . . . . . . . . . . . . . . . . . . . . . . . . . . . . . . . . . . . . . . . . . . . . . . . . . . . . . . . . . . . . .
EXPLANATION OF SYMBOLS PLACED ON THE PRODUCT OR INTHE ACCOMPANYING DOCUMENTATION
The product meets all the basic requirements of the applicable EU directives.
This symbol on products or original documents means that used electric or electronic products must not be added to ordinary municipal
waste.
. . . . . . . . . . . . . . . . . . . . . . . . . . . . . . . . . . . . . . . . . . . . . . . . . . . . . . . . . . . . . . . . . . . . . . . . . . . . . . . . . . . . . . . . . . . . . . . . . . . . . . . . . . . . . . . . . . . . . . . . . . . . . . . . . . . . . . . . . . . .
- 5 -
01/2025
2025, .
• Thank you for purchasing our SENCOR product; we hope it will serve
to your satisfaction.
• Prior to using this appliance, please read the user manual thoroughly,
even in cases when you are already familiar with the use of similar
types of appliances. Use the appliance only as described in this
user manual. Keep the manual for future reference. If you pass the
appliance on to another person, ensure that this user manual is
included.
• Carefully unpack the appliance and make sure not to discard any part
of the packaging material until you have found all its components. It
is recommended to keep the original packaging, packing material,
receipt and confirmation of the extent of the seller'sliability or warranty
certificate at least for the duration of the legal right of defective
performance or quality guarantee. When transporting the appliance,
we recommend packaging it again in the original box provided by the
manufacturer.
. . . . . . . . . . . . . . . . . . . . . . . . . . . . . . . . . . . . . . . . . . . . . . . . . . . . . . . . . . . . . . . . . . . .
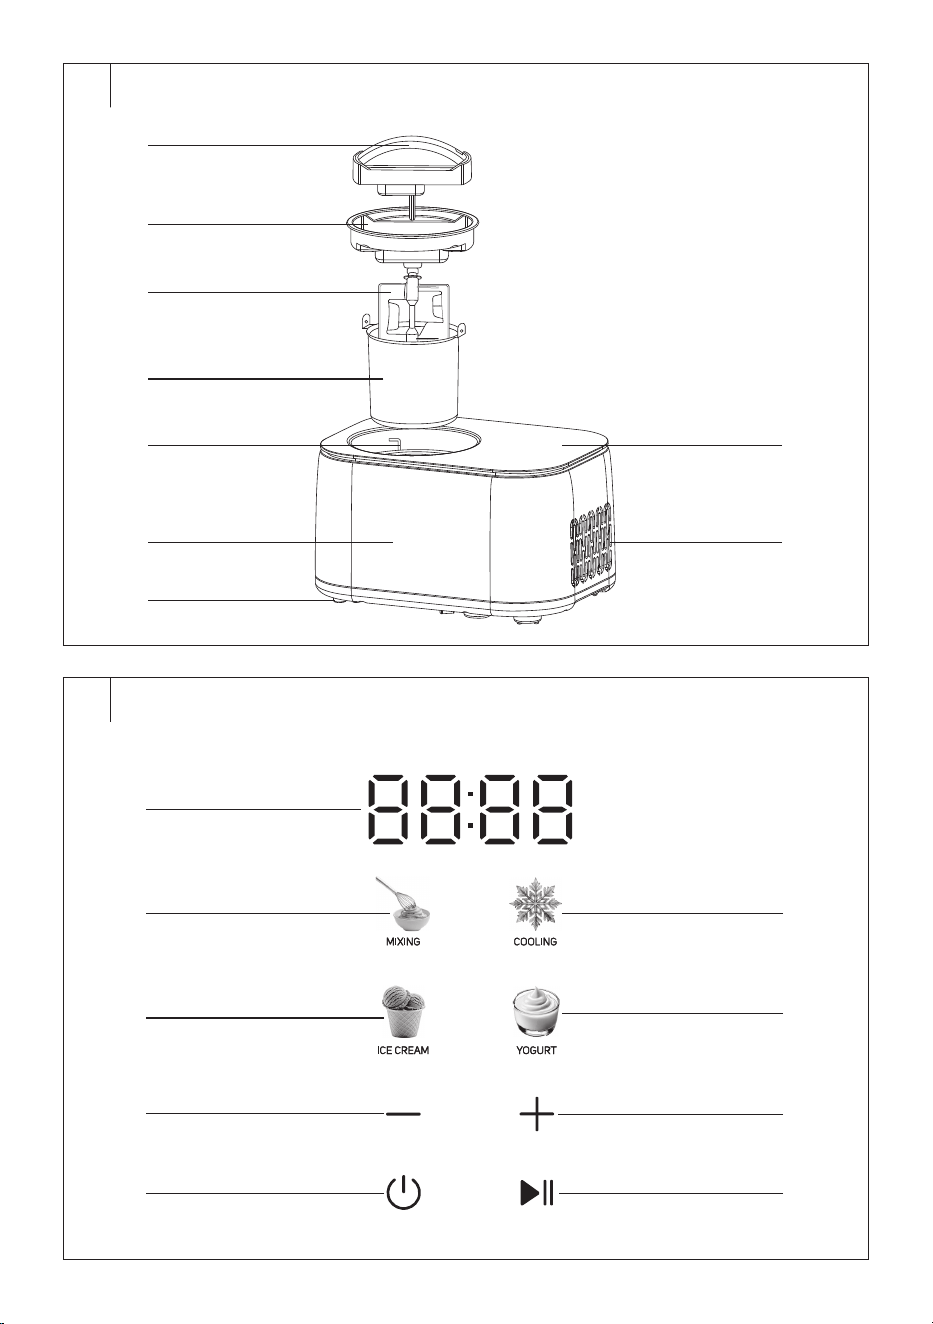
DESCRIPTION OF THE ICE CREAM MAKER
A1 Motor unit withhandle
A2 Lid
A3 Mixing paddle
A4 Container with ahandle
A5 Internal space for insertion of
the container
A6 Ice cream maker body
A7 Antiskid feet
A8 Control panel
A9 Ventilation openings
. . . . . . . . . . . . . . . . . . . . . . . . . . . . . . . . . . . . . . . . . . . . . . . . . . . . . . . . . . . . . . . . . . . .
DESCRIPTION OF THE CONTROL PANEL
B1 Numeric display
B2 MIXING button
B3 ICE CREAM button
B4 – button
B5
button toswitch the maker
on/off
B6 COOLING button
B7 YOGHURT button
B8 + button
B9
button to start/pause the
maker
. . . . . . . . . . . . . . . . . . . . . . . . . . . . . . . . . . . . . . . . . . . . . . . . . . . . . . . . . . . . . . . . . . . .
PURPOSE OF USE
• The Sencor SIC 3000WH ice cream maker is designed tomake ice
cream, sorbet, frozen yoghurts, etc. The Keep Cool function keeps the
produced ice cream or sorbet cool to keep its texture fresh. The ice
cream maker is also equipped with programs for preparing yoghurt,
mixing ingredients andcooling.
. . . . . . . . . . . . . . . . . . . . . . . . . . . . . . . . . . . . . . . . . . . . . . . . . . . . . . . . . . . . . . . . . . . .
BEFORE FIRST USE
• Before first use, remove the appliance and its accessories form the
packaging and discard all promotional labels and tags. Check that
neither the appliance nor any of its components is damaged.
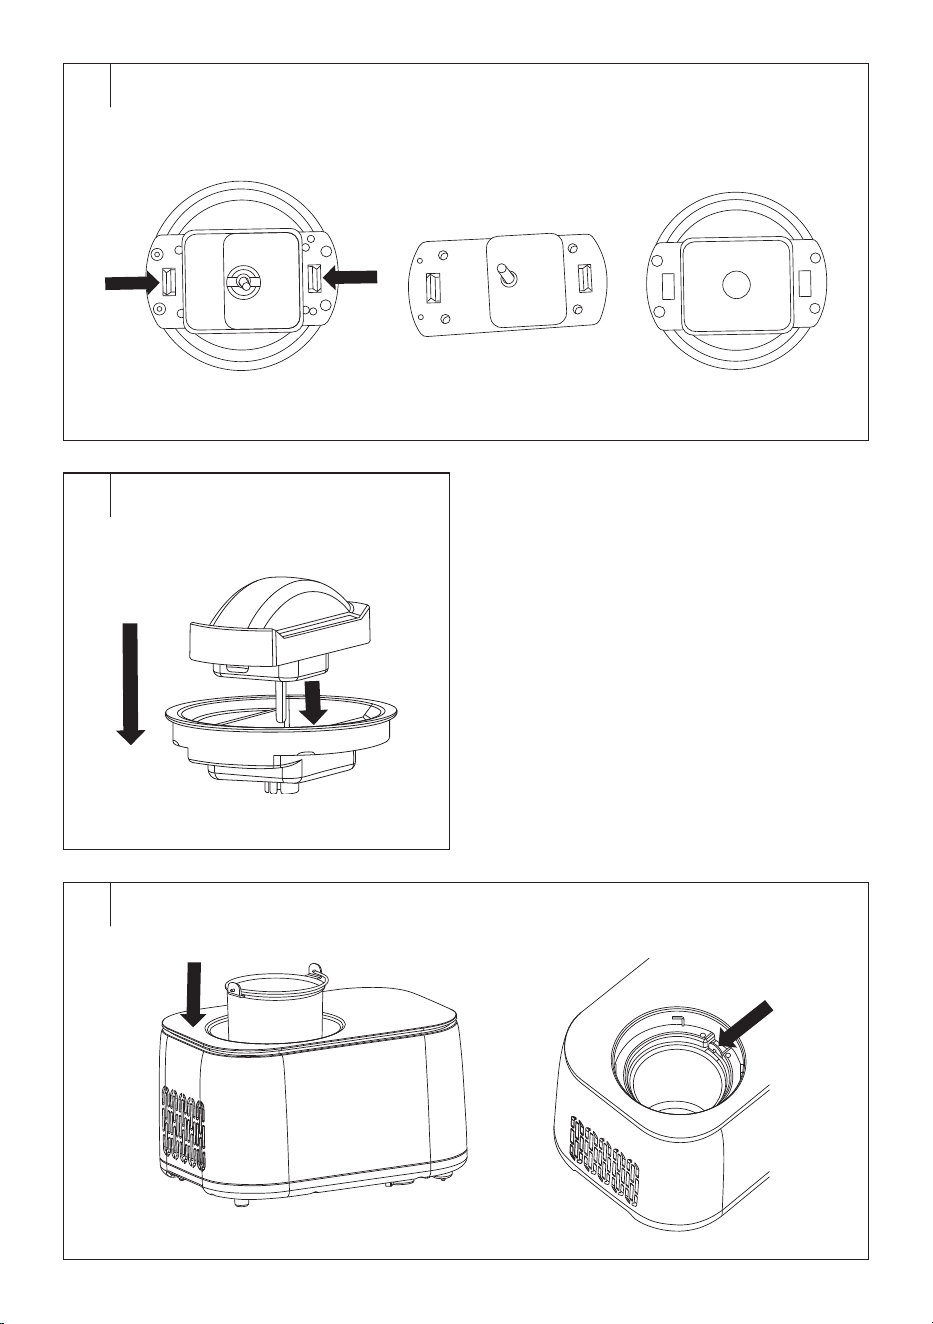
• Remove the motor unit from the lid. Place the motor unit so that the
motor unit handle faces down. Press the latches against each other –
see figure C1; andlift the lid upwards.
Warning:
The motor unit must not be immersed in water.
• Wash the container, mixing paddle and lid in warm water with alittle
kitchen detergent using asoft sponge. Rinse and wipe dry.
• Wipe the motor unit, the interior and the outer surface of the maker
with aslightly dampened sponge. Wipe dry with aclean cloth.
• Attach the lid from below to the motor unit so that the shaft passes
through the hole in the lid – see figure C2. Press gently until you hear
aclick.
. . . . . . . . . . . . . . . . . . . . . . . . . . . . . . . . . . . . . . . . . . . . . . . . . . . . . . . . . . . . . . . . . . . .
ASSEMBLING THE MAKER
1. Put the maker on asolid, flat and dry surface.
2. Make sure that the space into which the container is put is clean
anddry, andthat the outer bottom of the container is also dry
andclean.
3. Insert the container into the inner space of the machine so that the
tabs on the container fit into the gaps in the inner space – see Figure
D1.
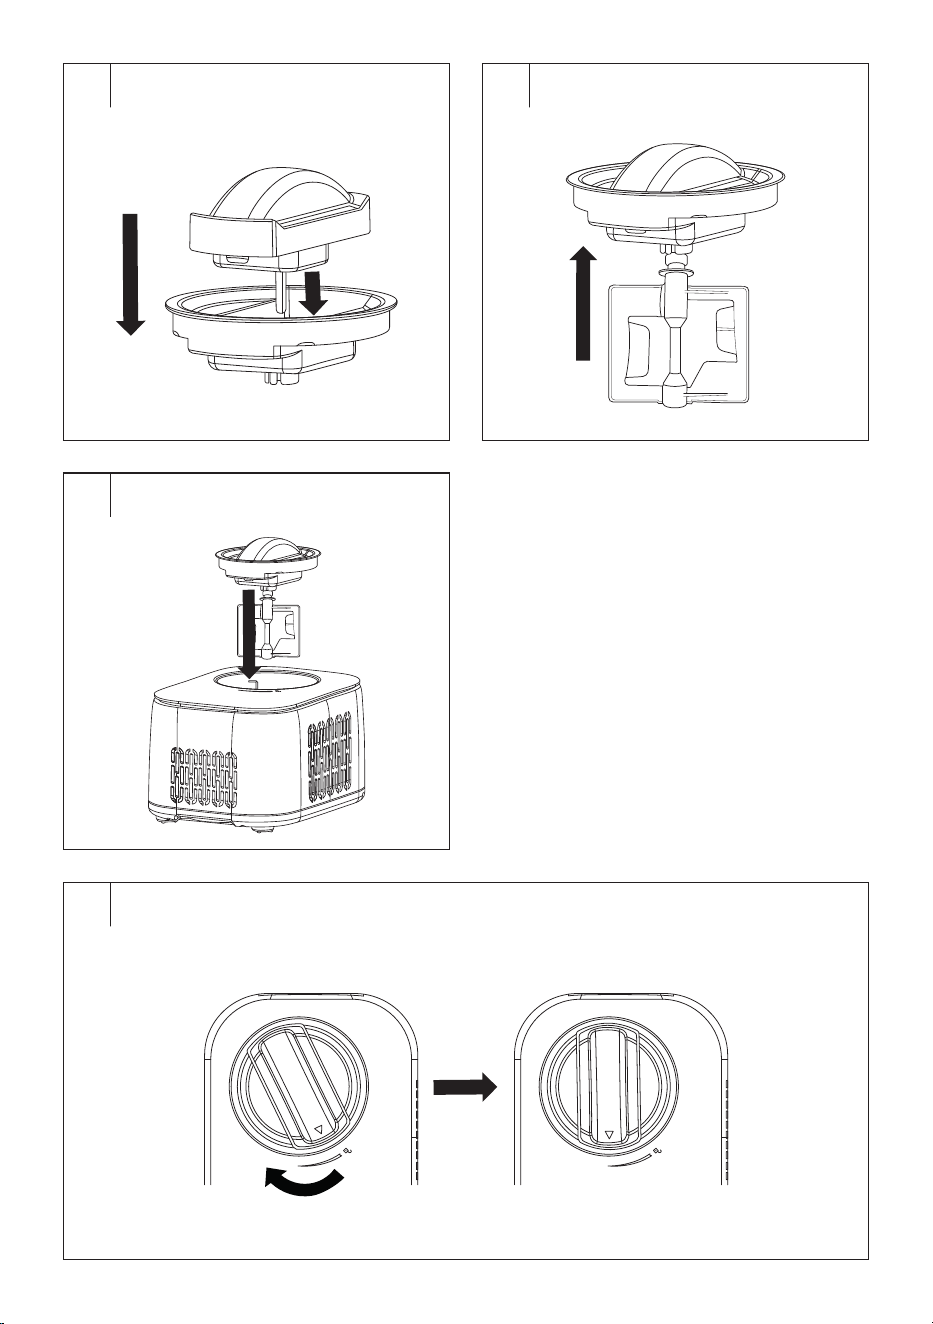
4. Put the motor unit on the lid – see Figure D2.
5. Put the mixing paddle on to the motor unit shaft – see figure D3.
6. Place the assembled motor unit on the container so that the mixing
paddles face the container and the arrow on the handle of the motor
unit is aligned with the symbol
on the body of the maker – see
Figure D4.
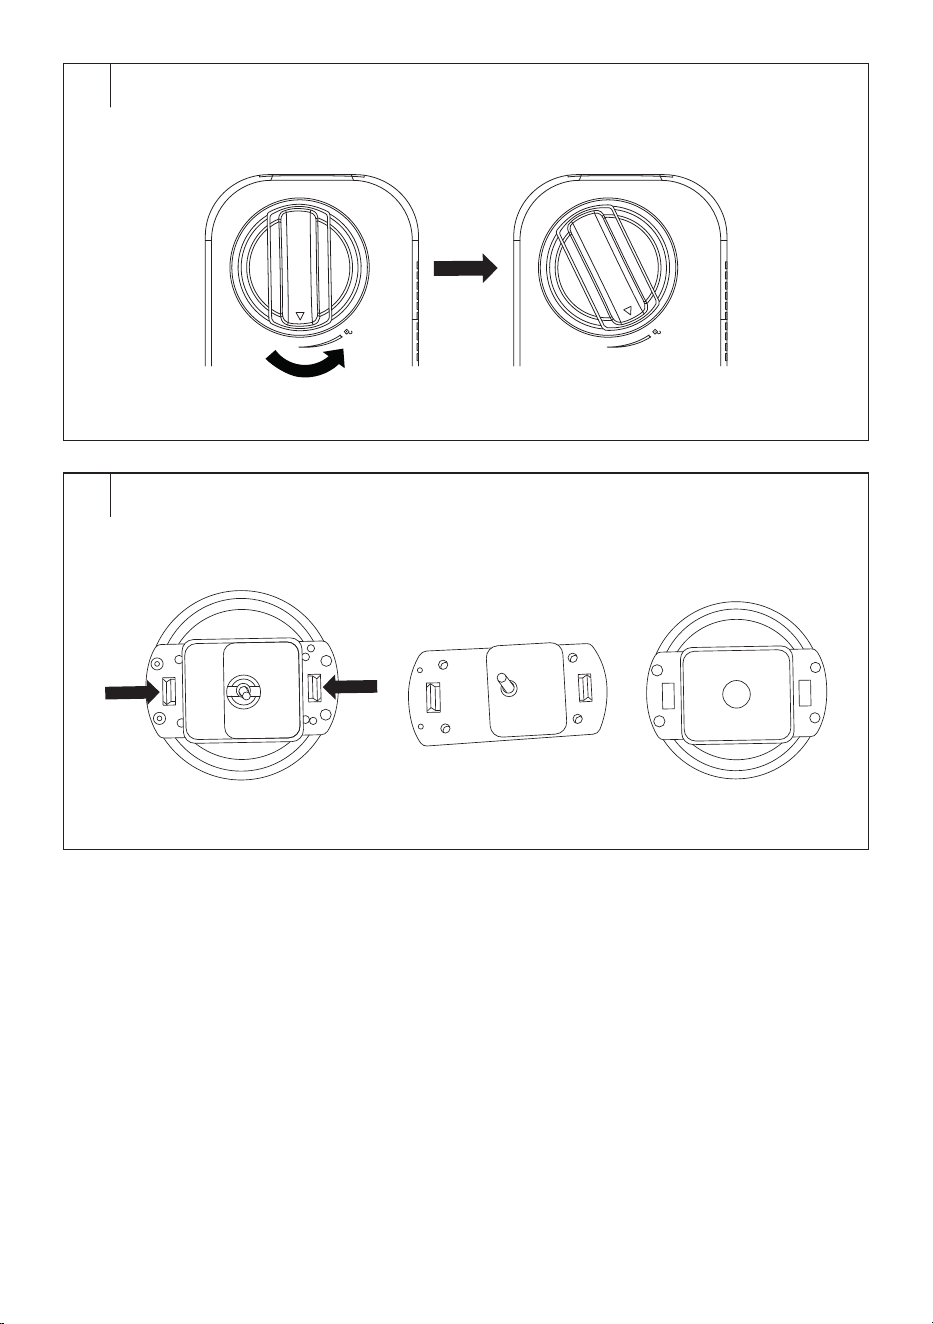
7. Turn the handle of the motor unit in the direction of the graphical
representation until you feel resistance – see Figure D5.
. . . . . . . . . . . . . . . . . . . . . . . . . . . . . . . . . . . . . . . . . . . . . . . . . . . . . . . . . . . . . . . . . . . .
PUTTING INTO OPERATION
1. Fully unwind the power cord.
2. Insert the power plug into apower outlet.
3. The maker will make along beep, the control panel will light up
for about 1second andthen go out. The
button will flash. This
indicates that the maker has switched to standby mode.
. . . . . . . . . . . . . . . . . . . . . . . . . . . . . . . . . . . . . . . . . . . . . . . . . . . . . . . . . . . . . . . . . . . .
USING THE ICE CREAM MAKER
1. Prepare your ice cream, sorbet or yoghurt ingredients andput them
in the container.
Note:
The container should be filled with amaximum of 2/3
of the total capacity. Do not fill the container above this
amount. There is arisk of ingredients overflowing, blocking
the mixing paddle anddamaging the maker.
2. Then assemble the maker according to the instructions in the
section ICE CREAM MAKER ASSEMBLY.
3. Insert the power cord plug into amains socket andpress the button
to turn the maker on.
4. Select one of theprograms, adjust the time as needed andpress the
button . The maker will start.
5. The mixing paddle will rotate throughout the entire preparation time.
Note:
For more dense mixtures, you may notice that the mixing
paddle is more difficult to rotate. Insuch acase, interrupt
the operation of the machine and dilute the mixture or
remove apart.
6. When the set time has elapsed, 10 short beeps will sound, the
maker will switch off andswitch to standby mode, exceptfor the
ICECREAM program, when the Keep Cool function will automatically
start.
7. Loosen the motor unit and store the prepared ice cream, sorbet or
yoghurt in afreezer or afridge.
8. Allow all parts to warm up to room temperature andthen clean
them according to the instructions inthe CLEANING AND
MAINTENANCE section.
. . . . . . . . . . . . . . . . . . . . . . . . . . . . . . . . . . . . . . . . . . . . . . . . . . . . . . . . . . . . . . . . . . . .
EN
Ice cream maker
User Manual
- 6 -
01/2025
2025, .
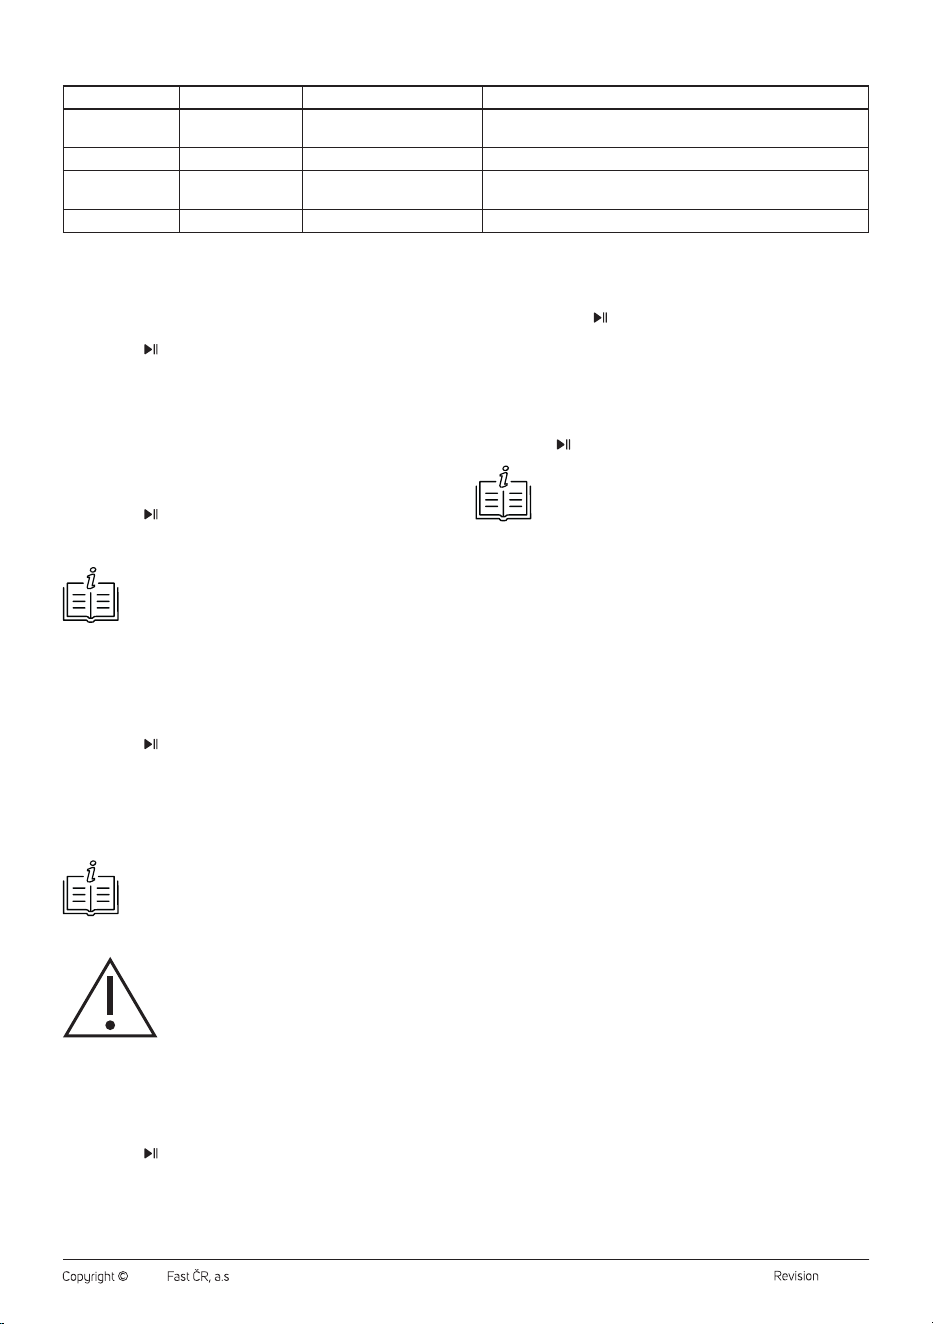
PROGRAM TABLE
Mode Default time Option to adjust Note
MIXING
30:00 05:00–60:00
Suitable formixing ice cream, sorbet or yoghurt ingredients without
refrigeration or heating.
COOLING
10:00 05:00–60:00 Suitable formixing andcooling ingredients.
ICE CREAM
60:00 05:00–60:00
Suitable for making ice cream, sorbet or frozen yoghurt. When
finished, Keep Cool will automatically turn on.
YOGHURT
8 h 4 h–24 h Suitable for preparing fresh yoghurt.
OPERATION INTERRUPTION OF THE MAKER
If you need to check the condition of the ingredients, add ingredients
or release ingredients from the mixing paddle during operation, do the
following:
1. Briefly press the
button. The button will start flashing.
2. Release the motor unit andgently pull it upwards.
3.
It is possible that the mixing paddle will remain inside the container.
This is anormal occurrence.
4. Check the ingredients, add the ingredients or release the ingredients
from thepaddle.
5. Attach the paddle to the shaft andinsert it back into the container.
Turn the motor unit.
6. Press the
button to continue processing of ingredients.
Note:
Only interrupt the operation of the maker for as long as
necessary andonly if necessary.
. . . . . . . . . . . . . . . . . . . . . . . . . . . . . . . . . . . . . . . . . . . . . . . . . . . . . . . . . . . . . . . . . . . .
KEEP COOL FUNCTION
Keep Cool function (to keep the temperature low) keeps the temperature
low so that the finished ice cream or sorbet does not melt before
transferring it to the freezer.
The Keep Cool function will activate automatically when the ICE
CREAM program has finished andwill last for approximately 1hour.
The maker then switches off and switches to standby mode. Therefore,
it is necessary to transfer the finished ice cream or sorbet to asuitable
container andstore it in afreezer.
While the Keep Cool function is activated, the compressor will be
switched on regularly. This is anormal occurrence. When the maker
detects an increase in temperature, the compressor will start, which will
lower the temperature again.
It is not possible to select the Keep Cool function separately.
. . . . . . . . . . . . . . . . . . . . . . . . . . . . . . . . . . . . . . . . . . . . . . . . . . . . . . . . . . . . . . . . . . . .
ENGINE PROTECTION
The ice cream maker is equipped with an engine protection function. If
the hardness of the ice cream reaches the set consistency, the motor
automatically stops to avoid damage due to overheating, evenbefore the
set time has elapsed.
10 short beeps will sound and the maker will automatically switch to the
Keep Cool function.
. . . . . . . . . . . . . . . . . . . . . . . . . . . . . . . . . . . . . . . . . . . . . . . . . . . . . . . . . . . . . . . . . . . .
COMPRESSOR PROTECTION
The ice cream maker is equipped with acompressor protection to
protect it from damage if you would turn the maker off in the ICE CREAM
or COOLING programs andthen turn the maker back on andselect
one ofthese modes. Inthis case, the compressor will start after about
3minutes.
However, if you disconnect the power cord andreconnect it to the mains,
the maker will restart and the compressor will be switched on after
selecting the ICE CREAM or COOLING programs.
. . . . . . . . . . . . . . . . . . . . . . . . . . . . . . . . . . . . . . . . . . . . . . . . . . . . . . . . . . . . . . . . . . . .
TIPS AND ADVICE
For best results, the mixture should be pre-cooled in the refrigerator for
afewhours (ideally 2–4hours). The colder mixture will freeze faster,
which will improve the structure of the ice cream.
Use high quality ingredients.
• Whole cream andmilk: The fatter the cream andmilk, the creamier
the resulting ice cream. Choose high-fat cream (ideally 30% or more).
MIXING program
1. Place the ingredients that you wish to process into the container.
2. Turn on the machine andpress the MIXING button.
3. Use the +/– buttons to adjust the preparation time. Each short press
of the +/– buttons increases/decreases the time by1minute; each
long press of the +/– buttons increases/decreases the time rapidly.
4. Press the
button to start the program.
5. Once the set time elapses, 10 short beeps will sound, the maker will
switch off andswitch to standby mode.
COOLING program
1. Place the ingredients that you wish to mix and cool into the
container.
2. Turn on the maker andpress the COOLING button.
3. Use the +/– buttons to adjust the preparation time. Each short press
of the +/– buttons increases/decreases the time by1minute; each
long press of the +/– buttons increases/decreases the time rapidly.
4. Press the
button to start the program.
5. Once the set time elapses, 10 short beeps will sound, the maker will
switch off andswitch to standby mode.
Note:
During the COOLING program, the temperature is reduced
and the container may be very cold. We recommend using
protective kitchen mitts when taking out the container.
ICE CREAM program
1. Place the ingredients for the ice cream or sorbet in the container.
2. Turn on the maker andpress the ICE CREAM button.
3. Use the +/– buttons to adjust the preparation time. Each short press
of the +/– buttons increases/decreases the time by1minute; each
long press of the +/– buttons increases/decreases the time rapidly.
4. Press the
button to start the program.
5. When the set time has elapsed, or the maker detects that
the ice cream or sorbet is ready, 10 short beeps will sound
andautomatically switch to the Keep Cool function.
6. The Keep Cool function will be inoperation for 1hour.
7. After 1hour, 10 short beeps sound, the maker switches off
andswitches to standby mode.
Note:
During the ICE CREAM program, the temperature
is reduced and the container may be very cold. We
recommend using protective kitchen mitts when taking out
the container.
Warning:
Do not touch the container with wet hands.
YOGHURT program
1. Place the ingredients for the yoghurt in the container.
2. Turn on the maker andpress the YOGHURT button.
3. Use the +/– buttons to adjust the preparation time. Each short press
of the +/– buttons increases/decreases the time by1hour each long
press of the +/– buttons increases/decreases the time rapidly.
4. Press the button to start the program.
5. Once the set time elapses, 10 short beeps will sound, the maker will
switch off andswitch to standby mode.
. . . . . . . . . . . . . . . . . . . . . . . . . . . . . . . . . . . . . . . . . . . . . . . . . . . . . . . . . . . . . . . . . . . .
- 7 -
01/2025
2025, .
• Sugar: Sugar not only sweetens, but also helps to soften the texture
of ice cream. You can use regular white sugar, but alsoother variants
such as cane sugar or honey.
After the production is finished, the ice cream can still be soft, ideal for
serving directly from themaker. If you want it to be firmer, put it in the
freezer for 1–2hours so that it hardens to the required consistency.
Experiment withflavours:
• Vanilla base: If you want to have abase for different flavours, use
asimple vanilla base (see recipe for vanilla ice cream). You can add
various flavours to this base, such as chocolate, coffee, fruit or spices
(cinnamon, cardamom).
• Milk or fruit ice cream: Based on what type of ice cream you want,
customize the ingredients. For fruit ice cream, you can use fresh fruit
puree instead of some liquid ingredients (e.g. part of milk or cream).
Store ice cream, sorbet or frozen yoghurt in afreezer container with the
lid tightly closed. Allow the ice cream to loosen for awhile before serving
for abetter scoop.
. . . . . . . . . . . . . . . . . . . . . . . . . . . . . . . . . . . . . . . . . . . . . . . . . . . . . . . . . . . . . . . . . . . .
CLEANING AND MAINTENANCE
• The ice cream maker must be cleaned after each use.
• Before cleaning, disconnect the power plug from the mains socket and
allow the appliance to warm up to room temperature.
• Do not use abrasive cleaning agents, solvents, etc. to clean any parts
of the appliance, as these could damage the surface of the appliance.
None of the components of this appliance are dishwasher safe.
Warning:
To prevent the risk of electric shock, do not immerse
the appliance, power cable, or plug into water or any
other liquid.
. . . . . . . . . . . . . . . . . . . . . . . . . . . . . . . . . . . . . . . . . . . . . . . . . . . . . . . . . . . . . . . . . . . .
DISASSEMBLY OF THE ICE CREAM MAKER
1. Turn the motor unit handle until the arrow on the motor unit handle is
aligned with the
symbol on the maker body – see figure E1.
2. Pull the motor unit out ofthe maker body.
3. It is possible that the mixing paddle will remain inside the container.
This is anormal occurrence. If it does not stay, remove it from
theshaft.
4. Grasp the container by the handle andpull it out of theinside area
of the maker. We recommend using kitchen mitts, especially if you
have used the ICE CREAM or COOLING program.
5. Remove the mixing paddle from thecontainer, transfer the contents
of the container to the bowl andstore in your refrigerator or freezer.
6. Remove the motor unit from the lid. Place the motor unit so that the
motor unit handle faces down. Press the latches against each other
– see figure E2; andlift the lid upwards.
. . . . . . . . . . . . . . . . . . . . . . . . . . . . . . . . . . . . . . . . . . . . . . . . . . . . . . . . . . . . . . . . . . . .
CLEANING THE CONTAINER, MIXING PADDLE AND LID
Wash the container, mixing paddle and lid in warm water with alittle
kitchen detergent using asoft sponge. Rinse and wipe dry.
. . . . . . . . . . . . . . . . . . . . . . . . . . . . . . . . . . . . . . . . . . . . . . . . . . . . . . . . . . . . . . . . . . . .
CLEANING THE MOTOR UNIT AND THE MAKER
Wipe the motor unit, the interior and the outer surface of the maker with
aslightly dampened sponge. Wipe dry with aclean cloth.
. . . . . . . . . . . . . . . . . . . . . . . . . . . . . . . . . . . . . . . . . . . . . . . . . . . . . . . . . . . . . . . . . . . .
STORAGE
• If you will not be using the appliance for an extended period of time,
unplug the plug from the power socket and clean it according to the
instructions in the chapter “Cleaning and Maintenance”.
• Before storing, ensure that the appliance and all accessories are
thoroughly clean and dry.
• Store the appliance in adry, clean, and well-ventilated place away
from extreme temperatures and out of the reach of children or pets.
. . . . . . . . . . . . . . . . . . . . . . . . . . . . . . . . . . . . . . . . . . . . . . . . . . . . . . . . . . . . . . . . . . . .
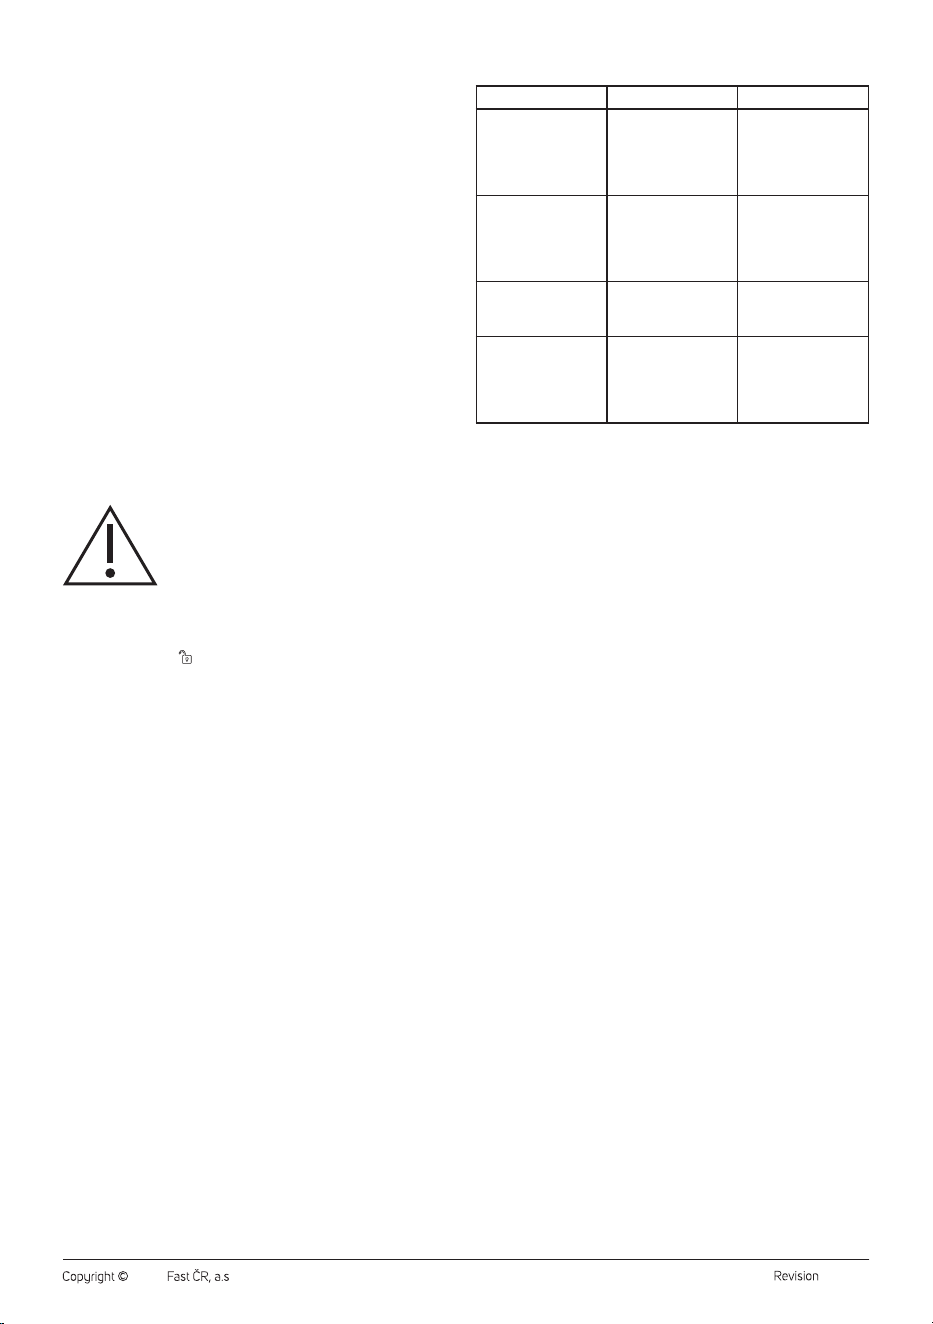
TROUBLESHOOTING
Problem Possible Cause Solution
After finishing the
ice cream, it is not
easy to remove the
container.
Water that has frozen
has remained on the
outer surface of the
container or in the
interior of the maker.
Wait 3–8minutes
for the water to melt
before removing the
container.
It is not possible
to insert the motor
unit with the mixing
paddle attached into
the container.
The mixing paddle is
not properly seated
on the shaft.
Remove the paddle
andreattach it.
The container cannot
be inserted into the
interior.
The container is
deformed.
It is necessary to
purchase anew
container.
At the beginning of ice
cream production, the
mixing paddle gets
stuck anddoes not
spin smoothly.
The container is
deformed.
It is necessary to
purchase anew
container.
. . . . . . . . . . . . . . . . . . . . . . . . . . . . . . . . . . . . . . . . . . . . . . . . . . . . . . . . . . . . . . . . . . . .
TECHNICAL SPECIFICATIONS
Rated voltage range ..............................................................................220–240 V~
Rated frequency ...................................................................................................50 Hz
Nominal power input (cooling) ........................................................................100 W
Nominal power input (heating) ..................................................................... 22.8 W
Refrigerant ................................................................................................R600a (18 g)
Insulation ...................................................................................Cyclopentane (C
5
H
10
)
Noise level ......................................................................................................<60 dB(A)
The declared noise emission level of the appliance is ≤ 60 dB(A), which
represents alevel Aof acoustic power with respect to areference acoustic
power of 1 pW.
. . . . . . . . . . . . . . . . . . . . . . . . . . . . . . . . . . . . . . . . . . . . . . . . . . . . . . . . . . . . . . . . . . . .
RECIPES
Vanilla ice cream
225 g full-fat milk (chilled)
105 g caster sugar
165 g of cream (min. 33% fat) (chilled)
1–2 tsp vanilla extract
1. Inabowl, mix the milk and caster sugar. Mix until the sugar
dissolves.
2. Add the cream andvanilla extract.
3. Transfer the mixture into the container and insert it into the machine.
4. Select the ICE CREAM program for 50–60minutes.
5. Transfer the finished ice cream to acontainer suitable for the freezer
andstore.
It is best to use the ice cream produced in this way within two weeks.
Tip: You can add fresh fruits (e.g. strawberries, blueberries or raspberries),
chocolate chips, etc. to the ice cream.
Creamy chocolate ice cream
160 g full-fat milk (chilled)
75 g caster sugar
160 g quality dark chocolate, broken into small pieces
160 g cream (min. 33% fat)
½ tsp vanilla extract
1. Place the sugar and chocolate chips into the container. Mix
thoroughly.
2. Pour the milk into asmaller pot andbring to theboil. Pull off thehob
as soon as it starts to boil.
3. Put the chopped chocolate withsugar in the hot milk andstir until
the sugar andchocolate are completely dissolved.
4. Allow to cool to room temperature, stirring occasionally.
5. When the mixture is chilled, put it in the refrigerator andchill
properly.

- 8 -
01/2025
2025, .
6. Add the cream to the cooled mixture and stir well.
7. Transfer the mixture into the container and insert it into the machine.
8. Select the ICE CREAM program for 50–60minutes.
9. Transfer the finished ice cream to acontainer suitable for the freezer
andstore.
It is best to use the ice cream produced in this way within two weeks.
Tip: You can add chocolate chips to the ice cream.
Tip: You can replace dark chocolate with quality milk chocolate.
LEMON SORBET
235 g caster sugar
280 g chilled water
80 g fresh lemon juice
0,5 tbsp lemon peel (finely grated)
Preparation of sugar syrup:
1. Inapot, mix water andsugar andheat at medium temperature until
almost boiling point.
2. Remove the heat and allow the sugar to dissolve completely without
stirring. This may take 3–5minutes.
3. Transfer to abowl andallow to fully cool down.
4. Preparation of lemon sorbet:
5. Add freshly squeezed lemon juice andlemon zest to the sugar
syrup. Mix well.
6. Transfer the mixture into the container and insert it into the machine.
7. Select the ICE CREAM program for 50–60minutes.
8. Transfer the finished ice cream to acontainer suitable for the freezer
andstore.
It is best to use the sorbet produced in this way within two weeks.
Tip: You can prepare sugar syrup in larger quantities and store it in
therefrigerator.
Tip: Instead of lemon you can use orange juice, tangerine juice, etc.
Basic preparation of yoghurt
600 ml fresh full-fat milk
50 ml white yoghurt with live cultures
1. Inabowl, mix the milk andyoghurt. Allow to warm up to room
temperature.
2. Transfer the mixture into the container and insert it into the machine.
3. Select the YOGHURT program for 8hours. First, the mixture is
heated to 37–45°C. The yoghurt cells are activated andthen the
yoghurt matures andforms.
4. Put the finished yoghurt in asuitable glasses and store in the
refrigerator.
The time of preparation andripening of yoghurt depends on the initial
temperature of the ingredients and the amount of yoghurt. If the milk
andyoghurt are cold, the heating andsubsequent fermentation will be
longer. Inthis case, we recommend extending the preparation time to 10
to 12hours. If you put in more yoghurt, the cooking time will be faster.
Frozen Yoghurt
160 g full-fat milk
180 g high-quality dark or milk chocolate, chopped into smaller pieces
270g of vanilla yoghurt
30 g caster sugar
1. Place the milk and chocolate chips into the container. Mix well for
approximately 15–20seconds.
2. Add yoghurt andsugar andstir for another 15–20seconds.
3. Transfer the mixture into the container and insert it into the machine.
4. Select the COOLING program for 30–50minutes.
5. Transfer the finished frozen yoghurt to acontainer suitable for the
freezer andstore.
. . . . . . . . . . . . . . . . . . . . . . . . . . . . . . . . . . . . . . . . . . . . . . . . . . . . . . . . . . . . . . . . . . . .
INSTRUCTIONS AND INFORMATION ON DISPOSAL OF USED
PACKAGING MATERIAL
Dispose of used packaging material at the location designated by the
municipality for waste disposal.
DISPOSAL OF USED ELECTRICAL AND ELECTRONIC EQUIPMENT
Used electrical andelectronic products must not be added to ordinary
municipal waste. For proper disposal and recycling of these products,
deliver them to designated collection points. Alternatively, in some
European Union states or other European countries the products can be
returned to the local retailer when buying an equivalent new product. By
properly disposing of this product, you help preserve valuable natural
resources and contribute to preventing potential negative impacts on the
environment and human health resulting from improper waste disposal.
For more details, contact your local authority or nearest collection point.
Fines may be imposed for improper disposal of this type of waste as per
national regulations.
For Business Entities in European Union States
To dispose of electric or electronic equipment, request necessary
information from your retailer or supplier.
Disposal in Other Countries Outside the European Union
To dispose of this product elsewhere, request necessary information on
the correct disposal method from local authorities or your retailer.
. . . . . . . . . . . . . . . . . . . . . . . . . . . . . . . . . . . . . . . . . . . . . . . . . . . . . . . . . . . . . . . . . . . .
Changes to text and technical parameters are reserved.

www.sencor.com
info@sencor.cz