Save the user manual for future reference. If you have any questions,
please contact us to get suppo.
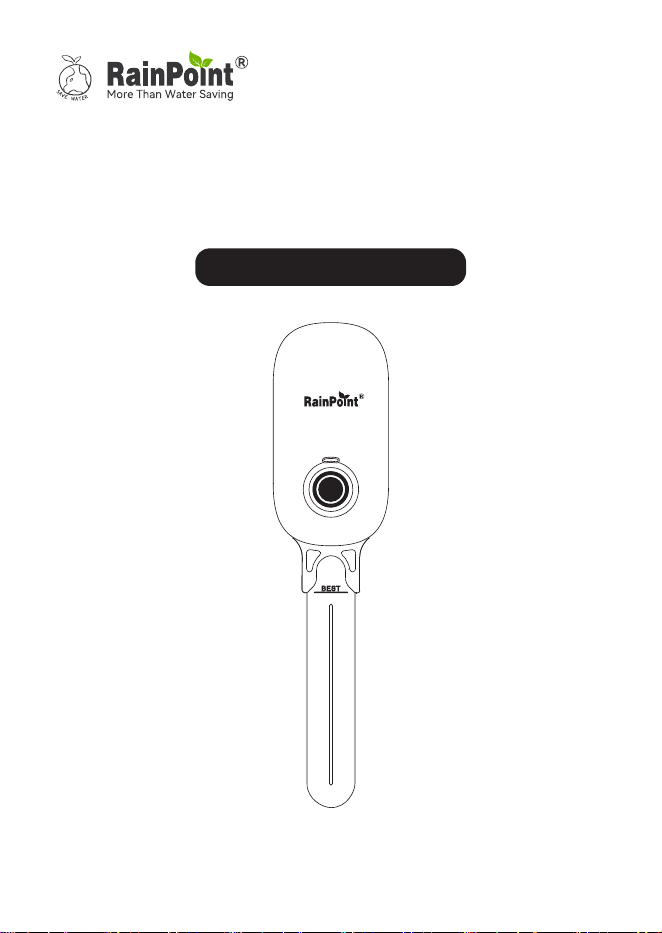
USER MANUAL
Sma Soil Moisture Sensor
Model No. TCS024B

Contents
01
02
02
03
03
03
03
04
09
09
10
11
12
13
14
15
16
16
18
EN
1. Contents in the box
2. Introduction
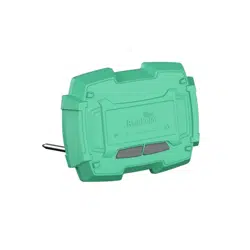
2.1 Product Oveiew
2.2 Specication
2.3 Product Features
3. Connection And Installation
3.1 Installing the APP
3.2 Connecting the Soil Moisture Sensor
4. APP Programming
4.1 Product Oveiew
4.2 Device Home Page
4.3 Plant List
4.4 Customized Settings
4.5 Home Management
4.6 Reset The Device
5. Troubleshooting
6. Warranty Policy
7. FCC Statement
8. Customer Suppo
-01-
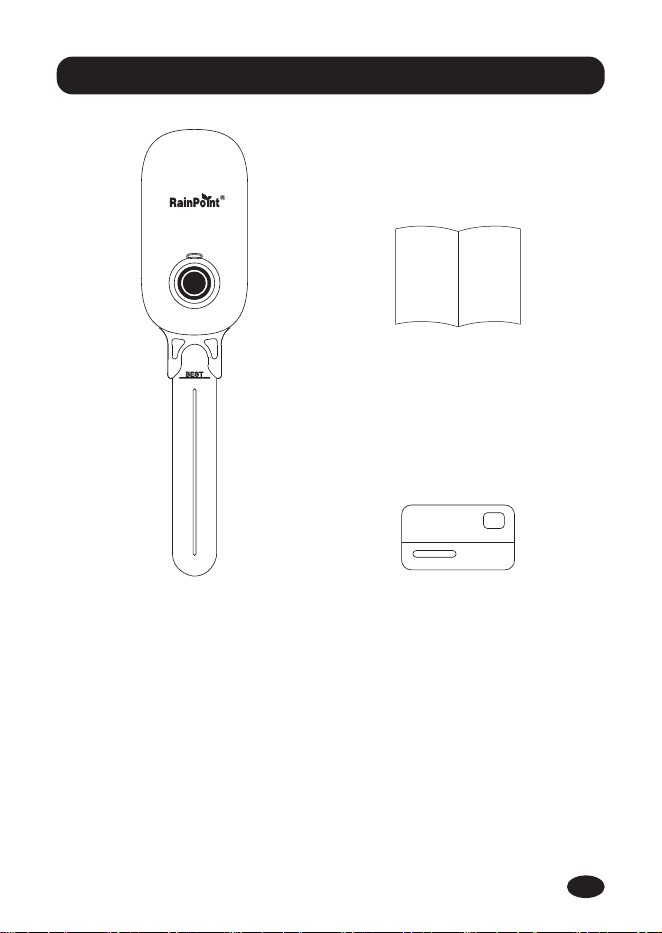
1. Contents in the box
TCS024B Sma Soil Moisture Sensor
User Manual
Warranty Card
1.
2.
3.
1
2
3
EN
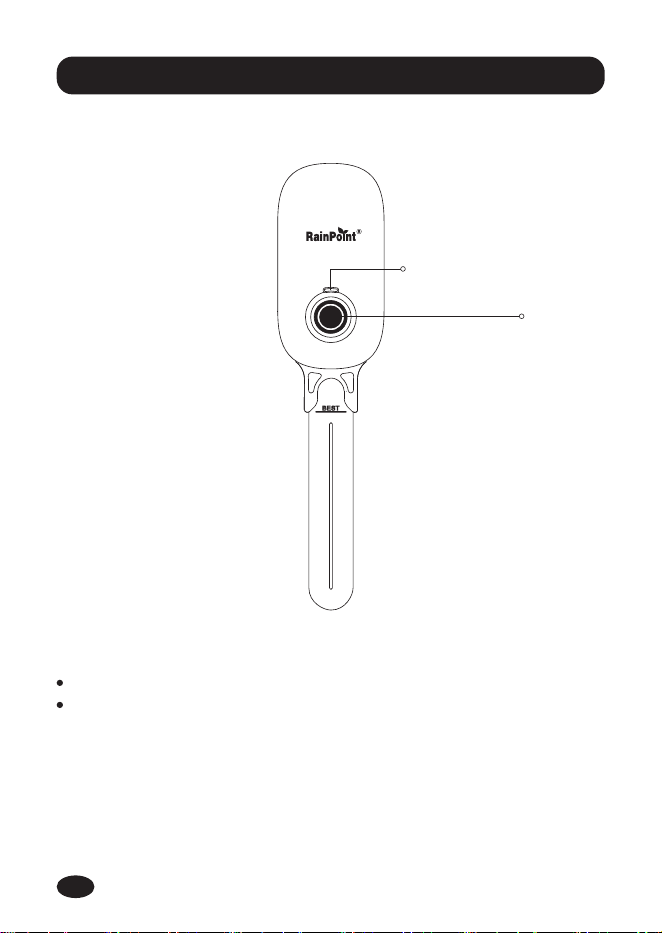
2.1 Product Oveiew
-02-
2. Introduction
Button Function
LED INDICATOR LIGHT
BUTTON
Hold the button to enter connection mode.
Press the button to make a real-time detection and the result
will be shown on the APP.
EN
2.2 Specication
Waterproof Level: IP54
TemperatureRange:37.4℉-122℉(3℃-50℃)
MoistureRange:0%RH-100%RH
Communication by Bluetooth
Powered by 3*AAA batteries (Not included)
2.3 Product Features
3.1 Installing the APP
Measures soil moisture (%) and air temperature (℃/℉).
App control for easy setup and operation.
Used in indoor planters, learning more about areas of soil
information.
When the batteries are low, a sho press on the button will
cause the red light to ash rapidly for 3 times. The device will
not peorm any detection, and the app will display a low
batte indication.
3. Connection And Installation
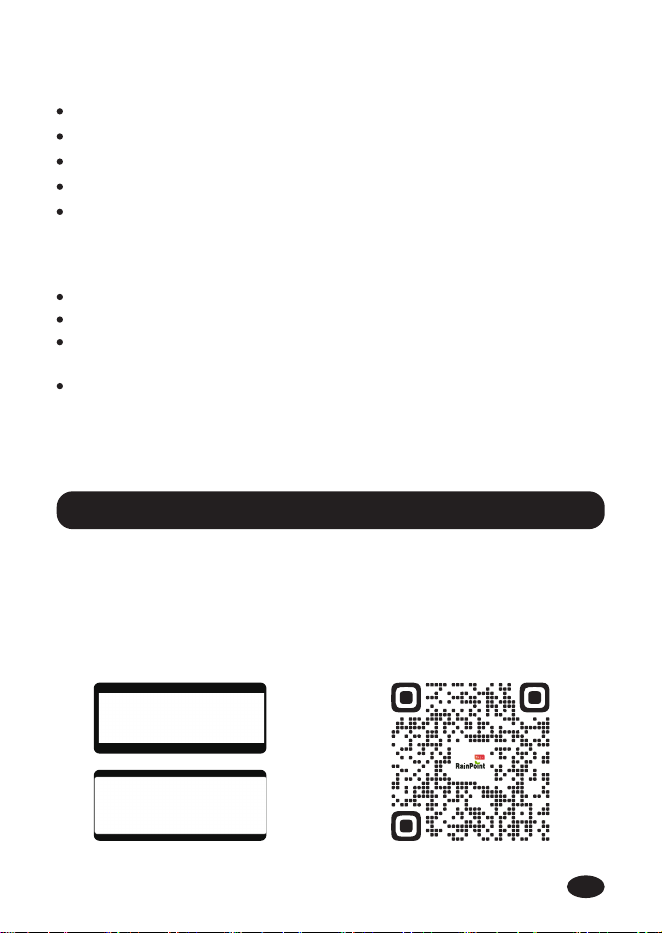
Download the RainPoint APP
Search for "RainPoint" on Google Play/App Store or scan the
QR code to download the RainPoint APP.
1.
iOS/Android
-03-
EN
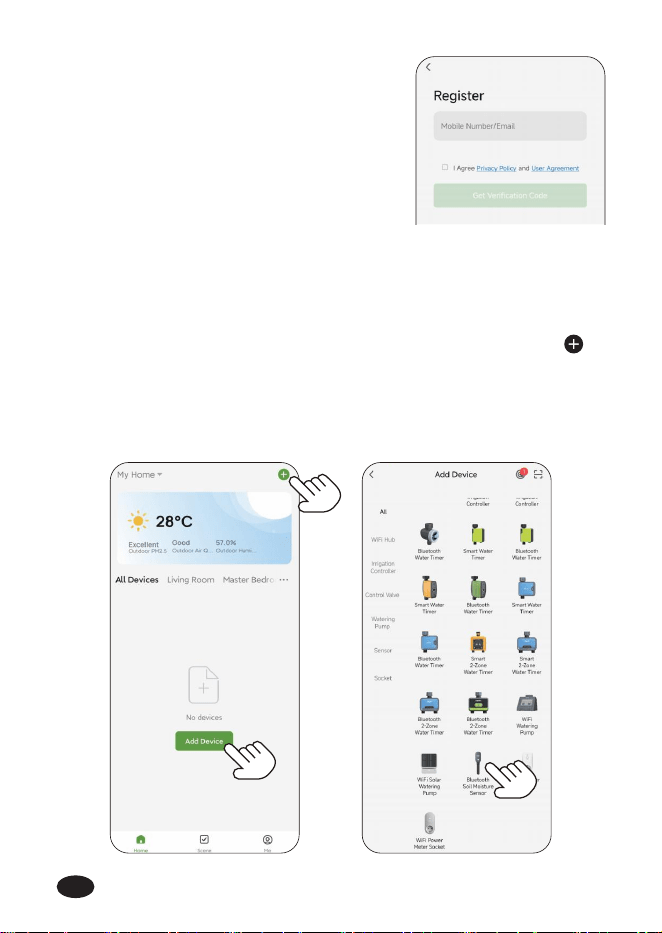
Register your RainPoint account
Open your RainPoint APP, select
"Set Up" , and then follow the
prompts to register a RainPoint
account with your email or mobile
phone.
2.
3.2 Connecting the Soil Moisture Sensor
After account created, in the home page of the APP, click
on the top right corner, or then click "Add Device" to search
and add devices.
Tap "Sma Irrigation", then select "Bluetooth Soil Moisture
Sensor".
a.
b.
3.2.1 Connecting the Soil Moisture Sensor to the RainPoint APP
-04-
EN
Note: Before adding the soil moisture sensor, please turn on the
Bluetooth for pairing.
Tips: Besides that, you can also hold the button for 5 seconds to
reset and reconnect if you fail to connect for the rst time. (Please
refer to the "RESETTHE DEVICE" to reset the soil moisture sensor)
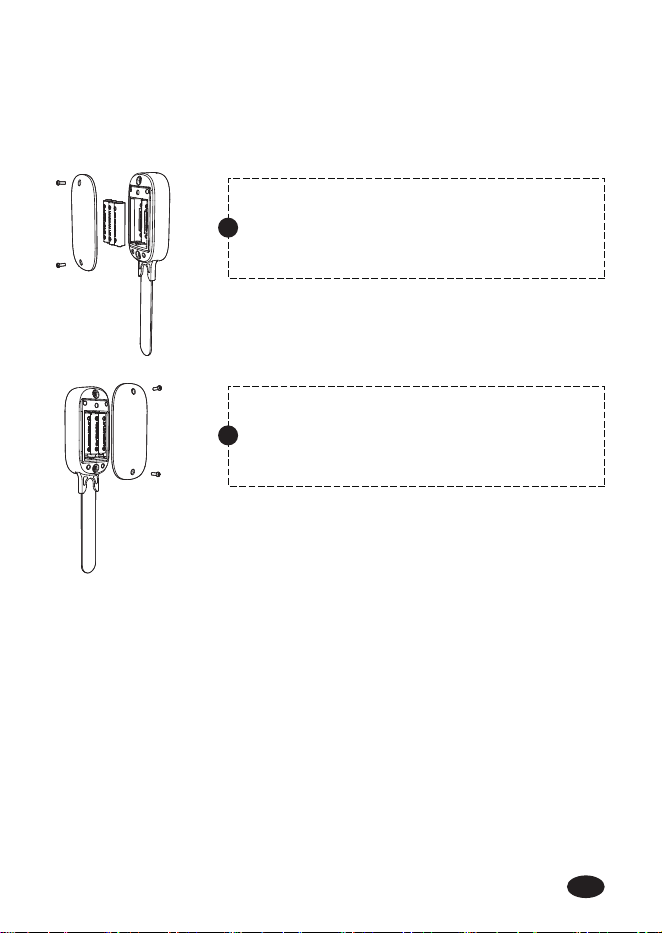
Installing the Batte.
c.
Remove the batte cover from the back
of the unit with a screwdriver.
1
Inse the batte, close the batte cover
and tighten the screws.
2
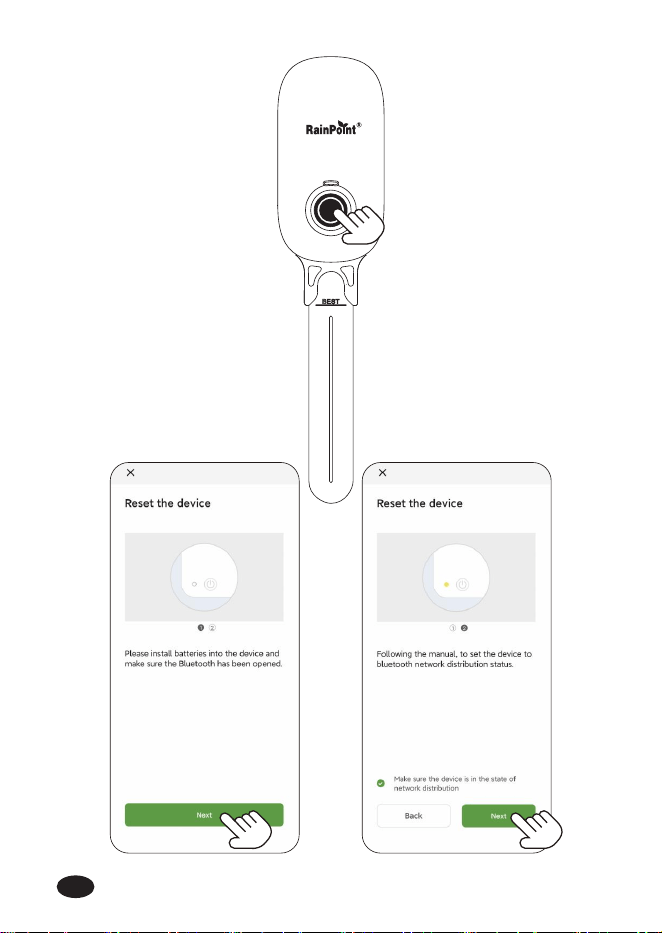
After the batte is correctly installed, the green LED indicator
will sta ashing rapidly (2 times per second) to enter pairing
mode automatically, make sure the Bluetooth has been
opened, and tap "Next".
Then select "Make sure the device is in the state of network
distribution" and tap "Next".
d.
-05-
EN
-06-
EN
-07-
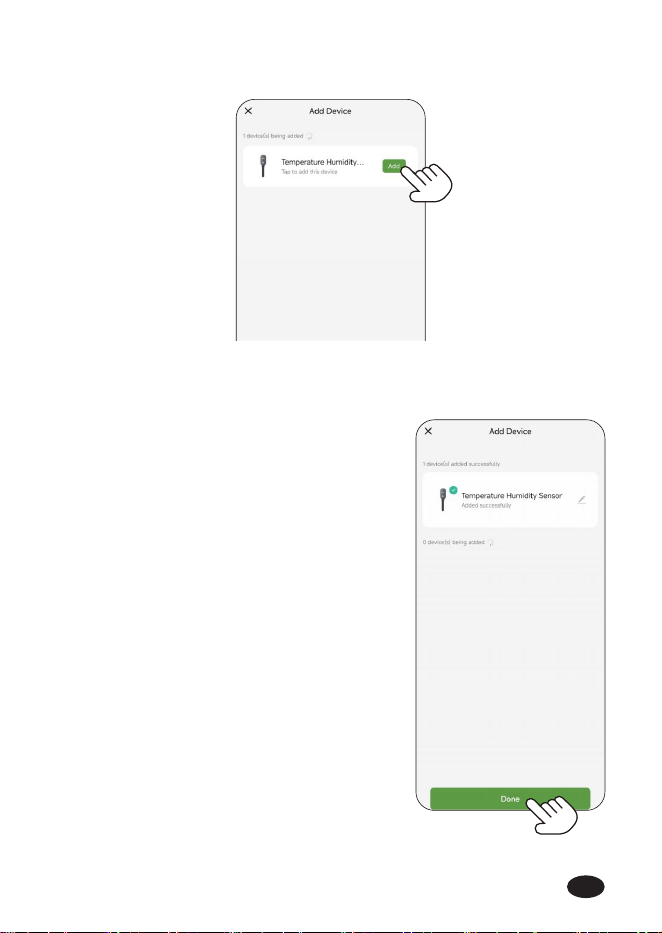
Click "Add" on the right.
e.
When the check mark appears, click "Done" to complete the
connection.
f.
NOTE: If necessa, the Bluetooth soil
moisture sensor can be paired with an
intelligent gateway (Model:TWG009BW)
to become a WiFi soil moisture sensor for
remote control. The WiFi soil moisture
sensor can also be paired with a water
timer (Model: TTV102B) for sma
watering.
EN
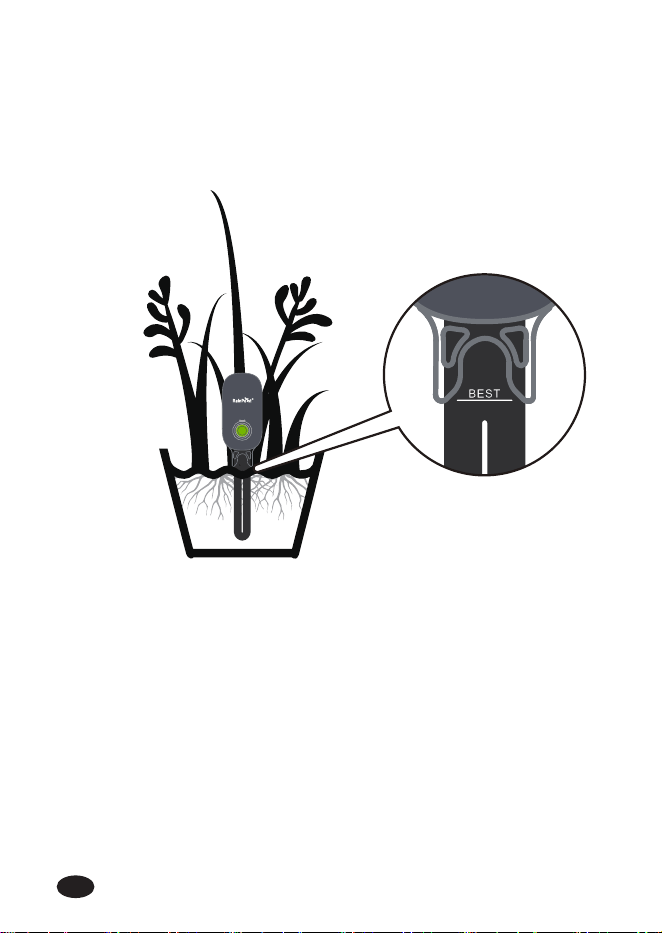
3.2.2 Installing the Soil Moisture Sonser
-08-
If your soil is soft, inse the device in the "BEST" position.
If your soil is hard, dig a hole and bu the device in the "BEST"
position.
EN
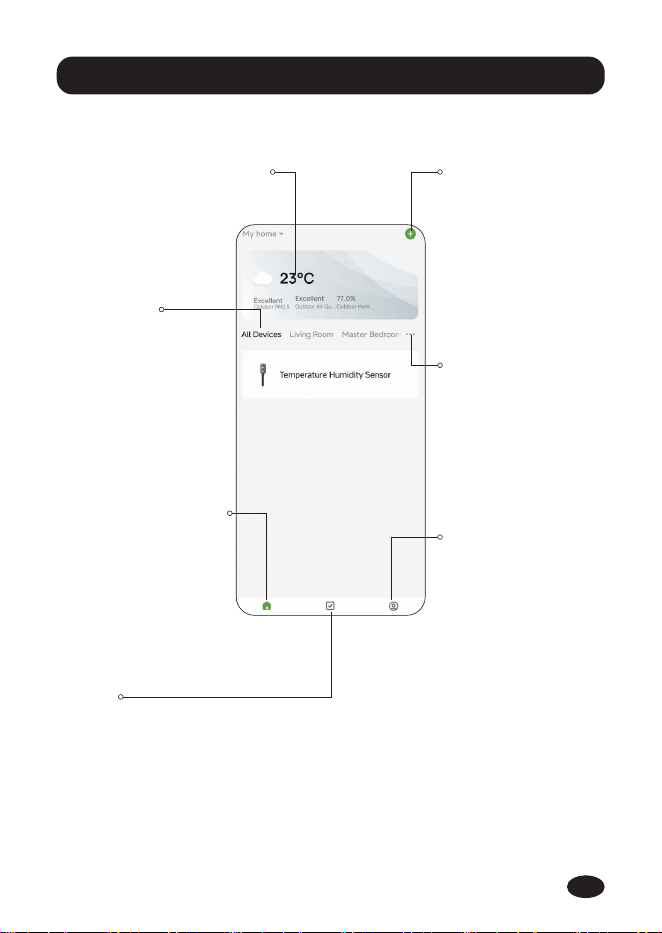
4.1 Product Oveiew
-09-
4. APP Programming
Add Devices
You can add
multiple RainPoint
devices on the APP
to create a
sma home
irrigation system.
Local Weather Forecast
Get your local
weather forecast
from website to
realize intelligent
watering.
All Devices
A check list of all the
devices you have
connected. Tap to
enter the operation
page of devices you
have added to
program the
operation schedule
of the device.
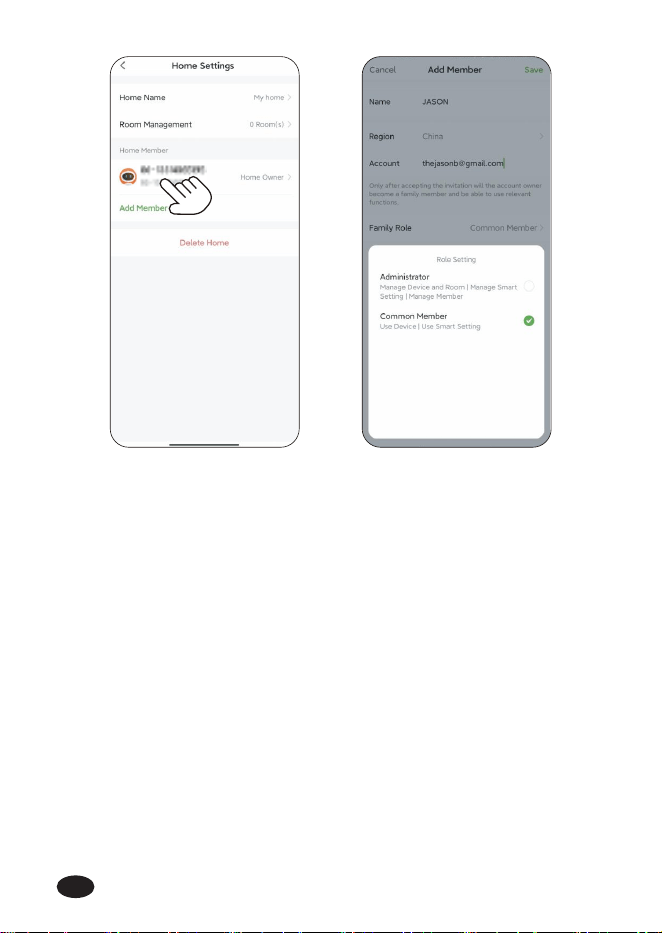
Home Management
You can locate your
home, customize the
home name and add
family members. It is
convenient for you
to manage irrigation
schedules for
dierent residences.
Scene
On the "Scene"
screen, there is
"Tap-To-Run" and
"Automation"
functions. You can
automate multiple
sma products by
setting conditions
and tasks.
Me
On the"Me" screen,
there is "Message
Center" and "FAQ &
Feedback" functions.
You will receive
water leak and low
batte ales on
"Message Center".
And you can get
FAQ and repo
issue on "FAQ &
Feedback".
Room Management
Room Management
is for indoor
automatic irrigation
system in dierent
room.
EN
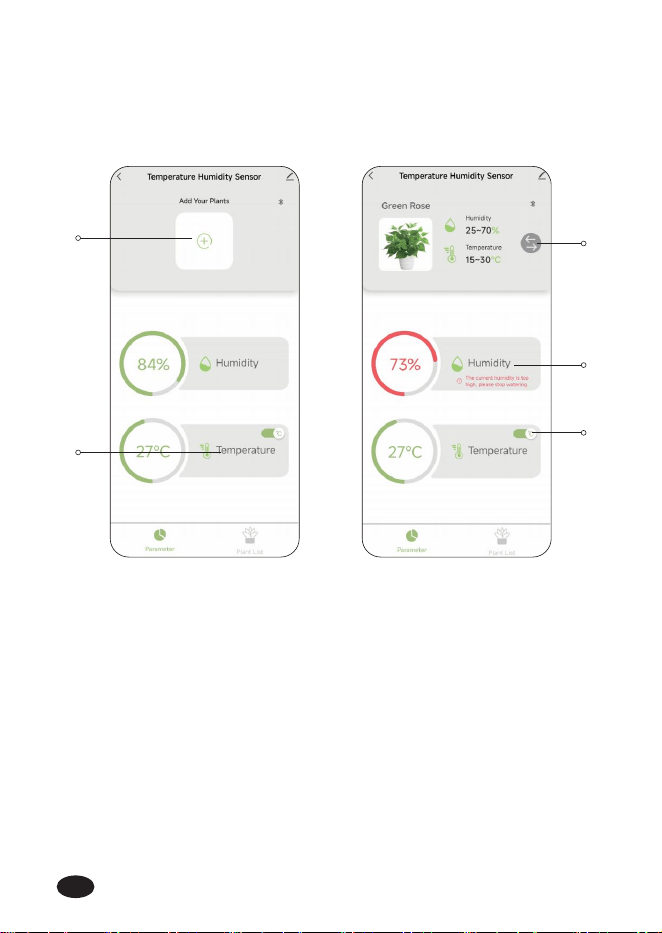
4.2 Device Home Page
Select the Bluetooth soil moisture sensor to go to the device
home page. There are many data and functions as follows:
1
2
3
5
4
Quickly add
Switch plants
Current soil moisture
Current air temperature
Celsius degree/Fahrenheit switching
1.
2.
3.
4.
5.
-10-
EN
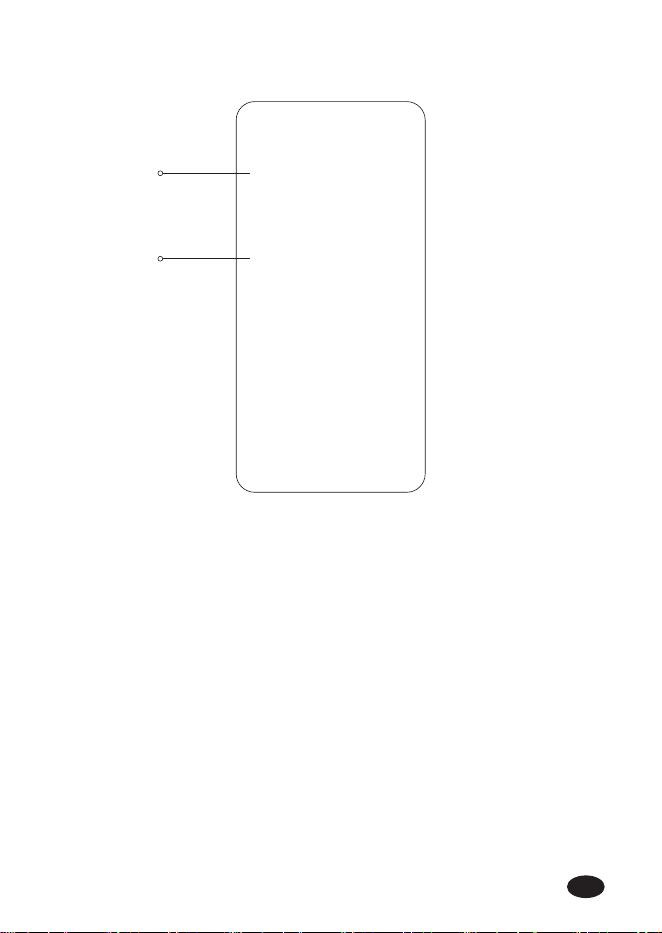
4.3 Plant List
1
2
Add customized plants
Add a system of plants, there are twenty to choose from.
1.
2.
-11-
EN
-12-
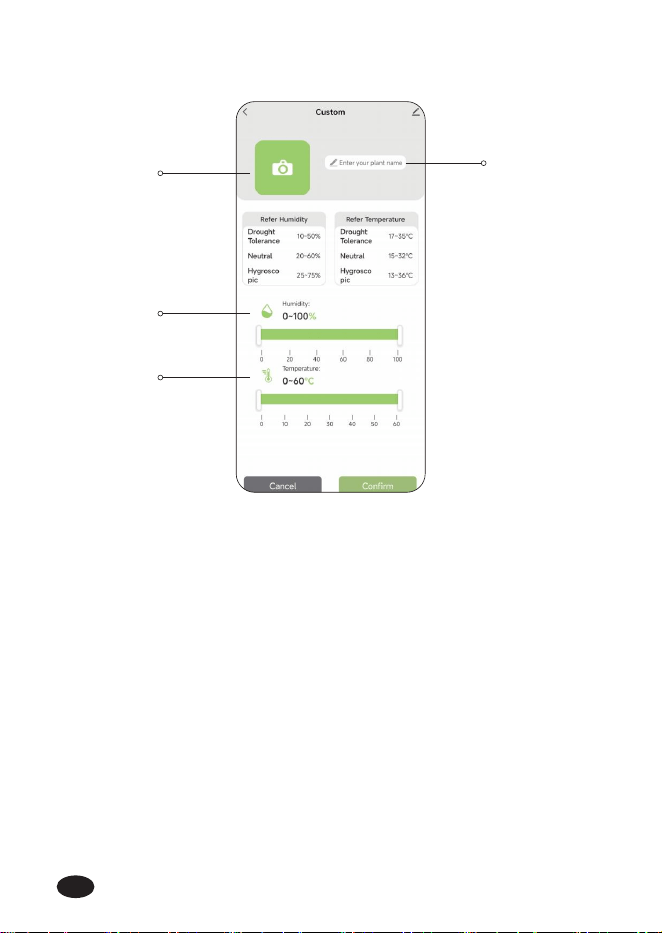
4.4 Customized Settings
1
3
4
Click here to take a picture or upload a picture of the plant.
Enter the name of the plant.
Set the appropriate humidity range for the plant
(Refer to the above data when setting).
Set the appropriate temperature range for the plant
(Refer to the above data when setting).
1.
2.
3.
4.
2
EN
-13-
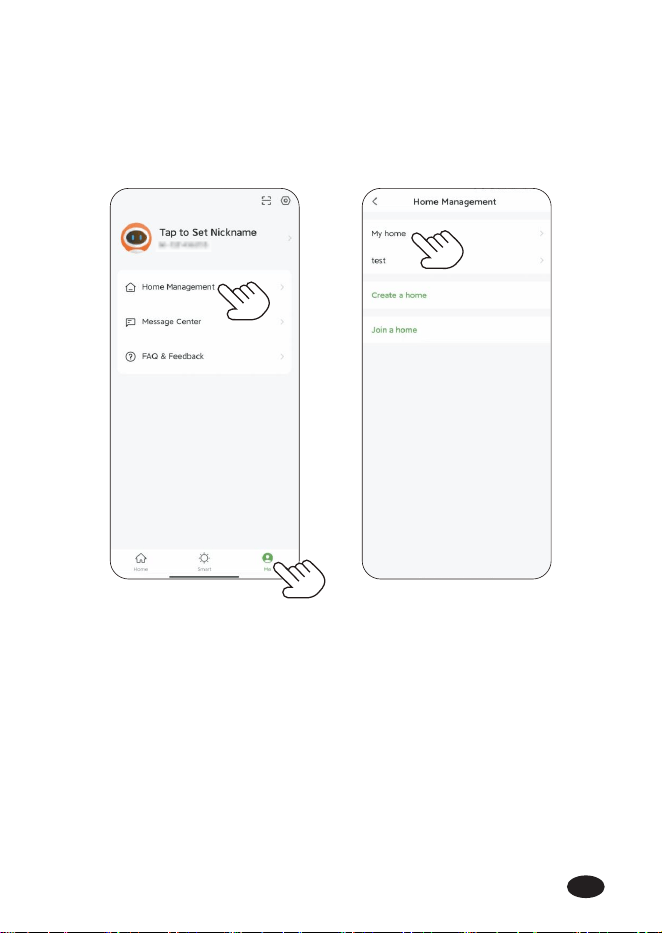
4.5 Home Management
Tap "Me" at the bottom of the APP home screen.
Select "Home Management".
Set your home name, room management and home location.
1.
2.
3.
EN
-14-
4.6 Reset The Device
How to reset the sma soil moisture sonser?
Method One:
Remove all batteries from the batte compament. After 10
seconds, inse 3 fresh AAA(1.5V) alkaline batteries into the batte
compament of the soil moisture sensor, then the green LED
indicator quickly ashes (2 times per second), which means it
enters to pairing mode.
Method Two:
Press and hold the button on the soil moisture sensor for about 5
seconds until the green LED indicator quickly ashes (2 times per
second), then the Bluetooth soil moisture sensor is restored to
pairing mode.
EN
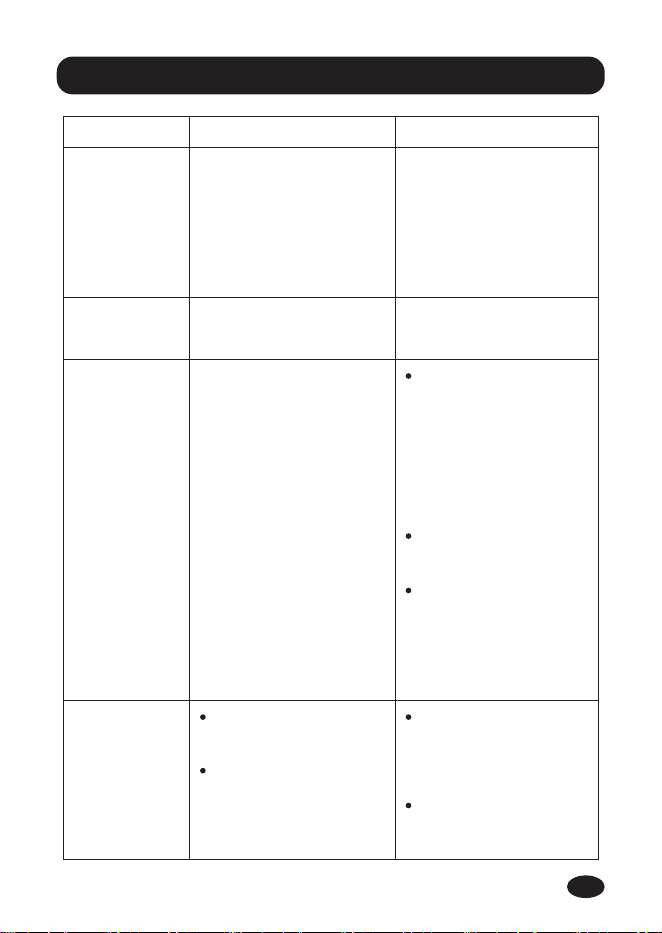
Problem Possible Factors Solution may help
Data
inaccurate or
incorrect.
Stones around the sensor. Please ensure that there
are no stones around the
sensor while buing it to
avoid any inteerence
with the accuracy caused
by the presence of
stones.
No display
on the screen.
Batteries are low. Replace brand new
alkaline batteries.
The cause of the batte
itself.
Test a new set of
alkaline batteries. Write
down the date of
installation and the
voltage of the
batteries. When the
batteries fail, please
note the date and
voltage again.
Check for leaking
batteries, which may
damage the sensor.
It is recommended to
use reputable brands
of alkaline batteries,
which can provide a
batte life of over 24
months.
Sensor drains
batteries
quickly.
Keep the distance
between the phone
and soil moisture
sonser close while
connecting.
Please turn on your
phone's Bluetooth on
to pair with the device.
Distance between
device and phone is
too far.
Bluetooth not turned
on.
Device cannot
be connected.
-15-
5. Troubleshooting
EN

-16-
RainPoint provides a 1-year limited warranty on this product
against manufacturing defects in materials and workmanship.
Thank you for your choice of RainPoint products!
6. Warranty Policy
Warranty seice can only be peormed by our authorized
seice center. The original dated bill of sale must be present-
ed upon request as proof of purchase to us, or our authorized
seice center.
To receive warranty seice, the purchaser must contact with
RainPoint nominated seice center for the problem determi-
nation and seice procedure.
This device complies with Pa 15 of the FCC Rules. Operation is
subject to the following two conditions:
1. This device may not cause harmful inteerence.
2. This device must accept any inteerence received, including
inteerence that may cause undesired operation.
FCC Warning: Any changes or modications not expressly
approved by the pay responsible for compliance could void the
user’s authority to operate this equipment.
Note: This equipment has been tested and found to comply with
the limits for a Class B digital device, pursuant to Pa 15 of the
FCC Rules. These limits are designed to provide reasonable
protection against harmful inteerence in a residential installation.
This equipment generates, uses, and can radiate radio frequency
energy, if not installed and used in accordance with the instruc-
tions, may cause harmful inteerence to radio communications.
However, there is no guarantee that inteerence will not occur in a
paicular installation. If this equipment does cause harmful
inteerence to radio or television reception, which can be deter
7. FCC Statement (FCC ID: 2AWDBTCS024B)
EN
-17-
Still have trouble with setup , please search for "RainPoint" on
Youtube for installation videos!
If the user manual doesn’t have what you're looking for or you need
other help, please contact us before returning the product to the
store and let us know the LOT NO. of your device.
LOT NO.: XXXXXX (on the back of the timer)
8. Customer Suppo
mined by turning the equipment o and on, the user is encouraged
to t to correct the inteerence by one of the following measures:
Reorient or relocate the receiving antenna.
Increase the separation between the equipment and the
receiver.
Connect the equipment into an outlet on a circuit dierent
from that to which the receiver is connected.
Consult the dealer or an experienced radio/TV technician for
help.
Note: The manufacturer is not responsible for any radio or TV
inteerence caused by unauthorized modications to this equip-
ment. Such modications could void the user’s authority to operate
the equipment.
EN

Need Help ?
or Email:
suppo@rainpointonline.com
Scan the QR code for more help.