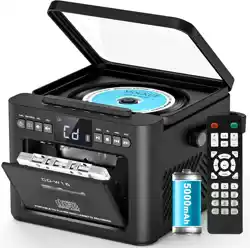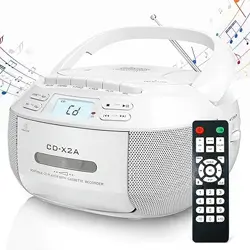
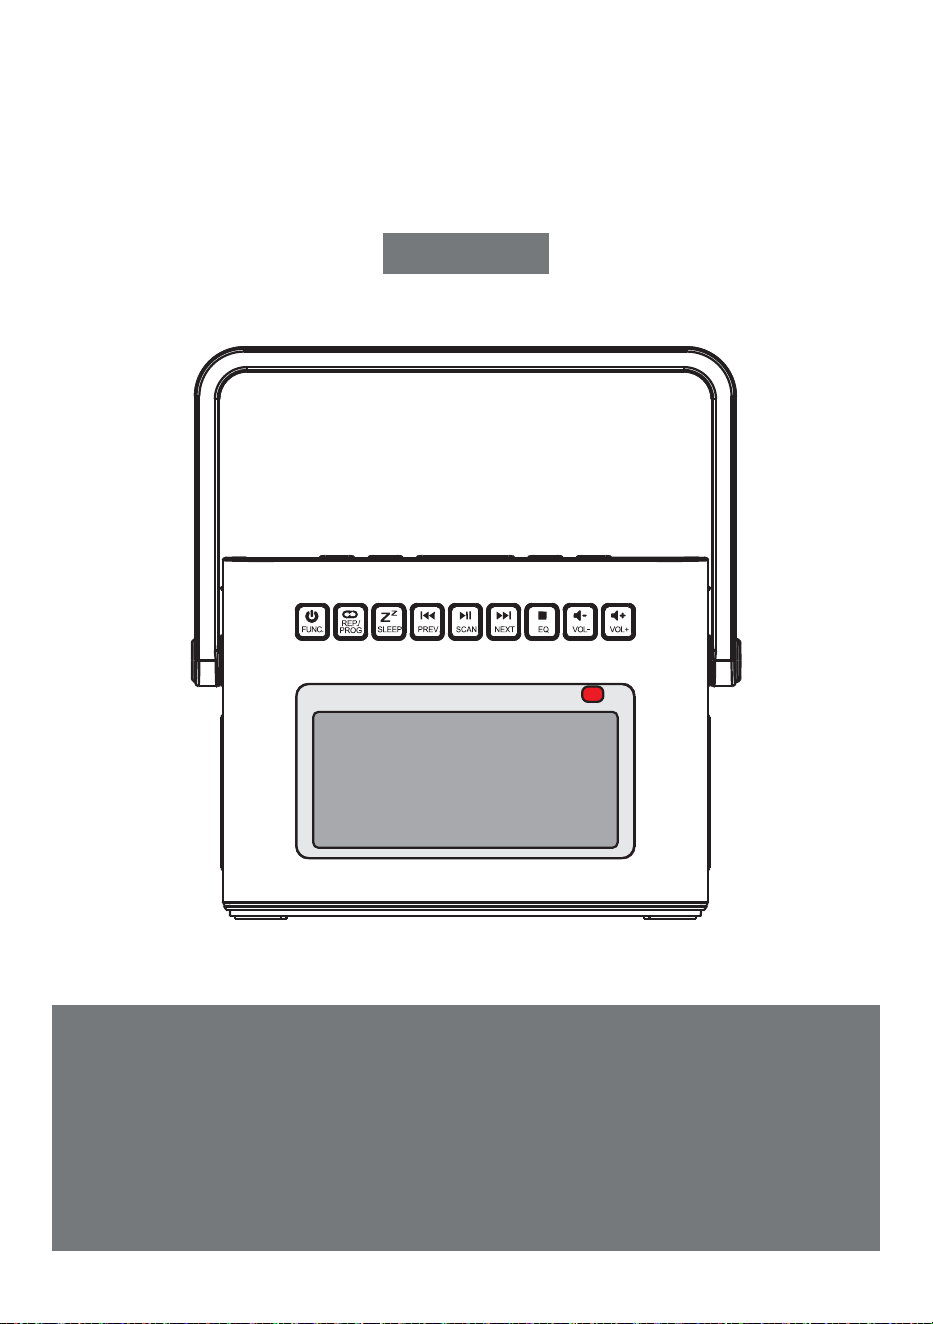
PORTABLE CD PLAYER
Thank you for purchasing our personal audio products.
High-quality CD player is an electronic acoustic technology prod-
uct carefully designed by our company, To obtain the perfect use
effect and prolong the service life of this product. Correct use
and maintenance are very important, please read this manual
carefully before use it.
CD-W17
User Manual
EN

USER MANUAL-EN P1-P11
BENUTZERHANDBUCH-DE P12-P22
MANUALE D'USO-IT P23-P33
MANUEL D'UTILISATION-FR P34-P44
MANUAL DEL USUARIO-ES P45-P55
CONTENTS
IMPORTANT TIPS
IMPORTANT TIPS
FUNCTION OF BUTTONS
REMOTE CONTROL DESCRIPTION
TURN ON/OFF
CHARGING THE BATTERY
ACTIVATE THE PRODUCT
CD/MP3 DISC OPERATION
USB/TF CARD OPERATION
AUX OPERATION
RADIO OPERATION
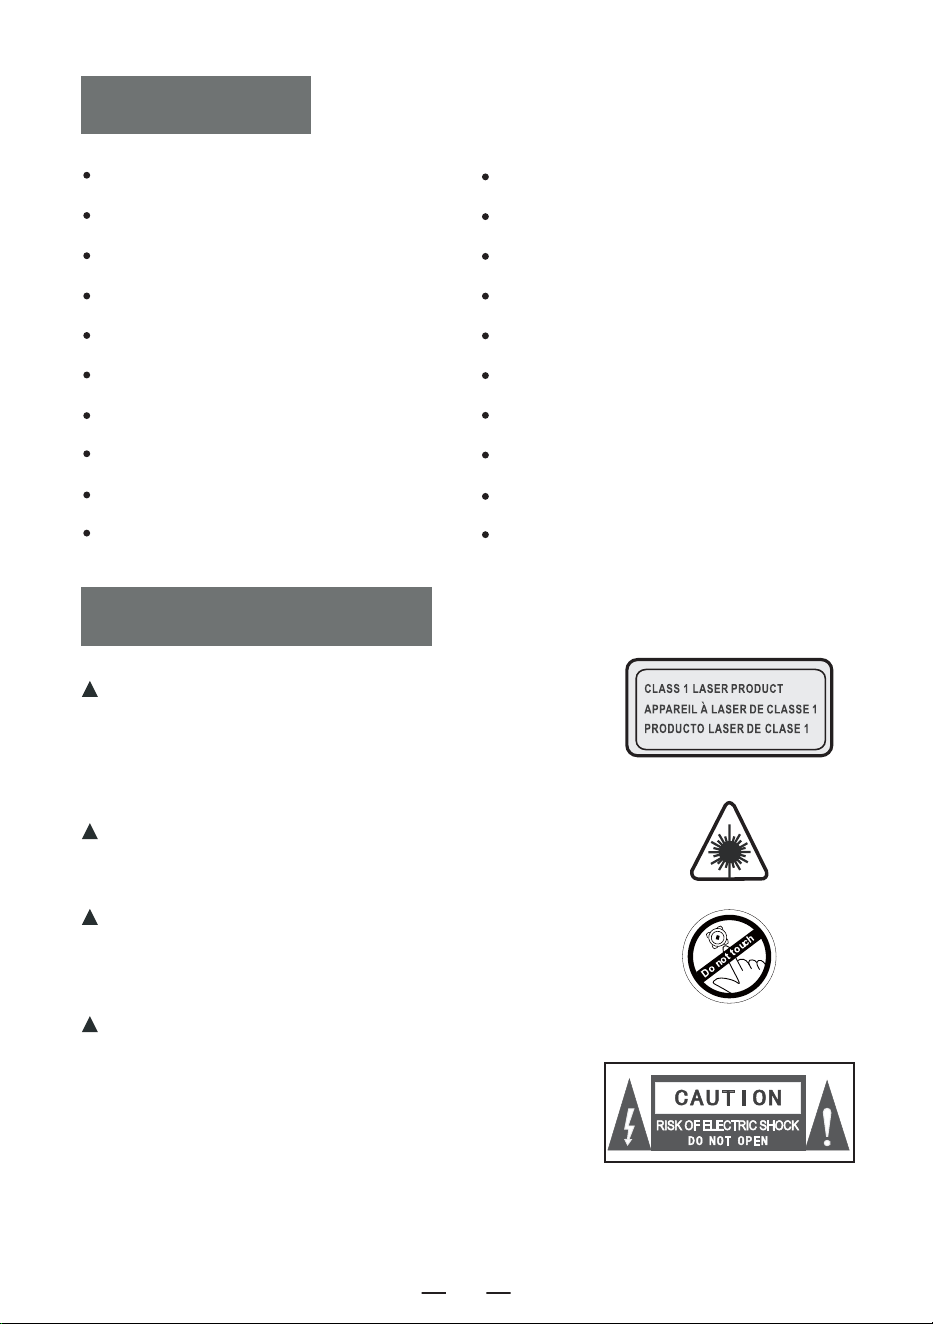
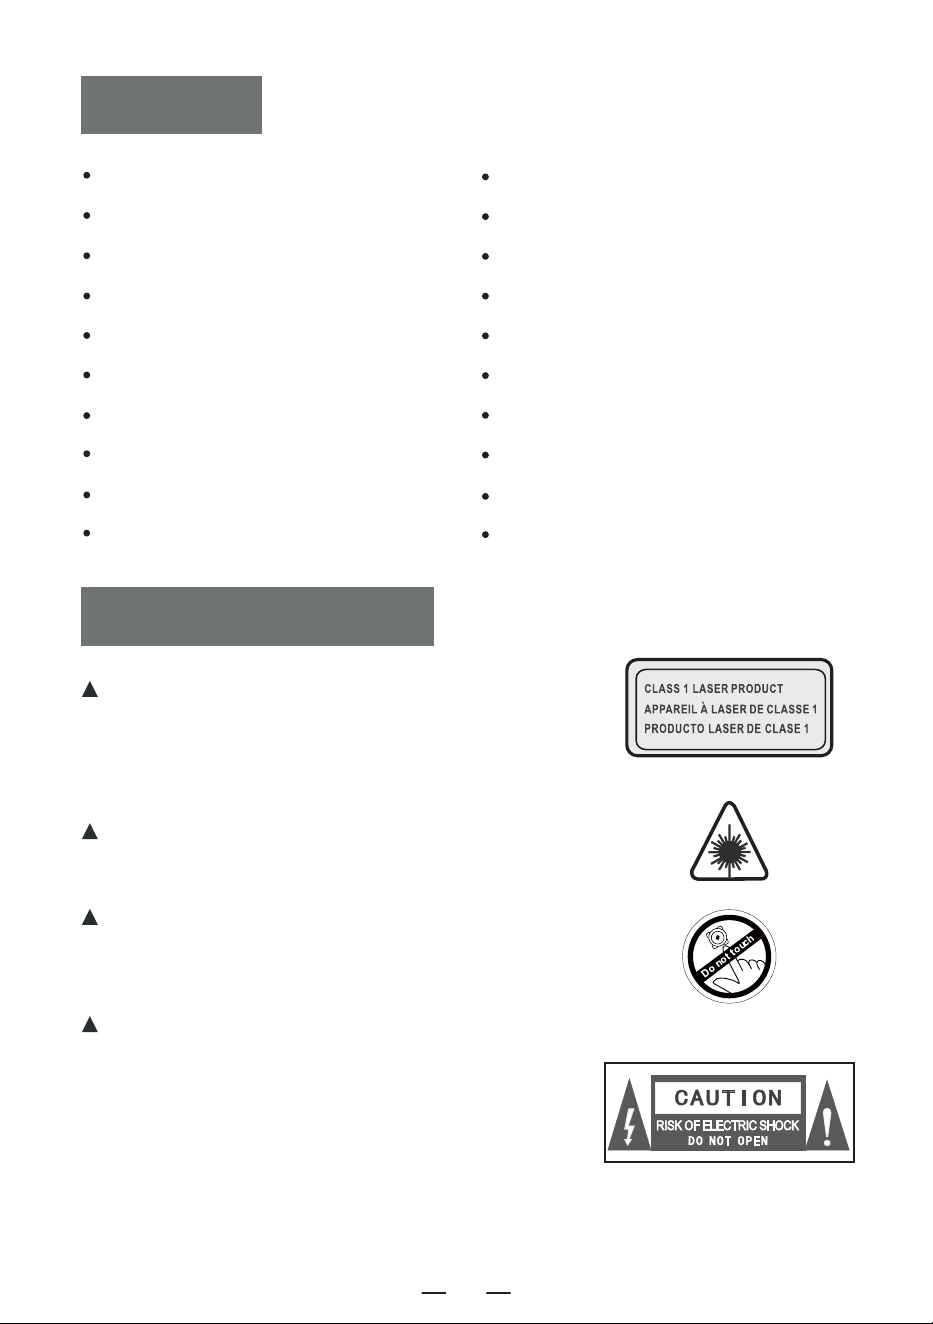
When using this product, please follow the prescribed
steps,otherwise you may be exposed to harmful
radiation.
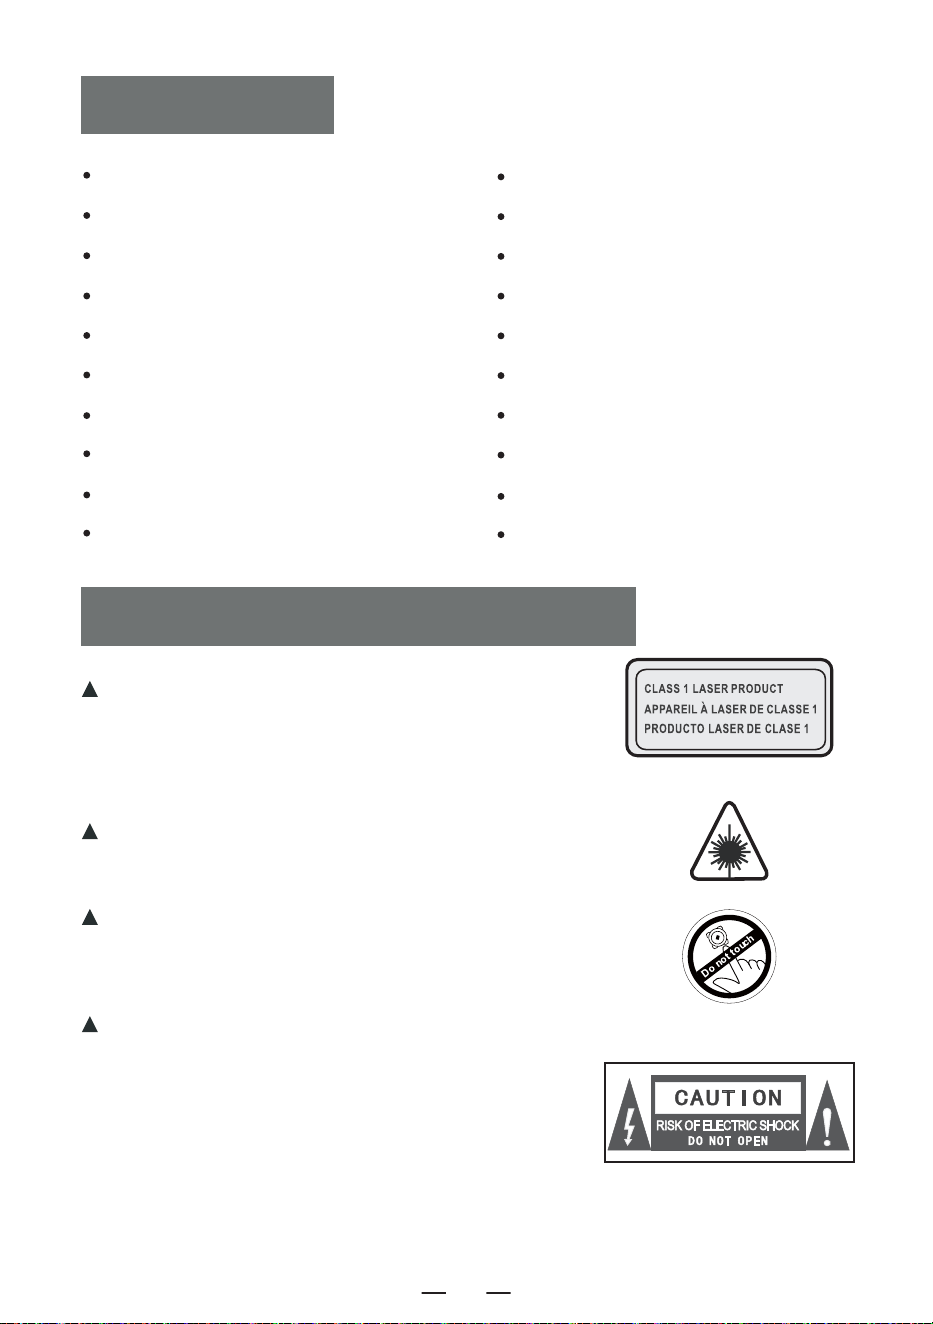
This CD player is a CLASS 1LASERproduct.
When the CD cover is opened or carelessly
closed,an invisible laser will be generated.
Please do not touch the bald head at will,
otherwise it will affect the playback
performance.
The lightning flash with arrow head symbol
within an equilateral triangle is intended to
alert the user to the presence of uninsulated
"hazardous voltage"within product's enclo-
sure.which may be sufficient to induce a risk
of electric shock to persons.
BLUETOOTH OPERATION
BLUETOOTH TRANSMISSION MODE
WHITE NOISE OPERATION
SLEEP OPERATION
TIME OPERATION
BACKLIGHT OPERATION
SPECIFICATIONS
SAFETY INSTRUCTIONS
WARRANTY
PACKING LIST
EN
1

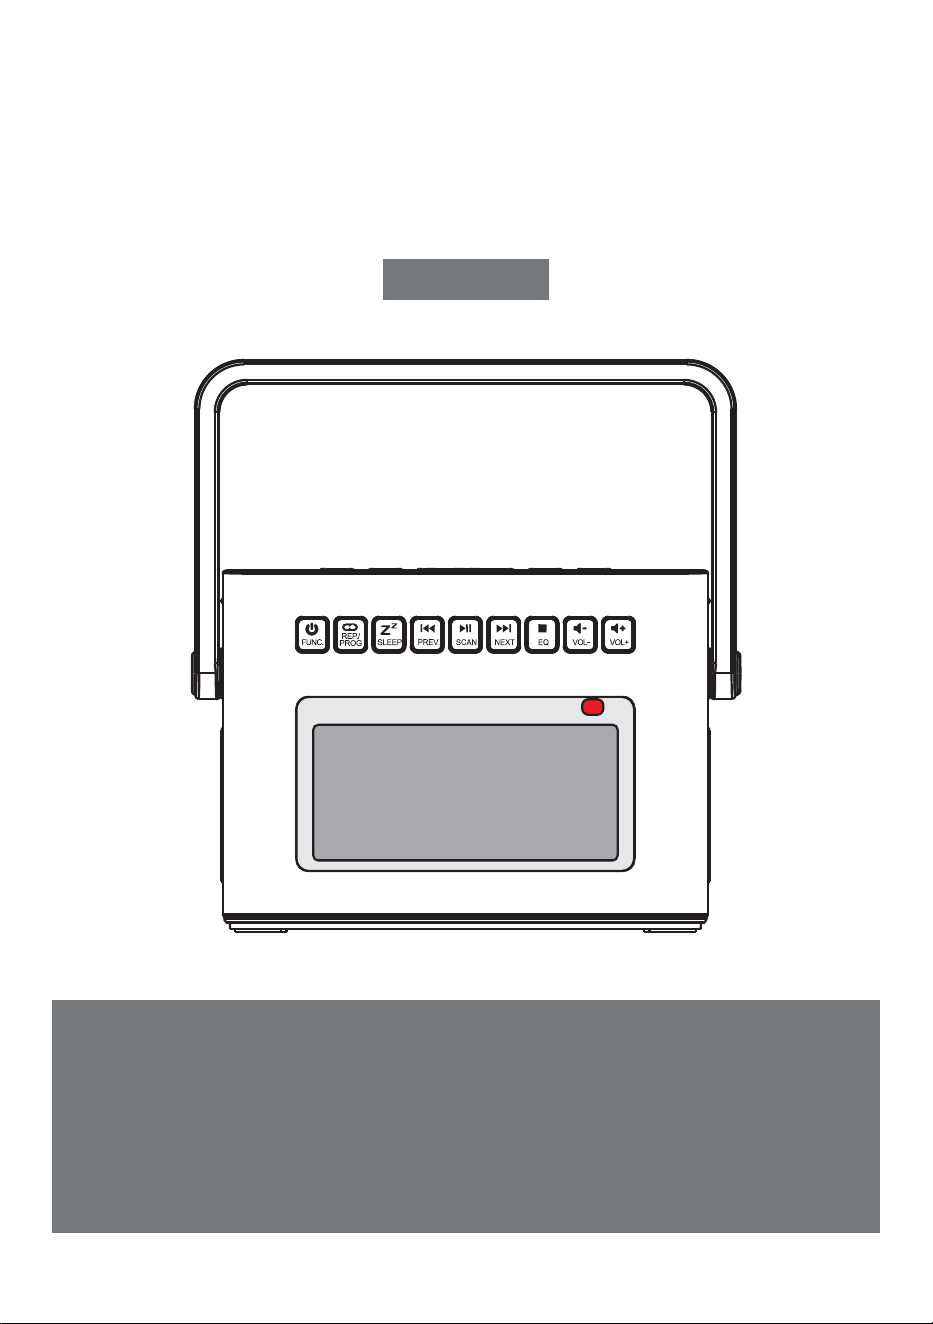
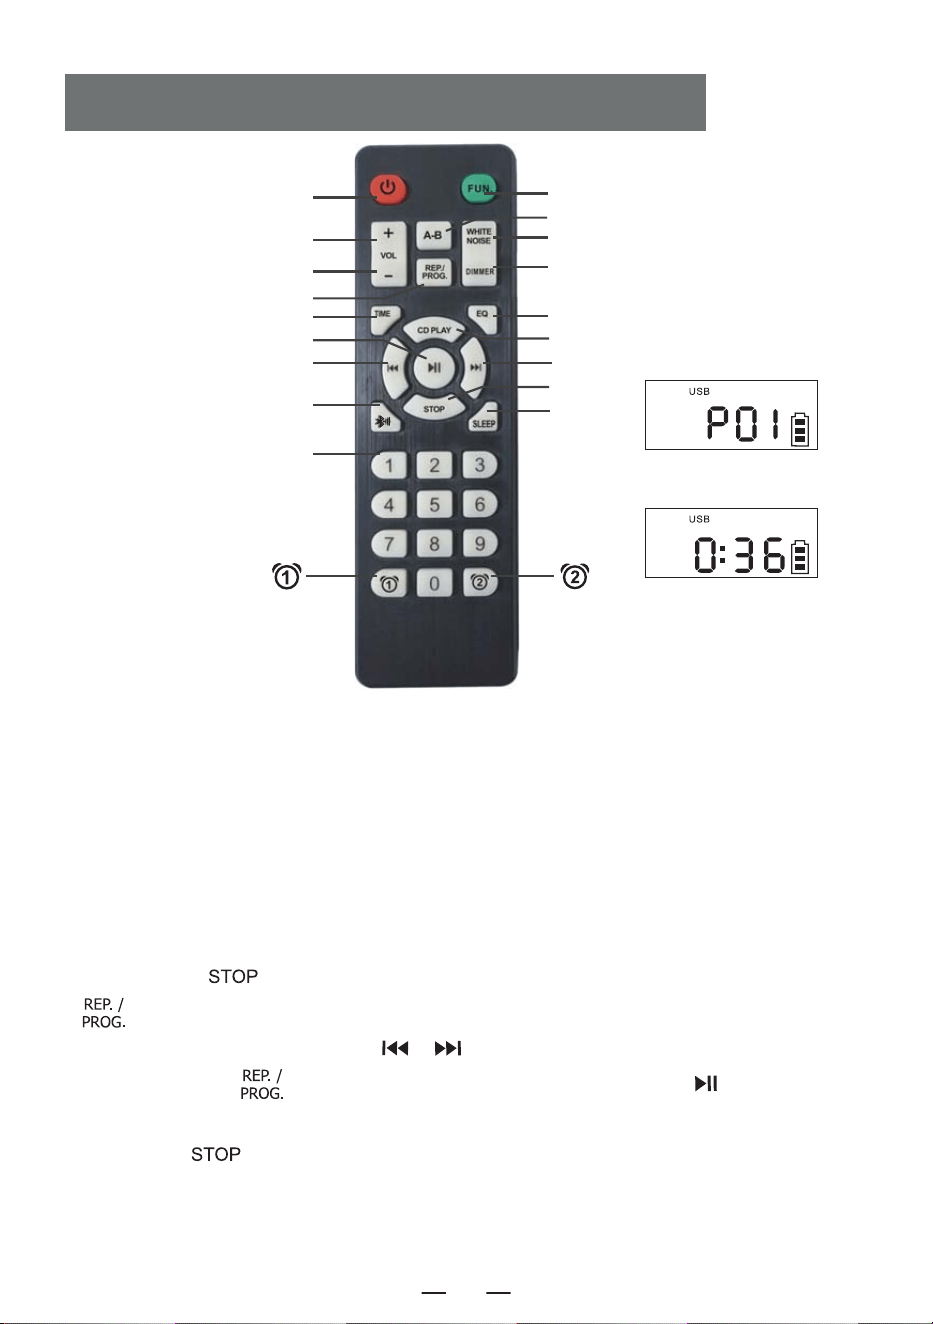
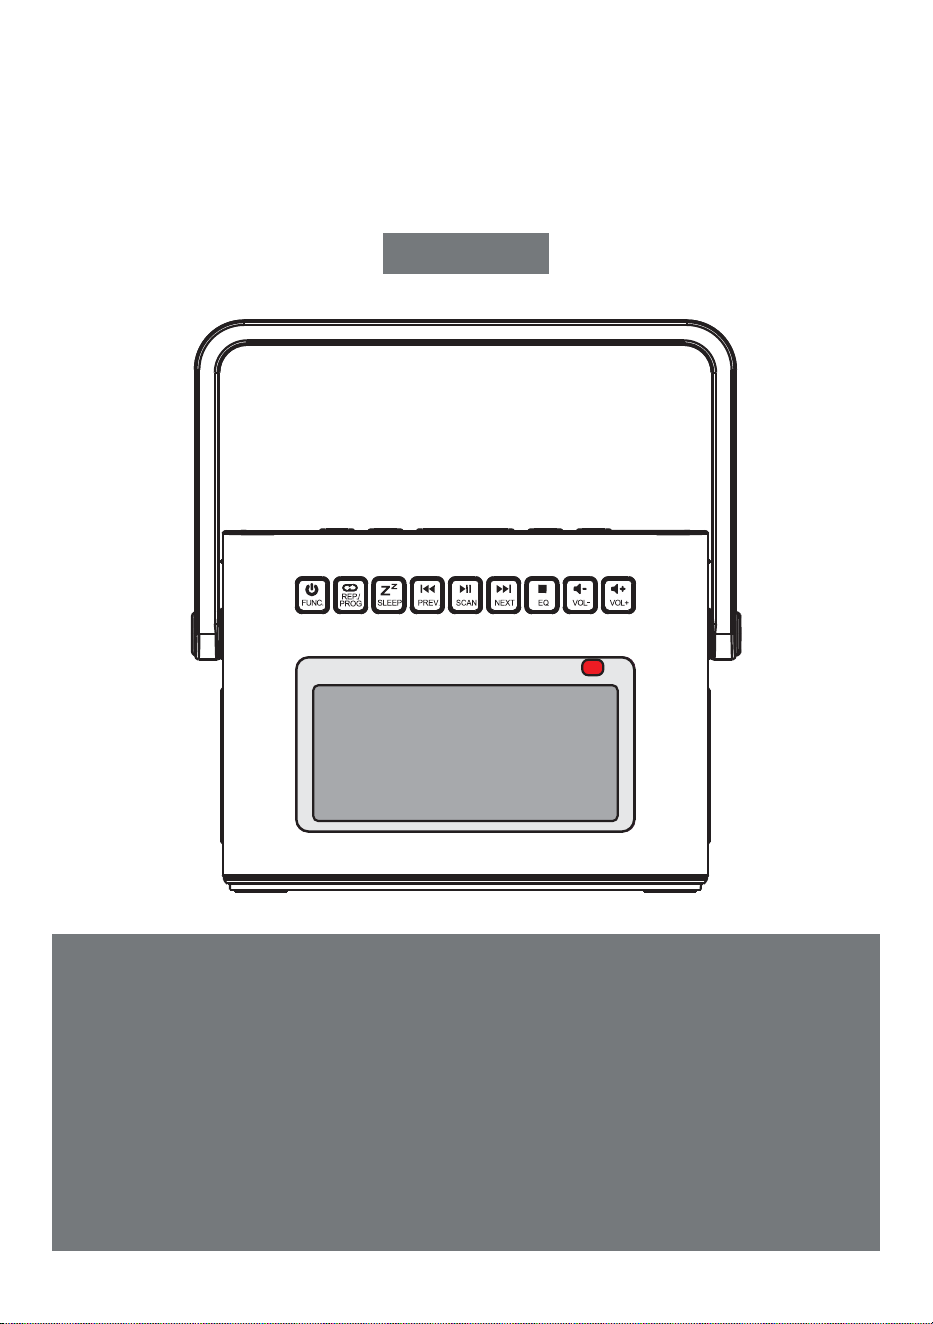
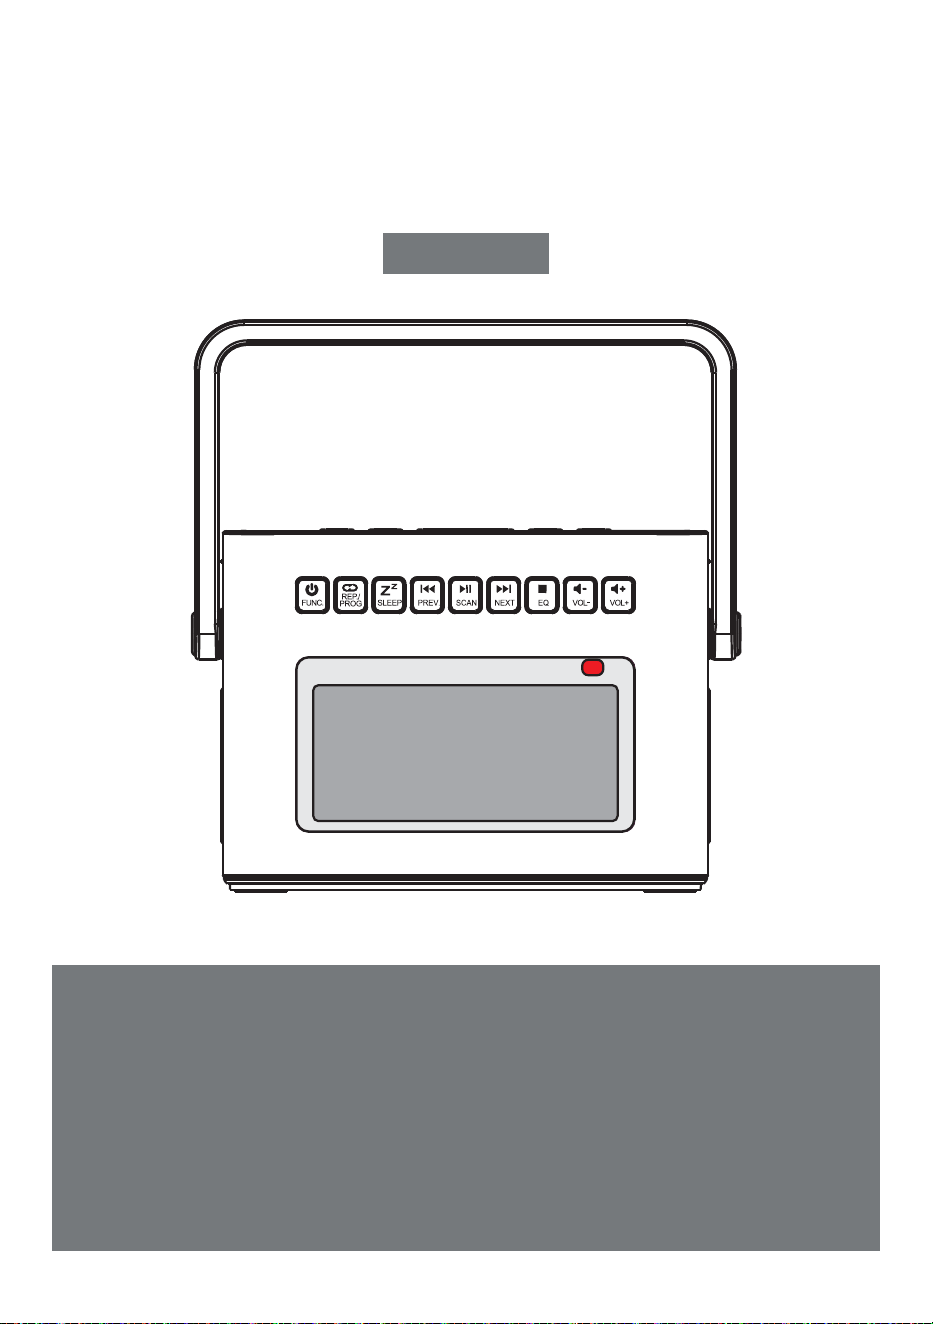
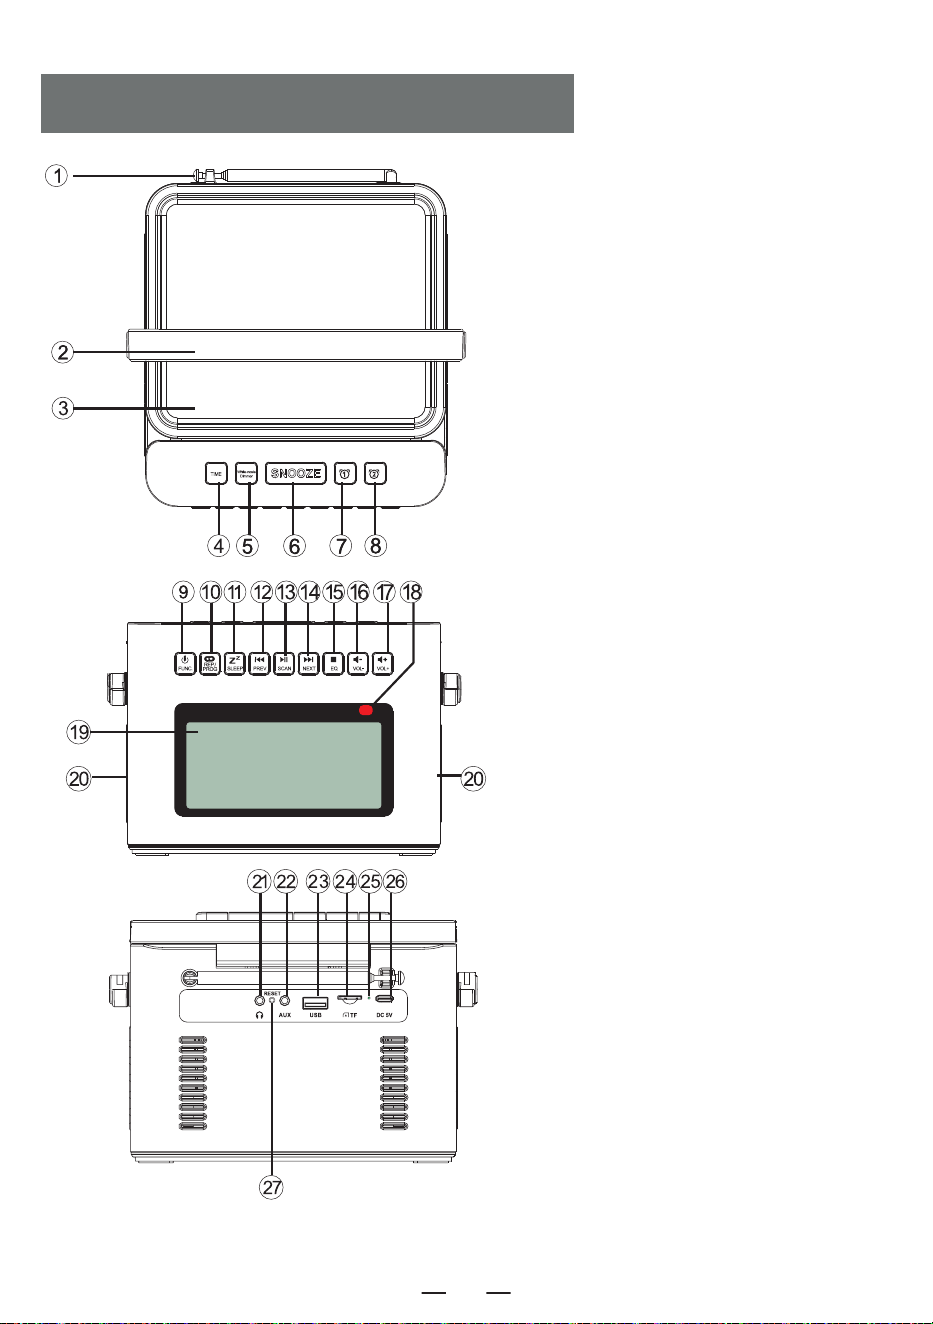
FUNCTION OF BUTTONS
1. Antenna
2. Handle
3. CD Door
4. Time Button
5. White Noise Button
6. Snooze Button
7. Alarm 1 Button
8. Alarm 2 Button
9. Power On/Function Selector Button
10. Repeat Button/Programming Button
11. Sleep Button
12. Previous Song/Fast Rewind Button
13. Play/Pause Button/Full Scan
14. Next Song/Fast Forward Button
15. Stop Button/EQ button
16. Volume Decrease Button-
17. Volume Increase Button+
18. Remote Control Receiving Point
19. LCD Display
20. Speaker
21. Earphone Jack
22. Audio input Interface
23. USB Socket
24. TF Socket
25. Charge lamp
26. DC 5V Outlets
27. Reset Button
EN
2
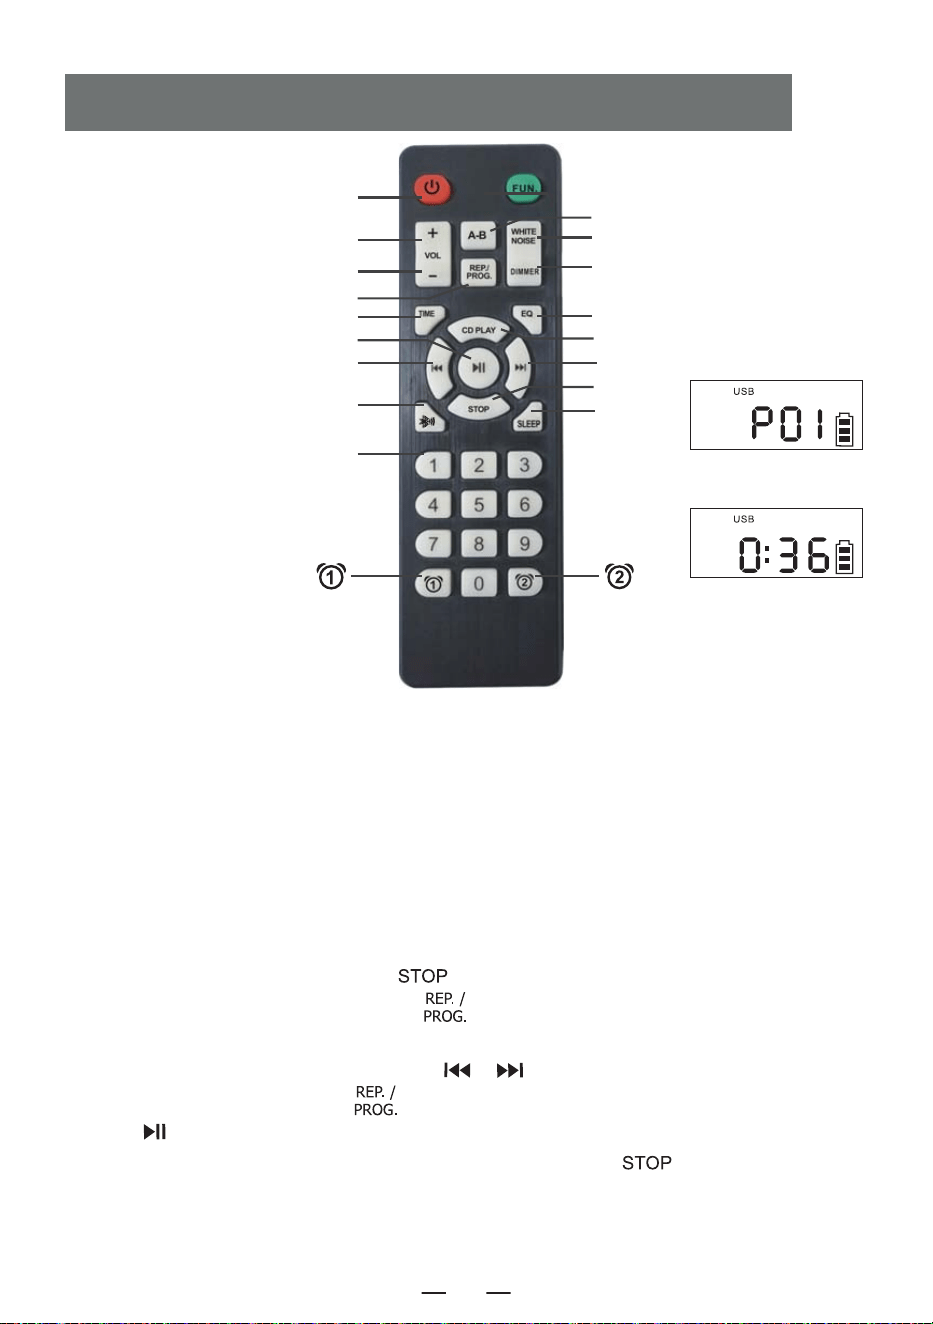
1. Power on/off: product on/off button.
2. Vol +/-: volume increase/decrease.
3. Function: in the power on status, press this function button to select different functions.The
playing sequence is: CD Play-USB- WIRELESS -Radio-Aux Conversion.
4. A-B play: A-B repeat button.
5. White noise: Offer 8 different styles of white noise to help you fall asleep quickly.
6. Repeat: repeat button to cycle through songs when playing USB flash disk/CD/MP3 discs Program-
ming: press the [ ] button on the remote control to stop the CD/MP3 discs/USB then press this
[ ] button to entry the programming interface (The LCD will flash and display " P01 " on the
screen, like above figure 1). Press the [ / ] button to select the track to be programmed,
and then press this [ ] button to confirm after programming. Press the [ ] button to play
in the sequence of the programmed track(Screen will display like above figure 2). If you need to stop,
just press the [ ] button.
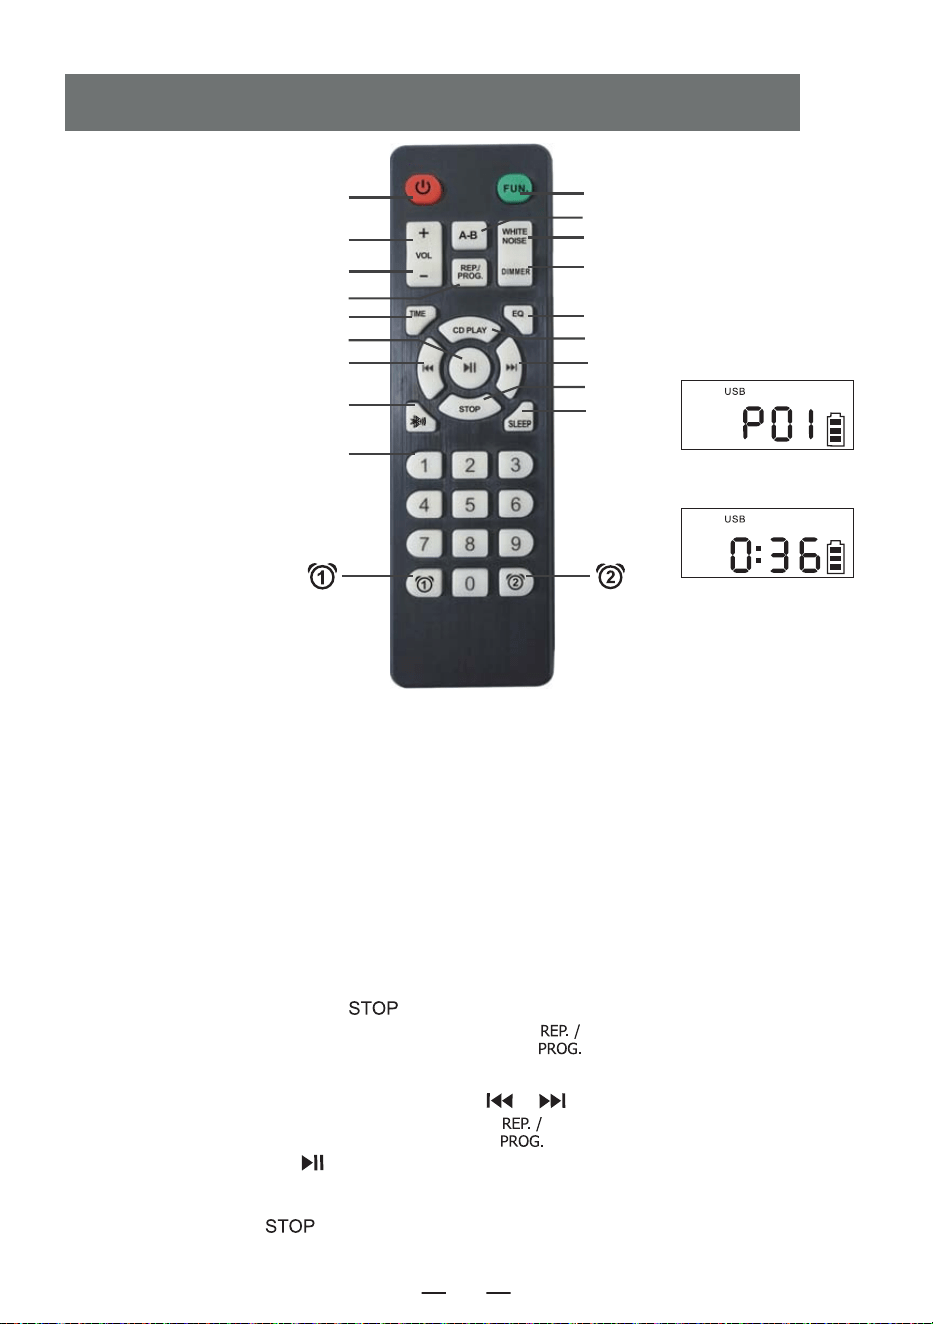
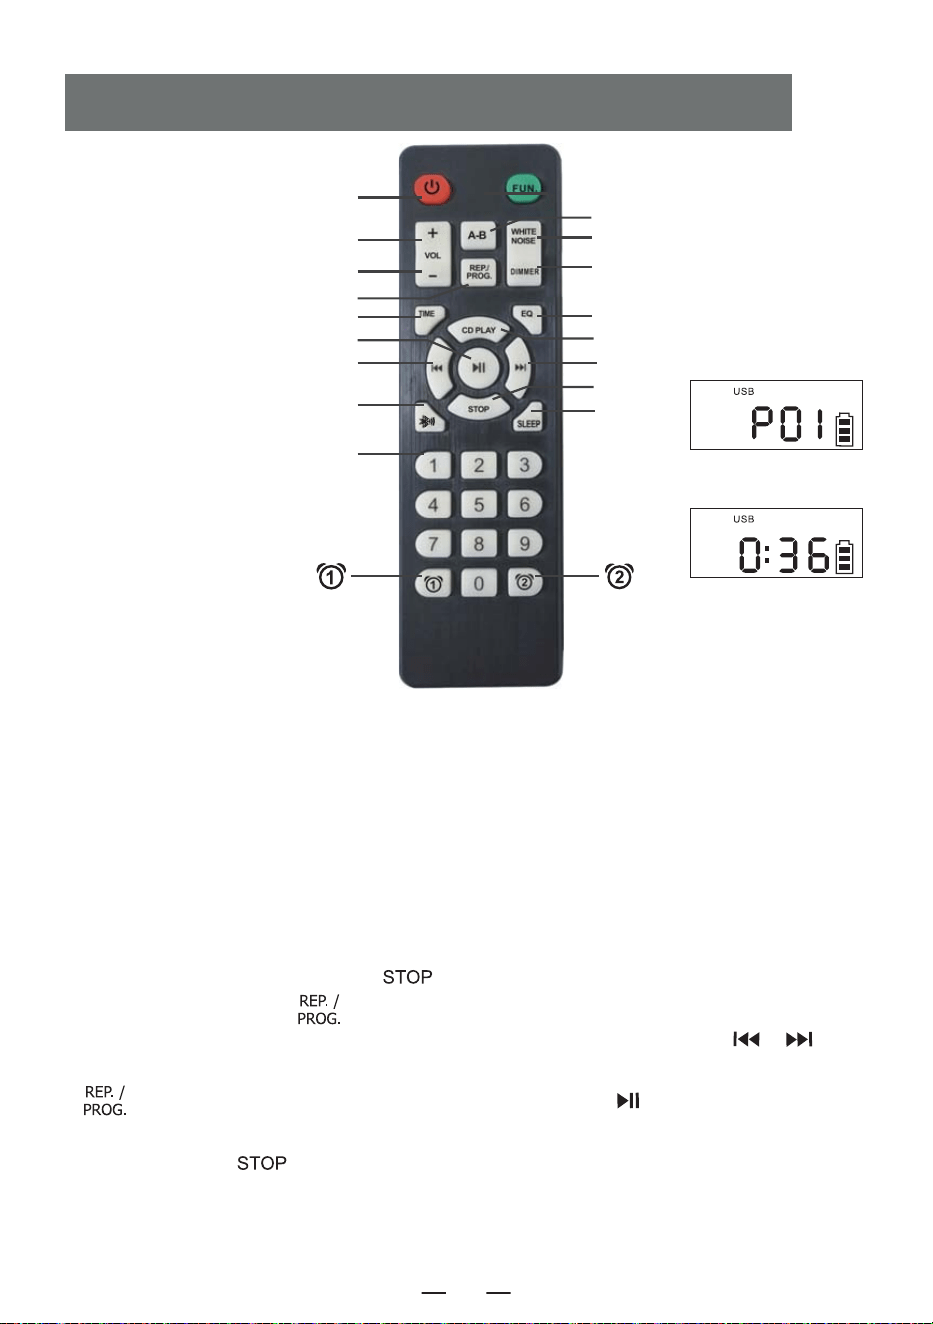
REMOTE CONTROL DESCRIPTION
3. FUNCTION
4. A-B PLAY
5. White Noise
17. Dimmer
8. EQ
9. CD PLAY
11. NEXT
13. STOP
16. SLEEP
Figure 1
Figure 2
1. POWER ON/OFF
2. VOL +
2. VOL -
6. REP./PROG.
7. Time Set
12. PLAY/PAUSE
10. PREVIOUS
14. BLUETOOTH BUTTON
15. NUMBER 0-9
EN
3

NOTE: In sleep mode, short press the " " button to see the rest ofsleep time before the
device turns off.
7. Time Set: In the time display interface, long press the [ ] button to enter the clock setting.
In the function selection interface, short press [ ] to display the time.
8. EQ: When the product is working, press [ ] button to change different music effects,namely:
FLA-ROC-POP-JAZ-CLA (Flat -Rock-Pop-Jazz-Classical).
9. CD play: Press this button to go to the CD play function.
10. Previous: Short press to the previous song, long press to fast rewind.
11. Next: Short press to the next song, long press to fast forward.
12. Play/Pause: Song play and pause.
13. Stop: Stop to play song.
14. Number 0-9: press the number button 0-9 to directly select the song number when playing USB
disk/CD/MP3 disc.
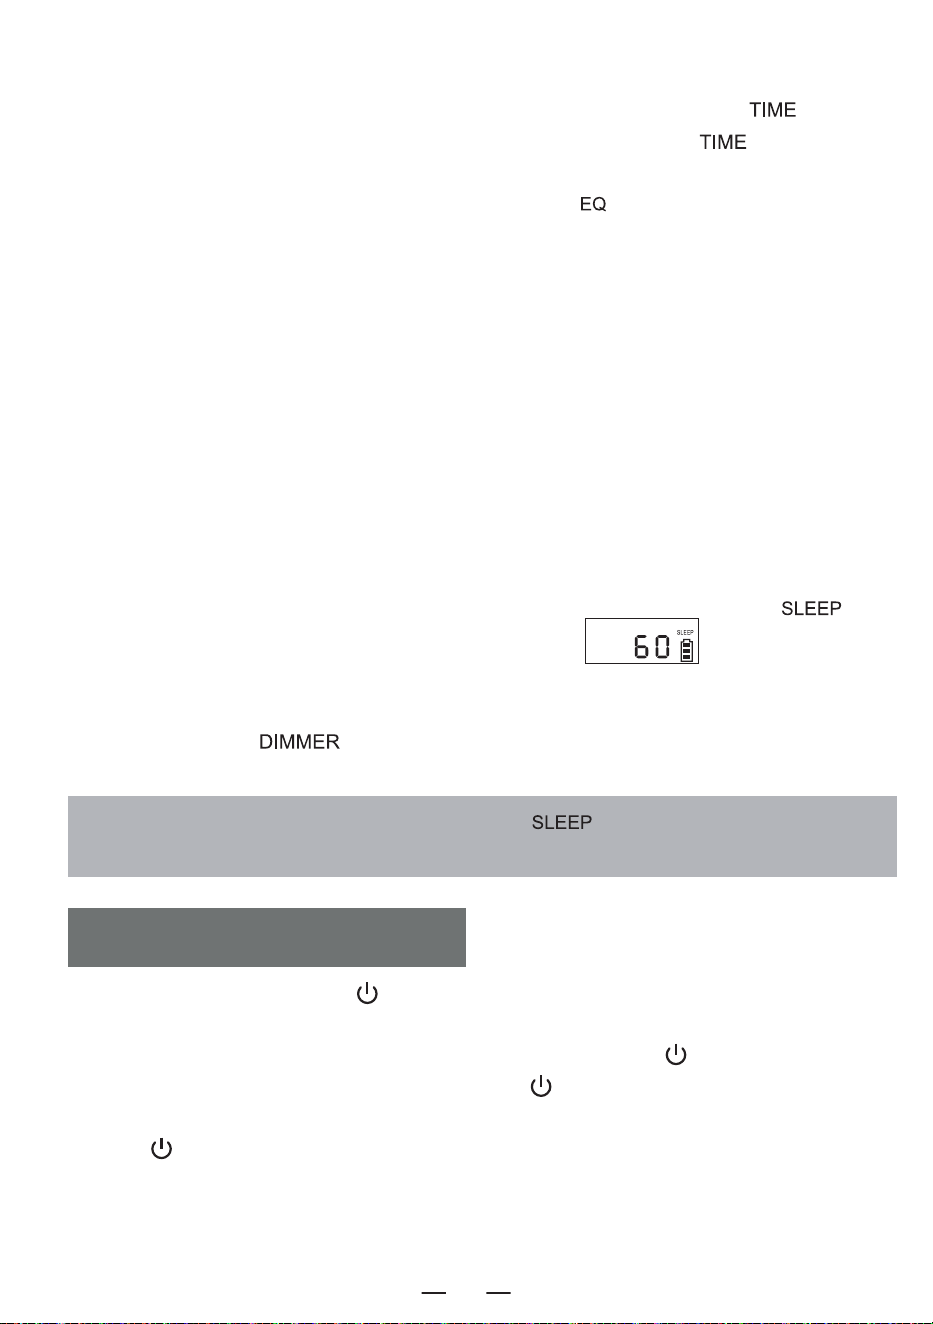
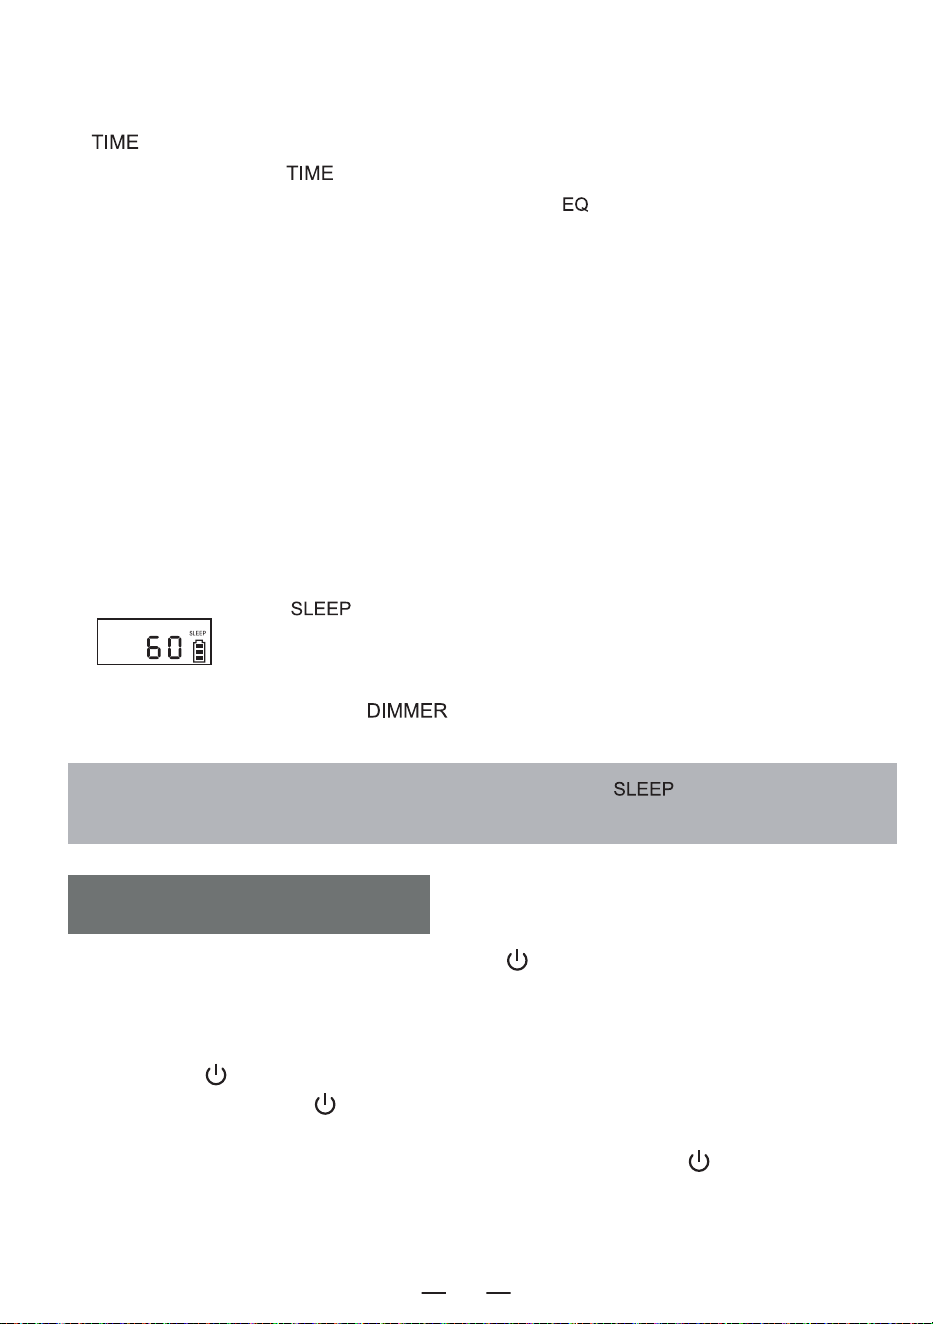
15. SLEEP: Short press " " to enter SLEEP mode. LCD shown as "
", press
again to set the sleep time:10<30<60<90<OFF.
16. Dimmer:
Short press the [ ] button to select the high/low lighting or tum off the light.
1. Short press the power button [ ] to turn on the device and enter the time display interface to
display the time, Short press the power button again this interface to turn off the device.
2. After entering the time display interface, long press the power button [ ] to enter the function
selection interface. Each short press the power button [ ] to a different function mode (function
modes include: CD\Bluetooth\USB\SD\AUX\White Noise\Radio). When you long press the power
button [ ] again, you will enter the time display interface.
3. You can also press the power button on the remote control to turn the product on or off.
TURN ON/OFF
EN
4

1. Please use a 5V/2A Type-C power adapter to charge the device. The fully charging time is about
5.5 hours.
2. After being fully charged,the battery indicator on the screen will show full bars and will not flash,
the charging indicator light will turn off.
3. During charging, the battery indicator on the screen will flash, the charging indicator light will
remain red.
NOTE:
1. When the power is less than 25%, Maybe the display is not clear, the radio signal is poor,the sound
quality is not clear, etc would appear. Please charge it as soon as possible to keep the radio working
properly.
2. When the product cannot be charged, please use the operation to activate the product to start.
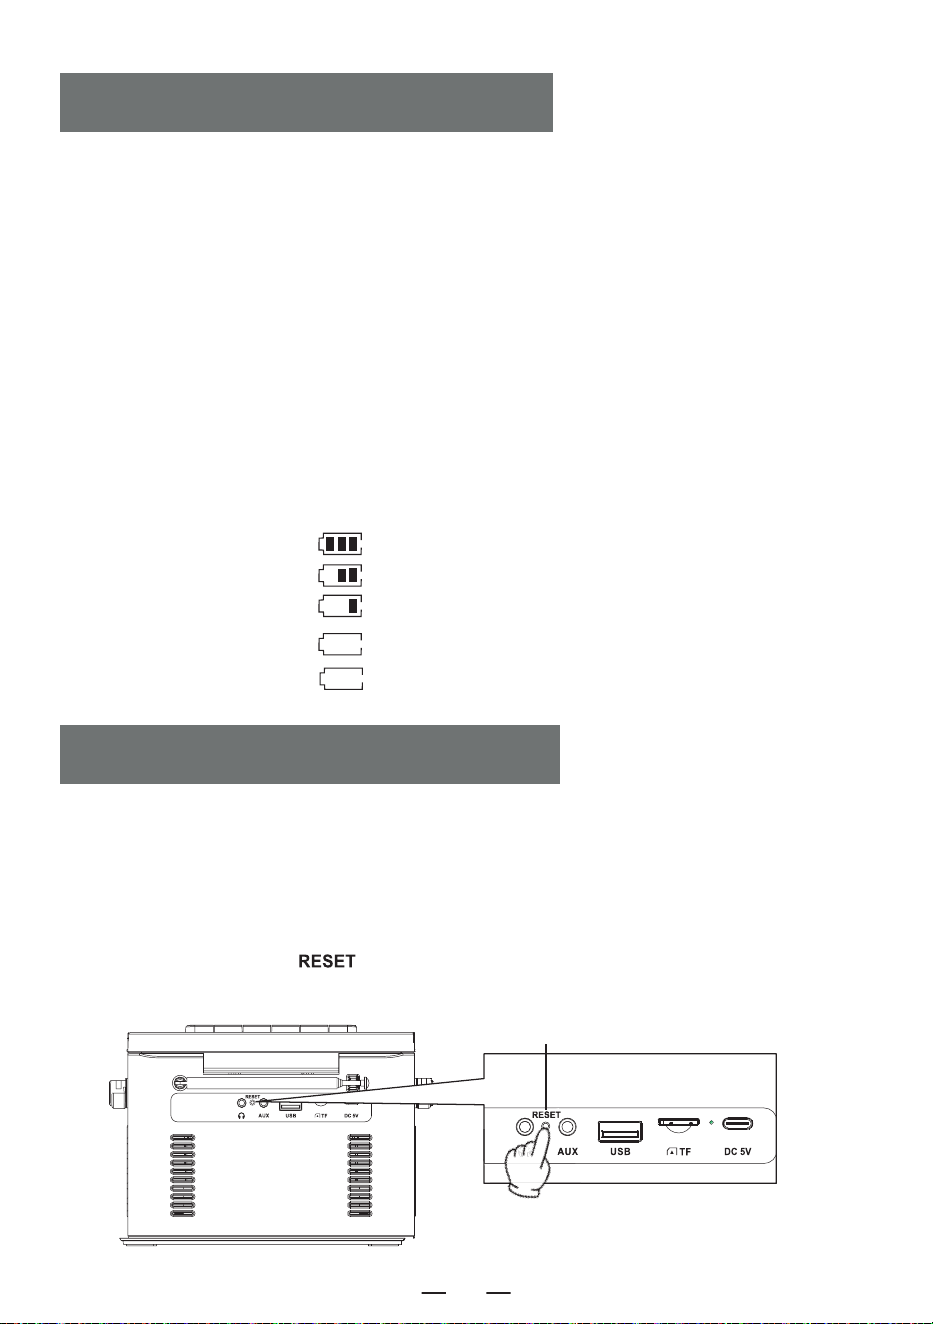
Notice:
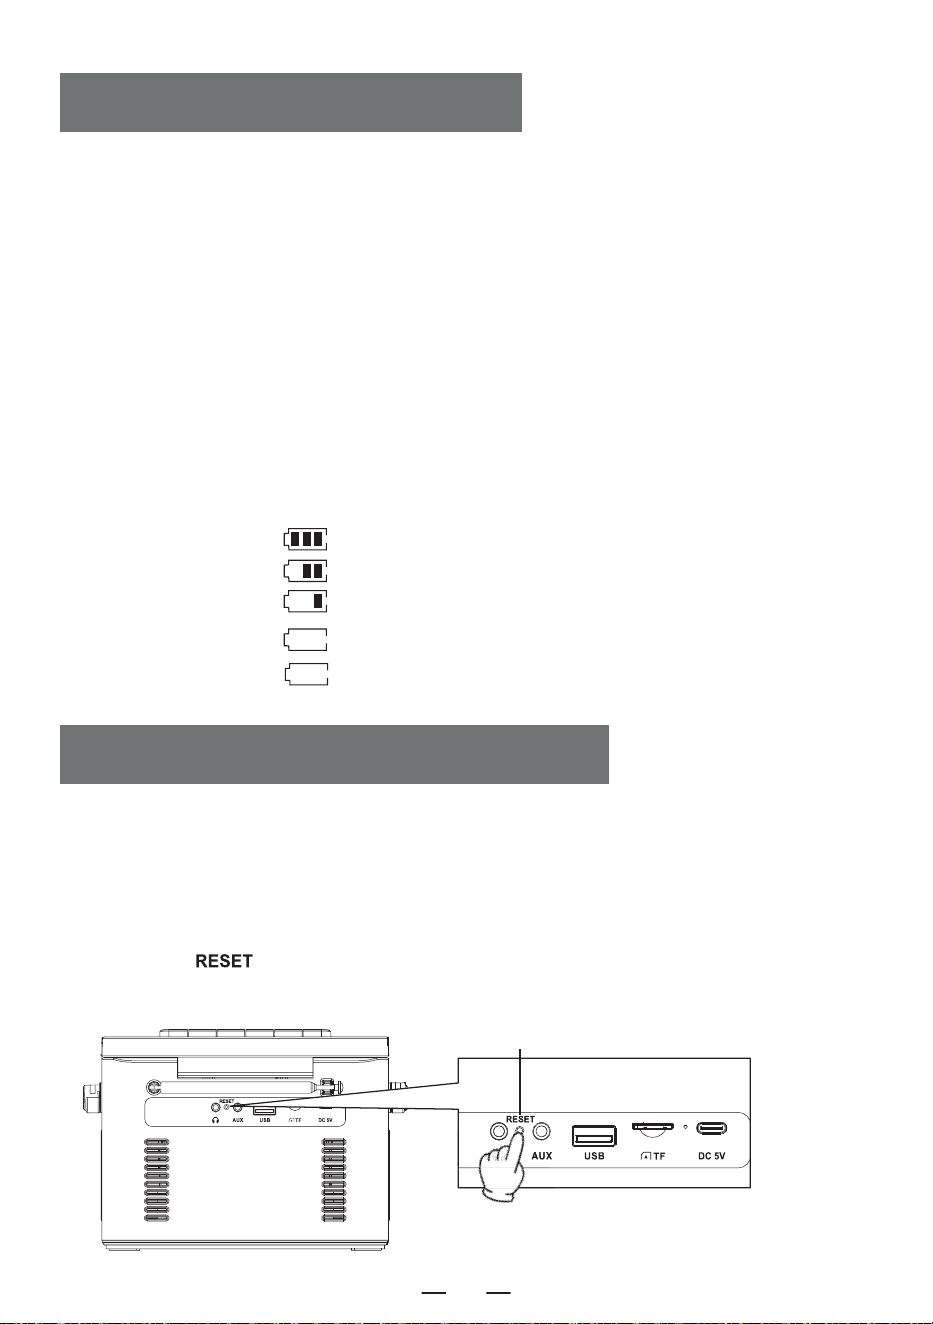
Because the product has battery prote- ction measures, when the device freezes, cannot be charge-
dor cannot use any functions after charging, or if there are lags or issues with functionality during
use, please try to reset it. it can be reactivated and used afterreset.
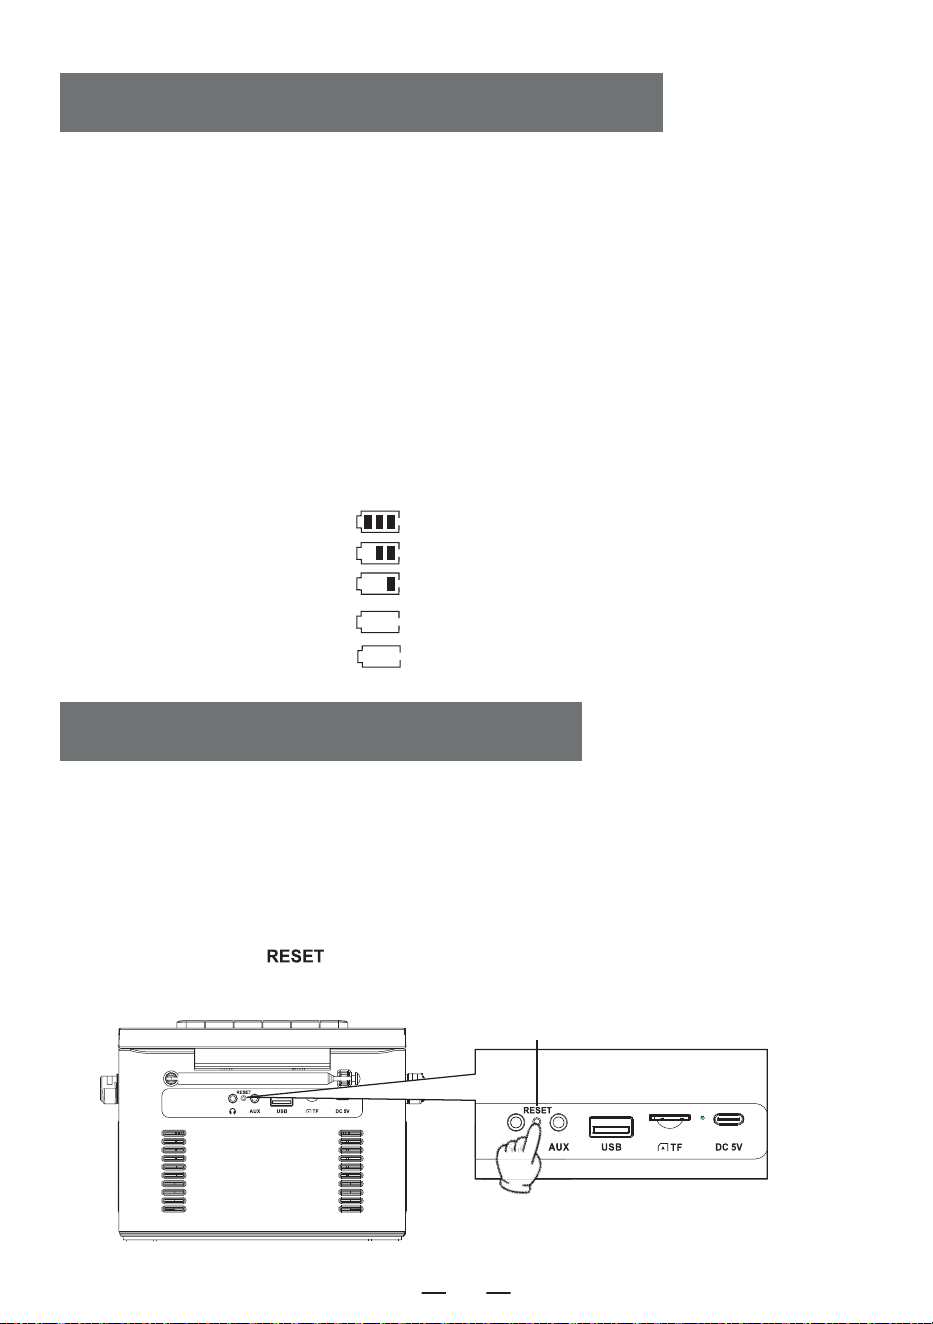
How to reset?
Press and hold the [ ] button for two seconds, then restart the device, and it will return to
normal operation.
Description of power level
a. 60% -100% power
b. 30%-60% power
c. 10%-30% power
d. 3%-10% power
e. 0%-3% power
flash slowly
flash quickly
CHARGING THE BATTERY
ACTIVATE THE MACHINE
Reset Button
EN
5
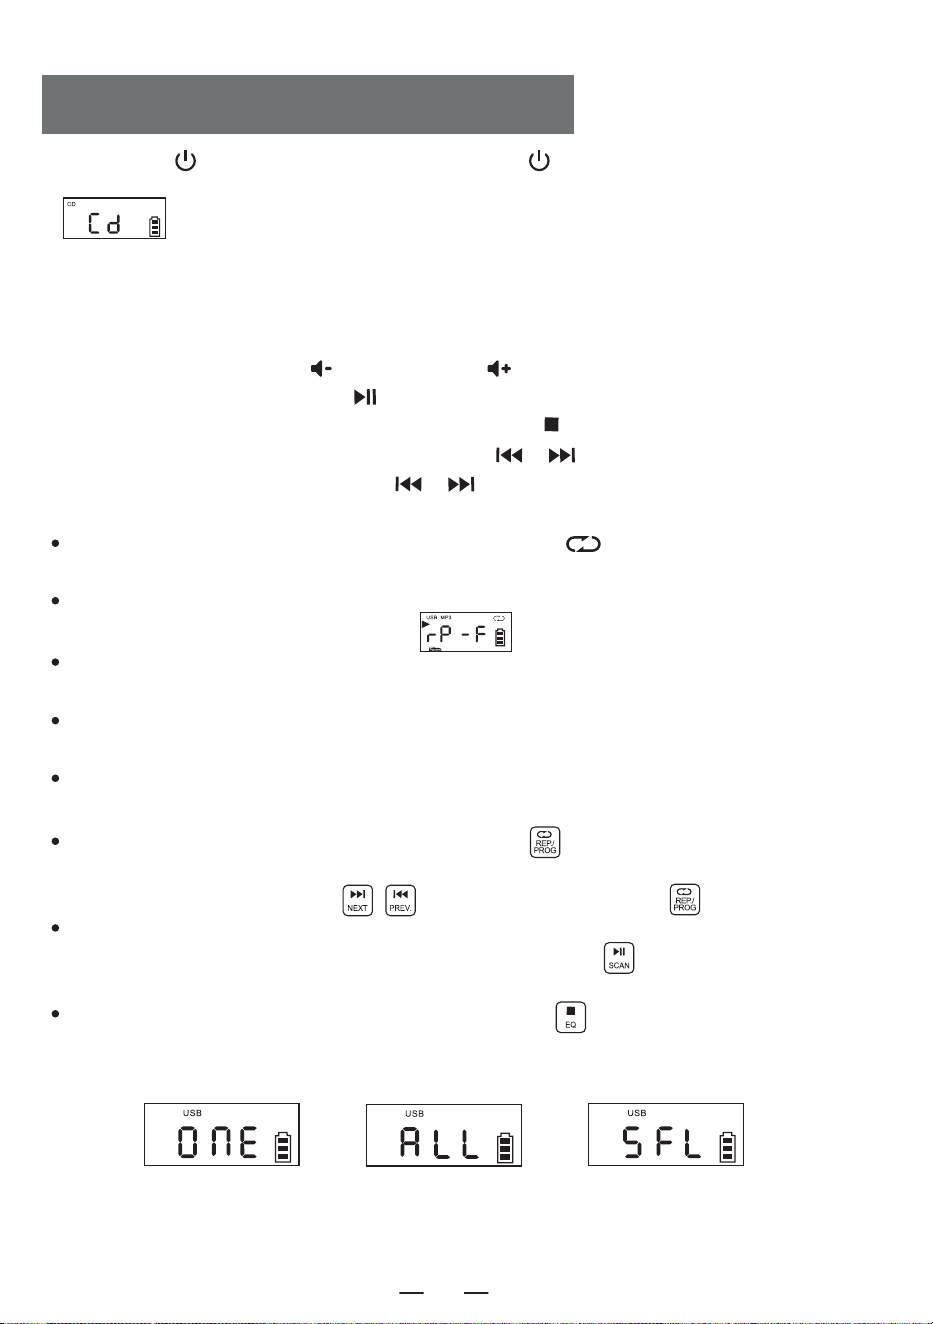
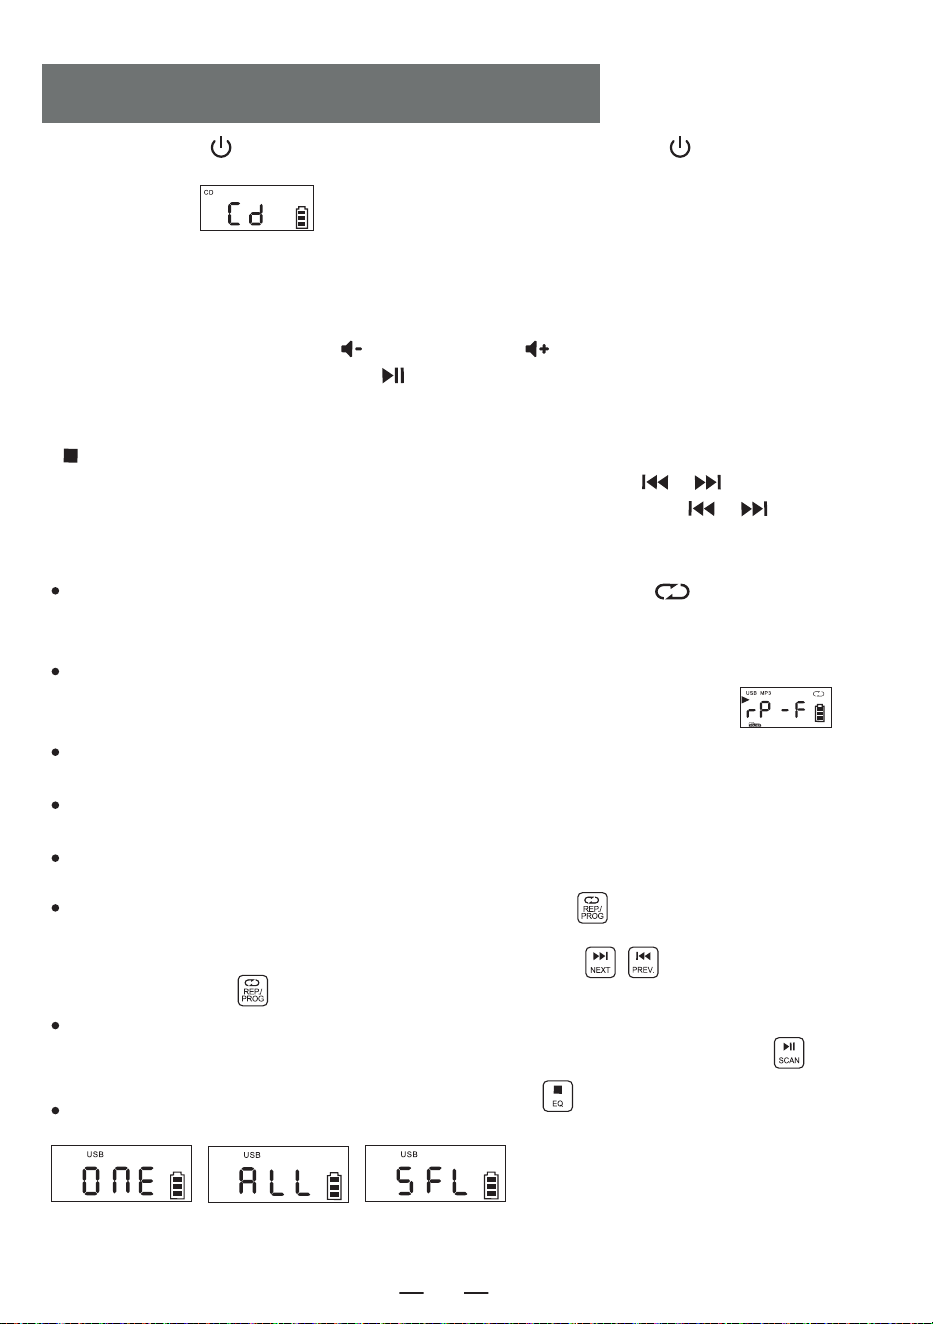
1. Short press [ ] to tum on the device. Press and hold [ ] for 2 seconds to enter the function
selection interface, Short press the function selector button The LCD will display
” ”.
2. Open the CD compartment door, put the disc printing surface upward on the spindle of the CD
movement.
3. Close the CD compartment door, the song will play automatically in a few seconds, the LCD will
display the number of the current song. The format of the disc, such as " CD " , " MP3 " , etc.
4. Short press the Vol + button [ ] or Vol - button [ ] to adjust the volume.
5. Short press the play/pause button [ ] to pause, press the button again to continue playing.
6. If you need to stop playing halfway, press the stop button [ ] to stop playing.
7. During playing, short press the previous/next button [ / ] to jump to the previous/next
song; long press the previous/next button [ / ] 2 seconds to fast rewind or fast forward.
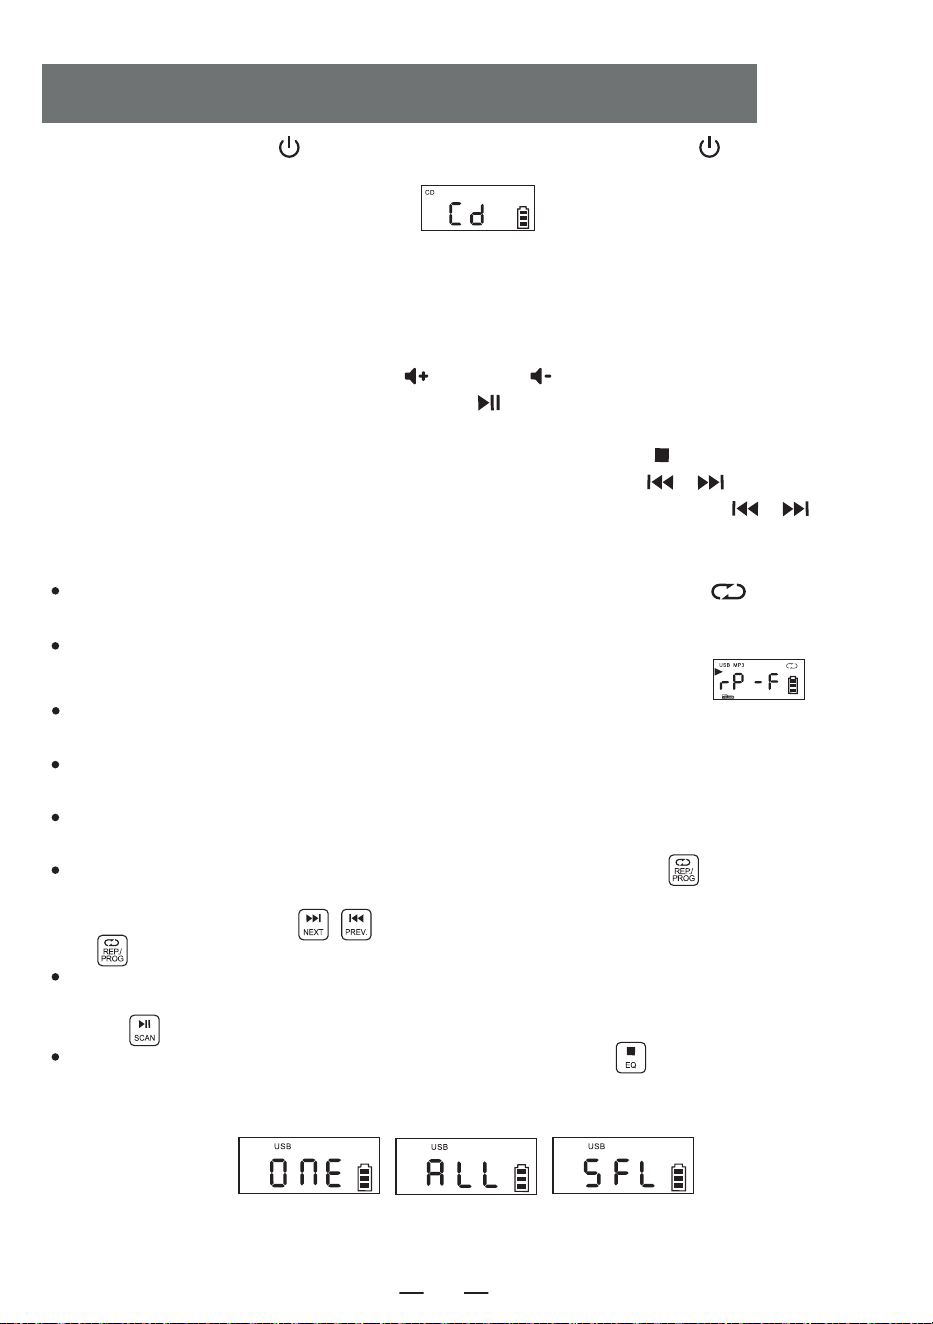
8. Repeat function:
In the process of playing CD, short press the repeat button [ ], the current song you
listen will enter single cycle mode, LCD screen will display as " Figure 3 ";
Press the repeat button twice, if your MP3 disc contains a file, it will repeat to play the current
folder, Displayed on the LCD as shown in ” ”.
Press the repeat button twice, if your MP3 disc contains a file, it will repeat to play the current
folder. Displayed on the LCD as shown in “Figure 4";
Press the repeat button three times, the whole disc will played randomly. Displayed on the LCD
as shown in “Figure 5";
Press the repeat button four times to resume normal playing.
9. Programming function:
NOTE: When playing CD/BT/USB/TF, the time will be displayed on the screen after 10 seconds.
While the device is stopped, press the " PROG " button [ ] once. The LED screen will display
" P01 " indicating that the programming mode is activated. After selecting a track using the next
track or previous track buttons [ ] , press the program button [ ] to save the track.
CDs can be programmed with a maximum of 20 tracks, while MP3s can be programmed with up to
99 tracks. Once programming is complete, press the play button [ ] to play the tracks in the
programmed order.
While in the programming mode, pressing the stop button [ ] twice will clear the programmed
tracks and exit the programming mode.
CD/MP3 DISC OPERATION
Figure 3
Single Cycle
Figure 4
Whole Disc Repeat
Figure 5
Random Play
EN
6

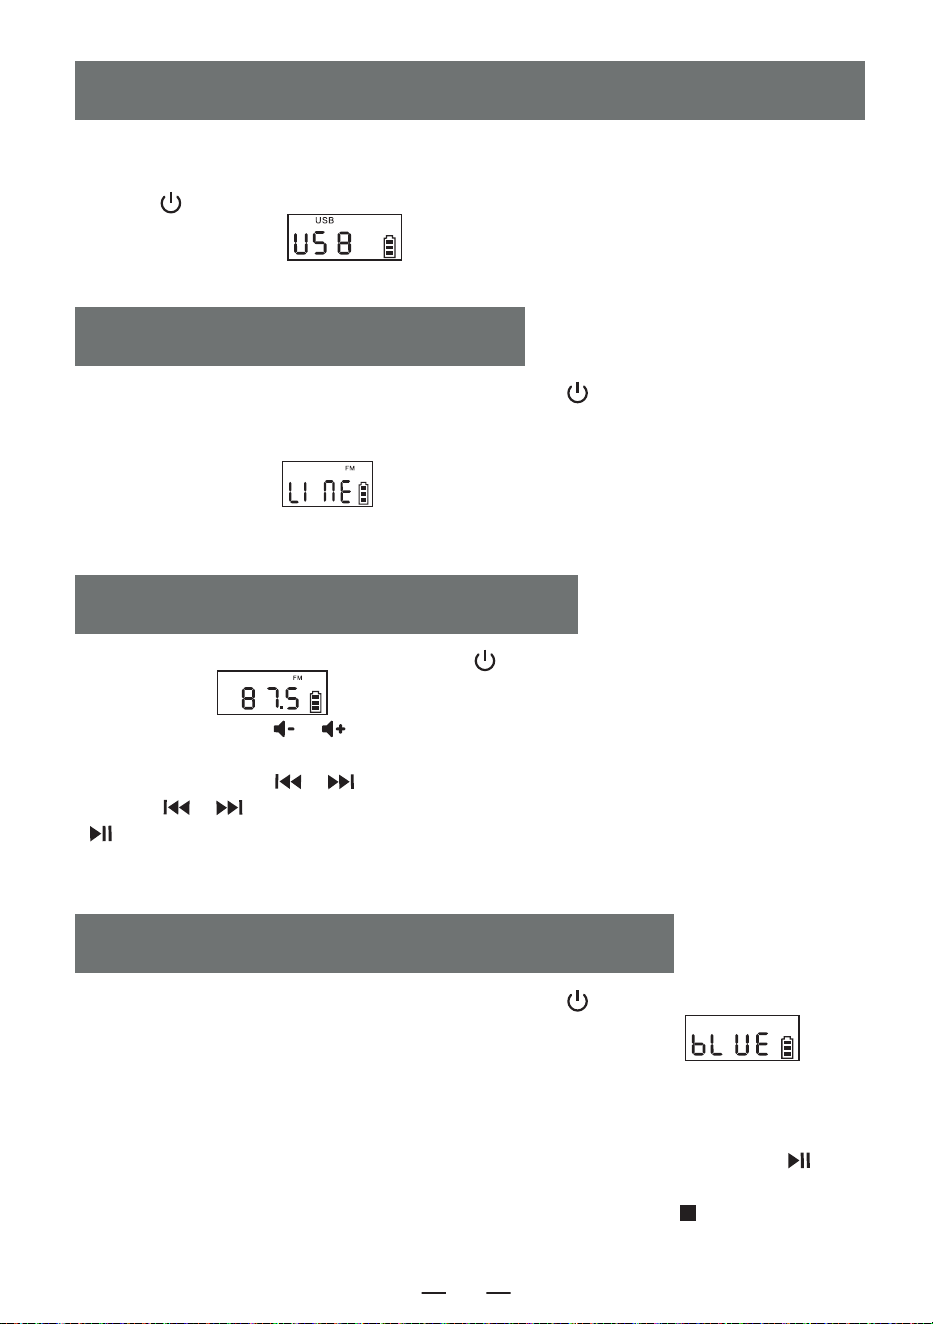
1.Short press the function selector button [ ] to select the AUX function. Then, use an AUX
cable to connect an external audio source to this product. Once the product detects the external
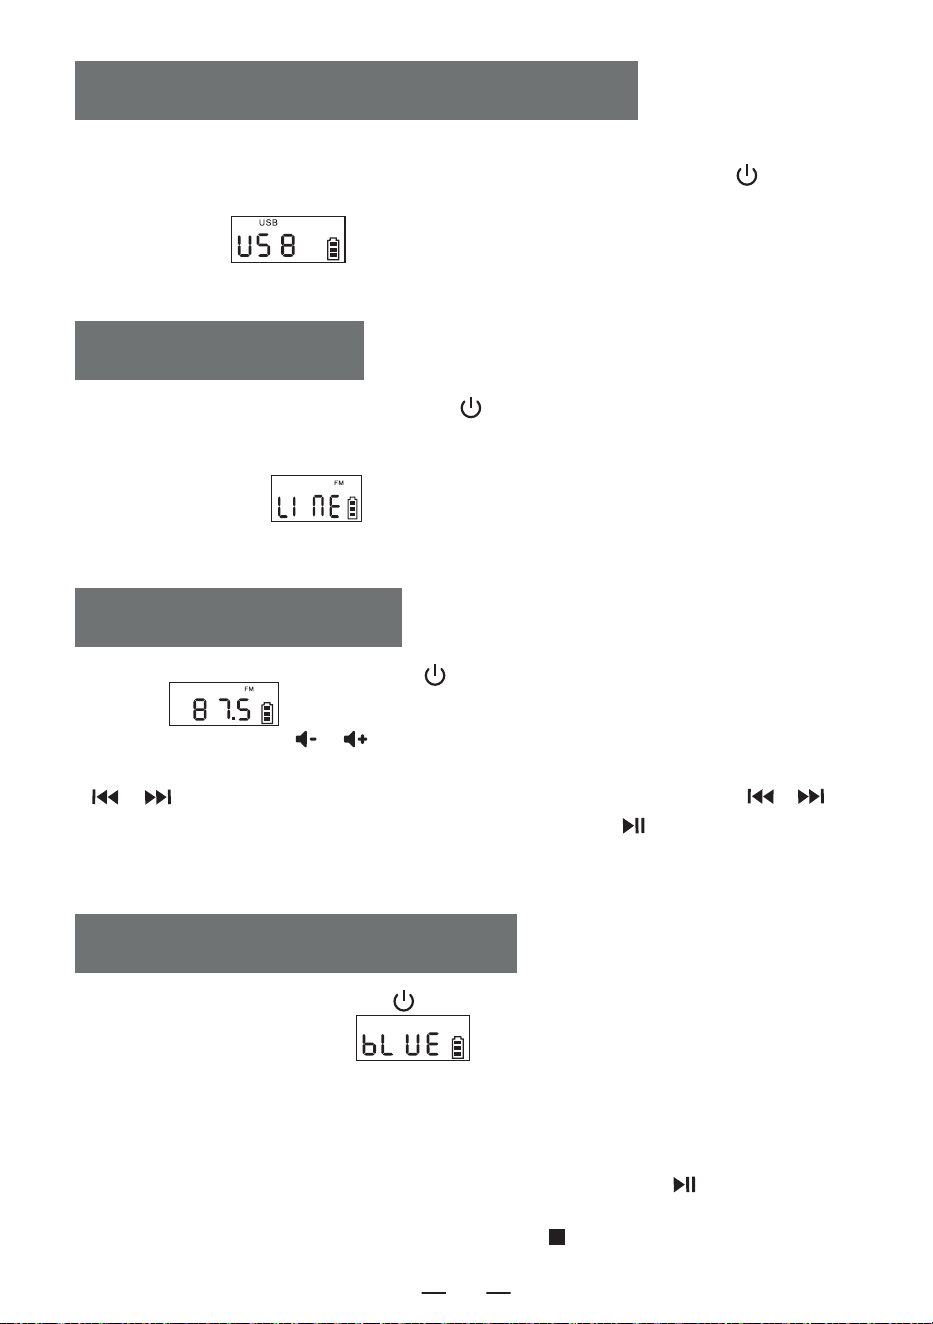
audio source, the songs will start playing.The LCD will display " " .
2.The product has the function of amplifying and outputting all external sound sources (such as
mobile phone, MP3 player, tape Walkman, CD player, radio, etc.).
AUX OPERATION
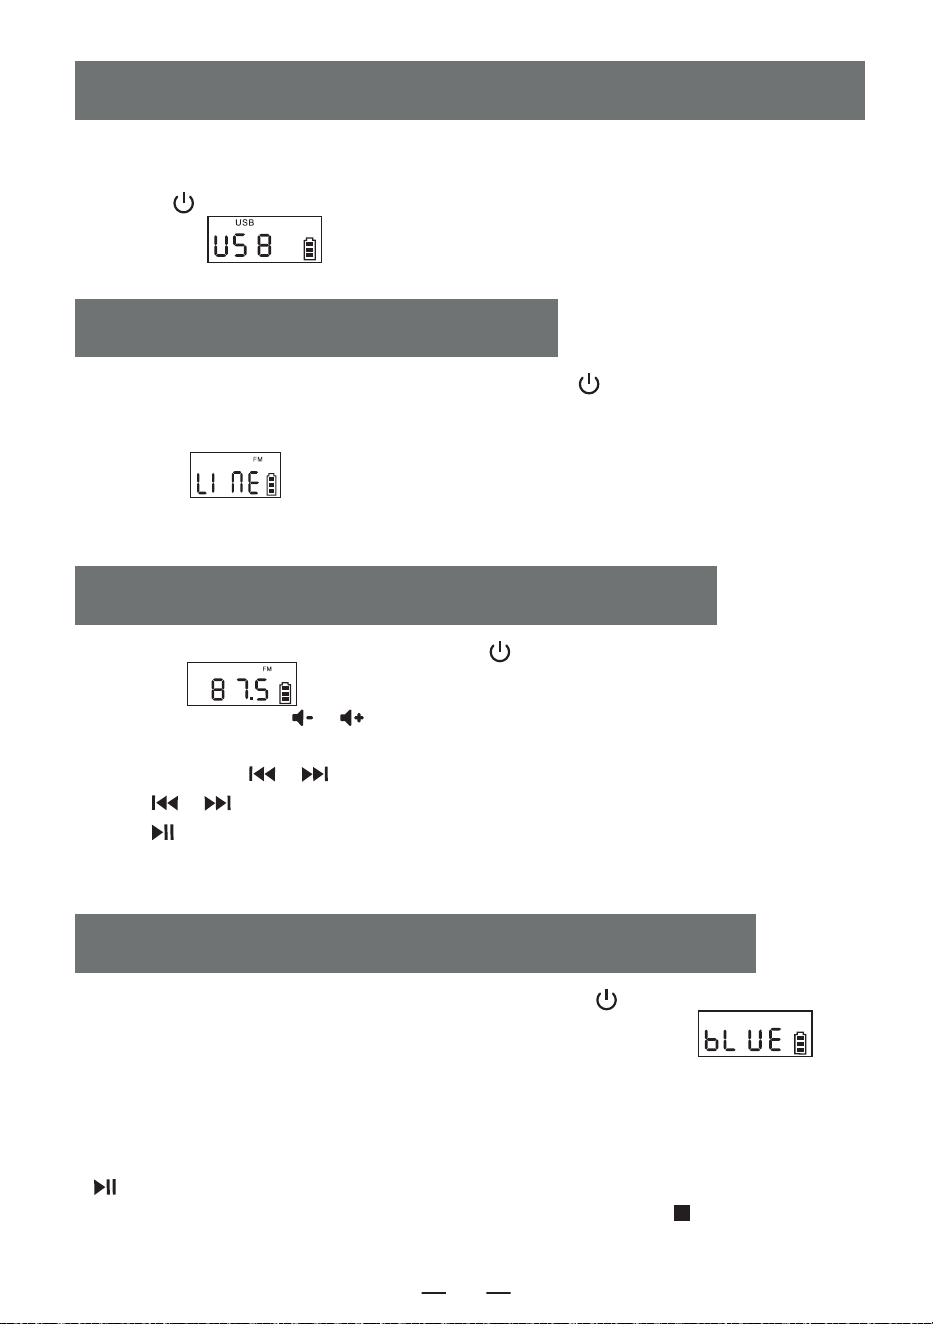
1. Short press the function selection button [ ] in the function selection interface to select the
" BT " mode (LCD will display " " ). At this point, the Bluetooth is in pairing mode.
BLUETOOTH OPERATION
1. Insert the USB with MP3 format into the USB socket.
2. In the function selection interface, Short press the function selector button [ ] on the
device or the remote control to switch to the USB playback mode. The LCD will display
" " , and the device will read the data and play the songs.
3. USB playing operation is same as " CD MP3 Disc Operation " .
USB/TF CARD OPERATION
EN
1. Press the function selector button [ ] to enter the radio state.
LCD shown as " ".
2. Press the [ / ] button to adjust it to the appropriate volume.
3. You can select your favorite radio station through buttons. Short press the [ / ] button
will adjust the channel by 0.1MHz. Long Press the [ / ] button will allow for quick
adjustment of the channel. Pressing [ ] for a long time will automatically search for stations.
The LCD will display the corresponding radio frequency.
4. Preset station
Short press the [ / ] button to select the station to be preset, short press the
[ REP./PROG. ] button on the unit or press the [ PROG. ] button on the remote control, the
screen will display “P01-P30”. Short press the [ / ] button to select the serial number of
the stored station, then short press the [ REP./PROG. ] button on the unit or press the [ PROG. ]
button on the remote control again to confirm. When the preset station is finished, short press the
[ ] button to call up the stations in sequence by the preset station serial number.
5. Pull out the antenna to get a good reception.
RADIO OPERATION
7
2. Turn on the mobile phone or other Bluetooth device. When it searches for the local Bluetooth device,
the Bluetooth name " W17 " will be displayed. After successful pairing.you will hear a prompt tone.
3. When Bluetooth is playing, short press the play button [ ] to play/pause.
4. After Bluetooth pairing, long press the stop button [ ] to clear the Bluetooth connection function.
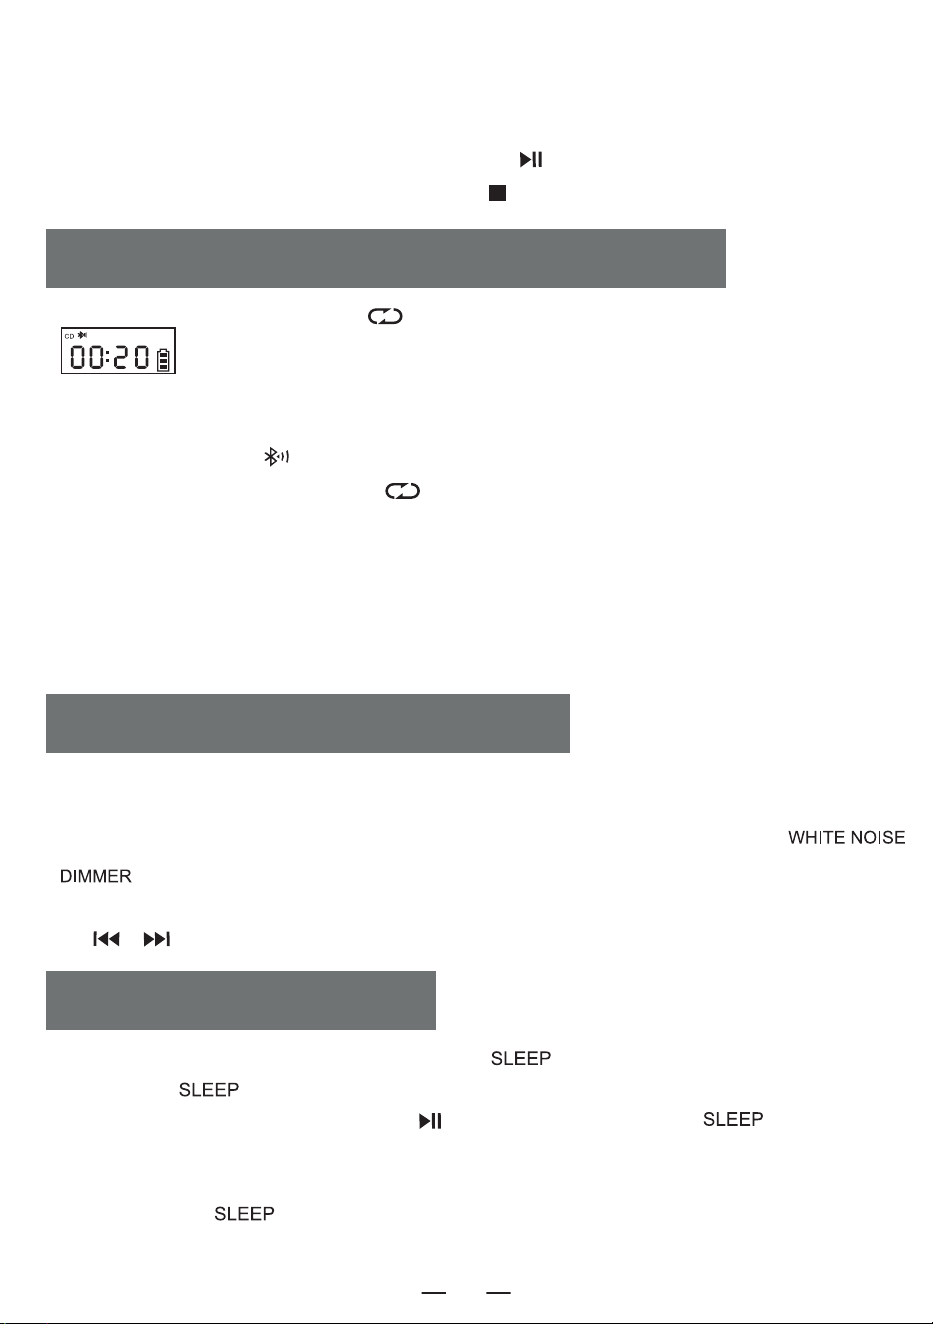
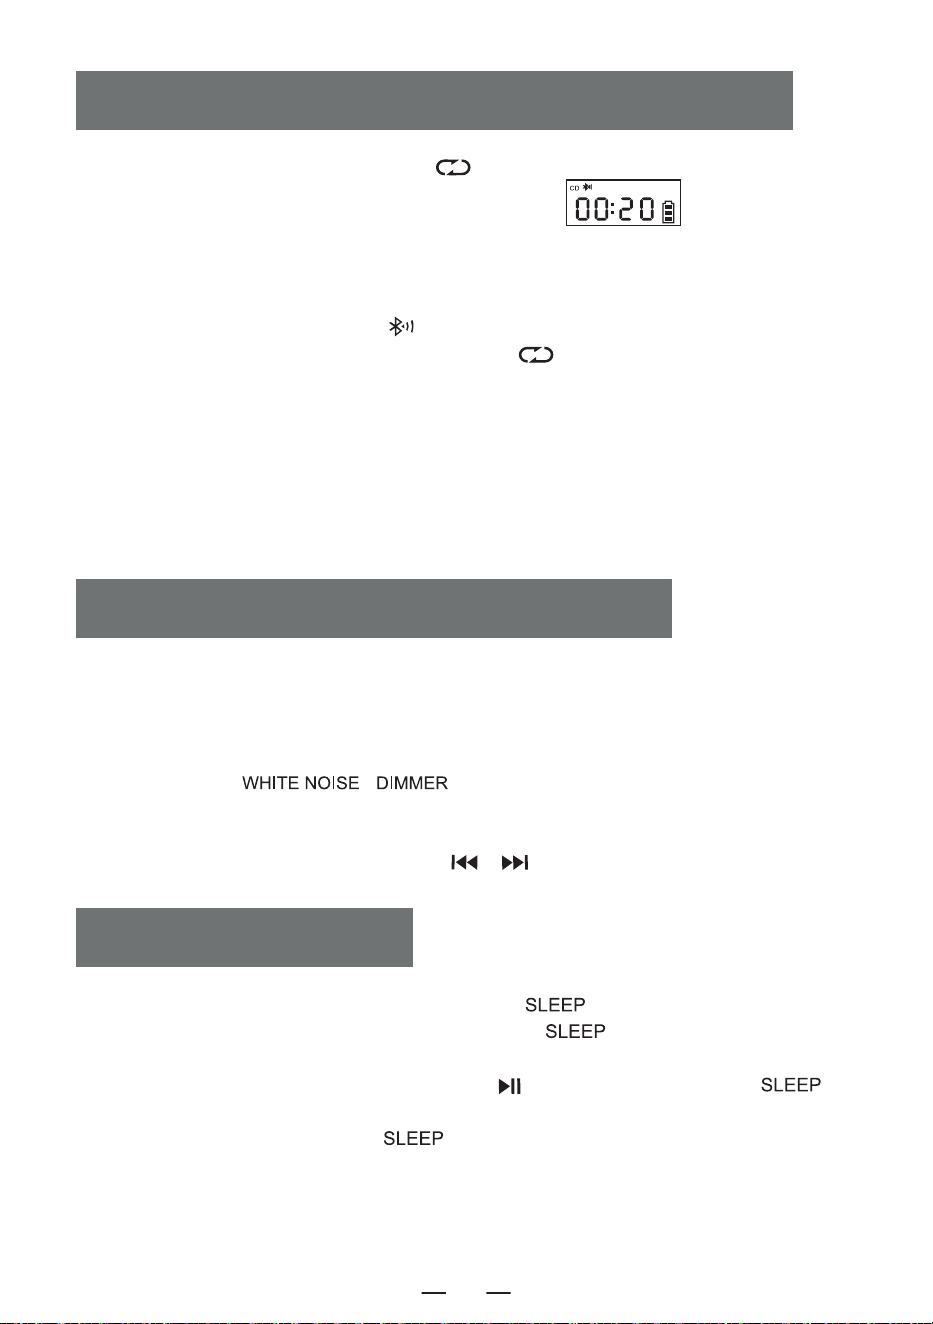
1. In CD/USB/TF/FM mode, long Press [ ] to enter bluetooth transmission mode.(LCD shown as
" " will flash on the screen)
2. When the Bluetooth is under pairing status, it will search Bluetooth devices around for pairing (those
with receiving function like Bluetooth speaker/Bluetooth earphone/Bluetooth headphone).
3. After pairing, the icon [ ] on LCD screen stops flashing.
4. Long press Bluetooth transmit button [ ] again to stop Bluetooth transmission.
NOTE:
1. Before connect the wireless Bluetooth earphone with this player, you need to make sure to disconnect
the other electronic Bluetooth device with earphone and set your wireless Bluetooth earphone to the
searchable mode.
2. If you cannot search and connect to the Bluetooth device, please restart the Bluetooth or the player.
BLUETOOTH TRANSMISSION MODE
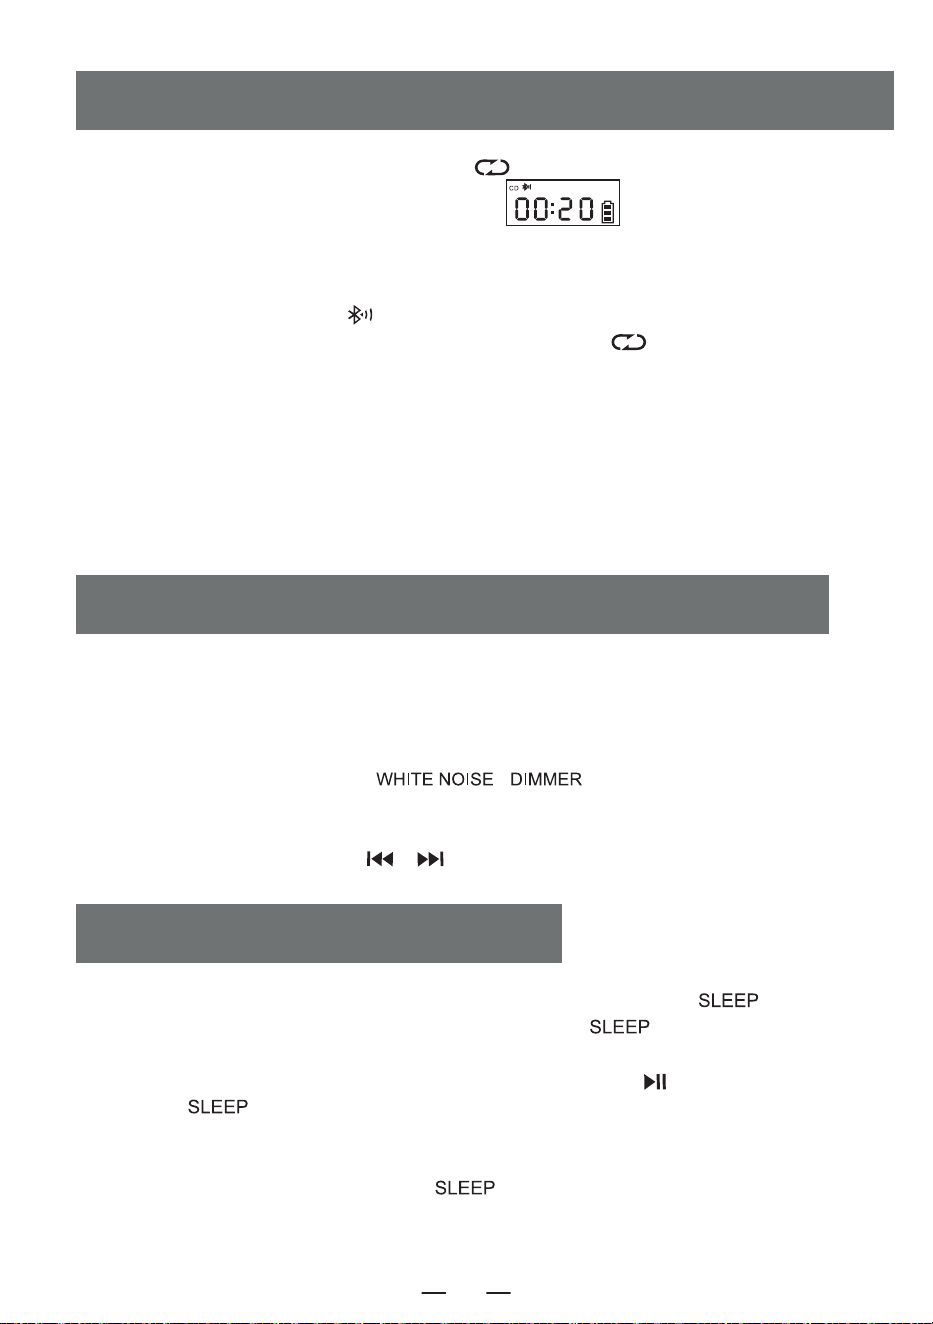
1. On the function selection interface, Short press the " " button to enter the sleep timer mode.
Then, use the " " button to set the timer duration.10-30-60-90-0FF.
2. To confirm the sleep time, Short press the [ ] button. The LCD will display " " . When the
set sleep time elapses, the device will automatically turn off.
NOTE:
By Short press the " " button again, you can check the remaining sleep time before the device
shuts off.
SLEEP OPERATION
1. This product offers 8 different styles of white noise to help you fall asleep quickly.
2. There are two ways to enter the white noise module. On the function selection interface you can either
short press the function selection button to toggle through the options or press and hold the [
\ ] button to directly enter the white noise module.
3. Once in the white noise module, you can switch between the different white noise styles by short press
the [ / ] button.
WHITE NOISE OPERATION
EN
8

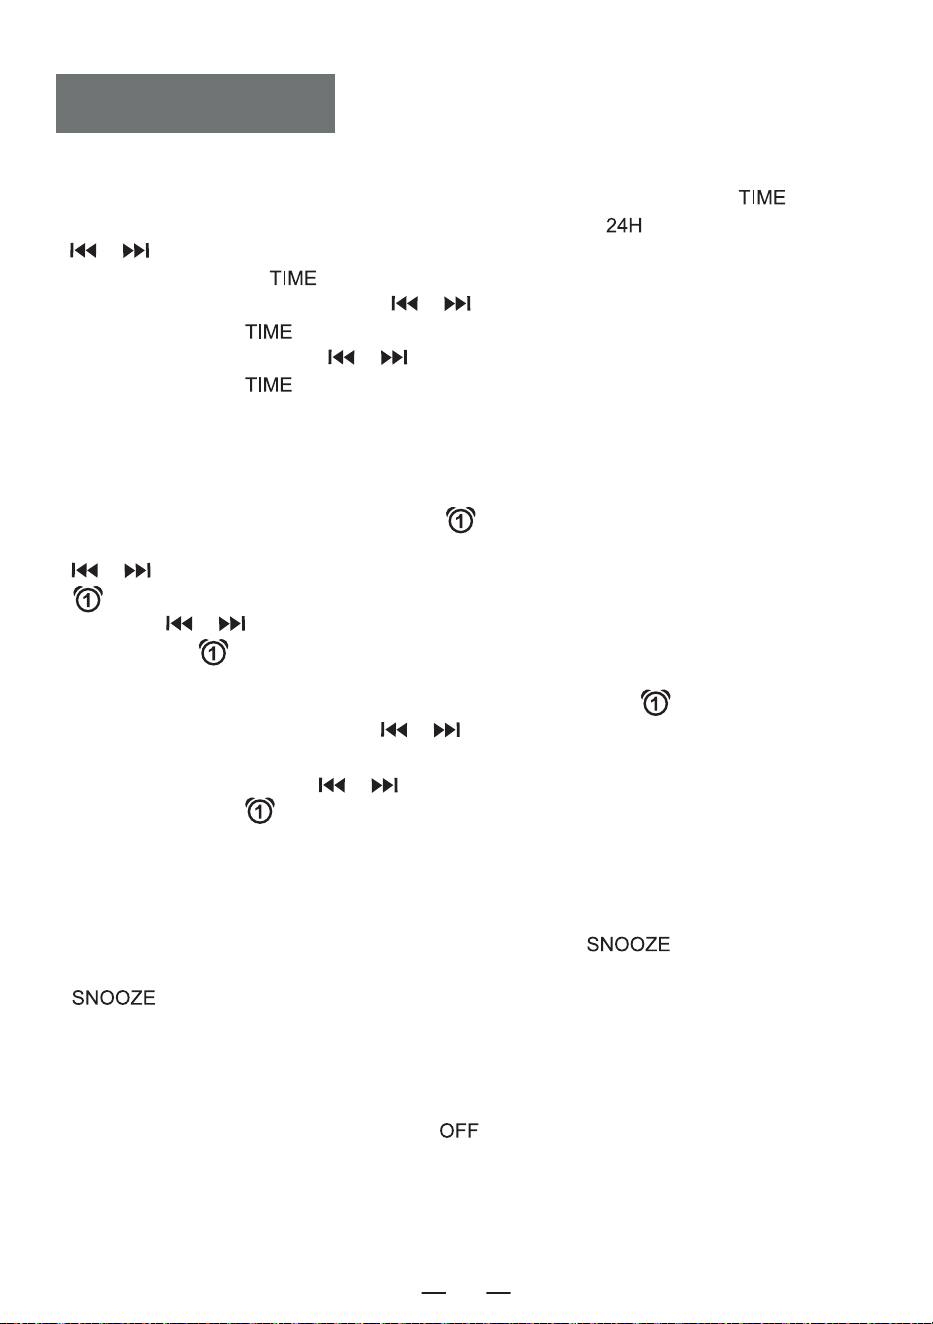
Clock Setting
1. You need to Enter the time display interface, long press the [ ] button to enter the time
setting, the screen display [ ] flashes, short press the [ / ] button to switch to 12H /24H,
select the short press the [ ] button to confirm, the screen display of the time hour blinking, short
press the [ / ] to select, short press the [ ] button to confirm again, the screen clock
minute Blinking short press to select, again short press [ ] button to confirm, complete the clock
setting.
Alarm Clock Setting
1. This product is equipped with two alarm clocks, the operation setting takes Alarm 1 as an example,the
alarm setting method is the same, you need to switch to the time display interface in order to set the
alarm clock.
2. In the time display interface, long press [ ] button to enter the alarm clock setting, at this time
the hour part of the screen clock flashes, short press [ / ] to set the time, select a good hour
short press [ ] button to confirm, at this time the minute part of the screen clock flashes, short
press [ / ] button to set the time, select a good minute short press [ ] to confirm, then
enter the alarm ringtone to choose from, 1.white noise 2.CD 3.USB 4.TF 5.AUX.
3. When you choose white noise for alarm function, short press [ ] button to confirm and then
press the [ / ] button to select one of the 8 songs as the alarm ringtone, then press to confirm
to enter the alarm sound volume setting, press the [ / ] button to select the desired volume
value and then press [ ] button to confirm, the alarm setting is complete, and when it comes to the
time of the set alarm, it will ring up according to the set function.
4. Other alarm settings are the same as white noise, when setting CD/USB/TF card mode as alarm
ringtone, if there is no CD disk or USB/TF card inserted, white noise will be selected as alarm ringtone by
default.
5. Snooze button, in the alarm clock ringing after a short press [ ] button to stop the alarm
ringing interval of 9 minutes will ring again, after the alarm does not press the [ ] button to
turn off the alarm ringing will have been ringing 60 minutes after the alarm will automatically stop
ringing.
NOTE:
After the alarm setting is completed, the alarm icon will be displayed at the lower right corner of the
screen, if you want to turn off the alarm, short press the corresponding Alarm 1/Alarm 2 button, the
screen will display [ ] and the alarm icon at the lower right corner of the screen will disappear,
indicating that the alarm has been turned off.
TIME OPERATION
EN
9

1 .Do not expose the product to rain or damp areas, and keep it away from bathtubs,washing
basins, swimming pools, and other wet environments when placing and using it.
2. Do not put any source of danger on the device (for example, objects filled with liquid,lighted
candles).
3. Do not use the product near heat sources, including radiator pipes, heaters or other
appliances that generate heat.
4. Put the product on a flat surface to use.
5. The product should be placed in a location with sufficient ventilation space around it.There
should be 5-10 cm of space around the front and rear of the product to ensure adequate
ventilation.
6. Do not place the product on a bed, blanket, or similar surfaces to prevent the vents from
being blocked. Additionally, do not cover the product with tablecloths, paper, or any other
materials.
7. Be careful not to let solids or liquids enter the body from the radio.
SAFETY INSTRUCTIONS
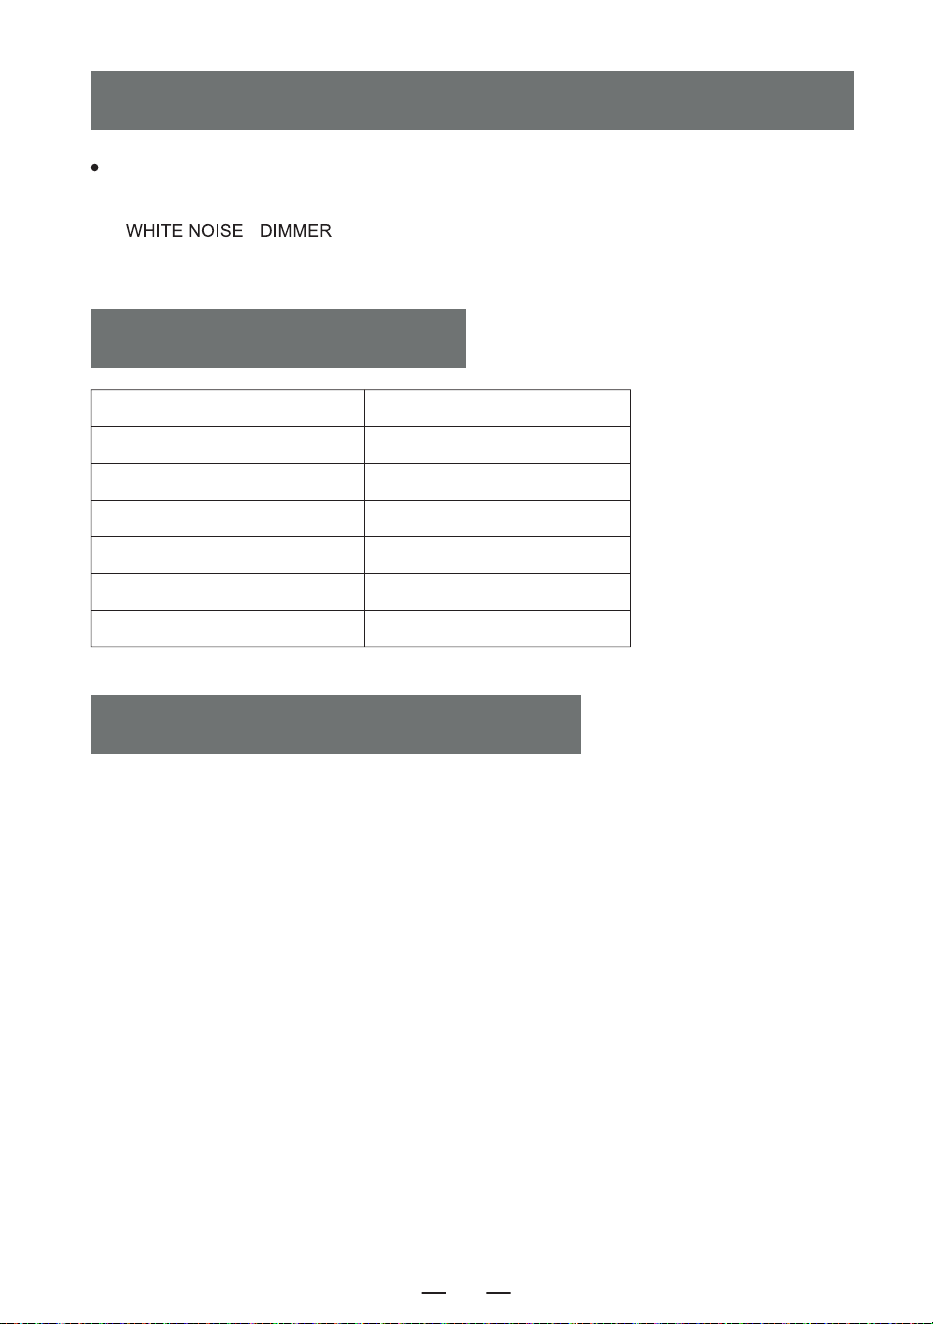
This product offers three backlight settings: normal brightness, increased brightness and light
off Short press [ \ ] to switch between the backlight settings.
Power Source DC 5V 2A Type-C charging
Bluetooth Version 5.1
CD Format CD/CD-R/CD-RW/MP3
USB/SD Format MP3/WMA
CD Playback Sound 31.5hz-16khz±3db
Size 6.69*.21*4.96in
Weight 2.65lb/1200g
BACKLIGHT OPERATION
SPECIFICATIONS
EN
10
8. Water vapor may condense on the laser lens under the following conditions:-
-When the unit is moved from a cold place to a warm place;
-When the heating system has just opened;
-When the machine is used in a very humid room;
-When the unit is cooled by the air conditioning system;
-When condensation occurs in the unit, the system cannot operate normally.If this happens,
you can temporarily stop using the unit for a few hours before operating it again.
9. The product should not be exposed to water droplets or splashes, and objects filled with
liquids such as vases should not be placed on the equipment.
Maintenance:
Please place the product in a well-ventilated place, not in the sun or other places that generate
high temperature and humidity, During maintenance, please use a soft cloth moistened with a
thinner detergent to wipe the body. Do not use strong solvents such as alcohol, stupid or
thinner.
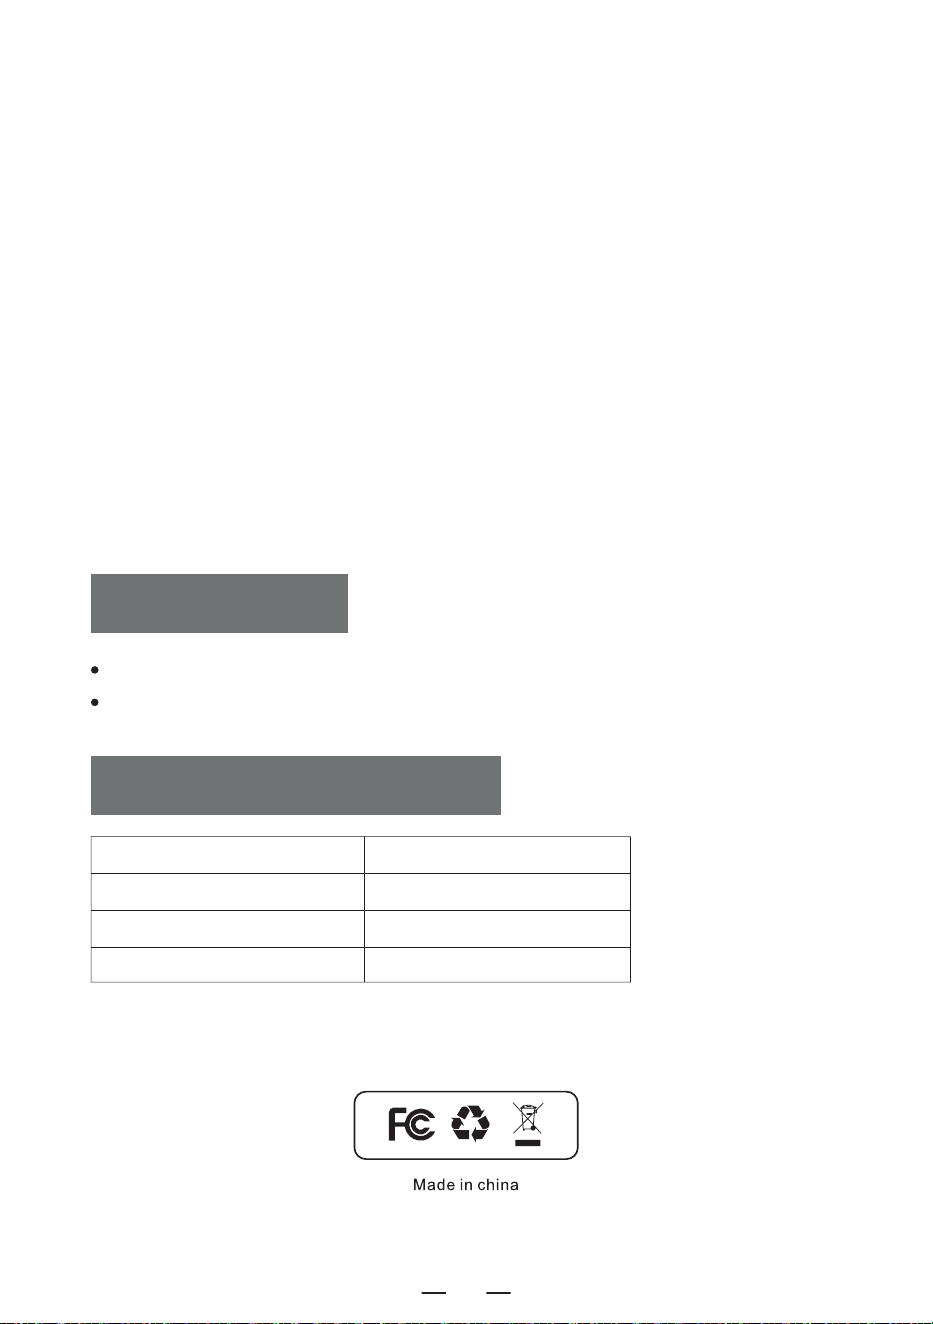
This CD player has full 12-month warranty against manufacturing defects.
The warranty period begins form the date of purchase.
WARRANTY
PACKING LIST
EN
CD Player 1
Type-C Cable 1
Remote Control 1
User Manual 1
11
TRAGBARER CD-PLAYER
Vielen Dank, dass Sie sich für den Kauf unserer persönlichen
Audioprodukte entschieden haben.Ein hochwertiger CD-Player ist
ein elektronisches, akustisches Technologieprodukt, das von
unserem Unternehmen sorgfältig entwickelt wurde. Um den
perfekten Gebrauchseffekt zu erzielen und die Lebensdauer
dieses Produkts zu verlängern, sind die richtige Verwendung und
Wartung sehr wichtig. Bitte lesen Sie diese Anleitung vor der
Verwendung sorgfältig durch.
CD-W17
Benutzerhandbuch
DE
INHALT
WICHTIGE TIPPS
WICHTIGE TIPPS
FUNKTION DER TASTEN
BESCHREIBUNG DER FERNBEDIENUNG
EIN/AUSSCHALTEN
AUFLADEN DES AKKUS
DAS GERÄT ZURÜCKSETZEN
BETRIEB DER CD/MP3 DISC
BETRIEB DER USBITF-KARTE
AUXBETRIEB
RADIOBETRIEB
Wenn Sie dieses Produkt verwenden, befolgen Sie
bitte die vorgeschriebenen Schritte, andernfalls
können Sie schädlicher Strahlung ausgesetzt werden
Dieser CD-Player ist ein Laserprodukt der Klasse 1.
Wenn die CD-Hülle geöffnet oder unachtsam geschlos-
sen wird, wird ein unsichtbarer Laser erzeugt
Bitte berühren Sie nicht den kahlen Kopf,
da sonst die Wiedergabe beeinträchtigt
wird.
Das Blitzsymbol mit Pfeilspitze in einem
gleichseitigen Dreieck soll den Benutzer auf
das Vorhandensein einer nicht isolierten
„gefährlichen Spannung“ innerhalb des
Produktgehäuses hinweisen, die ausreichen
kann, um einen elektrischen Schlag bei
Personen zu verursachen.
BLUETOOTH-BETRIEB
BLUETOOTH-ÜBERTRAGUNGSMODUS
WEISSES RAUSCHEN-BETRIEB
SLEEP-BETRIEB
ZEITBETRIEB
HINTERGRUNDBELEUCHTUNGSBETRIEB
SPEZIFIKATIONEN
SICHERHEITSHINWEISE
GUARANTEE
VERPACKUNGSLISTE
DE
12

FUNKTION DER TASTEN
1. Antenne
2. Handgriff
3. CD-Klappe
4. Zeit-Taste
5. weißes Rauschen / Dimmer
6. Snooze-Taste
7. Alarm 1 Taste
8. Alarm 2-Taste
9. Power-Taste/Funktionswahltaste
10. WiederholungstasteProgrammiertaste
11. Sleep-Taste
12. Vorheriger Titel/Schneller Rücklauf
13. Play/Pause-Taste/Vollscan
14. nächster Titel/Schnellvorlauf-Taste
15. Stop-Taste/EQ-Taste
16. Taste zum Verringern der Lautstärke-
17. Taste zum Erhöhen der Lautstärke+
18. Fernbedienung Empfangsstelle
19. LCD-Anzeige
20. Lautsprecher
21. Kopfhörerbuchse
22. Audio-Eingangsschnittstelle
23. USB-Buchse
24. TF-Buchse
25. Ladelampe
26. DC 5V-Anschlüsse
27. Die Reset-Taste
DE
13
1. Power on/off: Produkt ein f aus Taste.
2. Vol +/-: Lautstärke erhöhen/verringern.
3. Funktion: Drücken Sie diese Funktionstaste im eingeschalteten Zustand, um verschiedene
Funktionen auszuwählen: CD-Wiedergabe-Bluetooth-USB- SD-AUX-Weißes Rauschen-Radio.
4. A-B-Wiedergabe: A-B-Wiederholungstaste
5. weißes Rauschen: Bietet 8 verschiedene Arten von weißem Rauschen, um Ihnen zu helfen, schnell
einzuschlafen.
6. wiederholen: Wiederholungstaste zum Durchlaufen von Titeln bei der Wiedergabe von
USB-Flash-Disk/CD/MP3-Discs.
Programmierung: Drücken Sie die [ ]-Taste auf der Fernbedienung, um die Wiedergabe von
CD/MP3-Discs/USB zu stoppen, und drücken Sie dann die [ ] -Taste, um die Programmier-
schnittstelle aufzurufen (die LCD-Anzeige blinkt und zeigt „P01“ auf dem Bildschirm an, wie in
Abbildung 1 dargestellt). Drücken Sie die vorherige [ / ]-Taste, um den zu programmieren-
den Track auszuwählen, und drücken Sie dann diese [ ]-Taste, um die Programmierung zu
bestätigen. Drücken Sie die [ ]-Taste, um den programmierten Titel in der richtigen Reihenfolge
abzuspielen (auf dem Bildschirm erscheint die obige Abbildung 2). Wenn Sie anhalten möchten,
drücken Sie einfach die [ ]-Taste.
BESCHREIBUNG DER FERNSTEUERUNG
3. Funktion
4. A-B-Wiedergabe
5. weißes Rauschen
17. Dimmen
8. EQ
9. CD-Wiedergabe
11. NEXT
13. STOP
16. SLEEP
Abbildung 1
Abbildung 2
1. POWER ON/OFF
2. VOL +
2. VOL -
6. wiederholen
7. Uhrzeit einstellen
12. PLAY/PAUSE
10. Previous
14. Bluetooth-Übertragungsmodus
15. NUMBER 0-9
DE
14
7. Uhrzeit einstellen: Drücken Sie auf der Zeitanzeigeoberfläche lange auf die Taste [ ] , um
die Uhrzeit einzustellen. Drücken Sie in der Funktionsauswahloberfläche kurz [ ] , um die
Uhrzeit anzuzeigen.
8. EQ: Wenn das Produkt in Betrieb ist, drücken Sie die Taste [ ], um verschiedene Musikeffekte
zu ändern, nämlich FLA-ROC-POP-JAZ-CLA (Flat-Rock-Pop-Jazz-Classical)
9. CD-Wiedergabe: Drücken Sie diese Taste, um die CD-Wiedergabefunktion aufzurufen.
10. Previous: kurzes Drücken zum vorherigen Lied, langes Drücken zum schnellen Rücklauf。
11. Next: kurzes Drücken zum nächsten Titel, langes Drücken zum schnellen Vorlauf.
12. Play/Pause: Abspielen und Anhalten des Liedes.
13. Stop: Stoppt die Wiedergabe des Titels.
14. Bluetooth-Übertragungsmodus: Drücken Sie diese Taste, um in den Bluetooth-Übertragungsmo-
dus zu wechseln.
15. Nummer 0-9: Drücken Sie die Zifferntaste 0-9, um beim Abspielen einer USB-Festplatte/C-
D/MP3-Disc direkt die Titelnummer auszuwählen.
16. SLEEP:
Sie müssen sich in einem funktionsfähigen Zustand befinden, um Einstellungen für den Ruhemodus
vornehmen zu können, z. B. CD-Wiedergabe, Bluetooth, USB usw. Drücken Sie kurz auf „ “,
um den Schlafmodus zu aktivieren. Auf dem LCD-Display wird „ “ angezeigt. Drücken
Sie erneut, um die Einschlafzeit einzustellen: 10<30<60<90<OFF.
17. Dimmen:
Drücken Sie kurz die [ ]-Taste, um die Beleuchtung hoch/niedrig einzustellen oder das
Licht auszuschalten.
HINWEIS: Drücken Sie im Schlafmodus kurz die Taste „ “, um die verbleibende Schlafzeit
zu sehen, bevor sich das Gerät ausschaltet.
1. Short press the power button [ ] to turn on the device and enter the time display interface to
display the time, Short press the power button again this interface to turn off the device.
2. After entering the time display interface, long press the power button [ ] to enter the function
selection interface, Each short press the power button [ ] to a different function mode (function
modes include: CD\Bluetooth\USB\SD\AUX\White Noise\Radio). When you long press the power
button [ ] again, you will enter the time display interface.
3. You can also press the power button on the remote control to turn the product on or off.
EIN/AUSSCHALTEN
DE
15
1. verwenden Sie bitte einen 5V/2A Typ-C-Netzadapter, um das Gerät aufzuladen. Die vollständige
Ladezeit beträgt etwa 5,5 Stunden.
2. Nach dem vollständigen Aufladen zeigt die Batterieanzeige auf dem Bildschirm volle Balken an und
blinkt nicht, die Ladekontrollleuchte schaltet sich aus.
3. während des Ladevorgangs blinkt die Batterieanzeige auf dem Bildschirm, die Ladekontrollleuchte
leuchtet weiterhin rot.
HINWEIS :
1. wenn die Leistung weniger als 25% beträgt, kann es sein, dass die Anzeige nicht klar ist, das
Funksignal schlecht ist, die Tonqualität nicht klar ist, usw. Bitte laden Sie es so bald wie möglich auf,
damit das Radio richtig funktioniert.
2. wenn das Produkt nicht aufgeladen werden kann, verwenden Sie bitte die Funktion, um das
Produkt zu aktivieren.
Anzeige der Batteriekapazität
AUFLADEN DES AKKUS
DAS GERÄT ZURÜCKSETZEN
Resetknopf
HINWEIS:
Da das Produkt über Akkuschutzmaßnahmen verfügt, versuchen Sie bitte, es zurückzusetzen, wenn
das Gerät einfriert, nicht aufgeladen werden kann oder nach dem Aufladen keine Funktionen nutzen
kann, oder wenn es während der Nutzung zu Verzögerungen oder Problemen mit der Funktionalität
kommt. nach dem Zurücksetzen kann es wieder aktiviert und genutzt werden.
WIE KANN MAN ZURÜCKSETZEN?
Halten Sie die [ ]-Taste zwei Sekunden lang gedrückt und starten Sie das Gerät neu, damit es
wieder normal funktioniert.
a. 60%-100% Leistung
b. 30%-60% Leistung
c. 10%-30% Leistung
d. 3%-10% Leistung
e. 0% -3% Leistung
langsam blinken
schnell blinken
DE
16
1.drücken Sie kurz [ ] , um das Gerät einzuschalten. Halten Sie die Taste [ ] 2 Sekunden lang
gedrückt, um die Funktionsauswahl zu öffnen, und drücken Sie kurz die Funktionsauswahltaste, auf dem
LCD-Display wird „ “ angezeigt.
2. öffnen Sie die Tür des CD-Fachs, legen Sie die Druckfläche der CD nach oben auf die Spindel des
CD-Laufwerks.
3. schließen Sie die CD-Fachklappe, der Titel wird automatisch in einigen Sekunden abgespielt, das LCD
zeigt die Nummer des aktuellen Titels an. Das Format der CD, wie z.B. „CD“, „MP3“, usw.
4. drücken Sie kurz die Vol + Taste [ ] oder Vol - Taste [ ] , um die Lautstärke einzustellen.
5. drücken Sie kurz die Play/Pause Taste [ ] , um die Wiedergabe zu unterbrechen, drücken Sie die
Taste erneut, um die Wiedergabe fortzusetzen.
6. Wenn Sie die Wiedergabe auf halber Strecke unterbrechen müssen, drücken Sie die Stopptaste
[ ] , um die Wiedergabe zu stoppen.
7. Drücken Sie während der Wiedergabe kurz die vorherige/nächste Taste [ / ], um zum
vorherigen/nächsten Titel zu springen; drücken Sie die vorherige/nächste Taste [ / ] 2 Sekunden
lang, um schnell vor- oder zurückzuspulen.
8. Wiederholungsfunktion:
Drücken Sie während der CD-Wiedergabe kurz die Wiederholungstaste [ ] , wird der aktuelle
Titel, den Sie hören, in den Einzeltaktmodus versetzt und auf dem LCD-Bildschirm wie in
„ Abbildung 3 “ angezeigt.
Drücken Sie die Wiederholungstaste zweimal, wenn Ihre MP3-Disc einen Ordner enthält, wird die
Wiedergabe des aktuellen Ordners wiederholt und auf dem LCD-Bildschirm wie in „ “
angezeigt.
Wenn Sie die Wiederholungstaste dreimal drücken, wird die gesamte Disc vollständig abgespielt,
was auf dem LCD-Display wie in „ Abbildung 4 “ angezeigt wird.
Drücken Sie die Wiederholungstaste viermal, wird die gesamte Disc in zufälliger Reihenfolge
abgespielt.wie in „ Abbildung 5 “ gezeigt.
Drücken Sie die Wiederholungstaste fünfmal, um die normale Wiedergabe fortzusetzen.
9. Programmierfunktion:
Anmerkung:
Bei der Wiedergabe von CD/BT/USB/TF
wird die Uhrzeit nach 10 Sekunden auf
dem Bildschirm angezeigt.
Drücken Sie bei gestopptem Gerät einmal die Taste „ PROG “ [ ]. Auf dem LED-Display wird
„ P01 “ angezeigt, was bedeutet, dass der Programmiermodus aktiviert ist. Nach der Auswahl eines
Titels mit den Tasten „Nächster Titel“ oder „ Vorheriger Titel “ [ ] drücken Sie die
Programmiertaste [ ], um den Titel zu speichern.
CDs können mit bis zu 20 Titeln programmiert werden, während MP3s mit bis zu 99 Titeln program-
miert werden können. Sobald die Programmierung abgeschlossen ist, drücken Sie die [ ]
Wiedergabetaste , um die Titel in der programmierten Reihenfolge abzuspielen.
Wenn Sie im Programmiermodus zweimal die Stopptaste [ ] drücken, werden die programmier-
ten Titel gelöscht und der Programmiermodus verlassen.
BETRIEB DER CD/MP3 DISC
Abbildung 3
Einzelner Zyklus
Abbildung 4
Wiederholung der
gesamten Scheibe
Abbildung 5
Zufälliges Spiel
DE
17
1. Drücken Sie kurz auf die Funktionswahltaste [ ] , um die AUX-Funktion auszuwählen.
Verwenden Sie dann ein AUX-Kabel, um eine externe Audioquelle an dieses Gerät anzuschließen.
Sobald das Gerät die externe Audioquelle erkennt, beginnt die Wiedergabe der Titel. Auf der
LCD-Anzeige erscheint „ “.
2. Das Gerät kann alle externen Tonquellen (z. B. Mobiltelefon, MP3-Player, Walkman, CD-Player,
Radio usw.) verstärken und wiedergeben.
AUXBETRIEB
1. Drücken Sie die Funktionsauswahltaste [ ] , um in den Radiomodus zu wechseln. Auf dem
LCD wird „ “ angezeigt.
2. Drücken Sie die Taste [ / ] , um die entsprechende Lautstärke einzustellen.
3. Sie können Ihren Lieblingsradiosender über die Tasten auswählen. Durch kurzes Drücken von
[ / ] wird der Kanal um 0,1 MHz eingestellt. Durch längeres Drücken von [ / ]
können Sie den Kanal schnell einstellen. Durch langes Drücken von [ ] werden automatisch
Sender gesucht. Auf dem LCD wird die entsprechende Radiofrequenz angezeigt.
4. Ziehen Sie die Antenne heraus, um einen guten Empfang zu erhalten.
RADIOBETRIEB
1.Drücken Sie kurz die Funktionstaste [ ] im Funktionsauswahl-Menü, um den "BT"-Modus
auszuwählen (auf dem LCD wird " " angezeigt). Zu diesem Zeitpunkt befindet
sich das Bluetooth im Pairing-Modus.
2. Schalten Sie das Mobiltelefon oder ein anderes Bluetooth-Gerät ein. Wenn es das lokale
Bluetooth-Gerät sucht, wird der Bluetooth-Name " W17 " angezeigt. Nach erfolgreichem Pairing
hören Sie einen Bestätigungston.
3. Wenn Bluetooth abgespielt wird, drücken Sie kurz die Wiedergabetaste [ ] , um die
Wiedergabe zu starten/pausieren.
4. Nach dem Bluetooth-Pairing halten Sie die Stopp-Taste [ ] lange gedrückt, um die
Bluetooth-Verbindungsfunktion zu löschen.
BLUETOOTH-BETRIEB
1 Stecken Sie das USB-Gerät mit MP3-Format in die USB-Buchse.
2.Drücken Sie in der Funktionsauswahloberfläche kurz die Funktionsauswahltaste [ ] am
Gerät oder auf der Fernbedienung, um in den USB-Wiedergabemodus zu wechseln. Auf dem
LCD-Display wird „ “ angezeigt, und das Gerät liest die Daten und spielt die
Titel ab.
3.Die USB-Wiedergabe funktioniert genauso wie die CD/MP3-Wiedergabe.
BETRIEB DER USBITF-KARTE
DE
18
1. Im CD/USB/TF/FM-Modus halten Sie die [ ] Taste lange gedrückt, um in den
Bluetooth-Übertragungsmodus zu wechseln. (Das LCD zeigt „ “ an und blinkt auf
dem Bildschirm.)
2. Wenn sich das Bluetooth im Pairing-Modus befindet, sucht es nach Bluetooth-Geräten in der
Umgebung zur Verbindung (z. B. Bluetooth-Lautsprecher, Bluetooth-Ohrhörer, Bluetooth-Kopf-
hörer).
3. Nach dem Pairing hört das Symbol [ ] auf dem LCD-Bildschirm auf zu blinken.
4. Halten Sie erneut die Bluetooth-Übertragungstaste [ ] lange gedrückt, um die
Bluetooth-Übertragung zu stoppen.
Hinweis:
1. Bevor Sie die kabellosen Bluetooth-Ohrhörer mit diesem Gerät verbinden, stellen Sie sicher, dass
andere elektronische Bluetooth-Geräte von den Ohrhörern getrennt sind und setzen Sie Ihre
kabellosen Bluetooth-Ohrhörer in den Suchmodus.
2. Wenn Sie das Bluetooth-Gerät nicht suchen oder verbinden können, starten Sie bitte entweder
das Bluetooth oder das Gerät neu.
BLUETOOTH ÜBERTRAGUNGSMODUS
1. Auf der Funktionsauswahloberfläche drücken Sie die [ ]-Taste kurz, um den Schlaf-Tim-
er-Modus zu aktivieren. Anschließend können Sie mit den [ ]-Tasten die Timer-Dauer
einstellen: 10-30-60-90-0FF.
2 .Um die Schlafzeit zu bestätigen, drücken Sie die [ ]-Taste kurz. Das LCD zeigt [ ] an.
Wenn die eingestellte Schlafzeit abgelaufen ist, schaltet sich das Gerät automatisch aus.
HINWEIS: Durch kurzes Drücken der [ ]-Taste können Sie die verbleibende Schlafzeit
überprüfen, bevor das Gerät sich ausschaltet.
SLEEP-BETRIEB
1.Dieses Produkt bietet 8 verschiedene Arten von Weißrauschen, um Ihnen zu helfen, schnell
einzuschlafen.
2.Es gibt zwei Möglichkeiten, in das Weißrauschen-Modul zu gelangen. Auf der Funktionsau-
swahloberfläche können Sie entweder die Funktionstaste kurz drücken, um durch die Optionen zu
wechseln, oder die [ \ ]-Taste lange gedrückt halten, um direkt in das
Weißrauschen-Modul zu gelangen.
3.Sobald Sie sich im Weißrauschen-Modul befinden, können Sie zwischen den verschiedenen
Weißrauschen-Stilen wechseln, indem Sie die [ / ] -Taste kurz drücken.
WEISSES RAUSCHEN-BETRIEB
DE
19
Uhrzeiteinstellung
1. Um in den Einstellungsmodus für die Uhr zu gelangen, drücken und halten Sie die [ ]-Taste, um
die Zeit-Einstellungsoberfläche zu öffnen. Auf dem Bildschirm blinkt [ ]. Drücken Sie kurz die
[ / ]-Taste, um zwischen 12H und 24H umzuschalten. Wählen Sie den gewünschten Modus aus
und drücken Sie kurz die [ ]-Taste, um zu bestätigen. Der Stundenwert auf dem Bildschirm
beginnt zu blinken. Drücken Sie kurz die [ / ]-Taste, um die Stunden zu ändern. Drücken Sie
anschließend kurz die [ ]-Taste, um zu bestätigen. Dann beginnen die Minuten auf dem Bildschirm
zu blinken. Drücken Sie kurz die [ / ]-Taste, um die Minuten einzustellen. Drücken Sie
abschließend kurz die [ ]-Taste, um zu bestätigen. Damit ist die Uhrzeiteinstellung abgeschlossen.
Wecker-Einstellung
1. Dieses Produkt ist mit zwei Weckern ausgestattet. Die Einstellung wird am Beispiel von Wecker 1
erklärt; die Einstellung für den zweiten Wecker ist gleich. Sie müssen zuerst in die Zeitanzeige-Ober-
fläche wechseln, um den Wecker einzustellen.
2. In der Zeitanzeige-Oberfläche halten Sie die [ ]-Taste gedrückt, um in den Wecker-Einstellmodus
zu wechseln. Der Stundenwert auf dem Bildschirm beginnt zu blinken. Drücken Sie kurz die
[ / ]-Taste, um die Stunde einzustellen. Drücken Sie nach Auswahl der Stunden kurz die
[ ]-Taste, um zu bestätigen. Danach beginnen die Minuten auf dem Bildschirm zu blinken. Drücken
Sie kurz die [ / ]-Taste, um die Minuten einzustellen. Drücken Sie nach Auswahl der Minuten
wieder kurz die [ ]-Taste, um zu bestätigen und die Auswahl des Alarmtons zu starten. Sie können
aus folgenden Optionen wählen: 1.Weißes Rauschen 2.CD 3.USB 4.TF 5.AUX.
3.Wenn Sie weißes Rauschen als Alarmton wählen, drücken Sie kurz die [ ]-Taste, um zu bestäti-
gen, und drücken Sie anschließend die [ / ]-Taste, um einen der 8 Songs als Alarmton
auszuwählen. Drücken Sie dann zur Bestätigung und gelangen Sie zu den Lautstärkeeinstellungen für
den Alarmton. Drücken Sie die [ / ]-Taste, um die gewünschte Lautstärke auszuwählen, und
drücken Sie dann die [ ]-Taste zur Bestätigung. Damit ist die Wecker-Einstellung abgeschlossen.
Wenn die eingestellte Weckzeit erreicht ist, wird der Alarm gemäß der eingestellten Funktion aktiviert.
4. Die anderen Alarmeinstellungen sind dieselben wie bei weißem Rauschen. Wenn Sie CD/USB/TF-Kart-
enmodus als Alarmton wählen, wird weißes Rauschen als Standard-Alarmton ausgewählt, wenn keine CD
oder kein USB/TF-Kartenmedium eingelegt ist.
5. Schlummer-Taste: Nachdem der Wecker ertönt, können Sie die [ ]-Taste kurz drücken, um
den Alarm zu stoppen. Nach einer 9-minütigen Pause ertönt der Alarm erneut. Wenn Sie die
[ ]-Taste nicht drücken, um den Alarm zu stoppen, wird der Alarm nach 60 Minuten
automatisch abgeschaltet.
HINWEIS:
Nachdem der Wecker eingestellt wurde, wird das Wecker-Symbol in der unteren rechten Ecke des
Bildschirms angezeigt. Wenn Sie den Wecker ausschalten möchten, drücken Sie kurz die entsprechende
Wecker 1/Wecker 2-Taste. Der Bildschirm zeigt [ ] an, und das Wecker-Symbol in der unteren
rechten Ecke verschwindet, was bedeutet, dass der Wecker ausgeschaltet wurde.
ZEITBETRIEB
DE
20
1. Setzen Sie das Produkt nicht Regen oder feuchten Bereichen aus und halten Sie es fern von
Badewannen, Waschbecken, Schwimmbecken und anderen nassen Umgebungen, wenn Sie es
platzieren und verwenden.
2. Stellen Sie keine gefährlichen Gegenstände auf das Gerät (z. B. Flüssigkeitsbehälter,
brennende Kerzen).
3. Verwenden Sie das Produkt nicht in der Nähe von Wärmequellen, einschließlich Heizkörper-
rohren, Heizgeräten oder anderen Geräten, die Wärme erzeugen.
4.S tellen Sie das Produkt auf eine flache Oberfläche, um es zu verwenden.
5. Das Produkt sollte an einem Ort mit ausreichend Belüftungsraum um es herum platziert
werden. Es sollte ein Abstand von 5-10 cm an der Vorder- und Rückseite des Produkts
vorhanden sein, um eine ausreichende Belüftung zu gewährleisten.
6. Stellen Sie das Produkt nicht auf ein Bett, eine Decke oder ähnliche Oberflächen, um eine
Blockierung der Lüftungsöffnungen zu vermeiden. Decken Sie das Produkt außerdem nicht mit
Tischdecken, Papier oder anderen Materialien ab.
7. Achten Sie darauf, dass keine festen oder flüssigen Stoffe in das Gerät gelangen.
SICHERHEITSHINWEISE
Dieses Produkt bietet drei Helligkeitseinstellungen für die Hintergrundbeleuchtung: normale
Helligkeit, erhöhte Helligkeit und Licht aus. Drücken Sie kurz die
[ \ ]-Taste, um zwischen den Hintergrundbeleuchtungseinstellungen
umzuschalten.
Stromquelle DC 5V 2A Type-C charging
Bluetooth-Version 5.1
CD-Format CD/CD-R/CD-RW/MP3
USB/SD-Format MP3/WMA
CD-Wiedergabe Ton 31.5hz-16khz±3db
Größe 6.69*.21*4.96in
Gewicht 2.65lb/1200g
HINTERGRUNDBELEUCHTUNGSBETRIEB
SPEZIFIKATIONEN
DE
21
8. Unter folgenden Bedingungen kann sich Wasser auf der Laserlinsenvorrichtung des Produkts
niederschlagen:
-Wenn das Gerät von einem kalten Ort an einen warmen Ort bewegt wird;
-Wenn das Heizungssystem gerade eingeschaltet wurde;
-Wenn das Gerät in einem sehr feuchten Raum verwendet wird;
-Wenn das Gerät durch das Klimaanlagensystem abgekühlt wird. Wenn Kondensation im
Gerät auftritt, kann das System nicht normal arbeiten. Wenn dies passiert, können Sie das
Gerät vorübergehend für einige Stunden nicht benutzen, bevor Sie es wieder in Betrieb
nehmen.
9. Das Produkt sollte nicht Tropfen oder Spritzwasser ausgesetzt werden, und Gegenstände,
die mit Flüssigkeiten gefüllt sind, wie Vasen, sollten nicht auf dem Gerät platziert werden.
Wartung:
Stellen Sie das Produkt an einem gut belüfteten Ort auf, vermeiden Sie direkte Sonneneinstrah-
lung oder andere Orte mit hoher Temperatur und Luftfeuchtigkeit. Während der Wartung
verwenden Sie bitte ein weiches Tuch, das mit einem milden Reinigungsmittel befeuchtet ist,
um das Gehäuse abzuwischen. Verwenden Sie keine starken Lösungsmittel wie Alkohol, Aceton
oder Verdünner.
Dieser CD-Player hat eine vollständige 12-monatige Garantie gegen Herstellungsfehler.
Die Garantie beginnt ab dem Kaufdatum.
GUARANTEE
VERPACKUNGSLISTE
DE
CD-Player 1
Typ-C Kabel 1
Fernbedienung 1
Benutzerhandbuch 1
22
LETTORE CD PORTATILE
Grazie per aver acquistato i nostri prodotti audio personali.Il
lettore CD di alta qualità è un prodotto di tecnologia elettronica
acustica accuratamente progettato dalla nostra azienda. Per
ottenere un effetto d'uso perfetto e prolungare la durata di
questo prodotto, l'uso e la manutenzione corretti sono molto
importanti; si prega di leggere attentamente questo manuale
prima di utilizzarlo.
CD-W17
Manuale d'uso
IT
CONTENUTI
IMPORTANT SUGGERIMENTI
IMPORTANT SUGGERIMENTI
FUNCTION DI PULSANTI
REMOTE DESCRIZIONE DEI COMANDI
TURN ON/OFF
CHARGING LA BATTERIA
ACTIVATE IL PRODOTTO
CD/FUNZIONAMENTO DEL DISCO MP3
USB/FUNZIONAMENTO DELLA SCHEDA TF
AUX FUNZIONAMENTO
RADIO FUNZIONAMENTO
Quando si utilizza questo prodotto, seguire i passaggi
prescritti, altrimenti si rischia di essere esposti a
radiazioni nocive.
Questo lettore CD è un prodotto di CLASSE 1LASER.
Quando il coperchio del CD viene aperto o chiuso
incautamente, viene generato un laser invisibile.
Si prega di non toccare la testa calva a piacimento,
per non compromettere le prestazioni di riproduzi-
one.
Il simbolo del lampo con la punta a freccia
all'interno di un triangolo equilatero avverte
l'utente della presenza di una “tensione
pericolosa” non isolata all'interno del prodot-
to, che può essere sufficiente a provocare il
rischio di scosse elettriche alle persone.
BLUETOOTH FUNZIONAMENTO
MODALITÀ DI TRASMISSIONE BLUETOOTH
WHITE FUNZIONAMENTO DEL RUMORE
SLEEP FUNZIONAMENTO
TIME FUNZIONAMENTO
BACKLIGHT FUNZIONAMENTO
SPECIFICATIONS
ISTRUZIONI DI SICUREZZA
WARRANTY
L'ELENCO DEGLI IMBALLAGGI
IT
23

FUNCTION DI PULSANTI
1. Antenna
2. Maniglia
3. Porta CD
4. Pulsante del tempo
5. Rumore bianco/Dimmer
6. Pulsante Snooze
7. Pulsante allarme 1
8. Pulsante allarme 2
9. Pulsante di accensione/
tasto di selezione delle funzioni
10. Pulsante di ripetizione/
Tasto di programmazione
11. Pulsante Sleep
12. Tasto Canzone precedente/
Riavvolgimento veloce
13. Pulsante di riproduzione/pausa/
scansione completa
14. Tasto Canzone successiva/
Avanzamento veloce
15. Pulsante di arresto Pulsante di
equalizzazione
16. Pulsante di riduzione del volume-
17. Pulsante di aumento del volume+
18. Punto di ricezione del telecomando
19. Display LCD
20. Altoparlante
21. Jack per auricolari
22. Interfaccia di ingresso audio
23. Presa USB
24. Presa TF
25. Lampada di carica
26. Uscite DC 5V
27. Pulsante di reset
IT
24
1. Accensione/spegnimento: pulsante di accensione/spegnimento del prodotto.
2. Vol +/-: aumento/diminuzione del volume.
3. Funzione: in stato di accensione, premere questo pulsante funzione per selezionare diverse
funzioni. La sequenza di riproduzione è: Riproduzione CD-USB-Bluetooth-Radio-Conversione Aux.
4. Riproduzione A-B: Pulsante di ripetizione A-B
5. Rumore bianco: Offre 8 diversi stili di rumore bianco per aiutarvi ad addormentarvi rapidamente.
6. Ripetizione:
pulsante di ripetizione per scorrere i brani durante la riproduzione di dischi flash USB/CD/MP3
Programmazione: premere il pulsante [ ] sul telecomando per arrestare il CD/dischi MP3/USB,
quindi premere il pulsante [ ] per accedere all'interfaccia di programmazione (l'LCD lampeg-
gerà e visualizzerà “ P01 ” sullo schermo, come nella figura 1). Premere il pulsante [ / ] del
brano precedente o successivo per selezionare il brano da programmare, quindi premere il pulsante
[ ] per confermare la programmazione. Premere il pulsante [ ] per riprodurre la sequenza
del brano programmato (sullo schermo apparirà la figura 2). Se si desidera interrompere, è sufficiente
premere il pulsante [ ].
REMOTE DESCRIZIONE DEI COMANDI
3. Funzione
4. Riproduzione A-B
5. Rumore bianco
17. Dimmen
8. EQ
9. Riproduzione CD
11. Successivo
13. STOP
16. SLEEP
Abbildung 1
Abbildung 2
1. Accensione/spegnimento
2. VOL +
2. VOL -
6. Ripetizione
7. Impostazione dell'ora
12. Riproduzione/Pausa
10. Precedente
14. Modalità di trasmissione Bluetooth
15. Numero 0-9
IT
25
7. Impostazione dell'ora: nell'interfaccia di visualizzazione dell'ora, premere a lungo il pulsante
[ ] per accedere all'impostazione dell'orologio. Nell'interfaccia di selezione delle funzioni,
premere brevemente [ ] per visualizzare l'ora.
8.EQ: quando il prodotto è in funzione, premere il pulsante [ ] per cambiare i diversi effetti
musicali, ossia: FLA-ROC-POP-JAZ-CLA (Flat-Rock-Pop-Jazz-Classical).
9. Riproduzione CD: Premere questo pulsante per passare alla funzione di riproduzione del CD.
10. Precedente: premere brevemente per passare al brano precedente, premere a lungo per
riavvolgere velocemente.
11. Successivo: Premere brevemente per passare al brano successivo, premere a lungo per l'avanza-
mento rapido.
12. Riproduzione/Pausa: Riproduzione e pausa del brano.
13. Stop: interrompere la riproduzione del brano.
14. Modalità di trasmissione Bluetooth: premere questo pulsante per passare alla modalità di
trasmissione Bluetooth.
15. Numero 0-9: premere il pulsante numerico 0-9 per selezionare direttamente il numero del brano
durante la riproduzione di un disco USB/CD/MP3.
16. SLEEP:
Premere brevemente “ ” per accedere alla modalità SLEEP. Il display LCD visualizza
“ ”, premere di nuovo per impostare il tempo di sonno: 10<30<60<90<OFF.
17. Dimmer:
Premere brevemente il pulsante [ ] per selezionare l'illuminazione alta/bassa o spegnere
la luce.
NOTA: In modalità sleep, premere brevemente il tasto “ ” per visualizzare il tempo di sleep
rimanente prima che l'apparecchio si spenga.
1.Premere brevemente il pulsante di accensione [ ] per accendere il dispositivo e accedere
all'interfaccia di visualizzazione dell' ora; premere nuovamente il pulsante di accensione per spegnere
il dispositivo.
2.Dopo essere entrati nell'interfaccia di visualizzazione dell'ora, premere a lungo il pulsante di
accensione [ ] per entrare nell'interfaccia di selezione delle funzioni. Ad ogni pressione breve del
pulsante di accensione [ ] corrisponde una diversa modalità di funzione (le modalità di funzione
includono: CD, Bluetooth, USB, SD, AUX, Rumore bianco, Radio). Quando si preme di nuovo a lungo il
pulsante di accensione [ ] , si accede all'interfaccia di visualizzazione dell'ora.
3. È inoltre possibile premere il pulsante di accensione sul telecomando per accendere o spegnere il
prodotto.
TURN ON/OFF
IT
26
1. Per caricare il dispositivo, utilizzare un adattatore di alimentazione Type-C da 5V/2A. Il tempo di
ricarica completa è di circa 5,5 ore.
2. Dopo la ricarica completa, l'indicatore della batteria sullo schermo mostrerà le barre piene e non
lampeggerà, la spia di ricarica si spegnerà.
3. Durante la carica, l'indicatore della batteria sullo schermo lampeggerà, mentre la spia di carica
rimarrà rossa.
NOTA :
1.Quando la potenza è inferiore al 25%, forse il display non è chiaro, il segnale radio è scarso, la
qualità del suono non è chiara, ecc. Si prega di ricaricare il prodotto il prima possibile per garantire il
corretto funzionamento della radio.
2. Quando il prodotto non può essere caricato, si prega di utilizzare la funzione
per attivare il prodotto.
Visualizzazione della capacità della batteria
CHARGING LA BATTERIA
ACTIVATE IL PRODOTTO
AVVISO:
Poiché il prodotto è dotato di misure di protezione della batteria, quando il dispositivo si blocca, non
può essere caricato o non può utilizzare alcuna funzione dopo la carica, o se ci sono ritardi o problemi
di funzionalità durante l'uso, si prega di provare a resettarlo. può essere riattivato e utilizzato dopo il
reset.
COME RESETTARE?
Tenere premuto il pulsante [ ] per due secondi, quindi riavviare il dispositivo, che tornerà a
funzionare normalmente.
Pulsante di reset
a. Prestazioni del 60%-100%
b. Rendimento del 30%-60%
c. Prestazioni del 10%-30%
d. Prestazioni del 3%-10%
e. Prestazioni 0%-3%
lampeggiare lentamente
lampeggiare rapidamente
IT
27

1. Premere brevemente [ ] per accendere il dispositivo. Tenere premuto [ ] per 2 secondi per
accedere all'interfaccia di selezione delle funzioni, premere brevemente il pulsante di selezione delle
funzioni sul display LCD verrà visualizzato “ ”.
2.Aprire lo sportello del vano CD, posizionare la superficie di stampa del disco verso l'alto sul mandrino del
movimento CD.
3. Chiudere lo sportello del vano CD, il brano verrà riprodotto automaticamente in pochi secondi, il display
LCD visualizzerà il numero del brano corrente. Il formato del disco, ad esempio “ CD ‘, ’ MP3 ”, ecc.
4.Premere brevemente il pulsante Vol + [ ] o Vol - [ ] per regolare il volume.
5. Premere brevemente il pulsante play/pausa [ ] per mettere in pausa, premere nuovamente il
pulsante per continuare la riproduzione.
6. Se si desidera interrompere la riproduzione a metà, premere il pulsante di arresto [ ] per
interromperla.
7. Durante la riproduzione, premere brevemente il pulsante precedente/successivo [ / ] per
passare al brano precedente/successivo; premere a lungo il pulsante precedente/successivo [ / ]
per 2 secondi per riavvolgere o avanzare rapidamente.
8. Funzione di ripetizione:
In il processo di riproduzione del CD, premere brevemente il pulsante di ripetizione [ ], il
brano correntemente ascoltato entrerà in modalità ciclo singolo, lo schermo LCD visualizzerà
“ Figura 3 ”.
Press il pulsante di ripetizione due volte, se il disco MP3 contiene un file, verrà ripetuta la riproduzi-
one della cartella corrente, visualizzata sul display LCD come mostrato in “ ”.
Press il pulsante di ripetizione per tre volte, l'intero disco verrà riprodotto per intero.Visualizzato sul
display LCD come mostrato nella “ Figura 4 ”.
Press il pulsante di ripetizione per quattro volte, l'intero disco verrà riprodotto in modo casuale.Visu-
alizzato sul display LCD come mostrato in “ Figura 5 ”.
Press il tasto di ripetizione cinque volte per riprendere la riproduzione normale.
9. Funzione di programmazione:
NOTA:
Durante la riproduzione di CD/BT/USB/TF, l'ora
viene visualizzata sullo schermo dopo 10
secondi.
Dopo l'arresto dell'unità, premere una volta il pulsante PROG [ ]. Sullo schermo LED viene
visualizzato “P01”, a indicare che la modalità di programmazione è attiva. Dopo aver selezionato una
traccia con i pulsanti NEXT o PREVIOUS [ ] TRACK, premere il pulsante [ ] per
salvare la traccia.
I CD possono essere programmati con un massimo di 20 tracce, mentre gli MP3 possono essere
programmati con un massimo di 99 tracce. Al termine della programmazione, premere il pulsante
Play [ ] per riprodurre i brani nell'ordine programmato.
In modalità di programmazione, premendo due volte il pulsante Stop [ ] si cancellano le tracce
programmate e si esce dalla modalità di programmazione.
CD/FUNZIONAMENTO DEL DISCO MP3
Figura 3
Ciclo singolo
Figura 4
Ripetizione dell'intero
dell'intero disco
Figura 5
Gioco casuale
IT
28
1.Premere brevemente il pulsante di selezione delle funzioni [ ] per selezionare la funzione
AUX. Quindi, utilizzare un cavo AUX per collegare una sorgente audio esterna al prodotto. Una
volta che il prodotto rileva la sorgente audio esterna, i brani inizieranno a essere riprodotti e il
display LCD visualizzerà “ ”.
2. Il prodotto ha la funzione di amplificare e riprodurre tutte le sorgenti sonore esterne (come
telefoni cellulari, lettori MP3, Walkman a nastro, lettori CD, radio, ecc.)
AUX FUNZIONAMENTO
1. Premere il pulsante di selezione delle funzioni [ ] per accedere allo stato radio. Il display
LCD visualizzerà “ ”.
2. Premere il pulsante [ / ] per regolare il volume appropriato.
3. È possibile selezionare la propria stazione radio preferita attraverso i pulsanti.Premendo
brevemente il pulsante [ / ] regolerà il canale di 0,1 MHz.La pressione prolungata del
pulsante [ / ] consente di regolare rapidamente il canale. Premendo a lungo il pulsante
[ ] si effettua la ricerca automatica delle stazioni. Il display LCD visualizzerà la frequenza radio
corrispondente.
4. Estrarre l'antenna per ottenere una buona ricezione.
RADIO FUNZIONAMENTO
1.Premere brevemente il pulsante di selezione delle funzioni [ ] nell'interfaccia di selezione
delle funzioni per selezionare la modalità “ BT ” ( il display LCD visualizzerà’ “ ”).
A questo punto, il Bluetooth è in modalità di accoppiamento.
2.Accendere il telefono cellulare o un altro dispositivo Bluetooth. Quando cerca il dispositivo
Bluetooth locale, viene visualizzato il nome Bluetooth “W17”. Dopo l'accoppiamento, si sentirà
un segnale acustico.
3.Quando il Bluetooth è in riproduzione, premere brevemente il pulsante di riproduzione [ ]
per riprodurre/ mettere in pausa.
4. Dopo l'accoppiamento Bluetooth, premere a lungo il pulsante di arresto [ ] per cancel-
lare la funzione di connessione Bluetooth.
BLUETOOTH FUNZIONAMENTO
1.Inserire l'USB con formato MP3 nella presa USB.
2.Nell'interfaccia di selezione delle funzioni, premere brevemente il pulsante di selezione delle
funzioni [ ] sul dispositivo o sul telecomando per passare alla modalità di riproduzione USB. Il
display LCD visualizzerà “ ” e il dispositivo leggerà i dati e riprodurrà i brani.
3. Il funzionamento della riproduzione USB è identico a quello del “CD MP3 Disc Operation”.
USB/FUNZIONAMENTO DELLA SCHEDA TF
IT
29
1. In modalità CD/USB/TF/FM, premere a lungo [ ] per accedere alla modalità di trasmissi-
one Bluetooth (sullo schermo lampeggerà il simbolo “ ”).
2. Quando il Bluetooth è in stato di accoppiamento, cercherà i dispositivi Bluetooth in giro per
l'accoppiamento (quelli con funzione di ricezione come altoparlante Bluetooth/ auricolare
Bluetooth/cuffia Bluetooth).
3.Dopo l'accoppiamento, l'icona [ ] sullo schermo LCD smette di lampeggiare.
4. Premere di nuovo a lungo il pulsante di trasmissione Bluetooth [ ] per interrompere la
trasmissione Bluetooth.
NOTA:
1.Prima di collegare l'auricolare Bluetooth senza fili a questo lettore, è necessario assicurarsi di
scollegare l'altro dispositivo elettronico Bluetooth con l'auricolare e impostare l'auricolare Bluetooth
senza fili sulla modalità di ricerca.
2. Se non è possibile cercare e connettersi al dispositivo Bluetooth, riavviare il Bluetooth o il
lettore.
MODALITÀ DI TRASMISSIONE BLUETOOTH
1. Nell'interfaccia di selezione delle funzioni, premere brevemente il pulsante [ ] per
accedere alla modalità sleep timer. Quindi, utilizzare il pulsante [ ] per impostare la durata
del timer: 10-30-60-90-0FF.
2. Per confermare il tempo di sonno, premere brevemente il pulsante [ ]. Il display LCD
visualizzerà [ ]. Quando il tempo di sospensione impostato sarà trascorso, il dispositivo si
spegnerà automaticamente.
NOTA:
Premendo di nuovo brevemente il pulsante [ ], è possibile verificare il tempo di sonno
rimanente prima che il dispositivo si spenga.
SLEEP FUNZIONAMENTO
1. Questo prodotto offre 8 diversi stili di rumore bianco per aiutarvi ad addormentarvi rapida-
mente.
2.Ci sono due modi per accedere al modulo del rumore bianco. Sull'interfaccia di selezione delle
funzioni è possibile premere brevemente il pulsante di selezione delle funzioni per scorrere le
opzioni o tenere premuto il pulsante [ \ ] per accedere direttamente al
modulo del rumore bianco.
3. Una volta entrati nel modulo del rumore bianco, è possibile passare da uno stile all'altro
premendo brevemente il pulsante [ / ].
WHITE FUNZIONAMENTO DEL RUMORE
IT
30
Impostazione dell'orologio
1. È necessario entrare nell'interfaccia di visualizzazione dell'ora, premere a lungo il pulsante [ ]
per entrare nell'impostazione dell'ora, la schermata [ ] lampeggia, premere brevemente il pulsante
[ / ] per passare a 12H /24H, selezionare il pulsante [ ] per confermare, la schermata
dell'ora lampeggia, premere brevemente il pulsante [ / ] per selezionare, premere brevemente
il pulsante [ ] per confermare nuovamente, la schermata dei minuti dell'orologio lampeggia,
premere brevemente [ / ] per selezionare, premere nuovamente brevemente il pulsante
[ ] per confermare, completare l'impostazione dell'orologio.
Impostazione della sveglia
1. Questo prodotto è dotato di due sveglie, l'impostazione operativa prende come esempio la sveglia 1, il
metodo di impostazione della sveglia è lo stesso, è necessario passare all'interfaccia di visualizzazione
dell'ora per impostare la sveglia.
2.Nell'interfaccia di visualizzazione dell'ora, premere a lungo il pulsante [ ] per accedere
all'impostazione della sveglia, a questo punto la parte dell'ora dell'orologio a schermo lampeggia,
premere brevemente [ / ] per impostare l'ora, selezionare una buona ora, premere brevemente
il pulsante [ ] per confermare, a questo punto la parte dei minuti dell'orologio a schermo lampeg-
gia, premere brevemente il pulsante [ / ] per impostare l'ora, selezionare un buon minuto,
premere brevemente [ ] per confermare, quindi inserire la suoneria della sveglia da scegliere tra
1.rumore bianco 2.CD 3.USB 4.TF 5.AUX.
3.Quando si sceglie il rumore bianco per la funzione di allarme, premere brevemente il tasto [ ] per
confermare e poi premere il tasto [ / ] per selezionare una delle 8 canzoni come suoneria
dell'allarme, quindi premere per confermare per entrare nell'impostazione del volume del suono
dell'allarme, premere il tasto [ / ] per selezionare il valore del volume desiderato e poi premere
il tasto [ ] per confermare, l'impostazione dell'allarme è completa e quando arriva l'ora dell'allarme
impostato, suonerà in base alla funzione impostata.
4.Le altre impostazioni della sveglia sono identiche a quelle del rumore bianco; quando si imposta la
modalità CD/USB/TF card come suoneria della sveglia, se non è inserito un disco CD o una USB/TF card,
il rumore bianco sarà selezionato come suoneria della sveglia per impostazione predefinita.
5 Pulsante Snooze, quando la sveglia suona dopo una breve pressione del pulsante [ ] per
interrompere l'intervallo di suoneria della sveglia di 9 minuti, dopo che la sveglia non ha premuto il
pulsante [ ] per spegnere la suoneria della sveglia, dopo 60 minuti la sveglia smetterà
automaticamente di suonare.
NOTA:
Al termine dell'impostazione dell'allarme, nell'angolo inferiore destro dello schermo viene visualizzata
l'icona dell'allarme; se si desidera disattivare l'allarme, premere brevemente il pulsante corrispondente di
Allarme 1/Allarme 2; sullo schermo viene visualizzato [ ] e l'icona dell'allarme nell'angolo inferiore
destro dello schermo scompare, a indicare che l'allarme è stato disattivato.
TIME FUNZIONAMENTO
IT
31

1. Non esporre il prodotto alla pioggia o a zone umide e tenerlo lontano da vasche da bagno,
lavandini, piscine e altri ambienti umidi quando lo si posiziona e lo si utilizza.
2. Non collocare sul dispositivo alcuna fonte di pericolo (ad esempio, oggetti pieni di liquido,
candele accese).
3. Non utilizzare il prodotto in prossimità di fonti di calore, come tubi di radiatori, stufe o altri
apparecchi che generano calore.
4. Mettere il prodotto su una superficie piana per utilizzarlo.
5. Il prodotto deve essere collocato in un luogo con uno spazio di ventilazione sufficiente
intorno ad esso.
6. Non collocare il prodotto su letti, coperte o superfici simili per evitare che le aperture di
ventilazione vengano bloccate. Inoltre, non coprire il prodotto con tovaglie, carta o altri
materiali.
7. Fare attenzione a non far entrare nel corpo solidi o liquidi dalla radio.
ISTRUZIONI DI SICUREZZA
Questo prodotto offre tre impostazioni di retroilluminazione: luminosità normale, luminosità
aumentata e luce spenta Premere brevemente [ \ ] per passare da
un'impostazione all'altra.
Fonte di alimentazione DC 5V 2A Type-C charging
Versione Bluetooth 5.1
Formato CD CD/CD-R/CD-RW/MP3
Formato USB/SD MP3/WMA
Suono di riproduzione CD 31.5hz-16khz±3db
Dimensioni 6.69*.21*4.96in
Peso 2.65lb/1200g
BACKLIGHT FUNZIONAMENTO
SPECIFICATIONS
IT
32
8. Il vapore acqueo può condensarsi sulla lente del laser nelle seguenti condizioni: - - Quando
l'unità viene spostata da un luogo all'altro.
-Quando l'unità viene spostata da un luogo freddo a un luogo caldo;
-Quando il sistema di riscaldamento è appena stato aperto;
-Quando l'apparecchio viene utilizzato in un ambiente molto umido;
-Quando l'unità viene raffreddata dal sistema di condizionamento dell'aria;
-Se si forma della condensa all'interno dell'apparecchio, il sistema non può funzionare
normalmente; in tal caso, è possibile interrompere temporaneamente l'uso dell'apparecchio
per alcune ore prima di rimetterlo in funzione.
9. Il prodotto non deve essere esposto a gocce o spruzzi d'acqua e gli oggetti pieni di liquidi,
come i vasi, non devono essere collocati sull'apparecchio.
MANUTENZIONE:
Durante la manutenzione, utilizzare un panno morbido inumidito con un detergente diluito per
pulire il corpo dell'apparecchio. Non utilizzare solventi forti come alcol, stupidi o diluenti.
Questo lettore CD ha una garanzia completa di 12 mesi contro i difetti di fabbricazione.
Il periodo di garanzia decorre dalla data di acquisto.
WARRANTY
L'ELENCO DEGLI IMBALLAGGI
IT
Lettore CD 1
Cavo di tipo-C 1
Telecomando 1
Manuale d'uso 1
33
LECTEUR CD PORTABLE
Nous vous remercions d'avoir acheté nos produits audio person-
nels. Le lecteur de CD de haute qualité est le fruit de la technolo-
gie audio électronique bien conçue de notre société. Il est très
important d'utiliser et d'entretenir correctement l'appareil.
Veuillez lire attentivement ce manuel avant de l'utiliser.
CD-W17
Manuel de l'utilisateur
FR
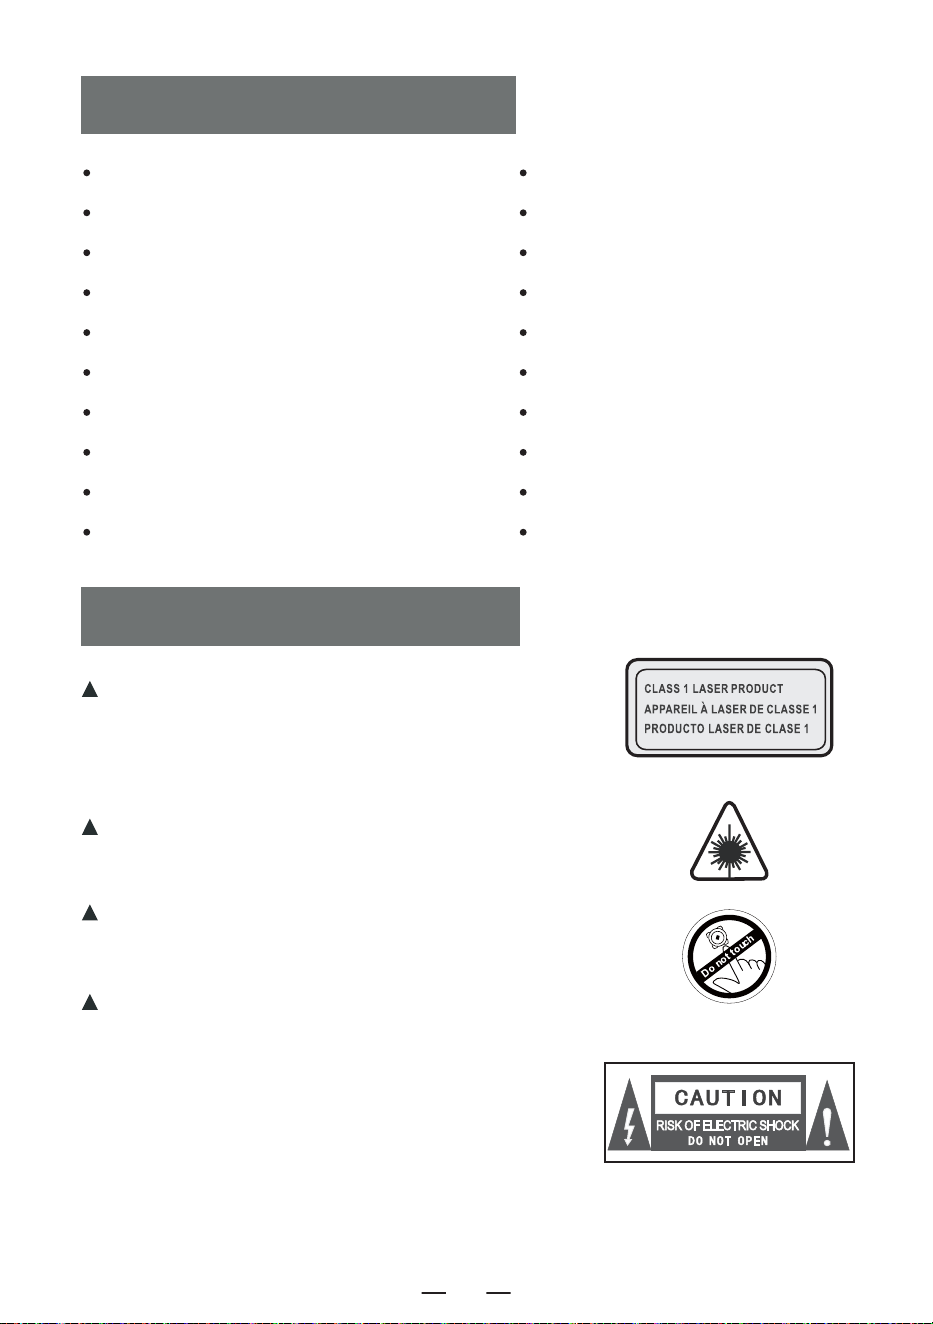
TABLE DES MATIÈRES
NOTES IMPORTANTES
NOTES IMPORTANTES
FONCTIONS DES BOUTONS
REMOTE DESCRIZIONE DEI COMANDI
OUVRIR/FERMER
CHARGEMENT DE LA BATTERIE
DÉMARRAGE DU PRODUIT
CD/UTILISATION D'UN DISQUE MP3
USB/ FONCTIONNEMENT DE LA CARTE TF
AUX FONCTIONNEMENT
FONCTIONNEMENT DE LA RADIO
Lors de l'utilisation de ce produit, veuillez suivre les
étapes prescrites, sinon vous risquez d'être exposé à
des radiations nocives.
Ce lecteur CD est un produit laser de classe 1.
Lorsque le couvercle du CD est ouvert ou fermé sans
précaution, un laser invisible est généré.
Veuillez ne pas toucher le crâne chauve à volonté,
sous peine d'affecter les performances de lecture.
Le symbole de l'éclair avec une flèche dans
un triangle équilatéral est destiné à alerter
l'utilisateur de la présence d'une « tension
dangereuse » non isolée dans le boîtier du
produit, qui peut être suffisante pour
provoquer un risque d'électrocution pour les
personnes.
FONCTIONNEMENT DE BLUETOOTH
MODE DE TRANSMISSION BLUETOOTH
FONCTIONNEMENT AVEC BRUIT BLANC
RÉGLAGE DE LA FONCTION SOMMEIL
FONCTIONNEMENT DE L'HEURE
FONCTIONNEMENT DU RÉTROÉCLAIRAGE
PARAMÈTRES
INSTRUCTIONS DE SÉCURITÉ
GARANTIE
LISTE D'EMBALLAGE
FR
34
FONCTIONS DES BOUTONS
1. Antenne
2. Poignée
3. Porte CD
4. Bouton de réglage de l'heure
5. Bruit blanc / variateur
6. Bouton « Snooze
7. Bouton d'alarme 1
8. Bouton Alarme 2
9. Bouton d'alimentation /
bouton de sélection des fonctions
10. Bouton de répétition/programmation
11. Bouton Sommeil
12. Bouton de la chanson précédente/
retour rapide
13. Bouton lecture/pause/balayage complet
14. Bouton de la chanson suivante/
de l'avance rapide
15. Bouton Stop / bouton EQ
16. Bouton de réduction du volume-
17. Bouton d'augmentation du volume +
18. Point de réception de la télécommande
19. écran LCD
20. Haut-parleur
21. Prise pour écouteurs
22. Interface d'entrée audio
23. Prise USB
24. Prise TF
25. Lampe de charge
26. Prises DC 5V
27. Bouton de réinitialisation
FR
35
1. Mise sous tension/hors tension : bouton de mise sous tension/hors tension du produit.
2. Vol +/- : augmentation/diminution du volume.
3. Fonction : lorsque l'appareil est sous tension, appuyez sur ce bouton de fonction pour sélectionner
différentes fonctions : Lecture CD-USB- Bluetooth-Radio-Conversion audio.
4. Lecture A-B : Bouton de répétition A-B
5. Bruit blanc : Offre 8 styles différents de bruit blanc pour vous aider à vous endormir rapidement.
6. Répétition :
Bouton de répétition pour faire défiler les chansons lors de la lecture de disques flash USB/CD/MP3
Programmation : appuyez sur le bouton [ ] de la télécommande pour arrêter les disques
CD/MP3/USB, puis appuyez sur ce bouton [ ] pour entrer dans l'interface de programmation
(l'écran LCD clignote et affiche « P01 » à l'écran, comme sur la figure 1 ci-dessus). Appuyez sur le
bouton de la chanson précédente ou suivante [ / ] pour sélectionner la piste à program-
mer, puis appuyez sur ce bouton [ ] pour confirmer la programmation. Appuyez sur le
bouton [ ] pour lire la séquence de la piste programmée (l'écran s'affiche comme sur la figure 2
ci-dessus). Si vous devez arrêter, appuyez simplement sur le bouton [ ] .
REMOTE DESCRIZIONE DEI COMANDI
3. Fonction
4. Lecture A-B
5. Bruit blanc
17. Gradateur
8. EQ
9. Lecture de CD
11. Suivant
13. STOP
16. SLEEP
Figure 1
Figure 2
1. Mise sous tension/hors tension
2. VOL +
2. VOL -
6. Répétition
7. Réglage de l'heure
12. Lecture/Pause
10. Précédent
14. Mode de transmission Bluetooth
15. Numéro 0-9
FR
36
7. Réglage de l'heure : Dans l'interface d'affichage de l'heure, appuyez longuement sur le bouton
[ ] pour entrer dans le réglage de l'horloge. Dans l'interface de sélection des fonctions,
appuyez brièvement sur [ ] pour afficher l'heure.
8. EQ: Lorsque l'appareil fonctionne, appuyez sur le bouton [ ] pour modifier les différents effets
musicaux, à savoir: FLA-ROC-POP-JAZ-CLA (Flat -Rock-Pop-Jazz-Classical).
9. lecture de CD: Appuyez sur ce bouton pour accéder à la fonction de lecture de CD.
10. Précédent: Une pression courte permet d'accéder à la chanson précédente, une pression longue
permet de revenir en arrière rapidement.
11. Suivant: Appui court pour passer à la chanson suivante, appui long pour l'avance rapide.
12. lecture/pause: Lecture et pause de la chanson.
13. Stop: Arrêter la lecture de la chanson.
14. Mode de transmission Bluetooth: appuyez sur ce bouton pour passer en mode de transmission
Bluetooth.
15. Numéro 0-9 appuyez sur le bouton numérique 0-9 pour sélectionner directement le numéro de la
chanson lors de la lecture d'un disque USB/CD/MP3.
16. SLEEP:
appuyez brièvement sur « » pour passer en mode SLEEP. L'écran LCD affiche
« », appuyez à nouveau pour régler le temps de sommeil: 10<30<60<90<OFF.
17. Gradateur:
Appuyez brièvement sur le bouton [ ] pour sélectionner l'éclairage haut/bas ou éteindre la
lumière.
REMARQUE: En mode veille, appuyez brièvement sur la touche « » pour afficher le temps
de veille restant avant que l'appareil ne s'éteigne.
1. appuyez brièvement sur le bouton d'alimentation [ ] pour allumer l'appareil et entrer dans
l'interface d'affichage de l'heure, puis appuyez à nouveau brièvement sur le bouton d'alimentation
pour éteindre l'appareil.
2.Après avoir accédé à l'interface d'affichage de l'heure, appuyez longuement sur le bouton
marche/arrêt [ ] pour accéder à l'interface de sélection des fonctions. Chaque pression courte
sur le bouton marche/arrêt [ ] permet d'accéder à un mode de fonctionnement différent (les
modes de fonctionnement sont les suivants : CD, Bluetooth, USB, SD, AUX, Bruit blanc, Radio).
Lorsque vous appuyez à nouveau longuement sur le bouton d'alimentation [ ] , vous entrez dans
l'interface d'affichage de l'heure.
3. vous pouvez également appuyer sur le bouton d'alimentation de la télécommande pour allumer ou
éteindre le produit.
OUVRIR/FERMER
FR
37
1. Veuillez utiliser un adaptateur d'alimentation de type C 5V/2A pour charger l'appareil. Le temps de
charge complet est d'environ 5,5 heures.
2. Après avoir été complètement chargé, l'indicateur de batterie sur l'écran affichera des barres
pleines et ne clignotera pas, le voyant de charge s'éteindra.
3. Pendant la charge, l'indicateur de batterie sur l'écran clignote, le témoin de charge reste rouge.
REMARQUE :
1. Lorsque la puissance est inférieure à 25 %, il se peut que l'affichage ne soit pas clair, que le signal
radio soit faible, que la qualité du son ne soit pas claire, etc. Veuillez le recharger dès que possible
pour que la radio fonctionne correctement.
2. Si le produit ne peut pas être chargé, veuillez utiliser l'opération pour activer le produit pour
démarrer.
Description du niveau de puissance
CHARGEMENT DE LA BATTERIE
DÉMARRAGE DU PRODUIT
AVIS:
Le produit étant doté de mesures de protection de la batterie, si l'appareil se bloque, ne peut être
rechargé ou ne peut utiliser aucune fonction après avoir été rechargé, ou s'il y a des décalages ou
des problèmes de fonctionnalité pendant l'utilisation, veuillez essayer de le réinitialiser. il peut être
réactivé et utilisé après la réinitialisation.
COMMENT RÉINITIALISER ?
Appuyez sur le bouton [ ] et maintenez-le enfoncé pendant deux secondes, puis redémarrez
l'appareil, qui retrouvera son fonctionnement normal.
Bouton de réinitialisation
a. 60%-100% de la puissance
b. 30%-60% de la puissance
c. 10%-30% de la puissance
d. 3%-10% de puissance
e. 0%-3% de puissance
clignote lentement
clignoter rapidement
FR
38
1. appuyez brièvement sur [ ] pour allumer l'appareil. Appuyer et maintenir [ ] pendant 2
secondes pour entrer dans l'interface de sélection des fonctions, appuyer brièvement sur le bouton de
sélection des fonctions L'écran LCD affichera « ».
2. Ouvrir la porte du compartiment CD, placer la surface d'impression du disque vers le haut sur la broche
du mouvement du CD.
3. fermez la porte du compartiment à CD, la chanson sera lue automatiquement dans quelques secondes,
l'écran LCD affichera le numéro de la chanson en cours. Le format du disque, tel que « CD » , « MP3 » ,
etc.
4. appuyez brièvement sur le bouton Vol + [ ]ou Vol - [ ] pour régler le volume.
5. appuyez brièvement sur le bouton lecture/pause [ ] pour faire une pause, appuyez à nouveau sur
le bouton pour continuer la lecture.
6 Si vous devez arrêter la lecture à mi-chemin, appuyez sur le bouton stop [ ] pour arrêter la lecture.
7 Pendant la lecture, appuyez brièvement sur le bouton précédent/suivant [ / ] pour passer à la
chanson précédente/suivante ; appuyez longuement sur le bouton précédent/suivant [ / ]
pendant 2 secondes pour effectuer un retour rapide ou une avance rapide.
8. fonction de répétition:
In Lors de la lecture d'un CD, appuyez brièvement sur le bouton de répétition [ ], la chanson
en cours d'écoute passera en mode cycle unique, l'écran LCD affichera la « Figure 3 ».
Press appuyez deux fois sur le bouton de répétition, si votre disque MP3 contient un fichier, la lecture
du dossier en cours sera répétée, l'écran LCD s'affichera comme indiqué sur la « ».
Press la touche de répétition trois fois, le disque entier sera lu en entier, ce qui s'affiche sur l'écran
LCD comme indiqué dans la « Figure 4 ».
Press la touche de répétition quatre fois, le disque entier sera lu de façon aléatoire.affiché sur l'écran
LCD comme indiqué dans « Figure 5 ».
Press la touche de répétition cinq fois pour reprendre la lecture normale.
9. Fonction de programmation:
REMARQUE: Lors de la lecture d'un CD/BT/USB/TF, l'heure s'affiche à l'écran après 10 secondes.
Lorsque l'appareil est à l'arrêt, appuyez une fois sur le bouton « PROG » [ ]. L'écran LED
affiche « P01 » indiquant que le mode de programmation est activé. Après avoir sélectionné une
piste à l'aide des boutons [ ] piste suivante ou piste précédente, appuyez sur le bouton
[ ] de programmation pour sauvegarder la piste.
Les CD peuvent être programmés avec un maximum de 20 pistes et les MP3 peuvent être program-
més avec un maximum de 99 pistes. Lorsque la programmation est terminée, appuyez sur la touche
Play [ ] pour lire les pistes dans l'ordre programmé.
En mode de programmation, appuyez deux fois sur la touche stop [ ] pour effacer les pistes
programmées et quitter le mode de programmation.
CD/UTILISATION D'UN DISQUE MP3
Figure 3
Cycle unique
Figure 4
Répétition du
disque entier
Figure 5
Jeu aléatoire
FR
39
1. appuyez brièvement sur le bouton de sélection de fonction [ ] pour sélectionner la fonction
AUX. Utilisez ensuite un câble AUX pour connecter une source audio externe à ce produit. Une fois
que le produit détecte la source audio externe, les chansons commencent à être jouées et l'écran
LCD affiche « ».
2.Le produit a la fonction d'amplifier et d'émettre toutes les sources sonores externes (telles que le
téléphone portable, le lecteur MP3, le Walkman à bande, le lecteur CD, la radio, etc.)
AUX FONCTIONNEMENT
1. appuyez sur le bouton de sélection de fonction [ ] pour entrer dans l'état radio. L'écran
LCD affiche « ».
2 Appuyez sur le bouton [ / ]«» pour régler le volume.
3. vous pouvez sélectionner votre station de radio préférée à l'aide des boutons. une pression
courte sur le bouton[ / ] ajustera le canal de 0,1 MHz. une pression longue sur le
bouton [ / ]permettra d'ajuster rapidement le canal. Une pression prolongée sur le
bouton [ ] permet de rechercher automatiquement les stations. L'écran LCD affiche la
fréquence radio correspondante.
4. tirez l'antenne pour obtenir une bonne réception.
FONCTIONNEMENT DE LA RADIO
1. appuyez brièvement sur le bouton de sélection des fonctions [ ] dans l'interface de
sélection des fonctions pour sélectionner le mode « BT » (l'écran LCD affiche « »
À ce stade, le Bluetooth est en mode d'appairage.
2. allumez le téléphone portable ou tout autre appareil Bluetooth. Lorsqu'il recherche le
périphérique Bluetooth local, le nom Bluetooth « W17 » s'affiche. Une fois l'appairage réussi,
vous entendrez une tonalité d'invite.
3. lorsque le Bluetooth est en cours de lecture, appuyez brièvement sur le bouton de lecture
[ ] pour lire/pause.
4. après l'appairage Bluetooth, appuyez longuement sur le bouton d'arrêt [ ] pour
désactiver la fonction de connexion Bluetooth.
FONCTIONNEMENT DE BLUETOOTH
1 Insérer la clé USB au format MP3 dans la prise USB.
2 Dans l'interface de sélection des fonctions, appuyez brièvement sur le bouton de sélection des
fonctions [ ] de l'appareil ou de la télécommande pour passer en mode de lecture USB. L'écran
LCD affichera « », et l'appareil lira les données et jouera les chansons.
3.le fonctionnement de la lecture USB est le même que le fonctionnement du disque CD MP3.
USB/ FONCTIONNEMENT DE LA CARTE TF
FR
40
1. En mode CD/USB/TF/FM, appuyez longuement sur « » pour passer en mode de transmis-
sion Bluetooth (l'écran LCD affiche « » en clignotant).
2. Lorsque le Bluetooth est en mode d'appairage, il recherche les appareils Bluetooth environnants
pour l'appairage (ceux qui ont une fonction de réception comme le haut-parleur Bluetooth/l'écou-
teur Bluetooth/le casque Bluetooth).
3. après l'appairage, l'icône « » sur l'écran LCD cesse de clignoter.
4. appuyez longuement sur le bouton de transmission Bluetooth « » pour arrêter la
transmission Bluetooth.
REMARQU:
1. Avant de connecter l'écouteur sans fil Bluetooth à ce lecteur, vous devez vous assurer de
déconnecter l'autre appareil électronique Bluetooth avec l'écouteur et de régler votre écouteur
sans fil Bluetooth sur le mode de recherche.
2. Si vous ne pouvez pas rechercher et vous connecter à l'appareil Bluetooth, veuillez redémarrer
le Bluetooth ou le lecteur.
MODE DE TRANSMISSION BLUETOOTH
1. sur l'interface de sélection des fonctions, appuyez brièvement sur le bouton [ ] pour
entrer dans le mode de minuterie de sommeil. Ensuite, utilisez le bouton [ ] pour régler la
durée de la minuterie.10-30-60-90-0FF.
2. pour confirmer le temps de sommeil, appuyez brièvement sur le bouton [ ]. L'écran LCD
affichera [ ]. Lorsque le temps de sommeil défini est écoulé, l'appareil s'éteindra automa-
tiquement.L'appareil s'éteint automatiquement à la fin de la durée de sommeil programmée
REMARQUE :
En appuyant brièvement sur le bouton [ ] , vous pouvez vérifier le temps de sommeil
restant avant que l'appareil ne s'éteigne.
RÉGLAGE DE LA FONCTION SOMMEIL
1 Ce produit offre 8 styles différents de bruit blanc pour vous aider à vous endormir rapidement.
2. il y a deux façons d'accéder au module de bruit blanc. Sur l'interface de sélection des fonctions,
vous pouvez soit appuyer brièvement sur le bouton de sélection des fonctions pour passer d'une
option à l'autre, soit appuyer sur le bouton [ \ ] et le maintenir enfoncé
pour accéder directement au module de bruit blanc.
3. une fois dans le module de bruit blanc, vous pouvez passer d'un style de bruit blanc à l'autre en
appuyant brièvement sur le bouton [ / ].
FONCTIONNEMENT AVEC BRUIT BLANC
FR
41
Réglage de l'horloge
1. vous devez entrer dans l'interface d'affichage de l'heure, appuyez longuement sur le bouton [ ]
pour entrer dans le réglage de l'heure, l'écran [ ] clignote, appuyez brièvement sur le bouton
[ / ] pour passer à 12H / 24H, sélectionnez l'heure en appuyant brièvement sur le bouton
[ ] pour confirmer, l'écran affiche l'heure en clignotant, appuyez brièvement sur le bouton
[ / ] pour sélectionner, appuyez brièvement sur le bouton [ ] pour confirmer à nouveau,
l'écran affiche les minutes en clignotant, appuyez brièvement [ / ] pour sélectionner, appuyez à
nouveau brièvement sur le bouton [ ] pour confirmer, terminez le réglage de l'horloge.
Réglage de l'horloge d'alarme
1. Ce produit est équipé de deux réveils, le réglage de l'opération prend l'alarme 1 comme exemple, la
méthode de réglage de l'alarme est la même, vous devez passer à l'interface d'affichage de l'heure pour
régler le réveil.
2. Dans l'interface d'affichage de l'heure, appuyez longuement sur le bouton [ ] pour entrer dans le
réglage du réveil, la partie heure de l'écran clignote, appuyez brièvement sur [ / ] pour régler
l'heure, sélectionnez une bonne heure, appuyez brièvement sur le bouton [ ] pour confirmer, la
partie minute de l'écran clignote, appuyez brièvement sur le bouton [ / ] pour régler l'heure,
sélectionnez une bonne minute, appuyez brièvement sur [ ] pour confirmer, puis entrez la sonnerie
de réveil à choisir parmi : 1.bruit blanc 2.CD 3.USB 4.TF 5.AUX.
3. Lorsque vous choisissez le bruit blanc pour la fonction d'alarme, appuyez brièvement sur le bouton
[ ] pour confirmer, puis appuyez sur le bouton [ / ] pour sélectionner l'une des 8
chansons comme sonnerie d'alarme, puis appuyez sur pour confirmer le réglage du volume du son de
l'alarme, appuyez sur le bouton [ / ] pour sélectionner la valeur de volume souhaitée, puis
appuyez sur le bouton [ ] pour confirmer, le réglage de l'alarme est terminé, et lorsque l'heure de
l'alarme programmée arrive, l'appareil sonnera conformément à la fonction programmée.
4 Les autres réglages de l'alarme sont les mêmes que pour le bruit blanc, lors du réglage du mode
CD/USB/Carte mémoire comme sonnerie d'alarme, si aucun disque CD ou carte USB/TF n'est inséré, le
bruit blanc sera sélectionné par défaut comme sonnerie d'alarme.
5 Touche Snooze, dans le réveil qui sonne après une courte pression sur la touche [ ] pour
arrêter la sonnerie de l'alarme, l'intervalle de 9 minutes sonnera à nouveau, après que l'alarme n'ait pas
appuyé sur la touche [ ] pour éteindre la sonnerie de l'alarme, 60 minutes après l'alarme
s'arrêtera automatiquement de sonner.
REMARQUE:
Une fois le réglage de l'alarme terminé, l'icône de l'alarme s'affiche dans le coin inférieur droit de l'écran.
Si vous souhaitez désactiver l'alarme, appuyez brièvement sur la touche Alarm 1/Alarm 2 correspondan-
te, l'écran affiche [ ] et l'icône de l'alarme dans le coin inférieur droit de l'écran disparaît, ce qui
indique que l'alarme a été désactivée.
FONCTIONNEMENT DE L'HEURE
FR
42
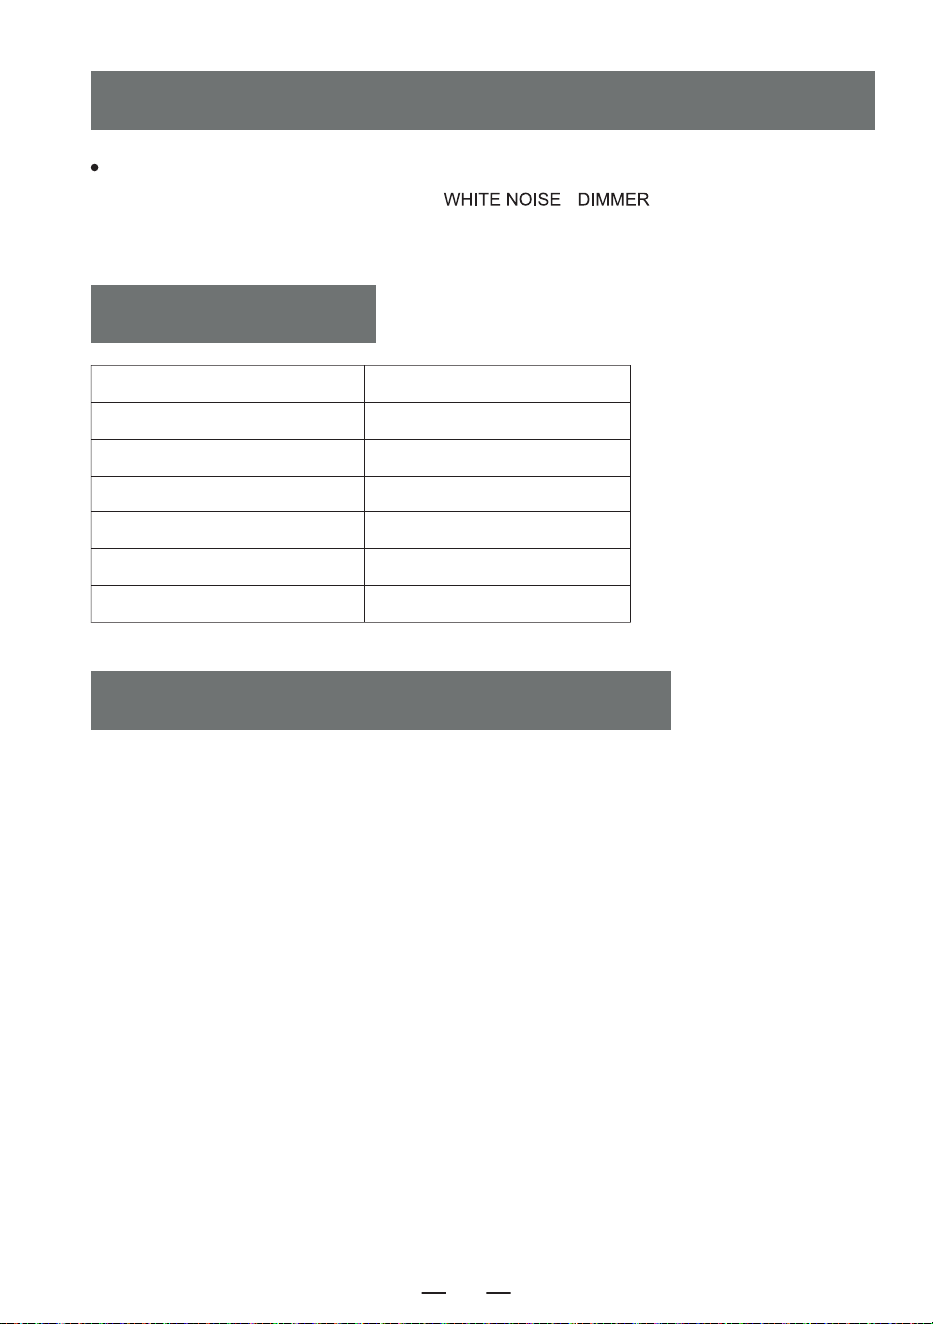
1. ne pas exposer le produit à la pluie ou à des zones humides, et le tenir éloigné des
baignoires, lavabos, piscines et autres environnements humides lors de sa mise en place et de
son utilisation.
2. Ne placez aucune source de danger sur l'appareil (par exemple, des objets remplis de
liquide, des bougies allumées).
3. N'utilisez pas l'appareil à proximité de sources de chaleur, y compris des tuyaux de radiateur,
des appareils de chauffage ou d'autres appareils générant de la chaleur.
4. Placez le produit sur une surface plane pour l'utiliser.
5. Le produit doit être placé dans un endroit suffisamment ventilé, avec un espace de 5 à 10
cm autour de l'avant et de l'arrière du produit pour assurer une ventilation adéquate.
6. Ne placez pas le produit sur un lit, une couverture ou toute autre surface similaire afin
d'éviter que les orifices d'aération ne soient obstrués. En outre, ne couvrez pas le produit avec
des nappes, du papier ou tout autre matériau.
7. Veillez à ce que des solides ou des liquides ne pénètrent pas dans le corps par la radio.
INSTRUCTIONS DE SÉCURITÉ
Ce produit offre trois réglages de rétroéclairage : luminosité normale, luminosité accrue et
lumière éteinte Appuyez brièvement sur [ \ ] pour passer d'un
réglage de rétroéclairage à l'autre.
Source d'alimentation DC 5V 2A Type-C charging
Version Bluetooth 5.1
Format CD CD/CD-R/CD-RW/MP3
Format USB/SD MP3/WMA
Son de la lecture de CD 31.5hz-16khz±3db
Taille 6.69*.21*4.96in
Poids 2.65lb/1200g
FONCTIONNEMENT DU RÉTROÉCLAIRAGE
PARAMÈTRES
FR
43

8. de la vapeur d'eau peut se condenser sur la lentille du laser dans les conditions suivantes:-
-lorsque l'appareil est déplacé d'un endroit à un autre.
-Lorsque l'appareil est déplacé d'un endroit froid à un endroit chaud ;
-Lorsque le système de chauffage vient d'être ouvert ;
-Lorsque l'appareil est utilisé dans une pièce très humide ;
-Lorsque l'appareil est refroidi par le système de climatisation ;
-Lorsque de la condensation se produit dans l'appareil, le système ne peut pas fonctionner
normalement. Si cela se produit, vous pouvez arrêter temporairement d'utiliser l'appareil
pendant quelques heures avant de le remettre en marche.
9. le produit ne doit pas être exposé à des gouttes d'eau ou à des éclaboussures, et les objets
remplis de liquides, tels que les vases, ne doivent pas être placés sur l'équipement.
MAINTENANCE:
Le produit doit être placé dans un endroit bien ventilé, à l'abri du soleil ou d'autres endroits
générant des températures et une humidité élevées. Lors de l'entretien, utilisez un chiffon doux
imbibé d'un détergent dilué pour essuyer le corps de l'appareil. N'utilisez pas de solvants
puissants tels que l'alcool, les stupéfiants ou les diluants.
Ce lecteur CD bénéficie d'une garantie complète de 12 mois contre les défauts de fabrication.
La période de garantie prend effet à partir de la date d'achat.
GARANTIE
LISTE D'EMBALLAGE
FR
Lecteur CD 1
Câble Type-C 1
Télécommande 1
Manuel de l'utilisateur 1
44
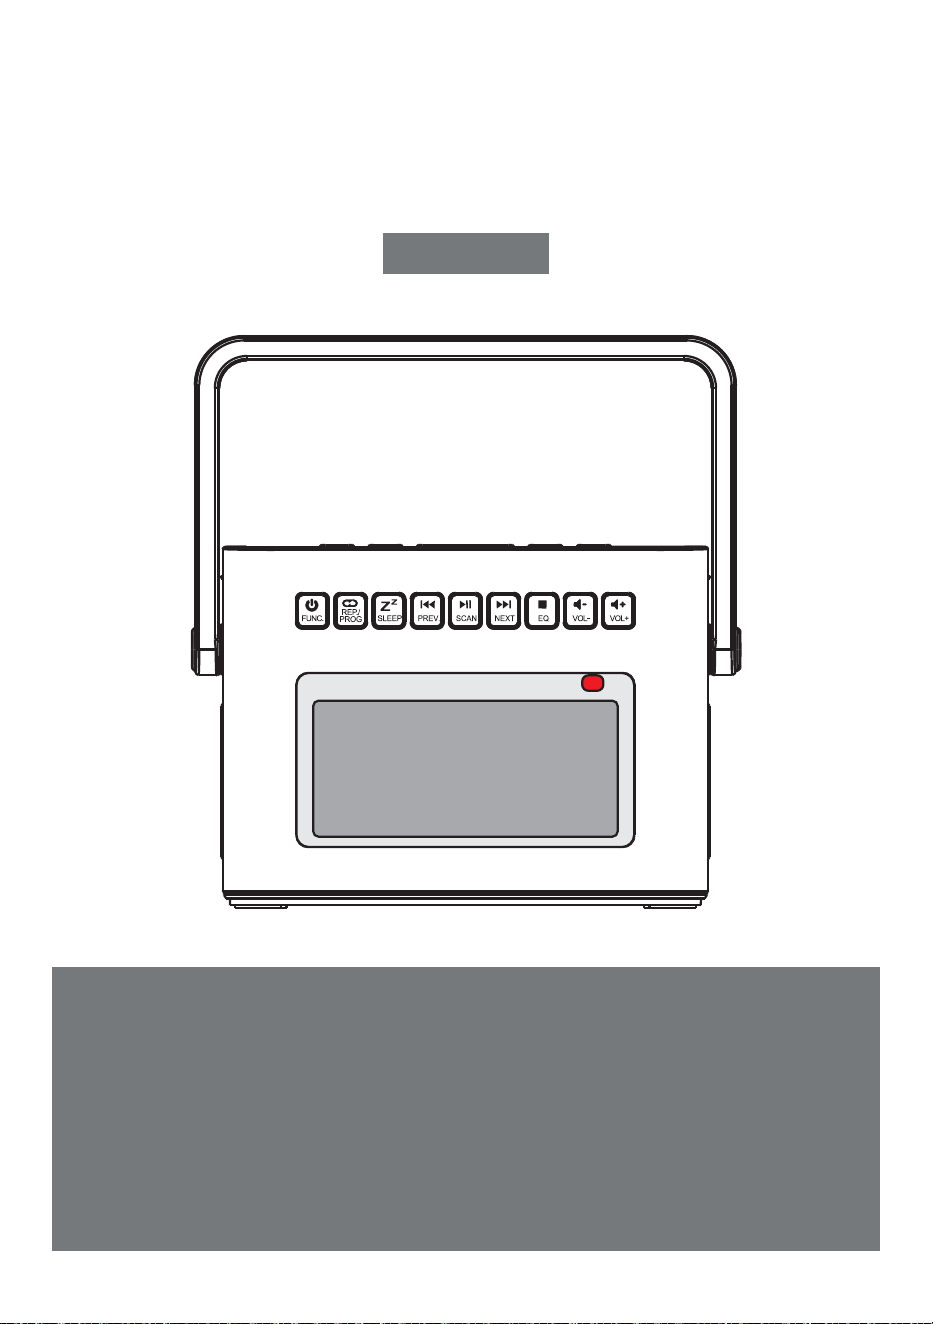
REPRODUCTOR DE CD PORTÁTIL
Gracias por adquirir nuestros productos de audio personal.El
reproductor de CD de alta calidad es un producto de tecnología
acústica electrónica cuidadosamente diseñado por nuestra
empresa. Para obtener el efecto de uso perfecto y prolongar la
vida útil de este product.correct uso y mantenimiento son muy
importantes, por favor lea este manual cuidadosamente antes de
usarlo.
CD-W17
MANUAL DEL USUARIO
ES
CONTENIDO
IMPORTANT CONSEJOS
IMPORTANT CONSEJOS
FUNCTION DE BOTONES
REMOTE DESCRIZIONE DEI COMANDI
TURN ENCENDIDO/APAGADO
CHARGING LA BATERÍA
ACTIVATE EL PRODUCTO
CD/FUNCIONAMIENTO DEL DISCO MP3
USB/FUNCIONAMIENTO DE LA TARJETA TF
AUX FUNCIONAMIENTO
RADIO FUNCIONAMIENTO
Cuando utilice este producto, siga los pasos indicados,
de lo contrario podría exponerse a radiaciones nocivas.
Este reproductor de CD es un producto CLASS 1LASER.
Cuando se abra la tapa del CD o se cierre por
descuido,se generará un láser invisible.
Por favor, no toque la calva a voluntad, de lo
contrario afectará al rendimiento de la reproduc-
ción.
El símbolo del rayo con una flecha dentro de
un triángulo equilátero tiene por objeto
alertar al usuario de la presencia de «tensión
peligrosa» no aislada dentro de la caja del
producto, que puede ser suficiente para
inducir un riesgo de descarga eléctrica a las
personas.
BLUETOOTH FUNCIONAMIENTO
MODO DE TRANSMISIÓN BLUETOOTH
WHITE FUNCIONAMIENTO RUIDO
SLEEP FUNCIONAMIENTO
TIME OPERACIÓN
BACKLIGHT FUNCIONAMIENTO
SPECIFICATIONS
INSTRUCCIONES DE SEGURIDAD
WARRANTY
LISTA DE EMBALAJES
ES
45

FUNCTION DE BOTONES
1. Antena
2. Manilla
3. Puerta CD
4. Botón de tiempo
5. Ruido blanco /Dimmer
6. Botón Snooze
7. Botón Alarma 1
8. Botón Alarma 2
9. Botón de encendido/
Botón selector de función
10. Botón de repetición/
Botón de programación
11. Botón Sleep
12. Botón de canción anterior/
rebobinado rápido
13. Botón de reproducción/
pausa/escaneo completo
14. Botón de canción siguiente/
avance rápido
15. Botón Stop/Botón EQ
16. Botón para bajar el volumen-
17. Botón de aumento de volumen+
18. Punto de recepción del mando
a distancia
19. Pantalla LCD
20. Altavoz
21.Conector para auriculares
22. Interfaz de entrada de audio
23. Toma USB
24. Toma TF
25. Lámpara de carga
26. Tomas DC 5V
27. Botón de reinicio
ES
46
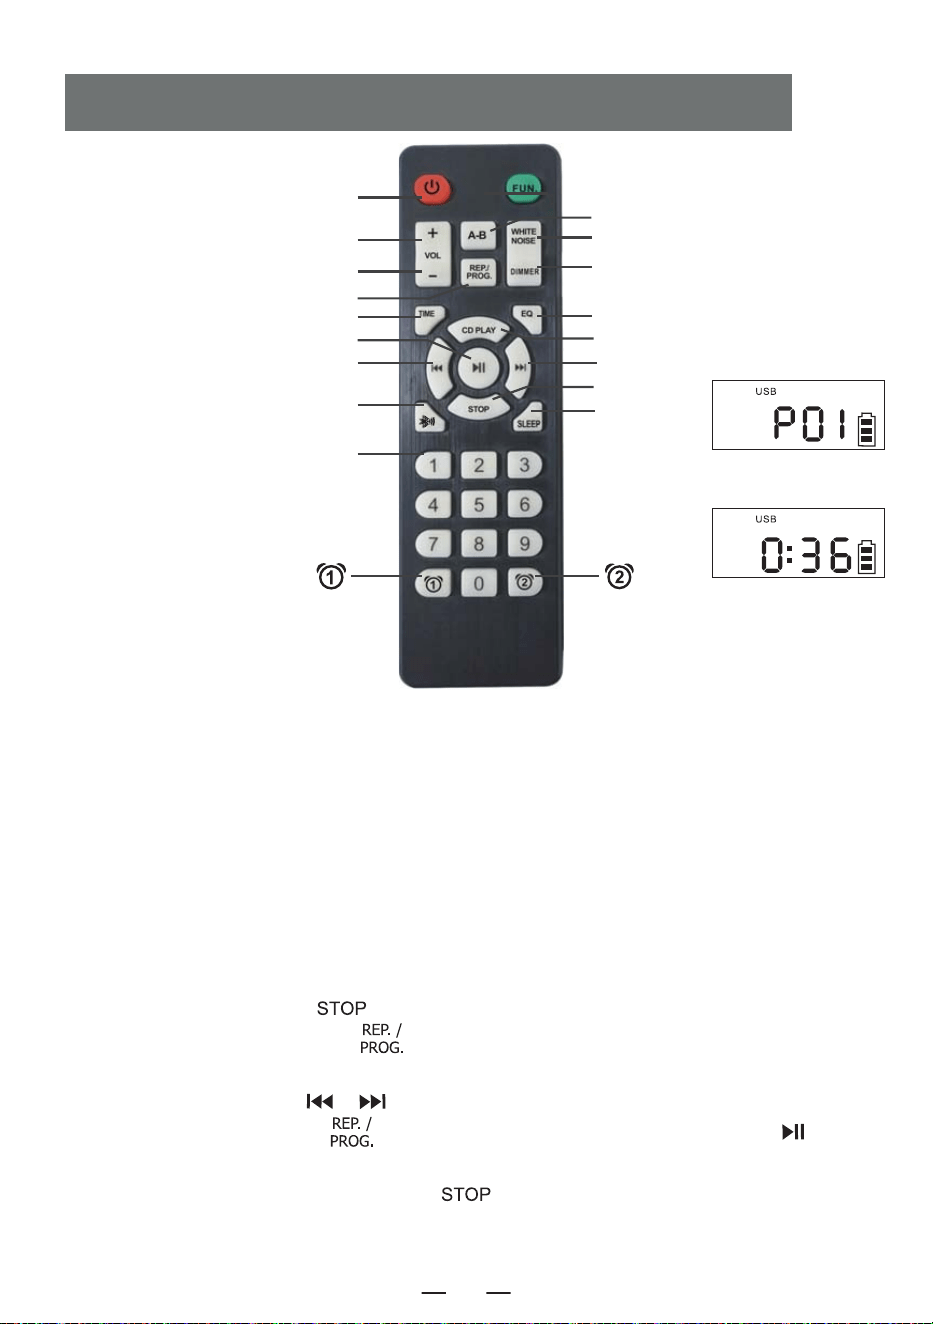
1. Encendido/apagado: botón de encendido/apagado del producto.
2. Vol +/-: subir/bajar volumen.
3. Función: en el estado de encendido, pulse este botón de función para seleccionar diferentes
funciones: CD Play-USB- Bluetooth-Radio-Aux Conversion.
4. Reproducción A-B: Botón de repetición A-B
5. Ruido blanco: Ofrece 8 estilos diferentes de ruido blanco para ayudarle a conciliar el sueño
rápidamente.
6. Repetición:
Botón de repetición para desplazarse por las canciones al reproducir discos flash USB/CD/MP3
Programación: pulse el botón [ ] del mando a distancia para detener los discos CD/MP3/USB
y, a continuación, pulse este botón [ ] para entrar en la interfaz de programación (la pantalla
LCD parpadea y muestra «P01» en la pantalla, como en la figura 1 anterior). Pulse el botón de
canción anterior o siguiente [ / ] para seleccionar la pista que desea programar y, a
continuación, pulse este botón [ ] para confirmar la programación. Pulse el botón [ ] para
reproducir la secuencia de la pista programada (la pantalla aparecerá como en la Figura 2 anterior).
Si necesita parar, simplemente pulse el botón [ ].
REMOTE DESCRIZIONE DEI COMANDI
3. Función
4. Reproducción A-B
5. Ruido blanco
17. Gradateur
8. EQ
9. Reproducción de CD
11. Siguiente
13. Detener
16. SLEEP
Figure 1
Figure 2
1. Encendido/apagado
2. VOL +
2. VOL -
6. Repetición
7. Ajuste de la hora
12. Reproducir/Pausa
10. Anterior
14. Modo de transmisión Bluetooth
15. Numéro 0-9
ES
47
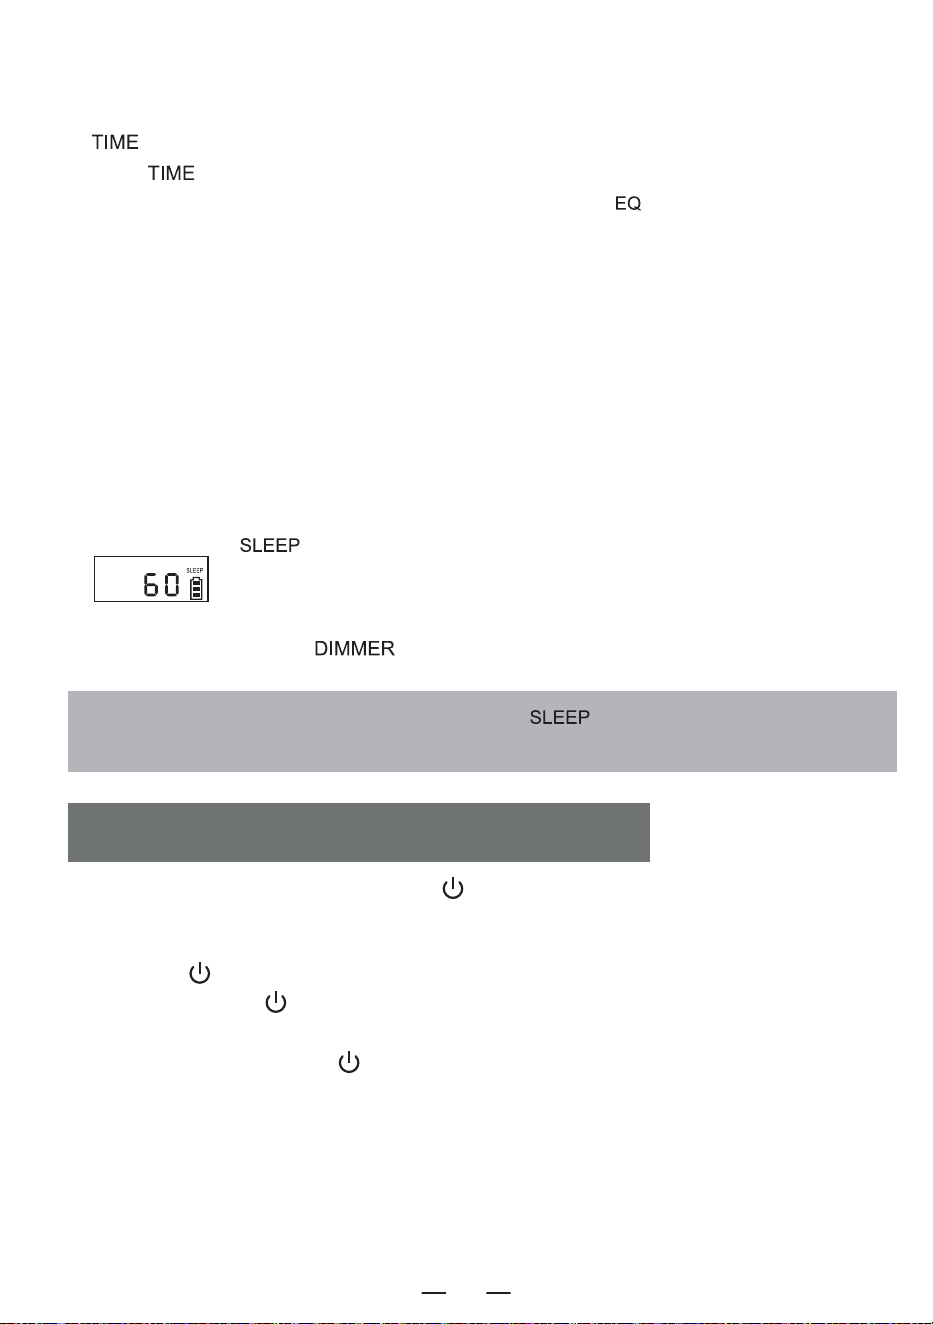
7. Ajuste de la hora:En la interfaz de visualización de la hora, realice una pulsación larga en el botón
[ ] para entrar en el ajuste del reloj. En la interfaz de selección de funciones, pulse breve-
mente [ ] para visualizar la hora.
8. EQ: Cuando el producto esté en funcionamiento, pulse el botón [ ] para cambiar los diferentes
efectos musicales, a saber: FLA-ROC-POP-JAZ-CLA(Flat -Rock-Pop-Jazz-Classical).
9. Reproducción de CD: Pulse este botón para ir a la función de reproducción de CD.
10. Anterior: Pulsación corta para ir a la canción anterior, pulsación larga para rebobinar rápidamente.
11. Siguiente: Pulse brevemente para ir a la canción siguiente y prolongadamente para avanzar.
12. Reproducir/Pausa: Reproducción y pausa de la canción.
13. Detener: Detener la reproducción de la canción.
14. Modo de transmisión Bluetooth: pulse este botón para pasar al modo de transmisión Bluetooth.
15. Número 0-9: pulse el botón numérico 0-9 para seleccionar directamente el número de canción
cuando reproduzca un disco USB/CD/MP3.
16. SLEEP:
Pulse brevemente « » para entrar en el modo SLEEP. La pantalla LCD mostrará
« », pulse de nuevo para ajustar el tiempo de sueño:10<30<60<90<OFF.
17. Atenuador:
Pulse brevemente el botón [ ] para seleccionar la iluminación alta/baja o apagar la luz.
NOTA: En modo de espera, pulse brevemente la tecla « » para visualizar el tiempo de
espera restante antes de que el aparato se apague.
1.Pulse brevemente el botón de encendido [ ] para encender el dispositivo y acceder a la
interfaz de visualización de la hora para mostrar la hora.
2.Después de entrar en la interfaz de visualización de la hora, pulse prolongadamente el botón de
encendido [ ] para entrar en la interfaz de selección de funciones. Cada pulsación corta del
botón de encendido [ ] le llevará a un modo de función diferente (los modos de función
incluyen: CD, Bluetooth, USB, SD, AUX, ruido blanco y radio). Cuando vuelva a realizar una pulsación
larga del botón de encendido [ ] entrará en la interfaz de visualización de la hora.
3.También puede pulsar el botón de encendido del mando a distancia para encender o apagar el
producto.
TURN ENCENDIDO/APAGADO
ES
48
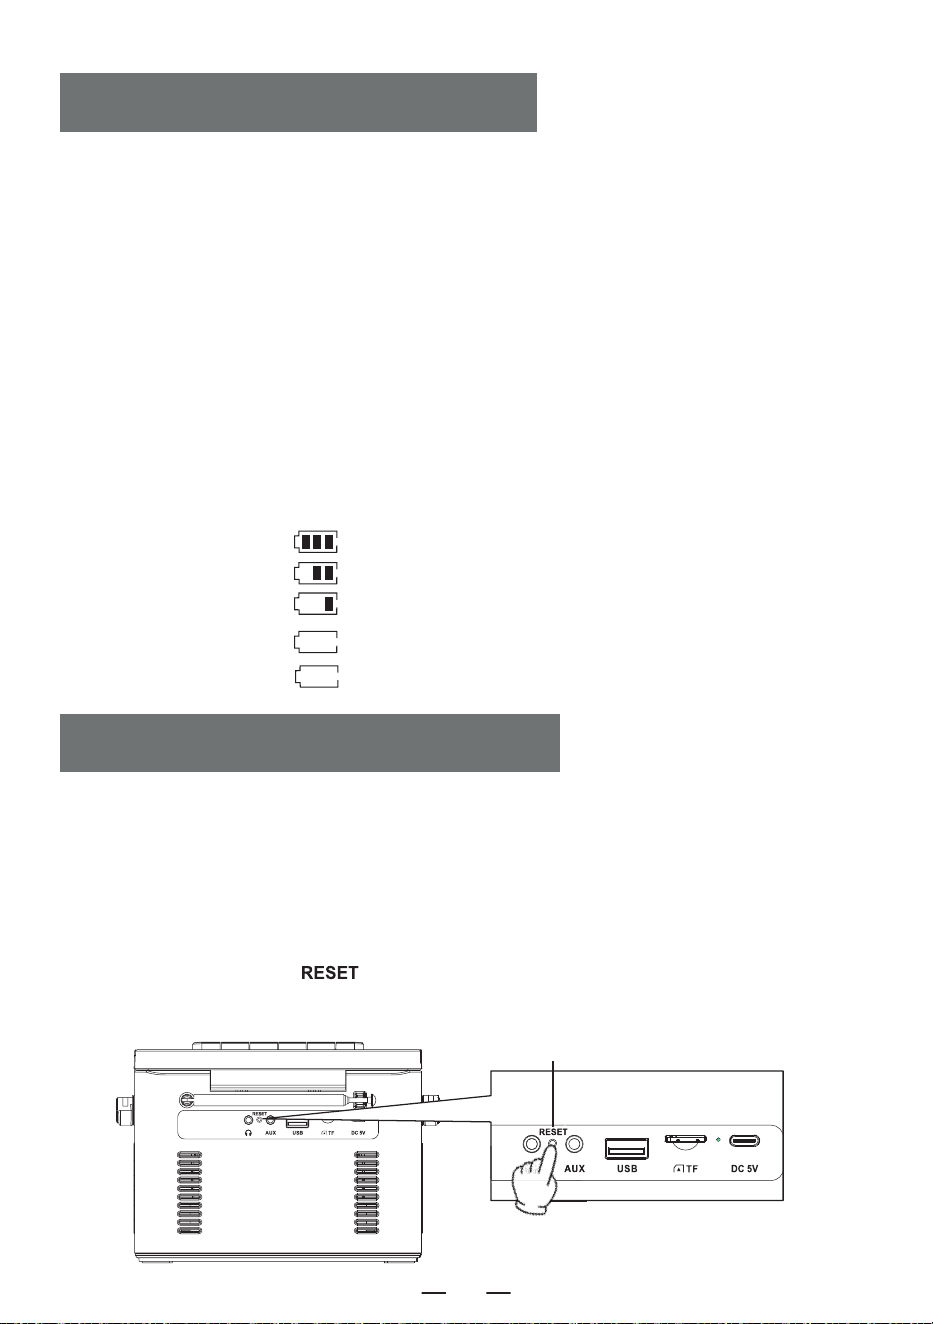
1. Por favor, utilice un adaptador de corriente 5V/2A Tipo-C para cargar el dispositivo. El tiempo de
carga completa es de aproximadamente 5,5 horas.
2. Después de estar completamente cargado, el indicador de batería en la pantalla mostrará barras
completas y no parpadeará, la luz indicadora de carga se apagará.
3. Durante la carga, el indicador de batería de la pantalla parpadeará, la luz indicadora de carga
permanecerá en rojo.
NOTA:
1. Cuando la carga es inferior al 25%, puede que la pantalla no sea clara, la señal de radio sea pobre,
la calidad del sonido no sea clara, etc. Por favor, cárguelo lo antes posible para que la radio funcione
correctamente.
2. Cuando el producto no se puede cargar, por favor, utilice la operación para activar el producto para
empezar.
Indicación del nivel de potencia
CHARGING LA BATERÍA
ACTIVATE EL PRODUCTO
NOTA:
Debido a que el producto tiene medidas de protección de la batería, cuando el dispositivo se congela,
no se puede chargedor no puede utilizar cualquier función después de la carga, o si hay retrasos o
problemas con la funcionalidad durante el uso, por favor trate de restablecerlo. puede ser reactivado
y utilizado afterreset.
¿CÓMO REINICIAR?
Mantenga pulsado el botón [ ] durante dos segundos, reinicie el dispositivo y volverá a funcionar
con normalidad.
Botón de reinicio
a. 60% -100% de potencia
b. 30%-60% de potencia
c. 10%-30% de potencia
d. 3%-10% de potencia
e. 0%-3% de potencia
El pueblo notificó a los discípulos de Knight
Discípulos de Renren API en la aldea.
ES
49

1. Pulse brevemente [ ] para encender el aparato. Mantenga pulsado [ ] durante 2 segundos
para acceder a la interfaz de selección de funciones, pulse brevemente el botón selector de función La
pantalla LCD mostrará [ ].
2. Abra la puerta del compartimento del CD, coloque la superficie de impresión del disco hacia arriba en el
eje del movimiento del CD.
3. Cierre la puerta del compartimento del CD, la canción se reproducirá automáticamente en unos
segundos, la pantalla LCD mostrará el número de la canción actual. El formato del disco, como « CD “ , ”
MP3 » , etc.
4. Pulse brevemente el botón Vol + [ ] o Vol - [ ] para ajustar el volumen.
5. Pulse brevemente el botón de reproducción/pausa [ ]para hacer una pausa, pulse el botón de
nuevo para continuar la reproducción.
6. Si necesita detener la reproducción a mitad de camino, pulse el botón stop [ ] para detener la
reproducción.
7. Durante la reproducción, pulse brevemente el botón anterior/siguiente [ / ] para saltar a la
canción anterior/siguiente; mantenga pulsado el botón anterior/siguiente [ / ] 2 segundos para
rebobinar o avanzar rápidamente.
8. Función de repetición:
In el proceso de reproducción del CD, pulse brevemente el botón de repetición [ ] , la
canción actual que esté escuchando entrará en modo de ciclo único, la pantalla LCD mostrará como «
Figura 3 ».
Press el botón de repetición dos veces, si su disco MP3 contiene un archivo, se repetirá para
reproducir la carpeta actual, se mostrará en la pantalla LCD como se muestra en « ».
Press Si pulsa tres veces el botón de repetición, el disco se reproducirá en su totalidad, tal y como se
muestra en la «Figura 4» de la pantalla LCD.
Press el botón de repetición cuatro veces, todo el disco se reproducirá aleatoriamente.Aparecerá en la
pantalla LCD como se muestra en «Figura 5».
Press el botón de repetición cinco veces para reanudar la reproducción normal.
9.Función de programación:
NOTA: Cuando reproduzca CD/BT/USB/TF, la hora se mostrará en la pantalla después de 10 segundos.
Con el aparato parado, pulse una vez la tecla « PROG » [ ]. La pantalla LED mostrará « P01 »
indicando que el modo de programación está activado. Después de seleccionar una pista utilizando
los botones de pista siguiente o pista anterior [ ], pulse el botón de programación
[ ] para guardar la pista.
Los CD pueden programarse con un máximo de 20 pistas, mientras que los MP3 pueden
programarse con un máximo de 99 pistas. Una vez finalizada la programación, pulse el botón de
reproducción [ ] para reproducir las pistas en el orden programado.
En el modo de programación, pulse dos veces el botón de parada [ ] para borrar las pistas
programadas y salir del modo de programación.
CD/FUNCIONAMIENTO DEL DISCO MP3
Figura 3
Ciclo único
Gráfico 4
Repetición del
disco entero
Figura 5
Juego aleatorio
ES
50
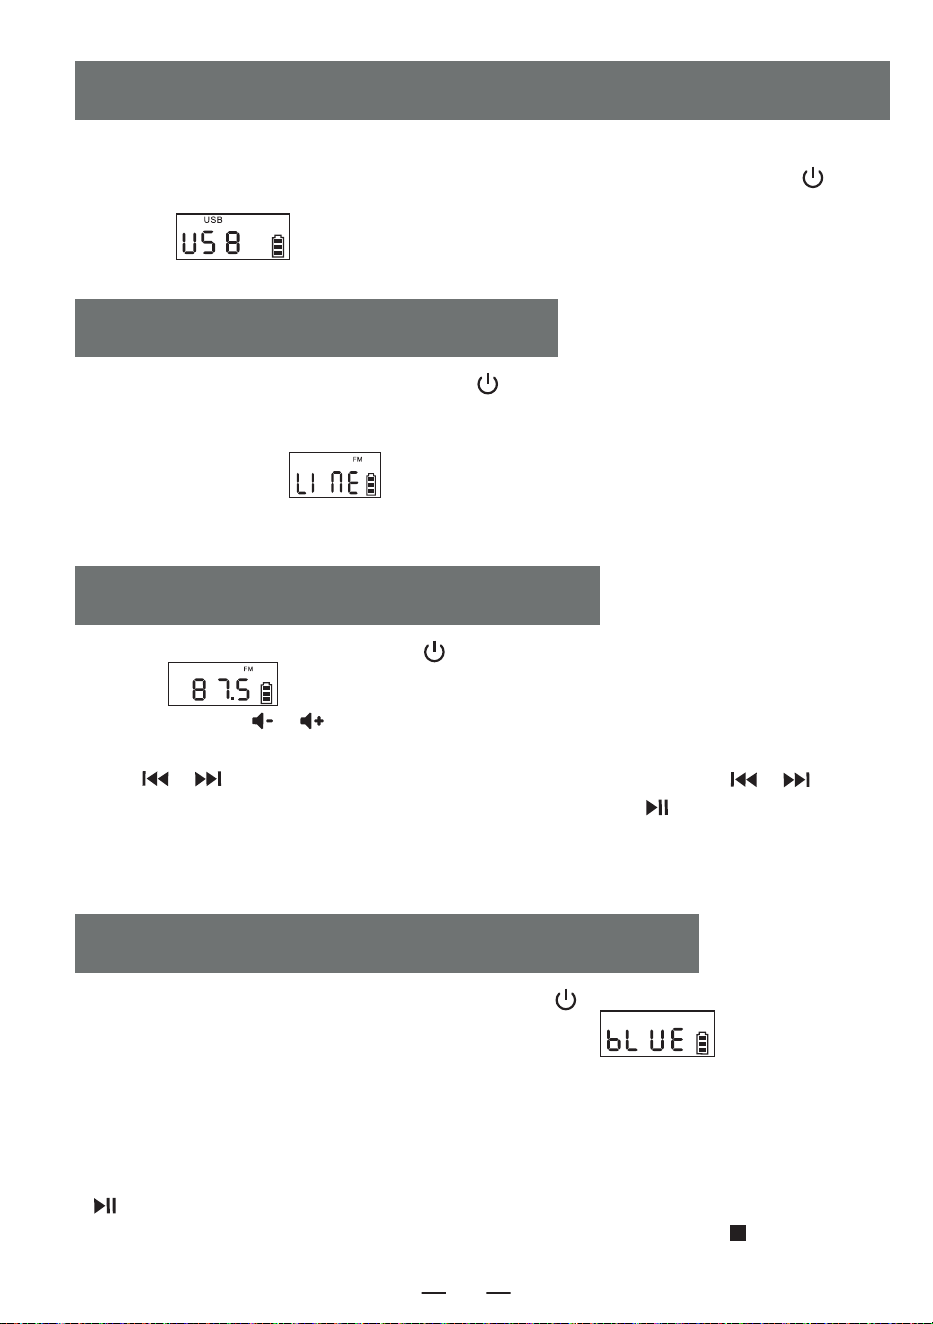
1.Pulse brevemente el botón selector de función [ ] para seleccionar la función AUX. A
continuación, utilice un cable AUX para conectar una fuente de audio externa a este producto. Una
vez que el producto detecte la fuente de audio externa, las canciones comenzarán a reproducirse y
la pantalla LCD mostrará « ».
2.El producto tiene la función de amplificar y emitir todas las fuentes de sonido externas (como
teléfono móvil, reproductor MP3, Walkman de cinta, reproductor de CD, radio, etc.).
AUX FUNCIONAMIENTO
1.Presione el botón selector de funciones [ ] para entrar al estado de radio. La pantalla LCD
mostrará " ".
2.Presione el botón [ / ] para ajustar el volumen adecuado.
3.Puedes seleccionar tu estación de radio favorita a través de los botones. Una pulsación corta del
botón [ / ] ajustará el canal en 0.1 MHz. Mantener presionado el botón [ / ]
permitirá ajustar rápidamente el canal. Mantener presionado el botón [ ] por un largo tiempo
buscará estaciones automáticamente. La pantalla LCD mostrará la frecuencia de radio correspon-
diente.
4.Extienda la antena para obtener una mejor recepción.
RADIO FUNCIONAMIENTO
1.Presione brevemente el botón de selección de funciones [ ] en la interfaz de selección
de funciones para elegir el modo "BT" (la pantalla LCD mostrará " "). En este
momento, el Bluetooth está en modo de emparejamiento.
2.Encienda el teléfono móvil u otro dispositivo Bluetooth. Cuando busque dispositivos Bluetooth
locales, aparecerá el nombre "W17". Después de un emparejamiento exitoso, escuchará un
tono de aviso.
3.Cuando se esté reproduciendo por Bluetooth, presione brevemente el botón de reproducción
[ ] para reproducir/pausar.
4.Después de emparejar el Bluetooth, mantenga presionado el botón de parada [ ] para
borrar la conexión Bluetooth.
BLUETOOTH FUNCIONAMIENTO
1.Inserte el USB con formato MP3 en la toma USB.
2.En la interfaz de selección de funciones, pulse brevemente el botón selector de función [ ]
del dispositivo o del mando a distancia para cambiar al modo de reproducción USB. La pantalla LCD
mostrará « », y el dispositivo leerá los datos y reproducirá las canciones.
3.El funcionamiento de la reproducción USB es el mismo que el de « CD MP3 Disc Operation».
USB/FUNCIONAMIENTO DE LA TARJETA TF
ES
51
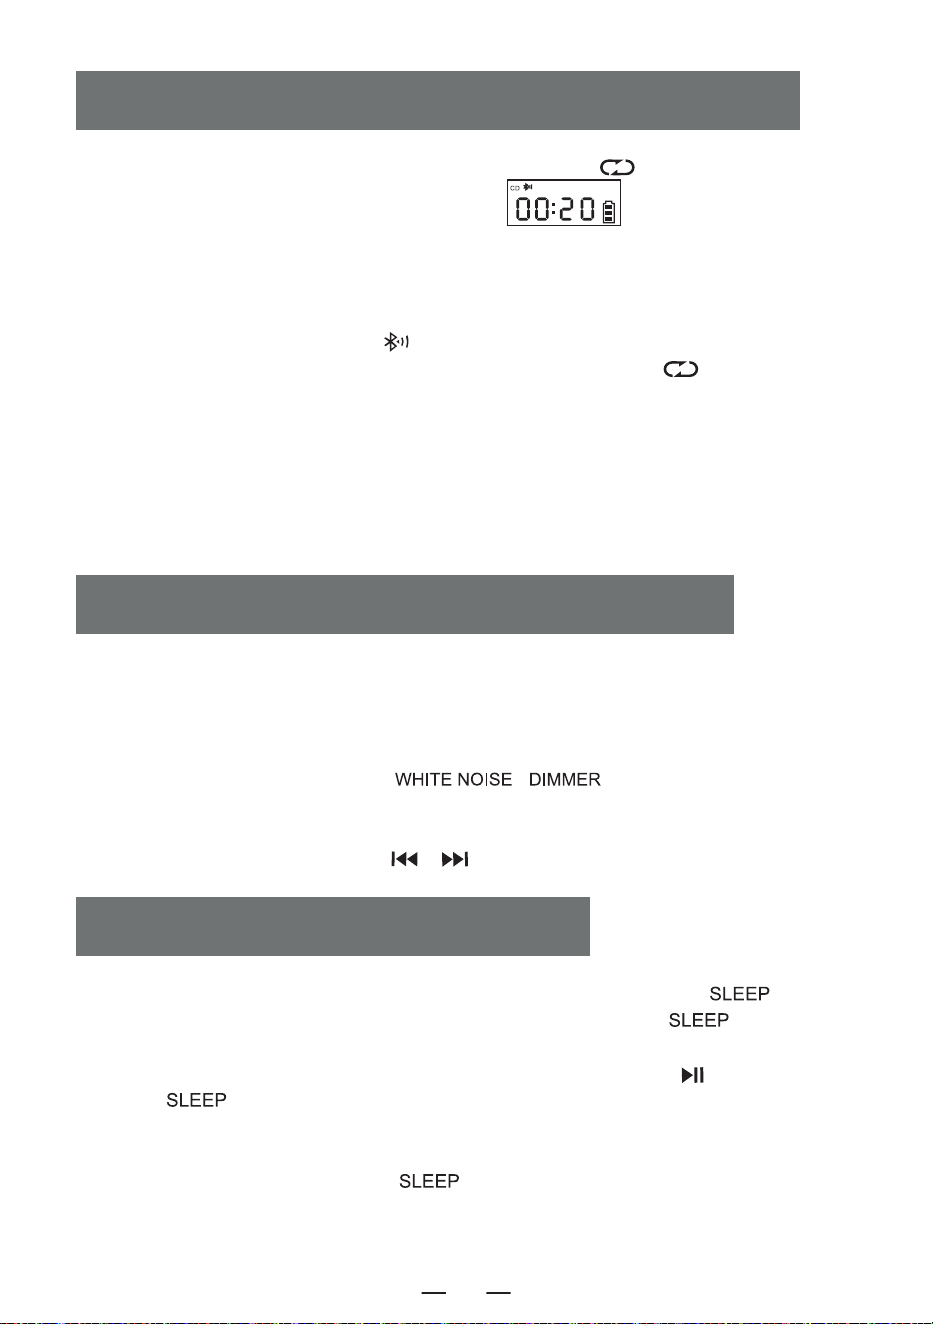
1. En los modos CD/USB/TF/FM, mantenga presionado el botón [ ] para entrar en el modo
de transmisión Bluetooth. (La pantalla LCD mostrará “ ” que parpadeará en la
pantalla).
2. Cuando el Bluetooth esté en estado de emparejamiento, buscará dispositivos Bluetooth
cercanos para emparejarse (aquellos con función receptora como altavoces Bluetooth, auriculares
Bluetooth, etc.).
3. Después de emparejarse, el ícono [ ] en la pantalla LCD dejará de parpadear.
4. Mantenga presionado nuevamente el botón de transmisión Bluetooth [ ] para detener la
transmisión Bluetooth.
NOTA:
1. Antes de conectar los auriculares Bluetooth inalámbricos a este reproductor, asegúrese de
desconectar otros dispositivos electrónicos Bluetooth de los auriculares y ponga sus auriculares
Bluetooth en modo de búsqueda.
2. Si no puede buscar ni conectar el dispositivo Bluetooth, reinicie el Bluetooth o el reproductor.
MODO DE TRANSMISIÓN BLUETOOTH
SLEEP FUNCIONAMIENTO
1. Este producto ofrece 8 estilos diferentes de ruido blanco para ayudarle a conciliar el sueño
rápidamente.
2. Hay dos formas de entrar en el módulo de ruido blanco. En la interfaz de selección de
funciones, puede pulsar brevemente el botón de selección de funciones para alternar entre las
opciones o mantener pulsado el botón [ \ ] para acceder directamente al
módulo de ruido blanco.
3. Una vez en el módulo de ruido blanco, puede cambiar entre los diferentes estilos de ruido
blanco pulsando brevemente el botón [ / ].
WHITE FUNCIONAMIENTO RUIDO
1. sur l'interface de sélection des fonctions, appuyez brièvement sur le bouton [ ] pour
entrer dans le mode de minuterie de sommeil. Ensuite, utilisez le bouton [ ] pour régler la
durée de la minuterie.10-30-60-90-0FF.
2. pour confirmer le temps de sommeil, appuyez brièvement sur le bouton [ ]. L'écran LCD
affichera [ ]. Lorsque le temps de sommeil défini est écoulé, l'appareil s'éteindra automa-
tiquement.L'appareil s'éteint automatiquement à la fin de la durée de sommeil programmée
REMARQUE :
En appuyant brièvement sur le bouton [ ] , vous pouvez vérifier le temps de sommeil
restant avant que l'appareil ne s'éteigne.
ES
52
Ajuste del reloj
1. debe entrar en la interfaz de visualización de la hora, pulse prolongadamente el botón [ ] para
entrar en el ajuste de la hora, la pantalla [ ] parpadea, pulse brevemente el botón [ / ]
para cambiar a 12H / 24H, seleccione la hora pulsando brevemente el botón [ ] para confirmar, la
pantalla muestra la hora parpadeando, pulse brevemente el botón [ / ] para seleccionar, pulse
brevemente el botón [ ] para confirmar de nuevo, en la pantalla parpadearán los minutos, pulse
brevemente el botón [ / ] para seleccionar, pulse brevemente el botón [ ] de nuevo
para confirmar, termine de ajustar el reloj.
Ajuste del reloj de alarma
1. Este producto está equipado con dos despertadores, el ajuste de funcionamiento toma la alarma 1
como ejemplo, el método de ajuste de la alarma es el mismo, necesita cambiar a la interfaz de visual-
ización de la hora para ajustar el despertador.
2.En la interfaz de visualización de la hora, pulse prolongadamente el botón [ ] para entrar en el
ajuste del reloj de alarma, en este momento la parte de la hora del reloj de pantalla parpadea, pulse
brevemente [ / ] para ajustar la hora, seleccione una buena hora pulse brevemente el botón
[ ] para confirmar, en este momento la parte de los minutos del reloj de pantalla parpadea, pulse
brevemente el botón [ / ] para ajustar la hora, seleccione un buen minuto pulse brevemente
[ ] para confirmar, a continuación, introduzca el tono de llamada de alarma a elegir entre, 1.Ruido
blanco 2.CD 3.USB 4.TF 5.AUX.
3.Cuando elija ruido blanco para la función de alarma, pulse brevemente el botón [ ] para confirmar
y luego pulse el botón [ / ] para seleccionar una de las 8 canciones como tono de llamada de
alarma, luego pulse para confirmar para entrar en el ajuste del volumen del sonido de alarma, pulse el
botón [ / ] para seleccionar el valor de volumen deseado y luego pulse el botón [ ] para
confirmar, el ajuste de la alarma está completo, y cuando llegue la hora de la alarma ajustada, sonará de
acuerdo con la función ajustada.
4.Otros ajustes de la alarma son los mismos que el ruido blanco, cuando se configura el modo CD/US-
B/Tarjeta TIF como tono de llamada de la alarma, si no hay ningún disco CD o tarjeta USB/TIF inserta-
da, se seleccionará por defecto el ruido blanco como tono de llamada de la alarma.
5 Botón Snooze, en el reloj de alarma sonando después de una breve pulsación del botón [ ]
para detener la alarma sonando intervalo de 9 minutos sonará de nuevo, después de la alarma no pulse
el botón [ ] para apagar la alarma sonando habrá estado sonando 60 minutos después de la
alarma dejará de sonar automáticamente.
NOTA:
Una vez finalizado el ajuste de la alarma, el icono de alarma se mostrará en la esquina inferior derecha
de la pantalla, si desea desactivar la alarma, pulse brevemente el botón Alarma 1/Alarma 2 correspondi-
ente, la pantalla mostrará [ ] y el icono de alarma de la esquina inferior derecha de la pantalla
desaparecerá, indicando que la alarma se ha desactivado.
TIME OPERACIÓN
ES
53

1.No exponga el producto a la lluvia ni a zonas húmedas, y manténgalo alejado de bañeras,la-
vabos, piscinas y otros ambientes húmedos cuando lo coloque y utilice.
2. No coloque ninguna fuente de peligro sobre el aparato (por ejemplo, objetos llenos de
líquido,velas encendidas).
3. No utilice el producto cerca de fuentes de calor, incluidos tubos de radiadores, calefactores u
otros aparatos que generen calor.
4. Coloque el producto sobre una superficie plana para utilizarlo.
5. Debe haber entre 5 y 10 cm de espacio alrededor de la parte delantera y trasera del
producto para garantizar una ventilación adecuada.
6. No coloque el producto sobre una cama, manta o superficies similares para evitar que se
bloqueen las rejillas de ventilación. Además, no cubra el producto con manteles, papel o
cualquier otro material.
7. Tenga cuidado de que no entren sólidos o líquidos en el cuerpo desde la radio.
INSTRUCCIONES DE SEGURIDAD
Este producto ofrece tres ajustes de retroiluminación: brillo normal, brillo aumentado y luz
apagada Pulsa brevemente [ \ ] para cambiar entre los ajustes de
retroiluminación.
Fuente de energía DC 5V 2A Type-C charging
Versión Bluetooth 5.1
Formato CD CD/CD-R/CD-RW/MP3
Formato USB/SD MP3/WMA
Sonido de reproducción de CD 31.5hz-16khz±3db
Talla 6.69*.21*4.96in
Peso 2.65lb/1200g
BACKLIGHT FUNCIONAMIENTO
SPECIFICATIONS
ES
54
8. El vapor de agua puede condensarse en la lente del láser en las siguientes condiciones:-
-Cuando se mueve la unidad de un lugar a otro.
-Cuando la unidad se traslada de un lugar frío a un lugar cálido;
-Cuando se acaba de abrir el sistema de calefacción;
-Cuando la máquina se utiliza en una habitación muy húmeda;
-Cuando la unidad se enfría con el sistema de aire acondicionado;
-Cuando se produce condensación en la unidad, el sistema no puede funcionar con
normalidad.Si esto ocurre, puede dejar de utilizar la unidad temporalmente durante unas
horas antes de volver a ponerla en funcionamiento.
9. El producto no debe exponerse a gotas o salpicaduras de agua, y no deben colocarse
objetos llenos de líquido, como jarrones, sobre el equipo.
MANTENIMIENTO:
Por favor, coloque el producto en un lugar bien ventilado, no en el sol u otros lugares que
generan alta temperatura y humedad, Durante el mantenimiento, por favor, utilice un paño
suave humedecido con un detergente más delgado para limpiar el cuerpo. No utilice
disolventes fuertes como alcohol, estúpido o diluyente.
Este reproductor de CD tiene una garantía completa de 12 meses contra defectos de fabricación.
El período de garantía comienza a partir de la fecha de compra.
WARRANTY
LISTA DE EMBALAJES
ES
Reproductor de CD 1
Cable tipo-C 1
Mando a distancia 1
Manual del usuario 1
55

PORTABLE CD PLAYER
Thank you for purchasing our personal audio products.
High-quality CD player is an electronic acoustic technology prod-
uct carefully designed by our company, To obtain the perfect use
effect and prolong the service life of this product. Correct use
and maintenance are very important, please read this manual
carefully before use it.
CD-W17
User Manual
EN

USER MANUAL-EN P1-P11
BENUTZERHANDBUCH-DE P12-P22
MANUALE D'USO-IT P23-P33
MANUEL D'UTILISATION-FR P34-P44
MANUAL DEL USUARIO-ES P45-P55

CONTENTS
IMPORTANT TIPS
IMPORTANT TIPS
FUNCTION OF BUTTONS
REMOTE CONTROL DESCRIPTION
TURN ON/OFF
CHARGING THE BATTERY
ACTIVATE THE PRODUCT
CD/MP3 DISC OPERATION
USB/TF CARD OPERATION
AUX OPERATION
RADIO OPERATION
When using this product, please follow the prescribed
steps,otherwise you may be exposed to harmful
radiation.
This CD player is a CLASS 1LASERproduct.
When the CD cover is opened or carelessly
closed,an invisible laser will be generated.
Please do not touch the bald head at will,
otherwise it will affect the playback
performance.
The lightning flash with arrow head symbol
within an equilateral triangle is intended to
alert the user to the presence of uninsulated
"hazardous voltage"within product's enclo-
sure.which may be sufficient to induce a risk
of electric shock to persons.
BLUETOOTH OPERATION
BLUETOOTH TRANSMISSION MODE
WHITE NOISE OPERATION
SLEEP OPERATION
TIME OPERATION
BACKLIGHT OPERATION
SPECIFICATIONS
SAFETY INSTRUCTIONS
WARRANTY
PACKING LIST
EN
1

FUNCTION OF BUTTONS
1. Antenna
2. Handle
3. CD Door
4. Time Button
5. White Noise Button
6. Snooze Button
7. Alarm 1 Button
8. Alarm 2 Button
9. Power On/Function Selector Button
10. Repeat Button/Programming Button
11. Sleep Button
12. Previous Song/Fast Rewind Button
13. Play/Pause Button/Full Scan
14. Next Song/Fast Forward Button
15. Stop Button/EQ button
16. Volume Decrease Button-
17. Volume Increase Button+
18. Remote Control Receiving Point
19. LCD Display
20. Speaker
21. Earphone Jack
22. Audio input Interface
23. USB Socket
24. TF Socket
25. Charge lamp
26. DC 5V Outlets
27. Reset Button
EN
2

1. Power on/off: product on/off button.
2. Vol +/-: volume increase/decrease.
3. Function: in the power on status, press this function button to select different functions.The
playing sequence is: CD Play-USB- WIRELESS -Radio-Aux Conversion.
4. A-B play: A-B repeat button.
5. White noise: Offer 8 different styles of white noise to help you fall asleep quickly.
6. Repeat: repeat button to cycle through songs when playing USB flash disk/CD/MP3 discs Program-
ming: press the [ ] button on the remote control to stop the CD/MP3 discs/USB then press this
[ ] button to entry the programming interface (The LCD will flash and display " P01 " on the
screen, like above figure 1). Press the [ / ] button to select the track to be programmed,
and then press this [ ] button to confirm after programming. Press the [ ] button to play
in the sequence of the programmed track(Screen will display like above figure 2). If you need to stop,
just press the [ ] button.
REMOTE CONTROL DESCRIPTION
3. FUNCTION
4. A-B PLAY
5. White Noise
17. Dimmer
8. EQ
9. CD PLAY
11. NEXT
13. STOP
16. SLEEP
Figure 1
Figure 2
1. POWER ON/OFF
2. VOL +
2. VOL -
6. REP./PROG.
7. Time Set
12. PLAY/PAUSE
10. PREVIOUS
14. BLUETOOTH BUTTON
15. NUMBER 0-9
EN
3
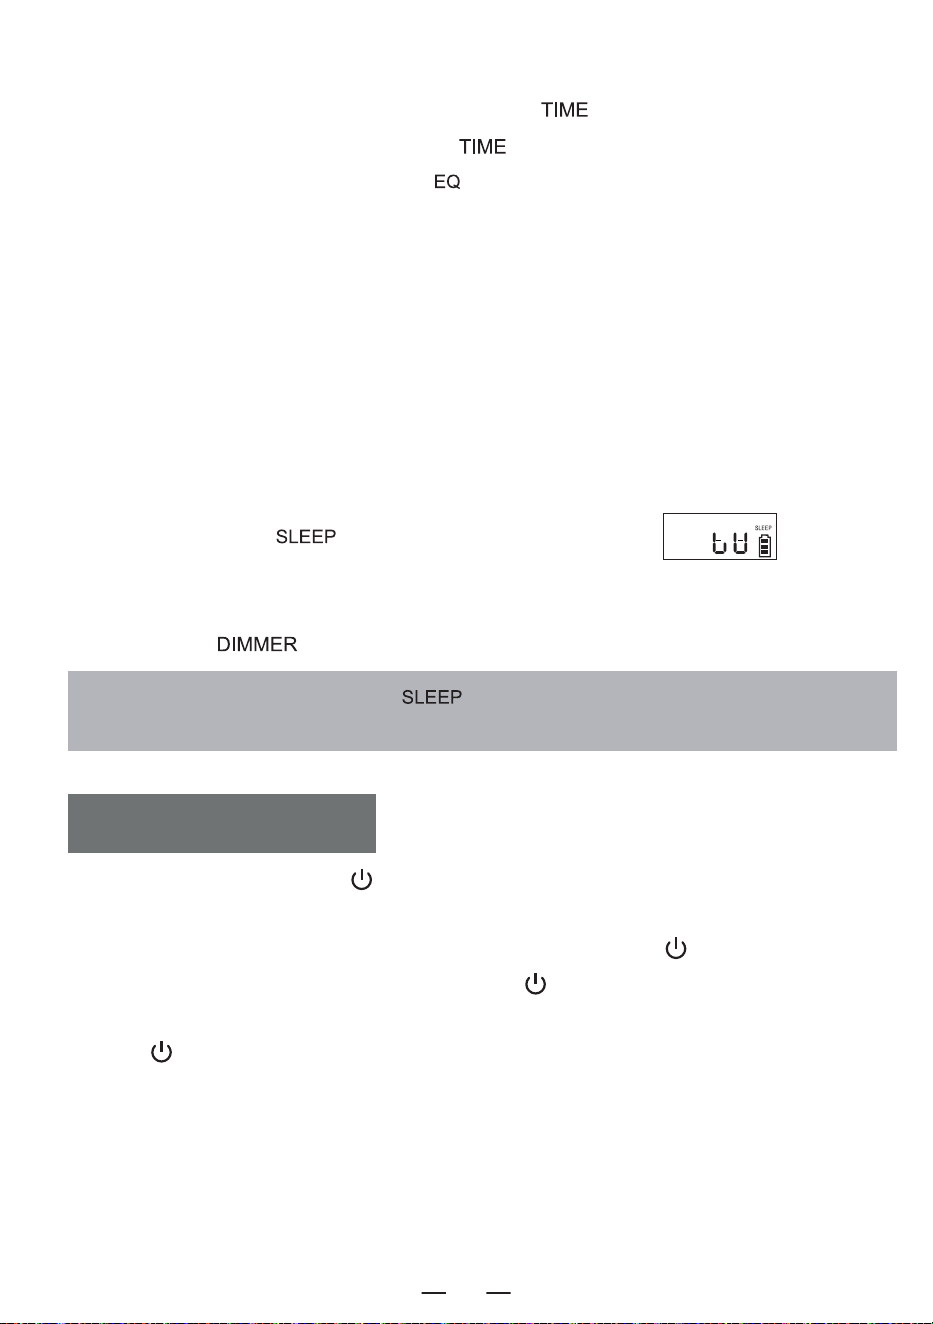
NOTE: In sleep mode, short press the " " button to see the rest ofsleep time before the
device turns off.
7. Time Set: In the time display interface, long press the [ ] button to enter the clock setting.
In the function selection interface, short press [ ] to display the time.
8. EQ: When the product is working, press [ ] button to change different music effects,namely:
FLA-ROC-POP-JAZ-CLA (Flat -Rock-Pop-Jazz-Classical).
9. CD play: Press this button to go to the CD play function.
10. Previous: Short press to the previous song, long press to fast rewind.
11. Next: Short press to the next song, long press to fast forward.
12. Play/Pause: Song play and pause.
13. Stop: Stop to play song.
14. Number 0-9: press the number button 0-9 to directly select the song number when playing USB
disk/CD/MP3 disc.
15. SLEEP: Short press " " to enter SLEEP mode. LCD shown as "
", press
again to set the sleep time:10<30<60<90<OFF.
16. Dimmer:
Short press the [ ] button to select the high/low lighting or tum off the light.
1. Short press the power button [ ] to turn on the device and enter the time display interface to
display the time, Short press the power button again this interface to turn off the device.
2. After entering the time display interface, long press the power button [ ] to enter the function
selection interface. Each short press the power button [ ] to a different function mode (function
modes include: CD\Bluetooth\USB\SD\AUX\White Noise\Radio). When you long press the power
button [ ] again, you will enter the time display interface.
3. You can also press the power button on the remote control to turn the product on or off.
TURN ON/OFF
EN
4
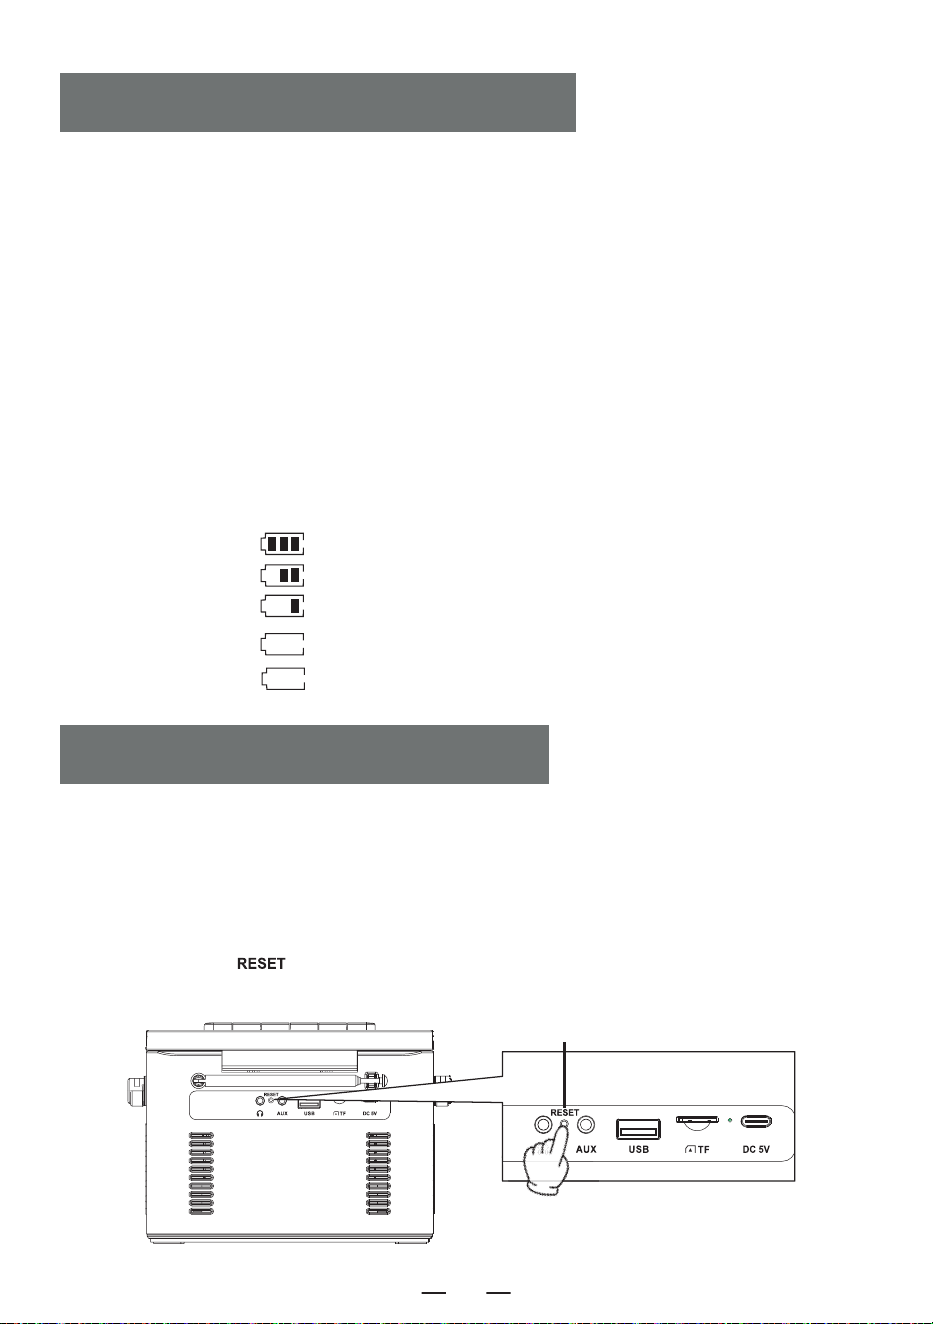
1. Please use a 5V/2A Type-C power adapter to charge the device. The fully charging time is about
5.5 hours.
2. After being fully charged,the battery indicator on the screen will show full bars and will not flash,
the charging indicator light will turn off.
3. During charging, the battery indicator on the screen will flash, the charging indicator light will
remain red.
NOTE:
1. When the power is less than 25%, Maybe the display is not clear, the radio signal is poor,the sound
quality is not clear, etc would appear. Please charge it as soon as possible to keep the radio working
properly.
2. When the product cannot be charged, please use the operation to activate the product to start.
Notice:
Because the product has battery prote- ction measures, when the device freezes, cannot be charge-
dor cannot use any functions after charging, or if there are lags or issues with functionality during
use, please try to reset it. it can be reactivated and used afterreset.
How to reset?
Press and hold the [ ] button for two seconds, then restart the device, and it will return to
normal operation.
Description of power level
a. 60% -100% power
b. 30%-60% power
c. 10%-30% power
d. 3%-10% power
e. 0%-3% power
flash slowly
flash quickly
CHARGING THE BATTERY
ACTIVATE THE MACHINE
Reset Button
EN
5
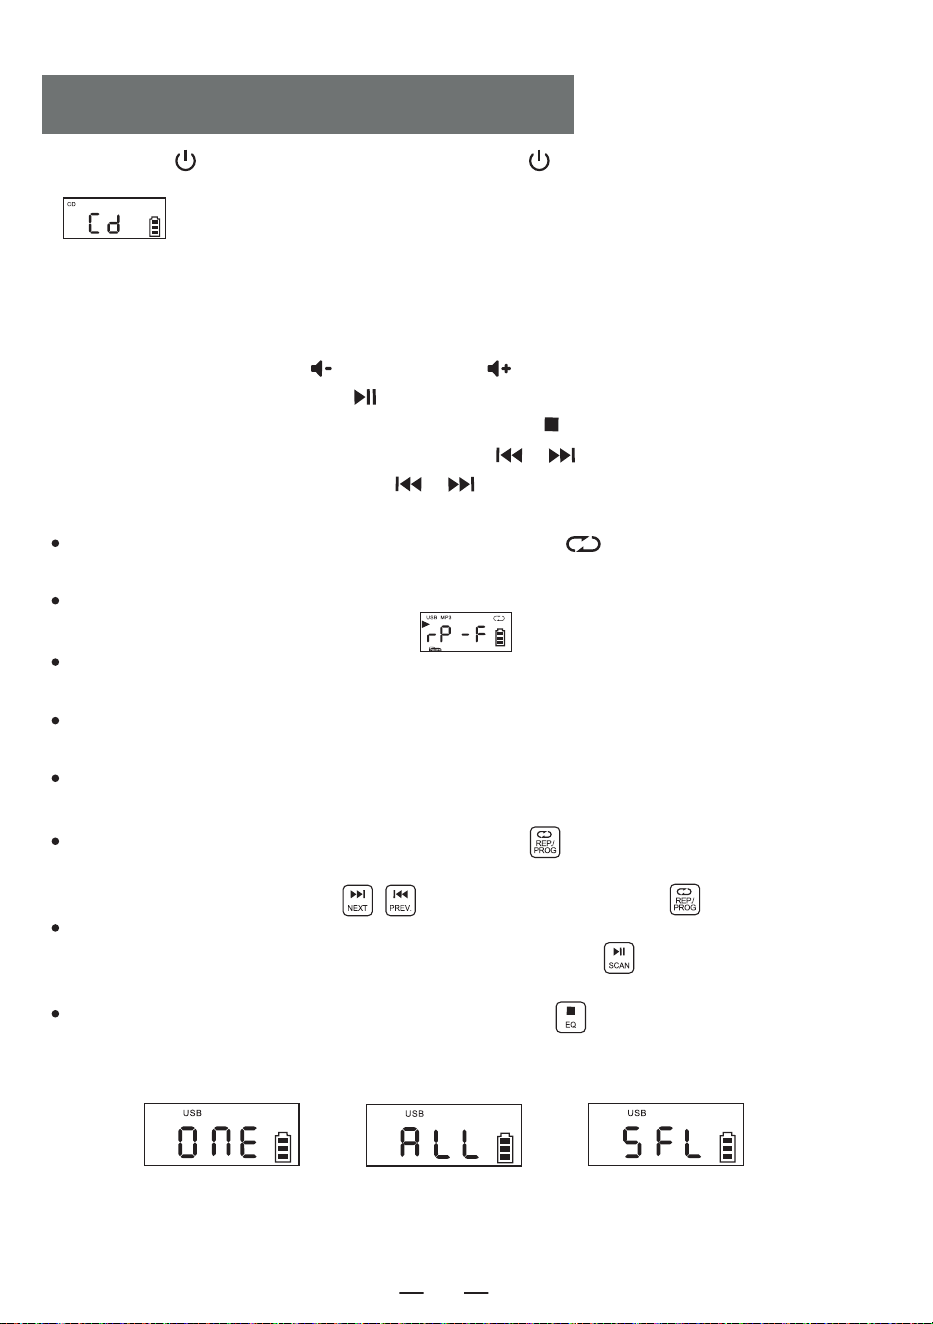
1. Short press [ ] to tum on the device. Press and hold [ ] for 2 seconds to enter the function
selection interface, Short press the function selector button The LCD will display
” ”.
2. Open the CD compartment door, put the disc printing surface upward on the spindle of the CD
movement.
3. Close the CD compartment door, the song will play automatically in a few seconds, the LCD will
display the number of the current song. The format of the disc, such as " CD " , " MP3 " , etc.
4. Short press the Vol + button [ ] or Vol - button [ ] to adjust the volume.
5. Short press the play/pause button [ ] to pause, press the button again to continue playing.
6. If you need to stop playing halfway, press the stop button [ ] to stop playing.
7. During playing, short press the previous/next button [ / ] to jump to the previous/next
song; long press the previous/next button [ / ] 2 seconds to fast rewind or fast forward.
8. Repeat function:
In the process of playing CD, short press the repeat button [ ], the current song you
listen will enter single cycle mode, LCD screen will display as " Figure 3 ";
Press the repeat button twice, if your MP3 disc contains a file, it will repeat to play the current
folder, Displayed on the LCD as shown in ” ”.
Press the repeat button twice, if your MP3 disc contains a file, it will repeat to play the current
folder. Displayed on the LCD as shown in “Figure 4";
Press the repeat button three times, the whole disc will played randomly. Displayed on the LCD
as shown in “Figure 5";
Press the repeat button four times to resume normal playing.
9. Programming function:
NOTE: When playing CD/BT/USB/TF, the time will be displayed on the screen after 10 seconds.
While the device is stopped, press the " PROG " button [ ] once. The LED screen will display
" P01 " indicating that the programming mode is activated. After selecting a track using the next
track or previous track buttons [ ] , press the program button [ ] to save the track.
CDs can be programmed with a maximum of 20 tracks, while MP3s can be programmed with up to
99 tracks. Once programming is complete, press the play button [ ] to play the tracks in the
programmed order.
While in the programming mode, pressing the stop button [ ] twice will clear the programmed
tracks and exit the programming mode.
CD/MP3 DISC OPERATION
Figure 3
Single Cycle
Figure 4
Whole Disc Repeat
Figure 5
Random Play
EN
6
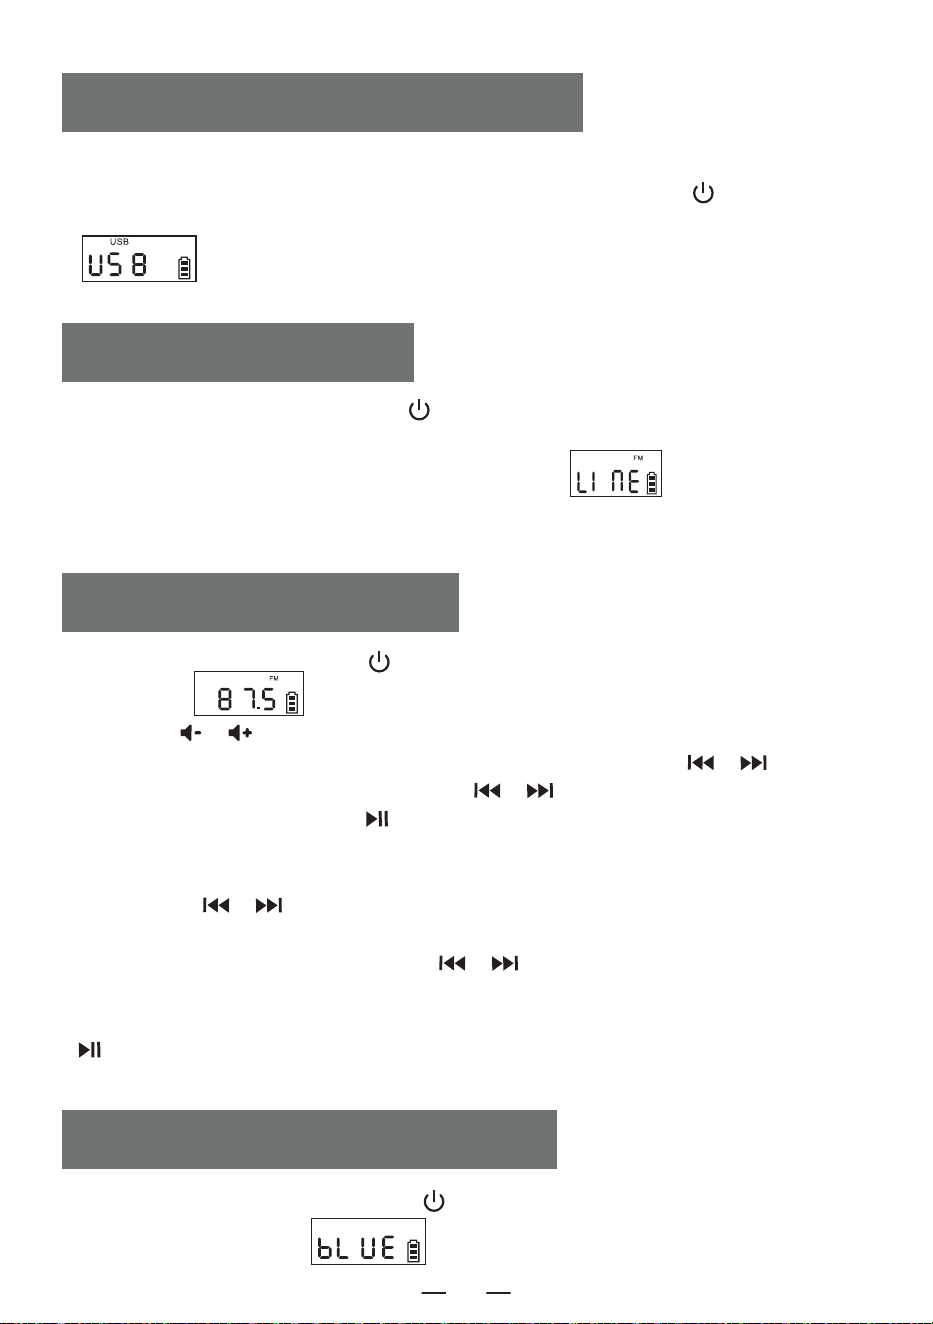
1.Short press the function selector button [ ] to select the AUX function. Then, use an AUX
cable to connect an external audio source to this product. Once the product detects the external
audio source, the songs will start playing.The LCD will display " " .
2.The product has the function of amplifying and outputting all external sound sources (such as
mobile phone, MP3 player, tape Walkman, CD player, radio, etc.).
AUX OPERATION
1. Short press the function selection button [ ] in the function selection interface to select the
" BT " mode (LCD will display " " ). At this point, the Bluetooth is in pairing mode.
BLUETOOTH OPERATION
1. Insert the USB with MP3 format into the USB socket.
2. In the function selection interface, Short press the function selector button [ ] on the
device or the remote control to switch to the USB playback mode. The LCD will display
" " , and the device will read the data and play the songs.
3. USB playing operation is same as " CD MP3 Disc Operation " .
USB/TF CARD OPERATION
EN
1. Press the function selector button [ ] to enter the radio state.
LCD shown as " ".
2. Press the [ / ] button to adjust it to the appropriate volume.
3. You can select your favorite radio station through buttons. Short press the [ / ] button
will adjust the channel by 0.1MHz. Long Press the [ / ] button will allow for quick
adjustment of the channel. Pressing [ ] for a long time will automatically search for stations.
The LCD will display the corresponding radio frequency.
4. Preset station
Short press the [ / ] button to select the station to be preset, short press the
[ REP./PROG. ] button on the unit or press the [ PROG. ] button on the remote control, the
screen will display “P01-P30”. Short press the [ / ] button to select the serial number of
the stored station, then short press the [ REP./PROG. ] button on the unit or press the [ PROG. ]
button on the remote control again to confirm. When the preset station is finished, short press the
[ ] button to call up the stations in sequence by the preset station serial number.
5. Pull out the antenna to get a good reception.
RADIO OPERATION
7
2. Turn on the mobile phone or other Bluetooth device. When it searches for the local Bluetooth device,
the Bluetooth name " W17 " will be displayed. After successful pairing.you will hear a prompt tone.
3. When Bluetooth is playing, short press the play button [ ] to play/pause.
4. After Bluetooth pairing, long press the stop button [ ] to clear the Bluetooth connection function.
1. In CD/USB/TF/FM mode, long Press [ ] to enter bluetooth transmission mode.(LCD shown as
" " will flash on the screen)
2. When the Bluetooth is under pairing status, it will search Bluetooth devices around for pairing (those
with receiving function like Bluetooth speaker/Bluetooth earphone/Bluetooth headphone).
3. After pairing, the icon [ ] on LCD screen stops flashing.
4. Long press Bluetooth transmit button [ ] again to stop Bluetooth transmission.
NOTE:
1. Before connect the wireless Bluetooth earphone with this player, you need to make sure to disconnect
the other electronic Bluetooth device with earphone and set your wireless Bluetooth earphone to the
searchable mode.
2. If you cannot search and connect to the Bluetooth device, please restart the Bluetooth or the player.
BLUETOOTH TRANSMISSION MODE
1. On the function selection interface, Short press the " " button to enter the sleep timer mode.
Then, use the " " button to set the timer duration.10-30-60-90-0FF.
2. To confirm the sleep time, Short press the [ ] button. The LCD will display " " . When the
set sleep time elapses, the device will automatically turn off.
NOTE:
By Short press the " " button again, you can check the remaining sleep time before the device
shuts off.
SLEEP OPERATION
1. This product offers 8 different styles of white noise to help you fall asleep quickly.
2. There are two ways to enter the white noise module. On the function selection interface you can either
short press the function selection button to toggle through the options or press and hold the [
\ ] button to directly enter the white noise module.
3. Once in the white noise module, you can switch between the different white noise styles by short press
the [ / ] button.
WHITE NOISE OPERATION
EN
8
Clock Setting
1. You need to Enter the time display interface, long press the [ ] button to enter the time
setting, the screen display [ ] flashes, short press the [ / ] button to switch to 12H /24H,
select the short press the [ ] button to confirm, the screen display of the time hour blinking, short
press the [ / ] to select, short press the [ ] button to confirm again, the screen clock
minute Blinking short press to select, again short press [ ] button to confirm, complete the clock
setting.
Alarm Clock Setting
1. This product is equipped with two alarm clocks, the operation setting takes Alarm 1 as an example,the
alarm setting method is the same, you need to switch to the time display interface in order to set the
alarm clock.
2. In the time display interface, long press [ ] button to enter the alarm clock setting, at this time
the hour part of the screen clock flashes, short press [ / ] to set the time, select a good hour
short press [ ] button to confirm, at this time the minute part of the screen clock flashes, short
press [ / ] button to set the time, select a good minute short press [ ] to confirm, then
enter the alarm ringtone to choose from, 1.white noise 2.CD 3.USB 4.TF 5.AUX.
3. When you choose white noise for alarm function, short press [ ] button to confirm and then
press the [ / ] button to select one of the 8 songs as the alarm ringtone, then press to confirm
to enter the alarm sound volume setting, press the [ / ] button to select the desired volume
value and then press [ ] button to confirm, the alarm setting is complete, and when it comes to the
time of the set alarm, it will ring up according to the set function.
4. Other alarm settings are the same as white noise, when setting CD/USB/TF card mode as alarm
ringtone, if there is no CD disk or USB/TF card inserted, white noise will be selected as alarm ringtone by
default.
5. Snooze button, in the alarm clock ringing after a short press [ ] button to stop the alarm
ringing interval of 9 minutes will ring again, after the alarm does not press the [ ] button to
turn off the alarm ringing will have been ringing 60 minutes after the alarm will automatically stop
ringing.
NOTE:
After the alarm setting is completed, the alarm icon will be displayed at the lower right corner of the
screen, if you want to turn off the alarm, short press the corresponding Alarm 1/Alarm 2 button, the
screen will display [ ] and the alarm icon at the lower right corner of the screen will disappear,
indicating that the alarm has been turned off.
TIME OPERATION
EN
9
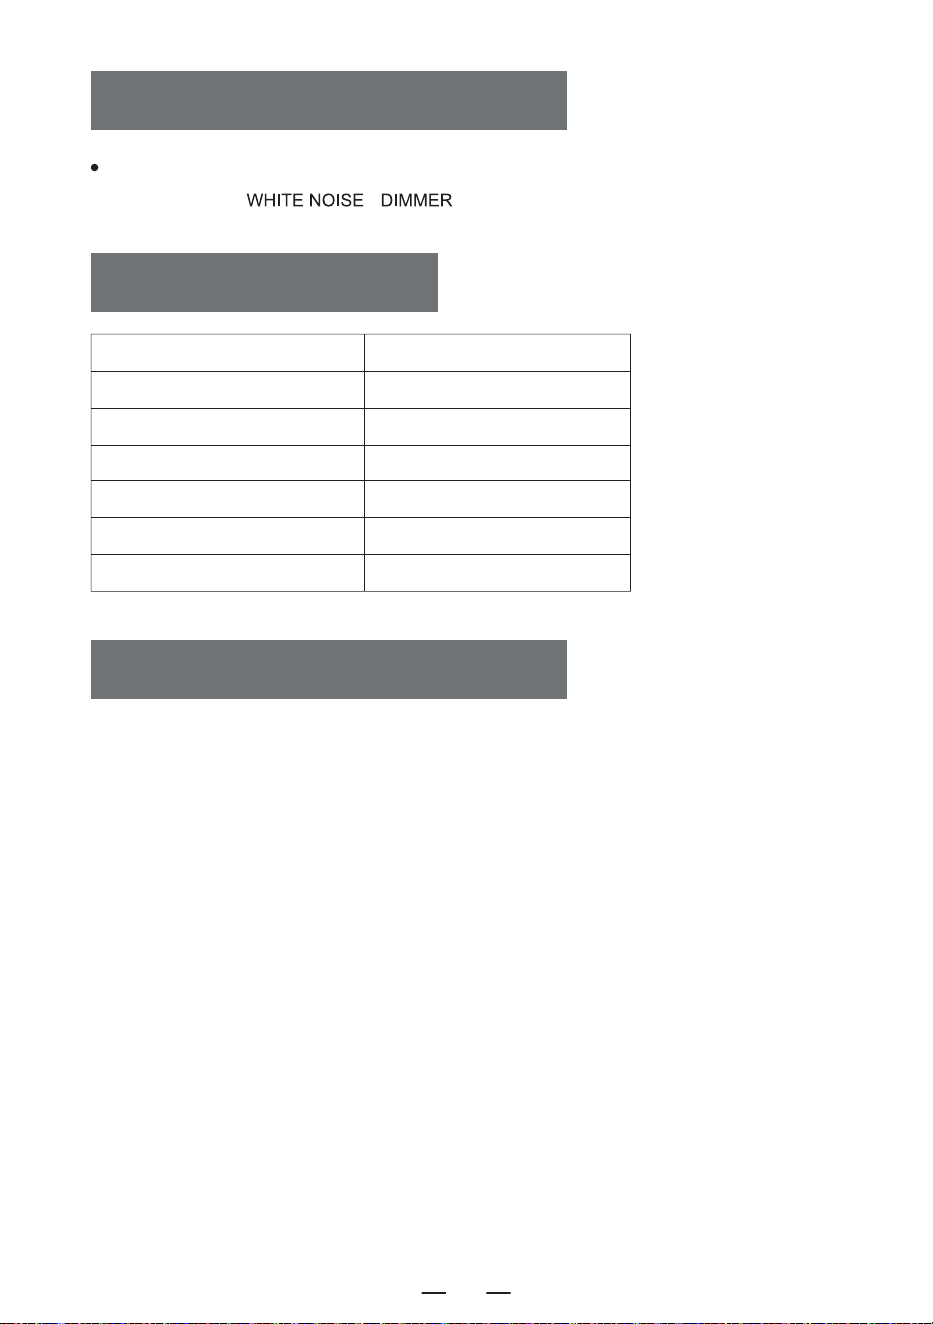
1 .Do not expose the product to rain or damp areas, and keep it away from bathtubs,washing
basins, swimming pools, and other wet environments when placing and using it.
2. Do not put any source of danger on the device (for example, objects filled with liquid,lighted
candles).
3. Do not use the product near heat sources, including radiator pipes, heaters or other
appliances that generate heat.
4. Put the product on a flat surface to use.
5. The product should be placed in a location with sufficient ventilation space around it.There
should be 5-10 cm of space around the front and rear of the product to ensure adequate
ventilation.
6. Do not place the product on a bed, blanket, or similar surfaces to prevent the vents from
being blocked. Additionally, do not cover the product with tablecloths, paper, or any other
materials.
7. Be careful not to let solids or liquids enter the body from the radio.
SAFETY INSTRUCTIONS
This product offers three backlight settings: normal brightness, increased brightness and light
off Short press [ \ ] to switch between the backlight settings.
Power Source DC 5V 2A Type-C charging
Bluetooth Version 5.1
CD Format CD/CD-R/CD-RW/MP3
USB/SD Format MP3/WMA
CD Playback Sound 31.5hz-16khz±3db
Size 6.69*.21*4.96in
Weight 2.65lb/1200g
BACKLIGHT OPERATION
SPECIFICATIONS
EN
10
8. Water vapor may condense on the laser lens under the following conditions:-
-When the unit is moved from a cold place to a warm place;
-When the heating system has just opened;
-When the machine is used in a very humid room;
-When the unit is cooled by the air conditioning system;
-When condensation occurs in the unit, the system cannot operate normally.If this happens,
you can temporarily stop using the unit for a few hours before operating it again.
9. The product should not be exposed to water droplets or splashes, and objects filled with
liquids such as vases should not be placed on the equipment.
Maintenance:
Please place the product in a well-ventilated place, not in the sun or other places that generate
high temperature and humidity, During maintenance, please use a soft cloth moistened with a
thinner detergent to wipe the body. Do not use strong solvents such as alcohol, stupid or
thinner.
This CD player has full 12-month warranty against manufacturing defects.
The warranty period begins form the date of purchase.
WARRANTY
PACKING LIST
EN
CD Player 1
Type-C Cable 1
Remote Control 1
User Manual 1
11

5)H[SRVXUHVWDWHPHQW
7KLVHTXLSPHQWFRPSOLHVZLWKWKH)&&UDGLDWLRQH[SRVXUHOLPLWVVHWIRUWKIRUDQXQFRQWUROOHG
HQYLURQPHQW7KLVWUDQVPLWWHUPXVWQRWEHFRORFDWHGRURSHUDWLQJLQFRQMXQFWLRQZLWKDQ\
RWKHUDQWHQQDRUWUDQVPLWWHU
)&&:DUQLQJ
7KLVGHYLFHFRPSOLHVZLWK3DUWRIWKH)&&5XOHV2SHUDWLRQLVVXEMHFWWRWKHIROORZLQJWZR
FRQGLWLRQV
7KLVGHYLFHPD\QRWFDXVHKDUPIXOLQWHUIHUHQFHDQGWKLVGHYLFHPXVWDFFHSWDQ\
LQWHUIHUHQFHUHFHLYHGLQFOXGLQJLQWHUIHUHQFHWKDWPD\FDXVHXQGHVLUHGRSHUDWLRQ
1RWH7KLVHTXLSPHQWKDVEHHQWHVWHGDQGIRXQGWRFRPSO\ZLWKWKHOLPLWVIRUD&ODVV%GLJLWDO
GHYLFHSXUVXDQWWRSDUWRIWKH)&&5XOHV7KHVHOLPLWVDUHGHVLJQHGWRSURYLGHUHDVRQDEOH
SURWHFWLRQDJDLQVWKDUPIXOLQWHUIHUHQFHLQDUHVLGHQWLDOLQVWDOODWLRQ7KLVHTXLSPHQWJHQHUDWHV
XVHVDQGFDQUDGLDWHUDGLRIUHTXHQF\HQHUJ\DQGLIQRWLQVWDOOHGDQGXVHGLQDFFRUGDQFHZLWK
WKHLQVWUXFWLRQVPD\FDXVHKDUPIXOLQWHUIHUHQFHWRUDGLRFRPPXQLFDWLRQV+RZHYHUWKHUHLV
QRJXDUDQWHHWKDWLQWHUIHUHQFHZLOOQRWRFFXULQDSDUWLFXODULQVWDOODWLRQ,IWKLVHTXLSPHQWGRHV
FDXVHKDUPIXOLQWHUIHUHQFHWRUDGLRRUWHOHYLVLRQUHFHSWLRQZKLFKFDQEHGHWHUPLQHGE\
WXUQLQJWKHHTXLSPHQWRIIDQGRQWKHXVHULVHQFRXUDJHGWRWU\WRFRUUHFWWKHLQWHUIHUHQFHE\
RQHRUPRUHRIWKHIROORZLQJPHDVXUHV
²5HRULHQWRUUHORFDWHWKHUHFHLYLQJDQWHQQD
²,QFUHDVHWKHVHSDUDWLRQEHWZHHQWKHHTXLSPHQWDQGUHFHLYHU
²&RQQHFWWKHHTXLSPHQWLQWRDQRXWOHWRQDFLUFXLWGLIIHUHQWIURPWKDWWRZKLFKWKHUHFHLYHULV
FRQQHFWHG
²&RQVXOWWKHGHDOHURUDQH[SHULHQFHGUDGLR79WHFKQLFLDQIRUKHOS
127($Q\FKDQJHVRUPRGLILFDWLRQVWRWKLVXQLWQRWH[SUHVVO\DSSURYHGE\WKHSDUW\
UHVSRQVLEOHIRUFRPSOLDQFHFRXOGYRLGWKHXVHUVDXWKRULW\WRRSHUDWHWKHHTXLSPHQW
EN