
SVW 3500WH
EN
HARD FLOOR CLEANER
Translation of the original manual
SVW 3500WH
A
1
2
4
5
6
15
3
9
10
11
12
7
8
13
14
B
1 2 3
C
C1 C2
C3 C4
1
2
1
2
C
C5 C6
C7 C8
D
D1 D2 D3
1
2
E
E1 E2
E3
F
F2 F3
F1
F4

- 1 -
11/2024
2024, .
EN
Hard Floor Cleaner
User Manual
Important Safety Instructions
READ CAREFULLY AND STORE FOR FUTURE USE.
• This appliance may be only used by children aged
8 years and older and by persons with physical, sensory
or mental impairments or lack of experience and
knowledge, if they are supervised or have been instructed
on the safe use of the appliance and understand the
potential hazards.
• Children must not play with the appliance. Cleaning and
maintenance must not be performed by children without
supervision.
• If the power cord is damaged, have it replaced in
aprofessional service centre in order to prevent
adangerous situation. It is forbidden to use the appliance
with the power cord damaged.
• Do not run over power cords. There is adanger.
• Only fill the water tank with clean, cold water. Follow the
instructions for filling the tank that are given in this manual.
• Pull the plug out of the socket before cleaning or servicing
the appliance.
• Do not immerse in water when cleaning.
• Check all components of the electric mop regularly. If they
are damaged, they must not be used.
ELECTRIC MOP
- 2 -
11/2024
2024, .
. . . . . . . . . . . . . . . . . . . . . . . . . . . . . . . . . . . . . . . . . . . . . . . . . . . . . . . . . . . . . . . . . . . . . . . . . . . . . . . . . . . . . . . . . . . . . . . . . . . . . . . . . . . . . . . . . . . . . . . . . . . . . . . . . . . . . . . . . . . .
Additional Important Safety Instructions forUse of the Appliance
• This electric mop is designed for use in households, offices and similar types of areas. Do not use in industrial surroundings. Do not use it outdoors.
• This electric mop is designed for floor coverings such as vinyl, tile, laminate, marble, etc. Do not use it on carpeted floors.
• Do not expose the electric mop to direct sunlight and do not place it near open fire or appliances that are asource of heat. Avoid using or storing the
cleaner in an environment where flammable, volatile, or explosive substances are used or stored.
• Before connecting the adapter to apower socket check that the technical details on its rating label match the electrical voltage in the socket.
• Use only the power adapter supplied tocharge the electric mop. Do not use the power adapter to charge any other device.
• Do not short-circuit the connectors. Do not touch the connectors with wet hands.
• The recommended operating temperature is 0 to 40 °C. Do not use the electric mop at alower or higher temperature.
• Make sure that the power cable does not touch hot surfaces or sharp objects.
• Do not immerse the electric mop in water or any other liquid, or rinse it under running water, unless otherwise specified by the manufacturer.
• Before switching on the electric mop, make sure it is correctly assembled.
• Make sure that the air outlet or suction opening is not blocked when the electric mop is in operation.
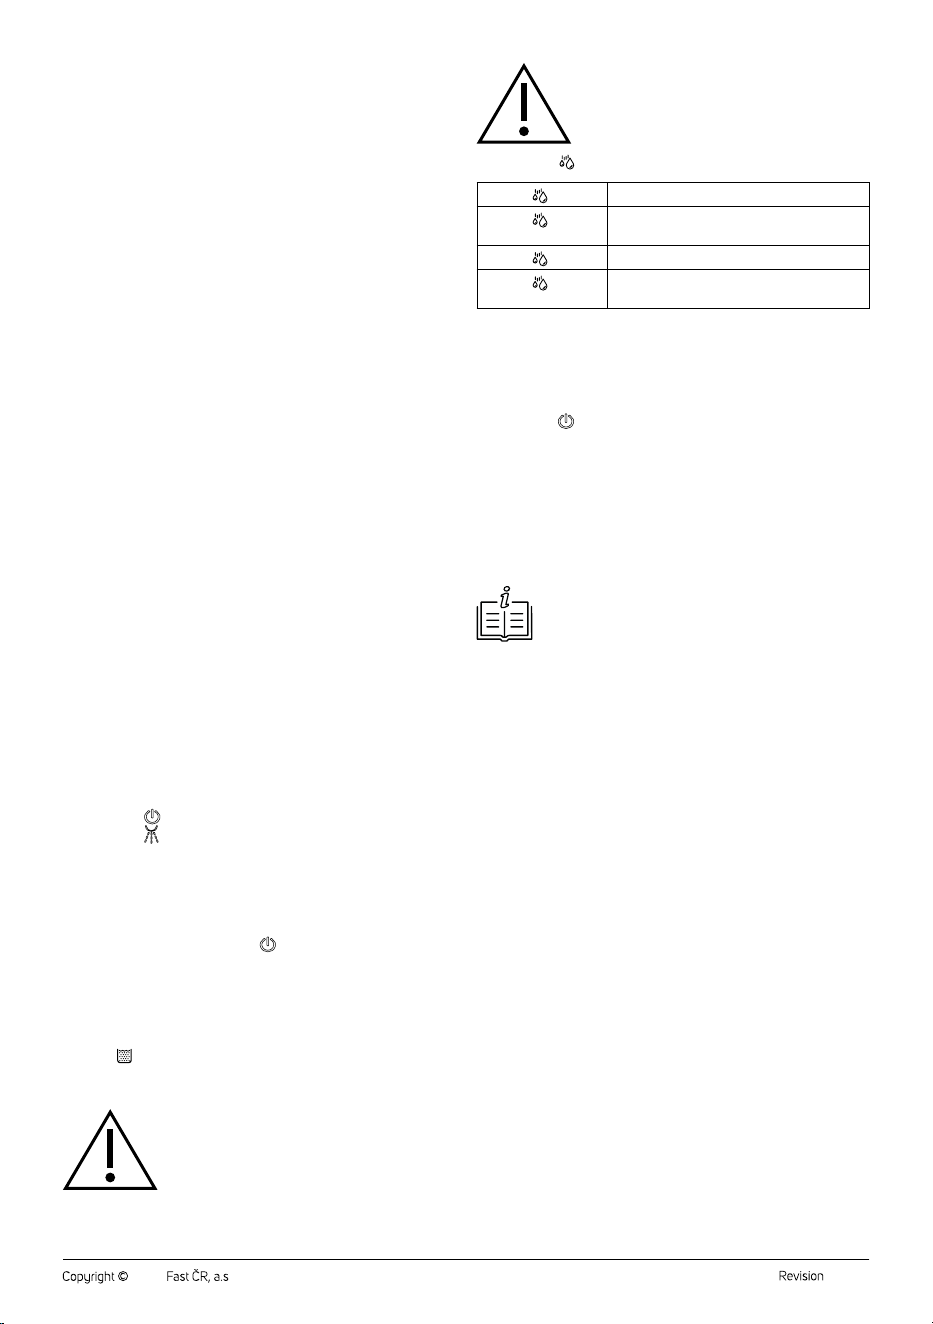
• Do not use the electric mop to vacuum the following items:
- smouldering cigarettes, burning objects, matches or hot ash;
- flammable or volatile substances;
- sharp objects, such as shards, needles, pins, etc.;
- flour, plaster, cement and other building materials;
- larger pieces of paper or plastic bags, which can easily block the suction port.
• Do not use the electric mop if the water on the floor covering reaches 4 mm or more.
• Take extra care when using the electric mop on stairs.
• Always switch off the electric mop when left unattended, after use and before cleaning.
• Disconnect the power cable from the socket by pulling the plug, not the cable. Otherwise, damage to the power cable or the socket may occur.
• Keep the electric mop clean. Wipe the outer surface with aclean, dry sponge. Follow the cleaning instructions provided in this manual.
• Empty the dirty water tank when the dirty water level reaches the maximum line. Follow the instructions inthis manual if water enters the motor unit.
• Clean the dirty water tank after each use. Otherwise, the suction port may become clogged, the suction power may be reduced, or the engine may
overheat, which may result in ashortened lifespan of the appliance.
• Do not use the electric mop if it does not operate properly, has been damaged, or has been submerged in water.
• Do not repair or modify the electric mop yourself. All repairs should be carried out by an authorised service centre. Tampering with the appliance
may result in the loss of your legal rights regarding faulty performance or warranty for quality.
. . . . . . . . . . . . . . . . . . . . . . . . . . . . . . . . . . . . . . . . . . . . . . . . . . . . . . . . . . . . . . . . . . . . . . . . . . . . . . . . . . . . . . . . . . . . . . . . . . . . . . . . . . . . . . . . . . . . . . . . . . . . . . . . . . . . . . . . . . . .
EXPLANATION OF SYMBOLS PLACED ON THE PRODUCT OR INTHE ACCOMPANYING DOCUMENTATION
The product meets all the basic requirements of the applicable EU directives.
This symbol on products or original documents means that used electric or electronic products must not be added to ordinary municipal
waste.
The product is intended for household use only. The product is not intended for outdoor use.
Safety Class for Electric Shock Protection:
Class II – Electric shock protection is provided by double or heavy-duty insulation.
BATTERY DISPOSAL
Before disposing of the product or returning it to adesignated collection point, ensure that the battery is removed. Before removing
the battery, it is necessary to start the electric mop and wait until it is completely flat. The battery contains environmentally harmful
substances and should not be disposed of in regular household waste. Proper disposal shall be ensured by the relevant collection point.
. . . . . . . . . . . . . . . . . . . . . . . . . . . . . . . . . . . . . . . . . . . . . . . . . . . . . . . . . . . . . . . . . . . . . . . . . . . . . . . . . . . . . . . . . . . . . . . . . . . . . . . . . . . . . . . . . . . . . . . . . . . . . . . . . . . . . . . . . . . .
- 3 -
11/2024
2024, .
• Thank you for purchasing our SENCOR product; we hope it will serve
to your satisfaction.
• Prior to using this appliance, please read the user manual thoroughly,
even in cases when you are already familiar with the use of similar
types of appliances. Use the appliance only as described in this
user manual. Keep the manual for future reference. If you pass the
appliance on to another person, ensure that this user manual is
included.
• Carefully unpack the appliance and make sure not to discard any part
of the packaging material until you have found all its components. It
is recommended to keep the original packaging, packing material,
receipt and confirmation of the extent of the seller'sliability or warranty
certificate at least for the duration of the legal right of defective
performance or quality guarantee. When transporting the appliance,
we recommend packaging it again in the original box provided by the
manufacturer.
. . . . . . . . . . . . . . . . . . . . . . . . . . . . . . . . . . . . . . . . . . . . . . . . . . . . . . . . . . . . . . . . . . . .
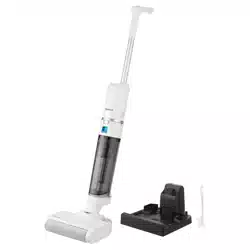
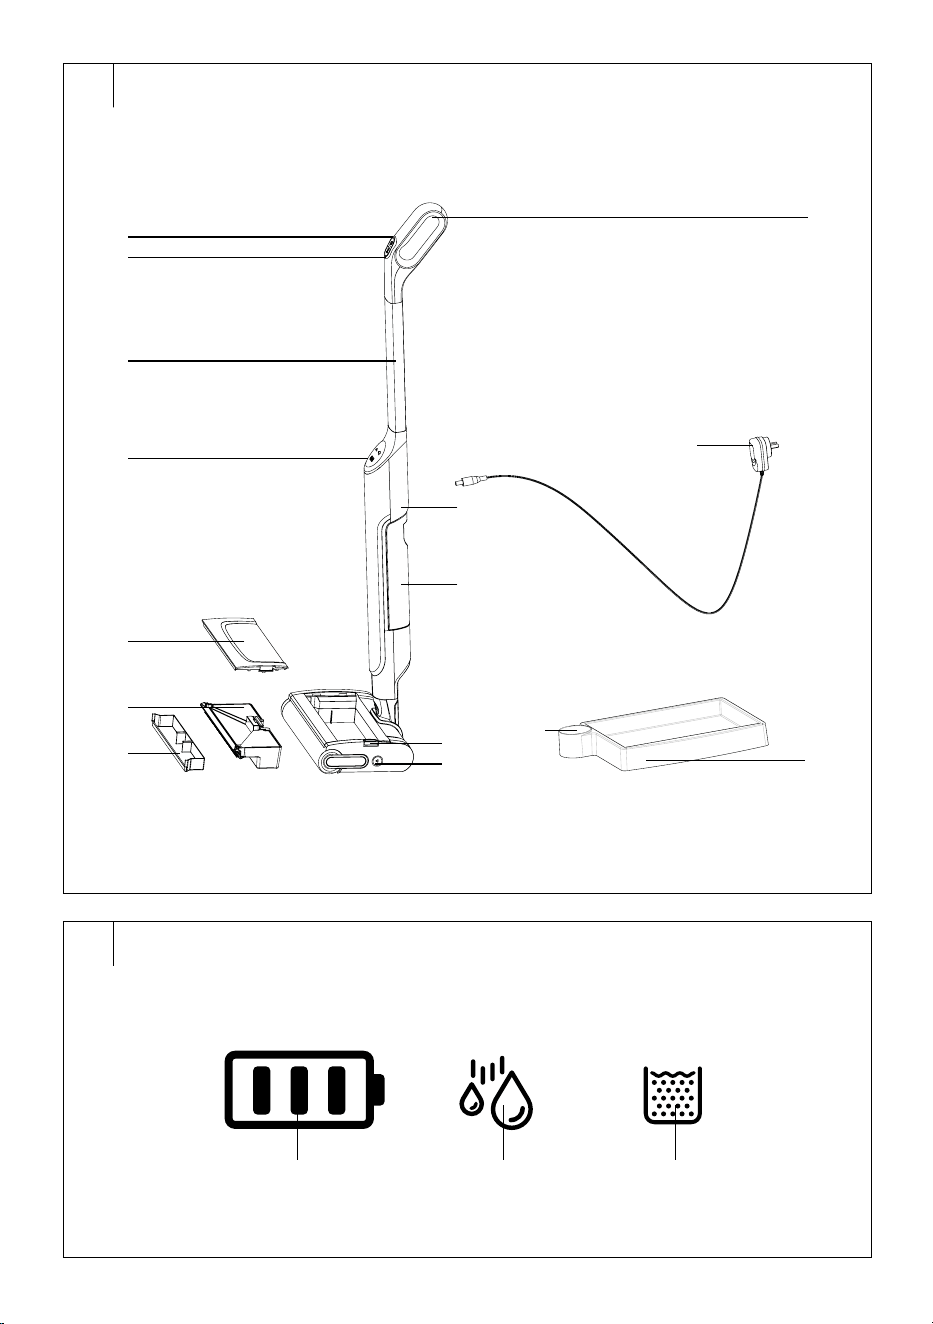
DESCRIPTION OF THE ELECTRIC MOP
A1 Handle
A2
On/off button
A3
Water intensity control
button
A4 Handle bar
A5 Display
A6 Top cover
A7 Button to release the top
cover
A8 Rotating brush lock
A9 Dirty water tank
A10 Container for solid dirt
A11 Power adapter connection
socket
A12 Clean water tank
A13 Storage base
A14 Stand fordrying the rotating
brush
A15 Power adapter
. . . . . . . . . . . . . . . . . . . . . . . . . . . . . . . . . . . . . . . . . . . . . . . . . . . . . . . . . . . . . . . . . . . .
DESCRIPTION OF THE DISPLAY
B1 Charge status icon
B2 Wiping icon
B3 Full dirty water tank icon
. . . . . . . . . . . . . . . . . . . . . . . . . . . . . . . . . . . . . . . . . . . . . . . . . . . . . . . . . . . . . . . . . . . .
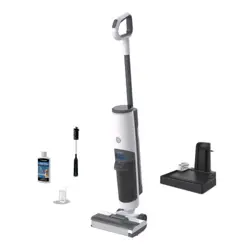
PACKAGE CONTENTS
• Electric Mop
• Storage base
• Power adapter
. . . . . . . . . . . . . . . . . . . . . . . . . . . . . . . . . . . . . . . . . . . . . . . . . . . . . . . . . . . . . . . . . . . .
PURPOSE OF USE
• The electric mop is designed for cleaning all types of hard floors, such
as wooden or laminate floating floors, tiles, vinyl, etc.
• The electric mop can be used for cleaning carpets, mats, runners, etc.,
provided that you select the mode without water (do not use the
button toadjust the intensity of water dispensing).
. . . . . . . . . . . . . . . . . . . . . . . . . . . . . . . . . . . . . . . . . . . . . . . . . . . . . . . . . . . . . . . . . . . .
PREPARATION BEFORE USE
• Remove the electric mop and all accessories from the packaging.
Check that you have removed all the parts. Check for any damage to
the mop and its accessories.
• Remove any protective films and advertising labels from the mop and
all accessories.
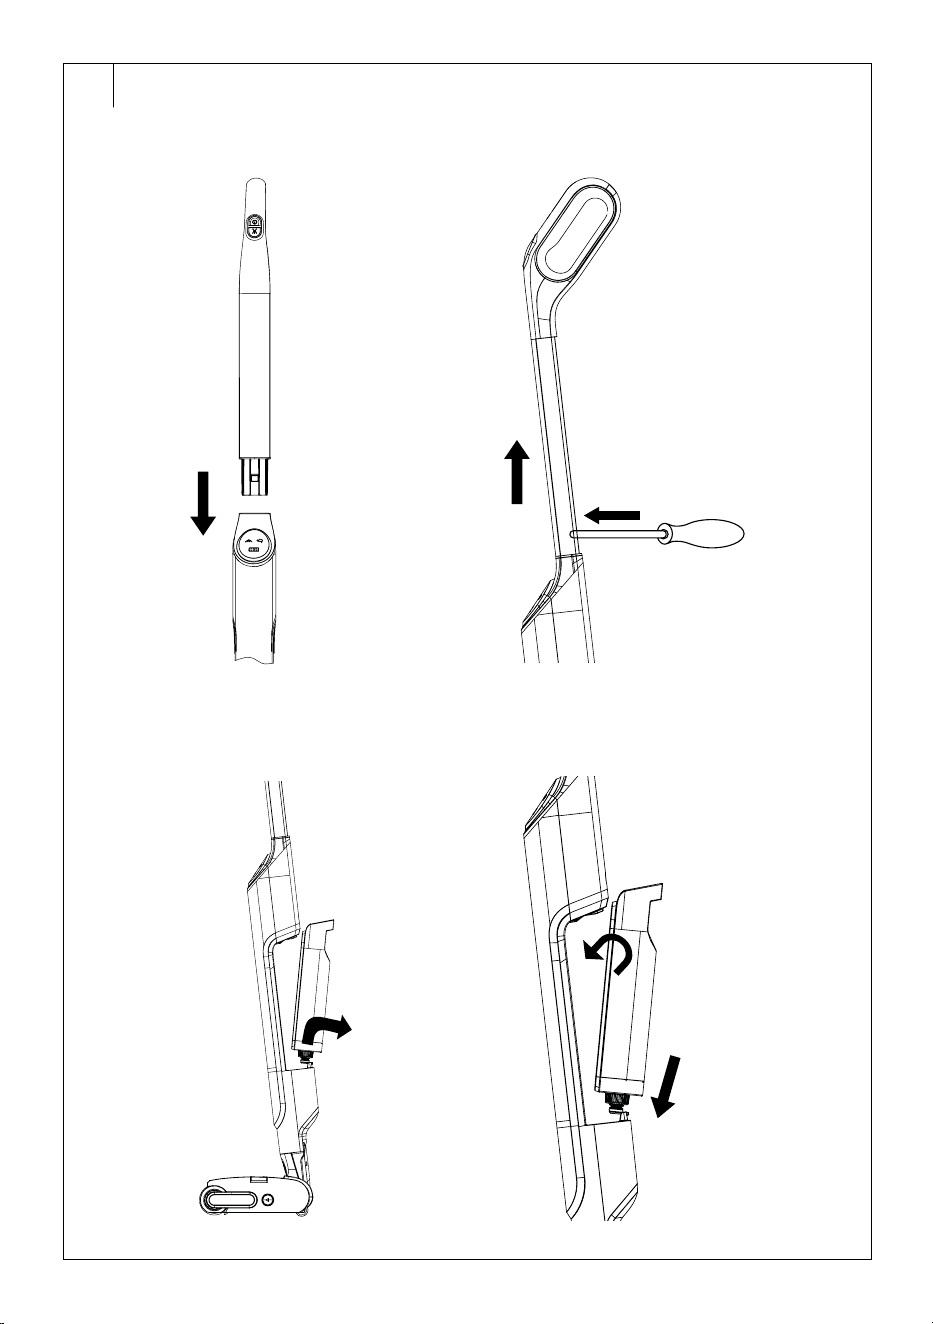
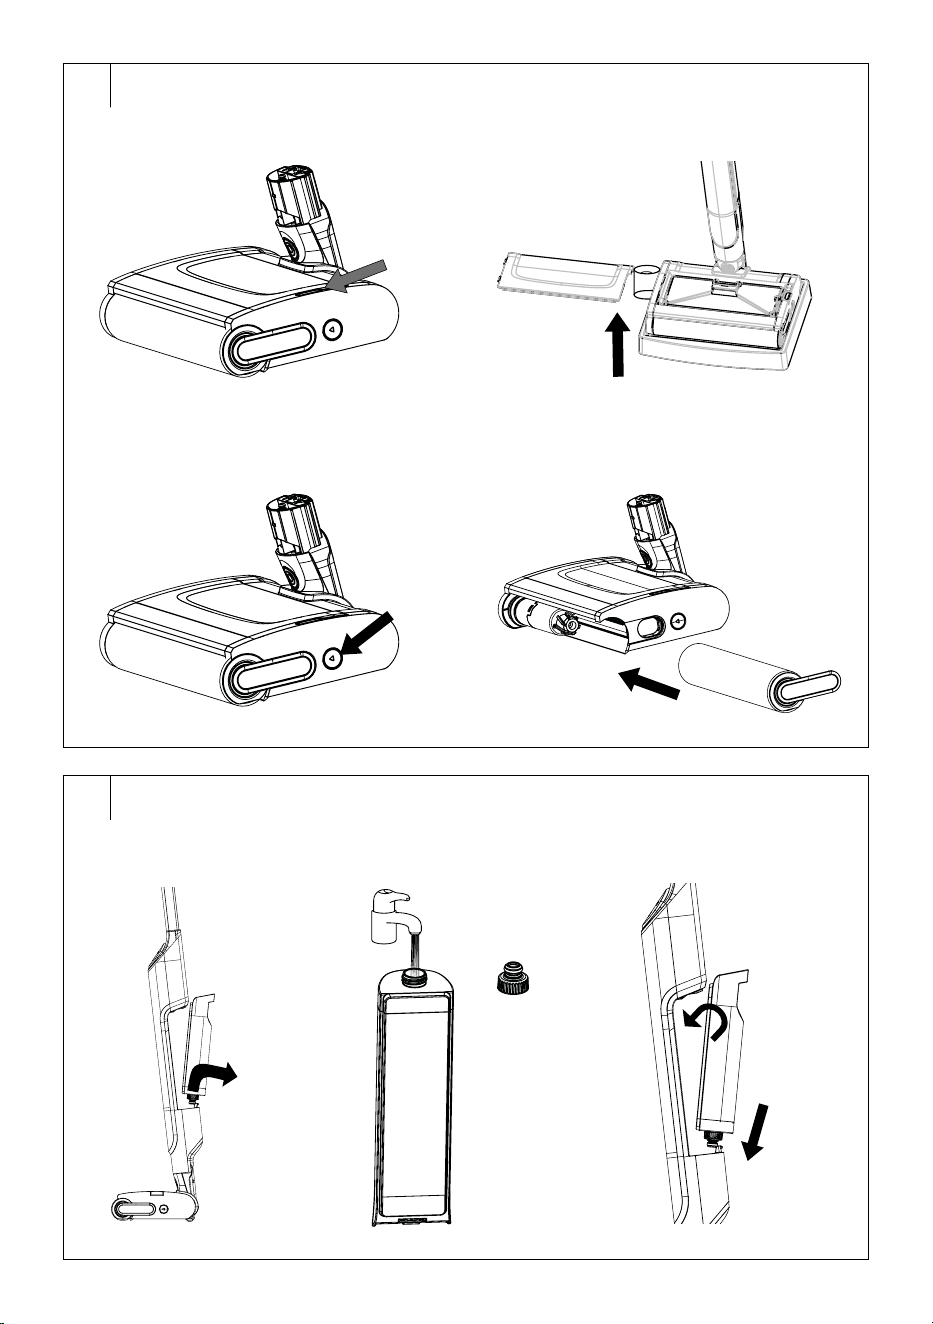
Assembly/Disassembly of the Mop
The electric mop is supplied disassembled. Follow these steps for
assembly:
1. Insert the bottom part of the rod into the hole in the mop body – see
figure C1.
2. Press gently until you hear aclick. This indicates that the rod is
securely fastened.
To disassemble, follow these steps:
1. Hold the rod with one hand.
2. Insert the end of the screwdriver into the hole at the back of the mop
with the other hand andpress the aluminium rod release lock – see
figure C2.
3. Pull the rod upwards.
Note:
It is not necessary to disassemble the electric mop, e.g.
for cleaning. Disassemble the electric mop only when
absolutely necessary, e.g. moving, where it is not possible
to carry the folded electric mop.
Clean Water Tank
To remove the clean water tank, follow these steps:
1. Hold the tank by the built-in handle andtilt the top part of the tank
out of the mop body – see Figure C3.
2. Pull the bottom of the tank out of thebody ofthe mop.
To attach the clean water tank, follow these steps:
1. Insert the bottom part of the tank into the cleaner body first.
2. Then close the top part of the tank – see figure C4.
3. Press gently until you hear aclick.
Dirty Water Tank
To remove the dirty water tank, follow these steps:
1. Press the top cover release button – see figure C5.
2. Remove the top cover andremove the dirty water tank – see figure
C6.
To attach the dirty water tank, follow these steps:
1. Insert the tank into the space in the floor nozzle.
2. Put the cover on. Press gently until you hear aclick. This indicates
that the top cover is properly secured in place.
Rotating Brush
When removing the rotating brush, proceed as follows:
1. Press the lock of the rotating brush – see figure C7.
2. The rotating brush will be automatically released and you will be
able to pull it out by its handle – see figure C8.
When fitting the rotating brush, proceed as follows:
1. Fit the rotating brush to the holder in thefloor nozzle. Push the
rotating brush until you feel resistance.
2. Press the handle of the rotating brush into the moulding in the floor
nozzle until you hear aclick. This indicates that the rotating brush is
properly secured.
. . . . . . . . . . . . . . . . . . . . . . . . . . . . . . . . . . . . . . . . . . . . . . . . . . . . . . . . . . . . . . . . . . . .
LOCATION OF THE STORAGE BASE
• The storage base is used tostore the electric mop when not in use or
when charging. Therefore, we recommend placing the storage base
withineasy reach of apower socket.
• Place the storage base on ahard, horizontal anddry surface.
Warning:
The instability of the electric mop, which is located
in the storage base, may cause the mop to fall, may
be damaged, or may damage the floor. Therefore,
make sure that the electric mop is correctly stored in
thebase andis stable.
. . . . . . . . . . . . . . . . . . . . . . . . . . . . . . . . . . . . . . . . . . . . . . . . . . . . . . . . . . . . . . . . . . . .
CHARGING THE MOP
Use only the supplied power adapter to charge the mop.
It is recommended to fully charge the mop before use.
EN
Hard Floor Cleaner
User Manual
- 4 -
11/2024
2024, .
1. Place the mop in the storage base.
2. Plug the power adapter connector into the socket at the back of the
mop and the adapter plug into aproperly grounded power socket.
3. The charge status icon will be lit on the control panel. As the mop
charges, the bars on the icon will gradually light up.
4. When the electric mop is fully charged, all the bars of the icon light
up.
5. Disconnect the connector from the socket at therear of the mop
andpull the adapter plug out of the power socket.
• If the battery level drops below 30% during operation (only one bar of
the icon lights up), the mop will need to be charged.
• If the electric mop cannot be turned on (only one bar of the indicator
blinks when attempting to turn it on), the mop is fully discharged.
. . . . . . . . . . . . . . . . . . . . . . . . . . . . . . . . . . . . . . . . . . . . . . . . . . . . . . . . . . . . . . . . . . . .
FILLING THE WATER TANK
1. Hold the tank by the built-in handle andtilt the top of the tank out of
the mop body – see figure D1.
2. Pull the bottom of the tank out of thebody ofthe mop.
3. Unscrew the water tank cover andpour water into it – see figure D2.
4. Replace the cover andscrew it in. Make sure the cover is properly
closed to prevent water from leaking out of the tank.
5. Reinsert the tank into the cleaner body – see figure D3.
• Do not overfill the water tank. We recommend filling tothe top.
• Use clean, cold water. You can add afew drops of non-foaming agent,
which is designed for hard floor cleaners. Do not use cleaning agents
or solutions that are intended for mopping with amop, cloth, etc.
. . . . . . . . . . . . . . . . . . . . . . . . . . . . . . . . . . . . . . . . . . . . . . . . . . . . . . . . . . . . . . . . . . . .
BEFORE USING THE MOP
• Before using the mop, remove large objects from the floor, store toys,
hide cables, etc. Depending on the level of soiling, vacuum the floor to
remove coarse dirt.
• Check that the floor covering is suitable forwet wiping. We do not
recommend using the electric mop on moisture-sensitive floor
coverings such as cork floors.
. . . . . . . . . . . . . . . . . . . . . . . . . . . . . . . . . . . . . . . . . . . . . . . . . . . . . . . . . . . . . . . . . . . .
USING THE MOP
Ensure the mop is properly assembled, there is water in the clean water
tank, the dirty water tank is empty, and the mop is fully charged.
1. Pull the mop out of the storage base and place it on the floor.
2. Grasp the mop by the handle and unlock it from the parking position
by pulling the handle slightly backwards.
3. Press the
button once briefly to turn the mop on.
4. Press the
button and the water from thetank will start flowing into
the rotating brush. Move the mop back andforth afew times to get
the entire rotating brush wet, andthen you can start mopping.
5. "Move the mop forward and backward to clean the floor. Move
forward and backward at the same speed to allow the mop to suck
up the dirty water. It is not necessary to exert alot of pressure on the
handle or the mop.
6. After cleaning, press the button
to turn off the mop.
7. Return the mop to avertical position andsecure it in theparking
position.
8. Clean the dirty water tank andempty the water from the clean water
tank. Clean the mop according to the instructions in the “Cleaning
and Maintenance” section.
If the icon flashes during cleaning, the dirty water tank needs to be
emptied. Follow the instructions in the "Cleaning and Maintenance"
section.
Warning:
Do not run the cleaner over thresholds, door sills or
other obstacles or foreign objects.
Warning:
Do not turn the cleaner upside down when the dirty
water tank or clean water tank is full. Otherwise, there
is arisk of water leaking into the engine unit and
irreparably damaging it.
Meaning of the
Icon on the Display
The icon is not lit.
The mopping function is not on.
The icon
is
flashing.
The mopping function is set to the normal
level.
The icon
is lit.
The mopping function is set to ahigher level.
The icon
lights up
during self-cleaning.
This is normal.
Self-Cleaning
The electric mop is equipped with an automatic programme forcleaning
the rotating brush andinternal pipes.
1. Fill the clean water tank up to the maximum mark.
2. Ensure that the dirty water tank is empty.
3. Place the mop in the storage base.
4. Press the
button for 5 seconds to start the self-cleaning process.
5. The mop will begin to dispense water andclean the rotating brush
andinternal pipes. The dirty water will enter the tank mechanically
as the rotating brush rotates and rubs against the ridges in the front
of the tank.
6. Let the mop finish self-cleaning. This usually takes 30 seconds.
7. After self-cleaning is complete, remove the dirty water tank
according to the instructions in the “Cleaning andMaintenance”
section.
8. Remove the rotating brush andplace it on astand in thebase to dry.
Note:
Always make sure that the dirty water tank is correctly
inserted before starting the self-cleaning process.
. . . . . . . . . . . . . . . . . . . . . . . . . . . . . . . . . . . . . . . . . . . . . . . . . . . . . . . . . . . . . . . . . . . .
CLEANING AND MAINTENANCE
• Before cleaning, the mop must be switched off and disconnected from
the power supply.
• Never use abrasive cleaning agents, solvents, etc. for cleaning.
• Neglecting cleaning and maintenance may negatively affect the
working order of the mop and lead to its reduced performance.
• For daily cleaning and maintenance, wipe the mop body and storage
base with adry cloth. Wipe the floor nozzle with alightly damp cloth.
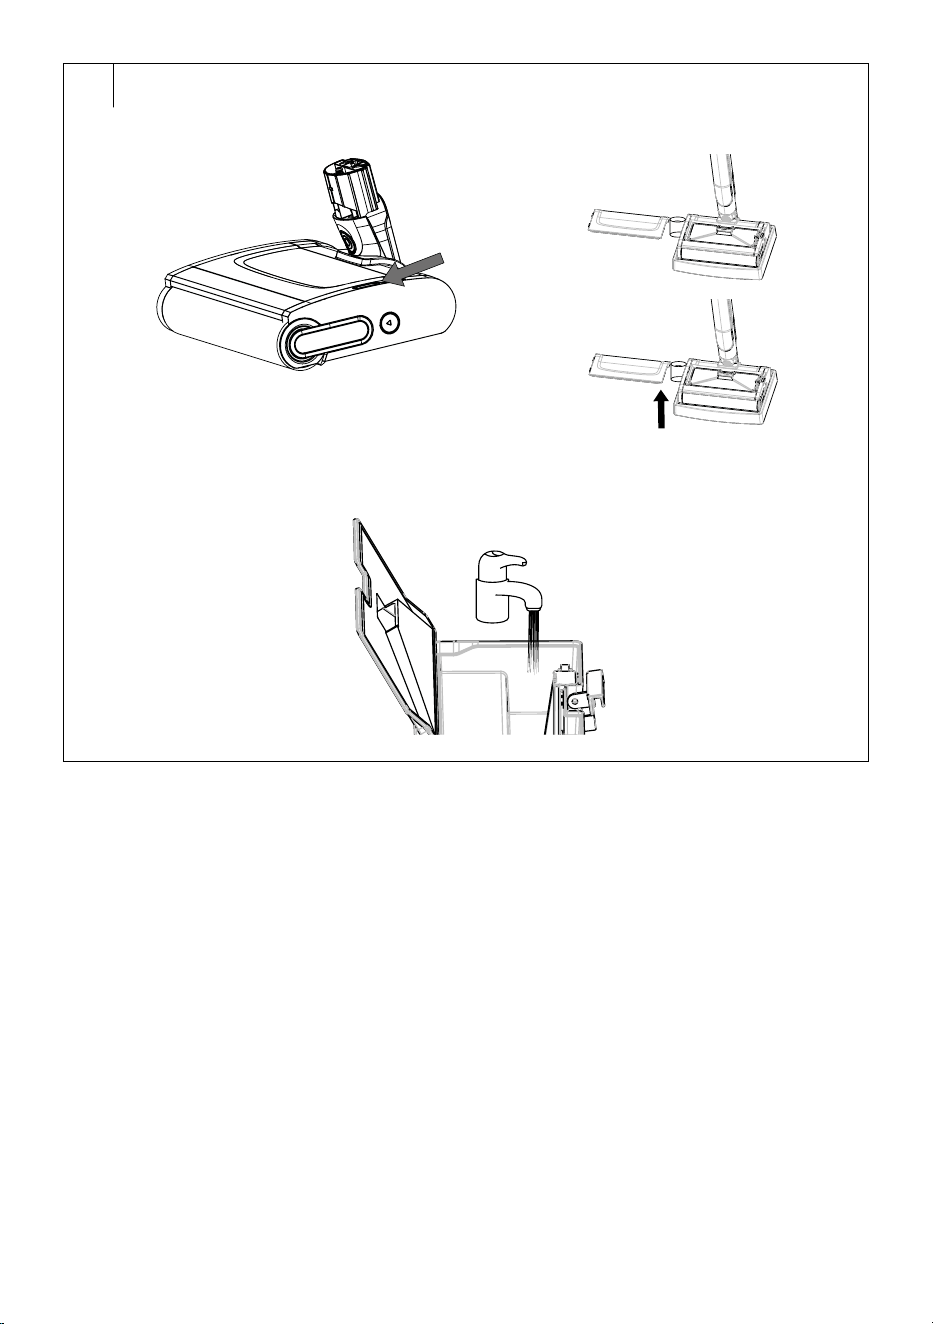
Emptying andCleaning the Dirty Water Tank
1. Remove the top cover andremove the dirty water tank – see figure
E1.
2. Release the lock on the tank cover, flip it open, remove the dirt and
dispose of it in the bin, discard the dirty water – see figure E2.
3. Rinse the tank with clean water – see figure E3.
4. Close the cover, secure it with the lock andinsert the dirty water tank
back.
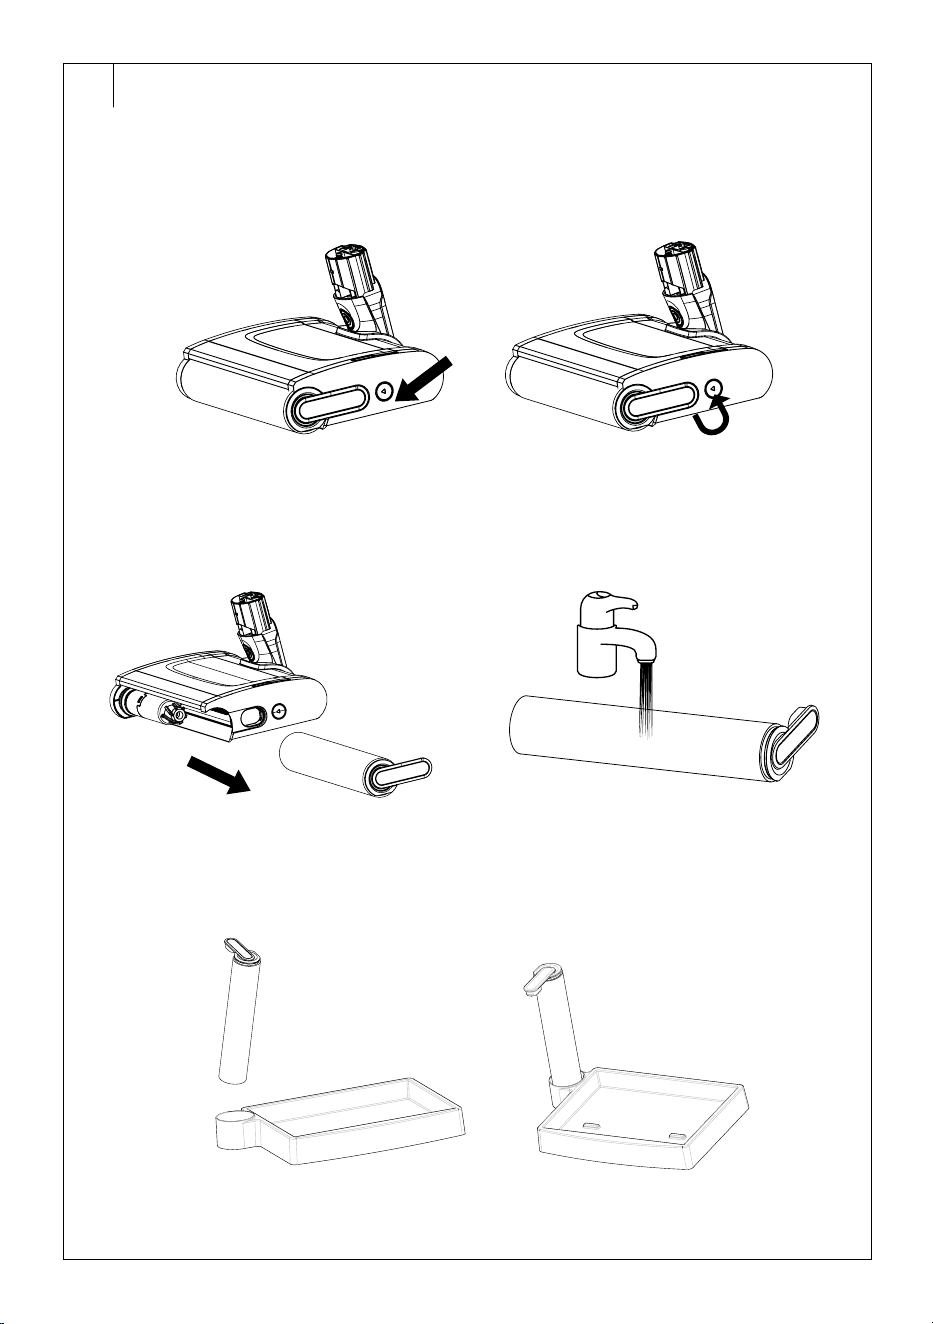
Cleaning the Rotating Brush
1. Press the lock of the rotating brush in the direction of the arrow – see
figure F1.
2. The rotating brush will automatically release, and you can pull it out
– see figure F2.
3. Clean the rotating brush under running water – see figure F3.
4. Wipe the area where the rotating brush is housed with adamp cloth.
5. Insert the rotating brush into the holder in thestorage base, allowing
it to dry.
6. Insert the dry rotating brush into the floor nozzle.
Cleaning the Clean Water Tank
1. Hold the tank by the built-in handle and tip the top of the tank out of
thebody ofthe mop.
2. Pull the bottom of the tank out of thebody ofthe mop.
- 5 -
11/2024
2024, .
3. Unscrew the cover of the tank andpour out the excess water.
4. Pour alittle clean water into the tank, close the cover, and shake it
slightly to wipe the inner walls with water. Open the cover andpour
out the water.
5. Leave the cover open to allow the tank to dry.
6. Once dry, insert the tank back into the mop body.
Cleaning the Mop Body and Storage Base
1. Disconnect the power adapter connector from the mop.
2. Wipe the storage base and mop body with adry cloth.
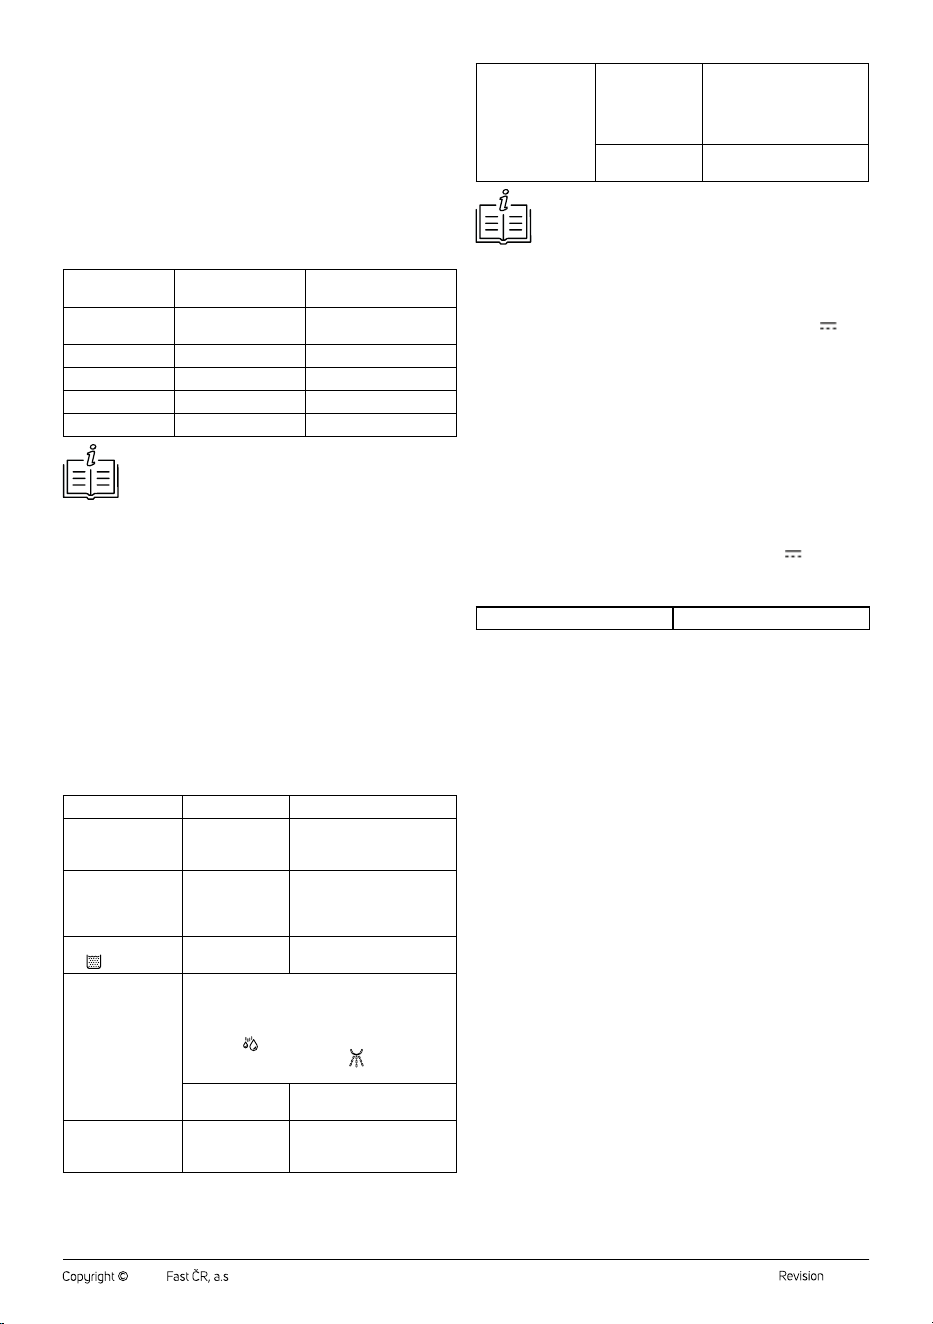
Recommended Maintenance andReplacement of Accessories
Cleaner Part
Recommended
Maintenance
Recommended
Replacement
Clean water tank After each use --
Dirty water tank After each use --
Rotating brush After each use In 3–6 months
Storage base After each use --
Castors Once amonth --
Note:
The above values are approximated andmay vary
dependingon the frequency of use of the cleaner.
. . . . . . . . . . . . . . . . . . . . . . . . . . . . . . . . . . . . . . . . . . . . . . . . . . . . . . . . . . . . . . . . . . . .
MOP STORAGE
• Place the clean mop in the parking position and insert it into the
storage base.
. . . . . . . . . . . . . . . . . . . . . . . . . . . . . . . . . . . . . . . . . . . . . . . . . . . . . . . . . . . . . . . . . . . .
LONG-TERM STORAGE
• If you will not be using the electric mop for an extended period, clean it
according to the instructions above and make sure it is completely dry.
Unplug the electric mop from the power socket. Store the mop with all
its accessories in adry, clean and cool place.
• It is recommended to charge the mop every 3 months as this will
extend the lifetime of the built-in battery.
. . . . . . . . . . . . . . . . . . . . . . . . . . . . . . . . . . . . . . . . . . . . . . . . . . . . . . . . . . . . . . . . . . . .
TROUBLESHOOTING
Problem Cause
Solution
The mop cannot
be turned on
andoperated.
The battery is
depleted.
Allow the battery to fully
charge.
The battery does
not charge itself.
The power
adapter is not
connected.
Plug the adapter plug into
the socket at the back of the
mop and the plug into the
power socket.
The icon lights
up
The dirty water
tank is full.
Empty the dirty water tank.
The rotating brush
is dry.
Slowly move the mop back andforth and the
rotating brush will get wet. After activating the
mopping function, it takes awhile for the rotating
brush to get wet. This is anormal occurrence.
If the icon
is not lit, the wiping function is not
switched on. Press the button
andselect the
water dispensing intensity.
The water tank is
empty.
Refill the water tank.
The rotating brush
does not move.
The rotating
brush is blocked.
Turn off the mop, clean the
rotating brush andremove
the blockage.
The floor is still
wet. / The mop is
leaking water.
The dirty
water tank is
not properly
positioned in
thefloor nozzle.
Remove the top cover
andproperly insert the dirty
water tank.
The dirty water
tank is full.
Turn off the mop andempty
the dirty water tank.
Note:
If the problem or error message persists, turn off the mop
andcontact an authorised service centre.
. . . . . . . . . . . . . . . . . . . . . . . . . . . . . . . . . . . . . . . . . . . . . . . . . . . . . . . . . . . . . . . . . . . .
TECHNICAL SPECIFICATIONS
Electric Mop
Input voltage ........................................................................................ 9.0 V
0.9 A
Power consumption ..............................................................................................8.1 W
Battery ..................................................................................Li-Ion, 7,2 V, 2600 mAh
Dimensions (mop only) .......................................................1150 x 288 x 196 mm
Weight ...........................................................................2.8 kg (without accessories)
Operating time per charge....................................................................up to 40 min
Charging time ........................................................................ approximately 2 hours
Clean water tank capacity .............................................................................. 400 ml
Dirty water tank capacity ................................................................................ 280 ml
Dirt container capacity ........................................................................................ 85 ml
Ingress protection ....................................................................................................IPX4
Power Adapter
Input ........................................................................... 100–240 V~ 50/60 Hz 0.5 A
Output ....................................................................................... 9.0 V
0.9 A, 8.1 W
Original Consumable Accessories
SVWX 3501 Rotating brush
. . . . . . . . . . . . . . . . . . . . . . . . . . . . . . . . . . . . . . . . . . . . . . . . . . . . . . . . . . . . . . . . . . . .
INSTRUCTIONS AND INFORMATION ON DISPOSAL OF USED
PACKAGING MATERIAL
Dispose of used packaging material at the location designated by the
municipality for waste disposal.
DISPOSAL OF USED ELECTRICAL AND ELECTRONIC EQUIPMENT
Used electrical andelectronic products must not be added to ordinary
municipal waste. For proper disposal and recycling of these products,
deliver them to designated collection points. Alternatively, in some
European Union states or other European countries the products can be
returned to the local retailer when buying an equivalent new product. By
properly disposing of this product, you help preserve valuable natural
resources and contribute to preventing potential negative impacts on the
environment and human health resulting from improper waste disposal.
For further details, contact your local authorities or the nearest collection
point. Fines may be imposed for improper disposal of this type of waste in
accordance with national regulations.
For Business Entities in European Union States
To dispose of electric or electronic equipment, request necessary
information from your retailer or supplier.
Disposal in Other Countries Outside the European Union
To dispose of this product elsewhere, request necessary information on
the correct disposal method from local authorities or your retailer.
. . . . . . . . . . . . . . . . . . . . . . . . . . . . . . . . . . . . . . . . . . . . . . . . . . . . . . . . . . . . . . . . . . . .
Changes to text and technical parameters are reserved.

- 6 -
11/2024
2024, .