Installation video
Please scan the below QR code to get
the video for easy installation.
KBS-52K131
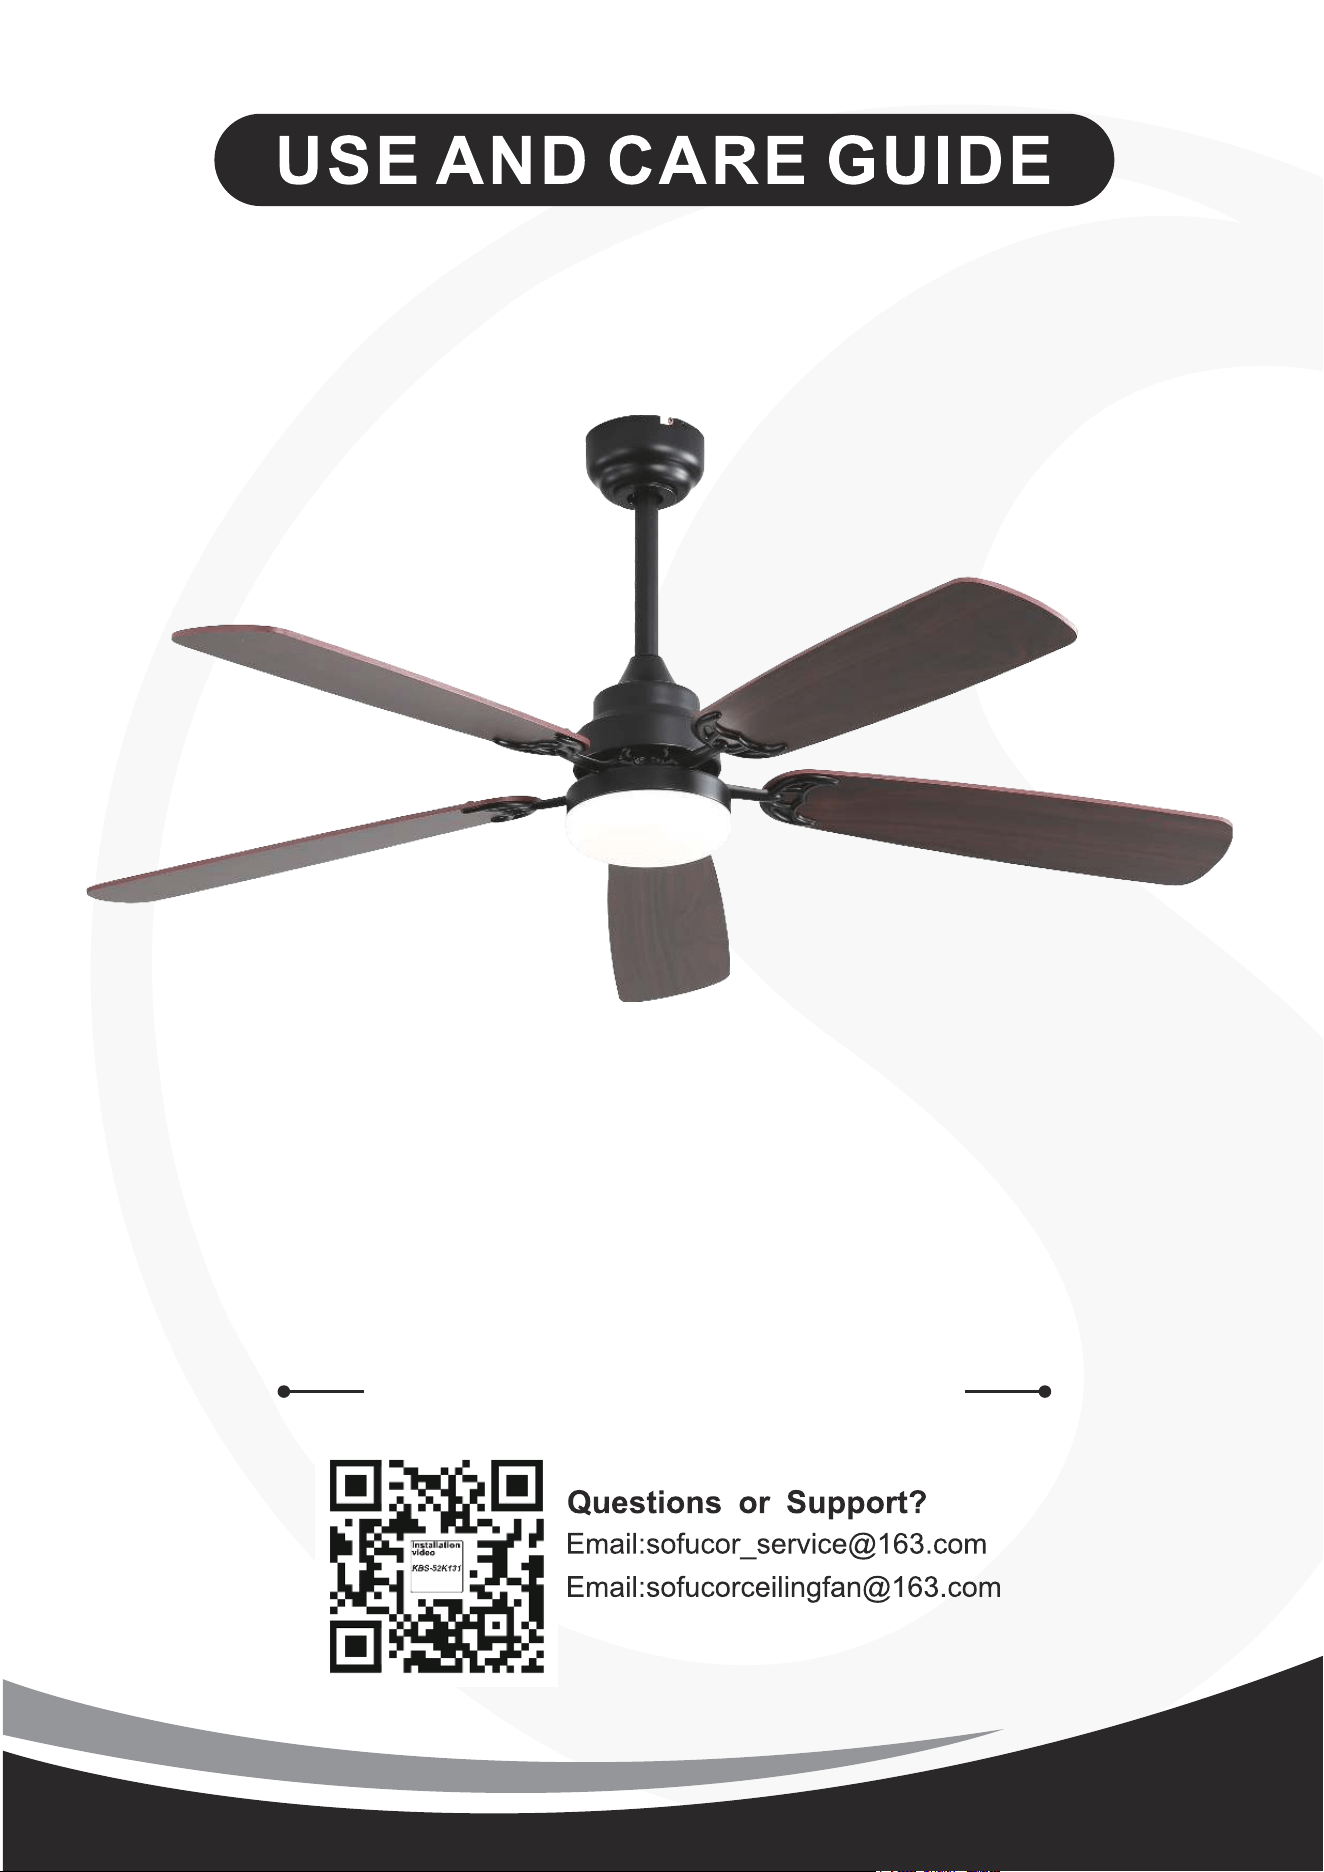
Website: www.sofucorfan.com
2
01
02
02
03
04
05
06
17
18
19
20
20
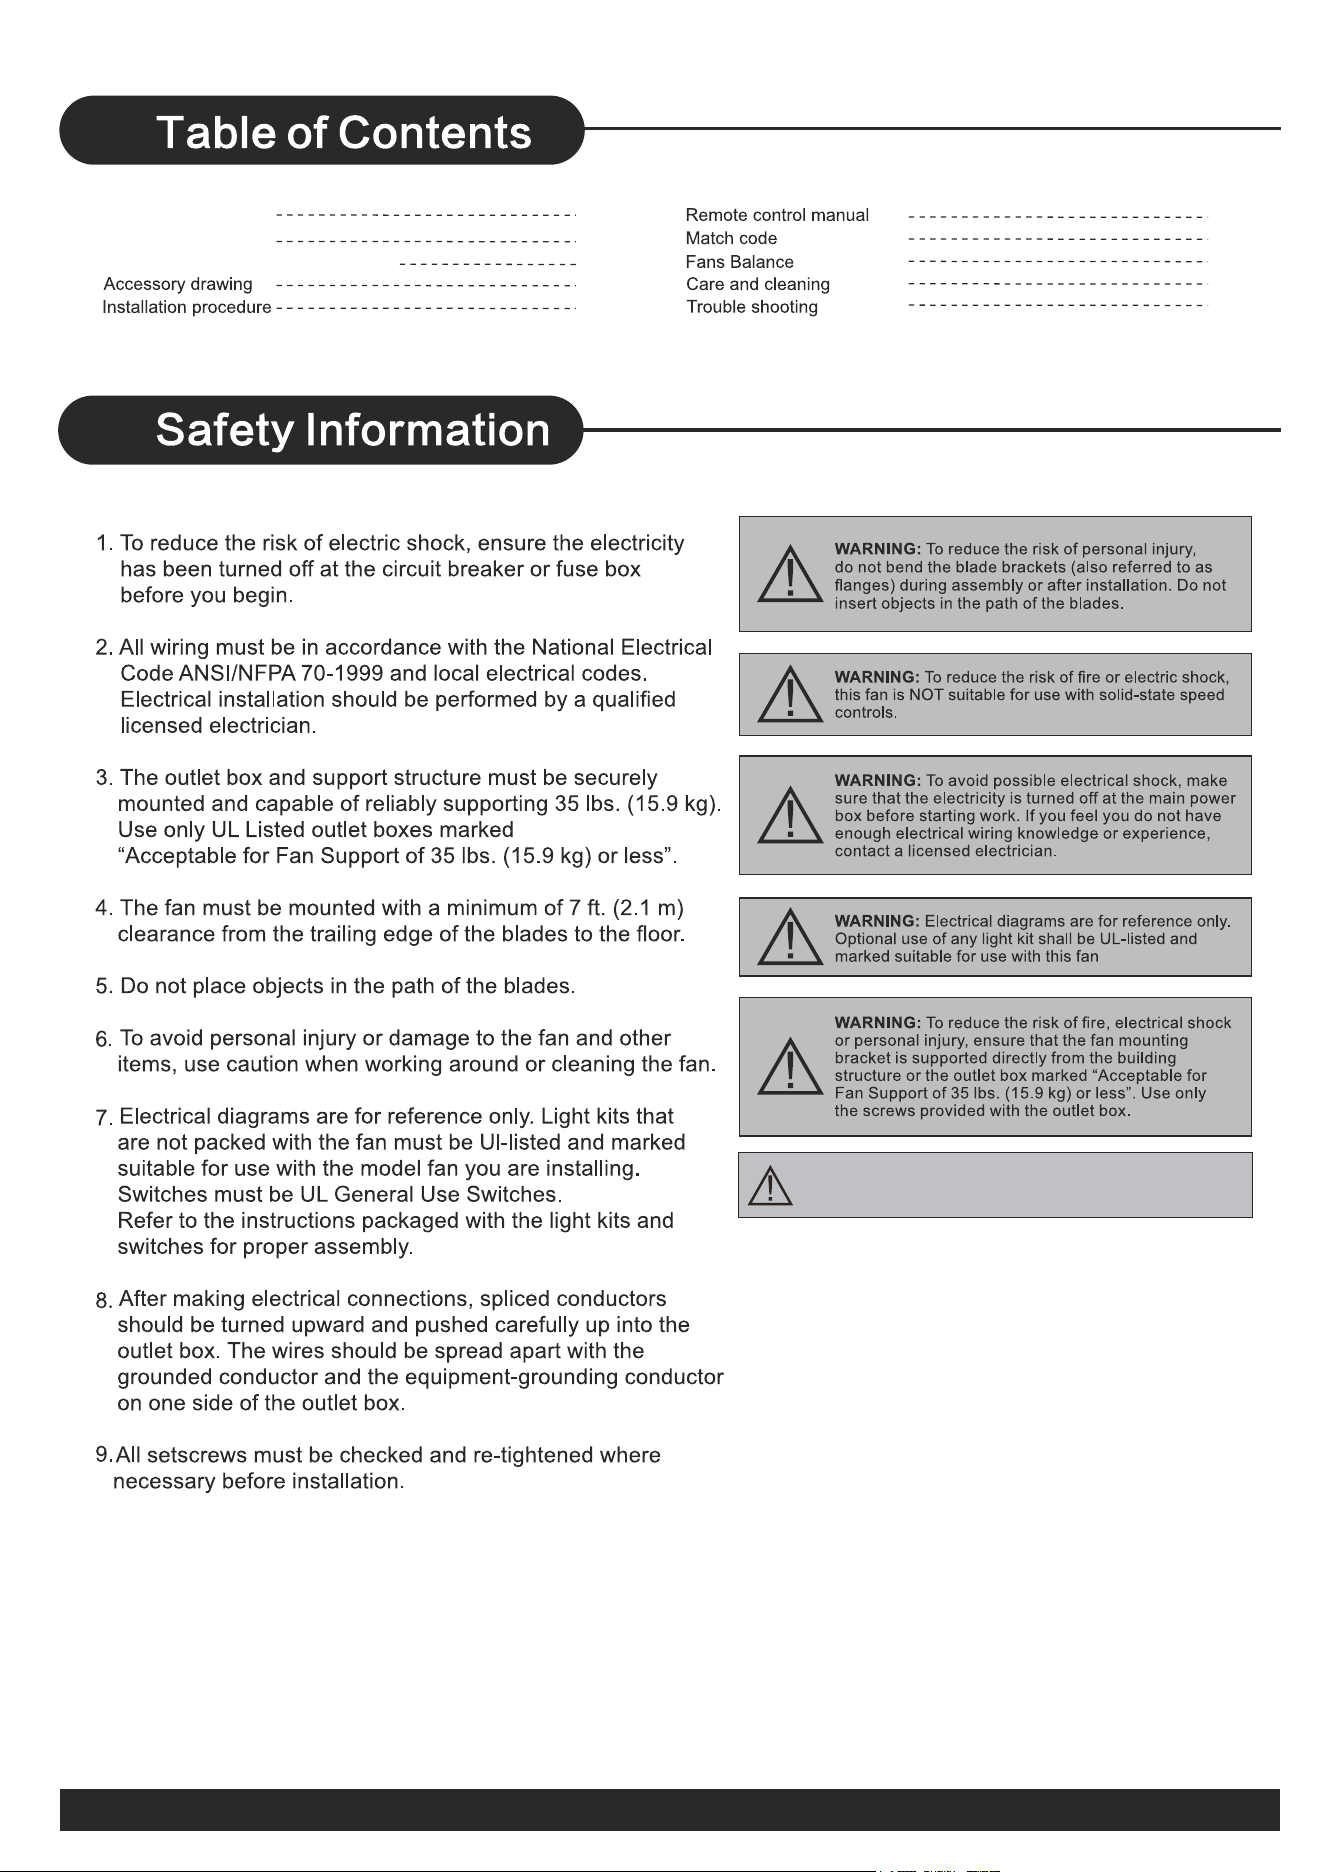
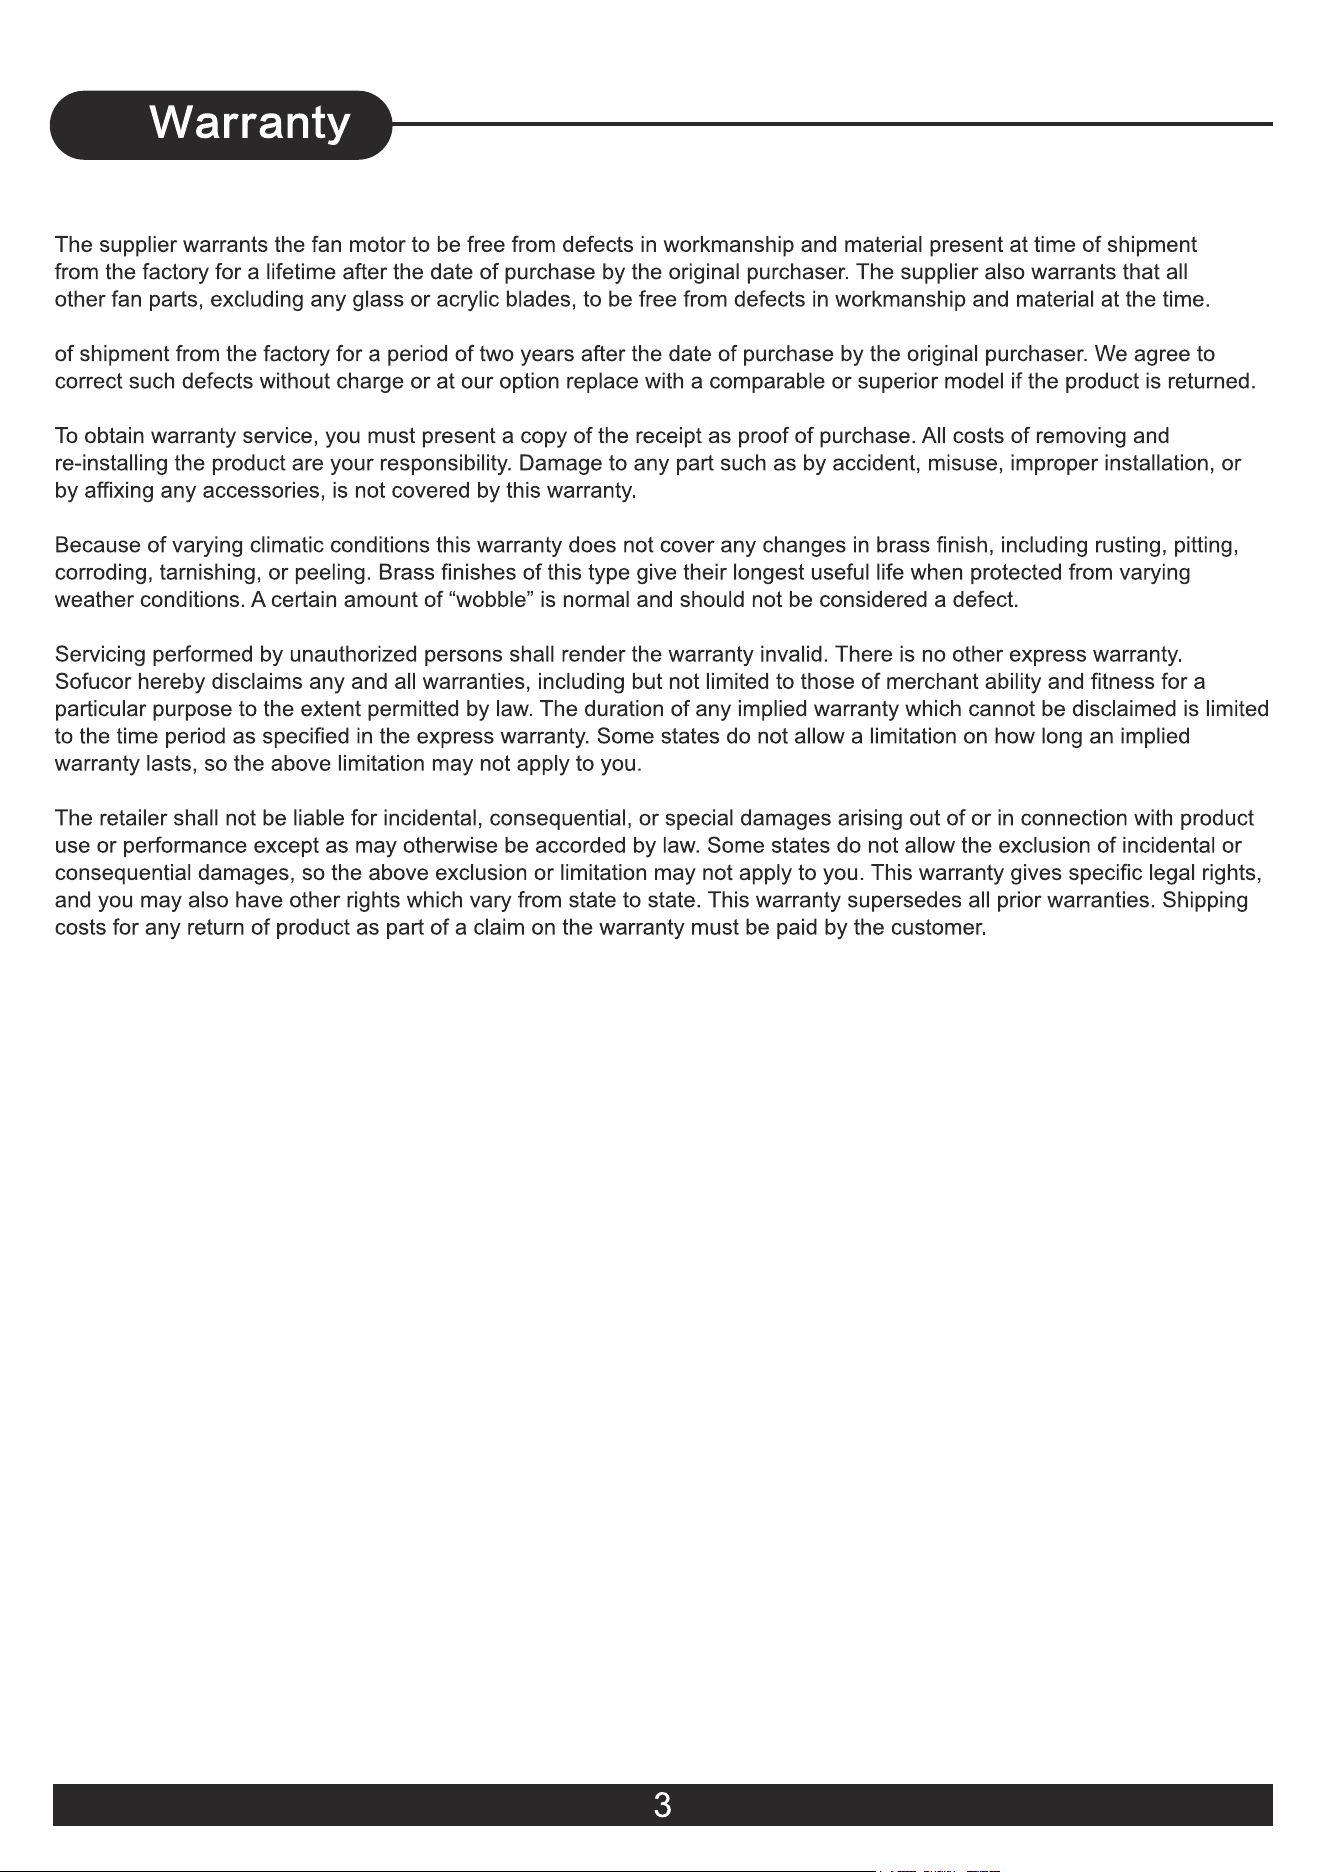
Safety Information
Warranty
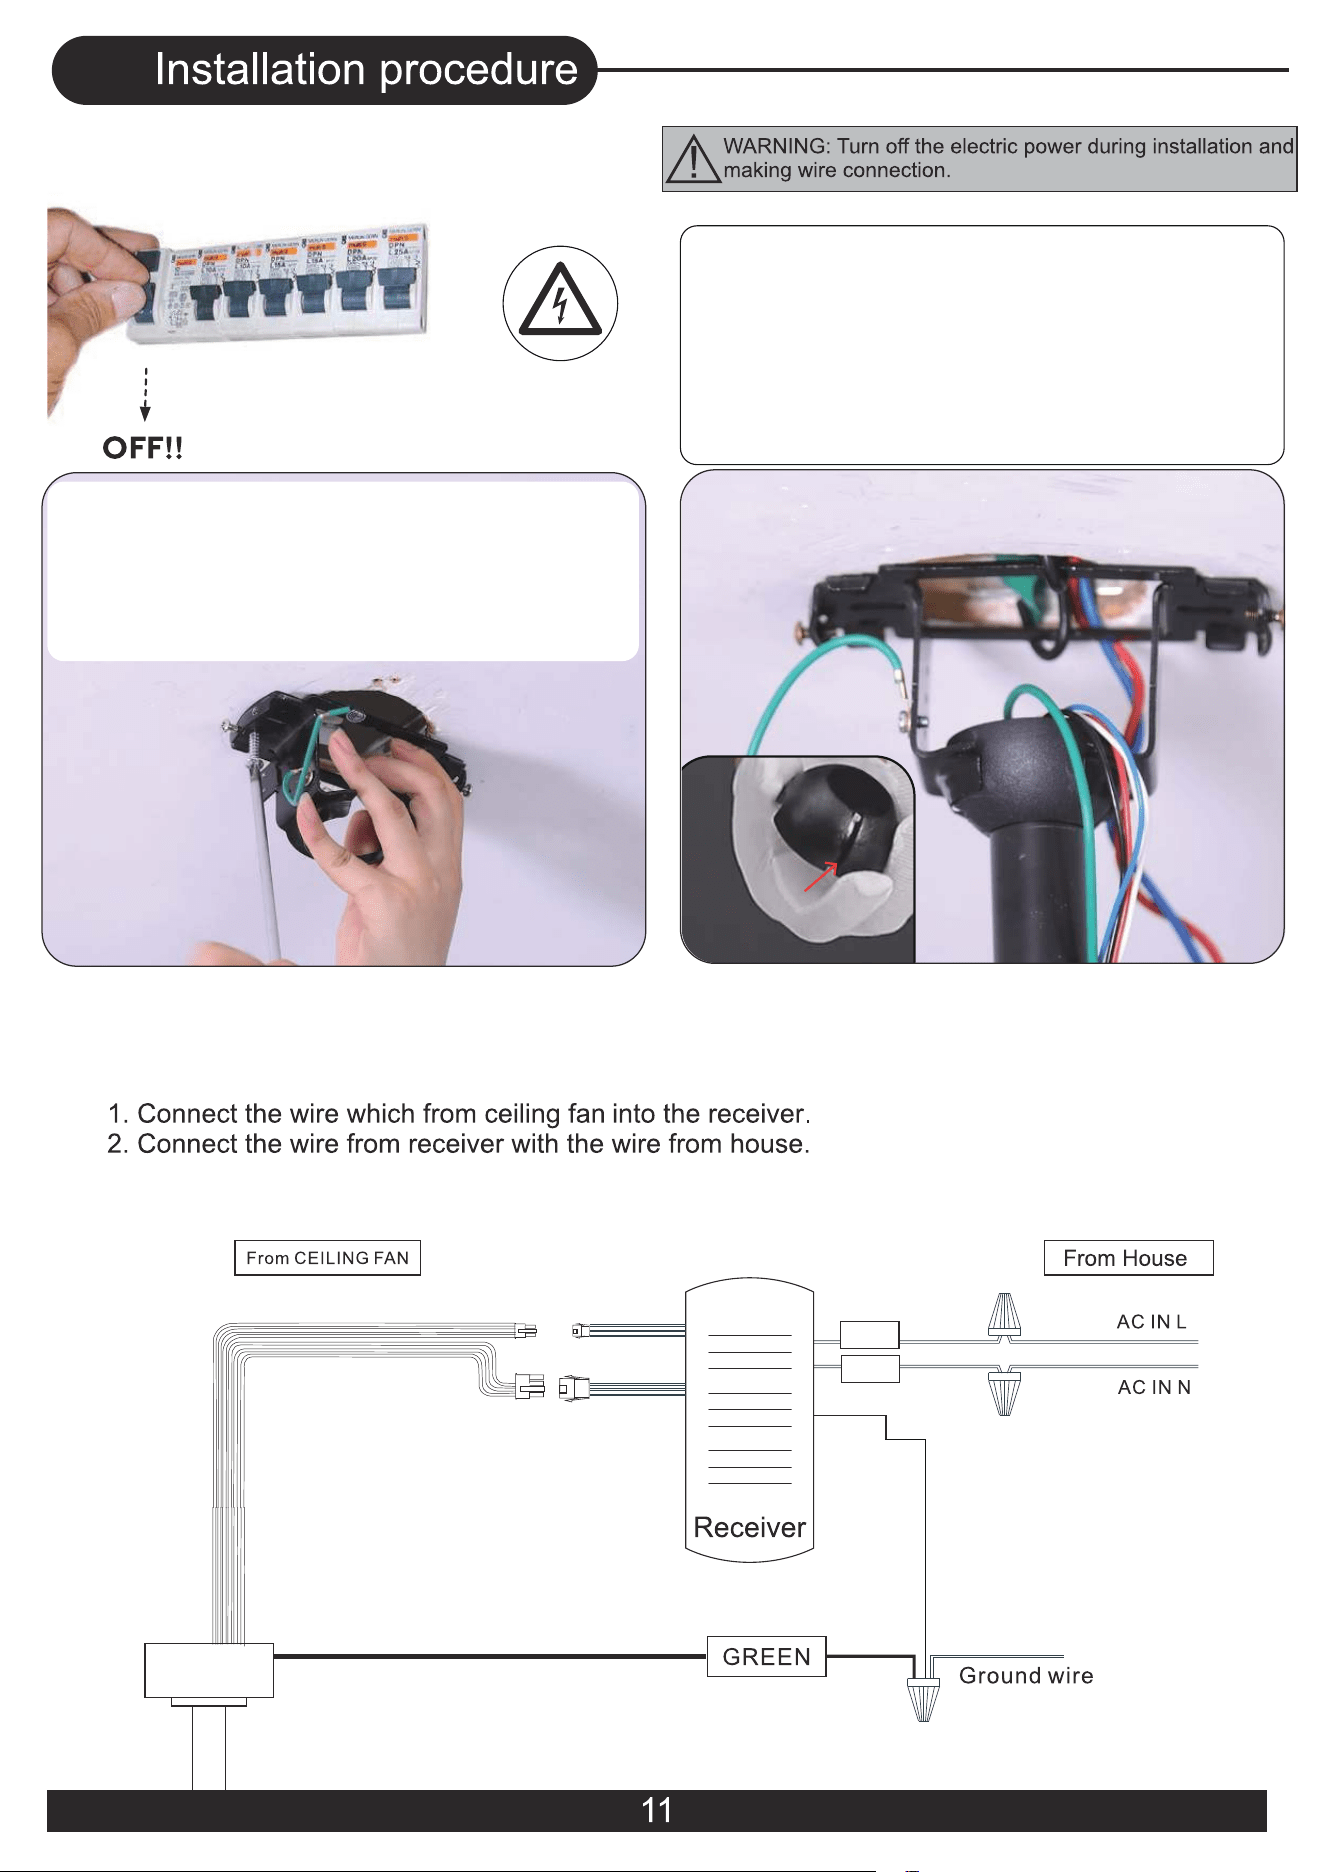
Warning: Do not test the fan before affixing the blades. The DC
motor needs a load to rotate properly. Affixing blades and then
testing the fans.
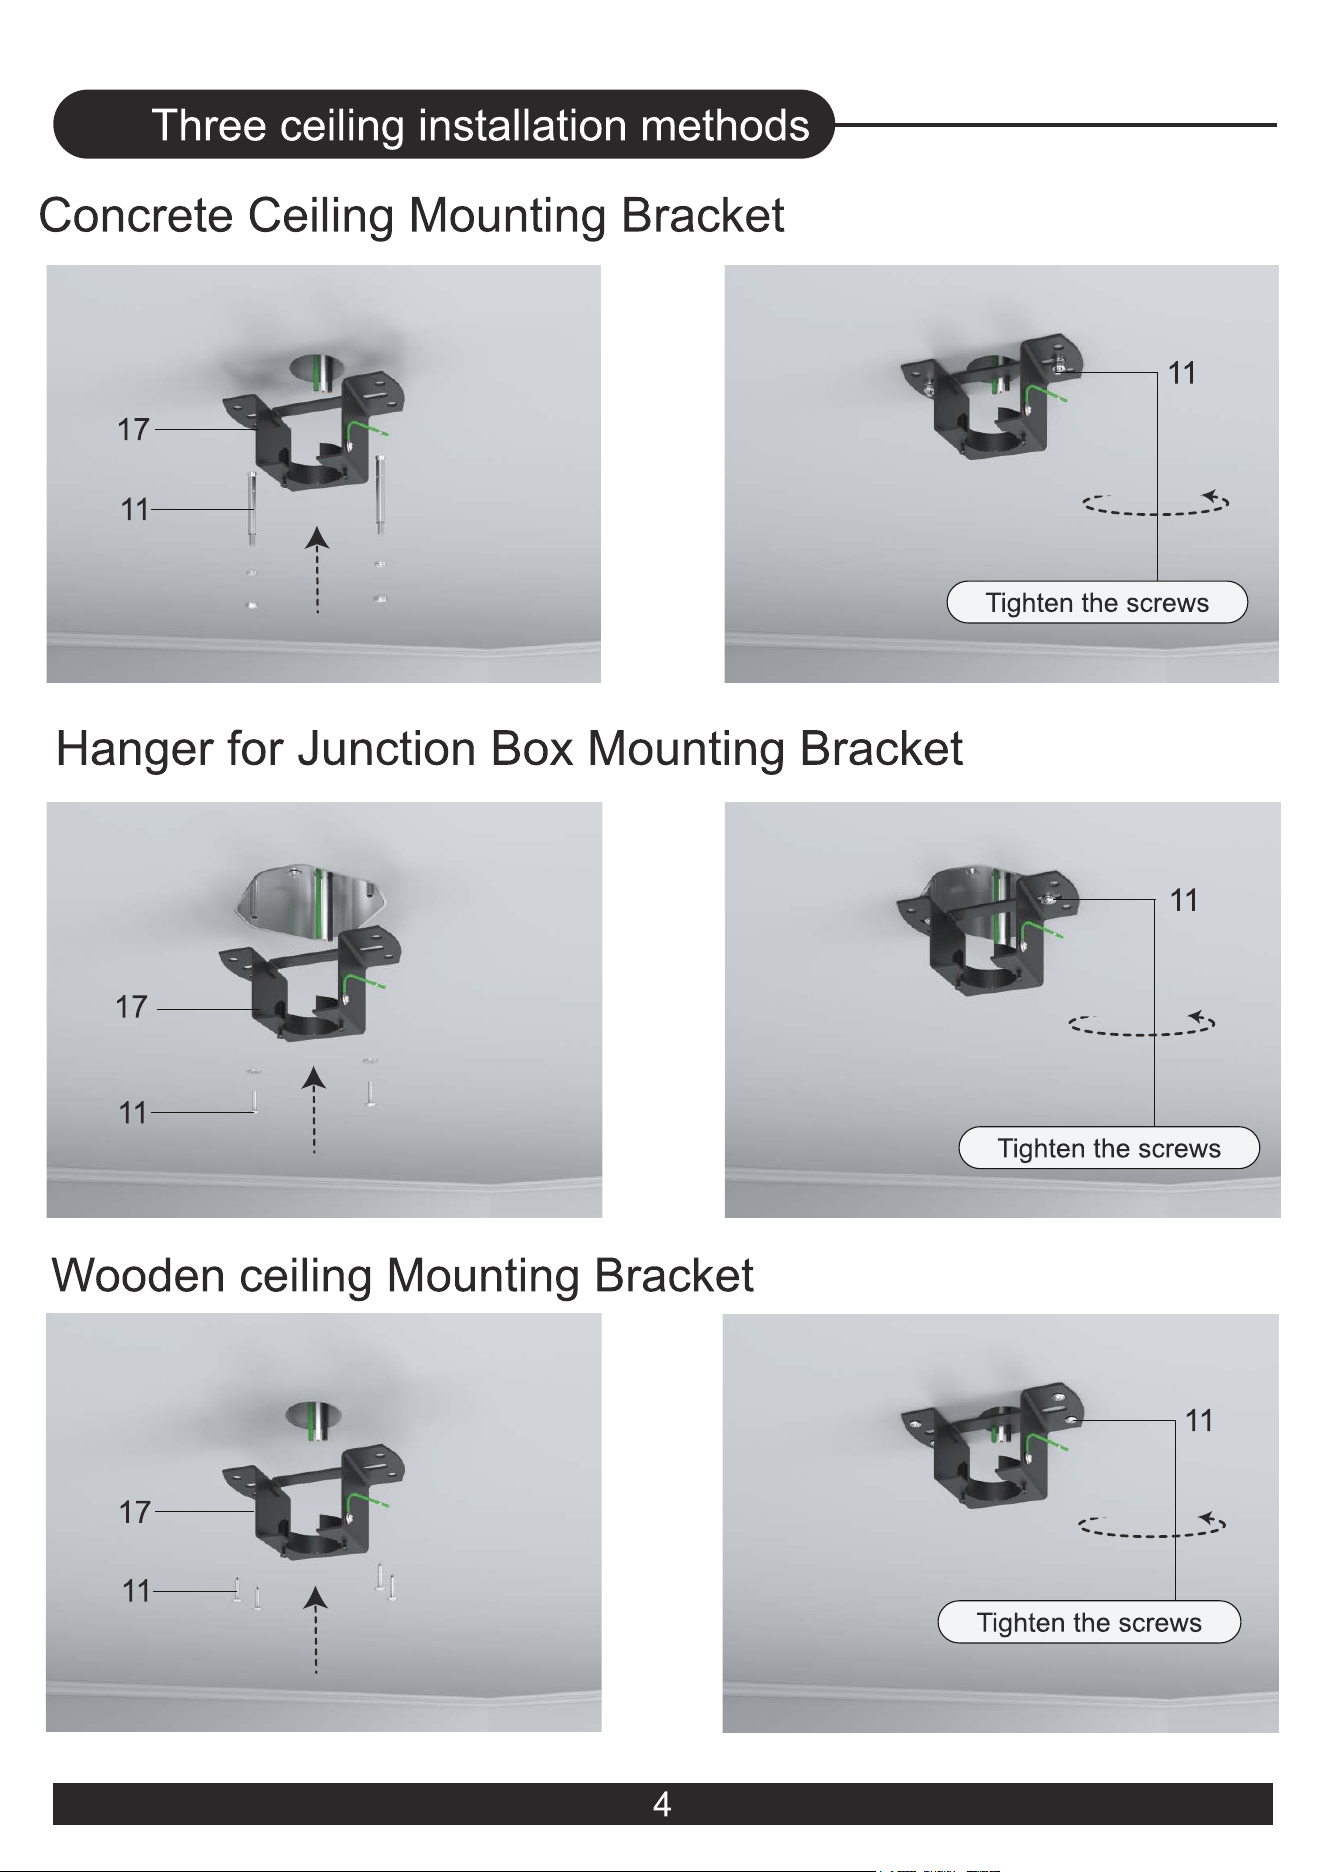
Three ceiling installation methods
03
04
05
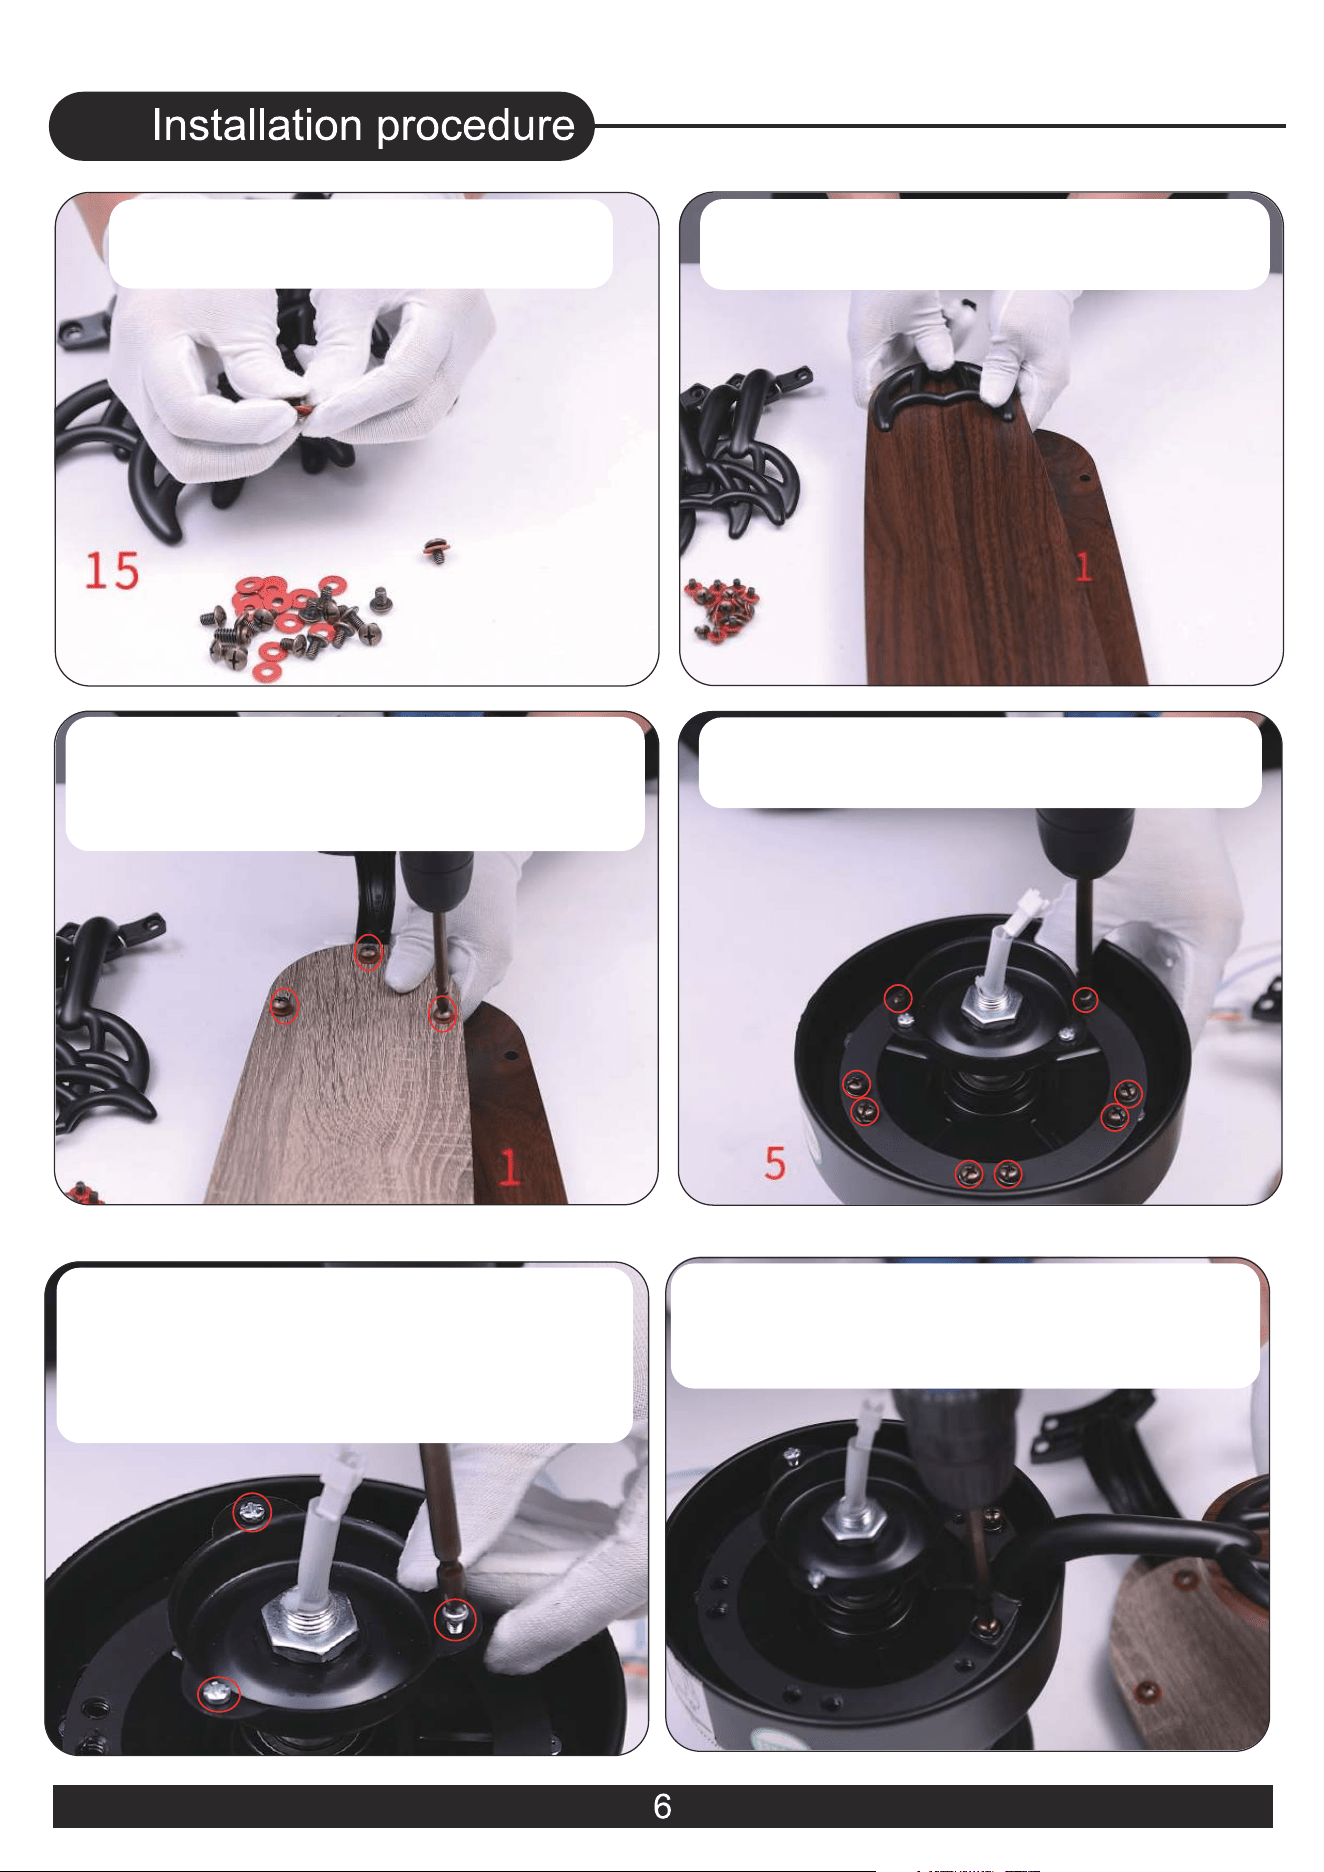
1. Put the screw washers
on the screws
6. Attach the blades using the ten
blade screws and tighten the
blade screws
4. Remove the ten blade screws
on the motor
3. Insert the blade screws into
the holes and tighten each blade
screw
06
2.Put the blade arm onto one
blade and align the holes
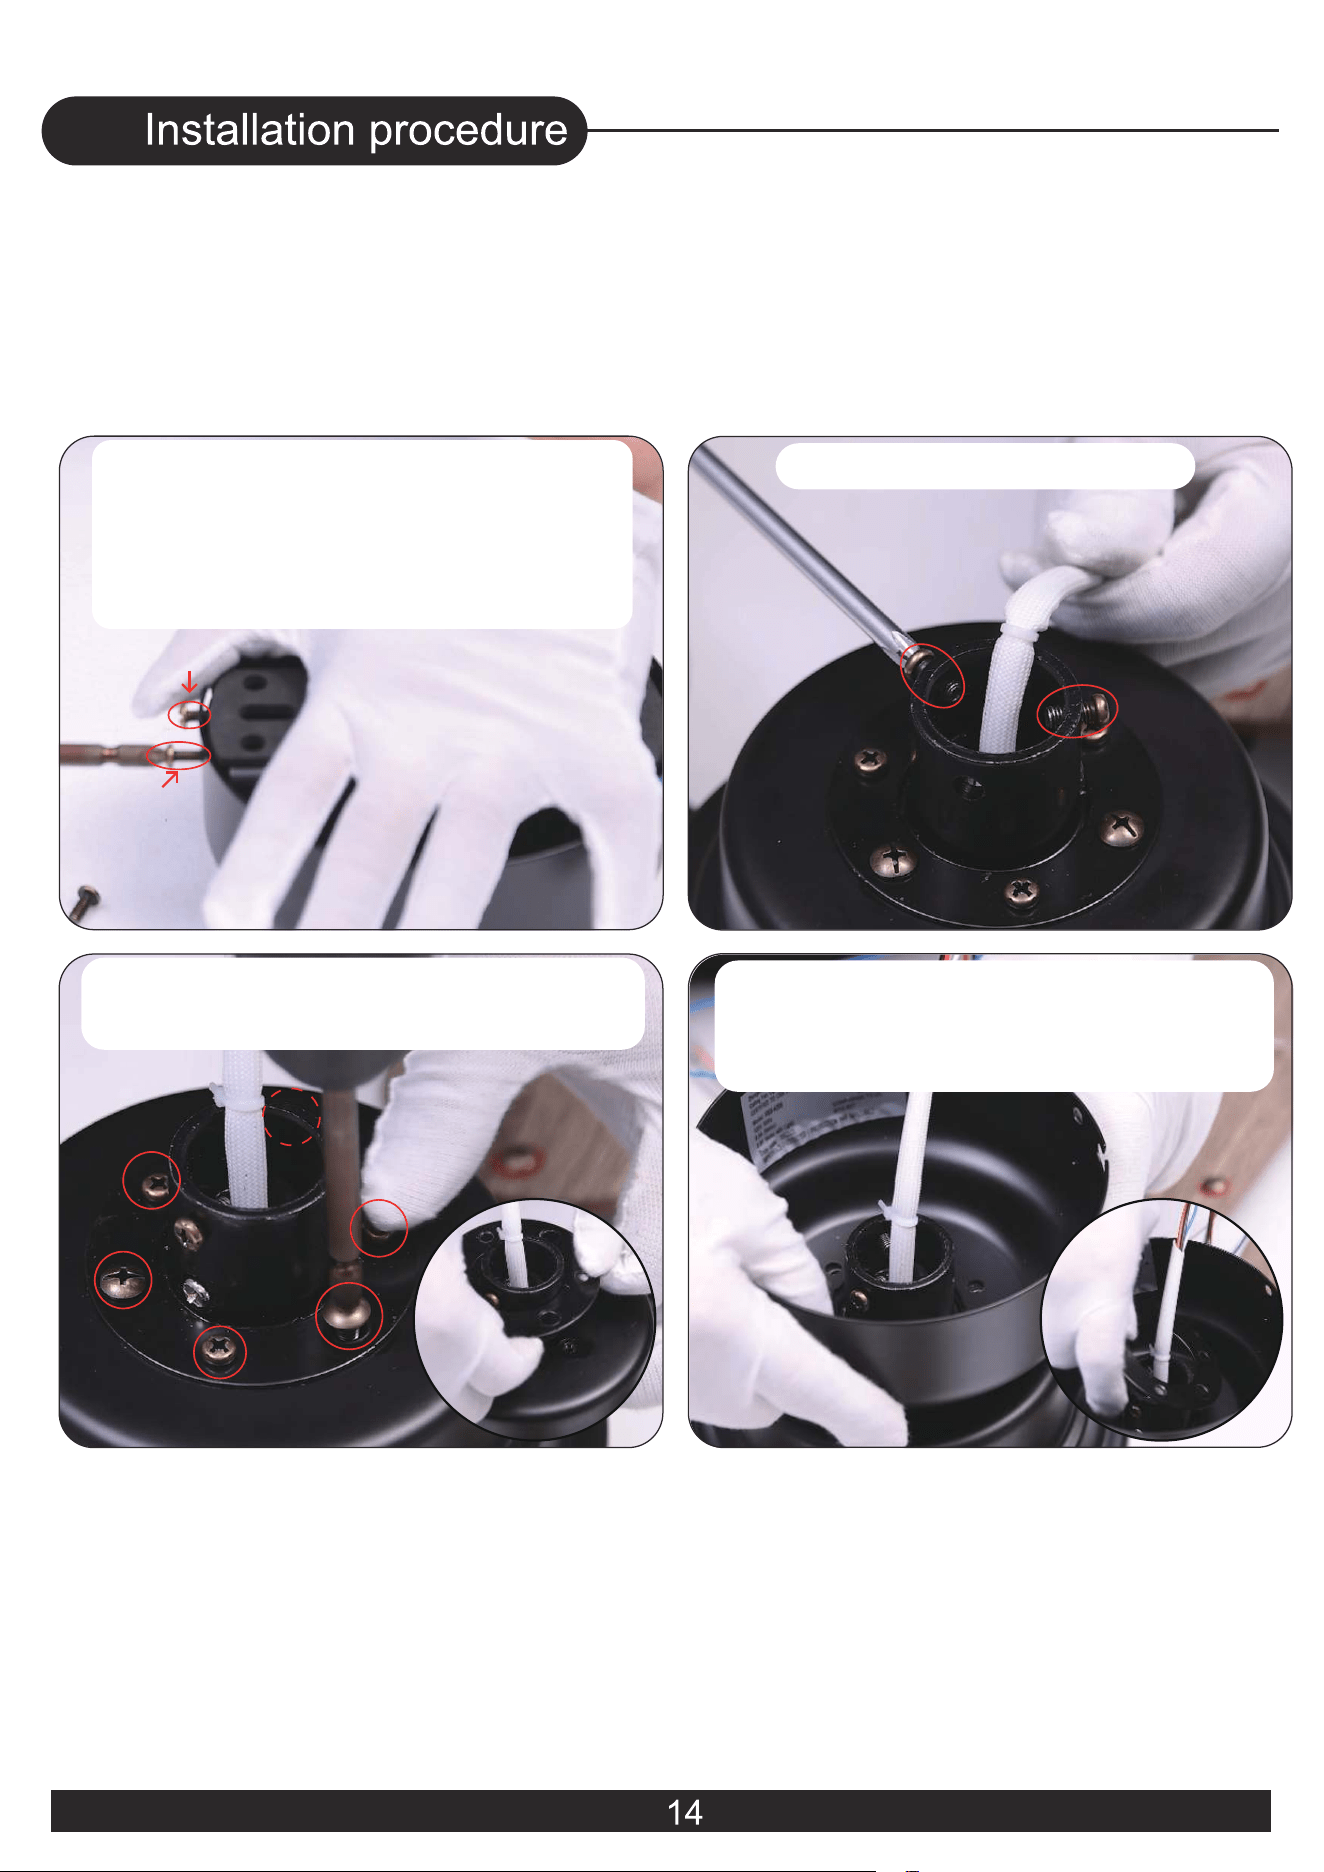
5. Remove the first light kit screw
and loosen the two light kit
screws pre-locked on the motor
(They will be needed later.)
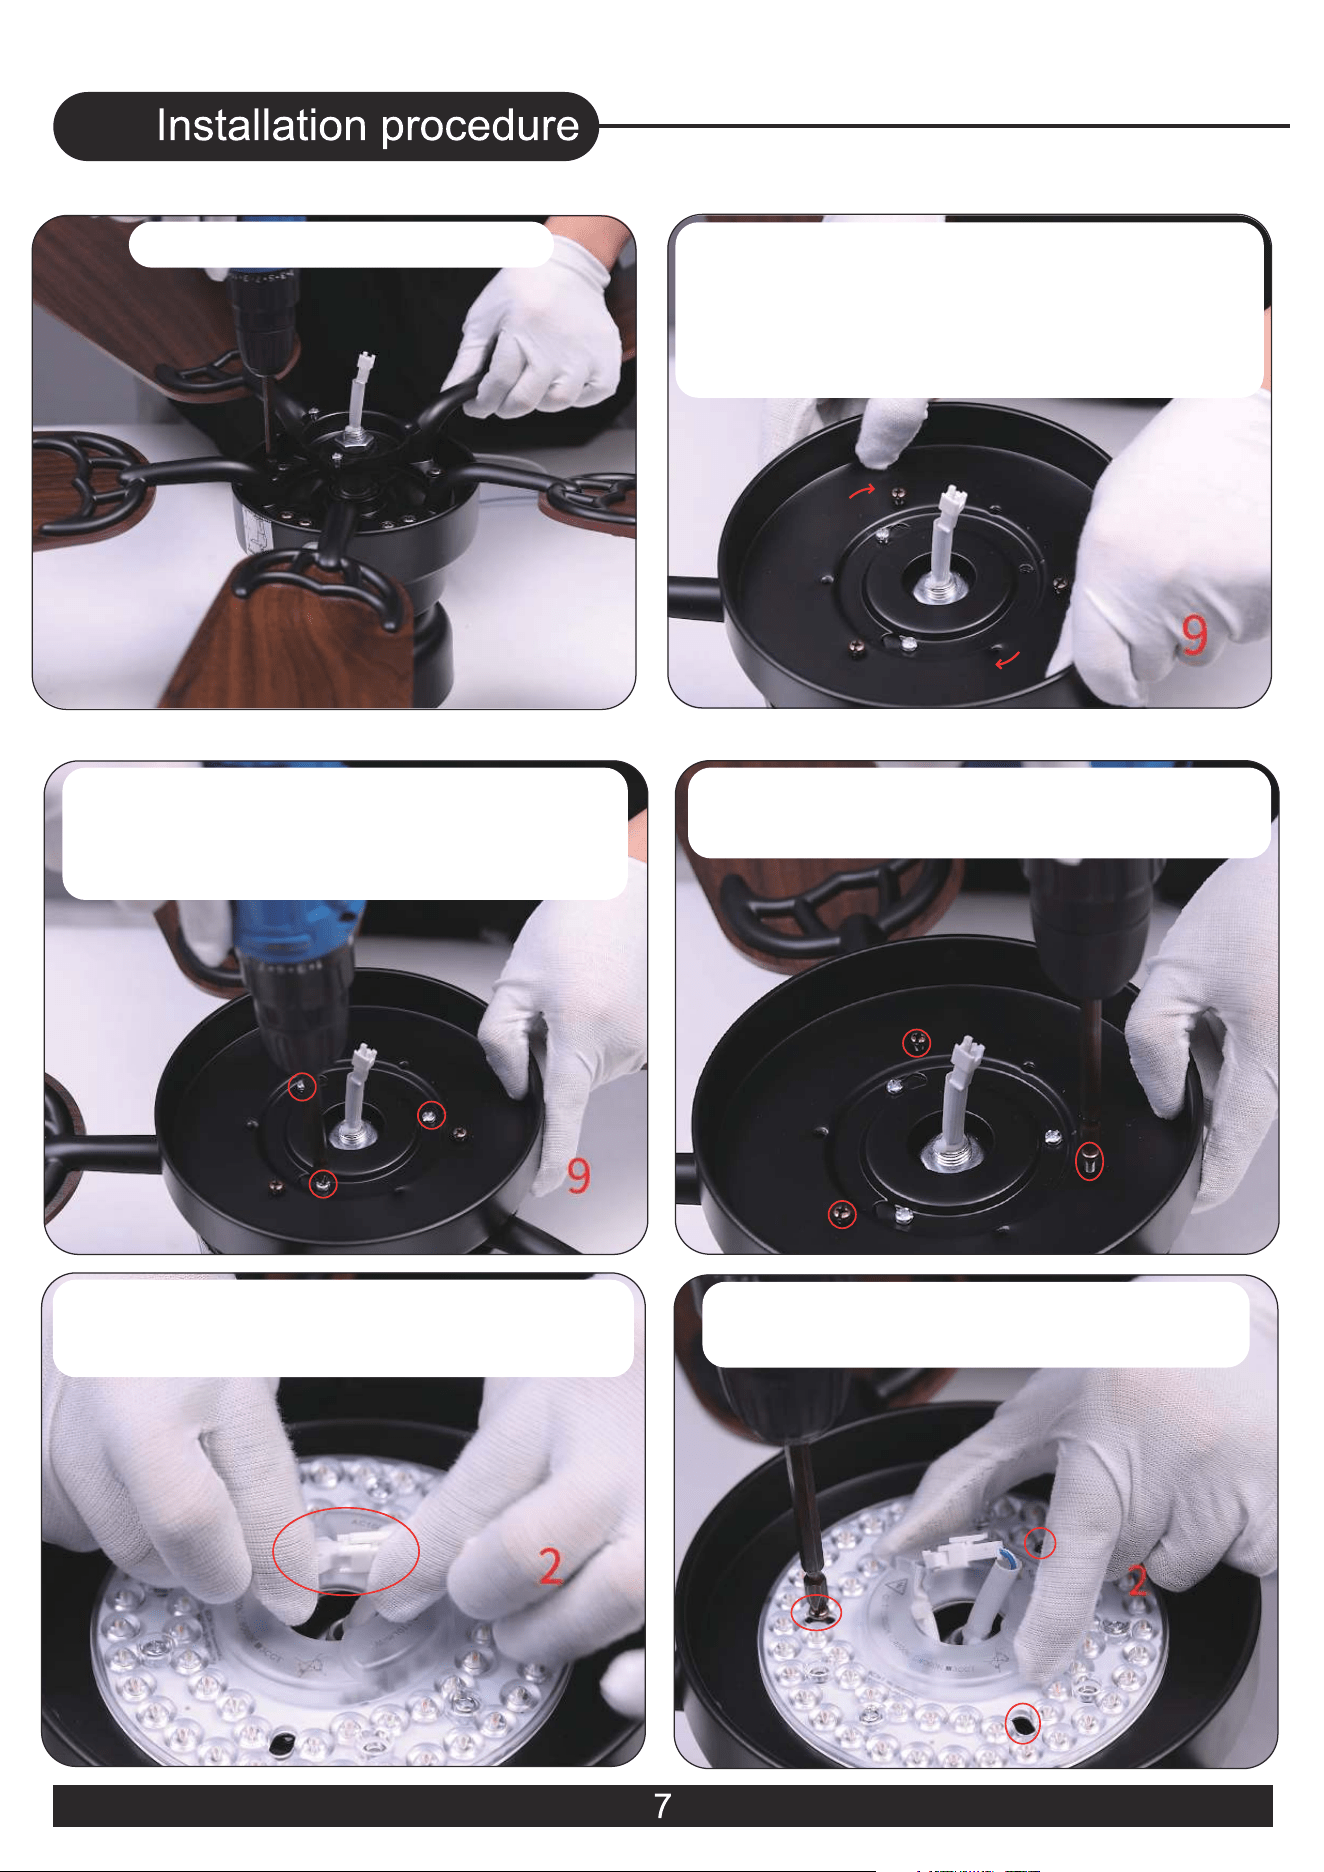
9. Insert the third light kit screw,
and then tighten all three light
kit screws
8. Feed the wire plugs through the
center hole. Wrap keyhole slots
around the screws and
twist clockwise
7. Install all the blades
06
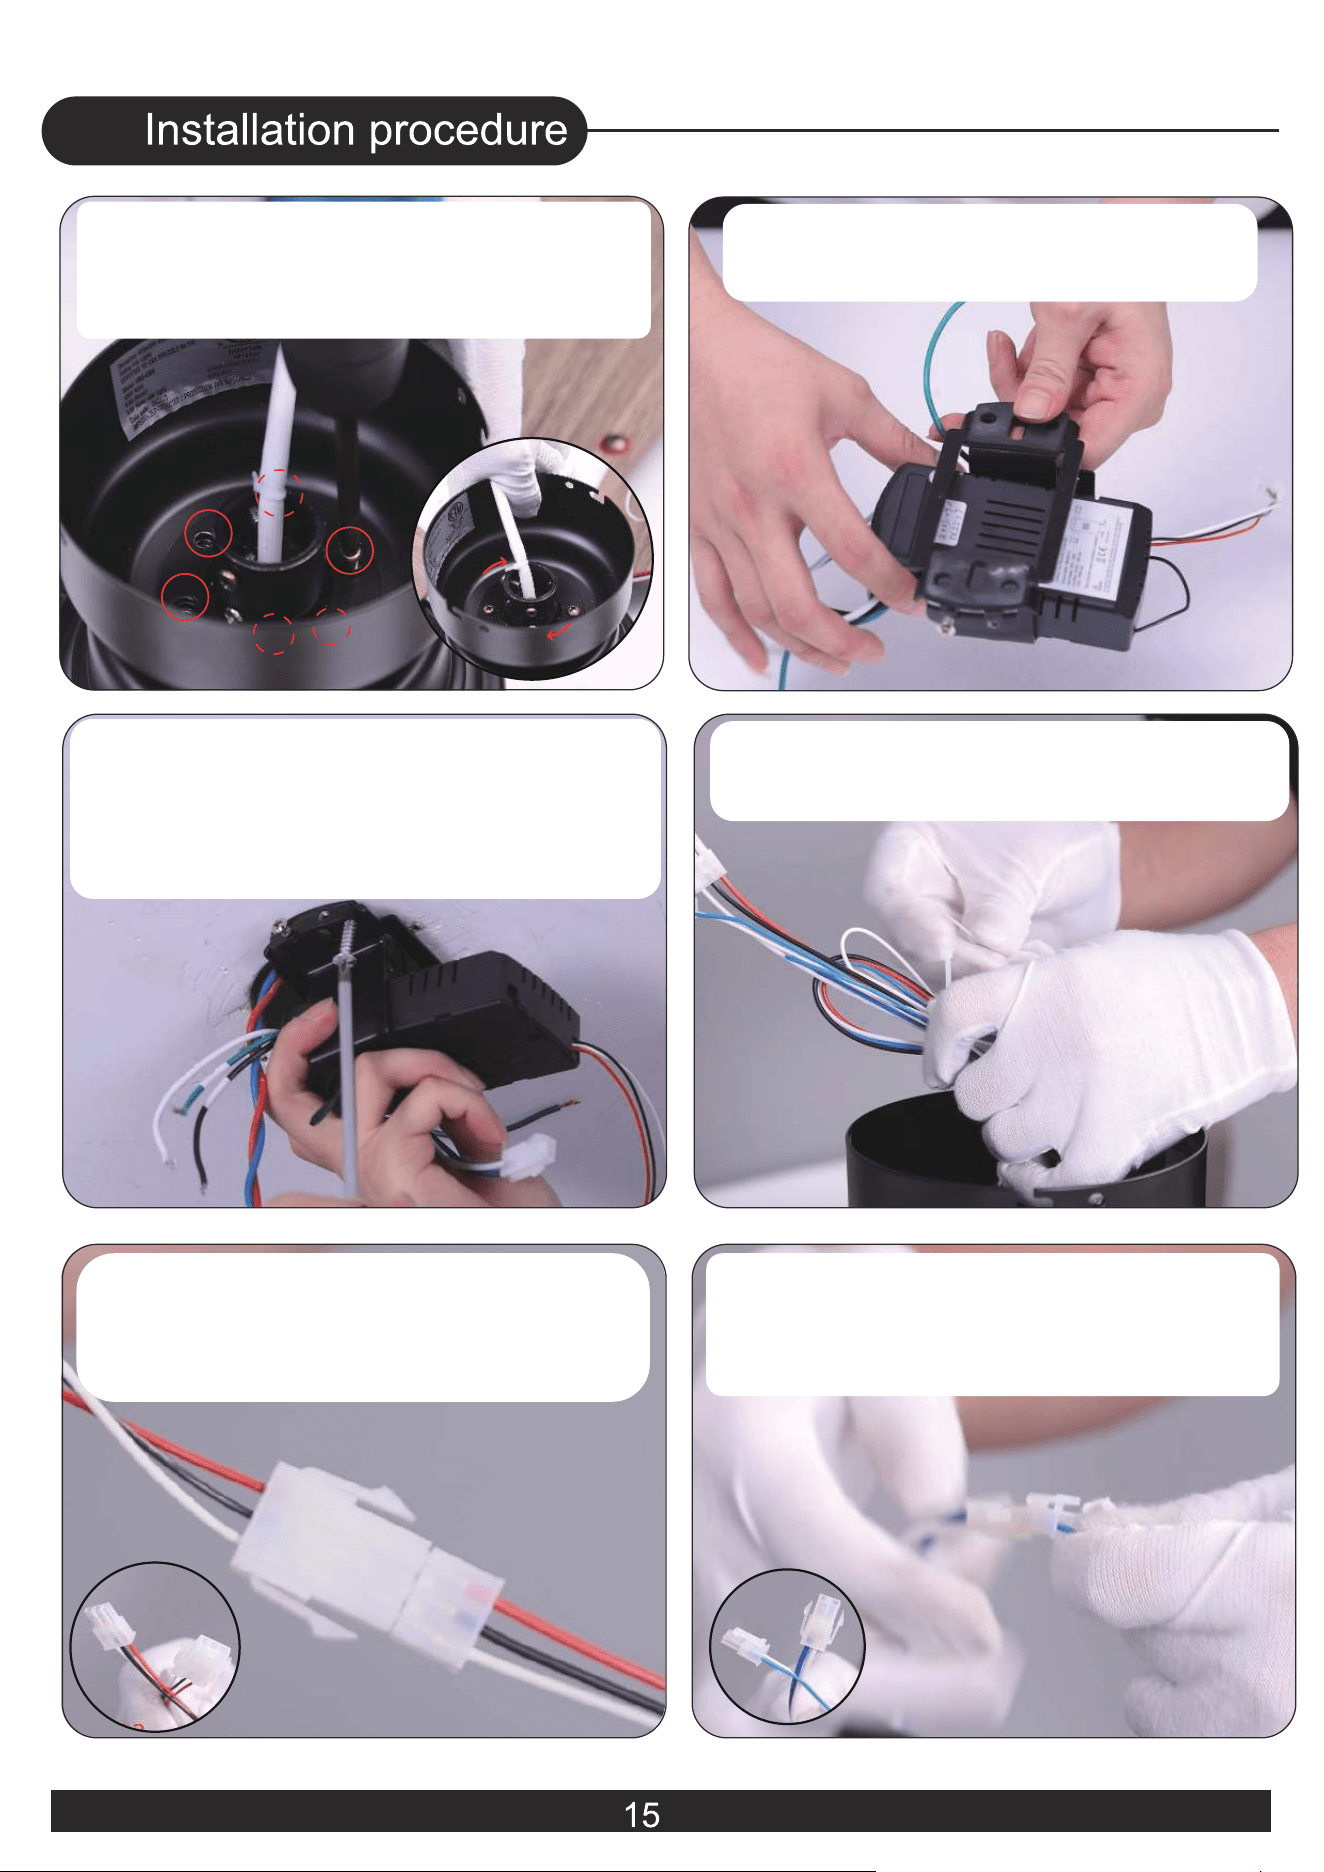
10. Remove the three light kit
screws on light plate
11. Connect the light source with
the wires from the motor
12. Insert three light kit screws,
and then tighten them
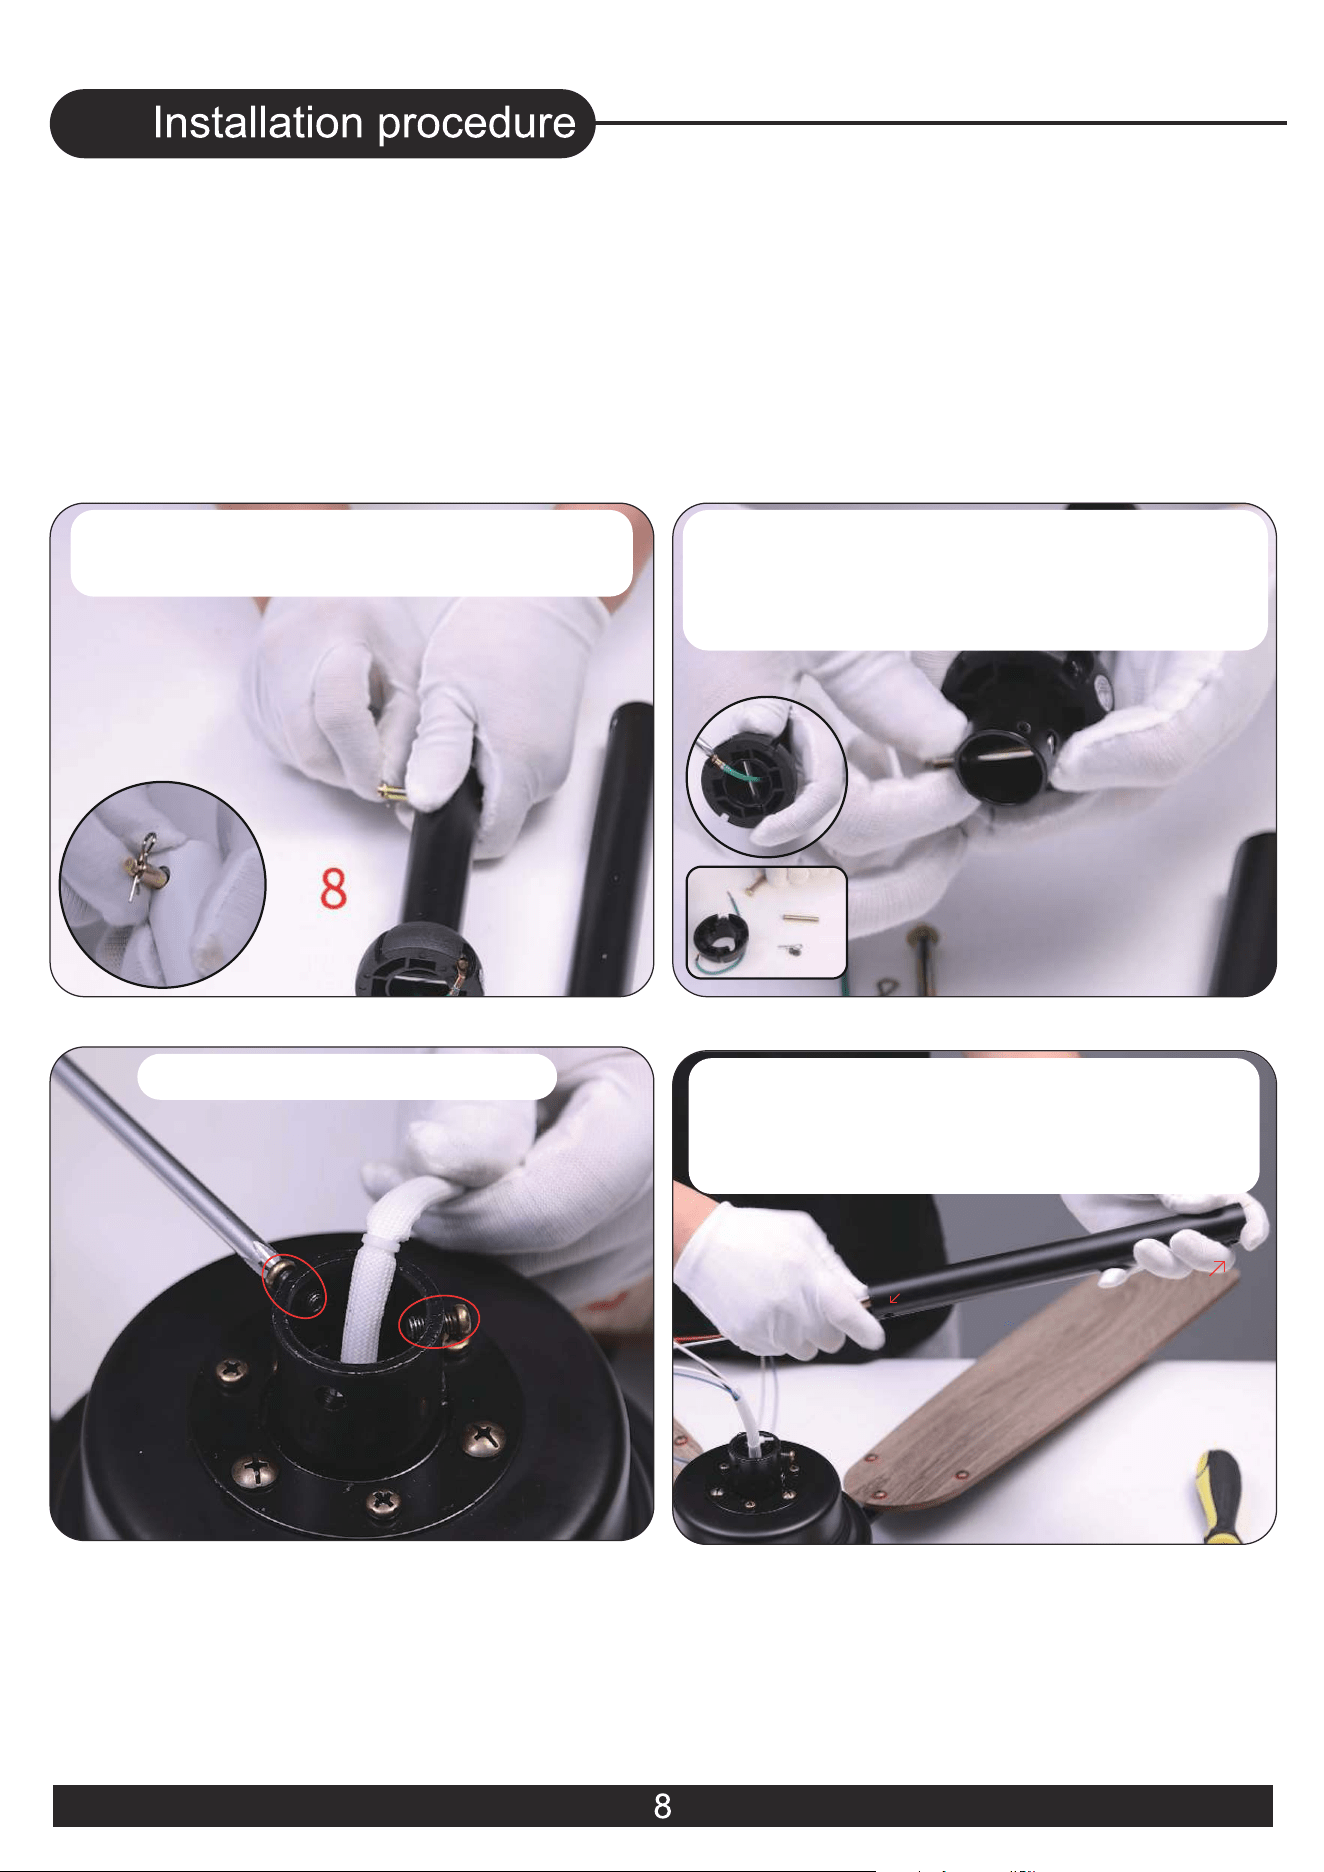
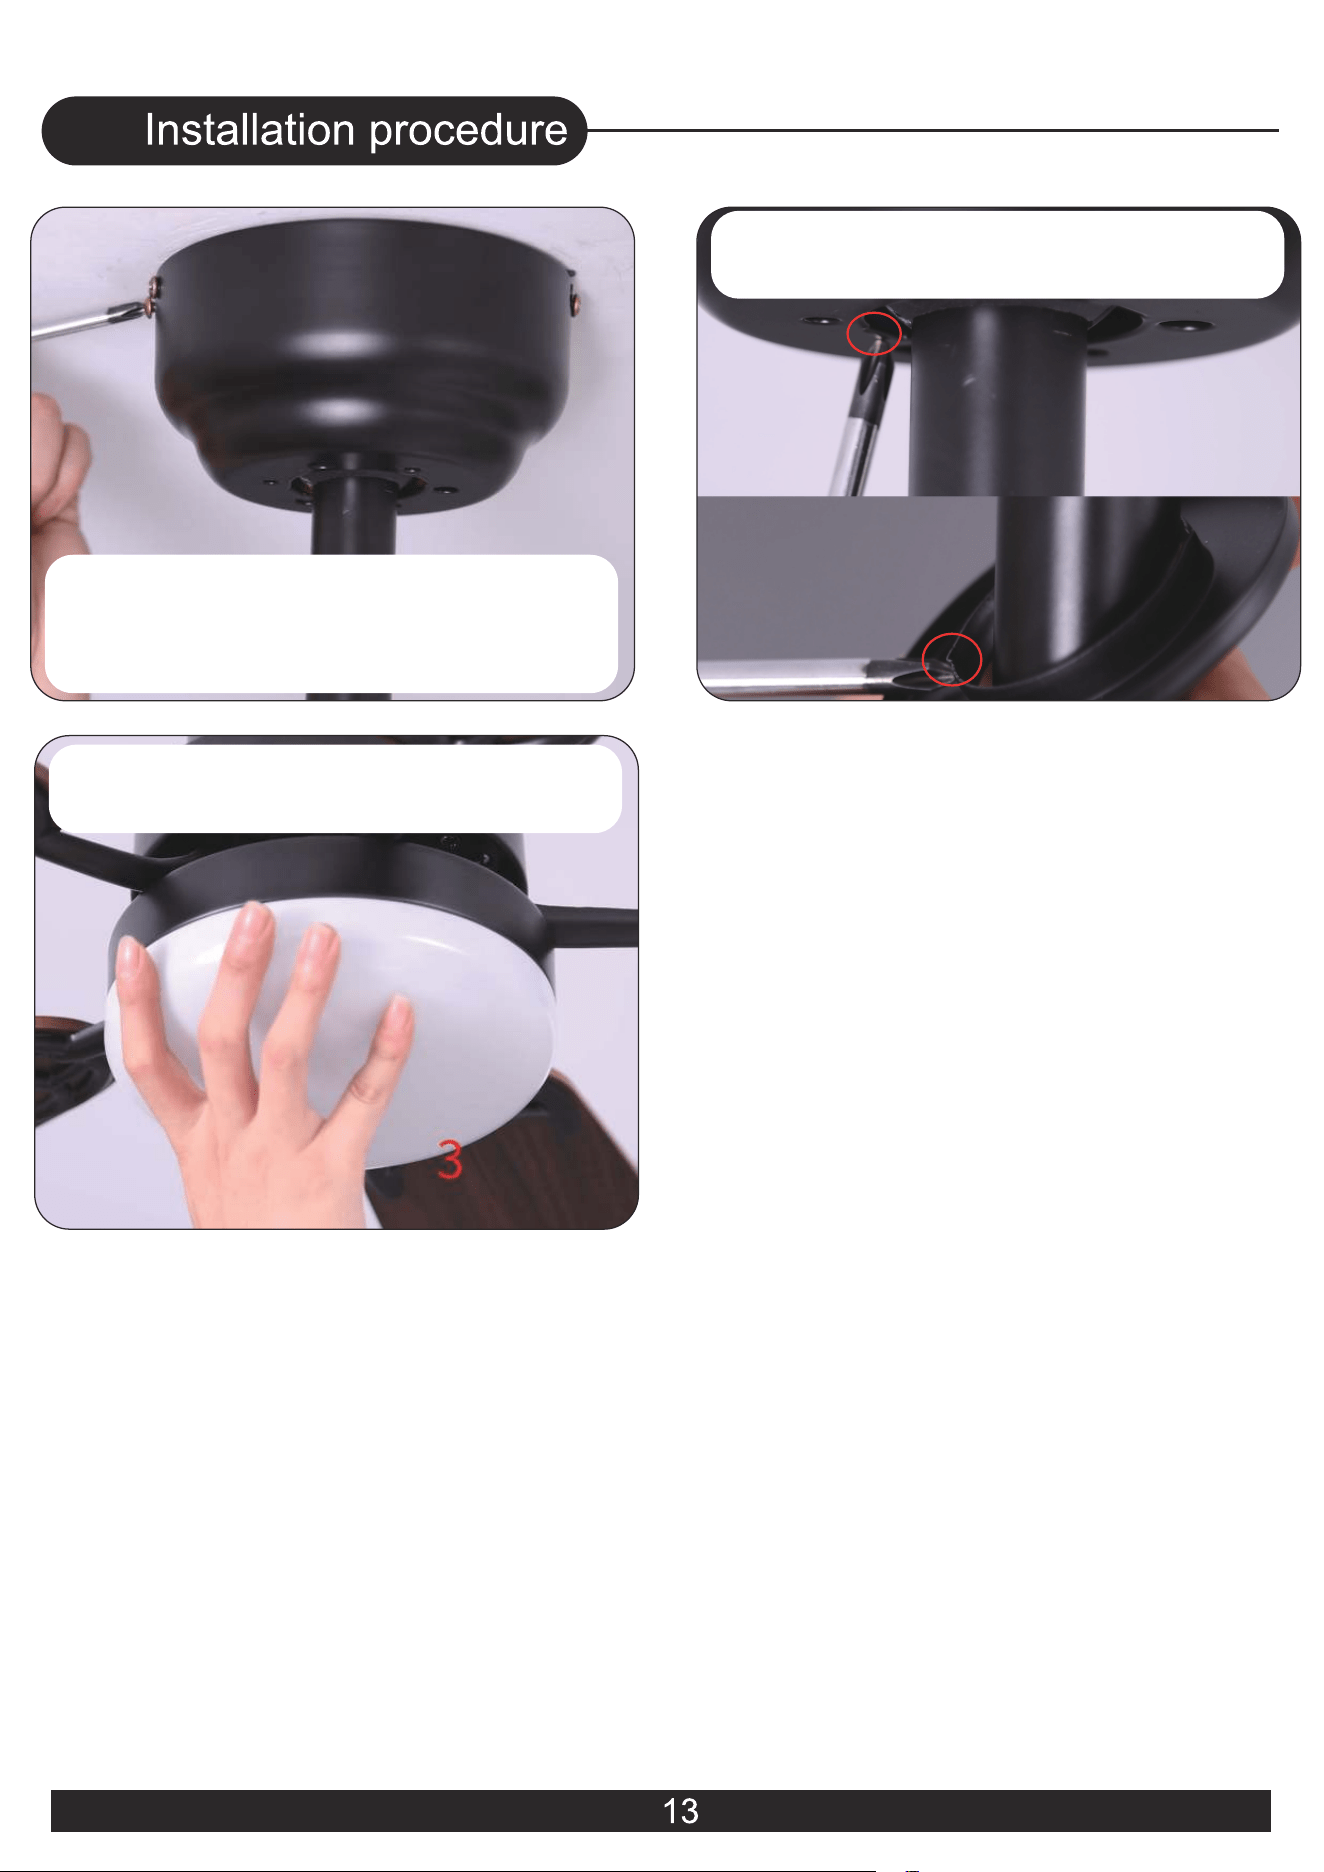
13. Remove the lock pin and the
bolt of the base of the downrod
14. Remove two screws and
ground wire on the hanger ball.
Remove the hanger ball and bolt
06
15. Loosen the screws.
If you want a ceiling fan with downrod, please follow this step.
If you want a low profile ceiling fan, please skip to page 14.
01.Downrod installation method
16. Select one downrod and pass
all motor wires through the
downrod
2 holes
3 holes
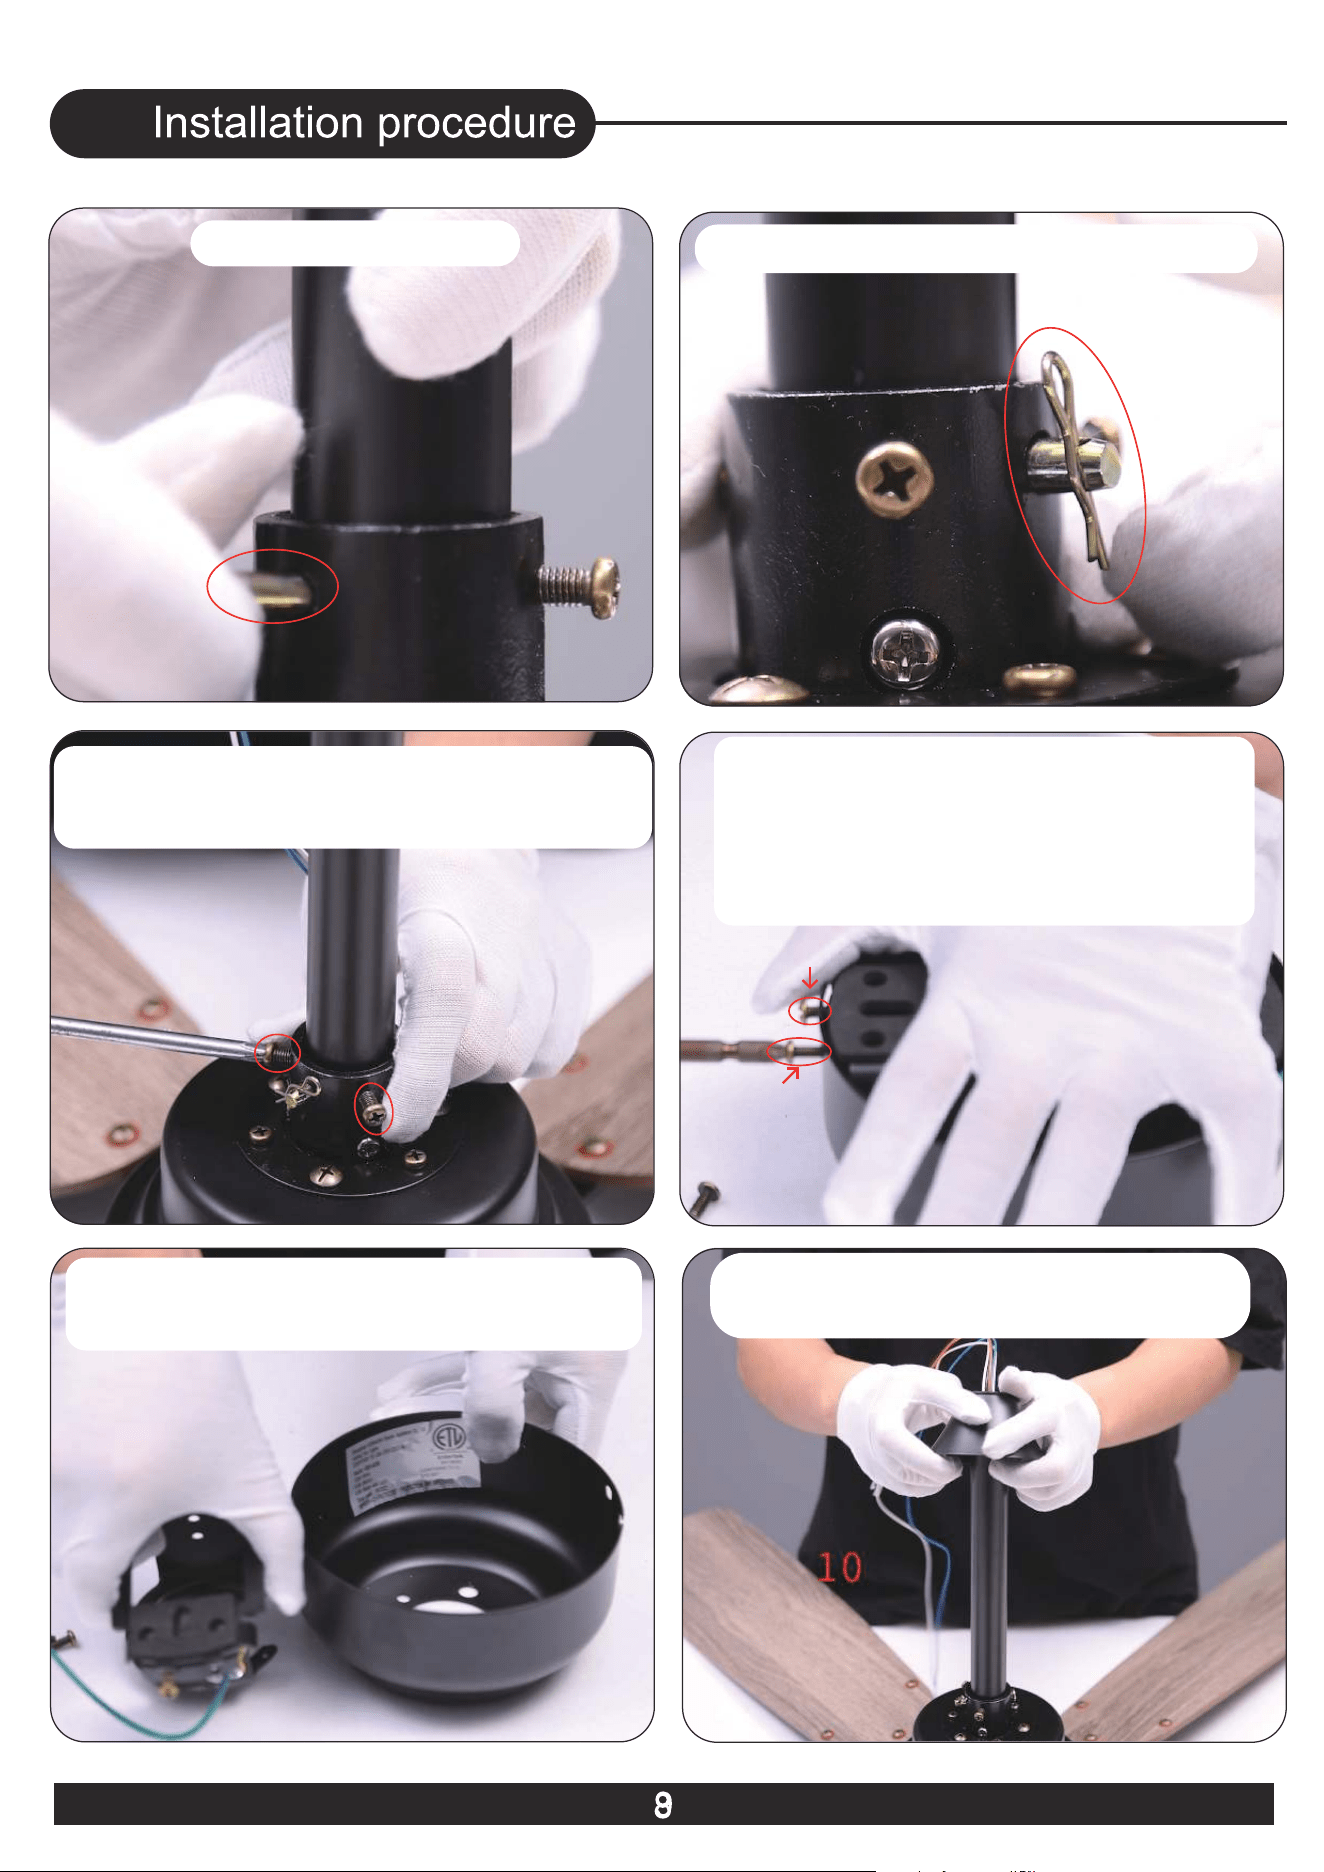
17. Insert the bolt
18. Fix the bolt with the lock pin
19. Tighten the 2 screws to prevent
fan shaking during operation
remove
loosen
06
21. Remove the ceiling bracket
from the canopy
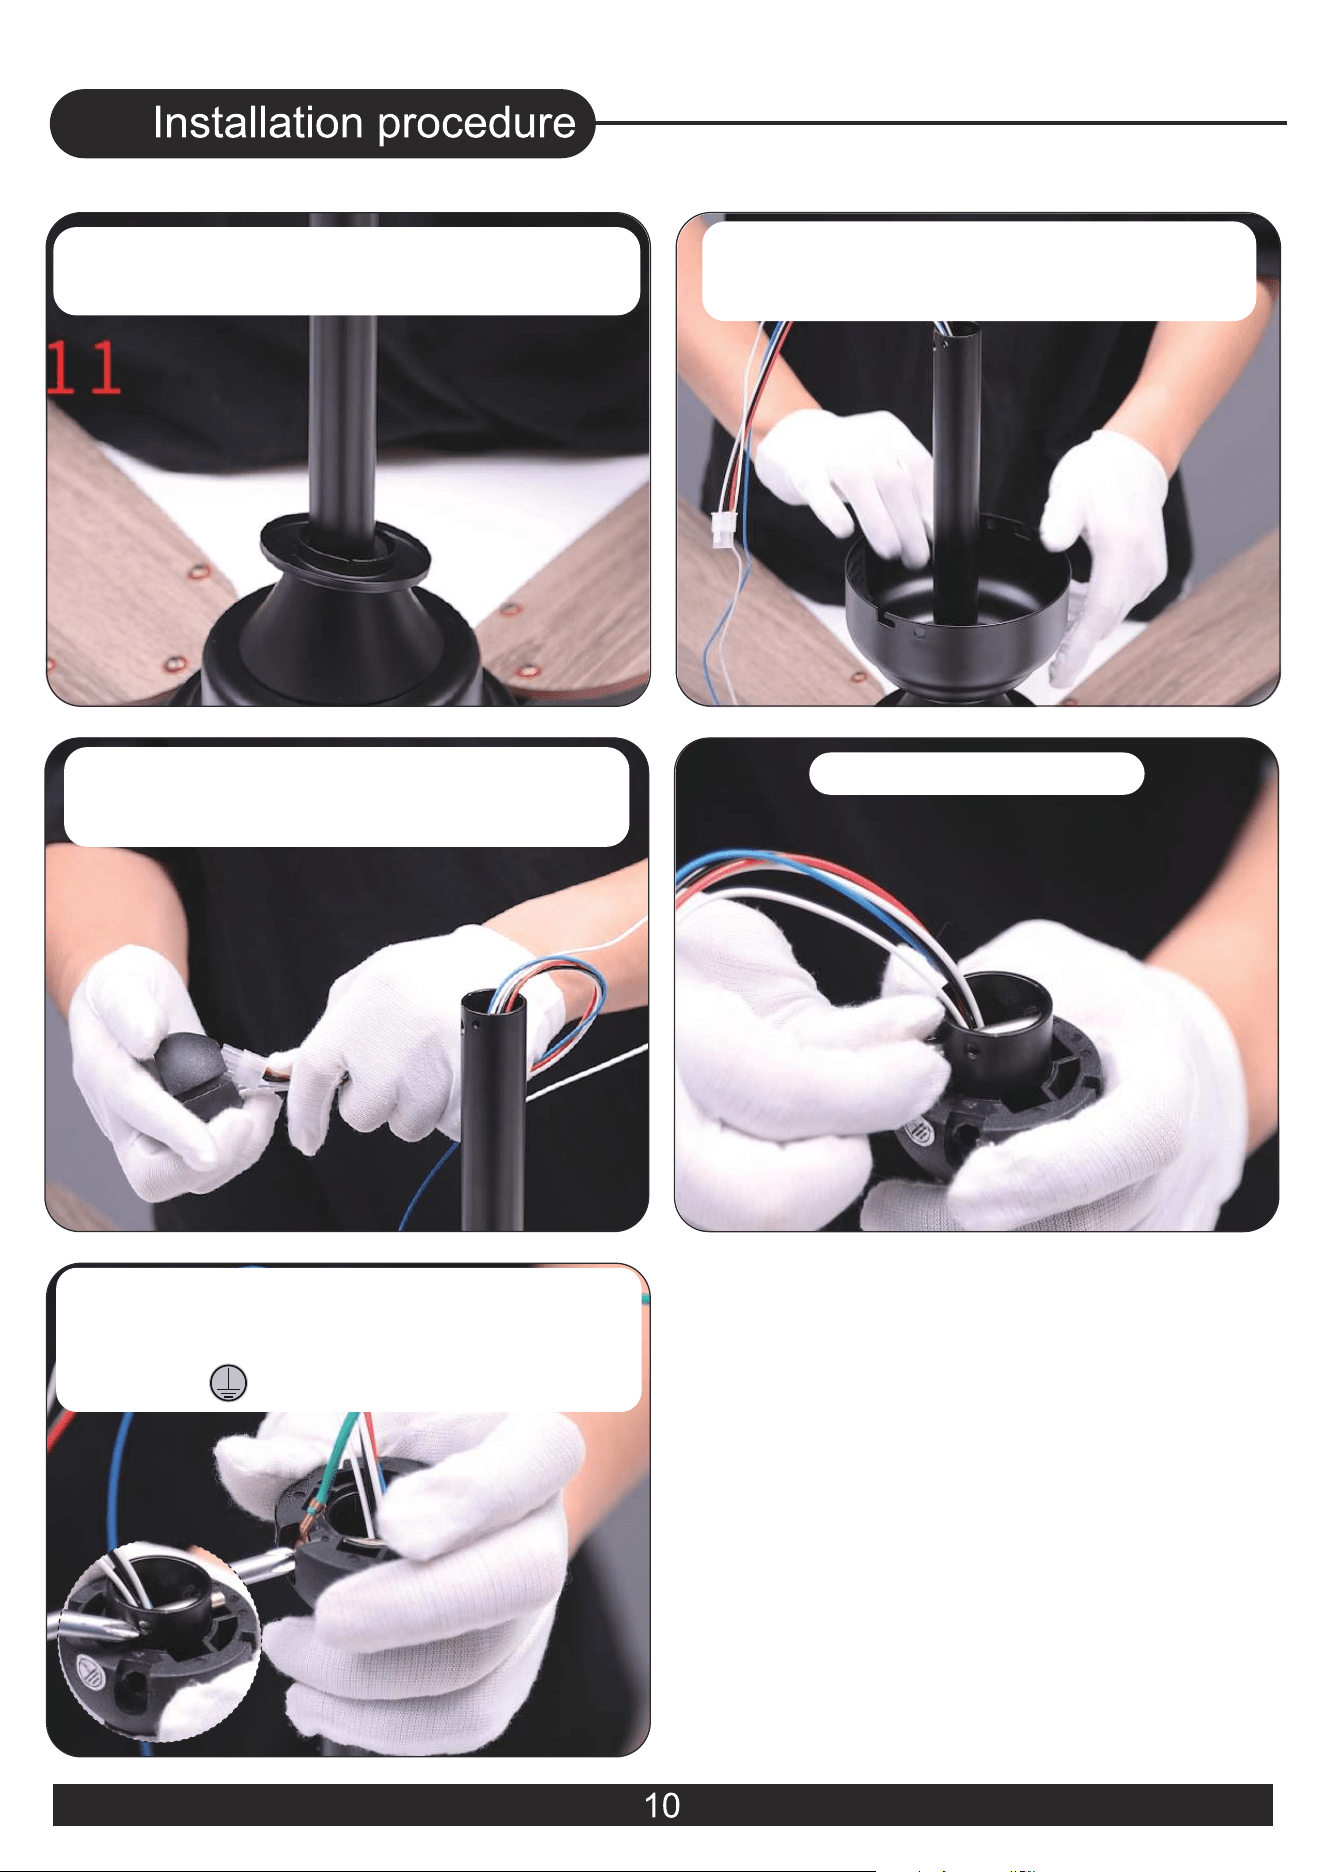
22. Put the decorative cover
through the downrod
20. Remove the non-slotted
canopy mounting screws, and
loosen the slotted canopy
mounting screws.
06
27. Fix the green ground wire
with screw. Align the screw hole
(labeled ) and tighten the screw
26. Insert the bolt
23. Put the canopy cover through
the downrod
25. Put the hanger ball through
the downrod
24. Put the canopy through the
downrod
06
Black
White
fixation slot
29. Place the downrod ball into the
ceiling bracket. Be sure the fixation
slot is locked by the bracket. If not,
rotate the ball until the fixation slot
is locked
28. Install the ceiling bracket with
four self tapping screws.(Is your
ceiling different? Check out the
guide at the page of 4.)

06
30. Connect the wire from the
ceiling fan to the receiver( Red,
White, and Black wires)
31. Connect the wire from the
ceiling fan to the receiver( White
and Blue wires)
32. Use wire connecting nuts to
connect the three ground wires
( green) coming from the downrod,
receiver and ceiling bracket
33. Connect the fan live wire (blac
k) to your house live wire; Connect
the fan neutral wire (white) to your
house neutral wire
34. Put the receiver into the
mounting bracket
35. Lift the canopy into place and
wrap keyhole slots around the
screws
06
36. Secure the canopy to the
mounting bracket with the four
canopy mounting screws
37. Lift the canopy cover to the
canopy
38. Install the lampshade and
rotate it to lock
06
41. Remove the six screws and
remove the gasket
42. Put the canopy through the
motor wires.Put the gasket you
just took out and align the holes
02. Flush mount installation method
Continue from step 12 on page 7
39. Remove the non-slotted
canopy mounting screws, and
loosen the slotted canopy
mounting screws.
remove
loosen
40. Loosen the screws.
47. Connect the wire from the
ceiling fan to the receiver( Red,
White, and Black wires)
48. Connect the wire from the
ceiling fan to the receiver( White
and Blue wires)
06
44. Put the receiver into the
mounting bracket
45. Install the ceiling bracket with
four self tapping screws.(Is your
ceiling different? Check out the
guide at the page of 3.)
46. Organize and tie up the wires
with zip ties
43.Align the holes;Insert six
screws and tighten them and
rotate and tighten the top cover

06
51. Lift the canopy into place and
wrap keyhole slots around the
screws
52. Secure the canopy to the
mounting bracket with the four
canopy mounting screws
53. Install the lampshade and
rotate it to lock
49. Use wire connecting nuts to
connect the two ground wires
(green) coming from the receiver
and hanging bracket
50. Connect the fan live wire
(black) to your house live wire;
Connect the fan neutral wire
(white) to your house neutral wire
16
07
17
7
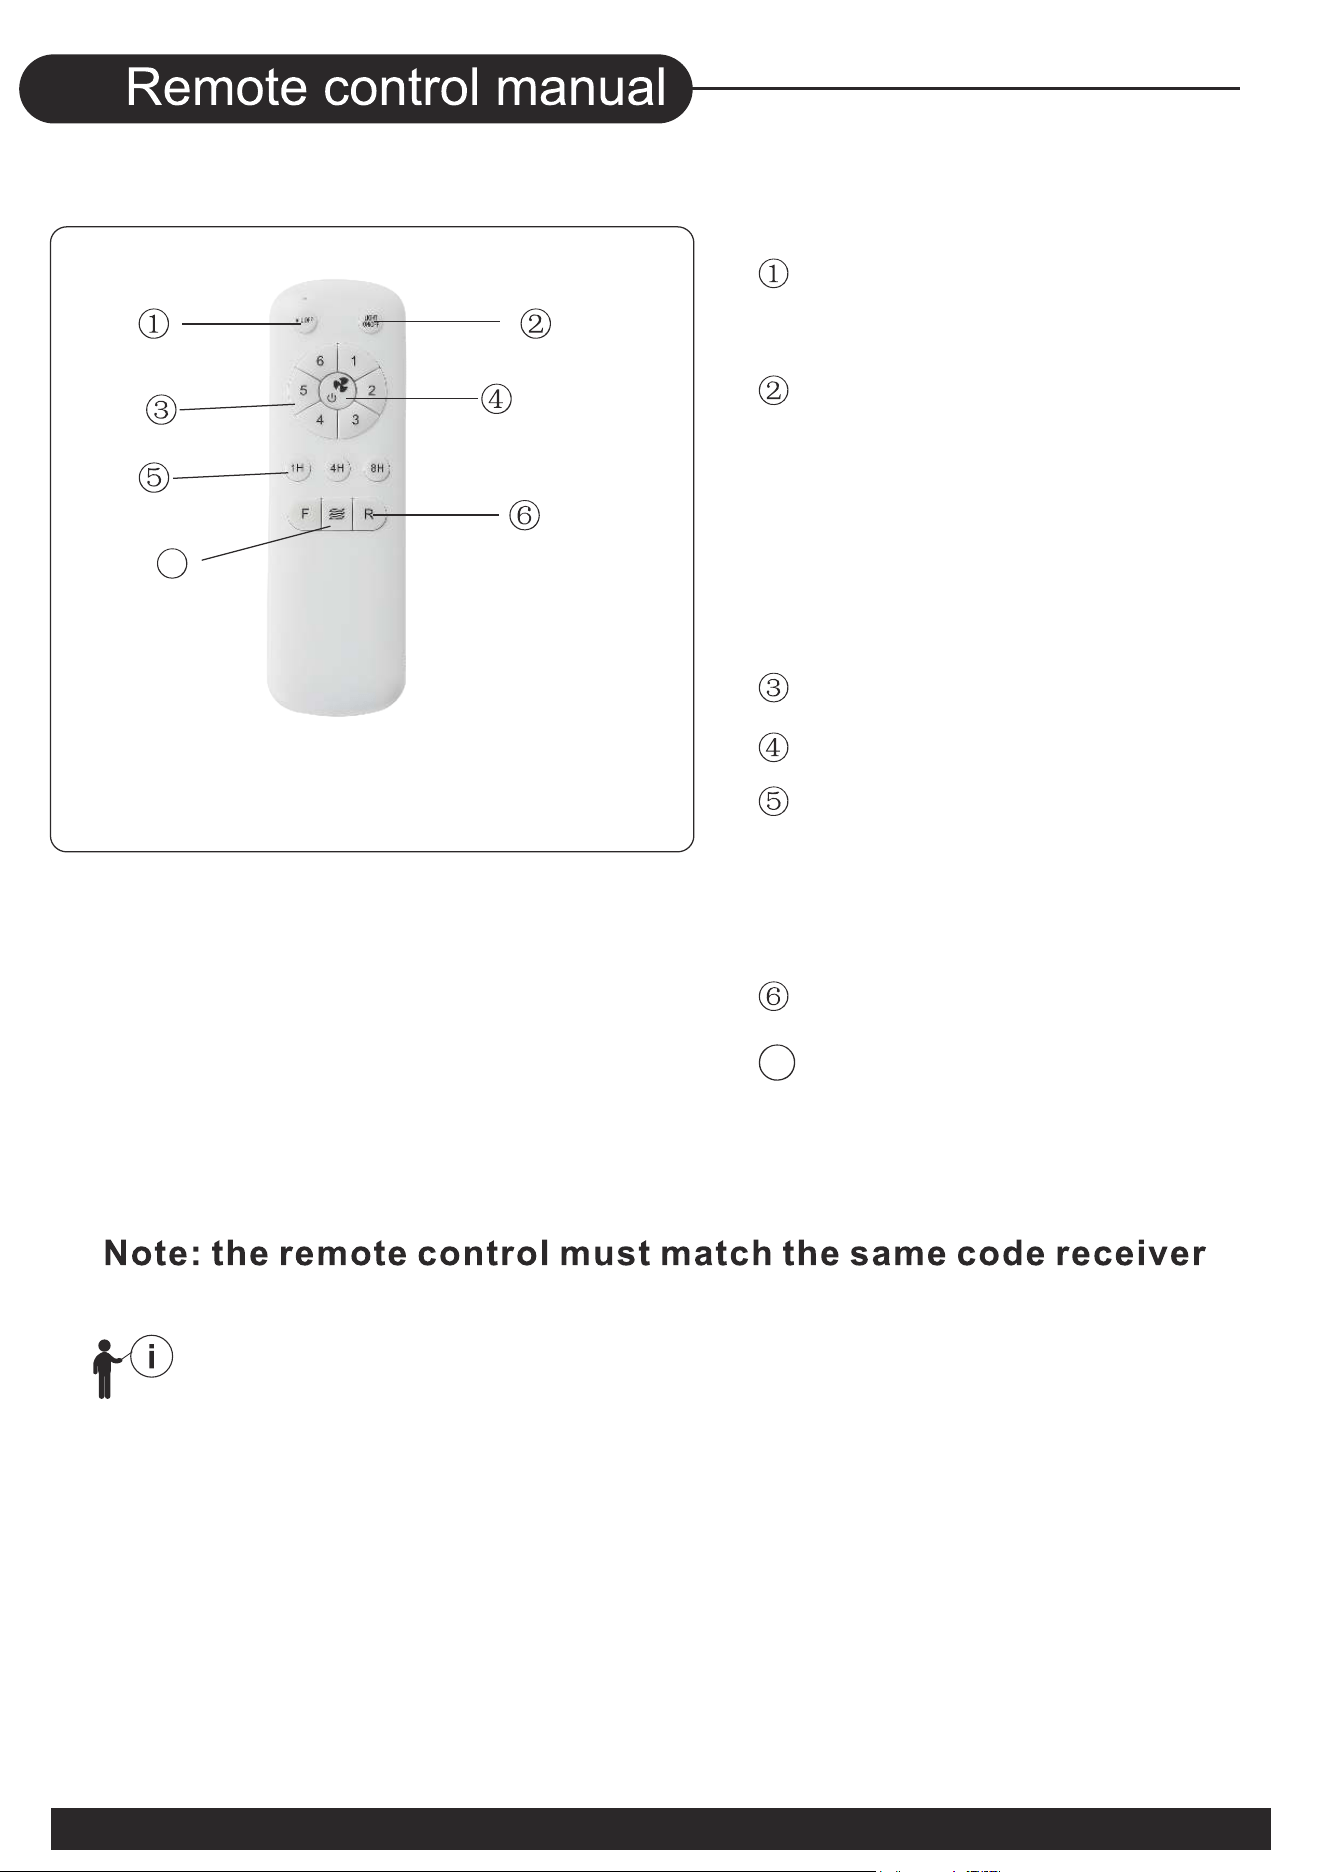
Light on/off
6 Wind Speeds
Fan off
Turn off the light and
fan at the same time
3 Kinds of Timing
Turning off the light and
the fan when the time is
over
Fan Reverse Mode
7
Natural Wind Mode
When the reversible button is pressed, the fan slowly slows
down to a stop and then begins to reverse.
Light color temperature
switch (Press twice with an
interval of 2 seconds to
switch a color temperature
after turning on the light.)
08
18
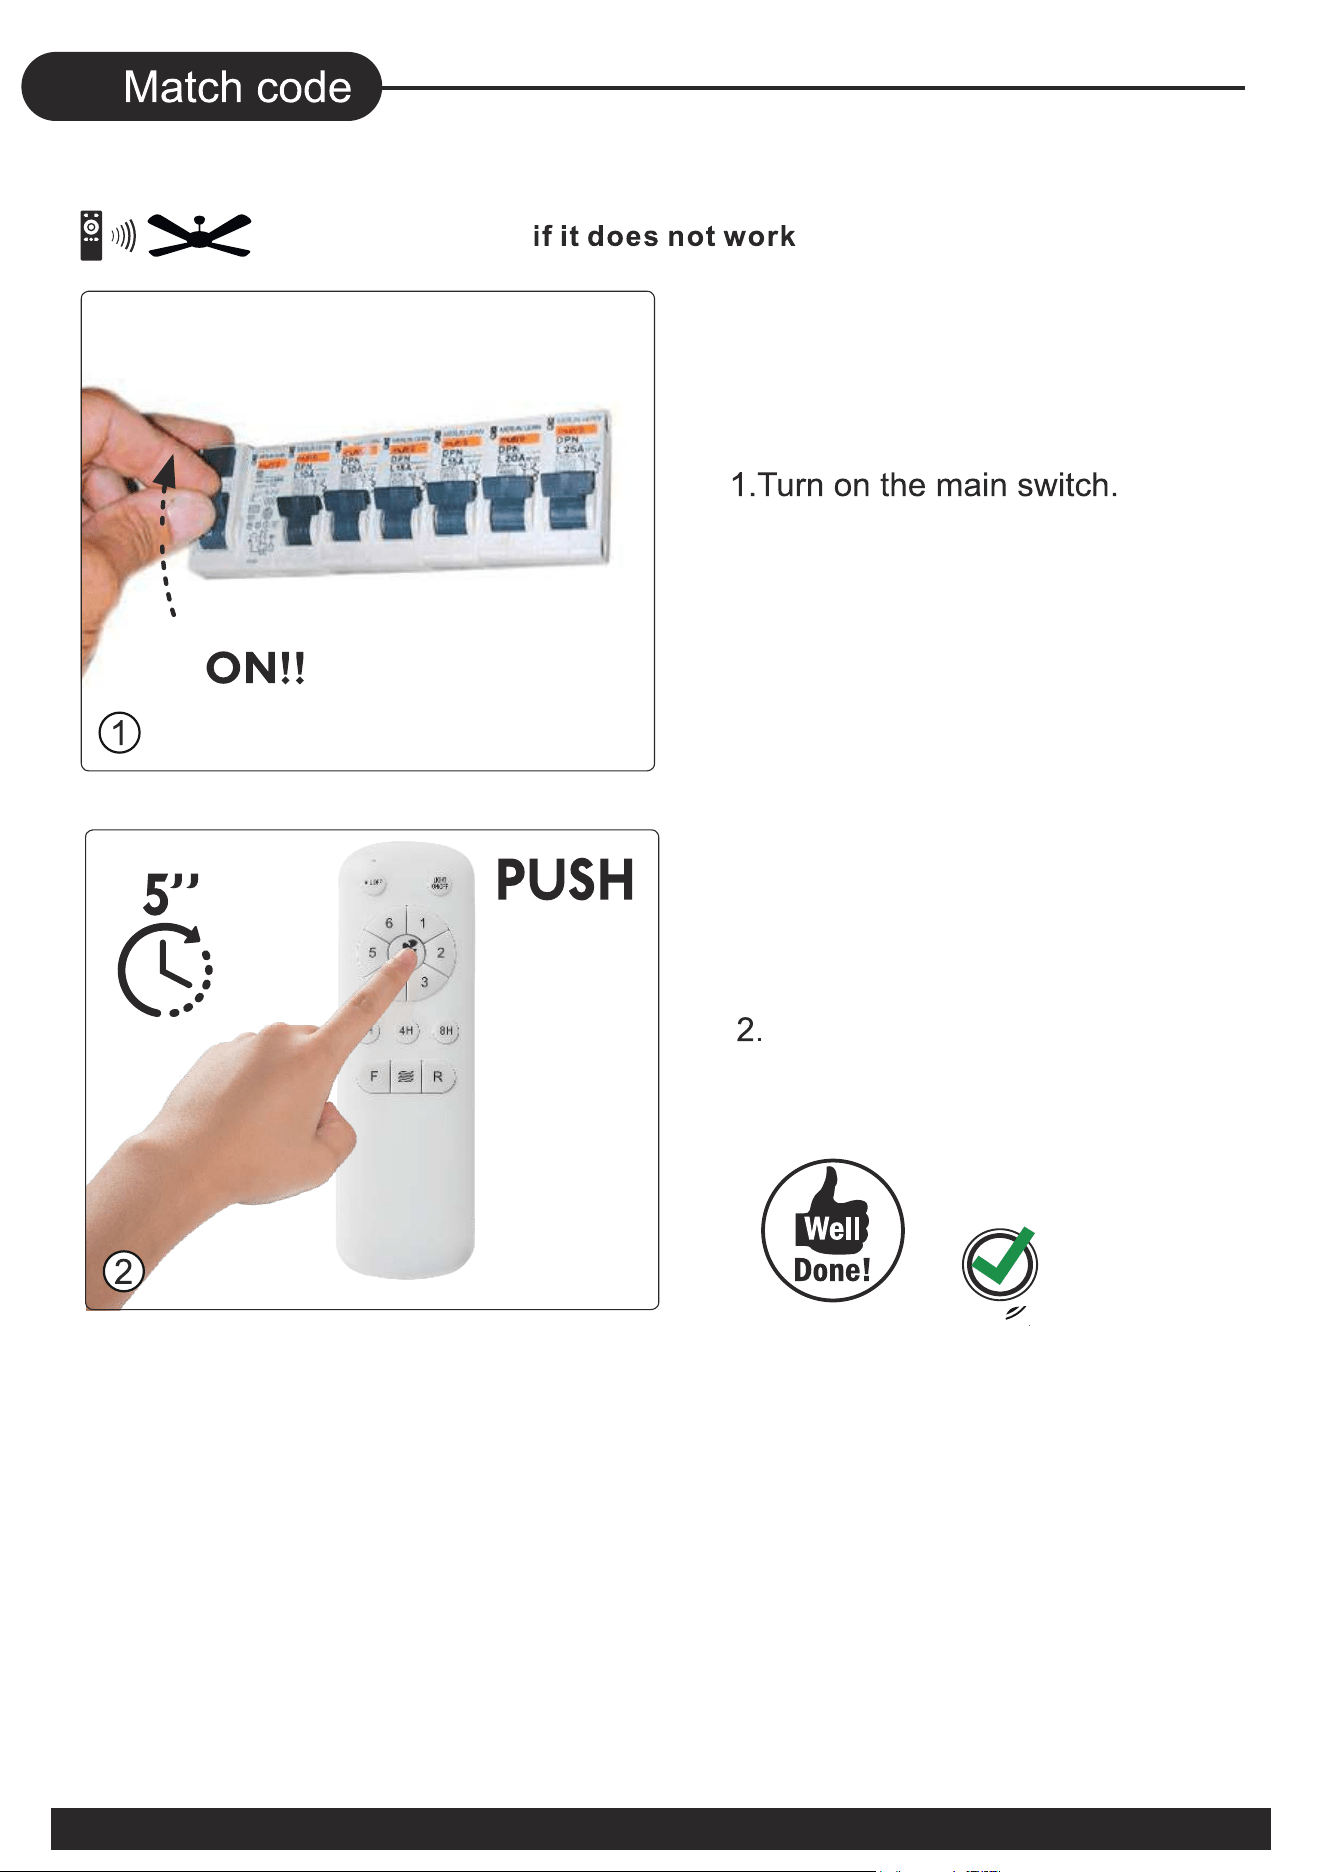
Pressing and holding this key
for 5 seconds.

09
19
10
11
20
Website: