
AIR NAILER
ITEM# 65168/65169
OWNER'S MANUAL AND SAFETY INSTRUCTIONS
SAVE THIS MANUAL. KEEP THIS MANUAL FOR SAFETY WARNINGS, PRECAUTIONS, ASSEMBLY,
FOR QUESTIONS, PLEASE CALL CUSTOMER SERVICE: 909.628.4900
SERIAL NUMBER ON THE BACK OF THE MANUAL, OR THE MONTH AND VEAR OF PURCHASE IF
OPERATION, INSPECTION, MAINTENANCE AND CLEANING PROCEDURES. WRITE THE PRODUCT'S
PRODUCT HAS NO SERIAL NUMBER
Technical Specifications:
Nail/Brad Capacity: 18 Gauge 10-50mm
Fastener Diameter: 1.05x1.26 mm
Stapler Capacity: 5.7mm crown Series 90 Up to 40mm length
(Fasteners are available from hardware stores)
Working Pressure: 60-100 PSI
Av.Air Requirement:
3CFM / 85Lt / min
Air Inlet:
Safety:
● When using compressed air always follow the safety codes of practice laid out by the compressor manufacturer.
● Damaged or split air hoses can cause a 'whip' hazard. Immediately replace damaged air hoses.
● Ensure all air couplings are secure and tight.
● Do not try to modify the tool to accept fasteners other than those specified.
● Only use this equipment for its intended use. Do not modify or change its design.
● When tool is not in use always disconnect from the air supply.
● Maintenance should only be carry out by a competent person.
● NEVER point the nail gun at people or yourself.
● When using the tool safety clothing must be worn. Goggles,gloves,ear defenders.Tie back long hair and do not
wear loose clothing.
● Do not allow children to use this tool. Never leave the tool connected to the air supply before loading nails or
staples.
Operating Instructions:
DECLARATION:
The manufacturer declares that this nailer is in conformity to the following directives and
supportive standards:
2006/42/EC Machinery Directive.
EN ISO 11148-13:2018
Operating Instructions:
Maintenance:
● Lubricate gun by applying 2-3 drops of air tool oil to the air intake daily.
● Keep the gun clean.
● Remove top plate covering striking pin and clean monthly or after every 50 hours use.
● Use a water separator in compressor line to reduce Moisture contamination and possible corrosive damage to
tool.
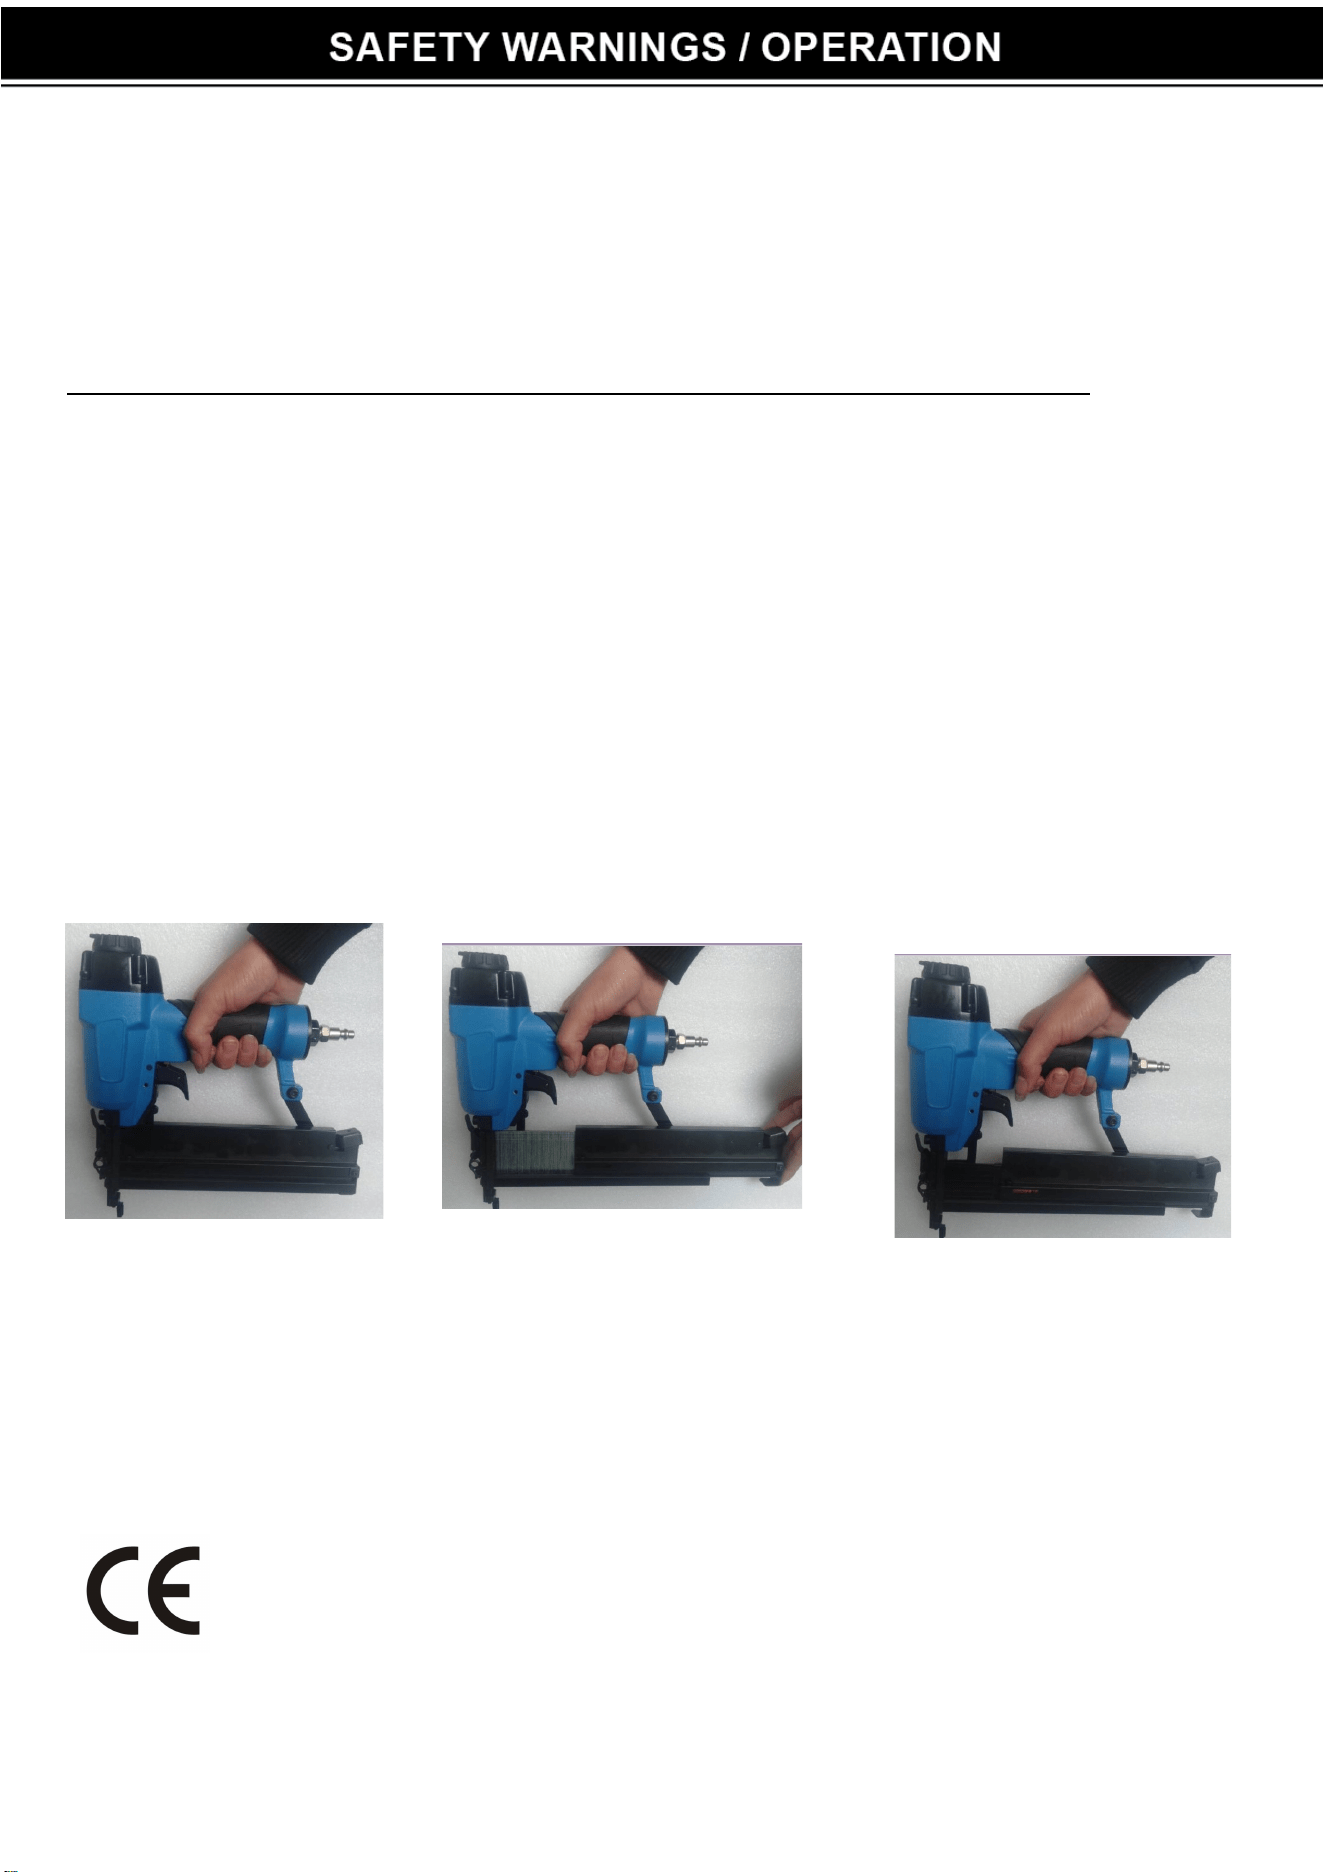
To load the magazine with nails or
staples, release the magazine by
squeezing the lever.
Insert the fasteners into the magazine.
(See overleaf details). Then shut the
magazine by pushing it fully upwards.
Check that the air supply is at least
60PSI. The gun is now ready to use.
Press the head of the gun onto the
workpiece to be fastened then squeeze
the trigger to fire the nail or staple.

�
- �
86
I
1
2
3
4
5
6
7
8
9
10
11
12
13
14
15
16
17
18
19
21
27
31
37
39
41
n �I
I
I
12
I
I
I
�
w
I
X
I
ii
AIR
13. . 4
V PI
. .
1
Pist
R . . 7
P 4. 13. 5
. 7X2.
t rir
R 5.
y
i- Vve ide
lb:1. 9
r fno
R l
1. 1. 2
R lb:1.
P
P
I
P 2.16
I I
P 18
I
B
P
. 0211
. . 1
. . 11
..ml
. 11. 1
01. . 0161
. . 71
. . 0141
. . 1
. . 1
. . 1
. . 11
. . 11
. . 1
. .
. . 1
. . 11
. 01. 1
. . 1
. . 1
. . 1
.ml
. 10. 21
. . 0101
. . 1
. . 21
. . 0151
. 1
. . 11
01. 1
. . 11
. . 1
. 11. 1
. . 1
. 01. 11
. . 1
. . 0751
.01.1751
.01.11
01. . 1
01. . 1
. 11. 1
07. 19. 1
07. 12. 11
07. 11. 1
07. 14. 11
I
I
1
47
A
5
4
1
1
51
37. . 55
1
Tail
1
t
1
l
1
1
Stl
1
57
18
1
T
1
1
1
61
ine
1
Tail
1
P
1
i t
1
Plate in i alY
1
P 1. 10
1
67
X12
1
X10
1
I
1
70
I
1
71
1
72
P 11
1
73
1
2
75
A
1
76
X
1
77
PI
1
78
I
1
79
I V
1
I
1
81
1
82
1
1
1
1
V PI
1
87
1
1
1
1
1
P
07. 11. 1
1
07. 1 1
1
. . 71
1
. 0711
1
. . 71
1
10.01.ml
1
. 11
1
..0111
1
.01.1741
1
07. . 71
1
. 01. 11
2
07. 01. 11
1
07. . 0721
1
07. 07. 0181
1
07. . 11
2
07. 18.
1
. . 1
1
07. . 1
1
07. 01. 1
1
. 11. 1
1
. . 1
2
. . 21
2
. . 1
2
07. . 71
1
01. . 1
2
. 11. 1
1
. . 1
2
. . 1
1
.07.ml
1
. . 1
2
B. . . 1131
1
B. . . 1
1
B. . 1
1
B. . . 1
1
B. . 01. 1
1
B. 07. 11. 1
1
B. 07. 01. 11
1
01. . 1
1
01. . 1
1
B. . . 0141
1
01. . 1
1
. 71
DISCLAIMER
PLEASE READ THE FOLLOWING CAREFUL
THE MANUFACTURER AND/OR DISTRIBUTOR HAS PROVIDED THE PARTS LIST AND ASSEMBLY
DIAGRAM IN THIS MANUAL AS A REFERENCE TOOL ONLY. NEITHER THE MANUFACTURER OR
DISTRIBUTOR MAKES ANY REPRESENTATION OR WARRANTY OF ANY KIND TO THE BUYER THAT HE
OR SHE IS QUALIFIED TO MAKE ANY REPAIRS TO THE PRODUCT, OR THAT HE OR SHE IS QUALIFIED
TO REPLACE ANY PARTS OF THE PRODUCT. IN FACT, THE MANUFACTURER AND/OR DISTRIBUTOR
EXPRESSLY SES THAT ALL REPAIRS AND PARTS REPLACEMENTS SHOULD BE UNDERTAKEN
BY CERTIFIED AND LICENSED TECHNICIANS, AND NOT BY THE BUYER. THE BUYER ASSUMES
ALL RISK AND LIABILITY ARISING OUT OF HIS OR HER REPAIRS TO THE ORIGINAL PRODUCT OR
REPLACEMEN T PARTS THERETO, OR ARISING OUT OF HIS OR HER INSTALLATION OF REPLACEMENT
PARTS THERETO.
Record Product's Serial Number Here: _________________ _
Note: If product has no serial number, record month and year of purchase instead.
Note: Some parts are listed and shown for illustration purposes only and are not available
individually as replacement parts.
The material in this manual is r inrmational purposes only. e product(s) it describes are subject to change without
prior notice, due to the manucturer's continuous development program. XtremePowerUS makes no representations
or warranties with respect to this manual or with respect to the products described herein. XtremePowerUS shall not be
liable r any damages, losses, costs or expenses, direct, indirect or incidental, consequential or special, arising out of, or
related to the use of this material or the products described herein.
Questios, issues or issing parts?
Before returning to your retailer, our customer servce team is. here to hellp.
Call Us: 909.628
,
.900
Email Us: [email protected]
Hours of Operation: 9am - 3pm PST Monday - Fr
i
iday
MADE IN CHINA
