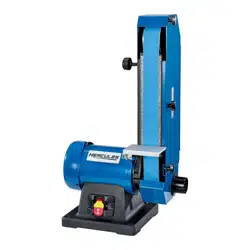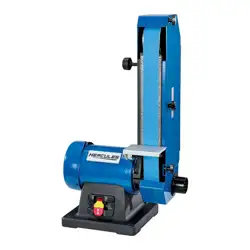
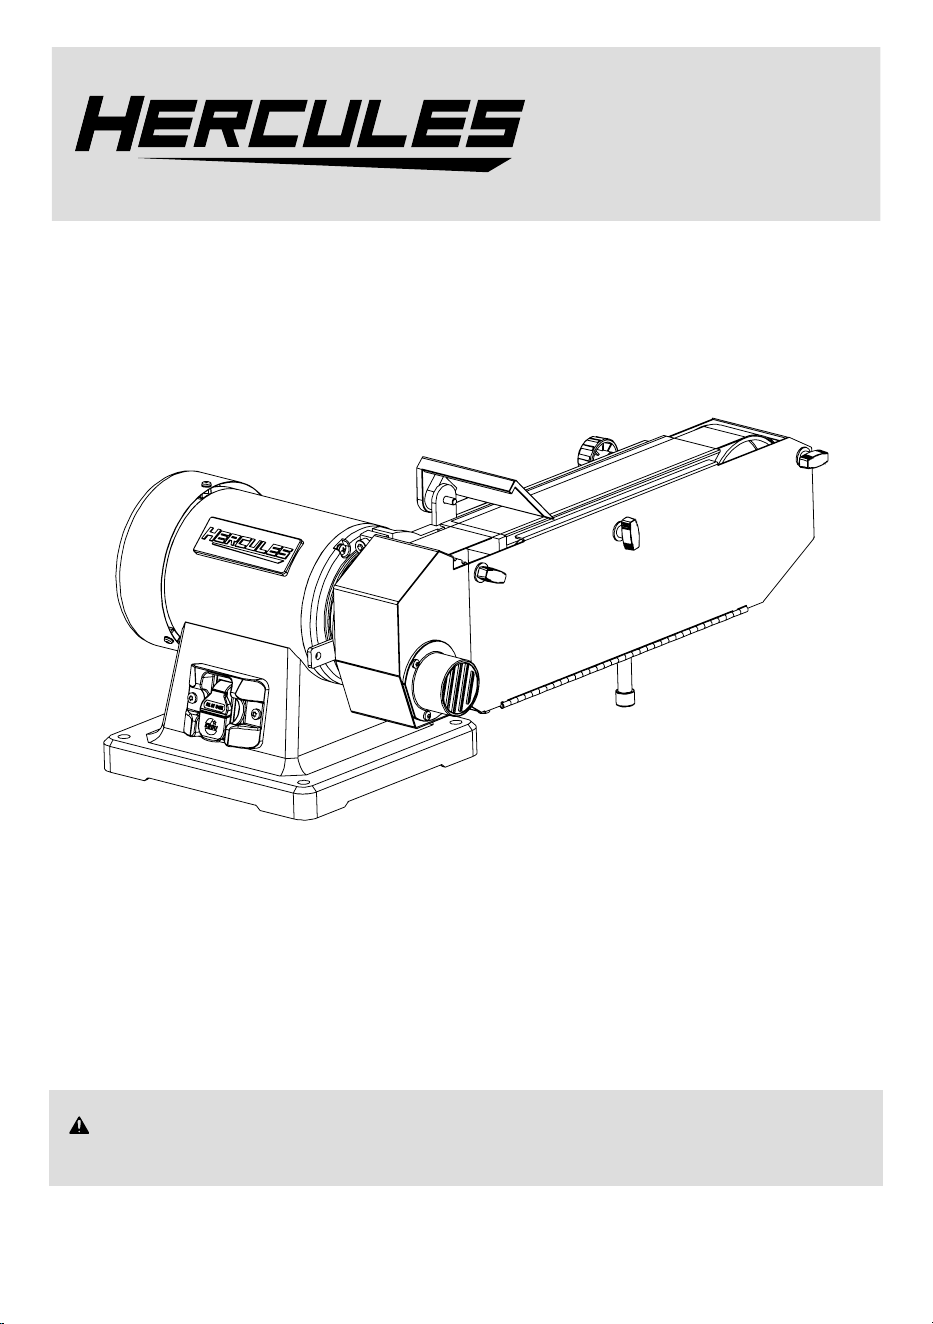
2" x 48" Belt Grinder
Model
HE092
WARNING: To prevent serious injury, User must read and understand
Owner’s Manual. SAVE THIS MANUAL.
When unpacking, make sure that the product is intact and undamaged.
If any parts are missing or broken, please visit harborfreight.com/customer-support/contact-us
as soon as possible. Reference 58875.
TM
Owner’s Manual &
Safety Instructions
26j

Page 2
For product assistance, please visit harborfreight.com/customer-support/contact-us
Items 58875
IMPORTANT SAFETY INFORMATION
GENERAL POWER TOOL SAFETY WARNINGS
Read all safety warnings and instructions.
Failure to follow the warnings and instructions may
result in electric shock, fire and/or serious injury.
Save all warnings and instructions for future
reference.
1. KEEP GUARDS IN PLACE and in working order.
2. REMOVE ADJUSTING KEYS AND WRENCHES.
Form habit of checking to see that keys and adjusting
wrenches are removed from tool before turning it on.
3. KEEP WORK AREA CLEAN.
Cluttered areas and benches invite accidents.
4. DON’T USE IN DANGEROUS ENVIRONMENT.
Don’t use power tools in damp or wet locations,
or expose them to rain. Keep work area well lighted.
5. KEEP CHILDREN AWAY. All visitors should
be kept safe distance from work area.
6. MAKE WORKSHOP KID PROOF with padlocks,
master switches, or by removing starter keys.
7. DON’T FORCE TOOL. It will do the job better
and safer at the rate for which it was designed.
8. USE RIGHT TOOL. Don’t force tool or attachment
to do a job for which it was not designed.
Table A: RECOMMENDED MINIMUM WIRE GAUGE
FOR EXTENSION CORDS
(120 VOLT)
NAMEPLATE
AMPERES
(at full load)
EXTENSION CORD
LENGTH
25′ 50′ 100′ 150′
0 – 6 18 16 16 14
6.1 – 10 18 16 14 12
10.1 – 12 16 16 14 12
12.1 – 16 14 12 Do not use.
9. USE PROPER EXTENSION CORD. Make sure your
extension cord is in good condition. When using
an extension cord, be sure to use one heavy
enough to carry the current your product will draw.
An undersized cord will cause a drop in line voltage
resulting in loss of power and overheating.
Table A shows the correct size to use depending
on cord length and nameplate ampere rating.
If in doubt, use the next heavier gauge.
The smaller the gauge number, the heavier the cord.
10. WEAR PROPER APPAREL. Do not wear
loose clothing, gloves, neckties, rings, bracelets,
or other jewelry which may get caught in moving
parts. Nonslip footwear is recommended.
Wear protective hair covering to contain long hair.
11. ALWAYS USE SAFETY GLASSES. Also use
face or dust mask if cutting operation is dusty.
Everyday eyeglasses only have impact resistant
lenses, they are NOT safety glasses.
12. SECURE WORK. Use clamps or a vise to
hold work when practical. It’s safer than using
your hand and it frees both hands to operate tool.
13. DON’T OVERREACH.
Keep proper footing and balance at all times.
14. MAINTAIN TOOLS WITH CARE. Keep tools sharp
and clean for best and safest performance. Follow
instructions for lubricating and changing accessories.
15. DISCONNECT TOOLS before servicing
when changing accessories, such as
blades, bits, cutters, and the like.
16. REDUCE THE RISK OF UNINTENTIONAL
STARTING. Make sure switch is in
off position before plugging in.
17. USE RECOMMENDED ACCESSORIES.
Consult the owner’s manual for recommended
accessories. The use of improper accessories
may cause risk of injury to persons.
18. NEVER STAND ON TOOL.
Serious injury could occur if the tool is tipped or
if the cutting tool is unintentionally contacted.
19. CHECK DAMAGED PARTS. Before further use
of the tool, a guard or other part that is damaged
should be carefully checked to determine that
it will operate properly and perform its intended
function – check for alignment of moving parts,
binding of moving parts, breakage of parts,
mounting, and any other conditions that may
affect its operation. A guard or other part that is
damaged should be properly repaired or replaced.
20. DIRECTION OF FEED.
Feed work into a blade or cutter against the
direction of rotation of the blade or cutter only.
21. NEVER LEAVE TOOL RUNNING UNATTENDED.
TURN POWER OFF. Don’t leave tool
until it comes to a complete stop.
Page 3
For product assistance, please visit harborfreight.com/customer-support/contact-us
Items 58875
GROUNDING INSTRUCTIONS
TO PREVENT ELECTRIC SHOCK AND
DEATH FROM INCORRECT
GROUNDING WIRE CONNECTION READ
AND FOLLOW THESE INSTRUCTIONS:
110-120 VAC Grounded Tools:
Tools with Three Prong Plugs
1. In the event of a malfunction or breakdown,
grounding provides a path of least resistance for
electric current to reduce the risk of electric shock.
This tool is equipped with an electric cord having an
equipment-grounding conductor and a grounding
plug. The plug must be plugged into a matching
outlet that is properly installed and grounded in
accordance with all local codes and ordinances.
2. Do not modify the plug provided – if it will
not fit the outlet, have the proper outlet
installed by a qualified electrician.
3. Improper connection of the equipment-grounding
conductor can result in a risk of electric shock.
The conductor with insulation having an outer
surface that is green with or without yellow
stripes is the equipment-grounding conductor.
If repair or replacement of the electric cord or
plug is necessary, do not connect the equipment-
grounding conductor to a live terminal.
4. Check with a qualified electrician or service
personnel if the grounding instructions are
not completely understood, or if in doubt as
to whether the tool is properly grounded.
5. Use only 3-wire extension cords that
have 3-prong grounding plugs and 3-pole
receptacles that accept the tool’s plug.
6. Repair or replace damaged or
worn cord immediately.
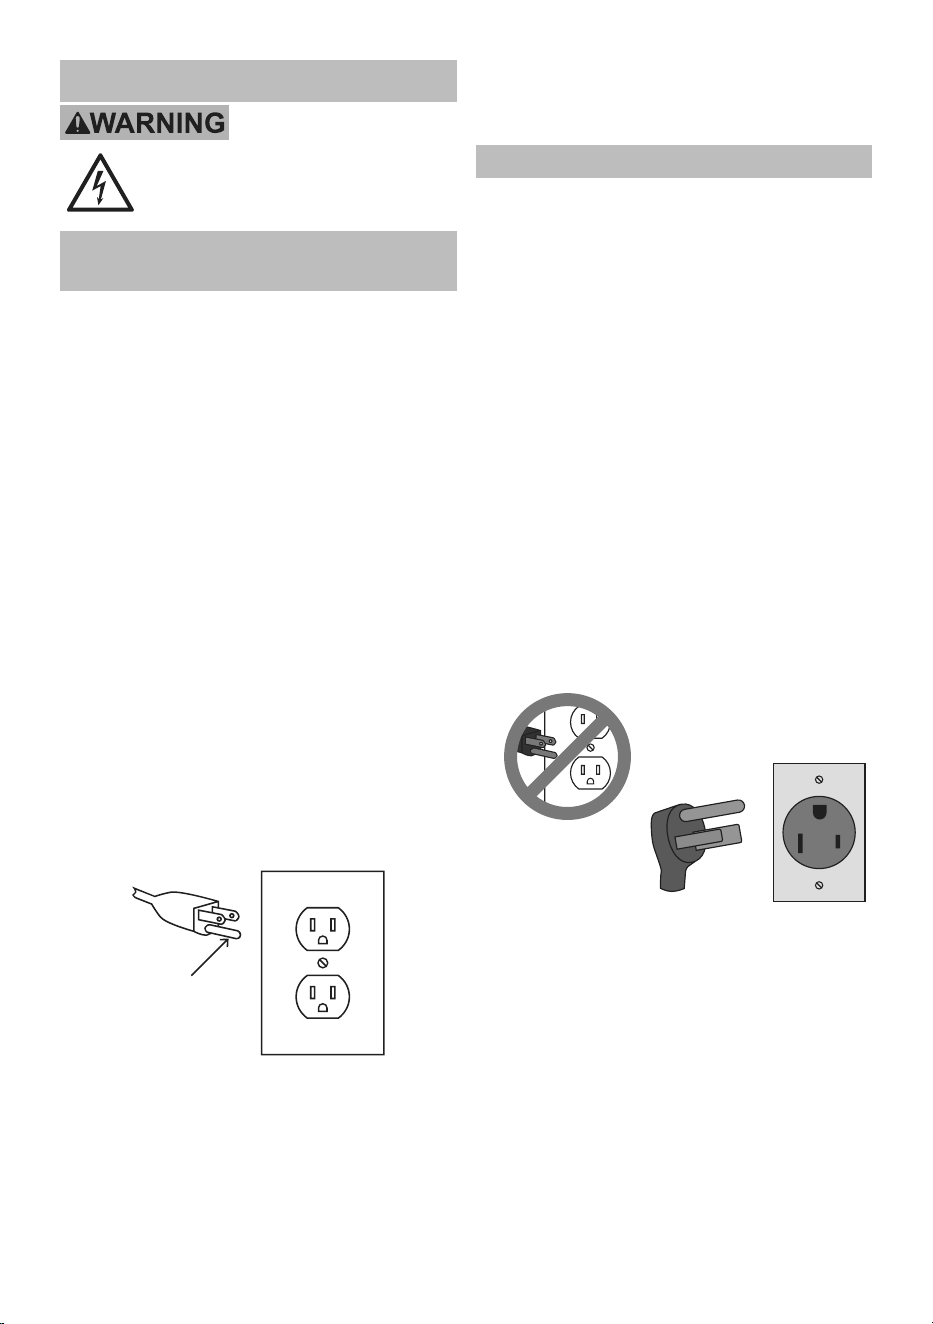
Grounding
Pin
125 VAC 3-Prong Plug and Outlet
(for up to 125 VAC and up to 15A )
7. This tool is intended for use on a circuit that has
an outlet that looks like the one illustrated above in
125 VAC 3-Prong Plug and Outlet. The tool has
a grounding plug that looks like the plug illustrated
above in 125 VAC 3-Prong Plug and Outlet.
8. The outlet must be properly installed and grounded
in accordance with all codes and ordinances.
9. Do not use an adapter to connect
this tool to a different outlet.
240 VAC Grounded Belt Sander
1. This tool can be modified to operate on
240VAC.A240 Vpowercord(notincluded)
mustbeinstalledinplaceofthe120 Vpower
cord by a certified electrician before use.
2. The green wire inside the cord is connected to
the grounding system in the tool. The green
wire in the cord must be the only wire connected
to the tool’s grounding system and must never
be attached to an electrically “live” terminal.
Never leave the grounding wire disconnected
or modify the Power Cord Plug in any way.
3. Make sure the tool is connected to an outlet having
the same configuration as the plug. If the tool must
be reconnected for use on a different type of electric
circuit, the reconnection should be made by qualified
service personnel; and after reconnection, the tool
should comply with all local codes and ordinances.
4. Do not use an extension cord when tool has
beenmodifiedtooperateon240 VAC.
5. Theplugshown(NEMA6-50p)isforuseona
50 A circuit. A different 250 VAC plug and outlet
combination may be used, provided it is rated
to handle the electrical requirements of the tool
and is installed by a certified electrician.
250 VAC 3-Prong Plug (6-50p) and Outlet (6-50r)
(for up to 250 VAC and up to 50 A)
DO NOT USE
125 VAC PLUG.
NOTE SIZE
DIFFERENCE.

Page 4
For product assistance, please visit harborfreight.com/customer-support/contact-us
Items 58875
Belt Sander Safety Warnings
For Your Own Safety Read Instruction
Manual Before Operating Sander
1. Wear eye protection.
2. Support workpiece with miter gauge,
backstop, or worktable.
3. Maintain 1/16 inch maximum clearance
between table and sanding belt or disc.
4. Avoid kickback by sanding in accordance
with the directional arrows.
5. The backstop is a fence near the surface that
helps the operator maintain control of the
workpiece and prevents the workpiece from being
pulled into the machine. For safety, it must be
adjusted very close to the sanding surface.
6. The worktable is the surface mounted close to
the sanding surface that the operator rests the
workpiece against to prevent it from being pulled
by the sanding surface. For safety, it must be
adjusted very close to the sanding surface.
7. The sanding belt is designed to rotate down towards
the table while the disc rotates both up from the
table and down towards the table. Sand on the
belt with the workpiece in front of the backstop
and/or table. Sand only on the downward moving
surface of the disc - sanding on the upward
moving surface may result in the workpiece
being thrown up and towards the operator.
8. Remove Safety Key when the Switch is
turned off. Do not leave the Safety Key in
the Switch when the tool is not in use.
9. DO NOT OPERATE WITH ANY GUARD
DISABLED, DAMAGED, OR REMOVED. Moving
guards must move freely and close instantly.
10. The use of accessories or attachments not
recommended by the manufacturer may
result in a risk of injury to persons.
11. When servicing use only identical replacement parts.
12. Only use safety equipment that has been approved
by an appropriate standards agency. Unapproved
safety equipment may not provide adequate
protection. Eye protection must be ANSI-approved
and breathing protection must be NIOSH-approved
for the specific hazards in the work area.
13. Stay alert, watch what you are doing and use
common sense when operating a power tool.
Do not use a power tool while you are tired or
under the influence of drugs, alcohol or medication.
A moment of inattention while operating power
tools may result in serious personal injury.
14. Industrial applications must follow OSHA guidelines.
15. Maintain labels and nameplates on the tool.
These carry important safety information.
If unreadable or missing, contact
Harbor Freight Tools for a replacement.
16. Avoid unintentional starting.
Prepare to begin work before turning on the tool.
17. People with pacemakers should consult their
physician(s)beforeuse.Electromagneticfieldsin
close proximity to heart pacemaker could cause
pacemaker interference or pacemaker failure.
18. The warnings, precautions, and instructions
discussed in this instruction manual cannot cover all
possible conditions and situations that may occur.
It must be understood by the operator that
common sense and caution are factors
which cannot be built into this product, but
must be supplied by the operator.
Vibration Safety
This tool vibrates during use. Repeated or long-term
exposure to vibration may cause temporary or permanent
physical injury, particularly to the hands, arms and
shoulders. To reduce the risk of vibration-related injury:
1. Anyone using vibrating tools regularly or for an
extended period should first be examined by a
doctor and then have regular medical check-ups
to ensure medical problems are not being caused
or worsened from use. Pregnant women or
people who have impaired blood circulation to
the hand, past hand injuries, nervous system
disorders, diabetes, or Raynaud’s Disease should
not use this tool. If you feel any medical or
physicalsymptomsrelatedtovibration(suchas
tingling,numbness,andwhiteorbluefingers),
seek medical advice as soon as possible.
2. Do not smoke during use. Nicotine reduces
the blood supply to the hands and fingers,
increasing the risk of vibration-related injury.
3. Use tools with the lowest vibration when there
is a choice between different processes.
4. Include vibration-free periods each day of work.
5. Gripworkpieceaslightlyaspossible(whilestill
keepingsafecontrolofit).Letthetooldothework.
6. To reduce vibration, maintain the tool as
explained in this manual. If any abnormal
vibration occurs, stop use immediately.
SAVE THESE
INSTRUCTIONS.
Page 5
For product assistance, please visit harborfreight.com/customer-support/contact-us
Items 58875
Warning Symbols and Definitions
This is the safety alert symbol. It is used to
alert you to potential personal injury hazards.
Obey all safety messages that follow this symbol to
avoid possible injury or death.
Indicates a hazardous
situation which, if not
avoided, will result in death or serious injury.
Indicates a hazardous
situation which, if not
avoided, could result in death or serious injury.
Indicates a hazardous
situation which, if not
avoided, could result in minor or moderate injury.
Addresses practices not
related to personal injury.
SETUP – BEFORE USE
TO PREVENT SERIOUS INJURY FROM
ACCIDENTAL OPERATION:
Turn the Power Switch of the tool off and unplug the
tool from its electrical outlet before performing any
procedure in this section.
Note: For additional information regarding the
parts listed in the following pages, refer to the
Assembly Diagram near the end of this manual.
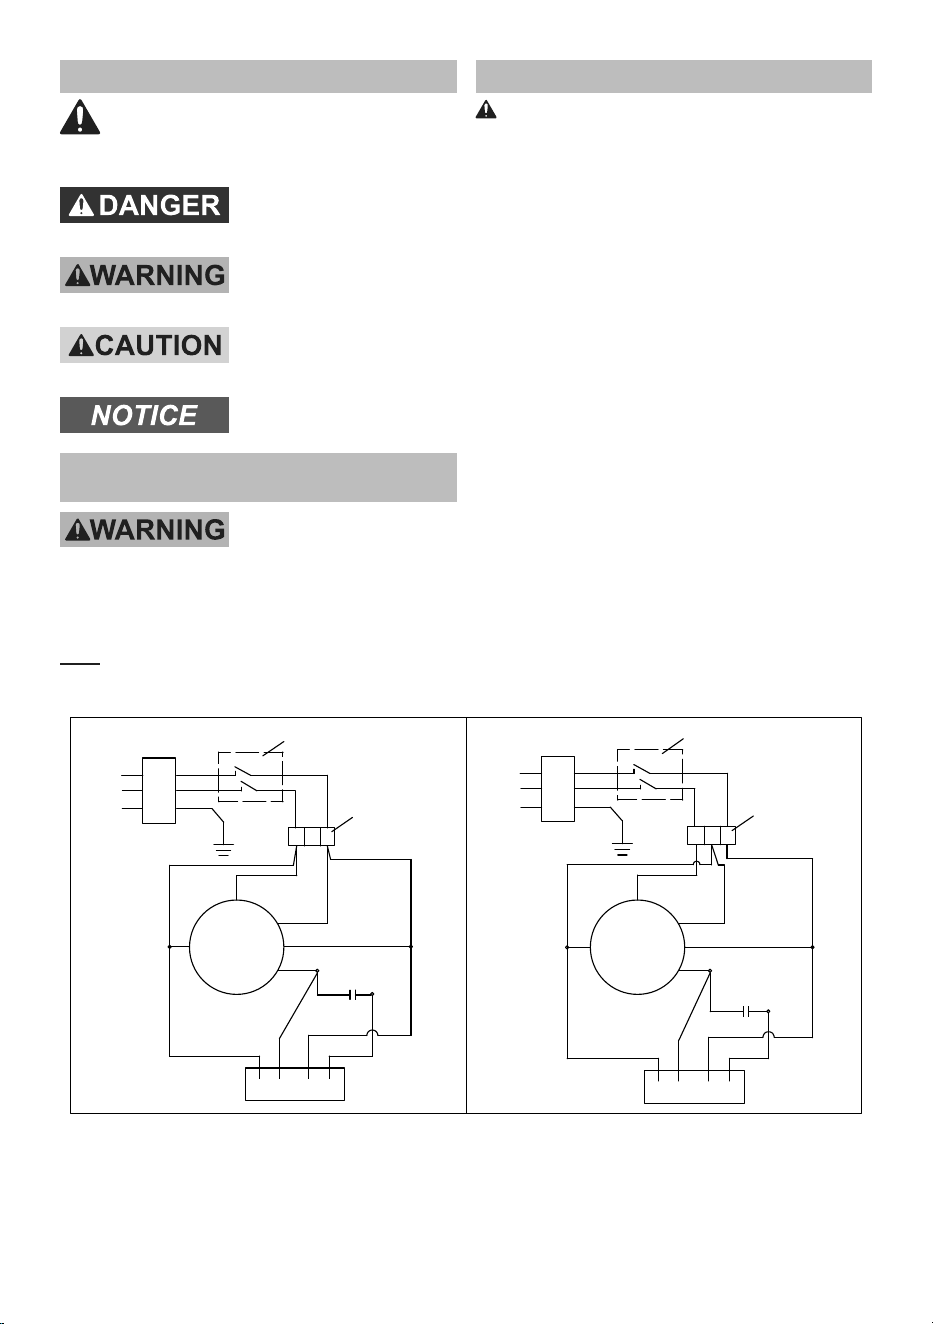
240 VAC Set Up
WARNING! TO PREVENT ELECTRIC SHOCK AND
DEATH:
Turn the Power Switch OFF and unplug
the tool from its electrical outlet before
performing any procedures in this section.
This tool can be modified to operate
on240 VAC.Modificationsshouldbe
performed by a certified electrician.
1. Remove the Base Plate on the bottom of tool.
2. Installa240 VACpowercord(notincluded)
inplaceofthe120 VACpowercord.For
grounding information refer 240 VAC
Grounded Belt Sander on page .
3. Rewireasfollowsfor240 Voperation:
a. Move the White wire from
Terminal 3 to Terminal 2.
b. Move the Red wire from Terminal 1 to Terminal 2.
c. Move the small Black wire from
Terminal 1 to Terminal 2.
Refer to the Wiring Diagram below.
4. Replace the Base Plate on the bottom of tool.
Electronic centrifugal switch
Electronic centrifugal switch
Start capacitor
Start capacitor
MOTOR MOTOR
BROWN BROWN
BLACK
BLACK
BLACK
BLACK
L BLACK
PE GREEN
N WHITE
L BLACK
PE GREEN
N WHITE
WHITE
WHITE
BLUE
BLUE
BLUE
WHITE
WHITE
Line-bank
Line-bank
WHITE
RED
BLUE
WHITE
RED
RED
WHITE
Ganged switch
Ganged switch
WHITE
RED
240V
˜
120V
˜
Page 6
For product assistance, please visit harborfreight.com/customer-support/contact-us
Items 58875
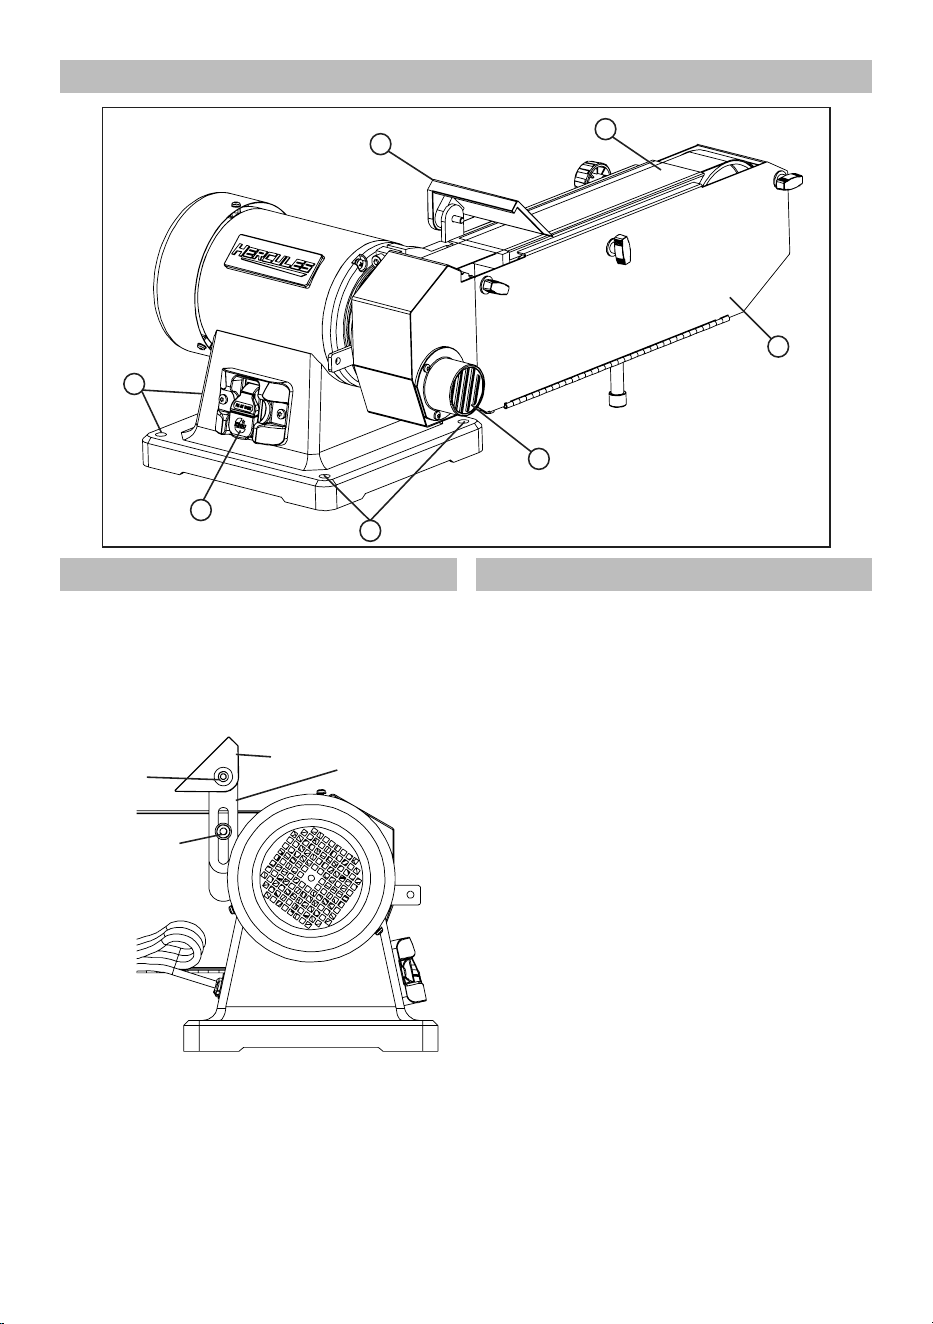
Functional Description
1
4
5
6
2
3
1. Mounting Holes
2. Power Switch
3. Dust Port
4. Belt Cover
5. Belt
6. Work Rest
1
Assembly
7. AttachBracketusingScrew(18),tighten
securely with included hex wrench.
8. Attach Work Rest to Bracket using
Bolt(38),fingertighten.
9. Position Work Rest 1/8" from and 90° to Belt.
10. Tighten Bolt securely using included hex wrench.
Work
Rest
Bracket
Screw (18)
Bolt (38)
Mounting
Select a workbench or mounting location that is able to
support the weight of the tool, plus any additional weight
placed on it during use. Use the mounting holes in the
Base to mount. Mounting hardware not included.
Page 7
For product assistance, please visit harborfreight.com/customer-support/contact-us
Items 58875
OPERATION
Read the ENTIRE IMPORTANT
SAFETY INFORMATION section at the
beginning of this manual including
all text under subheadings therein
before set up or use of this product.
TO PREVENT SERIOUS INJURY FROM
ACCIDENTAL OPERATION:
Turn the Power Switch of the tool off and
unplug the tool from its electrical outlet before
performing any procedure in this section.
TO PREVENT SERIOUS INJURY:
DO NOT OPERATE WITH ANY GUARD
DISABLED, DAMAGED, OR REMOVED.
Tool Set Up
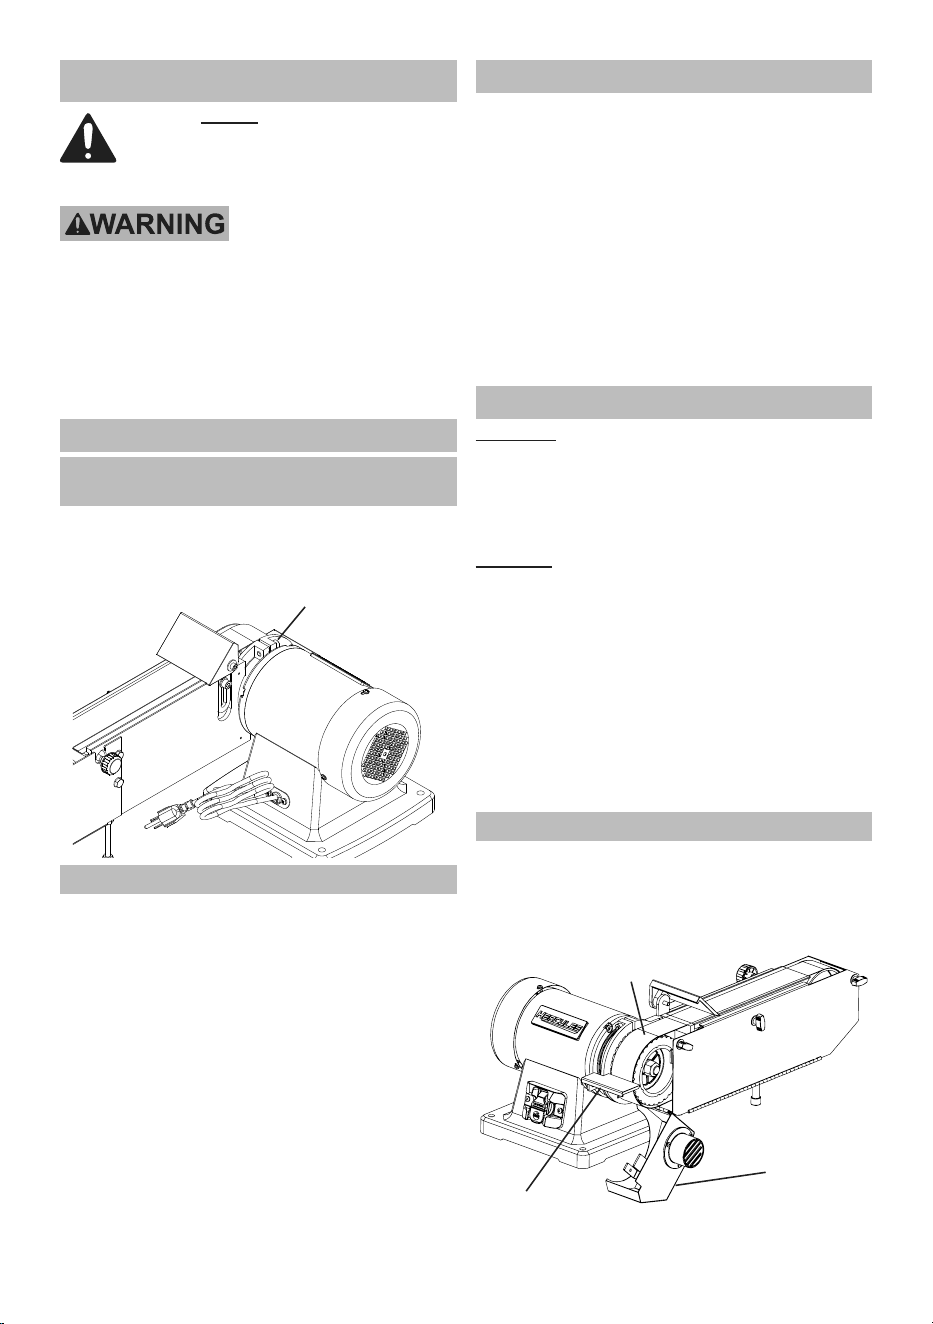
Adjusting Belt Assembly Position
(Vertical to Horizontal)
1. Loosen Screw with included hex wrench.
2. Rotate Belt Assembly to desired position.
3. Tighten Screw.
Screw
Dust Collection
Connect a dust hose from the Dust Port to a dust
collector(hoseanddustcollectorsoldseparately).
Workpiece and Work Area Set Up
1. Designate a work area that is clean and well lit.
The work area must not allow access by children
or pets to prevent distraction and injury.
2. Route the power cord along a safe route to reach
the work area without creating a tripping hazard or
exposing the power cord to possible damage. The
power cord must reach the work area with enough
extra length to allow free movement while working.
3. Secure loose workpieces using a vise or clamps
(notincluded)topreventmovementwhileworking.
4. There must not be objects, such as utility lines,
nearby that will present a hazard while working.
5. Before beginning work, provide for sparks and
debris that will fly off the work surface.
General Operating Instructions
WARNING! TO PREVENT SERIOUS INJURY:
Always use the Work Rest.
1. Make sure that the Power Switch
is in the off-position.
2. Make sure nothing is contacting the Belt,
then turn on the Power Switch.
CAUTION! TO PREVENT INJURY: Do not
apply so much pressure on object being
sanded to inhibit rotation of Belt.
3. Keep fingers away from the Belt. Use two hands and
hold workpiece securely against the Work Rest at all
times. Press the workpiece against the Belt to start
tool. Keep the workpiece moving for a better finish.
4. Occasionally check the Belt for tears, wear, or
fraying. Replace used or worn belts when necessary.
5. After use, turn off the tool, remove the
Safety Key from the Switch, and disconnect
the power supply. Clean and store the
tool indoors out of children’s reach.
Contouring
1. Place Belt Assembly in horizontal position.
2. Open Contact Wheel Access Door.
3. Use Work Rest to secure workpiece
while using Contact Wheel.
Contact
Wheel
Access Door
Contact
Wheel
Work Rest
Page 8
For product assistance, please visit harborfreight.com/customer-support/contact-us
Items 58875
MAINTENANCE AND SERVICING
Procedures not specifically explained
in this manual must be performed
only by a qualified technician.
TO PREVENT SERIOUS INJURY FROM
ACCIDENTAL OPERATION:
Turn the Power Switch of the tool off and
unplug the tool from its electrical outlet before
performing any procedure in this section.
TO PREVENT SERIOUS INJURY
FROM TOOL FAILURE:
Do not use damaged equipment. If abnormal noise
or vibration occurs or damage is noted, have
the problem corrected before further use.
Cleaning, Maintenance,
and Lubrication
1. BEFORE EACH USE, inspect the general
condition of the tool. Check for:
• loose hardware,
• misalignment or binding of moving parts,
• cracked or broken parts,
• damaged electrical wiring,
• any other condition that may
affect its safe operation.
2. AFTER USE, Wipe external surfaces
of the tool with clean cloth. Use a brush
to clean off sawdust or debris.
3. PERIODICALLY, wear ANSI-approved safety
goggles and NIOSH-approved breathing
protection and blow dust and debris out of
the motor vents using dry compressed air.
4. The Bearings on this Sander are sealed
and do not require lubrication.
5. Inspect Graphite Pad behind Belt. Replace
Pad(included)ifwornordamaged.
6. Inspect Belt. Replace if worn or damaged.
7. WARNING! TO PREVENT SERIOUS INJURY:
If the supply cord of this power tool
is damaged, it must be replaced only
by a qualified service technician.
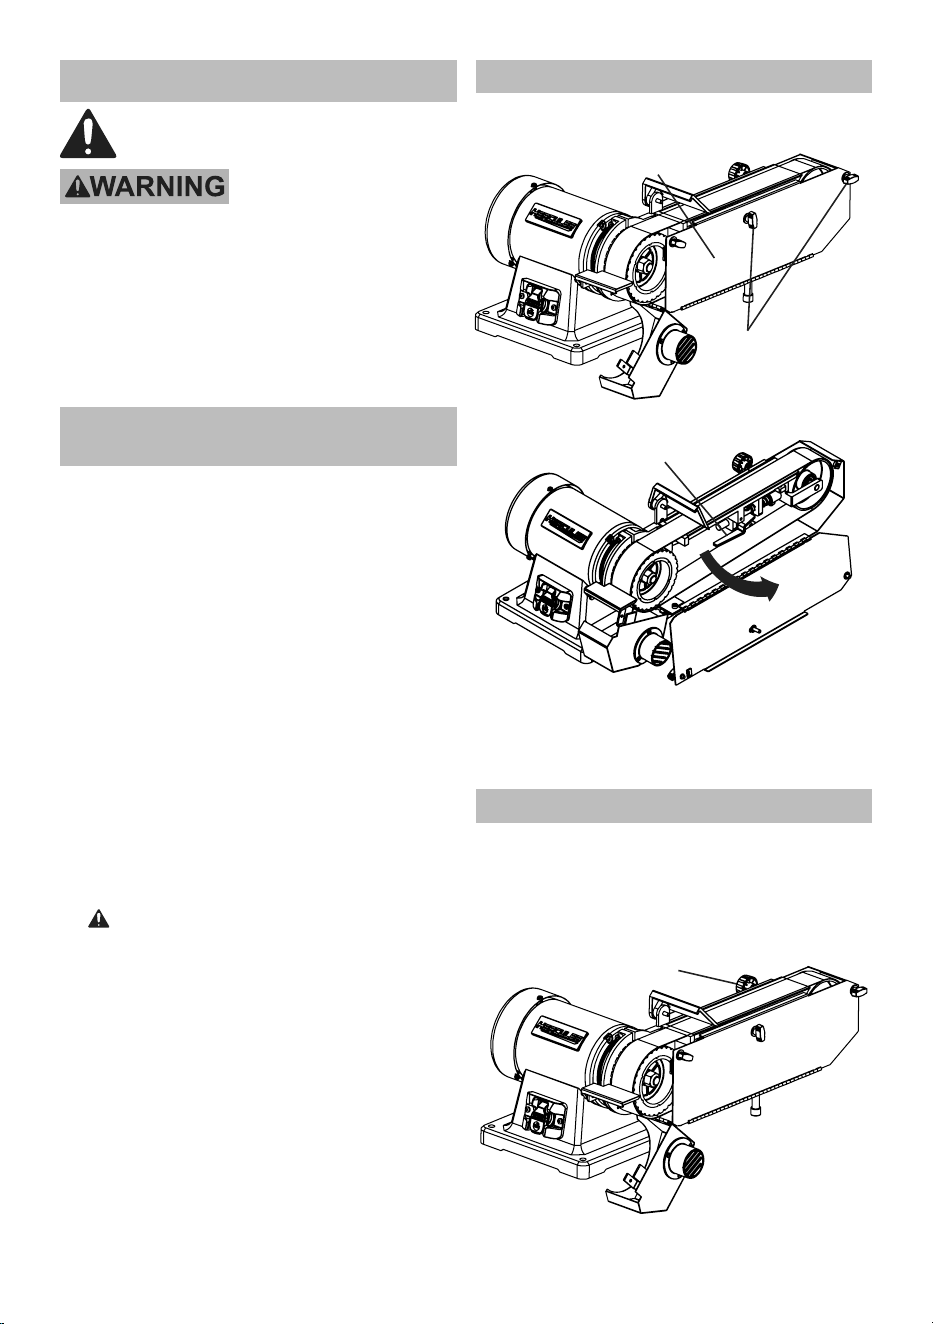
Belt Replacement
1. Loosen Lock Knobs.
2. Remove Belt Guard.
Lock Knobs
Belt Guard
3. Pull Belt Tension Lever out.
Tension Lever
4. Remove Belt.
5. Replace Belt.
6. Position Belt in center of pulleys.
7. Push Tension Lever in.
Belt Tracking
1. Rotate Belt by hand to check tracking. If Belt is not
centered, rotate Belt Adjustment Knob clockwise
to move Belt to the right and counterclockwise
to move Belt to the left, until Belt is centered.
2. Replace Belt Guard.
3. Tighten Lock Knobs.
Belt Adjustment
Knob
Page 9
For product assistance, please visit harborfreight.com/customer-support/contact-us
Items 58875
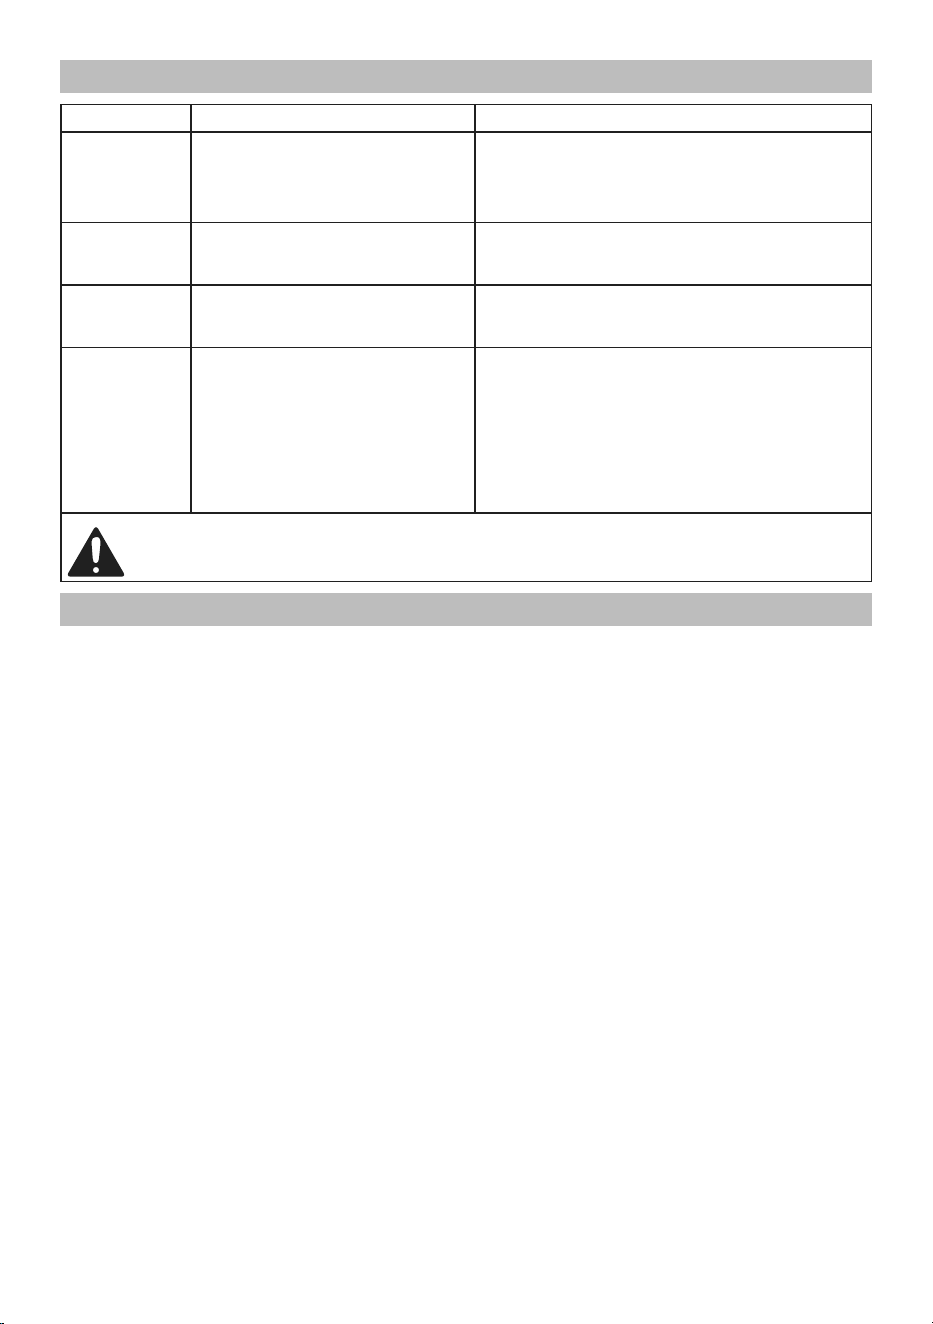
Troubleshooting
Problem Possible Causes Likely Solutions
Sander does
not turn on
1. Not plugged in.
2. No power at outlet.
3. Safety Key not inserted into Switch.
4. Switch is not turned ON.
1. Plug in Sander.
2. Check power at outlet and/or circuit breaker.
3. Insert Safety Key into Switch.
4. Turn on the Switch.
Motor slows
when during use
1. Drive Belt too tight.
2. Applying too much pressure.
1. Have the Drive Belt adjusted by
a qualified technician.
2. Use less pressure.
Wood burns
during use
1. Belt may be loaded
with dirt or debris.
2. Applying too much pressure.
1. Clean or replace Belt using
instructions in this manual.
2. Use less pressure.
Overheating. 1. Forcing machine to work too fast.
2. Accessory dull or damaged.
3. Blocked motor housing vents.
4. Motor being strained by long or
small diameter extension cord.
1. Allow machine to work at its own rate.
2. Keep cutting accessories sharp. Replace as needed.
3. Wear ANSI-approved safety goggles and
NIOSH-approved dust mask/respirator while
blowing dust out of motor using compressed air.
4. Eliminate use of extension cord. If an extension cord
is needed, use one with the proper diameter for
its length and load. See Table A on page .
Follow all safety precautions whenever diagnosing or servicing
the tool. Disconnect power supply before service.
PLEASE READ THE FOLLOWING CAREFULLY
THE MANUFACTURER AND/OR DISTRIBUTOR HAS PROVIDED THE COMPONENT LIST AND ASSEMBLY
DIAGRAM IN THIS MANUAL AS A REFERENCE TOOL ONLY. NEITHER THE MANUFACTURER OR
DISTRIBUTOR MAKES ANY REPRESENTATION OR WARRANTY OF ANY KIND TO THE BUYER THAT HE
OR SHE IS QUALIFIED TO MAKE ANY REPAIRS TO THE PRODUCT, OR THAT HE OR SHE IS QUALIFIED
TO REPLACE ANY PARTS OF THE PRODUCT. IN FACT, THE MANUFACTURER AND/OR DISTRIBUTOR
EXPRESSLY STATES THAT ALL REPAIRS AND PARTS REPLACEMENTS SHOULD BE UNDERTAKEN BY
CERTIFIED AND LICENSED TECHNICIANS, AND NOT BY THE BUYER. THE BUYER ASSUMES ALL RISK
AND LIABILITY ARISING OUT OF HIS OR HER REPAIRS TO THE ORIGINAL PRODUCT OR REPLACEMENT
PARTS THERETO, OR ARISING OUT OF HIS OR HER INSTALLATION OF REPLACEMENT PARTS THERETO.
Page 10
For product assistance, please visit harborfreight.com/customer-support/contact-us
Items 58875
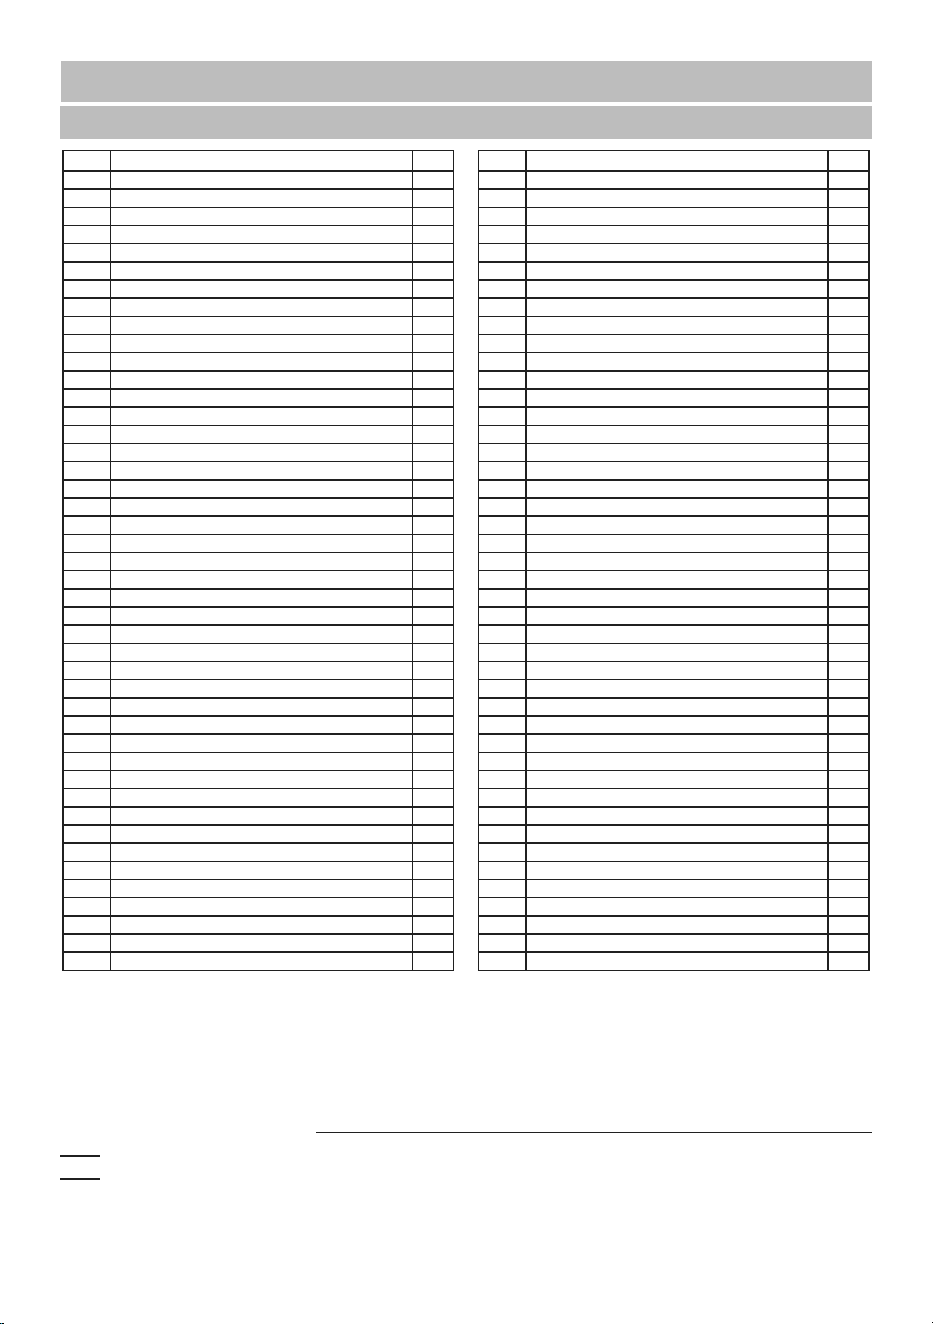
COMPONENT LIST AND DIAGRAM
Component List
Part Description Qty
1 Screw 13
2 Washer 9
3 Screw 2
4 Base Plate 1
5 Nut 4
6 Capacitor Support 1
7 Screw 1
8 Capacitor 1
9 ON/OFF Switch 1
10 Screw 6
11 Switch Plate 1
12 Base 1
13 Bolt 2
14 Centrifugal Switch 1
15 Power Cord 1
16 Table Support 1
17 Work Rest 1
18 Screw 2
19 Screw 1
20 Cord Clip Plate 1
21 Cord Clip 1
22 Screw 1
23 Star Washer 1
24 Cord Bushing 1
25 Line Bank 1
26 Fan Cover 1
27 Fan 1
28 Nut 4
29 Back End bell 1
30 Washer 1
31 Ball Bearing 1
32 Stator 1
33 Rotor 1
34 Screw 4
35 Ball Bearing 1
36 Front End Bell 1
37 Belt Table Support 1
38 Bolt 1
39 Work Rest 1
40 Bolt 2
41 Washer 2
42 Belt Adjustment Knob 1
43 Spring 1
44 Washer 3
Part Description Qty
45 Screw 2
46 Adjusting Pad 1
47 Graphite Pad 1
48 Location Board 1
49 Screw 3
50 Spring Pin 1
51 Rubber Foot 1
52 Support Rod 1
53 Nut 1
54 Belt support 1
55 Spring 1
56 Washer 4
57 Nut 2
58 Screw 1
59 Spring 1
60 Idler Wheel Support 1
61 Belt Tension Lever 1
62 Bolt 1
63 Guide Rod 1
64 Screw 1
65 Screw 2
66 Washer 2
67 Idler Shaft 1
68 Ball Bearing 2
69 Idler Drum 1
70 Belt 1
71 Key 1
72 Nut 1
73 Contact Wheel 1
74 Washer 1
75 Washer 2
76 Safe Guard 1
77 Lock Knob 1
78 Lock Knob 1
79 Lock Knob 1
80 Screw 1
81 Spring Washer 2
82 Bolt 2
83 Dust Port 1
84 Contact Wheel Access Door 1
85 Hex Wrench 1
86 Spanner 1
87 Label Plate 1
88 Screw 1
Record Product’s Date Code Here:
Note: If product has no date code, record month and year of purchase instead.
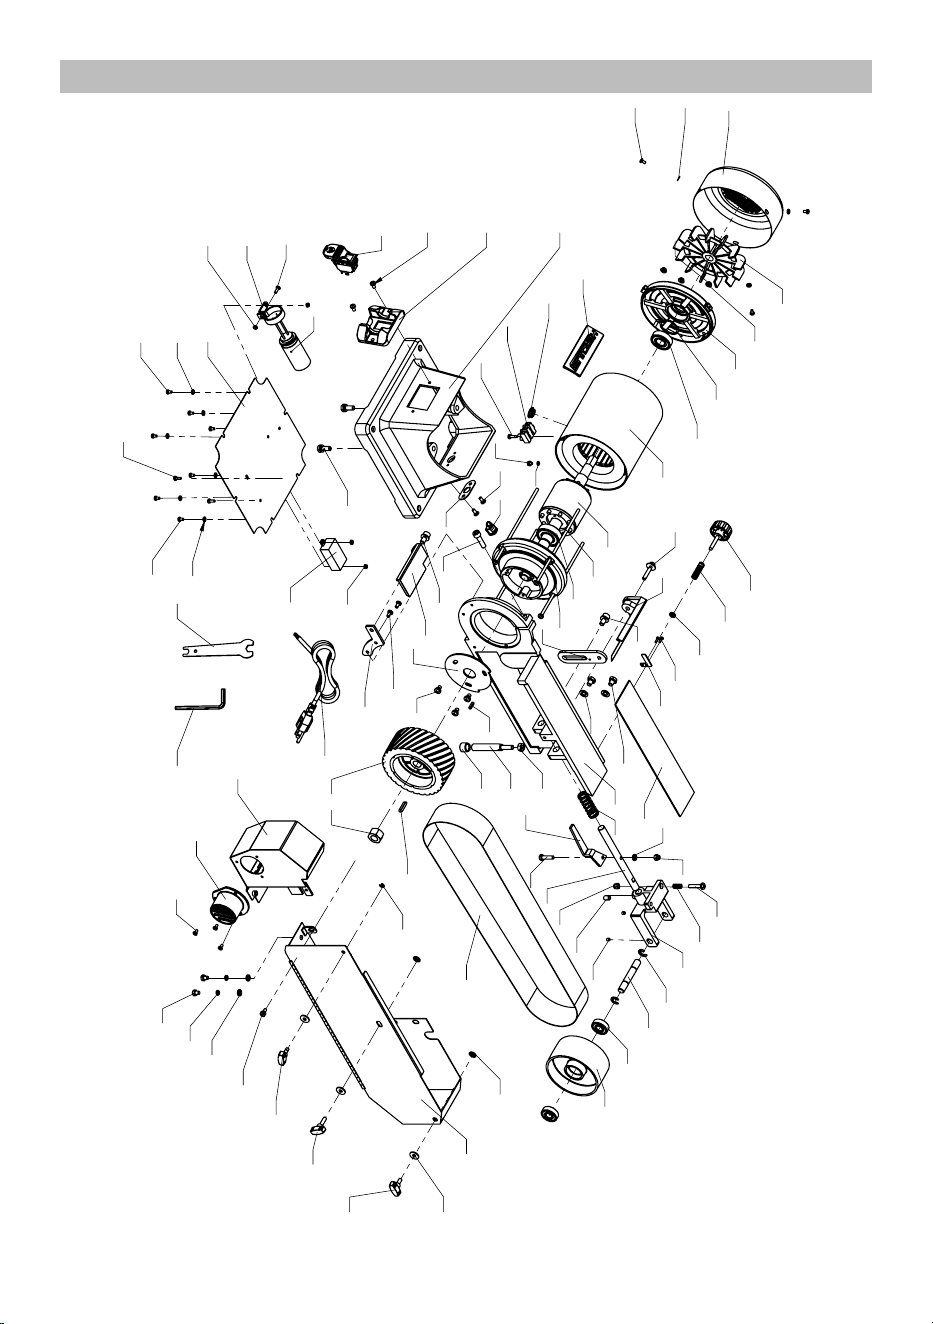
Note: The component list and assembly diagram are shown for reference only.
To view all currently available replacement parts, please visit harborfreight.com/parts
Specify UPC 193175448088 when ordering parts.
Page 11
For product assistance, please visit harborfreight.com/customer-support/contact-us
Items 58875
Assembly Diagram
28
1
2
1
2
3
45
6
7
8
9
10
11
12
13
14
5
16
10
17
18
20
10 21
19
15
22
23
24
25
1
2
26
27
28
29
30
31
33
34
36
35
37
43
44
46
47
39
40
18
38
41
42
48
49
51
50
53
52
54
55
56
63
62
58
57
59
60
61
58
65
66
67
68
69
70
74
72
71
73
75
76
77
45
78
79
80
81
57
83
85
84
1
87
86
82
64
88
57
32

TM
For product assistance, visit harborfreight.com/customer-support/contact-us
Copyright
©
2026 by Harbor Freight Tools
®
. All rights reserved. No portion of this manual or
any artwork contained herein may be reproduced in any shape or form without the express
written consent of Harbor Freight Tools. Diagrams within this manual may not be drawn
proportionally. Due to continuing improvements, actual product may differ slightly from the
product described herein. Tools required for assembly and service may not be included.
3-YEAR LIMITED WARRANTY
This HERCULES tool is warranted to the original purchaser to be free from defects in materials and
workmanshipforaperiodofthree(3)yearsbeginningonthedateofpurchase.Toobtainwarranty
service, visit your local Harbor Freight retail store. Warranty registration is not required. The product
orpartmustbereturnedtouswithproofofpurchase(e.g.in-storereceiptorpackingslip/invoice)
and may require shipment by purchaser to a service center at purchaser’s expense. If our inspection
verifies a covered defect in materials or workmanship during the warranty period, we will, at our option,
repair or replace the defective product. We will return repaired products within a reasonable time at our
expense, but if we determine that there is no defect, or that the defect resulted from causes not within
the scope of our warranty, then we will return the product to you if you pay return shipping costs.
This warranty does not cover any failure or damage that we determine is due directly or indirectly
to normal wear and tear, misuse, use not for the intended purpose or not in accordance with the
product manual, abuse, accident, rental, modification or alteration, unauthorized repair, improper
installation, neglect, lack of maintenance, or any other failure not arising from defective materials or
workmanship. Fraudulent returns or claims will be denied. The repair or replacement described in this
warranty shall be your sole and exclusive remedy. THIS WARRANTY IS EXCLUSIVE AND IN LIEU
OF ALL OTHER EXPRESS WARRANTIES, WRITTEN OR ORAL, AND ANY IMPLIED WARRANTIES
ARE DISCLAIMED TO THE EXTENT PERMITTED BY LAW AND OTHERWISE LIMITED TO THE
DURATION OF THE EXPRESS WARRANTY HEREIN. HARBOR FREIGHT SHALL NOT BE LIABLE
UNDER ANY CIRCUMSTANCES FOR ANY INCIDENTAL, INDIRECT, SPECIAL, CONSEQUENTIAL,
OR PUNITIVE DAMAGES OR COSTS ARISING FROM THIS WARRANTY OR THE USE OF THIS
PRODUCT. SOME STATES DO NOT ALLOW LIMITATIONS ON HOW LONG AN IMPLIED WARRANTY
LASTS OR THE EXCLUSION OR LIMITATION OF INCIDENTAL OR CONSEQUENTIAL DAMAGES, SO
THESE LIMITATIONS MAY NOT APPLY TO YOU. THIS WARRANTY GIVES YOU SPECIFIC LEGAL
RIGHTS, AND YOU MAY ALSO HAVE OTHER RIGHTS WHICH VARY FROM STATE TO STATE.
Visit our website at: https://www.harborfreight.com