Continued On Next Page
Smoove
®
1 & 4 RTS
Introduction
Part Numbers:
Smoove 1
#1811533
Smoove 4
#1811748
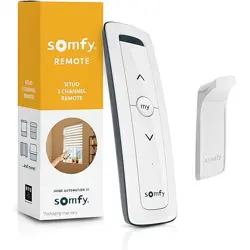
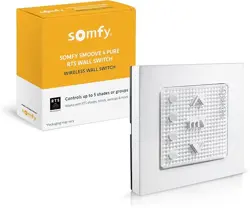
The Smoove 1 RTS controls a single group of window coverings.
The Smoove 4 RTS controls up to four dierent groups of window coverings.
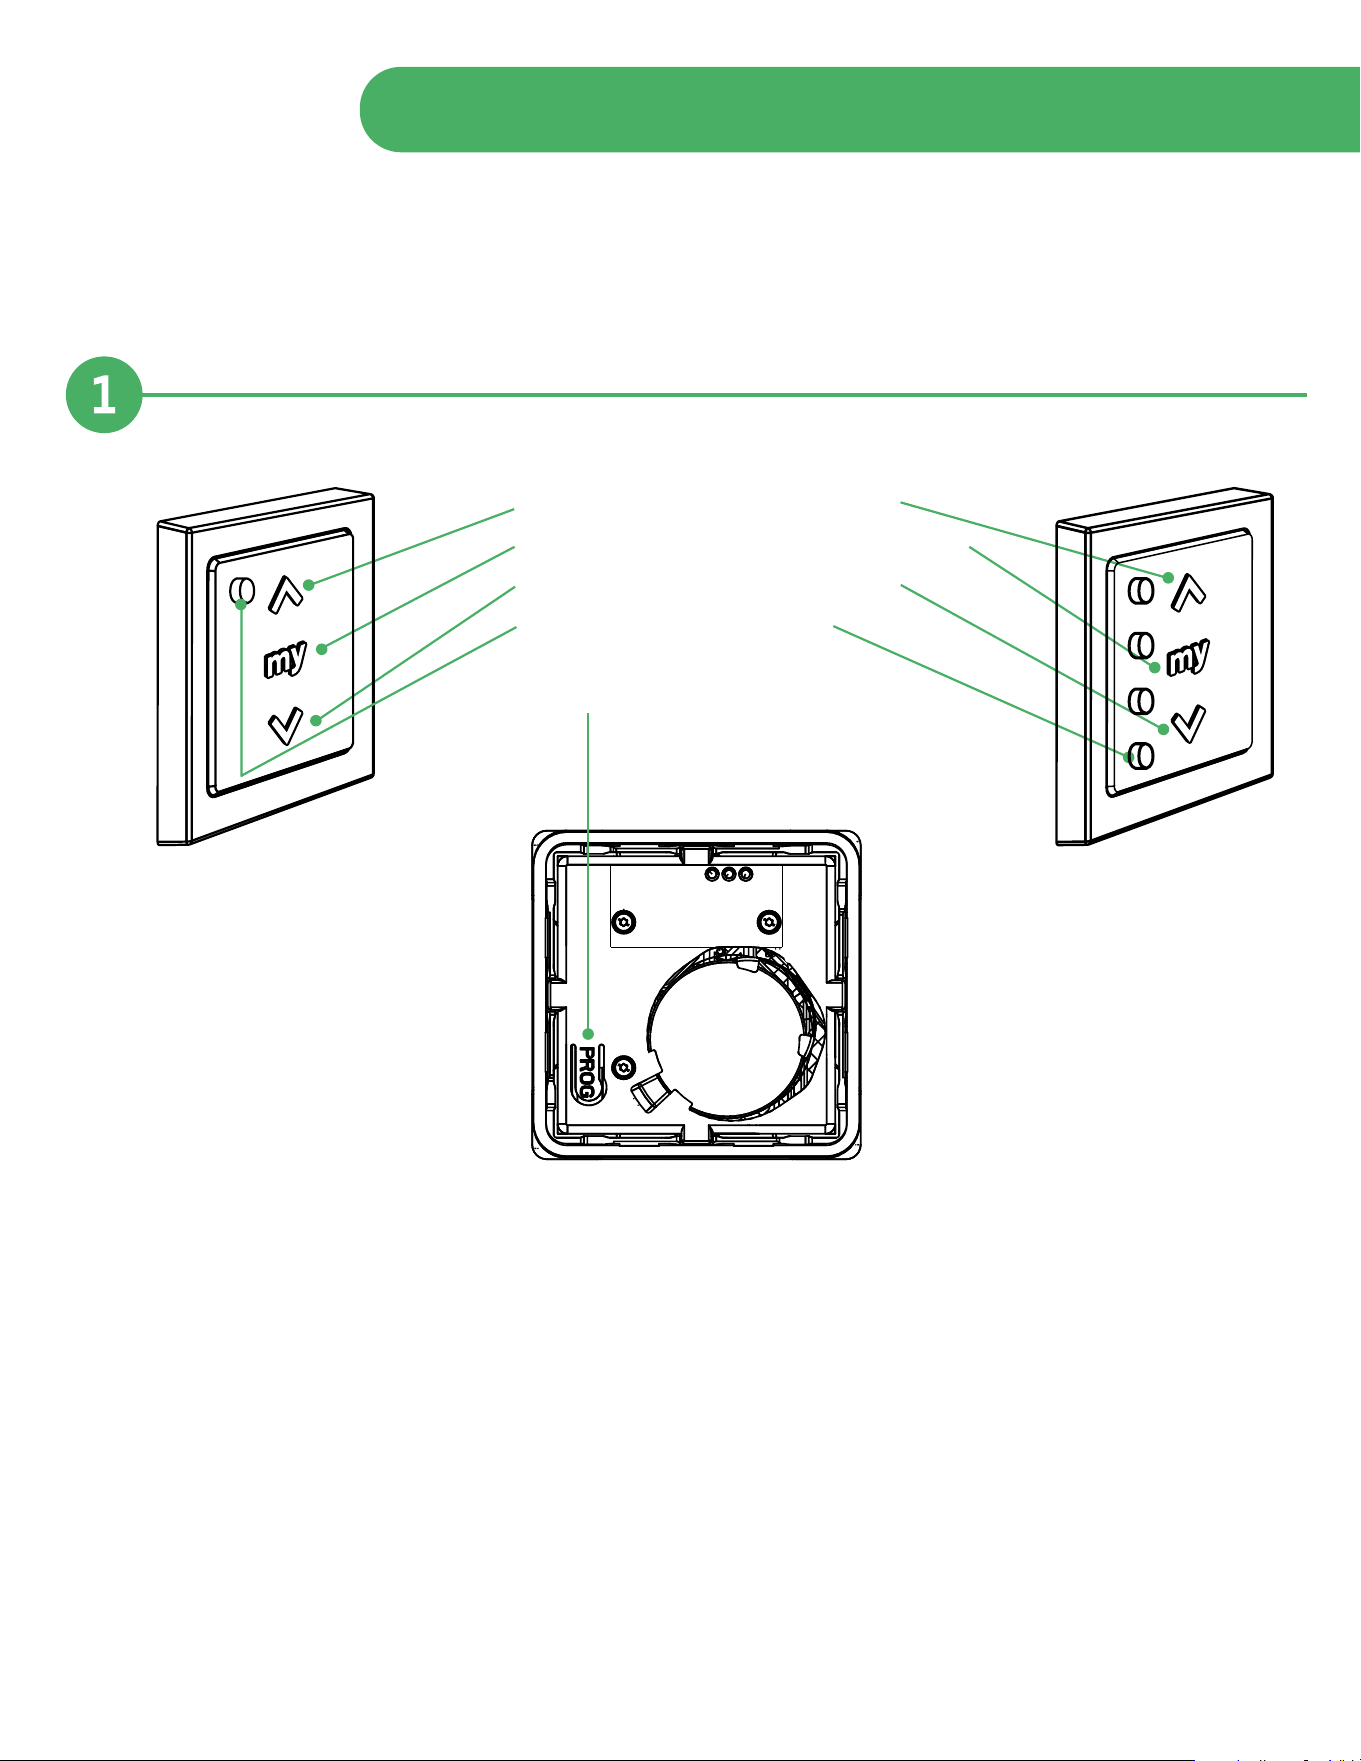
Smoove 1 RTS
A. Button (raise, switch on, open, tilt)
B.
“my” button (stop, go to favorite position)
C. Button (lower, switch o, close, tilt)
D. Channel selection indicators
E. Programming (PROG) button
(On backside of both models)
Smoove 4 RTS
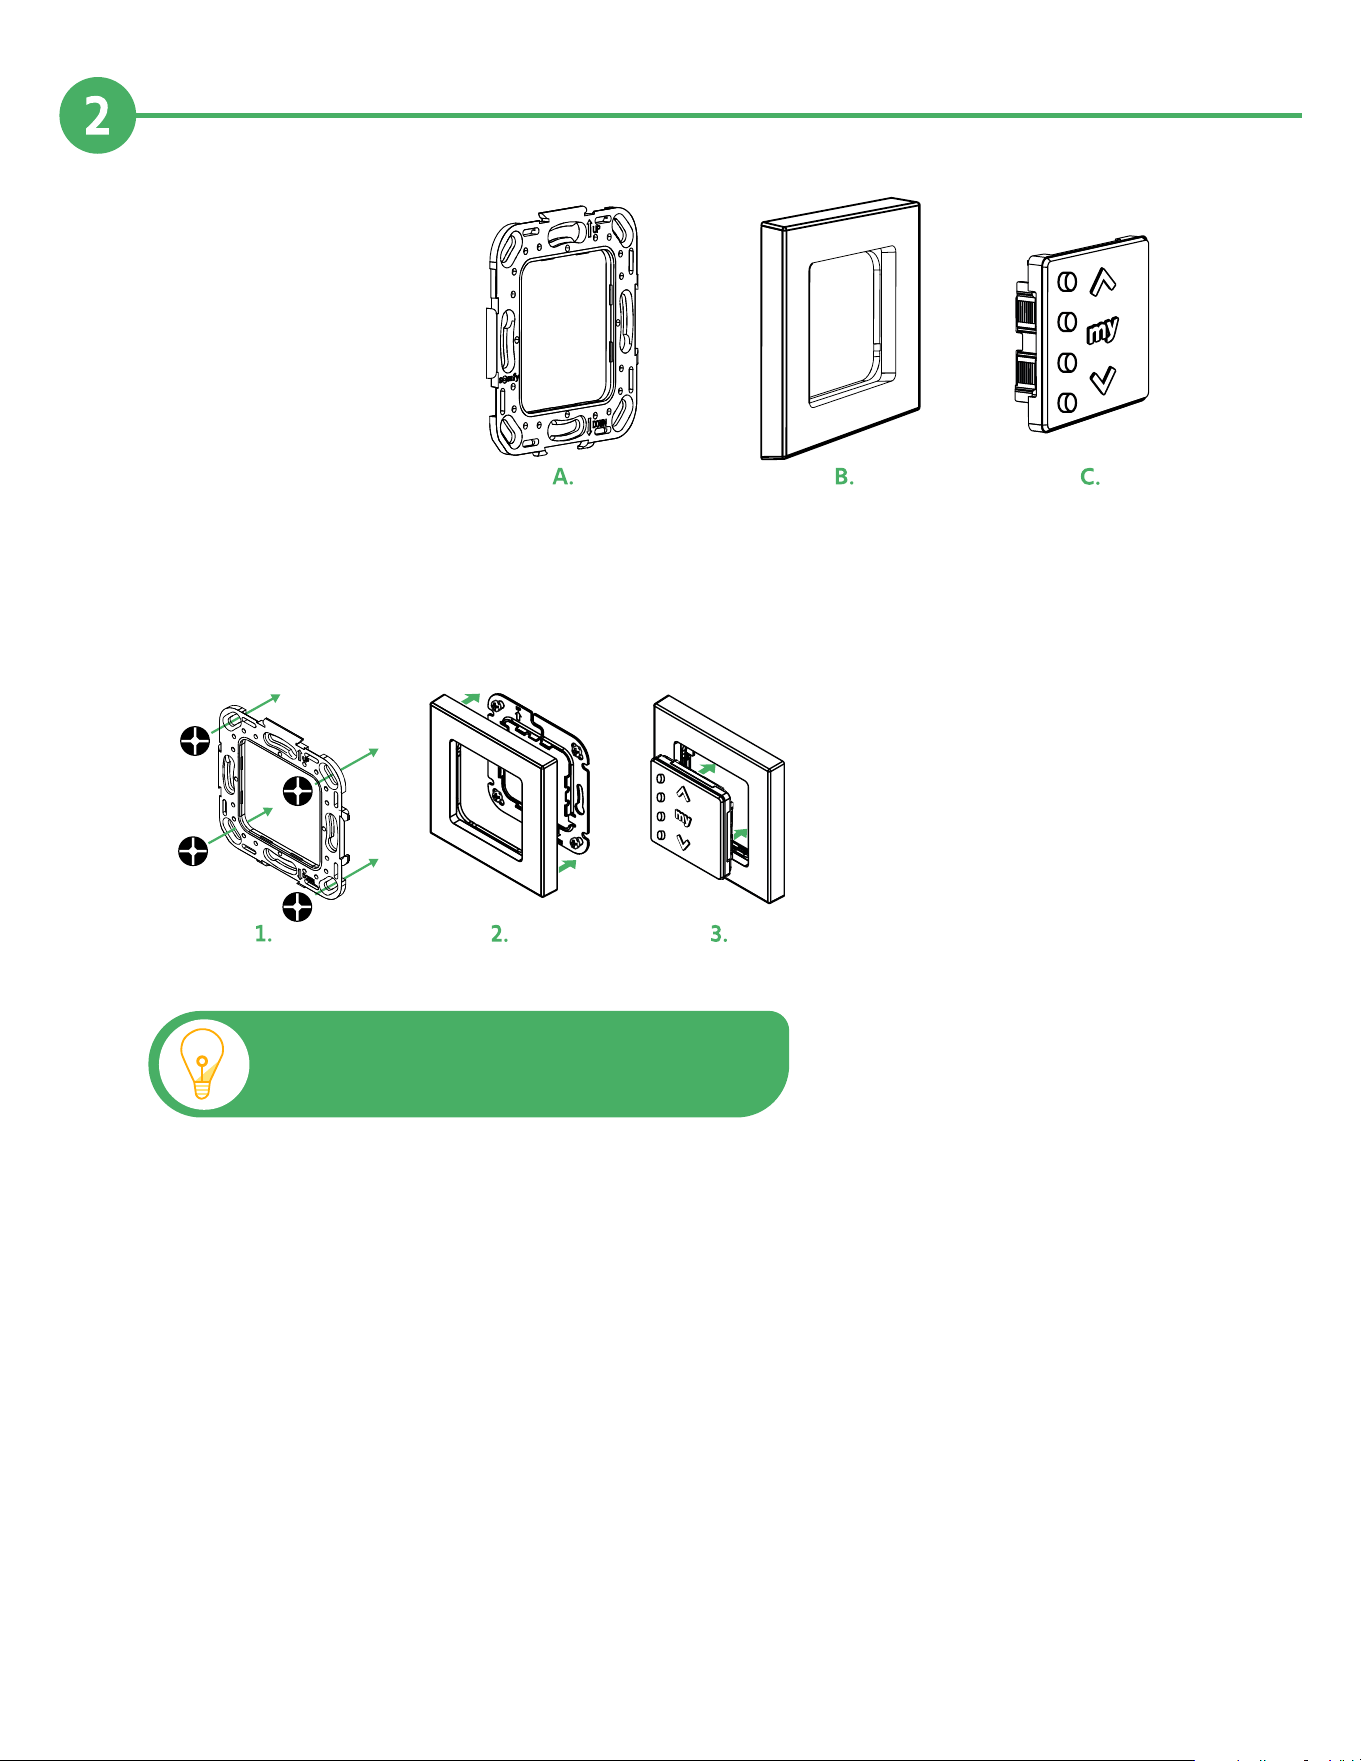
A. Mounting frame
B. Smoove frame
C. Smoove 1 or 4
(4 is shown)
Note: Locating the module near a metal frame or
surface may impede the product’s operation.
Installation
Install on a clean, flat interior wall within
35 feet of window coverings.
1. Install the mounting frame using
provided, countersunk screws in
corners of plate to the wall.
2. Snap the frame onto the mounting
plate (notch facing downward).
3. Clip the Smoove RTS
module onto the assembly.
4. Product can be mounted to the wall
using double sided tape (3M tape)
Continued On Next Page
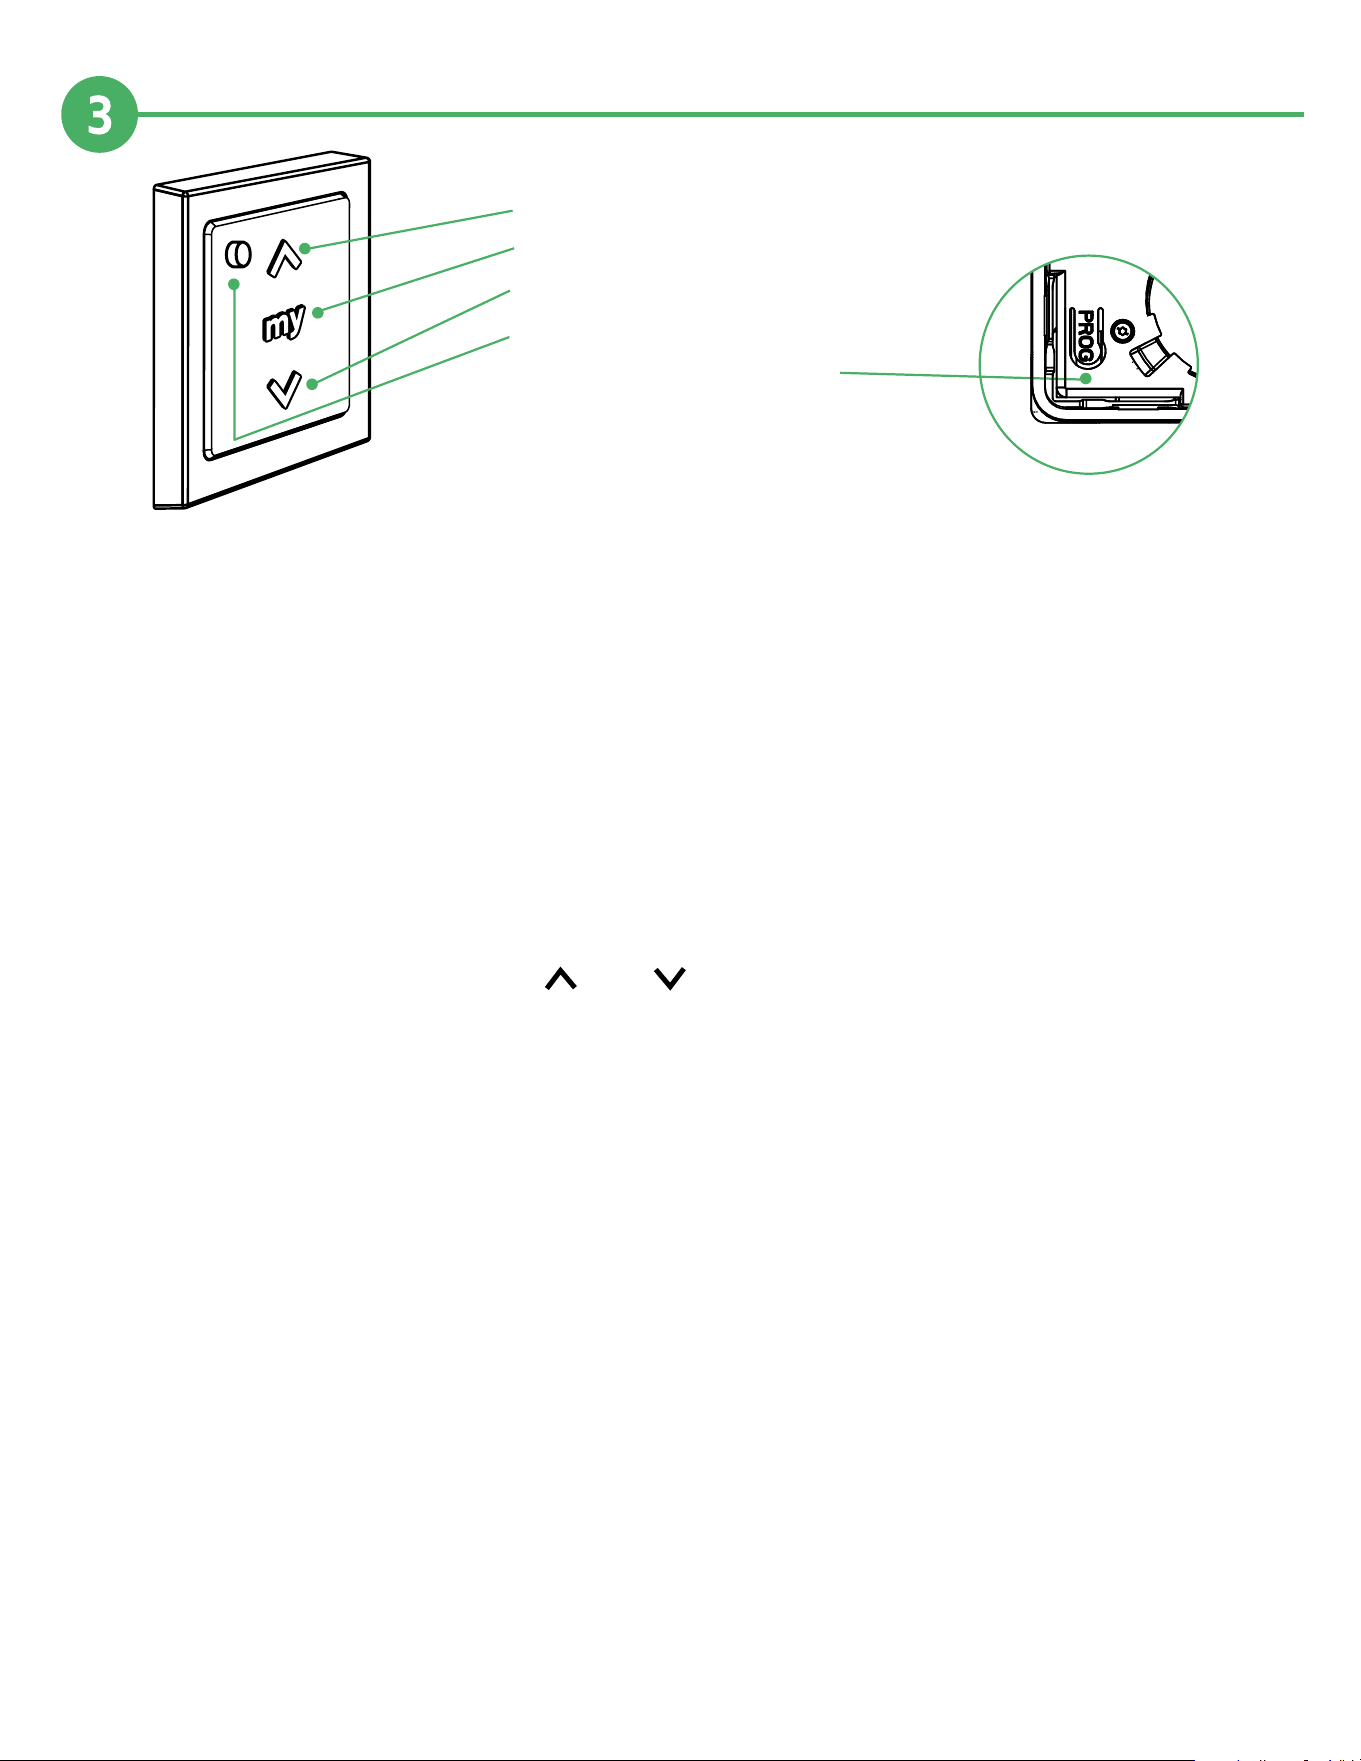
Operation for Smoove 1
A. Button (raise, switch on, open, tilt)
B. “my” button (stop, go to favorite position)
C. Button (lower, switch o, close, tilt)
D. Channel selection indicator
E. Programming (PROG) button
(On backside of faceplate)
Pairing a Smoove 1 to a window covering
• Press and hold the Programming (PROG) button on the window covering motor until the window
covering moves up and down. Note: You have 2 minutes to successfully complete RTS programming
or it will default back to factory setting, and you will have to start process over again.
• Press the
Programming (PROG) button (E) on the back of the Smoove 1 until the window covering
begins to move up and down.
• The Smoove 1 is now paired with the window covering motor.
Daily Use
• On the Smoove 1, press the (A) or (C) to open or close the window covering.
• To stop the window covering at a specific position, press the “my” button (B).
Creating Preset Positions
To create a preset position:
• Adjust the window covering to the desired position.
• Press “my” on the Smoove 1 until the window covering moves up and down.
The preset is now activated.
To delete a preset position
• Press the “my” button. The window covering moves to a preset position.
• Press the “my” button again until the window covering moves up and down.
The preset position has been deleted.
Daily use of preset positions
• Briefly press the “my”
button. The window covering will move to the preset position.
Continued On Next Page
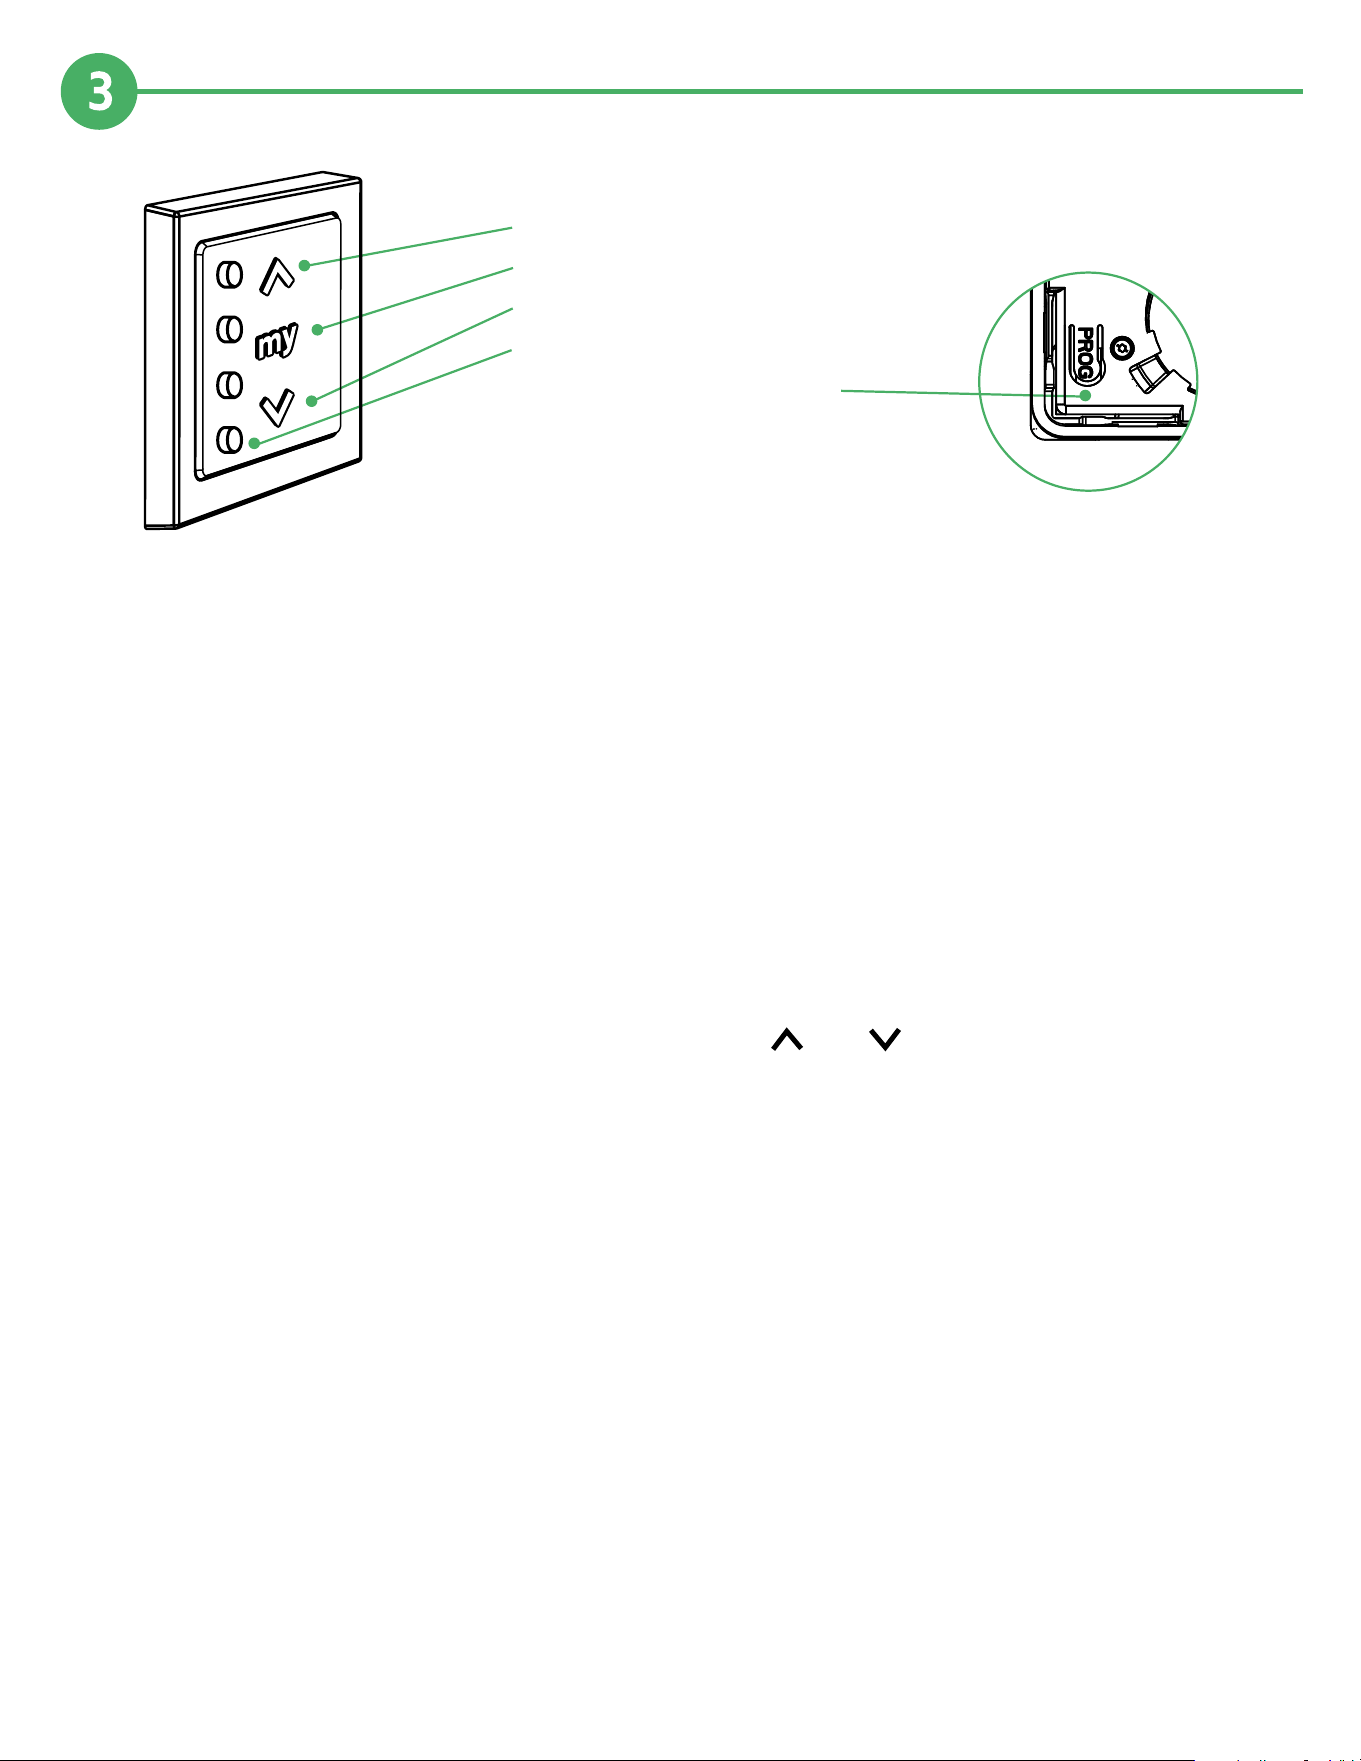
Operation for Smoove 4
A. Button (raise, switch on, open, tilt)
B. “my” button (stop, go to favorite position)
C. Button (lower, switch o, close, tilt)
D. Channel selection indicator
E. Programming (PROG) button
(On backside of faceplate)
Pairing a Smoove 4 to a window covering and creating channels
• Press and hold the Programming (PROG) button on the window covering motor until the window
covering moves up and down. Note: You have 2 minutes to successfully complete RTS programming
or it will default back to factory setting, and you will have to start process over again.
• Assign the window covering to a channel by selecting that channel (D) on the Smoove 4.
• Press the
Programming (PROG) button (E) on the Smoove 4.
• The window covering will move up and down, indicating a successful pairing.
• Repeat this procedure, assigning window coverings to channels until you have paired all the
window coverings to the Smoove 4.
• To remove a window covering from Smoove 4 control or to change its channel:
1. Press Programming (PROG) on the mounted window covering motor.
2. Press the channel button (D) on the Smoove 4 to which the window covering is assigned.
3. Press the
Programming (PROG) button (E). The window covering will move up and down,
indicating it is now removed from the Smoove 4 and its assigned channel.
Daily Use
• On the Smoove 1, select a channel, then press the (A) or (C) to open or close the
window covering.
• To stop the window covering at a specific position, press the “my” button (B).
Creating Preset Positions
To create a preset position:
• Press the channel number (E).
• Adjust the window coverings to the desired position.
• Press the “my” button (B) until the window coverings move up and down. The preset is now activated.
To delete a preset position
• Press the channel number (E).
• Press the “my” button (B). The window coverings move to a preset position.
• Press the “my” button (B) again until the window coverings move up and down.
The preset position has been deleted.
Daily Use of Preset Positions - The “my” button on the Smoove 4 opens and closes your window coverings
to your preferred preset conditions.
• Press the channel button (E).
• Press the “my” button (B).
• The window covering will move to a preset position.
The Smoove 4 operates four dierent groups of window coverings.
As you pair your Smoove 4 to each window covering controller, you also build each grouping.
Continued On Next Page
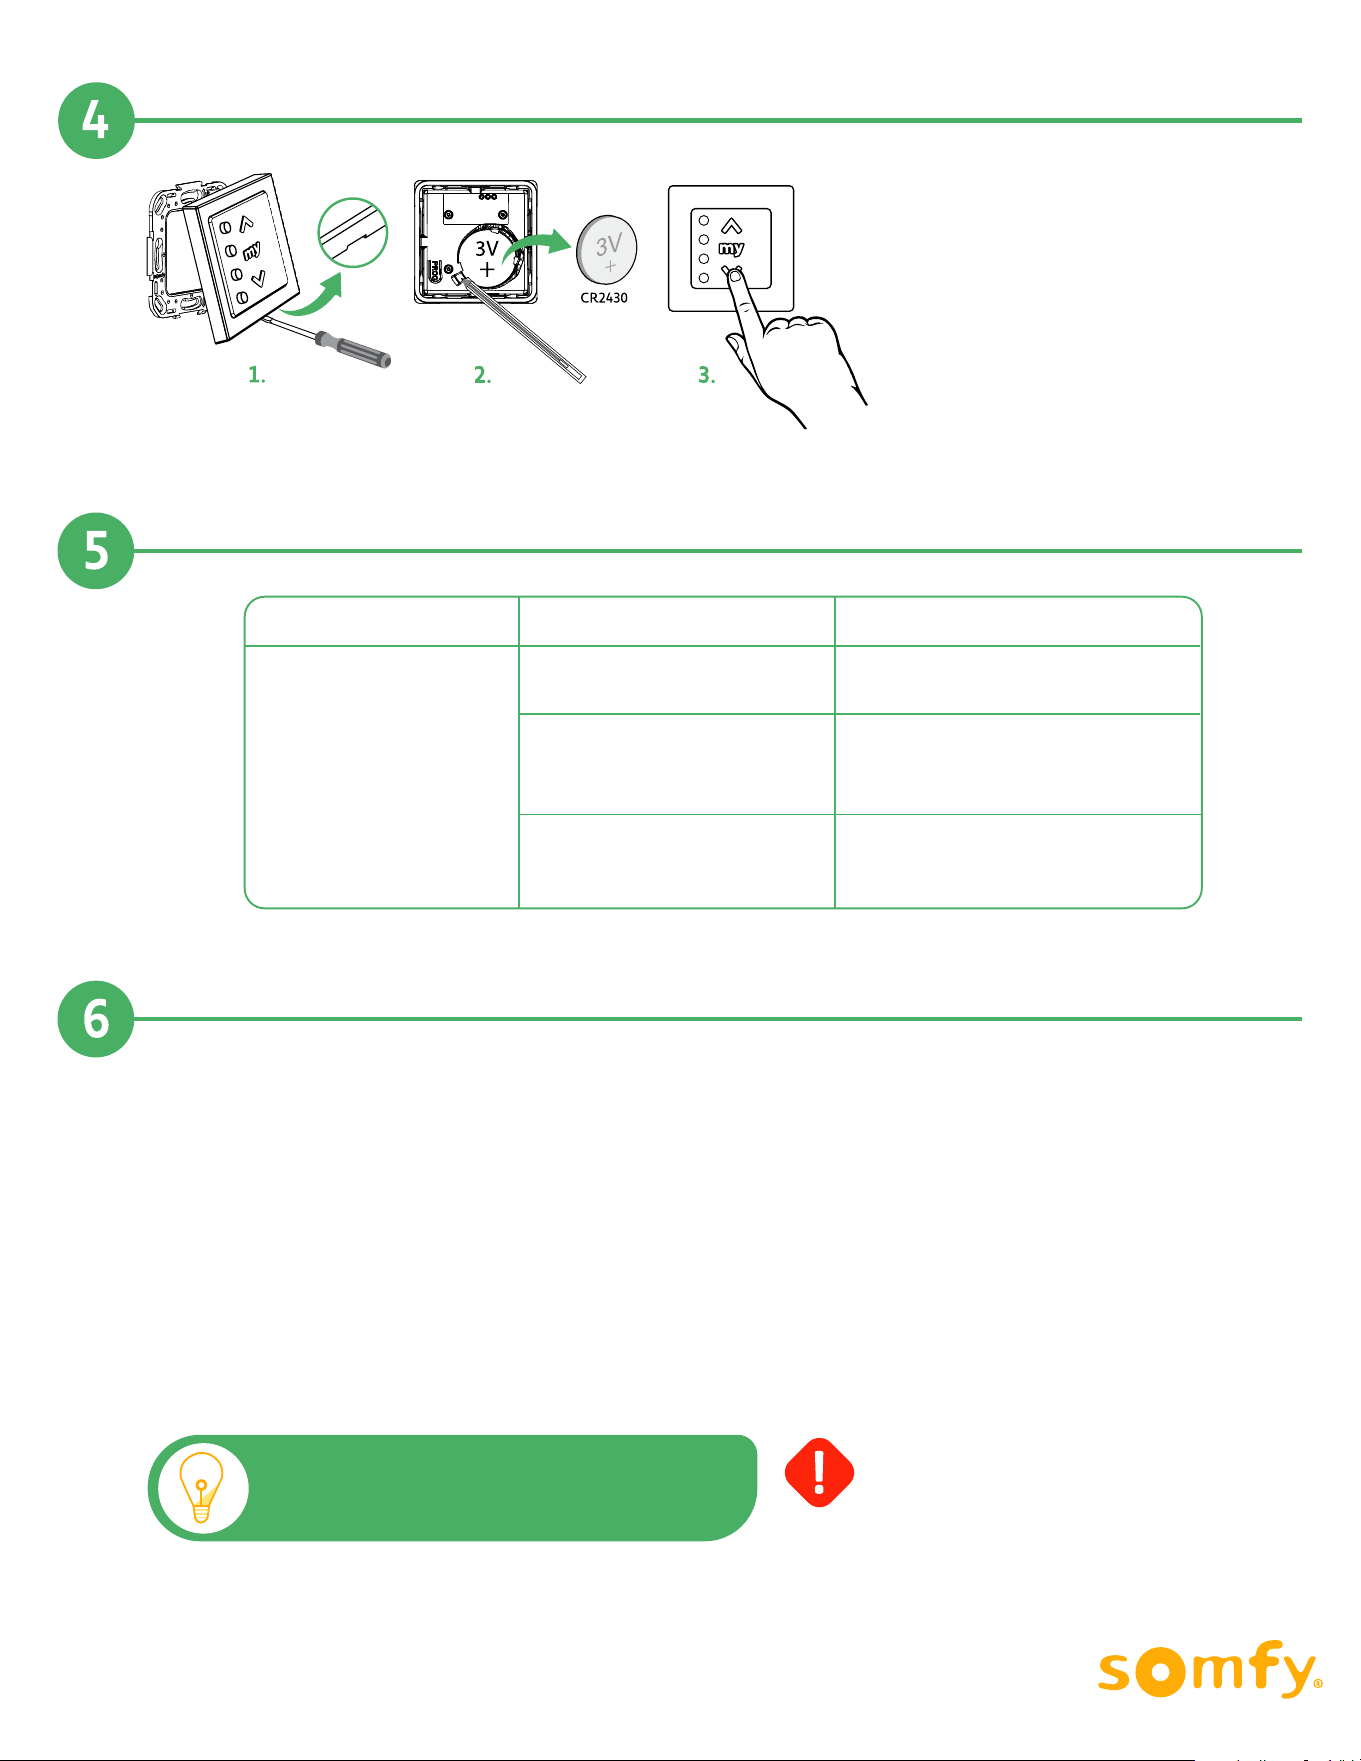
Battery Replacement
1. Unclip the frame by using a small
flat head screwdriver to open (against
the small groove shown in image 1)
2. Remove old battery then insert a
new CR 2430 3 V battery, (+) side up.
3. Replace the frame and Module onto
the mounting frame by pressing
back to original position.
Troubleshooting
Observation
The window covering
does not move
Possible Causes
Weak battery
Window covering
not paired with device
Signal interference
from nearby electronics
Solution
Insert new battery
See section 3 Pairing a
Smoove
Turn o nearby electronics
Replacing a lost or broken Smoove 1 or 4 Controller
To Replace a lost or broken remote, follow these steps with the NEW transmitter.
1. Press and hold the Programming (PROG) button on the window covering motor until the window
covering moves up and down.
2. Press the Programming (PROG) button (E) on the back of the Smoove 1 until the window covering
begins to move up and down.
3. The Smoove 1 is now paired with the window covering motor.
4. Follow steps of the installed motor to set the upper and lower limits
AS WITH ANY PRODUCT INVOLVING
GENERATION OF ELECTRICAL POWER,
CAUTION MUST BE USED AT ALL TIMES.
PLEASE CAREFULLY READ AND FOLLOW
ALL OF THE INSTRUCTIONS.
This device is FCC certified and complies with part 15 of the FCC rules.
RTS compatibility: RTS transmitters are capable of operating any RTS motor.
Note: Visit https://store.somfysystems.com/ to
purchase an additional or replacement product.