
Situo
®
1 & 5 RTS
Introduction
Part Numbers:
1870571 Situo 1 RTS Pure
1870575 Situo 5 RTS Pure
1870572 Situo 1 RTS Iron
1870576 Situo 5 RTS Iron
1870573 Situo 1 RTS Natural
1870577 Situo 5 RTS Natural
1870574 Situo 1 RTS Arctic
1870578 Situo 5 RTS Arctic
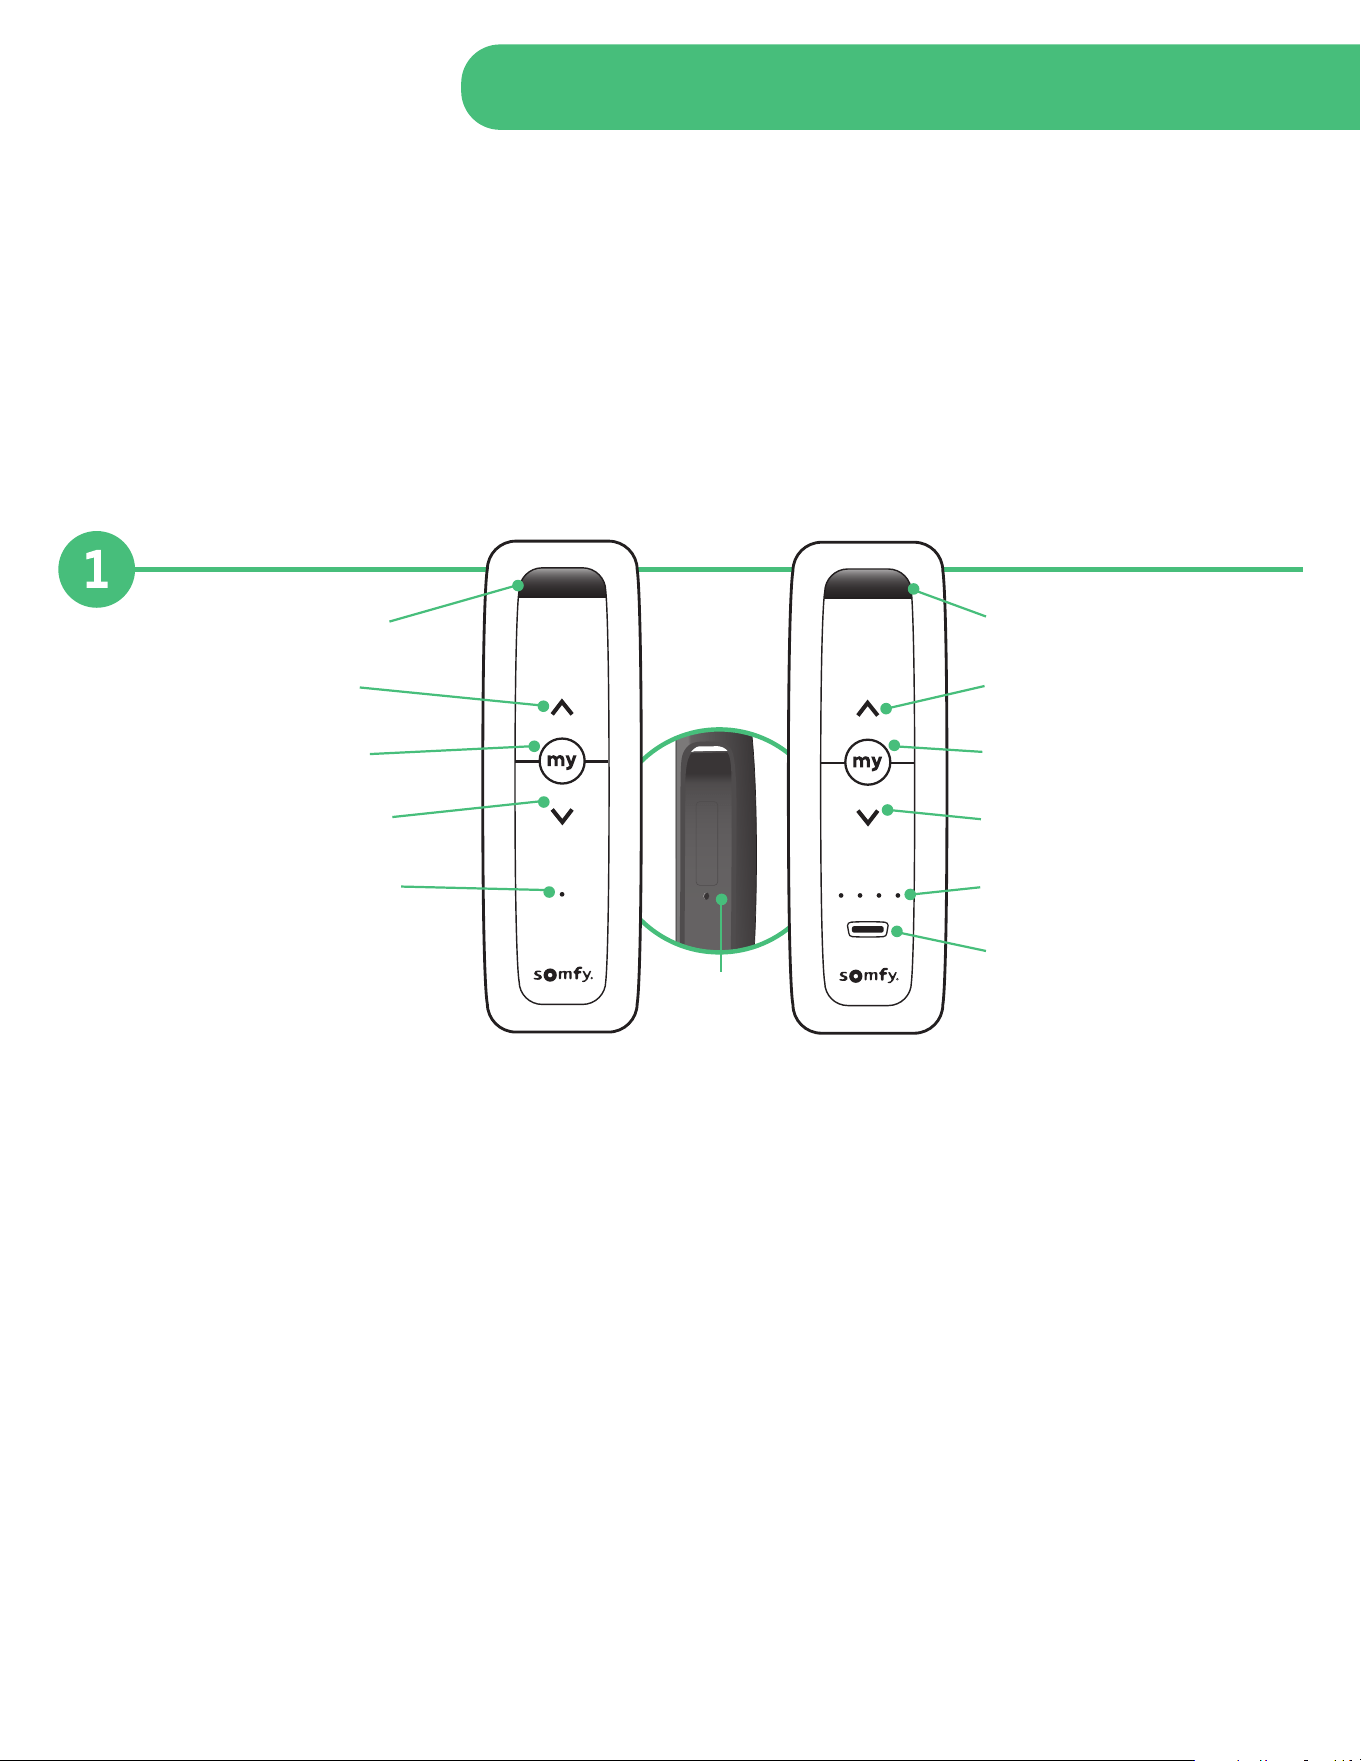
The Situo 1 RTS remote control allows a group of one or more
window coverings to be controlled. The Situo 5 RTS remote
control allows up to 5 groups of one or more window coverings
to be controlled.
A. Wall mounting recess
B. Up/On/Open/Tilt
C. STOP/”my” button
D. Down/O/Close/Tilt
E. Channel indicator light
Situo 1 RTS Situo 5 RTS
A. Wall mounting recess
B. Up/On/Open/Tilt
C. STOP/”my” button
D. Down/O/Close/Tilt
E. Channel indicator lights
F. Channel selector
G.
Programming
(PROG)
button on back
Continued On Next Page
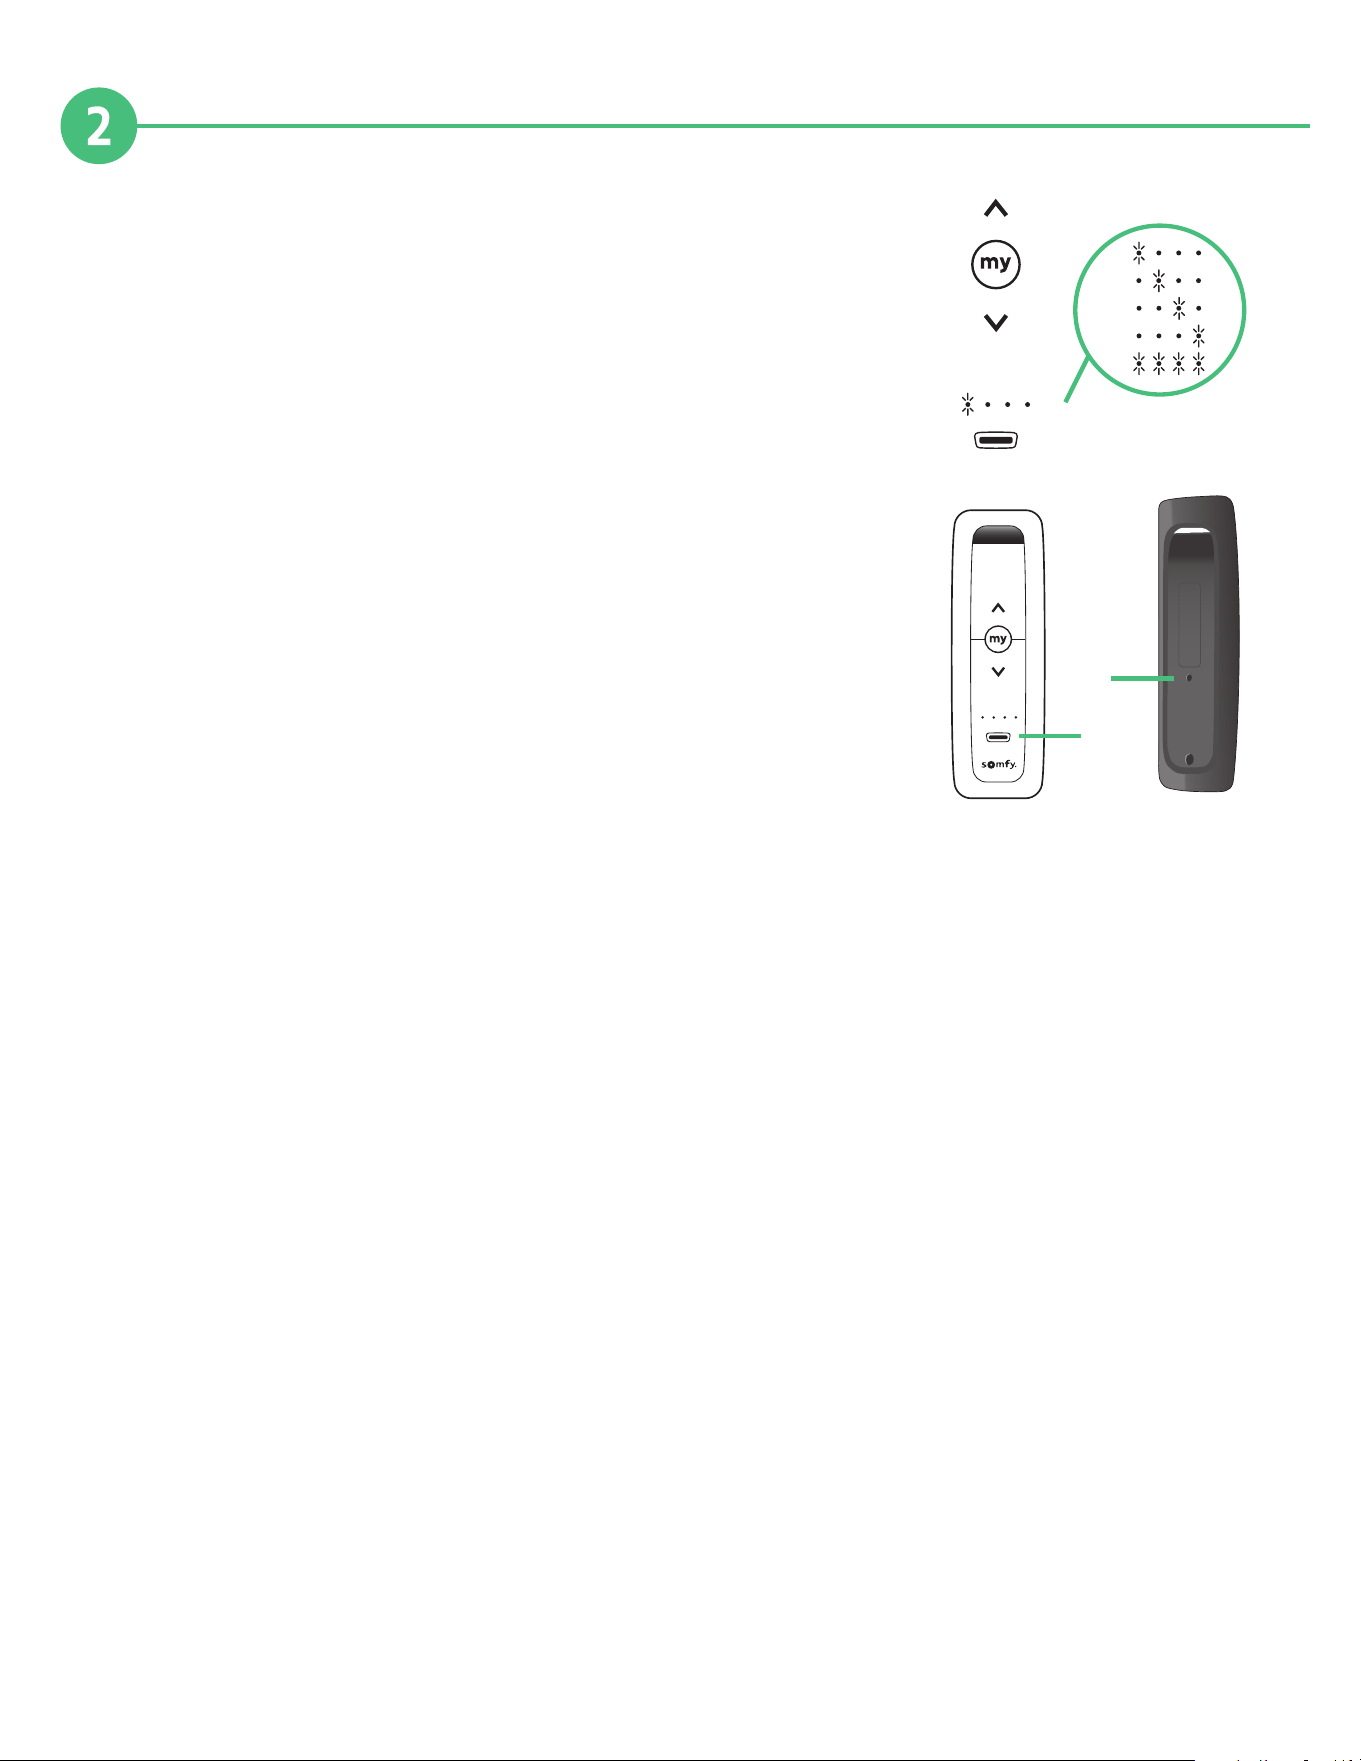
Programming
Channel Selection
Before operating the Situo 5 RTS, ensure the correct
channel has been selected.
• Press the channel selector button (F) to choose
the correct channel.
• The selection indicator lights (E) correspond
to channel 1 through 4. Channel 5 is selected
when all indicators lights are on.
Adding/Deleting a Situo 1 or 5 RTS
To add or delete from a window covering:
On the Situo 1 already paired with the window covering:
• Press and hold the PROG button (G) until the window
covering moves up and down. This step may require a paperclip
because the button is recessed.
On the Situo 5 RTS to be added or deleted:
• Select the channel (F).
• Briefly press the PROG button (G), the window covering
moves up and down and the Situo 5 RTS is added or deleted.
Setting Up a Replacement Remote
1. Reset motor from motor head (motor will jog to confirm).
2. On the Situo remote, Press UP & DOWN.
3. Next, Press "my" and DOWN to set lower limit. Move motor to the desired limit position.
4. Then, Press "my" and UP to set upper limit. Move motor to the desired limit position.
5. Now, PRESS & HOLD "my" Button to confirm limit settings (motor will jog once).
6. Finally, on the back of the Situo Remote, PRESS and HOLD "Programming Button" until the motor jogs again.
Your Situo remote is not programmed and can control your RTS shade. Use the UP and DOWN buttons to confirm.
7. Repeat steps again if motor limits are not properly set.
1
2
3
4
5
E
F
Situo 5 RTS
F
G
Continued On Next Page
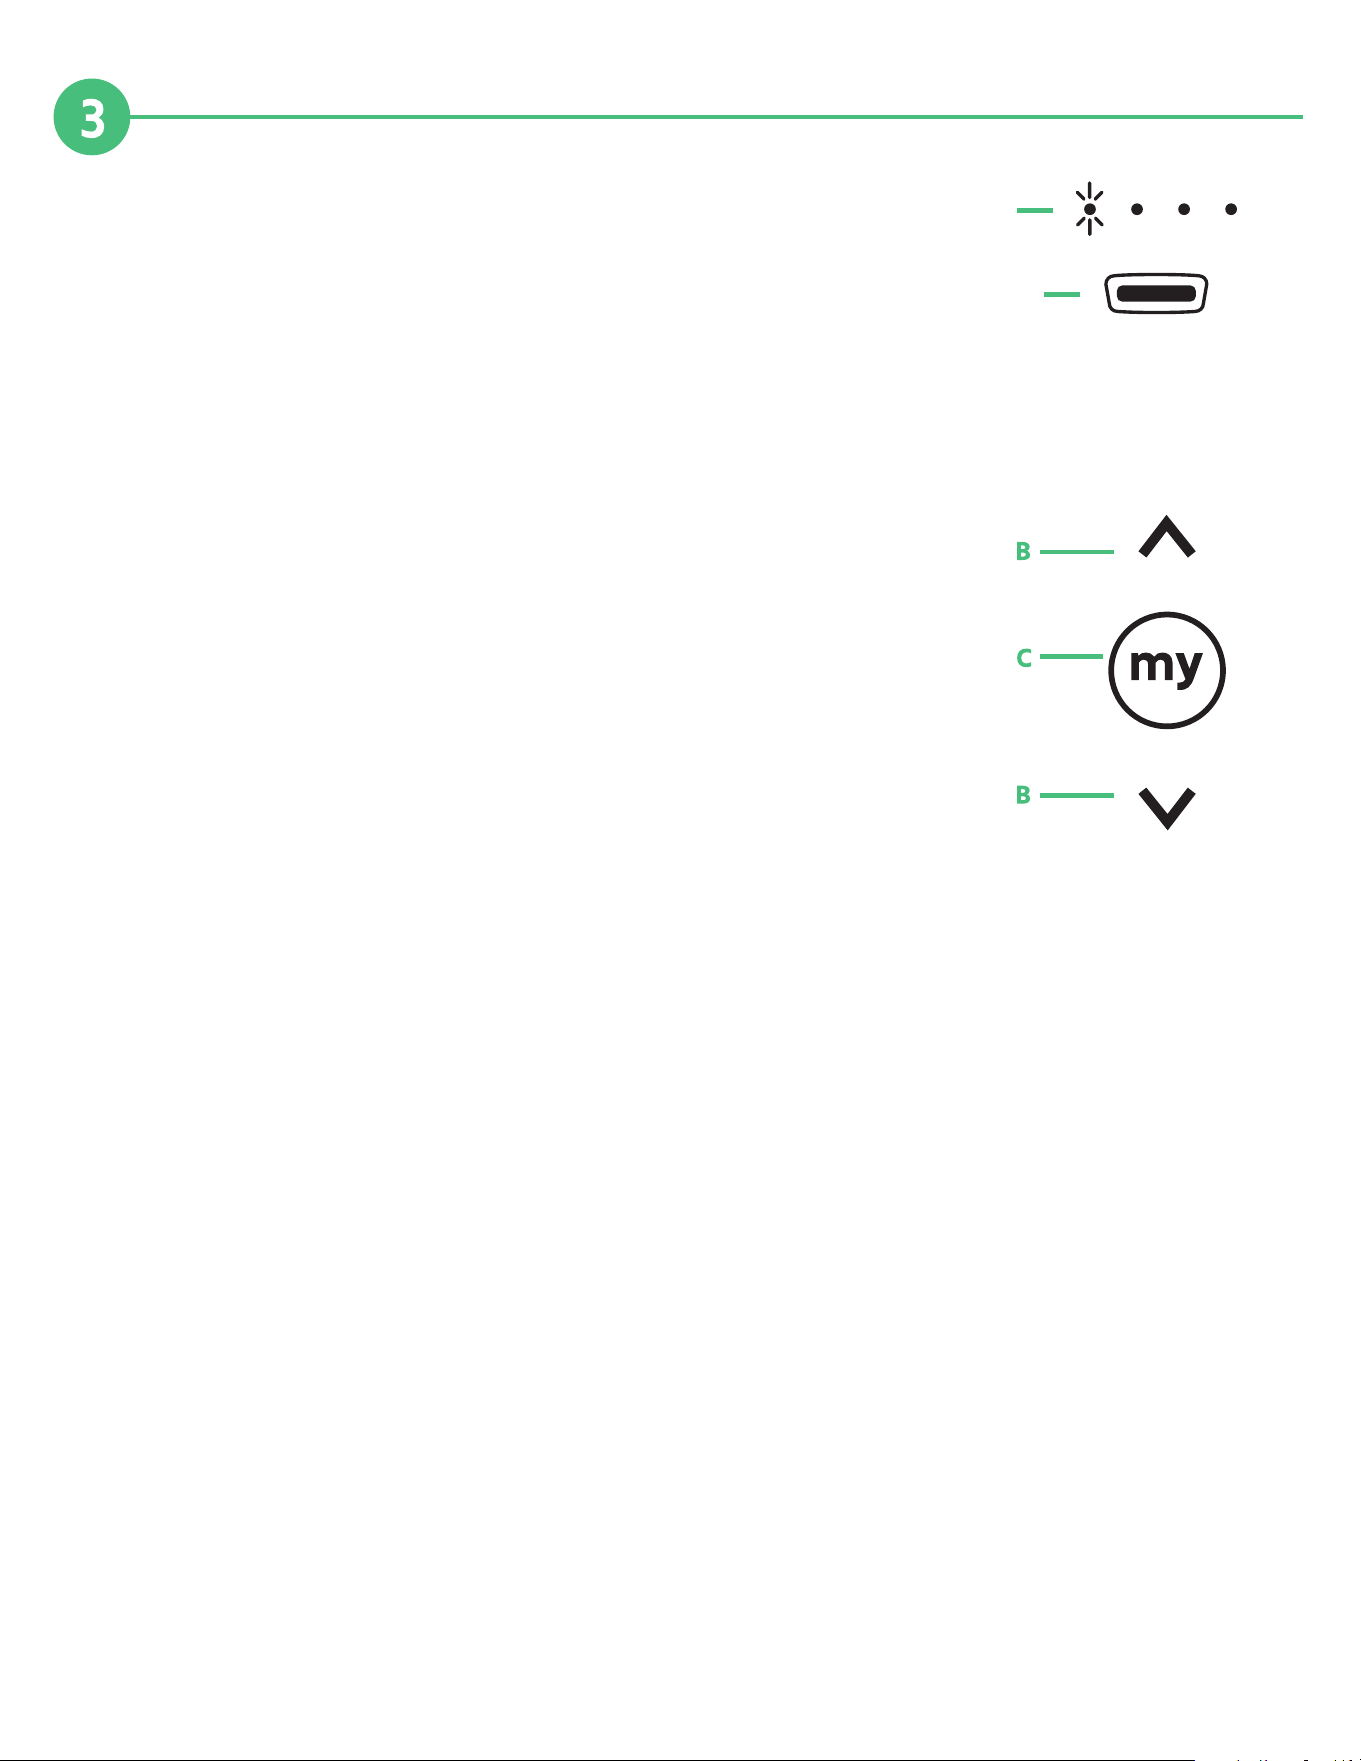
Operation
Situo 5 RTS, ensure the correct channel has been selected with
the Channel Selector Button (F)
• A short press highlights the selected channel (E).
Channel 5 is selected when all 4 indicator lights are on.
• Pressing several times changes the selected channel.
Arrow Buttons (B)
Depending on the type of window covering to be operated:
• Up/On/Open/Tilt
• Down/O/Close/Tilt
Stop button/“my” (C)
• Press the “my” button to stop the window covering action.
• If the window covering action has been stopped,
press Up/Down button to re-activate it.
Setting, modifying, or deleting the favorite preset position “my”. (C)
• Place the window covering in the desired position then press and hold “my” button for
approximately 5 seconds to set the favorite position.
• To delete the favorite preset position, place the window covering in the established favorite
position by pressing “my”. Then press and hold “my” button for approximately 5 seconds.
E
F
Continued On Next Page

This product is intended for indoor use only. Please keep out of reach of children. Avoid damaging product by
dropping or using undo force. Do not expose product to open flame, heat, or moisture.
Battery Replacement
Battery
compartment
located on back
• Remove rear panel from remote control with Phillips screwdriver.
• Insert new CR2032 battery as specified.
• Replace rear panel on remote control.
Wall Mounting
Using the included Mounting Bracket:
• Peel the protective film from the adhesive on the back
of the mounting bracket.
• Stick the wall mounting to a flat, clean,
and dry surface (press firmly).
• Hang the Situo 1 or 5 on the mounting bracket.
This device is FCC certified and complies with part 15 of the FCC rules. RTS compatibility: RTS transmitters are capable of operating any RTS motor.
• Peel
• Stick • Hang
Note: Visit https://store.somfysystems.com/ to
purchase an additional or replacement product.
6
C-0050 10/2021

