User Manual
VERSION 2.7
Thank you for purchasing the
Navigator Quad Gyro. To get
the most out of your Quad, please
follow these quick steps before use.
• Register your model online [section 1.0]
• Charge your battery and Remote Control
[section 4.0 and 9.0]
• Assemble your model [section 3.0]
For Customer Support, please contact MGI directly
for immediate and professional advice.
www.mgigolf.com
MGI AUSTRALIA
Service Email: [email protected]
Live Chat: visit mgigolf.com
Toll Free within Australia: 1300 644 523 (excludes mobiles)
Western Australia/ Internal phone +61 3 8872 6700
Local Service Centres: visit mgigolf.com
to locate you local service centre.
MGI USA
Service Email: [email protected]
Live Chat: visit mgigolf.com
Telephone: 1800 617 2990
Servicing Enquiries Telephone: 1888 391 0200
MGI GLOBAL
Sales Email: [email protected]
Service Email: [email protected]
Live Chat: visit mgigolf.com
NOTE: This user manual was correct at time of printing. The online
version is the most up-to-date and must be referred to as the
correct version. To download the most current user manual
please visit www.mgigolf.com. Images shown throughout this
manual may not be of the particular model you have purchased.
1.0 Registration
1.0 Registration
04
2.0 What’s Included
04
3.0 Assembling your Unit
05
3.1 Attaching the Front Wheels
05
3.2 Attaching the Rear Wheels
05
3.3 Rear Wheel Positions
06
3.4 Unfolding
07
3.5 Folding
08
3.6 Positioning the Seat
09
3.7 Positioning the Sand Bucket Loop
09
3.8 Attaching the Umbrella Holder
10
4.0 Battery Care
10
4.1 Charging Your Battery
10
4.2 Tips and Looking Aer Your Battery
11
4.3 Plugging in the Battery
11
4.4 Safe Operation Guidelines
12
4.5 Battery Storage
13
4.6 Water Damage Warning
13
4.7 Battery End-of-life and Disposal
13
4.8 Leaking or Damaged Batteries
13
5.0 Battery Lead Fuse
13
6.0 Front Wheels
14
6.1 Removing the Front Wheels
14
6.2 Adjusting and Aligning the Front Wheels
14
6.3 Front Wheel Maintenance
15
7.0 Fih Retractable Rear Wheel
16
8.0 Fitting Your Golf bag
16
9.0 Operating the Top Box
16
9.1 On/O Speed Control button
16
9.2 Battery Level Indicator
17
9.3 Remote Battery Level Indicator
17
9.4 Units Measurements
17
9.5 Distance Modes
17
9.6 Competition Mode
18
10.0 Remote Control Features
18
10.1 Charging your Remote Control
19
10.2 Forward Arrow
19
10.3 Down Arrow
19
10.4 Le and Right Arrow
19
10.5 Speed Control – Manually and Remotely
19
10.6 Keypad Unlock and Lock
20
10.7 Remote Range and Safety Stop
20
11.0 Gyroscope Anti-Deviation Navigation System
20
12.0 Integrated GPS Holder and Compartment
20
13.0 Warranty
21
13.1 Warranty Policy
21
13.2 Warranty Exclusions
21
13.3 Parts Installed During Warranty
22
14.0 Preventative Maintenance Program
22
14.1 Cleaning Your Navigator Quad Gyro
23
14.2 Rear Wheel Axles Maintenance
23
14.3 Upper and Lower Bag Strap Maintenance
23
14.5 MGI Service Schedule
24
15.0 Service and Repair Centres
25
16.0 Purchasing Parts and Accessories
25
17.0 Contact MGI
25
18.0 MGI Appendix 25
19.0 Frequently Asked Questions 27
Contents

It is most important you register your Navigator Quad Gyro online
immediately as registration:
• Records your Navigator Quad Gyro for warranty purposes
• Speeds up any servicing required on your unit
• Assist us to contact you with any updates to your unit.
To register your Navigator Quad Gyro, visit mgigolf.com
You will need to record your MGI serial number. This is found under
the battery tray.
Please keep this user manual on file for your own reference and a
copy of your serial number;
My Navigator Quad Gyro Serial Number is
[example AQNV01241212345 ]
Purchased Date
/ /
You may be required to show proof of purchase so we
recommend you keep your receipt with this manual.
2.0 What’s Included
• Navigator Quad Gyro
• Remote Control
• 12v Lithium ion Battery
• Battery Charger
• 5th Retractable Wheel
• USB Cord [for Remote Control charging)
• Seat Bracket
• Umbrella Holder
• Spare Parts
– Speed Button x 1
– 40A Fuse Connector x 1 [see battery care section 5.0]
– 4mmAllen Key [for aligning front wheel as required]
– 4 x Rubber Gaskets for the rotating front wheel housing
[see front wheel maintenance section 6.3]
04
3.0 Assembling Your Unit
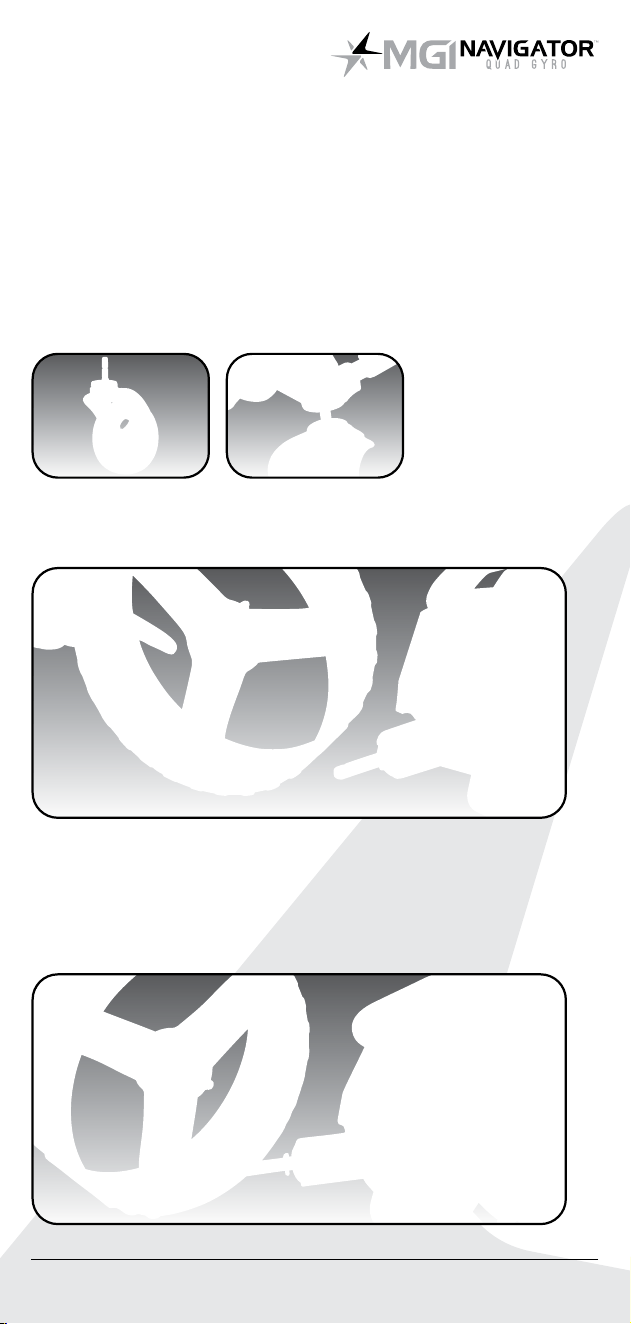
3.1 Attaching the Front Wheels
The two front wheels need to be attached to your Navigator Quad
Gyro. There is no dierence between each front wheel so either
can be placed on the le or right side. Simply line up the silver sha
on the front wheel with the axle and push into the frame until you
hear a click. You can test the wheel is in position by pulling firmly
on the wheel. It should not move out of position.
3.2 Attaching the Rear Wheels
Step 1. On the external wheel hub, slide the release button across.
Step 2. You will notice you need to match up the inner female slot
of the axle and the male of the wheel. When placed in position
simply release the button. You will notice you hear a “click” when
the wheel is properly secured. To check that the wheel is properly
in position pull on the wheel. If it is properly in position it will not slide
o. Repeat for the other wheel.
MGI Navigator™ Quad Gyro User Manual 05
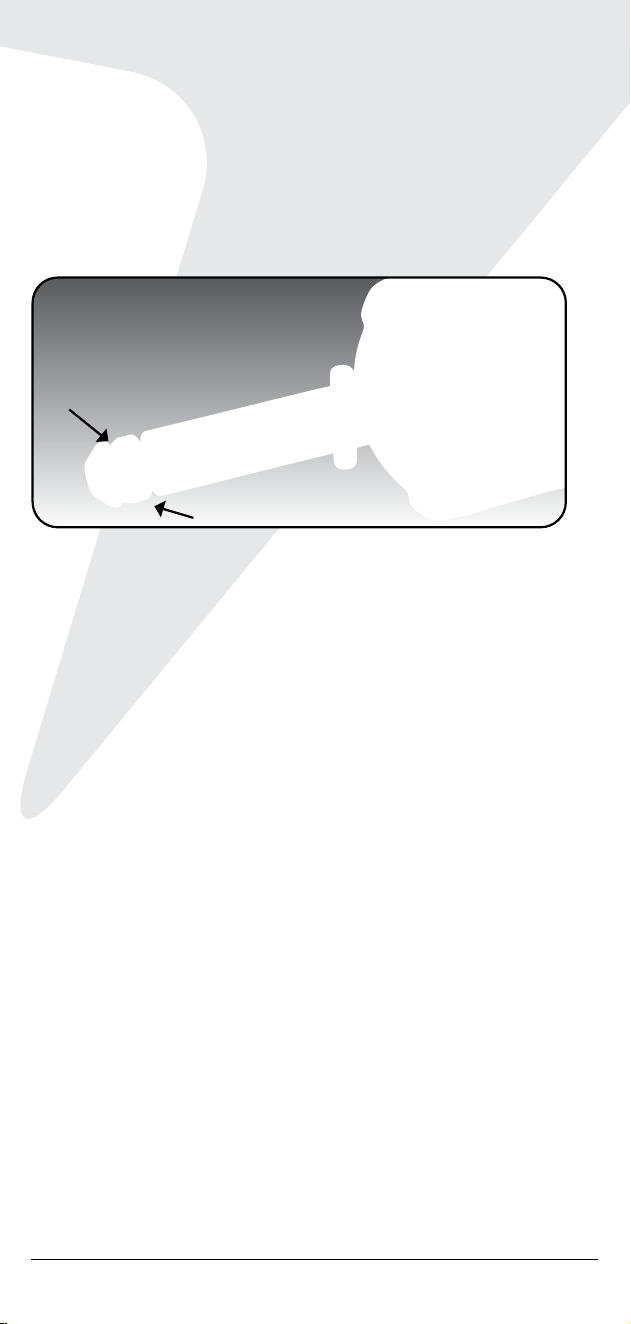
3.3 Rear Wheels positions
The Navigator Quad Gyro is designed to allow the rear wheels
to be in two positions. The position is determined by where the
wheel is locked on the axle in either of the two grooves [see
picture]. The drive position is used during the normal operation of
the model. The free wheel position is used to freely push the unit.
i. Drive position – Lock the wheel onto the groove closest to the
battery tray. To do this, while sliding the release button on the
wheel across, push the wheel on to the axle as far as possible. To
test for drive position trying rolling the wheel forward. If you feel
resistance then the wheel is now in drive position and ready to
use. Repeat for both wheels.
ii. Free wheel – Lock the wheel into the groove furthest from the
battery tray. To do this, while sliding the release button across
on the wheel, push the wheel on to the axle and release the
release button onto the groove. To test for free wheel position
try rolling the wheel forward. The wheel should spin freely with no
resistance. Repeat for both wheels.
06
Free wheel position
Drive position
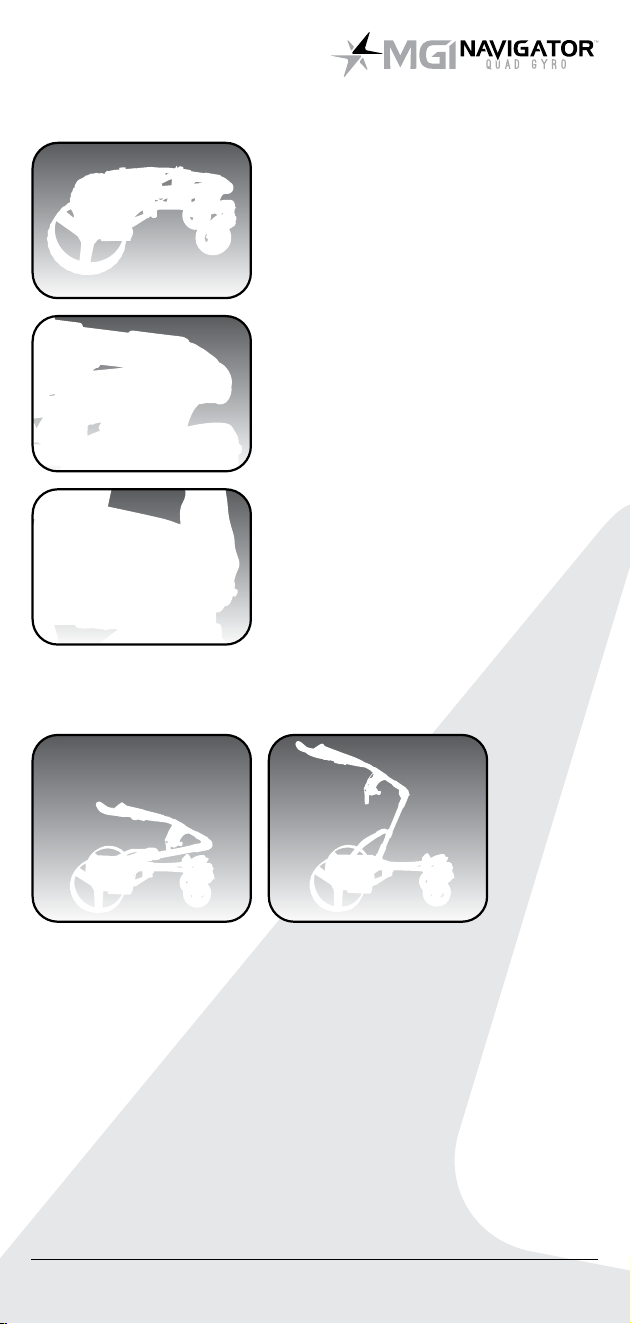
3.4 Unfolding
Step 1: Ensure both rear and front
wheels are attached.
Step 2: Release fold lever 1.
Step 3: Slide fold lever 2 upwards
to release the handle.
Step 4: The handle is now free to pull upwards. The unit will
naturally unfold as you continue to pull upwards until the unit
is completely open.
MGI Navigator™ Quad Gyro User Manual 07
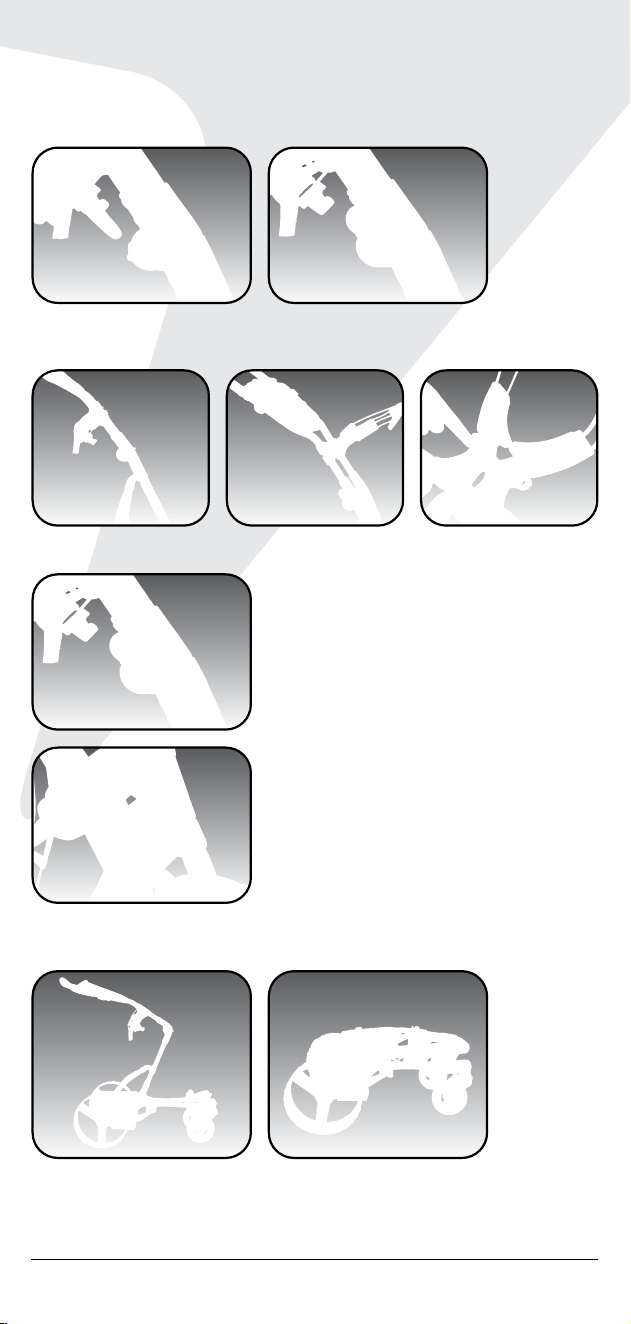
Step 6: Bring the top bag support brackets together, then lock
together using the button.
3.5 Folding
08
Step 1: Open the fold lever 2 to
release the handle.
Step 2: Press the button shown while
applying pressure down to close.
Step 3: Lower the unit down flat and close fold lever 2 to lock
handle.
Step 5: Close the fold lever 2 to lock the handle into place.
3.6 Positioning the Seat
IMPORTANT: Depress the seat with your hand before sitting. Do
not use the seat on uneven surfaces. MGI does not warranty any
seat support brackets that are damaged or bent.
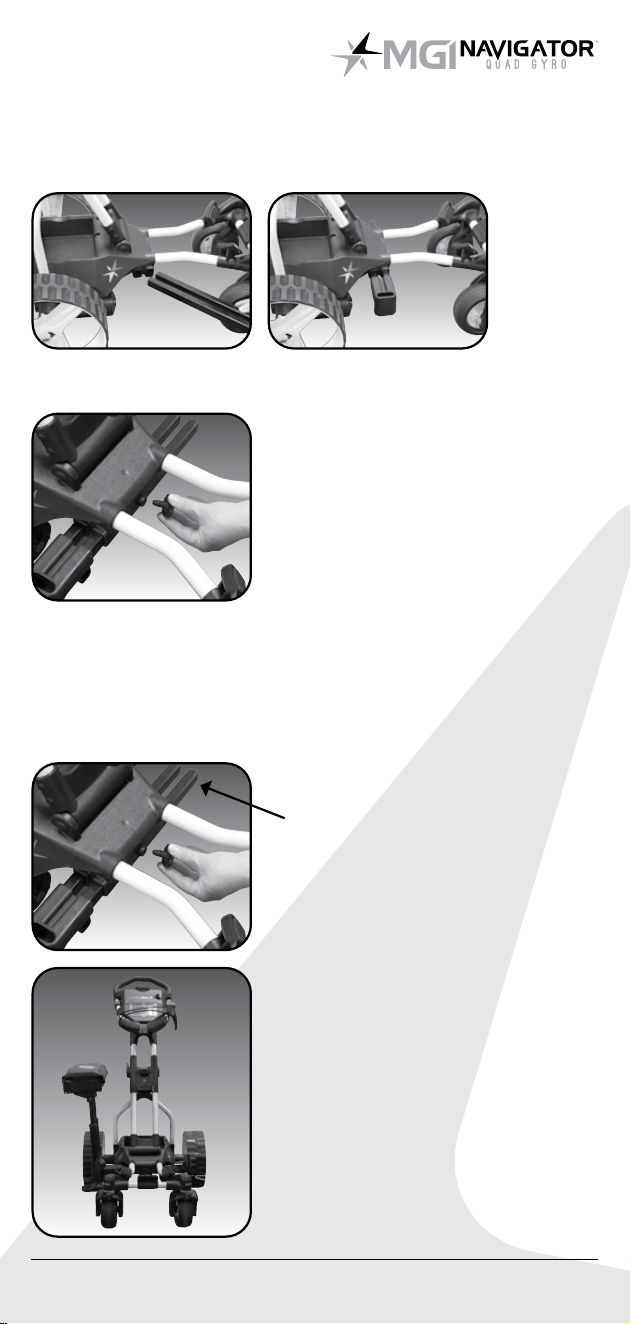
3.7 Positioning the Sand Bottle Holder
The Sand Bottle Holder can now be
added to the other end of the seat
bracket.
Your trolley will look like this once
the seat and sand bottle holder are
added.
Step 1: Using the bracket provided, feed it through as shown in
the picture.
Step 2: Secure the bracket by adding the screw in the position
shown.
Step 3: You can now insert the seat into the bracket.
Add the Sand Bottle
Holder here.
MGI Navigator™ Quad Gyro User Manual 09
10
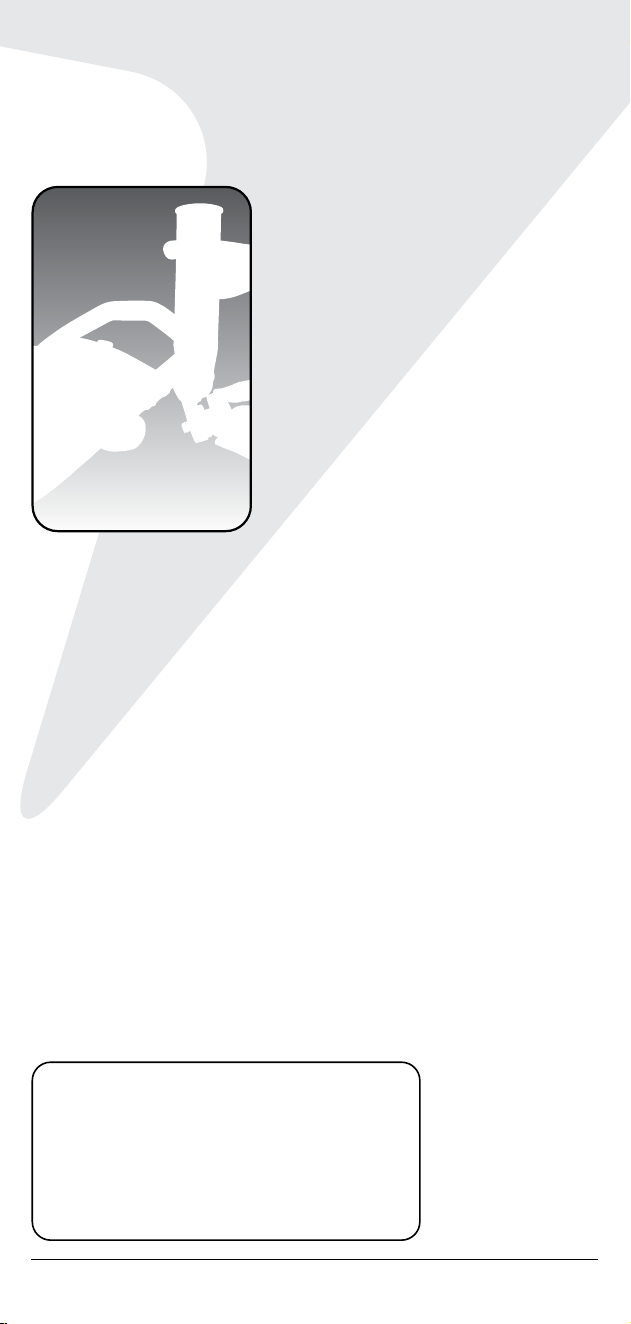
3.8 Attaching the Umbrella Holder
The umbrella holder is attached to the frame using the largest
bolt. Screw this into the frame as shown in the picture.
Your umbrella holder can be
adjusted both to the side,
backwards and forwards. The
umbrella is secured inside the
umbrella holder by tightening the
plastic bolt located near the top of
the holder.
IMPORTANT: Do not leave your
Umbrella up in the holder in windy
conditions. If the wind catches the
umbrella, it could cause your unit to
tip over and cause damage, which
will not be covered by warranty.
4.0 Battery Care
4.1 Before using your Navigator Quad Gyro for the first time you
must fully charge fully charge your battery for 10 hours.
The Navigator Quad Gyro can only be used with the:
• MGI 12v Lithium battery
Battery Type
The Navigator Quad Gyro uses an MGI 12V rechargeable lithium-ion
battery.
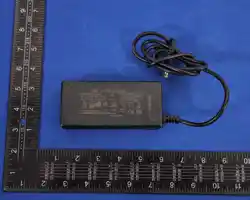
WARNING: Use only with the LC-2322 battery charger.
To charge your battery:
• Unplug the battery from your unit [aer play].
• Remove battery from battery tray of the unit.
• Plug the charger into a power point,
• Plug the charger into the battery.
• Turn on power from the mains switch.
The LED lights on the charger indicate charge state.
• The Green LED illuminates to indicate the charger
is powered on.
• The Red LED indicates the battery is charging.
• The LED will turn Green when the battery is fully charged.
• The LED will flash Green when the battery is on float charge.
• The Red LED will flash if there is a fault with the charger.
4.2 Tips and Important information about Charging your Battery
• Before using your Navigator Quad Gyro for the first time you
must fully charge the battery for 10 hours.
• Plug the charger AC Lead into a power point. The green LED
indicates the battery is fully charged whereas the red LED
indicates it is not fully charged
• Once fully charged (LED will turn solid Green), remove from
charge.
• Do not charge the battery for longer than 10 hours.
Looking aer your battery during play and travel
• During play, minimise the drain on the battery by avoiding
taking your Navigator Quad Gyro into the rough whenever
possible.
• Avoid using the unit to pull you up hills
• If you are intending to take your unit and battery on a flight,
we advise that you contact your airline prior to travel.
• Take care to avoid dropping or damaging the battery.
• Only transport the battery using the built-in handle. Do not
carry using the plug lead.
• Do not allow the Navigator Quad Gyro or the battery to
become submerged in water.
Please refer to the Battery Charger User Manual for a complete list
of important information.
4.3 Plugging Your Battery into the Navigator Quad Gyro
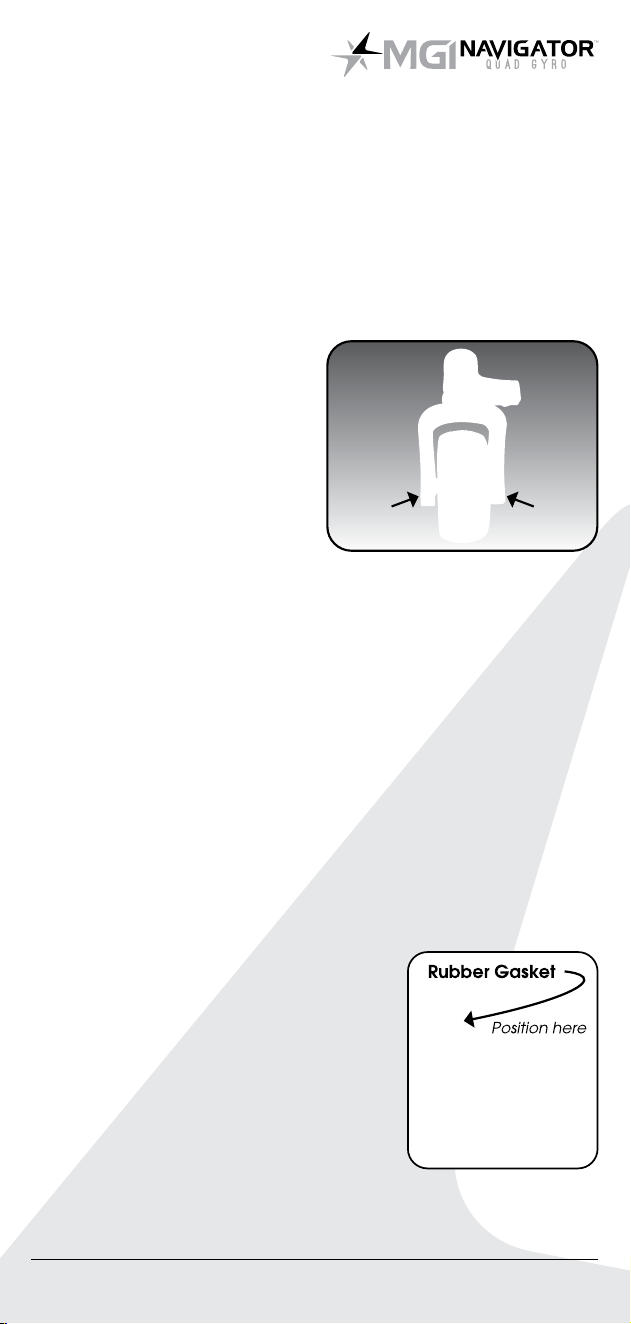
Step 1: Place the battery into the
battery tray.
MGI Navigator™ Quad Gyro User Manual 11
12
Your Navigator Quad Gyro has been equipped with fail safe
battery connection, so the unit will not move when you plug
the battery in. Your unit will only start once the speed control or
remote are activated.
4.4 Safe Operation Guidelines
• Do NOT charge your MGI lithium battery for more than 10
hours.
• Once the battery is fully charged, unplug the charger, or
disconnect power supply.
• The battery is designed for indoor charging only. Please
ensure it is used on an uncarpeted, non-flammable hard
floor in a well- ventilated area.
• Plug the charger directly into the mains wall socket. Do not
use a multi-outlet power board, or similar device, to charge
the battery.
• Always place the battery on charge aer each use.
Complete discharge of the lithium battery will reduce battery
lifetime performance.
• Charge your battery in ambient temperature; between 5°C
(30° F) and 30° C (86°F).
• To minimise drain on the battery during play, avoid taking
your MGI Model into rough terrain, where possible.
• The Quad Model is designed to carry a maximum load
of 20kg (45 lbs) – exceeding this limit will reduce battery
performance and may cause damage to the drive system.
• Lithium batteries are a dangerous good and cannot be
transported via air travel - please contact your airline prior
to travel.
• Do not drop your battery. Any damage/impact may
compromise battery performance, longevity, and safety
functionality - replace battery immediately.
• Your battery and charger leads, casing and connections
should be regularly inspected for damage and wear. If
your leads or connections need repair or replacement,
please contact your local MGI Service Agent for assistance,
immediately. Do not use the charger if the leads or
connections are damaged.
• Never attempt to fully discharge your battery. Complete
discharge of the lithium battery will reduce battery lifetime
performance.
Step 2: Plug the battery into the
model as shown.
• Under no circumstances should a lithium battery that
has been dropped, damaged or immersed in water be
connected to a Quad Series Model or charger. By doing so,
you may create a fire hazard or risk the battery catching
fire. Please safely dispose of your battery immediately and
responsibly.
• Please ensure the chassis battery housing and connectors
are free from debris before connecting the battery.
4.5 Battery Storage
• Lithium batteries should not be stored for long periods of
time, either depleted or fully charged. Ideally the battery
should be at 40-50% capacity, stored in a clean, dry
environment on a hard non-flammable surface, between
15°C (60°F) to 25°C (80°F). As lithium batteries slowly
discharge over time, it is recommended that the battery be
power cycled every 6 months if le unused and stored as
above.
• Do not leave your lithium battery in a car as high
temperatures can damage the battery cells.
4.6 Water Damage Warning
Should your Lithium battery or battery charger come into contact
with water or other conductive liquids, MGI strongly advises the
ceasing of usage/charging of the battery, and or charger, and to
responsibly dispose of the aected items.
Please visit these links for further information:
Battery care and maintenance:
mgigolf.com/pages/caring-and-maintaining-lithium-batteries
Battery water damage:
mgigolf.com/blogs/news/water-damaged-batteries-buggies
PLEASE NOTE: The ongoing use of a lithium battery compromised
by exposure to water carries a heightened risk of thermal
runaway, overheating, combustion, or explosion.
4.7 Battery End-of-life and Disposal
MGI lithium-ion batteries will require replacement at the end of
their usable life. If the battery shows signs of damage, reduced
performance or is no longer serviceable, discontinue use.
Lithium-ion batteries require special handling at end-of-life. Please
contact your local environmental authority, governing body or
approved battery recycling facility for guidance on safe disposal and
recycling in accordance with local regulations.
MGI Navigator™ Quad Gyro User Manual 13

14
DO NOT dispose of lithium-ion batteries in general household waste.
Before disposal or recycling, ensure the battery terminals are
protected from contact with metal objects and follow the instructions
provided by the applicable recycling or waste facility.
4.8 Leaking or Damaged Batteries
If the lithium-ion battery is leaking, damaged, swollen or otherwise
compromised, stop using immediately and do not charge the
battery. Do not touch any leaked material and do not attempt
to open, repair or reconnect the battery. Keep the battery away
from heat, flames, sparks, combustible materials and metal objects.
Contact MGI, an authorised MGI Service Centre or an approved
battery recycling facility for advice on safe handling and disposal.
A damaged or leaking battery must not be connected to the
Navigator Quad or battery charger.
5.0 Battery Lead Fuse
Your battery has a 40amp fuse connected to the battery lead.
The 40amp fuse helps protect the models control board against
a power surge. An extra fuse is supplied with your Navigator
Quad Gyro. The fuse is located on the positive lead close to the
battery terminal.
To replace the fuse, simply open the inline fuse housing and remove
the existing fuse with a pair of pliers. Insert the new fuse ensuring the
two feet are guided into their sleeves. Refit the fuse cap.
6.0 Front Wheels
6.1 Removing the Front Wheels
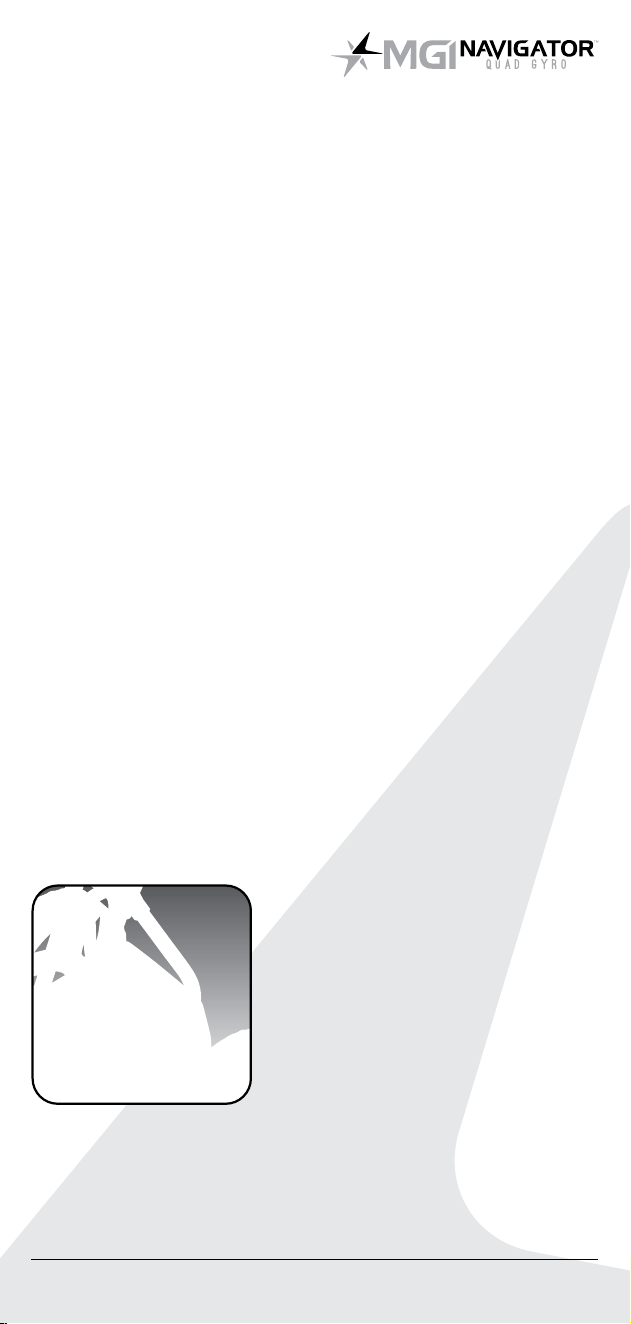
The front wheels can be removed by pressing the blue button
shown in the picture and pulling the wheel down until it is
completely removed from the unit.
6.2 Adjusting and Aligning the Front Wheels
(Serial Numbers starting with “ANQV”)
Each unit is checked for straight tracking prior to leaving the
factory. In the unlikely event the Navigator Quad Gyro is not
tracking straight, the front wheels can be adjusted to regain
straight tracking as follows:
1. Start the unit using the manual controls on a straight, flat
path. Do not start using the remote otherwise the Navigation
system will start. Watch the unit to see if it veers le or right.
2. Now turn the wheel you want to adjust until you see the two
adjusting bolts in the front wheel as per the below picture.
3. If the unit veers le, use the 4mm Allen Key provided in the
Quad free spare parts to screw the right bolts (in both front
wheels) clockwise and/or the le bolts (as shown in below
picture) anti clockwise.
4. If the unit veers right, use the 4mm Allen Key provided in the
Quad free spare parts to screw the right bolts (in both front
wheels) anti clockwise and/or the le bolts (as shown in
below picture) clockwise.
Please note that there is a
process in adjusting the track
as above point 3 and 4. It is
suggested that the users should
do a little bit of adjustment,
test the tracking and then
adjust again until the unit goes
straight. Aer the unit tracks
straight, do not swap the le
and right front wheels.
(Serial Numbers starting with “AQNV”)
1. You will need around 20 meters of level ground to trim the
motors on the Navigator Quad buggy.
2. Connect the battery and have the Navigator Quad stopped
(without a golf bag attached).
3. Press and hold the speed control button for 3 seconds and
the Navigator Quad will automatically enter into the “motor
trimming” function.
4. Release the speed control button, the buggy will go forward
automatically. Aer 5-20 meters (the distance travelled will
vary) the buggy will stop automatically.
5. Then check the straightness of the unit using the top box
speed control as normal, by pressing it once to start and
again to stop it.
The buggy should now run straight, if not, repeat the above
process until the buggy runs straight.
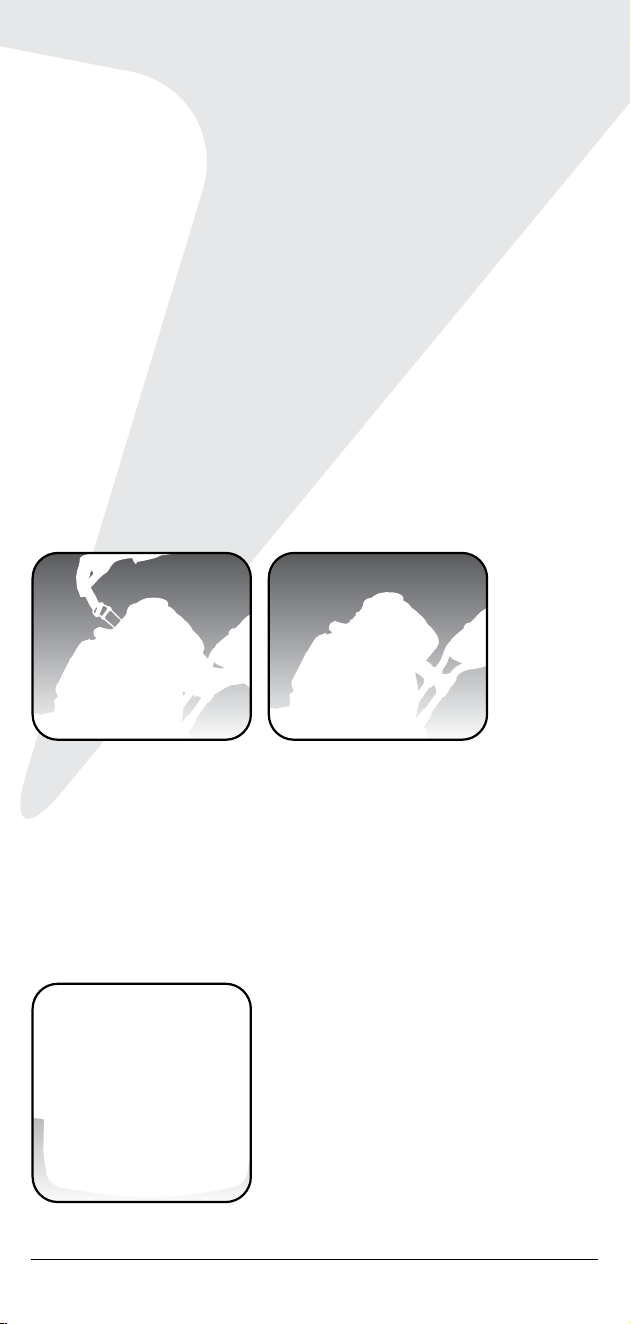
6.3 Front Wheel Maintenance
During the life of the Navigator Quad Gyro,
you may experience wearing of the front
wheel gasket. This may result in a noise
coming from the front wheel during use.
You can replace this gasket at home using
1 of the 4 gaskets included in the spare
parts included with your unit. Follow these
easy steps:
Step 1: Remove the front wheel following the steps above.
Step 2: Place the rubber gasket over the wheel pin.
MGI Navigator™ Quad Gyro User Manual 15
Right BoltLe Bolt
16
7.0 Fifth Retractable Rear Wheel
The Navigator Quad Gyro comes standard with a fih retractable
rear wheel. This wheel MUST be retracted into position at all times
when in use. This will reduce damaging the unit, and provide the
ultimate in stability across all terrains. This fih wheel should be
cleaned regularly with a cloth to ensure it can retract as required
for storage.
8.0 Fitting Your Golf Bag
Securing the top bag strap
• Provide a good position for the positioning of both ends of
the elasticised straps
• Stretch the longer end of the strap and secure to the
extended shorter end
• The attached strap should now be connected
Adjusting the length of the top strap
• The plastic bar on the longer length can be adjusted to
ensure the bag is secured properly in place.
Securing the lower bag strap
• To secure the lower bag strap, pull the fabric tab on the
lower bag strap up and over the base of your golf bag.
9.0 Operating the Digital Top Box
1. Function button 1
2. Function button 2
3. Speed Control ON / OFF button
4. Speed indicator
5. Battery level indicator
6. S-SLA battery type / L – Lithium
7. Remote battery Level Indicator
1.
4. 5
6.
7.
2.
3.
9.1 On/O Speed Control button
To start your Navigator Quad Gyro:
1. Pre-set your desired speed by rotating the speed control
button clockwise to increase speed, or anticlockwise to
decrease the speed. The speed setting chosen is displayed
on the colour screen on the le side. Then tap the speed
control button to start and stop the unit, or
2. Simply tap the speed control button to start the unit, then
adjust the speed settings to your desired speed.
9.2 Main Battery Level Indicator
Battery indication is located on the right side of the top screen.
The two bars are illuminated whilst the battery has between 25%
and 100% capacity. When the capacity drops to 25% then the
bottom red bar is only illuminated. When the battery is about to
run out of power, the red light will begin to flash. You should always
check the battery status before you play golf to ensure battery is
fully charged.
The battery indicator is set to L for Lithium as the Navigator Quad
is only compatible with the MGI 12v Lithium battery.
9.3 Remote Battery Level Indicator
The Navigator Quad Gyro remote is powered by a rechargeable
lithium battery. See section 10.1 for tips on recharging”.
The Digital top box displays the remote control battery level on
screen.
9.4 Unit measurements
To toggle between kilometres and miles, press the Function Button 2
[right]
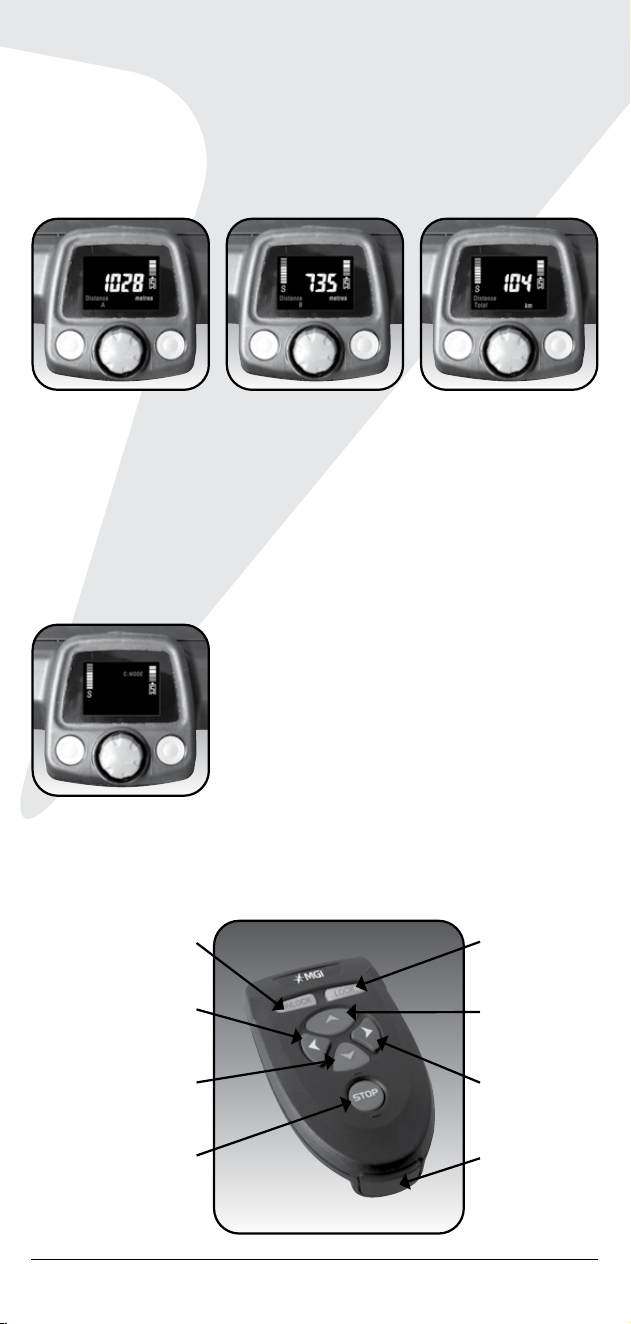
9.5 Distance Modes
There are three distance measurements. To toggle between the
mode, press the Function Button 1 [le].
1. Distance A and B: resettable distance measurements could be
used to measure how far you hit your shot and to measure
how far you have walked for the day. To reset, simply press
the Control button [le side] 1 for 3 seconds until the reading
displays “0”.
MGI Navigator™ Quad Gyro User Manual 17
18
2. Distance Total: cannot be reset as it is the Odometer for the life
of the Navigator Quad Gyro. This feature will assist with service
reminders which are recommended at each 500kms/300mi or
6 month periods.
9.6 Competition Mode
In the unlikely event the club you are playing at does not allow
the use of distance devices you will need to disable the distances
feature on the Navigator Quad Gyro.
To disable the distance recording feature, simply hold down the
two control buttons at the same time for 3 seconds. By doing
this the distance recording will be removed from the screen and
replaced with the words “Comp Mode”.
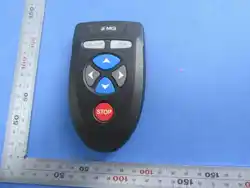
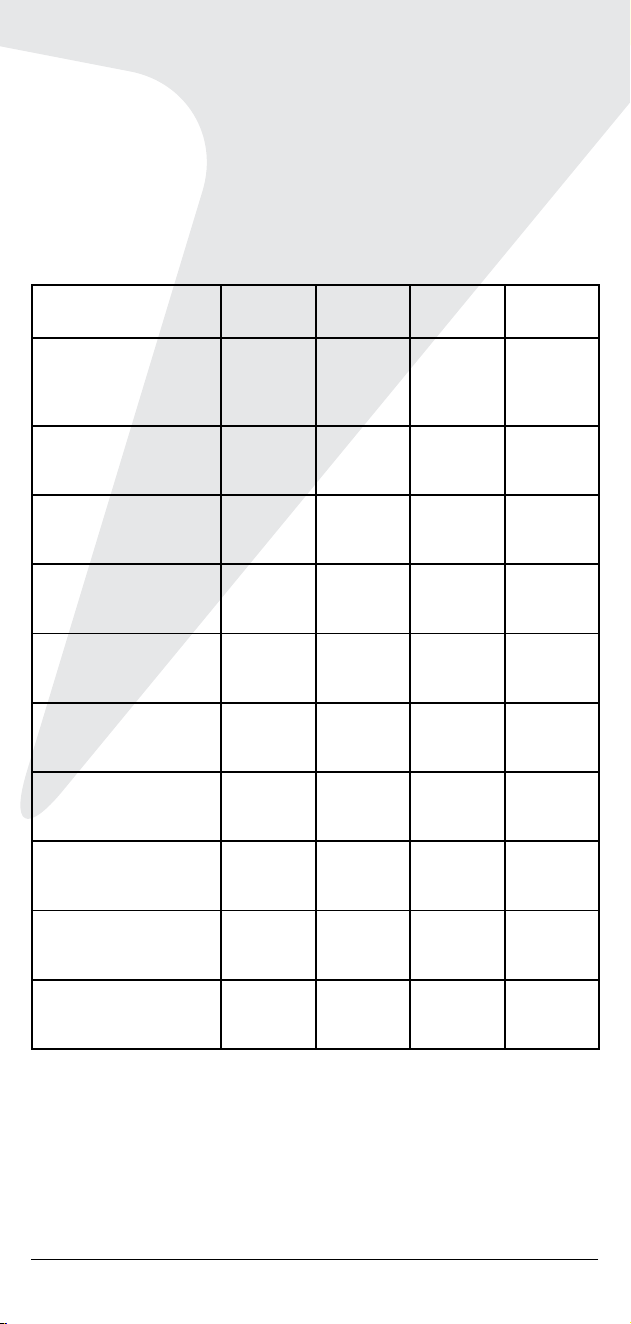
10.0 Remote Control Features
Keypad Unlock
Le Arrow
Down Arrow
Stop Button
Keypad Lock
Forward Arrow
Right Arrow
USB Plug for
Charging

10.1 Charging Your Remote Control
Before you start using your Navigator Quad Gyro you must
fully charge the remote control internal lithium ion battery for
approximately 6 hours using the USB cord provided. The top right
UNLOCK button will flash while charging. When a full charge is
complete, the green light will stay on and stop flashing. Please
ensure the remote is placed on charge aer every round.
To charge the remote, plug the USB cord into the USB plug at
the base of the remote as pictured in the diagram. The cable
then needs to be plugged into your PC or Laptop for charging.
Alternatively you can plug the cable into an AC adaptor [not
provided].
To check the power level of the remote control, point the remote
at the digital top box and press any button on the remote control.
The remotes battery level will appear on screen. See section 9.3
for more information.
10.2 Forward Arrow
Press the forward button to start and accelerate the unit. The
longer you depress the button, the faster the unit travels.
10.3 Down Arrow
The down arrow decreases the speed and provides for reverse.
If you are moving forward, the down arrow can be used to
decrease speed, the longer the pressure, the slower the speed.
To operate the Reverse mode you must stop the unit first. Press
the down arrow and the unit will reverse. The unit will move in the
backward direction only whilst you keep the arrow depressed. If
you take your finger o the down arrow the unit will stop [safety
feature].
10.4 Le and Right Arrow
Press the appropriate turn command, le or right buttons and
keep pressed until the degree of turn is achieved. Momentary
pressure will make a small adjustment to the direction, whilst
prolonged pressure will increase the amount of turn and speed
of the turn.
10.5 Speed Control – Manually and Remotely
Under manual control, you can adjust the speed by turning the
speed control button to the le or right. When changing to the
remote control, irrespective of the speed level indicated on the
display, the unit will always start at speed 1.
MGI Navigator™ Quad Gyro User Manual 19

20
10.6 Keypad Unlock and Lock
The remote control has two buttons at the top which allow
you to LOCK and UNLOCK the keypad. This will help eliminate
accidental control when storing the remote in your pocket.
The STOP button will continue to work, when the LOCK feature is
activated.
10.7 Remote Range and Safety Stop
The Navigator Quad Gyro can be remotely controlled up to 50m.
If the remote control is not touched for 150m, then the automatic
safety stop will activate causing the unit to stop. This is for the
protection of your unit, yourself and others. If the unit was last
activated using the manual controls, the auto safety stop feature
will not operate.
11.0 Gyroscope Anti-Deviation Navigation
System
The Navigator Quad is built with a Patented Gyroscope “anti-
deviation” navigation system. This automatic feature ensures the
unit maintains its direction regardless of the terrain. The unit will
automatically brake or accelerate either wheel to maintain its
direction.
When the model is controlled by the remote, the Navigation
system is always ON.
When the model is controlled manually, the Navigation system is
always OFF.
Tip: On a steep incline, the gradient may force the unit o course.
You do not need to adjust the unit. The unit will work its way back
on course. In addition, if the unit hits a tu of grass or another
object, the unit will momentarily be forced o course. However, it
will work its way back onto the original course automatically.
12.0 Integrated GPS Holder and Compartment
In the top handle compartment is an integrated GPS/mobile device
holder. To open the holder the holder always press the Coloured
button at the top of the holder. Place the GPS into the cradle, then
close the holder by squeezing the two sides closer together.

13.0 Warranty
13.1 Warranty Policy
The Navigator Quad Gyro is covered by a limited 2 year
manufacturer’s warranty from the date of purchase.
Duration of this warranty is:
– 2 years on parts*
– 2 years on Lithium batteries and chargers
*MGI or an authorised service centre will repair or replace any
parts found to be defective in materials or workmanship under
normal use provided that:
1. The Navigator Quad Gyro has been properly used, maintained
and regularly serviced [see section 14.0]
2. The replacement or repair is performed by an authorised MGI
service centre or the owner with MGI approval.
3. The Navigator Quad has been registered online.
Our goods come with guarantees that cannot be excluded under
Consumer Law. You are entitled to a replacement or refund for
a major failure and for compensation for any other reasonably
foreseeable loss or damage. You are also entitled to have the
goods repaired or replaced if goods fail to be of acceptable
quality and the failure does not amount to a major failure.
This warranty is in addition to other rights and remedies available
to the consumer under law. The consumer is responsible for
expenses associated with a warranty claim.
To make a warranty claim, cease using the goods immediately
and contact MGI directly using the contact details on the back of
this User Manual. Proof of purchase is mandatory.
13.2 Warranty Exclusions
The following events will void warranty:
• Any alteration performed by non-authorised people or
companies.
• Fitting of parts or accessories not recommended by MGI.
• Any damage caused by continued operation of the product
aer it is known to be defective.
• Damage to the seat and/or seat support bracket on the unit.
• Damage caused by partial or complete ingress of water
into motor/gearbox/battery/motor controller and other
components.
• Damage caused by the unit being driven into bunkers,
other course hazards or clubhouse and carpark hazards.
• Damage caused by golf balls or golf clubs.
• Application of external force to any part of the unit or battery.
• Fusion of motor or electronics through overload or continual
stationary operation.
MGI Navigator™ Quad Gyro User Manual 21

22
• All implied warranties [save those preserved by statute] are
excluded.
• Liability for consequential damages under any and all
warranties are excluded to the extent exclusion is permitted by
law.
If you elect to purchase replacement components, i.e. motors,
gearbox, motor controller and electronics, we advise the
replacement of ALL components simultaneously.
Replacing individual components on a water-damaged Navigator
Quad poses a higher risk of future failure of other components and
therefore these parts will not be covered under warranty.
Please note that MGI does NOT warrant water-damaged batteries
and, due to fire risk, under no circumstances should they continue
to be used. The battery must be disposed of immediately and
responsibly.
The following events are not covered under warranty:
Normal wear and tear;
- (e.g. tyres, rubber handlebar, elastic straps, paintwork, battery
performance, axles threads, charging ports on batteries and
remotes, screen glass etc.)
- Minor appearance defects which bear no eect on the
operation of the unit and are considered by the manufacturer to
be within the accepted standards.
13.2 Parts Installed during Warranty
Warranty coverage for components installed during a motorised
Navigator Quad Gyro’s warranty period shall consist of the
duration of the Navigator Quad Gyro warranty period, provided
the warranty installation is performed by MGI, an authorised
service centre or the Navigator Quad Gyro owner on approval.
Replacement of parts under warranty will not extend the warranty
of the Navigator Quad Gyro or parts.
Warranties are non-transferable. The warranty applied to a
product, on purchase, is limited to the original purchaser.
14.0 Preventative Maintenance Program
To properly provide for the continued operation of your Navigator
Quad Gyro, MGI has introduced its Preventative Maintenance
Program [PMP]. The PMP consists of work to
be carried out by both
the owner and authorised service centres. To properly maintain
the warranty of your Navigator Quad Gyro, it is essential that
this work is carried out. If the work carried out by the authorised
service centre is to replace parts that are part of the maintenance

schedule, the owner will be charged for the parts and labour. If
the work to be carried out is part of warranty, MGI will bear the
cost.
14.1 Cleaning Your Navigator Quad Gyro [See Maintenance
Schedule]
For years of good operation, your model requires care and
attention.
• Keep your unit clean by using a cloth with warm water and a
mild detergent.
• Do not hose down your unit under any circumstance, as your
Navigator Quad Gyro has electronic components.
• Ensure that the seat stem bracket is free from sand.
• Do not submerge your model in water as it will cause
irreparable damage.
14.2 Rear Wheel Axles Maintenance [See Maintenance Schedule]
The rear wheel axles need to be lubricated regularly. Remove the
rear wheels by depressing the spring clip and at the same time
pull o the wheel. Apply Petroleum Jelly or light grease to the stub
axles. Use a very small amount as the grease can attract sand.
If you play in sandy conditions you should clean your axle and
regrease fortnightly.
14.3 Upper and Lower Bag Strap Maintenance
[See Maintenance Schedule]
The bag straps should be replaced as per the Service Schedule.
The upper bag strap can be replaced by:
• Removing the le and right hand straps form the upper bag
support
• Undo and remove the screws holding the strap in position
on the bag support
• Remove and replace both bag straps
• Insert bag strap securing screws
MGI Navigator™ Quad Gyro User Manual 23
24
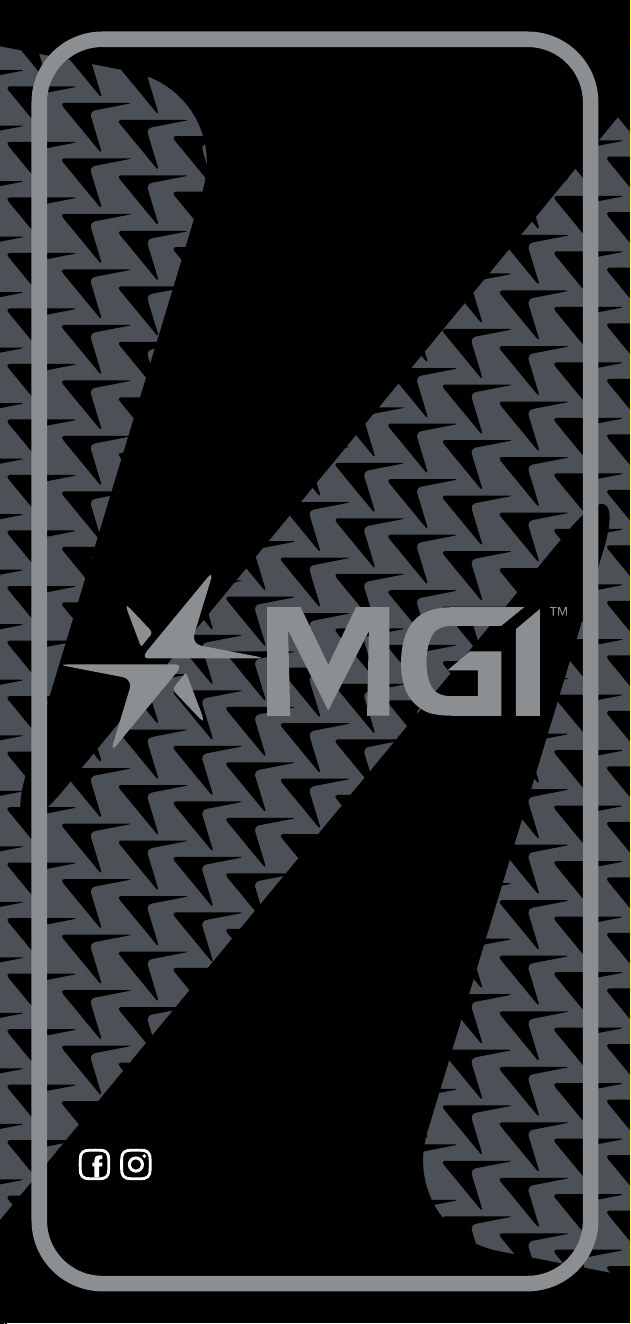
14.4 MGI Service Schedule
It is the owner’s responsibility to ensure that all periodical checks,
necessary adjustments and services are carried out. If in doubt
please contact MGI Service (03) 88726700 or via email
[email protected] Any work performed on your unit
should be recorded on your service record regardless of the work.
Navigator Quad
Gyro
Monthly
6
Monthly
Every
2 yrs
Every
3 yrs
Wipe down the unit
with a warm cloth
aer each use [do
not hose]
BO
Clean the 5th wheel BO
Lubricate rear wheel
stub axles
BO
Check and tighten
nuts and bolts
BO /SC
Check and tighten
handle pivots
BO/SC
Check alignment of
unit – ensure that it
runs straight
BO /SC
Replace Speed
Control button
BO/SC
Replace speed
controller and On/
O
switch assembly
BO/SC
Replace rear and
front wheels
BO
Replace upper and
lower bag straps
BO
BO = Navigator Quad owner can carry out this work
SC = Charged work to be carried by approved service centre
BO/SC = The six monthly service can be completed by either an
authorised service centre or the owner of the unit.

15.0 Service and Repair Centres
For all servicing, please do not go back to your place of
purchase.
To find your nearest Service centre visit mgigolf.com
For warranty repairs to be authorised you MUST provide proof of
purchase. Please keep this with you as well as your Serial number
you can record in this manual.
16.0 Purchasing Parts and Accessories
You are welcome to service your Navigator Quad Gyro out of
warranty, by purchasing parts direct from MGI. Please call or
email to discuss the right parts and instructions.
17.0 Contacting MGI
mgigolf.com
MGI AUSTRALIA
Service Email: [email protected]
Live Chat: visit mgigolf.com
Toll Free within Australia: 1300 644 523 (excludes mobiles)
Western Australia/ Internal phone +61 3 8872 6700
Local Service Centres: visit mgigolf.com
to locate your local service centre.
MGI USA
Service Email: [email protected]
Live Chat: visit mgigolf.com
Telephone: 1800 617 2990
Servicing Enquiries Telephone: 1888 391 0200
MGI GLOBAL
Sales Email: [email protected]
Service Email: [email protected]
Live Chat: visit mgigolf.com
18.0 MGI APPENDIX
Remote Control
Model: Navigator Quad
FCC ID: 2BA2LB8
IC: 28035-B8
18.1 FCC & ISED STATEMENTS
FCC STATEMENT
Please take attention that changes or modification not expressly
approved by the party responsible for compliance could void the
user’s authority to operate the equipment.
MGI Navigator™ Quad Gyro User Manual 25

This device complies with Part 15 of the FCC Rules. Operation is
subject to the following two conditions:
(1) This device may not cause harmful interference, and
(2) This device must accept any interference received, including
interference that may cause undesired operation.
ISED STATEMENT – ENGLISH
This device complies with Industry Canada licence-exempt RSS
standard(s). Operation is subject to the following two conditions:
(1) this device may not cause interference, and
(2) this device must accept any interference, including
interference that may cause undesired operation of the device.
ISED STATEMENT – FRENCH
Le présent appareil est conforme aux CNR d’Industrie
Canada applicables aux appareils radioexempts de licence.
L’exploitation est autorisée aux deux conditions suivantes :
(1) l’appareil ne doit pas produire de brouillage, et
(2) l’utilisateur de l’appareil doit accepter tout brouillage
radioélectrique subi, même si le brouillage est susceptible d’en
compromettre le fonctionnement.
SAFETY INFORMATION
this appliance is not intended for use by persons (including
children) with reduced physical, sensory or mental capabilities, or
lack of experience and knowledge, unless they have been given
supervision or instruction concerning use of the appliance by a
person responsible for their safety
• children should be supervised not to play with the appliance
• cleaning and user maintenance shall not be made by children
without supervision
For a part of class III construction supplied from a detachable
power supply part, the instructions state that the appliance is only
to be used with the unit provided
• Do not expose the appliance or battery to excessive
temperatures
• Be aware of the risk of terminals of the battery-operated
appliance or battery being short-circuited by metal objects
WARNING: Use only with LC-2322 battery charger.
This appliance contains battery cells that are non-replaceable.
When the battery is at end of life, the appliance shall be properly
disposed of.
26

19.0 FAQ
Q: The front wheel is noisy in operation.
A: You may need to change the front wheel gasket caused from
wear and tear. See section 6.3 Front wheel maintenance
Q: My model is not tracking straight.
A: You can do a simple realignment on the two front wheels. See
section 6.2 Adjusting and aligning the front wheels
MGI Navigator™ Quad Gyro User Manual 27
mgigolf.com
MGI AUSTRALIA
MGI HEAD OFFICE
11 Maurice Court Nunawading 3131
Victoria Australia
T +61 3 8872 6700 E [email protected]
SERVICE [email protected]
MGI USA
T 1800 617 2990 E [email protected]
SERVICE 1888 391 0200 E [email protected]
MGI GLOBAL
Follow us on
Absolute attention has been taken to ensure this manual is correct at time of
printing. Specifications, images and statistics may change at any time.
Visitmgigolf.com for the most current model information. Version 2.7 08/26