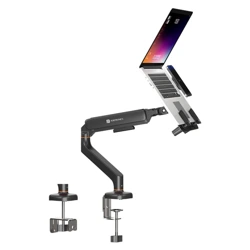
A versatile desk mount designed to hold 11.6”–17.3” laptops and
most smartphones, helping you create a clean, ergonomic
workspace.
• Supports laptops (11.6”–17.3”)
• Dual mounting options: Clamp & Grommet
• Fully adjustable arm for flexible viewing angles
• Built-in cable management system
• Load capacity: Up to 6 kg
Full-Motion Single Laptop Desk Mount
with Magnetic Phone Holder
AEROLIFT plus
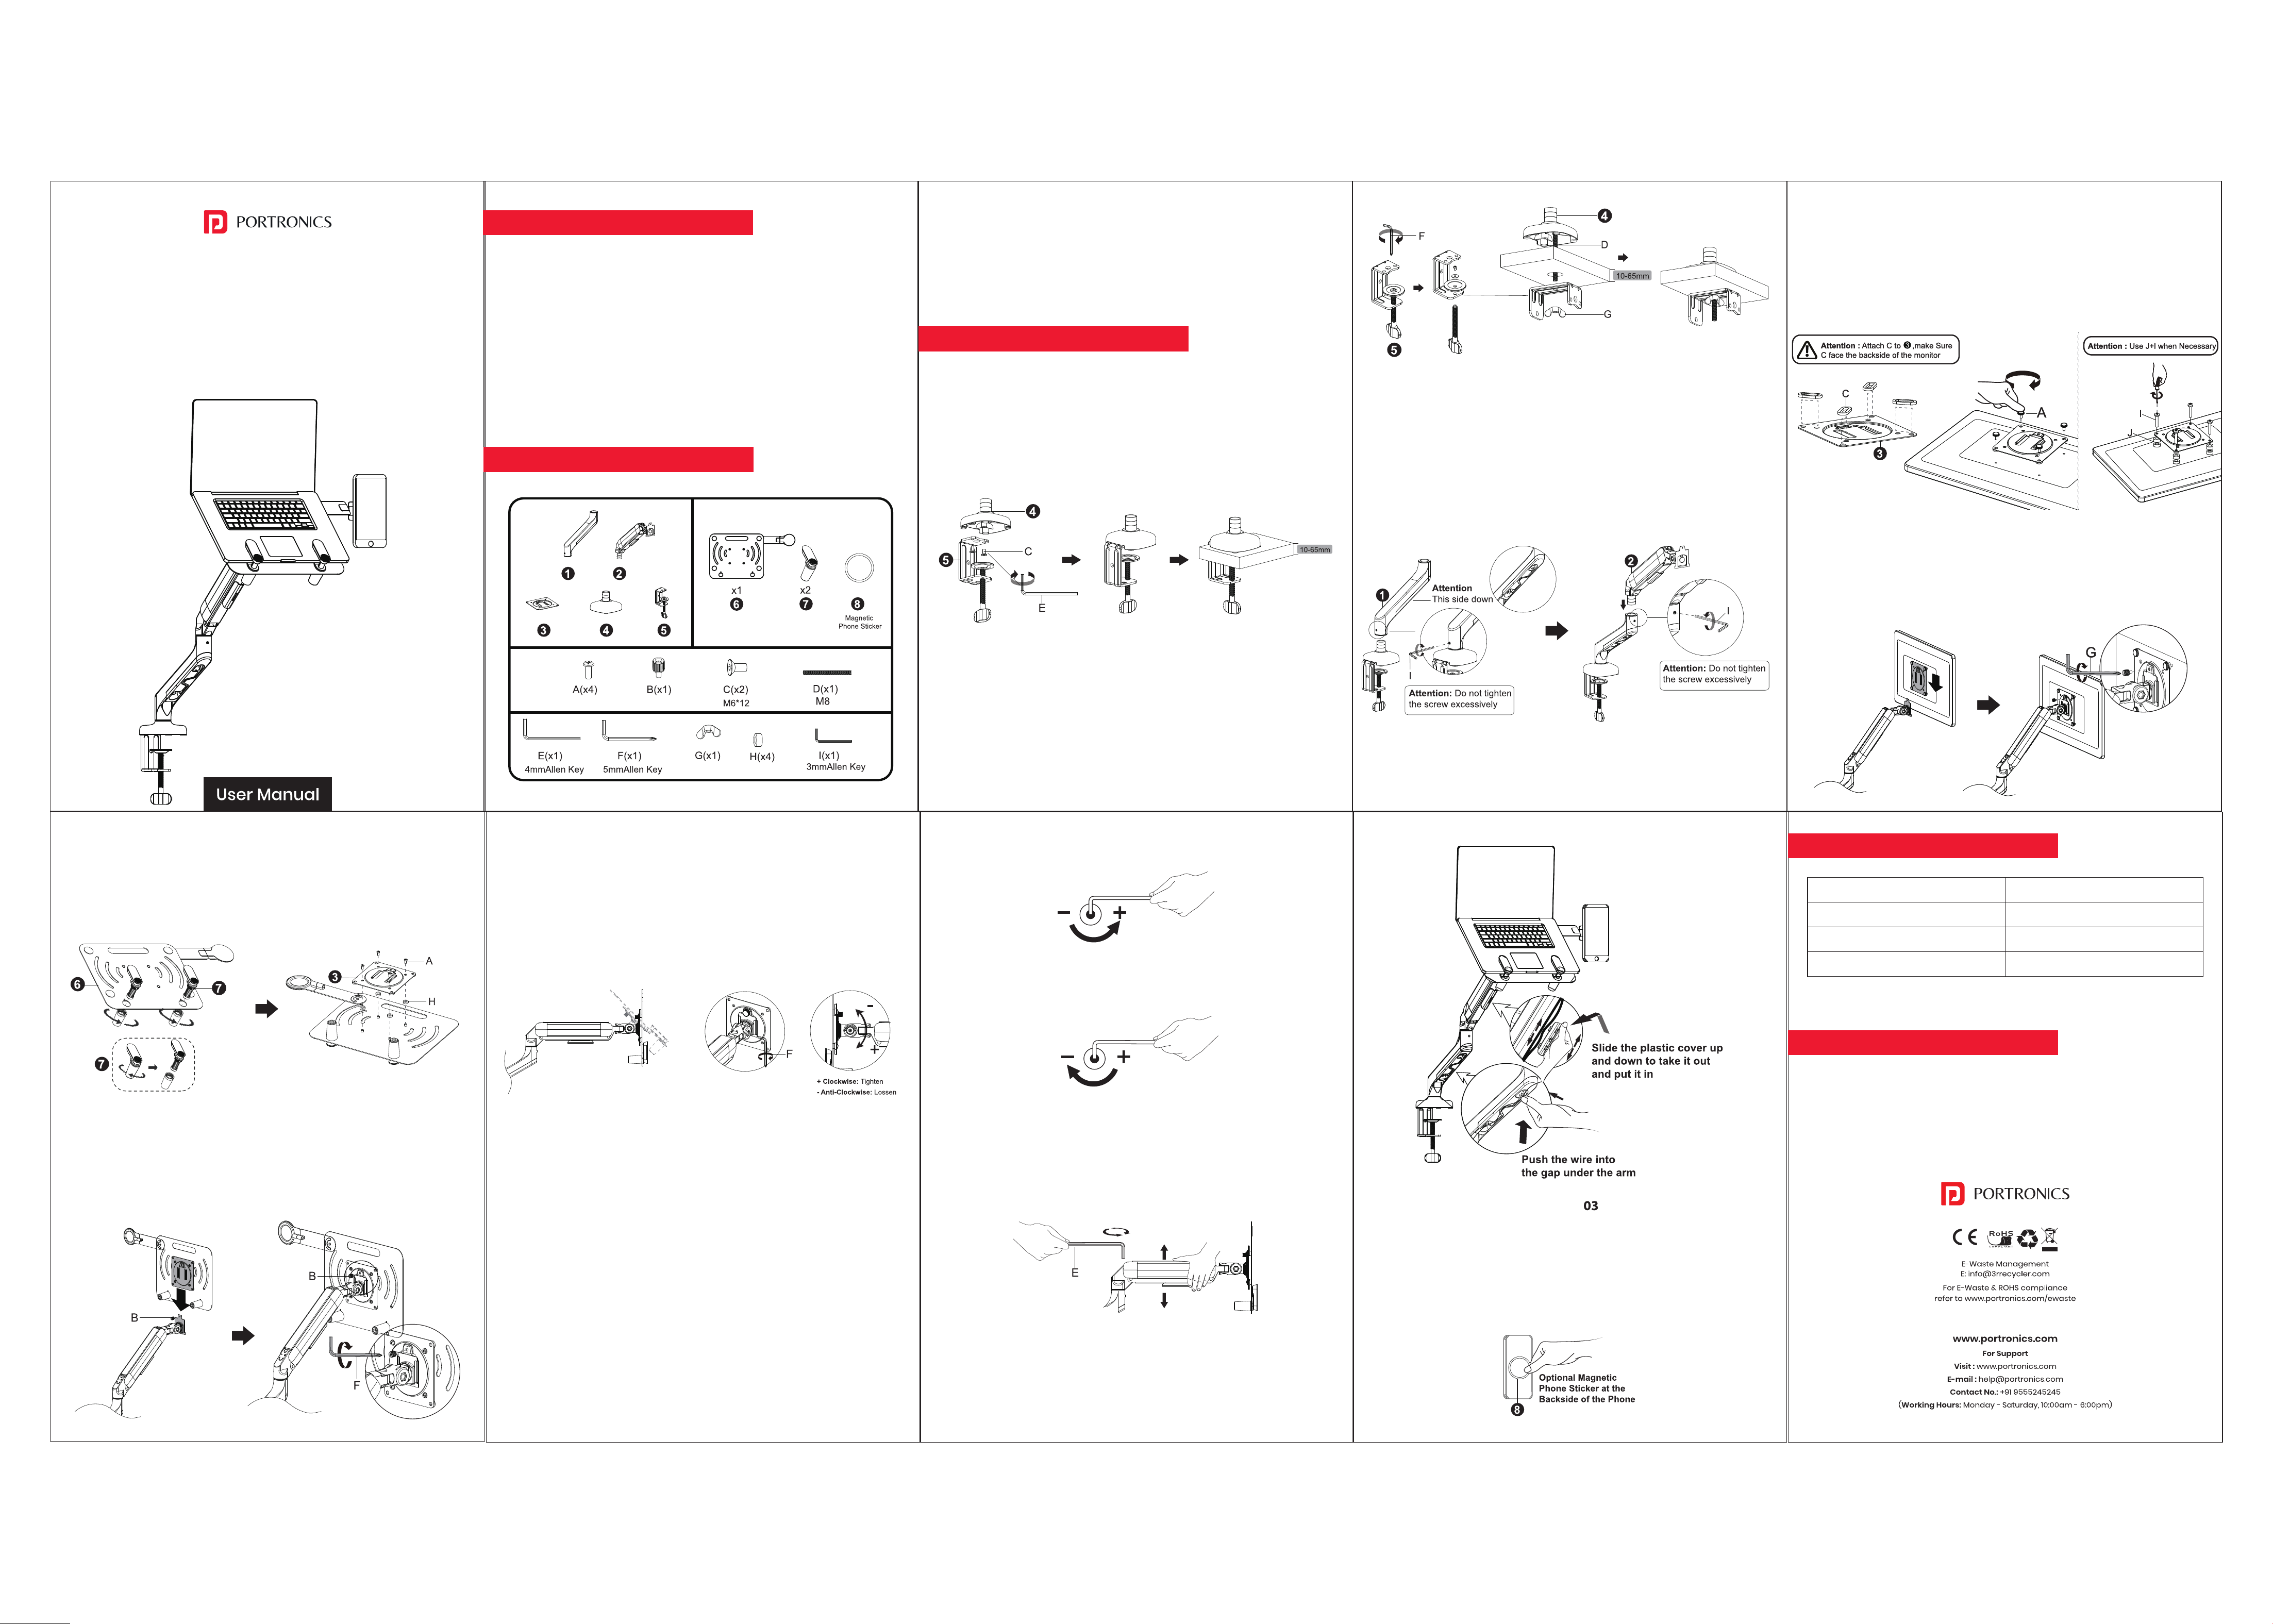
WHAT’S IN THE BOX
Before You Begin
• Ensure desk thickness is between 10–65 mm
• Do not exceed 6 kg weight capacity
• Tighten screws firmly, but avoid over-tightening
INSTALLATION GUIDE
PRODUCT OVERVIEW
Step 1 : Install the Base
Option A – Clamp Mount (No drilling required)
• Attach clamp to desk edge
• Tighten until secure
Option B – Grommet Mount (Through desk hole)
• Insert mount through desk hole
• Secure from underside
Step 2: Attach Arm to Base
• Insert arm into base
• Ensure correct orientation (“This side down”)
Option B–Install Laptop Tray
• Fix VESA plate to tray using screws
• Attach tray to arm head
• Ensure it locks securely
Step 5: Mount the Tray onto Arm
• Slide tray onto swivel head
• Tighten locking mechanism
TROUBLESHOOTING
Issue
Arm not staying in position
Tray not tilting properly
Arm feels loose
Solution
Adjust tension (Step 6)
Adjust tilt screw
Re-tighten base and joints
• Wipe with a dry cloth; avoid chemicals.
• Regularly check screw tightness.
• Ensure tension remains balanced after monitor changes.
MAINTENANCE
Step 6: Adjust Tilt
• Use Allen key to adjust tilt angle
• Turn clockwise → tighten
• Turn anti-clockwise → loosen
Phone Mount (Optional)
• Apply magnetic sticker to back of phone
• Attach to holder for easy access
• If the arm drops down → tighten the tension
• If the arm rises up → loosen the tension
Tip: Hold the arm firmly while adjusting to maintain control and
avoid sudden movement
Step 8: Cable Management
• Route wires through arm channels
• Push cables into bottom slot for a clean setuPhone Mount
Step 7: Adjust Vertical Position (Arm Tension)
(Important for proper balance)
⚠ Important: Always mount your monitor or laptop tray first
before adjusting the arm tension.
• This ensures the arm is balanced correctly according to the
actual weight.
Option A- Attach the VESA Plate to the Monitor
Select the correct screw set based on your monitor’s mounting
holes. Align the VESA plate with the holes and fasten all screws
securely. Make sure the plate is fully tightened and sits flat on
the monitor surface.
Step 3: Two Ways of Installation
Align the VESA plate with the head of the swivel arm.
Slide it until it clicks and locks securely.
Step 4: Attach The Vesa Plate