
33
1
RB48 radio setup and troubleshooting procedures
Setup and troubleshooting procedure for
T130U(4nd Gen T130) Wireless Tour Guide
System

33
2
目录
1. Unboxing and Initial Setup .....................................................................................3
1.1. Check ............................................................................................................. 3
1.2. Turn on/off.....................................................................................................3
1.3. Daily Use ....................................................................................................... 3
Transmitter Functions Introduction ......................................................................3
Receiver Functions Introduction .......................................................................... 4
2. Troubleshooting ......................................................................................................5
3. Contact Manufacturer .............................................................................................8
33
3
1.Unboxing and Initial Setup
1.1. Check
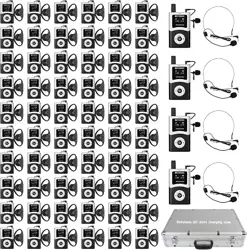
Please check if your package contains all parts listed in the package detail list.
1.2. Turn on/off
1.2.1 Transmitter:
Press and hold the
【 】
button for 2 seconds to power on or off.
1.2.2 Receiver
Press and hold the【 】button for 2 seconds to power on or off.
1.3. Daily Use
Transmitter Functions Introduction
1.3.1 Power On/Off
Press and hold the
【 】
button for 2 seconds to power on or off.
1.3.2 Unlock Setting
Long press the【+】button for 3 seconds. The【 】symbol on the display will
disappear, and the device will automatically lock after approximately 10 seconds of
inactivity.
1.3.3 Channel Adjustment/One-Button Pairing
After unlocking, press the【+ 】or【-】button. The screen will display the
【 CHS 】 symbol, indicating channel auto-follow is enabled. Receivers within
approximately 6 meters will automatically pair. The pairing process will
automatically exit after about 10 seconds, the 【CHS】symbol will disappear,
and the screen will automatically lock.
1.3.4 MIC Volume Adjustment
33
4
After unlocking, press the【 】button to adjust the microphone gain level,
which can be set to levels 1-4 based on actual conditions.
It is recommended to keep the microphone
approximately 15cm away from
your mouth, with adjustments based on actual performance.
1.3.5 Microphone Mute Function
In normal operating mode, long press the 【 4x 】 button for 2 seconds. The
display will show the
【 】
symbol, indicating mute mode is activated.
1.3.6 One-Button Power Off
In the locked state, long press the【-】button for about 5 seconds. The screen
will display
【
All Off
】
,indicating all paired receivers are turned off. Press any
button to exit this mode.
1.3.7 Bluetooth Connection
In the locked state, long press the
【
SET
】
button for about 3 seconds to turn
Bluetooth on or off. When Bluetooth is off, the green indicator light will stay on.
After Bluetooth is turned on, the screen will display the
【
BT
】
symbol, and the
blue indicator light will flash quickly. Open your phone's Bluetooth function and
search for T130U to pair and connect. Once connected, the blue indicator light will
flash slowly. This device has Bluetooth memory function. After successful pairing,
if Bluetooth is not turned off, it will default to on the next time the device is
powered on. After enabling Bluetooth on your phone, the device can automatically
connect without re-pairing.
1.3.8 Charging Indication
When the battery is low, the battery icon on the display will indicate【 】
prompting
immediate charging. The red indicator light will stay on during charging
and turn off when the battery is fully charged.
Receiver Functions Introduction
1.3.9 Power On/Off
33
5
Press and hold the【 】button for 2 seconds to power on or off.
1.3.10 Unlock Setting
In the off state, first press and hold the
【
VOL+
】
button, then press and hold
the
【 】
button to power on. The
【 】
symbol on the display will disappear, and
the device will automatically lock after approximately 5 seconds of inactivity.
1.3.11 Volume Adjustment
In the locked state, press the【VOL+】or【VOL-】button to adjust the volume.
The volume has 10 levels from 0 to 9, and the screen will display the current
volume level.
1.3.12 Channel Adjustment
After unlocking, press the
【
VOL+
】
or
【
VOL-
】
button. The screen will
display the current channel based on your adjustment.
1.3.13 Automatic Search
In the off state, first press and hold the【VOL-】button, then press and hold
the【 】button to power on. The device will enter automatic search mode upon
startup, with the blue light flashing. It will automatically exit search mode after
about 12 seconds. The green light will stay on if a signal is received, and the blue
light will stay on if no signal is received.
1.3.14 Charging Indication
When the battery is low, the battery icon on the display will indicate
【 】
prompting
immediate charging. The red indicator light will stay on during charging
and turn off when the battery is fully charged.
2.Troubleshooting
2.1 The T130U keeps disconnecting, or it can't communicate with other devices
even though they are on the same channel.
-------

33
6
1)T130U is divided into American frequency and European frequency.
You can distinguish the transmitter and receiver of American frequency and
European frequency by the number of channels.
The American frequency has 50 channels and the European frequency has 19
channels.
The two frequency versions of the product cannot be mixed and cannot
communicate with each other.
Because the operating frequency ranges of the transmitters and receivers of
European and American frequencies are different:
European frequency: 823-832/863-865MHz
American frequency: 902-928MHz
2) It is guessed that you accidentally switched to the European and American
frequency.
Could you please check whether the USA or EU is displayed on the screen?
If there is EU, could you try to switch to the USA using the following steps?
Could you try to switch to the USA by pressing the power button and the red mark
in the figure below at the same time?
You need to make sure all transmitters or receivers are tuned to USA or EU.
Here is a video, I hope it helps.
https://tinyurl.com/29ejv9ha
2.2 Transmitters are stuck on the lock position and no button is working to unlock
them.
----We consulted our engineers, and they confirmed it's a button issue.
For this, we can replace the transmitter for you.
Could you please share your full delivery address with us?
2.3The transmitter and receiver are not working properly.
---Is it a charging problem, a pairing problem, or a noise issue?

33
7
Could you please tell us how many transmitter/receiver batteries are not charging?
2.4 My transmitter cannot connect to the receiver.
----To address the issue, please follow these steps:
1. Re-pair the Devices:
Unlock the transmitter by pressing and holding the [+] button for 3 seconds.
2. Press the [+] or [-] button until the [CHS] symbol appears on the screen. This
enables channel auto-follow, and receivers within approximately 6 meters will
automatically pair.
3. The pairing process will exit automatically after about 10 seconds, and the [CHS]
symbol will disappear.
4. Check Frequency Settings:
Ensure that both the transmitter and receivers are set to the same frequency band
(European or American frequency).
5. To check and adjust the frequency:
Transmitter: While powered off, press and hold the [+] and [SET] buttons, then
press the [Power] button. The display will show either [EU] (European frequency)
or [USA] (American frequency). Ensure it is set to [EU].
6. Receiver: While powered off, press and hold the [VOL-] and the upper button
(similar to the transmitter's [SET] button), then press the [Power] button. The
display will show either [EU] or [USA]. Ensure it is set to [EU].
7. After ensuring all devices are on the same frequency, re-pair the transmitter and
receivers.
8. Verify Microphone and Headphones:
During the pairing process, ensure the microphone and headphones are properly
plugged in, as the microphone acts as an antenna.
9. Additional Resources:
You can view a demonstration video for pairing here: tinyurl-dot-com/5n85exyc
(replace "-dot-" with a ".").
2.5 Is the 4th generation
(
T130U
)
compatible with the 1st or 2nd

33
8
(T130S/T130P)generation receiver?
----1.At present, all products can be used at the same time on the premise that the
products have the same operating frequency and channel.
Unfortunately, the current product models are different, and the operating
frequency will also be different.
For example, your T130U has an operating AmericanFrequency: 902-928MHz
T130S has an operating frequency range of 195mhz-216mhz Therefore, the
receivers of the two products cannot be used at the same time.
2. However, our T130 series products are compatible. For example, if you buy
T130S, you can buy T130/T130P receivers.
3. Contact Manufacturer
If none of the above steps resolve the issue, contact the manufacturer for repair or
replacement.
We provides a warranty period of up to 3 years for the Wireless Tour Guide System,
even if the product is out of warranty, we will provide appropriate support.