Register this and other avanti® products through our website:
https://www.avantiproducts.com/pages/product-registration
Product registration is not required to activate warranty.
SAVE THIS INSTRUCTION MANUAL FOR FUTURE REFERENCE
© 2024 Avanti® www.avantiproducts.com
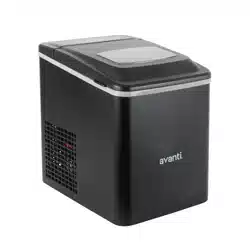
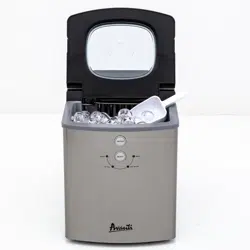
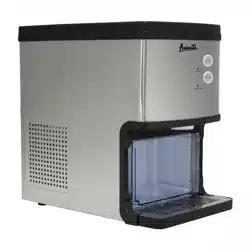
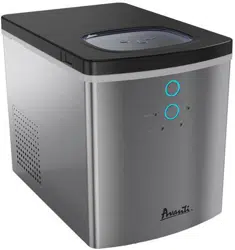
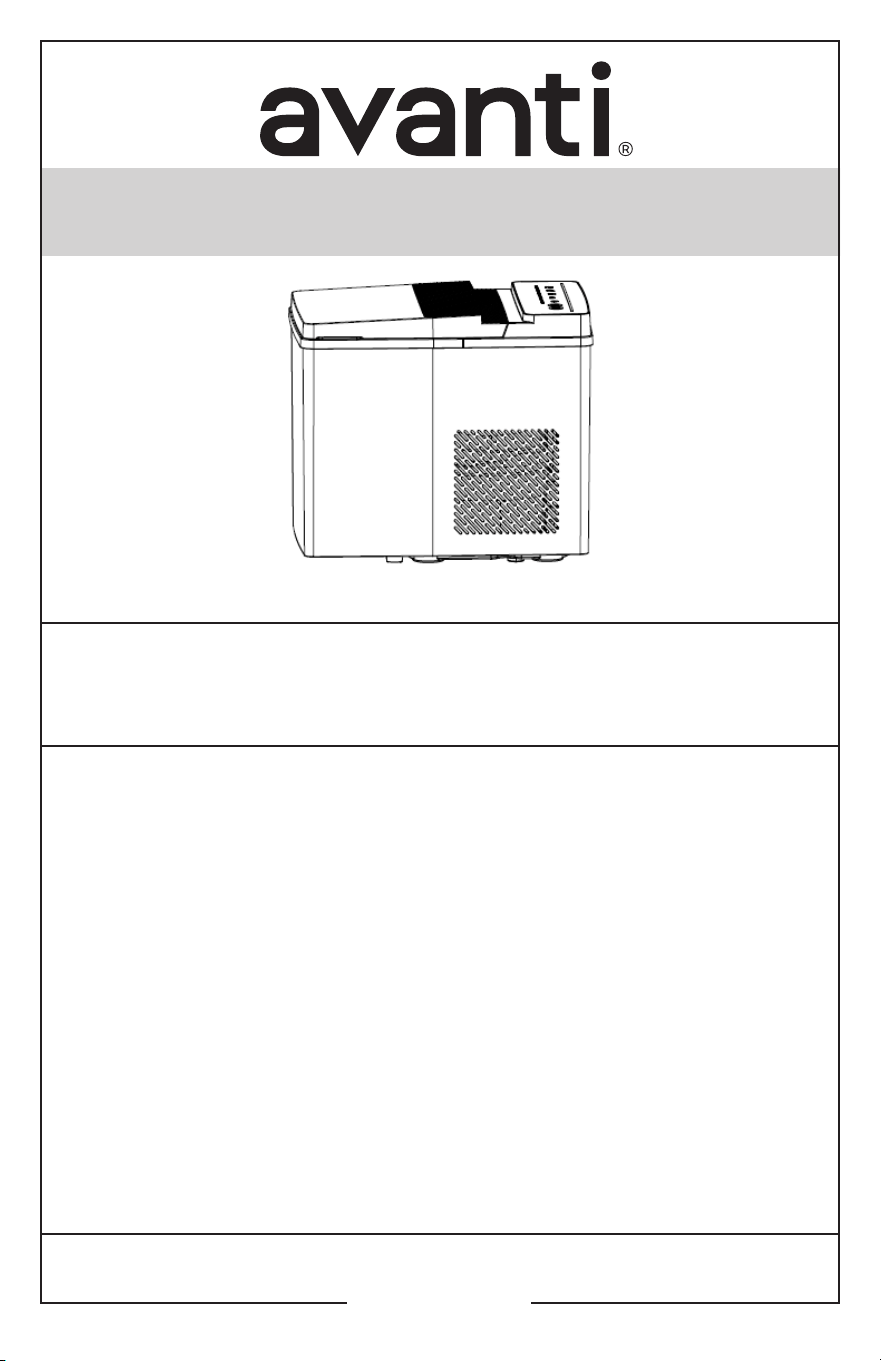
33LB Bullet Ice Maker
Instruction Manual
Models : AVIM333S-IS
English
Important Safeguards ...................................................................................................................... 2
Know your Ice Maker ........................................................................................................................ 3
Before First Use .................................................................................................................................. 3
Control Panel ........................................................................................................................................ 4
Using Your Ice Maker .................................................................................................................... 4-5
Cleaning and Maintenance ............................................................................................................ 5
Troubleshooting .................................................................................................................................. 6
Technical Parameters ....................................................................................................................... 7
Warranty .................................................................................................................................................. 7
English - 2
IMPORTANT SAFEGUARDS
To reduce the risk of fire, explosion, electric shock, or injury when using your ice maker, follow these important
safety instructions:
1. Before use:
Check that the voltage power corresponds to the one shown on the appliance nameplate.
2. Do not remove labels: Keep all safety, warning, and product information labels on your ice maker.
3. Exclusive grounded outlet: Plug the ice maker into a dedicated grounded power outlet. Do not plug any other appliances
into the same outlet. Ensure the plug is fully inserted into the receptacle.
4. Grounding required: This appliance must be grounded. It is equipped with a power cord having a grounding plug, which
must be plugged into a properly installed and grounded outlet.
5. Avoid extension cords: Extension cords can overheat and cause a fire. If you must use one:
• Use only a grounded extension cord.
• Ensure the extension cord’s marked rating is equal to or greater than the rating of this appliance.
• Position the cord so it does not drape over a counter or tabletop where it can be pulled on by children.
6. Damaged cord or appliance: Do not operate the appliance if the cord or plug is damaged, or if the appliance malfunctions
or is damaged in any way. Return it to an authorized service facility for repair.
7. Damaged supply cord: If the supply cord is damaged, it must be replaced by the manufacturer, its service agent, or a
qualified person to avoid a hazard.
8. WARNING: When positioning the appliance, ensure the supply cord is not trapped or damaged.
Warning; Risk of fire/flammable materials
9. WARNING: Do not locate multiple portable socket-outlets or portable power supplies at the rear of the appliance.
Warning; Risk of fire/flammable materials
10.
Do not dangle the cord: Keep the cord away from the edge of tables or counters.
11. Avoid heat sources: Do not place the ice maker on or near a hot gas or electric burner, or in a heated oven.
12. Prevent tripping:
Arrange the power cord so it cannot be pulled on by children or cause a tripping hazard.
13. No contact with hot surfaces
: Keep the power cord away from hot surfaces.
14. Use only approved attachments: Using attachments not recommended or sold by the manufacturer may cause fire,
electric shock, or injury.
15. Avoid frostbite: Do not touch the evaporator while the ice maker is in use or making ice.
16. Do not immerse: Never immerse any part of the product in water.
17. To disconnect: Turn all controls to “OFF,” then remove the plug from the wall outlet.
18. Dry hands only: Do not plug or unplug the product with wet hands.
19. Unplug when not in use: Unplug the product before cleaning, maintaining, or when not in use.
20. Safe water only: Use only microbiologically safe water of known quality.
21. No flammable cleaners: Do not clean your ice maker with flammable fluids, as the fumes may create a
fire hazard or explosion.
22. Keep upright: Do not overturn the ice maker. If it is overturned accidentally, let it stand upright for 2 hours
before turning it on again.
23.
Acclimation: If the ice maker has been exposed to cold temperatures, allow it to warm up to room temperature for a few hours
before use.
24. No hazardous materials: Never place flammable, explosive, or corrosive materials inside the ice maker.
25. Do not store explosive substances such as aerosol cans with a flammable propellant in this appliance.
26. Gas leaks: Do not use the ice maker if there is a gas leak in the area.
27. Store flammables safely: Keep flammable gases and materials away from the ice maker to prevent fires.
28. Unplug before moving: Always unplug the ice maker before moving it to avoid damage to the refrigeration system.
29. No unauthorized repairs: Do not attempt to disassemble, repair, modify, or replace any part of the product yourself.
30. Supervision for certain users: This appliance is not intended for used by persons (including children) with reduced physical,
sensory or mental capabilities, or lack of experience and knowledge, unless they have been given supervision or instruction
concerning use of the appliances by a person responsible for their safety.
31. Children and appliances: Supervise children to ensure they do not play with the appliance.
32.
Close supervision near children: Children should be supervised to ensure that they do not play with the appliance.
33.
Do not leave unattended: Never leave the appliance unattended while it is in use.
34.
Indoor use only: This appliance is designed for indoor use only.
35.
Intended use only: Use the appliance only for its intended purpose.
36. WARNING:
Risk of fire/flammable materials
37.
Proper disposal: Please abandon the ice maker according to the local regulations as it uses flammable blowing gas and refrigerant.
38.
Proper disposal: Please dispose of the flammable refrigerant and blowing gas used in the appliance according to the local regulations.
39.
WARNING: Keep ventilation openings, in the appliance enclosure or in the built-in structure, clear of obstruction.
40. WARNING:
Do not use mechanical devices or other means to accelerate the defrosting process, other than those recommended
by the manufacturer.
41. WARNING:
Do not damage the refrigerant circuit.
42. WARNING:
Do not use electrical appliances inside the food storage compartments of the appliance, unless they are of the type
recommended by the manufacturer.
43.
Cautionary statements concerning the handling, moving and use of the refrigerator or freezer to avoid either damaging the refrigerant
tubing, or increasing the risk of a leak: the appliance shall be handled with care and shall not be moved or installed violently.
English - 3
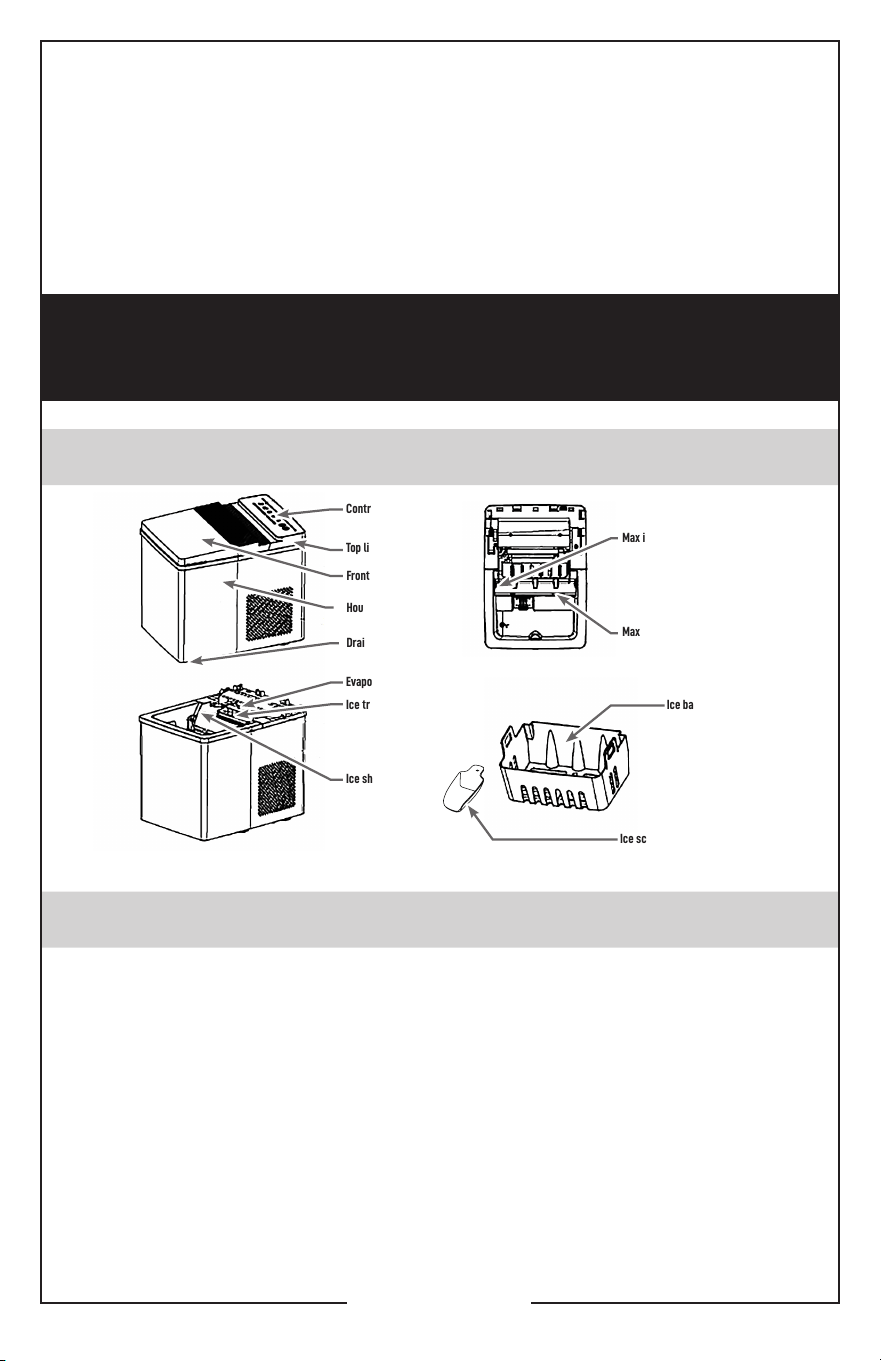
KNOW YOUR ICE MAKER
BEFORE FIRST USE
Congratulations on your purchase of an Avanti® 16lb Bullet Ice Maker!
SAVE THESE INSTRUCTIONS
HOUSEHOLD USE ONLY
(Product may be subject to change without prior notice)
Housing
Drain Plug
Front Cover
Top lid
Control panel
Max ice sensor
Max water level
Evaporator
Ice basket
Ice scoop
1.
Unpack the appliance and verify that all accessories (ice basket, ice scoop, etc.) are included. If
any accessories are missing, please contact customer service.
2.
Ensure the ice maker is level and placed on a stable surface to prevent malfunctions.
3.
Do not tilt the ice maker more than 45° during transport or use. Avoid turning it upside down, as
this could damage the compressor or refrigeration system. Allow the fluids in the compressor
to settle for 2 hours after moving or transporting the ice maker before using it.
4.
Place the appliance on a dry, level surface with adequate ventilation, away from heat sources
like ovens, heaters, and corrosive gases. Maintain a clearance of approximately 6 inches
(15 cm) on all sides for proper ventilation.
5.
Do not fill the water reservoir with hot water, as it may damage the ice maker. Use room
temperature or colder water.
6.
Avoid using the appliance in very cold environments (below 5˚C/41˚F).
7.
Clean the appliance following the instructions in the “CLEANING AND MAINTENANCE”
section before operating it.
44.
Component parts such as compressor, condenser, motor and copper pipe etc. shall be replaced with like components and that
servicing shall be done by factory authorized service personnel, so as to minimize the risk of possible ignition due to incorrect parts
or improper service.
45.
It is declares that the conformity to the applicable provisions of applicable US Federal requirements, including 21 CFR, Chapter 1,
Subchapter J, Radiological Health.
46.
The appliance must be powered off before the maintenance is performed to prevent the service personnel from being subject to
electric shock.
47. WARNING:
Never pour colored drinks or porridge-like drinks into the machine.
48.
This appliance is intended to be used in household and similar applications such as:
– staff kitchen areas in shops, offices and other working environments;
– farm houses and by clients in hotels, motels and other residential type environments;
– bed and breakfast type environments;
– catering and similar non-retail applications
Ice shovel
Ice tray
English - 4
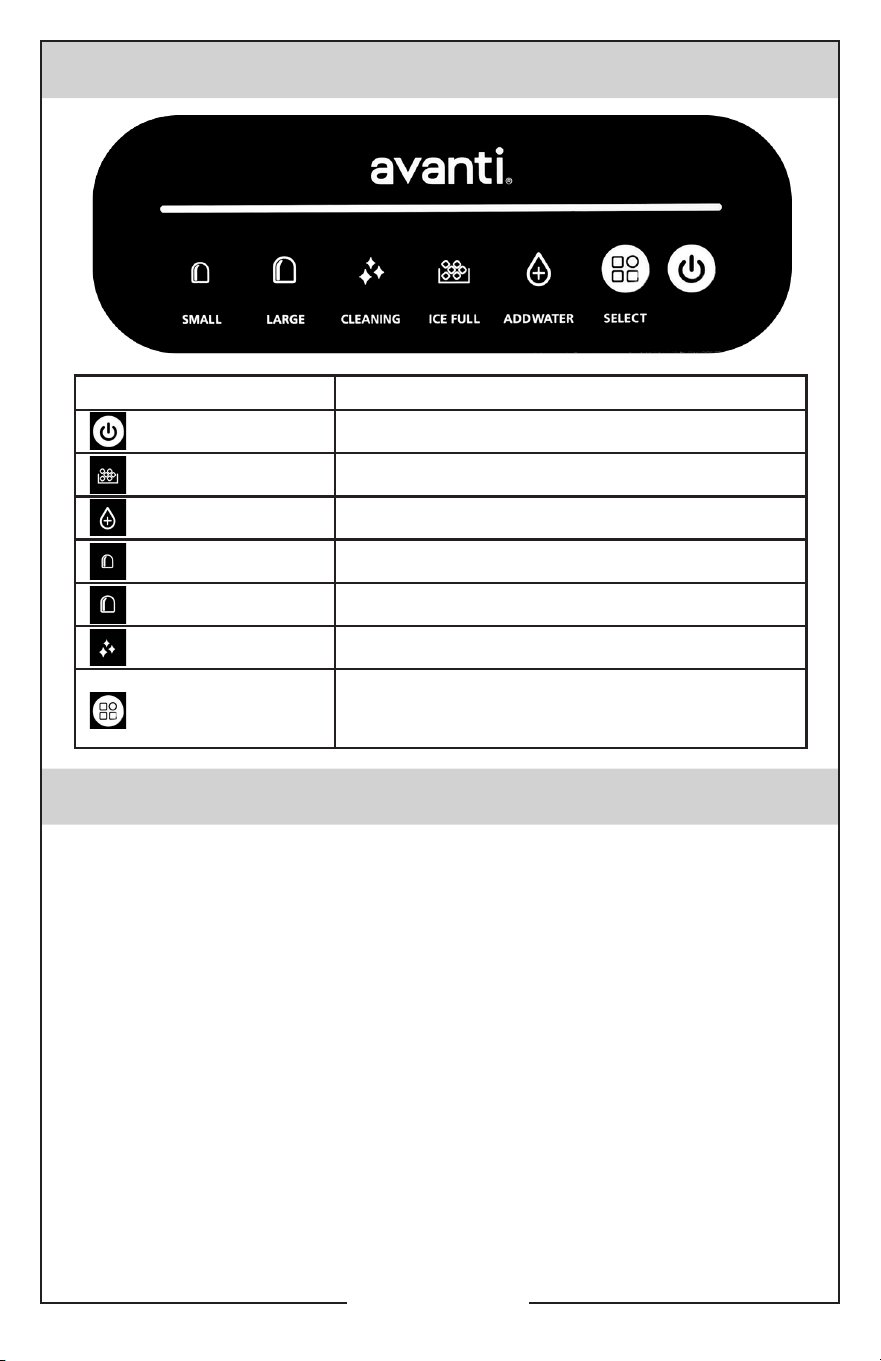
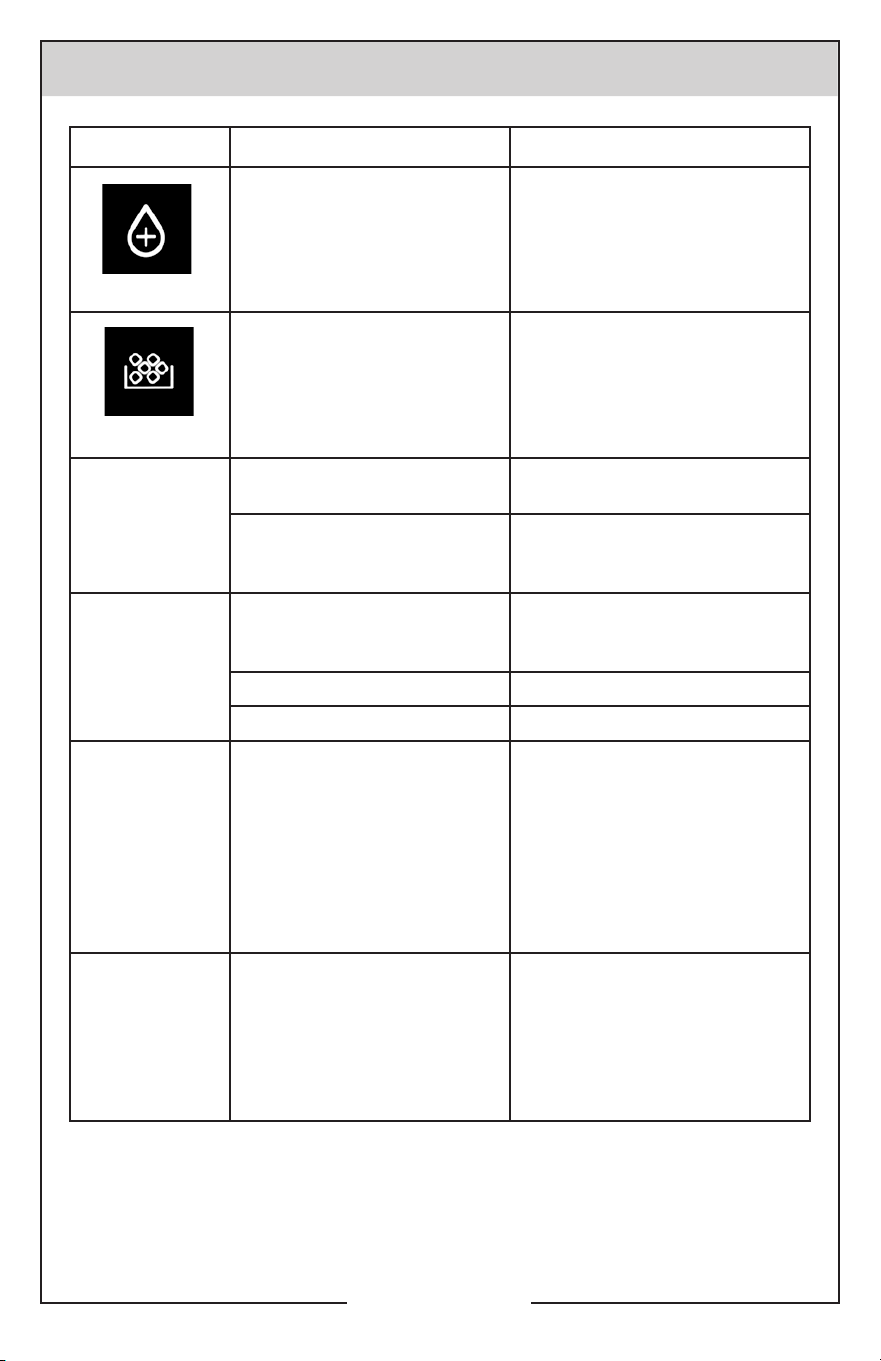
Key (with indicator) Function
Power
Starts or stops the ice maker
Full Ice
Lights up when the ice basket is full
Add Water
Lights up when the water reservoir is low
Small Ice
Lights up when Small ice mode is selected
Large Ice
Lights up when Large Ice mode is selected
Cleaning
Lights up when the cleaning cycle is running
Select
Press to select Small Ice, Large Ice, or Cleaning mode
(while in standby). When not in standby, press to cycle
between Small Ice and Large Ice.
English - 4
1. Check the Drain Plug: Ensure the drain plug at the bottom of the water reservoir is securely closed.
2. Plug In: Plug the ice maker into a wall outlet. NOTE: If the ice maker has been moved, allow it to rest
upright for 30 minutes before plugging it in.
3. Open and Empty: Open the top lid and remove the ice basket.
Note: Fill with potable water only
4. Fill with Drinking Water: Fill the water reservoir with drinking water, ensuring the water level does
not exceed the MAX mark.
5. Replace and Close: Replace the ice basket and close the top lid.
6. Power On and Select Ice size: Press the Power button. The large ice indicator light will remain on.
Then, press the Select button to choose your desired ice size (Small or Large). If you want to clean
the appliance, press the Select button again to enter Cleaning mode while the ice maker is in
standby.
7. Ice-making Cycle: The ice-making process takes about 6-10 minutes, depending on the ambient
and water temperature.
8. Ice-Making Process:
- Water is pumped into the ice tray beneath the evaporator.
- Ice forms on the evaporator over 6-10 minutes.
- The ice tray tilts back, draining excess water into the reservoir.
- Ice cubes fall from the evaporator and are pushed into the ice basket by the ice shovel.
CONTROL PANEL
USING YOUR ICE MAKER
English - 5English - 5
CLEANING AND MAINTENANCE
- The ice tray returns to its position under the evaporator for the next cycle.
9. Ice Full Basket: When the ice basket is full, the “Ice Full” indicator will light up, and the ice maker
will automatically stop. Gently remove ice with the scoop. The ice maker will automatically restart.
10. Low Water: The “Add Water” indicator will light up when the water reservoir is low, and the ice-
making process will stop. Remove the ice basket, refill the reservoir, and press the Power button to
restart the ice-making cycle.
11. Stopping the Ice Maker: Once you have enough ice, press the Power button to stop the ice-making
cycle and unplug the unit.
12. Transfer Ice (Optional): Open the top lid and transfer the ice to a freezer for storage.
13. Cool Down: Allow the ice maker to reach room temperature before storing it.
14. Water Replacement: It’s recommended to replace the water in the reservoir weekly. Empty the
reservoir if the ice maker won’t be used for an extended period.
To keep your ice tasting fresh and your ice maker looking great, we recommend cleaning your ice
maker once per week.
1.
Stop the ice-making cycle by pressing the Power button, unplug the ice maker from the wall
outlet, and let it warm up to room temperature.
2.
If residual water is found in the ice tray, gently push the ice tray back so that all water drains into
the water reservoir.
3.
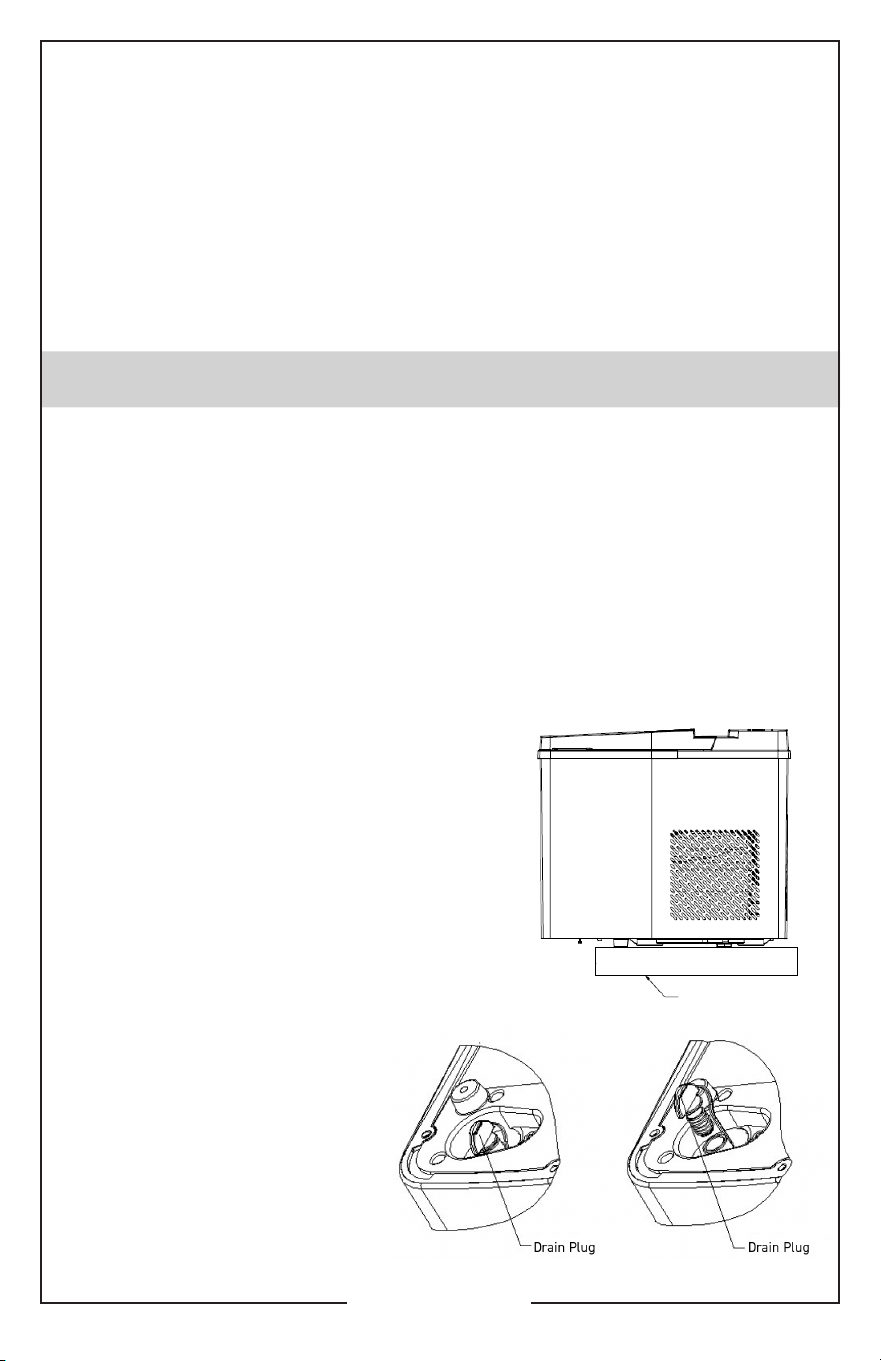
Move the appliance forward about 60mm (2.4 inches) away from the counter and open the drain
plug to drain any excess water into a separate container (see Figs. 1, 2, and 3).
4.
Ensure the drain plug is closed securely.
Fill the water reservoir with clean water.
Press and hold the Select button until the Cleaning indicator light flashes.
Then, press the Power button to start the cleaning cycle.
The pump will run for 6 minutes, then enter standby mode.
Open the drain plug and empty the water into a
separate container
5.
Remove the ice basket.
6.
Clean the ice maker interior with a soft cloth
soaked with warm water and vinegar, then rinse
with clean water and then drain all the water
into a separate container.
7.
Replace the drain plug. Wash the ice basket
and ice scoop in warm soapy water.
Rinse and dry.
8.
Clean the exterior of the ice maker with a
soft damp cloth. Use a mild dishwashing
soap, if necessary.
NOTE:
9.
If the ice maker will not be used for an
extended period, empty and dry the
water reservoir before storing it.
1) Do not use organic solvent, boiled
water, detergent, strong acid and
strong alkali etc. for cleaning.
2) Do not clean the evaporator.
(Figure 1)
(Figure 2) (Figure 3)
Table
English - 6English - 6
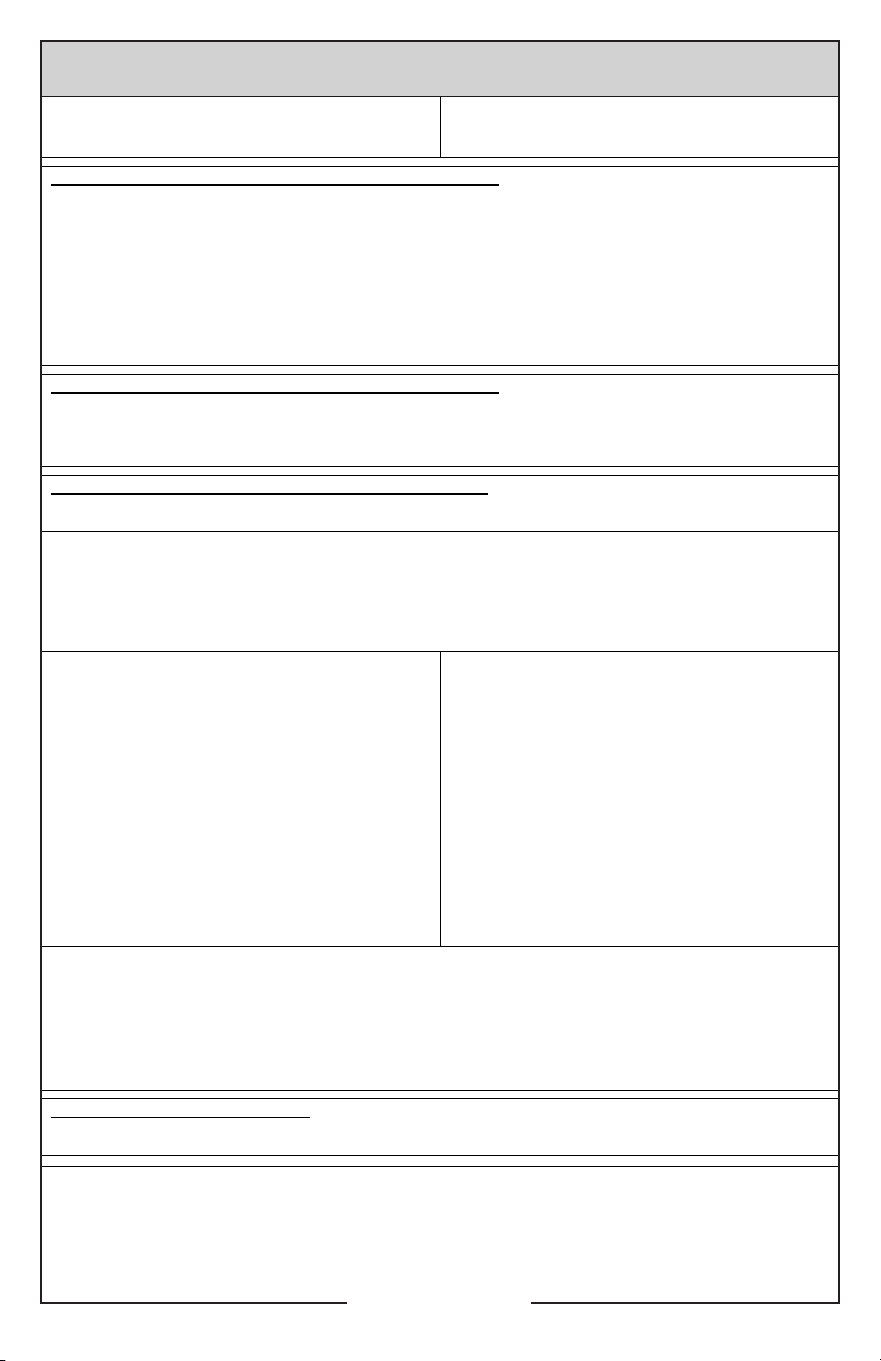
TROUBLESHOOTING
PROBLEM PROBABLE CAUSES SOLUTIONS
TURNS ON
1. Low water level or lack
of water
2. The water screen at the bottom
of water reservoir is blocked.
3. Pump malfunction.
1. Stop making ice, refill water and
then press POWER key to restart
ice-making cycle.
2. Clean the unit.
3. If the ice maker still doesn’t work,
contact Customer Service
TURNS ON
1. Ice basket is full and is
blocking the sensor.
2. Sensor is not working.
1. Remove the ice from ice from
ice basket.
2. Wipe any foreign objects off the
sensor and restart the ice maker.
3. If the ice maker still doesn’t work,
contact Customer Service.
The ice collects
together.
Making ice takes too much time.
Stop making ice and restart the ice-
making cycle after the ice melts.
The water temperature in the
reservoir is too low.
Fill the water reservoir with
water between 8°C and 25°C
(46°F and 77°F).
The ice-making
cycle seems
normal but no ice
is produced.
The ambient temperature or
water temperature is too high.
Start the cycle in an environment
below 32°C (90°F) and use cold
water in the reservoir.
Refrigerating system leaks Call Customer Service
Refrigerating system blocks Call Customer Service
Poor ice-making
result
1. Poor heat dissipation.
2. The water temperature is
too high.
3. The ambient temperature is
too high.
1. Leave a 6-inch clearance on all
sides of the ice maker for proper
ventilation.
2. Fill the reservoir with water
between 8°C and 28°C
(46°F and 82°F).
3. Use the ice maker in an
environment between 10°C and
32°C (50°F and 90°F).
Water pump
does not work or
produces noise.
1. Water pump is damaged.
2. Appliance hasn’t been cleaned,
causing blockages
1. Contact Customer Service
2. Clean the appliance every week,
using neutral cleaning agents
such as detergent and soapy
water. Avoid harsh chemicals.
English - 7
YOUR AVANTI PRODUCTS
WARRANTY
Staple your sales receipt here. Proof of original
purchase date is needed to obtain service under
warranty.
WHAT IS COVERED – LIMITED ONE-YEAR WARRANTY
Avanti Products warrants that the product is free from defects in materials and/or workmanship for a period of twelve
(12) months from the later of the date of purchase or delivery to the original owner. The foregoing timeline begins to
run upon the date of purchase, and shall not be stalled, tolled, extended, or suspended for any reason whatsoever
unless described in detail in the warranty document. For one year from the date of purchase by the original owner,
Avanti products will, at its option, repair or replace any part of the product which proves to be defective in material or
workmanship under normal use. Avanti Products will provide you with a reasonably similar product that is either new
or factory refurbished. During this period Avanti Products will provide all parts and labor necessary to correct such
defects free of charge, so long as the product has been installed and operated in accordance with the written
instructions in this manual. In rental or commercial use, the warranty period is 90 days. All Avanti appliances of 3.5
cubic feet capacity or less must be brought/sent to the appliance service center for repair.
LIMITED SECOND THROUGH FIFTH YEAR WARRANTY
For the second through the fifth year from the date of original purchase, Avanti Products will provide a replacement
compressor free of charge due to a failure. You are responsible for the service labor and freight charges. In rental
or commercial use, the limited compressor warranty is one year and nine months. Costs involved to move the
product to the service center and back to the user’s home, as maybe required, are the user’s responsibility.
WARRANTY EXCLUSIONS / WHAT IS NOT COVERED:
The warranty coverage described herein excludes all defects or damage that are not the direct fault of Avanti
Products, including without limitation, one or more of the following:
•
A failure to comply with any applicable state, local, city, or county electrical, plumbing and/or building codes,
regulations, or laws, including failure to install the product in strict conformity with local fire and building codes
and regulations.
• Any external, elemental and/or environmental forces and factors, including without limitation, rain, wind, sand,
floods, fires, mud slides, freezing temperatures, excessive moisture or extended exposure to humidity, lightning,
power surges, structural failures surrounding the appliance, and acts of God.
•
Content losses of food or other content due to
spoilage.
• Incidental or consequential damages
• Parts and labor costs for the following will not be
considered as warranty:
• Plastic cabinet liners.
• Punctured evaporator that voids the warranty on
the complete sealed system.
• Shipping and handling costs associated with the
replacement of the unit.
• Repairs performed by unauthorized servicers.
• Service calls that are related to external problems,
such as abuse, misuse, inadequate electrical power,
accidents, fire, floods, or any other acts of God.
• Failure of the product if it is used for other than it
intended purpose.
• The warranty does not apply outside the Continental
USA.
• Surcharges including but not limited to, any after
hour, weekend, or holiday service calls, tolls, ferry
trip charges, or mileage expense for service calls to
remote areas.
In no event shall Avanti Products have any liability or responsibility whatsoever for damage to surrounding property,
including cabinetry, floors, ceilings, and other structures and/or objects around the product. Also excluded from this
warranty are scratches, nicks, minor dents, and other cosmetic damages on external surfaces and exposed parts;
Products on which the serial numbers have been altered, defaced or removed; service visits for customer
education, or visits where there is nothing wrong with the product; correction of installation problems (you are solely
responsible for any structure and setting for the product, including all electrical, plumbing and/or other connecting
facilities, for proper foundation/flooring, and for any alterations including without limitation cabinetry, walls, floors,
shelving etc., as well as the resetting of breakers or fuses.
OUT OF WARRANTY PRODUCT
Avanti Products is under no obligation, at law or otherwise, to provide you with any concessions, including repairs,
pro-rates, or product replacement, once this warranty has expired.
WARRANTY – REFRIGERATION - COMPRESSOR
English - 7
WARRANTY
(C) 2024 Avanti Products
The Legacy Companies,
Weston, FL 33331 U.S.A
www.AvantiProducts.com
All rights reserved.
AVIM333S-IS
PRINTED IN CHINA.

070524
© 2024 Avanti® www.avantiproducts.com Printed in China