USER MANUAL
MODEL:
T0531STB-V15
BLUETOOTH AUTO-SYNC CLOCK
Welcome to BALDR family! Please read the manual before use to learn about the
features and functions.

4. PRECAUTIONS
6. FCC STATEMENT
3. TROUBLESHOOTING
2. HOW TO USE
1. PRODUCT INTRODUCTION
5. WARRANTY
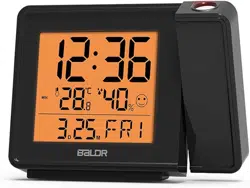
1.1 Product Oveiew
1.2 Button Introduction
1.3 Code for dierent language
1.4 Product Specication
2.2 Set Alarm Time
2.1 Pair Clock with Bluetooth Device
08
09
07
04
01
08
01
02
03
03
07
04
CONTENTS
1. PRODUCT INTRODUCTION
1.1 Product Oveiew
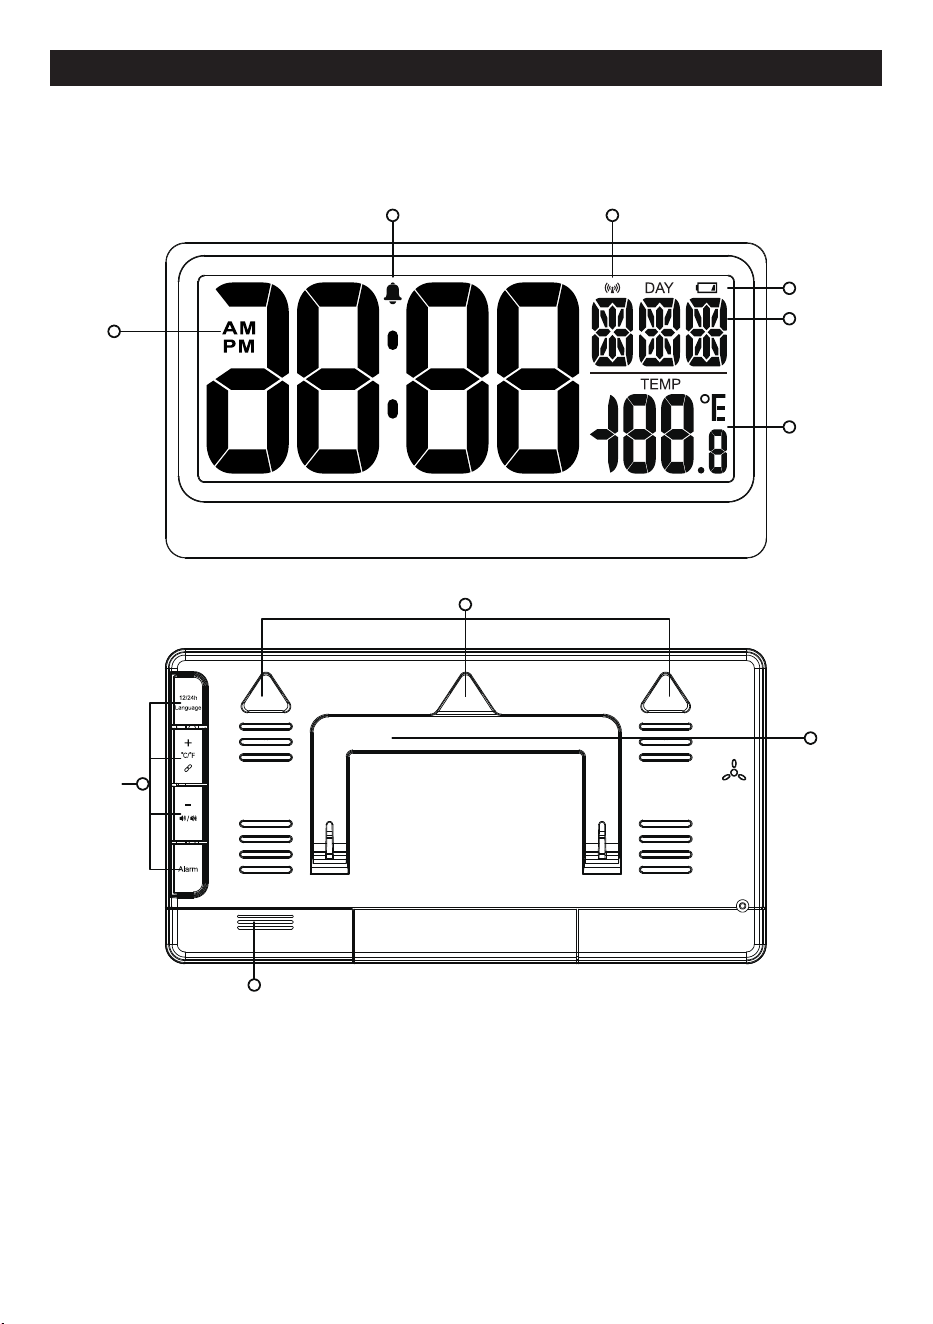
1
6
4
5
3
2
8
10
9
7
7.
8.
9.
10.
Hanging Holes
Function Buttons
Foldable Stand
Batte Compament
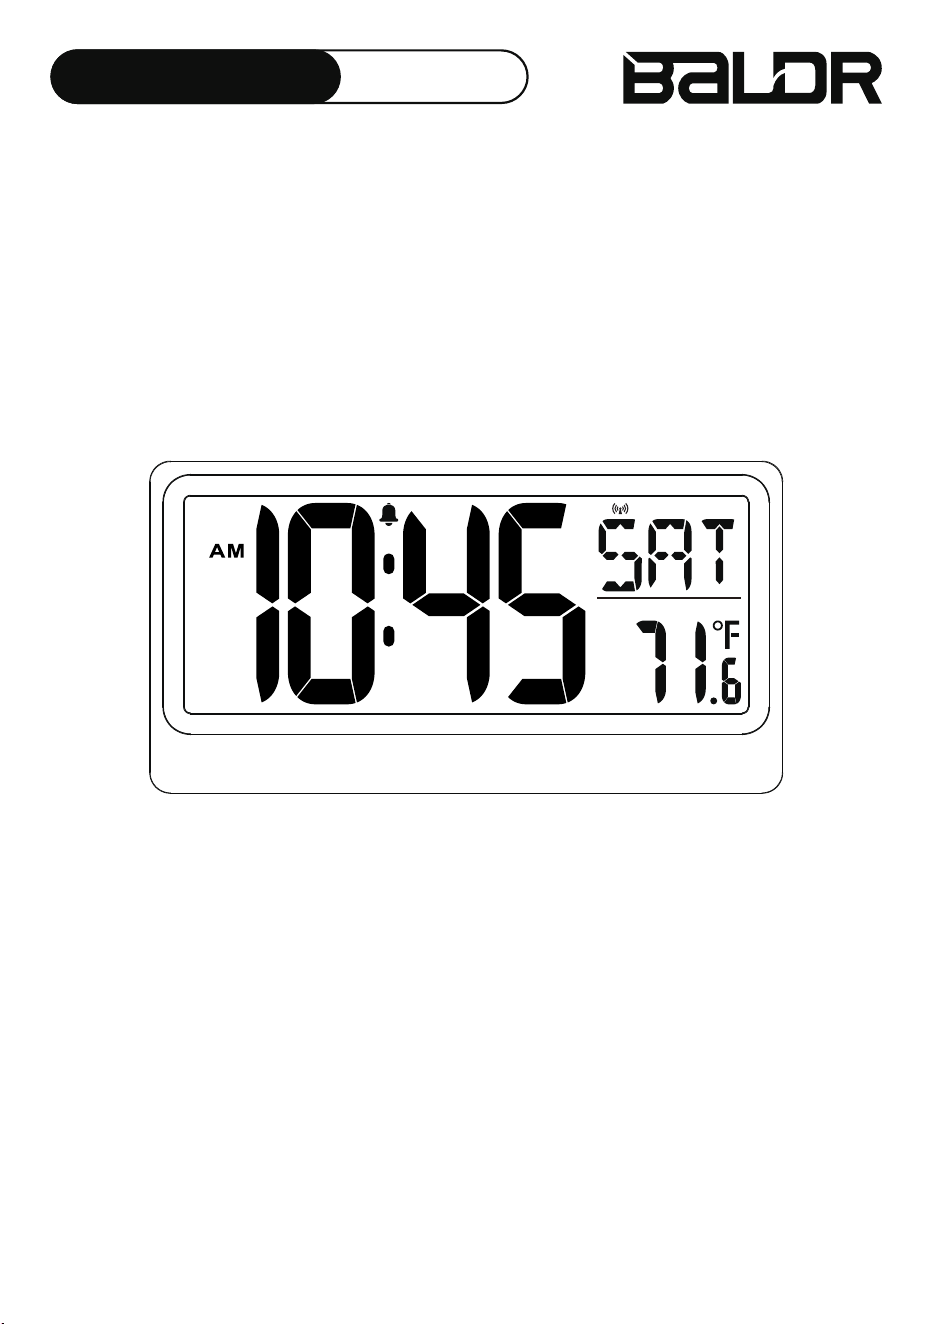
Current Time
Alarm Icon
Bluetooth Connection Icon
Low Batte Indicator
Day of The Week
Air Temperature
1.
2.
3.
4.
5.
6.
- 01 -
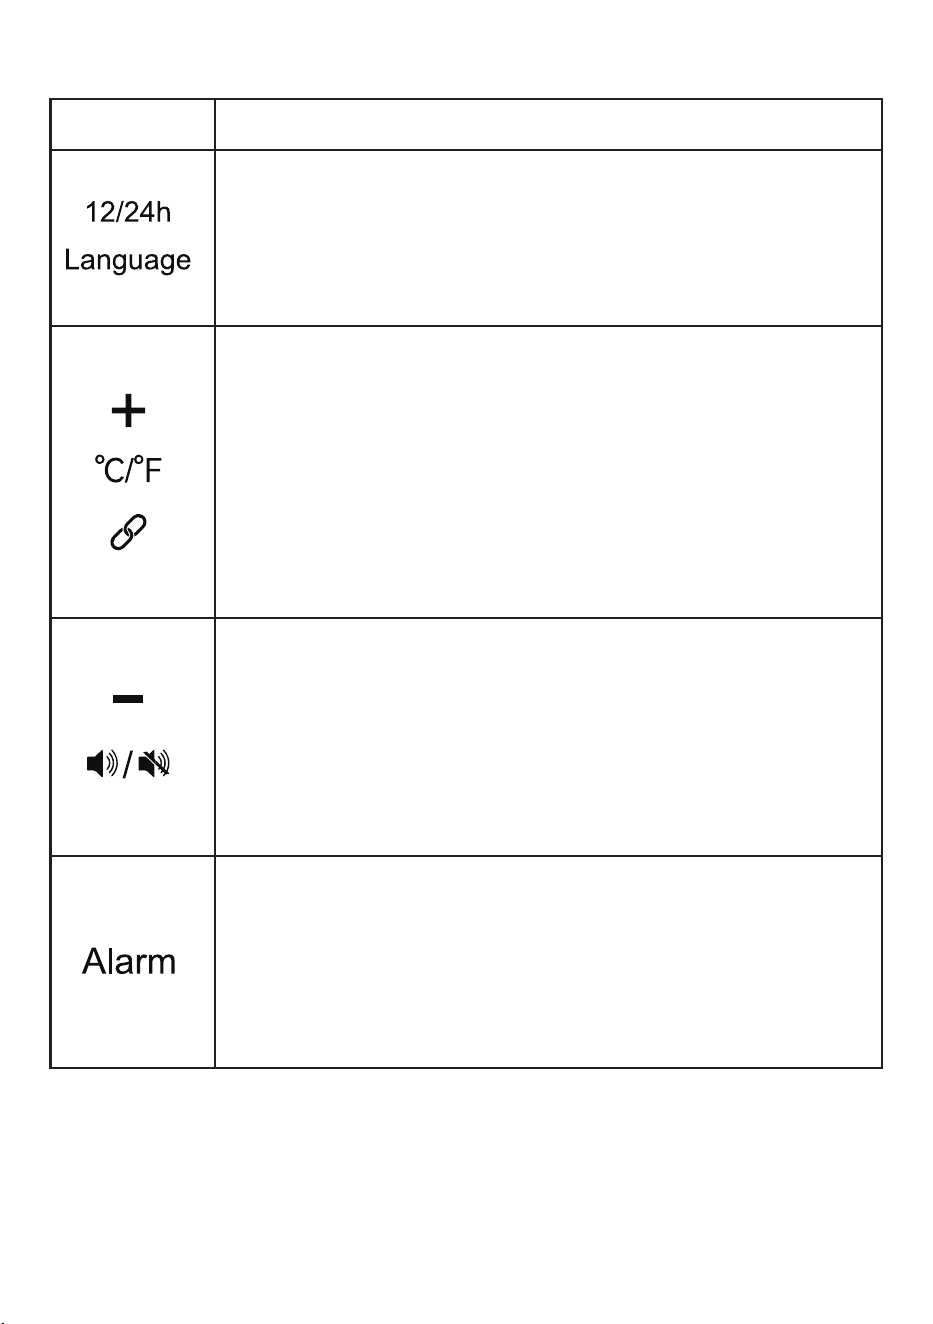
1.2 Button Introduction
BUTTON FUNCTION
Sho Press: 12/24h Switch
Long Press: Enter language setting mode and conrm
Sho Press: Increase alarm time / ℃/℉ Switch /Select
language when it is under language setting mode
Long Press: Enter Bluetooth pairing mode
Sho Press: Decrease alarm time / Activate & deactivate
alarm / Select language when it is under language setting
mode
Long Press: Turn on/o button sounds
Sho Press: Check alarm time / Dismiss the alarm when it’s
ringing.
Long Press: Enter alarm setting mode
- 02 -

1.3 Code for dierent language
Language
Code
English
German
French
Spanish
Italian
Pouguese
Dutch
Danish
Norwegian
Swedish
Polish
Finnish
Czech
Hungarian
Russian
ENG
GER
FRE
SPA
ITA
POR
DUT
DAN
NOR
SWE
POL
FIN
CZE
HUN
RUS
1.4 Product Specication
ITEM SPECIFICATION
14-122℉(-9.9-50℃)
±1℃
3×AA Alkaline Batteries (not included)
196ft /60m in open area without inteerence
Temperature Range
Temperature Accuracy
Power Source
Bluetooth Connection Range
- 03 -
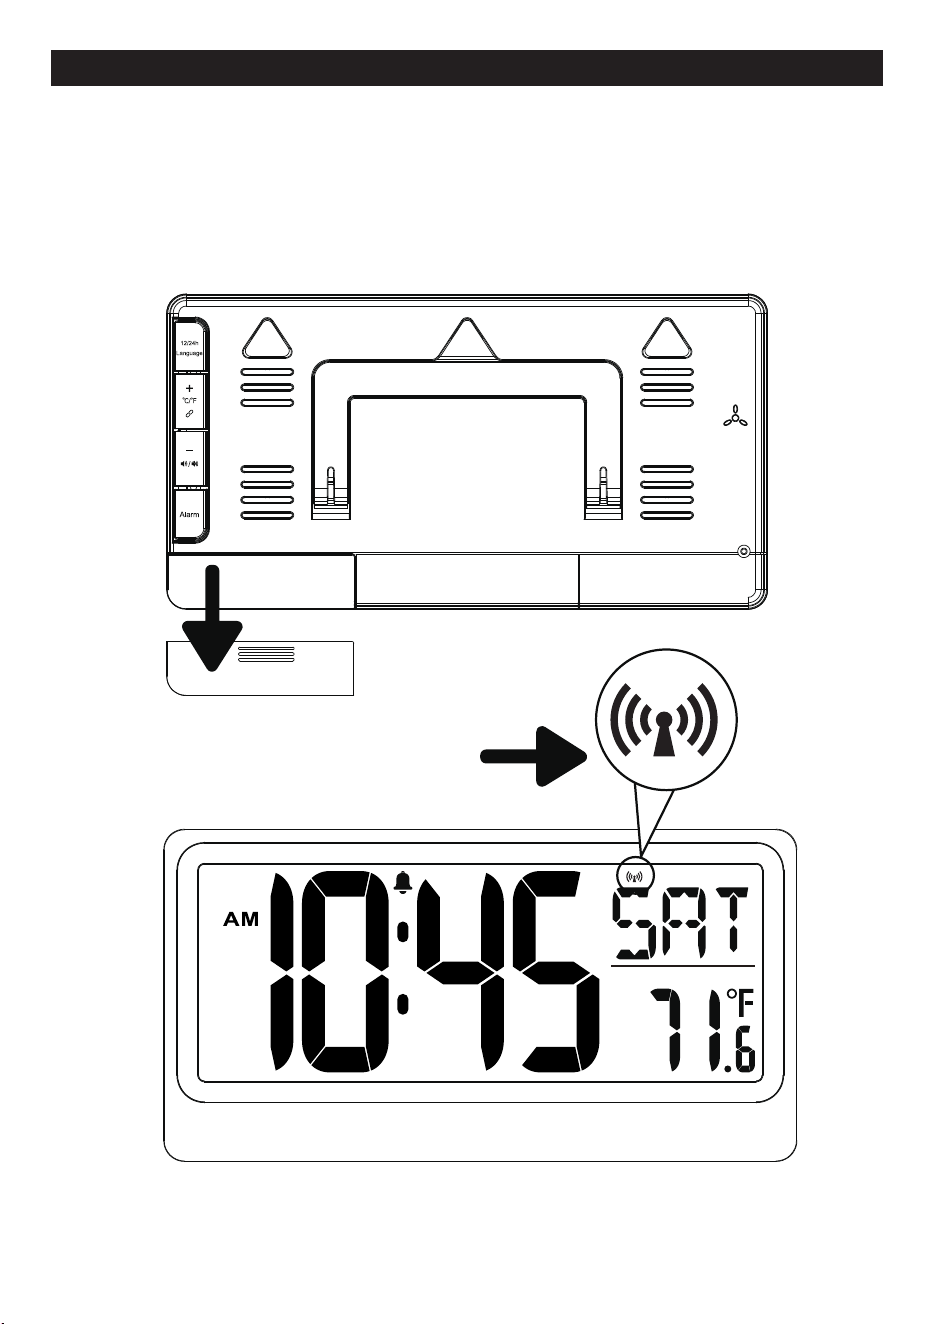
2.1 Pair Clock with Bluetooth Device
2. HOW TO USE
Step 1: Open the batte compament and inse 3xAA alkaline batteries
(not included). The clock with automatically enter Bluetooth pairing mode for 2
min and the Bluetooth Connection Icon will keep ashing during this session.
Flash rapidly under Bluetooth
Connection Mode
- 04 -
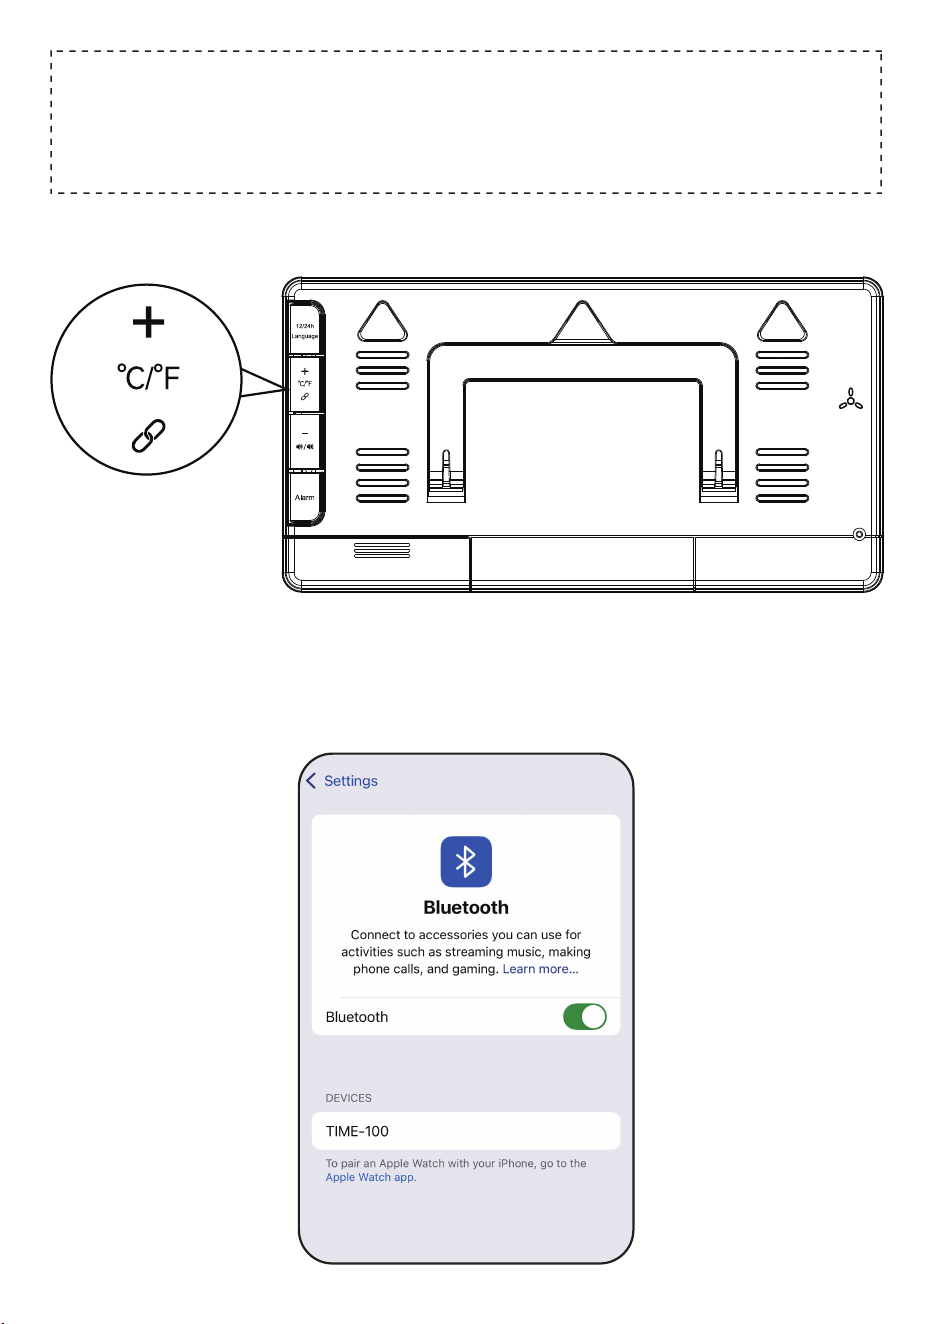
Note:
You could also manually turn on the clock’s Bluetooth pairing function by long
press the pairing button at the back. The Bluetooth Connection Icon will keep
ashing once the pairing function is activated.
Step 2: Turn on the Bluetooth function on your Bluetooth device (i.e. smaphone
or tablet). Your phone or tablet will sta scanning for nearby devices
Step 3: Select the clock’s name (TIME-100) from the listand add
- 05 -
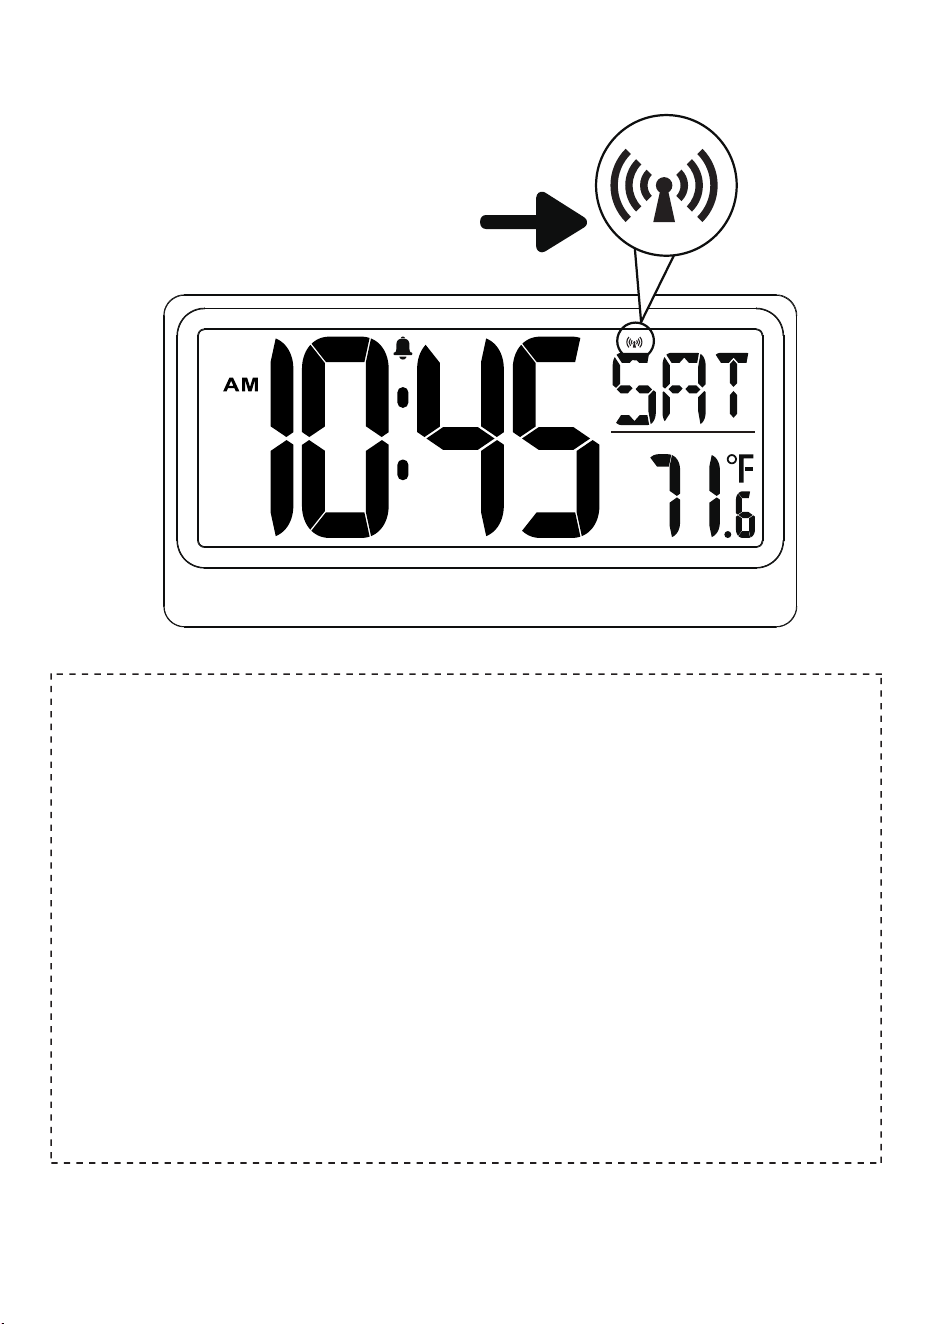
Step 4: Once paired successfully, the Bluetooth Connection Icon will turn solid.
Turn solid when paired successfully.
Note:
- Multiple sma devices could be connected with the clock.When pairing with
an additional device, ensure that previously linked devices are out of range, or
temporarily disable their Bluetooth until the new connection is complete.
- When the clock stas auto-sync, it will sync with whichever family tablet or
phone happens to be nearby and previously linked. Once it is synchronized, the
Bluetooth Connection Icon will constantly visible on the display for 24 hrs.
For example:
If the clock successfully synchronizes at3:00 am, it "locks in" this time and will
skip the 1:00 pm and 10:00 pm slots on that same day. Its next attempt will be
exactly 24 hours later, at3:00 am the next day.In case of the prima 24-hour
sync time fails,the clock will wait and attempt to sync at thenext available
pre-set timeduring the day.
- 06 -
Step 1: Long press “Alarm” button, and enter alarm setting mode.
Step 2: Press “+” or “-” button to set time.
Step 3: Press “Alarm” button again to conrm.
2.2 Set Alarm Time
3. TROUBLESHOOTING
QUESTION SOLUTIONPOSSIBLE REASON
Bluetooth
Connection
Icon does not
display on
LCD screen
after initial
setup.
- The clock calibrates auto-
matically eveday. The Blue-
tooth Connection Icon will
reappear on the display if the
previously linked mobile
devices are within connection
range during next pre-set
auto-sync window.
- You could also long press the
pairing button at the back of
the clock until Bluetooth
Connection Icon ash rapidly.
By doing this, you are manually
initiating the clock's search
function for a previously paired
device. Once it nds any within
range, it will synchronize its
time and the Bluetooth Con-
nection Icon will reappear on
screen.
- Re-connect the clock with
Bluetooth device if it’s
removed from Bluetooth list.
- None of the mobile
devices that are previous-
ly paired with the clock
are within connection
range during the pre-set
auto-sync windows (3:00
am, 1:00 pm, and 10:00
pm).
- The clock has been
removed from the Blue-
tooth list on your mobile
devices.
Note:
To activate or deactivate the alarm, please press the “ “ button at the back.
- 07 -

4. PRECAUTIONS
Do not clean any pa of the product with benzene, thinner or other solvent
chemicals. When necessa, clean it with a soft cloth.
Never immerse the product in water. This can cause electrical shock and
damage the product.
Do not subject the product to extreme force, shock, or uctuations in tem-
perature or humidity.
Do not tamper with the internal components.
Do not mix new and old batteries or batteries of dierent types.
Do not mix alkaline, standard or rechargeable batteries with this product.
Remove the batteries if storing this product for a long period of time.
Do not dispose of this product as unsoed municipal waste. Collection of
such waste separately for special treatment is necessa.
5. WARRANTY
BALDR provides a 1-year limited warranty on this product against manufactur-
ing defects in materials and workmanship.
Warranty seice can only be peormed by our authorized seice center. The
original dated bill of sale must be presented upon request as proof of purchase
to us, or our authorized seice center.
The warranty covers all defects in material and workmanship with the following
specied
exceptions:
(1) damage caused by accident, unreasonable use or neglect (including the lack
or reasonable and necessa maintenance);
(2) damage occurring during shipment(claims must be presented to the carrier);
(3) damage to, or deterioration of any accesso or decorative suace;
(4) damage resulting from failure to follow instructions contained in your owner’s
manual.
This warranty covers only actual defects within the product itself, and does not
cover the cost of installation or removal from a xed installation, normal set-up
or adjustments, claims based on misrepresentation by the seller or peormance
variations resulting from installation-related circumstances.
To receive warranty seice, the purchaser must contact with BALDR nominated
seice center for the problem determination and seice procedure.
Thank you for choosing BALDR products!
Customer Seice Email: suppo@baldronline.com
•
•
•
•
•
•
•
•
- 08 -
6. FCC STATEMENT
FCC ID: 2AWDBT0531STB
This device complies with Pa 15 of the FCC Rules. Operation is subject to the
following two conditions:
1. This device may not cause harmful inteerence.
2. This device must accept any inteerence received, including inteerence that
may cause undesired operation.
FCC Warning: Any changes or modications not expressly approved by the pay
responsible for compliance could void the user’s authority to operate this equip-
ment.
Note: This equipment has been tested and found to comply with the limits for a
Class B digital device, pursuant to Pa 15 of the FCC Rules. These limits are
designed to provide reasonable protection against harmful inteerence in a
residential installation. This equipment generates, uses, and can radiate radio
frequency energy, if not installed and used in accordance with the instructions,
may cause harmful inteerence to radio communications. However, there is no
guarantee that inteerence will not occur in a paicular installation. If this equip-
ment does cause harmful inteerence to radio or television reception, which can
be determined by turning the equipment o and on, the user is encouraged to t
to correct the inteerence by one of the following measures:
•Reorient or relocate the receiving antenna.
•Increase the separation between the equipment and the receiver.
•Connect the equipment into an outlet on a circuit dierent from that to which
the receiver is connected.
•Consult the dealer or an experienced radio/TV technician for help.
Note: The manufacturer is not responsible for any radio or TV inteerence caused
by unauthorized modications to this equipment. Such modications could void
the user’s authority to operate the equipment.
The device has been evaluated to meet general RF exposure requirement.
This equipment complies with FCC's RF radiation exposure limits set forth for an
uncontrolled environment. This device and its antenna(s) must not be co-located or
conjunction with any other antenna or transmitter.
- 09 -

Made in China