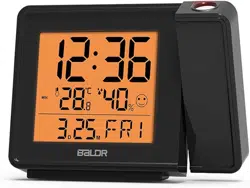

MODEL:B0367STHR
RADIO-CONTROLLED
PROJECTION ALARM CLOCK
QUICK SETUP GUIDE
1
2
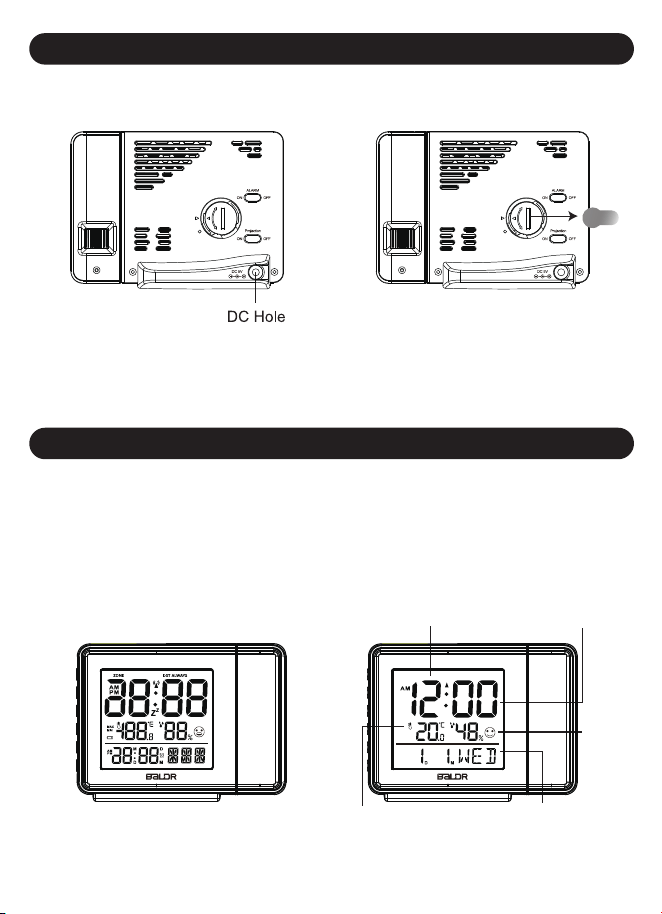
POWER ON
1.Main Unit Installation
1.After Power On
LCD will full display for
3 seconds with “BI” sound .
MAIN UNIT SETUP
Step 1, Plug the DC
adaptor to a powered outlet.
Step 2, Remove the built in
cell battery insulation strip.
After 3 seconds, the LCD
will display the datas as below.
Time (Calibration after
RCC signal received or
manual setup)
Date and weekday
(Calibration after RCC signal
received or manual setup)
Temperature
and humidity
RCC radio
signal receiving
icon (flashing)
Comfort
icon
CL
OS
EOPEN
CL
OS
EOPEN
3
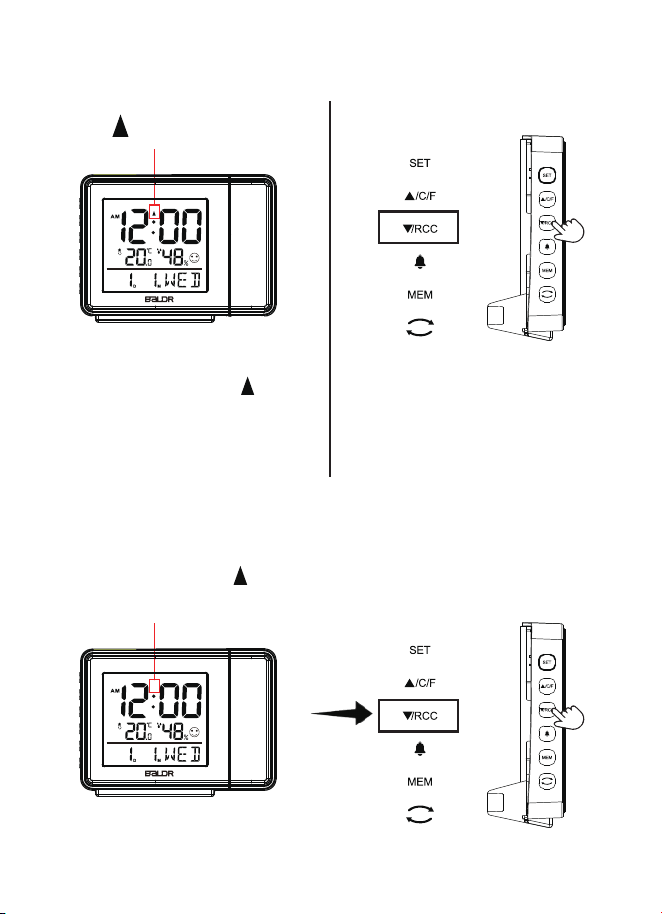
2.RCC Atomic Radio Signal Receiving Mode
Automatically starts after powering up
No RCC Radio Signal Received
The antenna signal
will disappear
Press and hold “▼/RCC” button
for 3 seconds to search RCC
radio signal again.
The antenna signal “ ” is
flashing. The screen will go
dim and no buttons except
“▼/RCC” button will function.
Press “▼/RCC” button will
allow exiting the Atomic mode
to continue manual setup.
Antenna
Signal
4
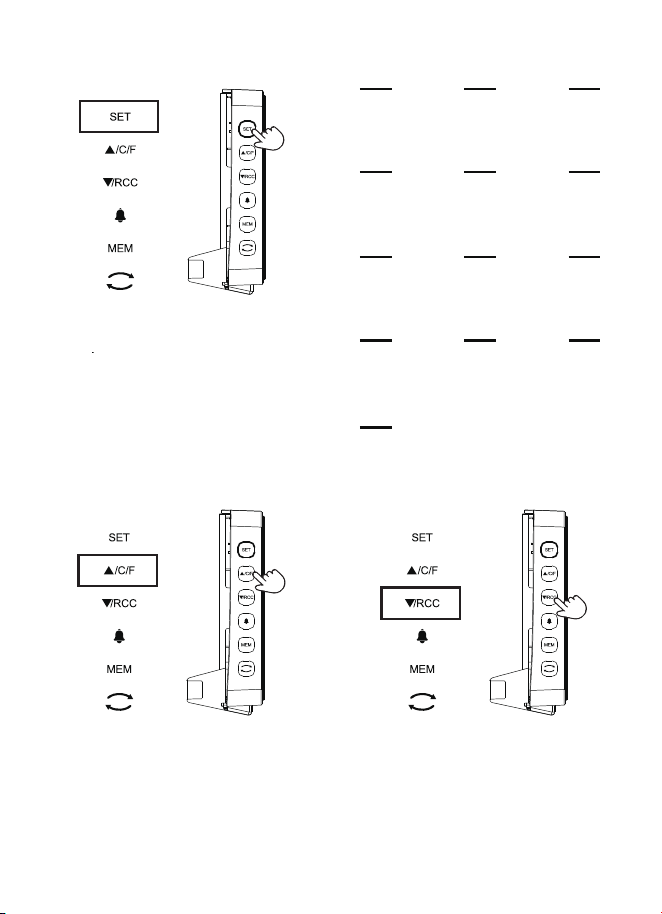
Manual setup SETUP ORDER
● Press and hold “ SET ” button for
3 seconds to enter into setting.
●
Press “ SET ’’ button for 1 second
to skip setting steps or go to the
next setting option
Weekday
Language
1
RCC
ON/OFF
4
Year
7
Month&Date
Display(MD/DM)
8
Month
9
Date
10
Time Display
(12/24 hours)
11
Hours
12
Minutes
13
DST
ON/OFF
5
Time
Zone
6
Key Tone
(ON/OFF)
2
Temperature
Unit
3
Press “▲/C/F ” button to
increase the values.
Press “▼/RCC ”button to
decrease the values.
*Tips: Press and hold “▲/CH ” or “▼/RCC ” button will quickly change
the value.
5
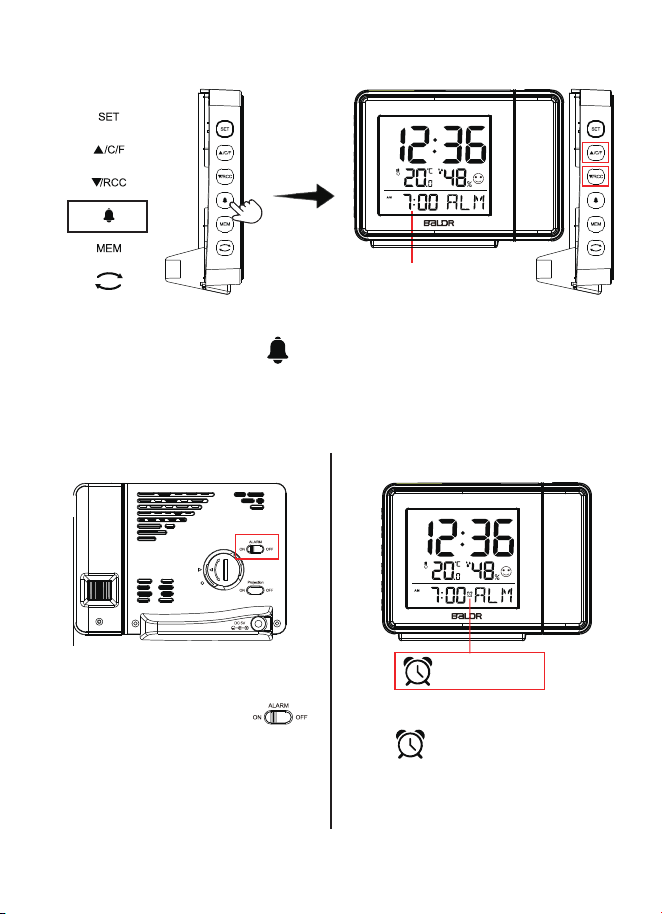
Step1, Press and hold “ ”
button to enter into alarm time
setting mode.
Step 3, Slide the switch“ ”
on the back to turn on the alarm.
After the alarm time was set, there
is a“ ” symbol in the screen.
Step 2, Press “▲/C/F” or
“▼/RCC” button to adjust
alarm time.
Hour and minute will
flashing while setting.
3.Alarm Time Setting
CL
OS
EOPEN
Alarm Symbol
6
CL
OS
EOPEN
CLOSEOPEN
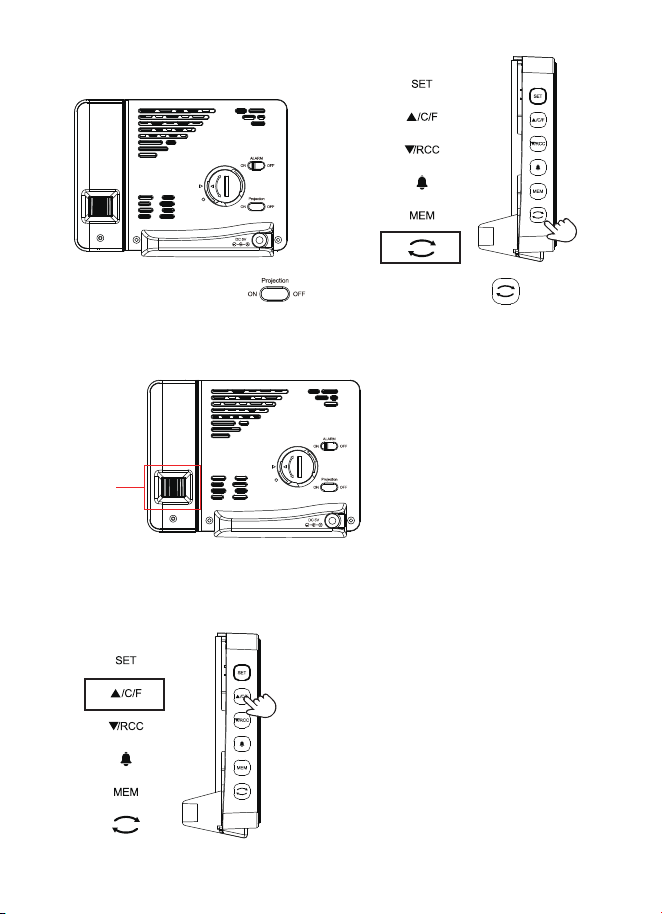
Step1, Slide the switch“ ”
on the back of unit to turn on/off
projection.
Step 3, Slide the “FOCUS”
switch on the back of unit to
adjust the focus of projection.
Focus
Adjustment
4.Projection Function
*Tips:
Step 2, Press “ ” button to
adjust the projection angle.
Press and hold the “▲/C/F”button to
switch the projection data between
time and temperature.

7
This Qucik Start is to help you quickly set up the product. For detailed
settings, please refer to the user manual, or scan the QR code below
for relevant product information and operation video link.Thank you.
www.baldr.com
Note: The clock will search the RCC radio signal from 1:00am to
5:00am everyday, the projection will be off at these time.