Use & Care Guide
Stick Vacuum Cleaner
MODEL NO. VSJ01
www.amazon.com
Distributed By
Suzhou Cleva Electric Appliance Co., Ltd.
No.8 Ting Rong Street
Suzhou Industrial Park, Suzhou
Jiangsu Province, China
Made in China

-2-
SECTION
Important Safety Instructions...................................................................................................................3
Technical Data
........................................................................................................................................4
Getting To Know Your Vacuum..............................................................................................................5-6
General Assembly Instructions.................................................................................................................7
Operating Instructions........................................................................................................................8-12
Maintaining Your Vacuum.................................................................................................................13-16
Troubleshooting.....................................................................................................................................17
TABLE OF CONTENTS
PAGE
Thank you for purchasing this Vacmaster
®
vacuum cleaner. With it you are
obtaining a high-quality product that is engineered for optimal performance.
FOR YOUR SAFETY
Read and understand this manual before use.
Keep this manual and your sales check (receipt) in a safe place for future
reference.

-3-
IMPORTANT SAFETY INSTRUCTIONS
When using an electrical appliance, basic precautions should always be followed,
including the following:
READ ALL INSTRUCTIONS BEFORE USING THIS VACUUM CLEANER
Failure to follow the warnings and instructions may result in electric shock, re
and/or serious injury.
WARNING -
To reduce the risk of re, electric shock, or injury:
• Do not leave appliance when plugged in. Unplug from outlet when not in use
and before servicing.
• Do not use outdoors or on wet surfaces.
• Do not allow to be used as a toy. Close attention is necessary when used by or
near children.
• Use only as described in this manual. Use only manufacturer’s recommended
attachments.
• Do not use with damaged cord or plug. If appliance is not working as it should,
has been dropped, damaged, left outdoors, or dropped into water, contact with
customer service.
• Do not pull or carry by cord, use cord as a handle, close a door on cord, or pull
cord around sharp edges or corners. Do not run appliance over cord. Keep cord
away from heated surfaces.
• Do not unplug by pulling on cord. To unplug, grasp the plug, not the cord.
• Do not handle plug or appliance with wet hands.
• Do not put any object into openings. Do not use with any opening blocked; keep
free of dust, lint, hair, and anything that may reduce air ow.
• Keep hair, loose clothing, ngers, and all parts of body away from openings and
moving parts.
• Turn off all controls before unplugging.
• Use extra care when cleaning on stairs.
• Do not use to pick up ammable or combustible liquids, such as gasoline, or
use in areas where they may be present.
• Do not pick up anything that is burning or smoking, such as cigarettes, matches,
or hot ashes.
• Do not use without the lter in place.
SAVE THESE INSTRUCTIONS
Household use only

-4-
Stick Vacuum Cleaner
Model: VSJ01
Rated Voltage: 120V AC
Rated Frequency: 60Hz
Nominal Current: 3A
TECHNICAL DATA
-5-
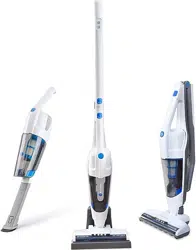
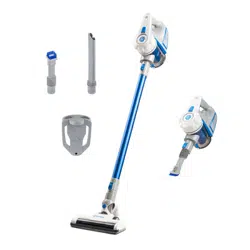
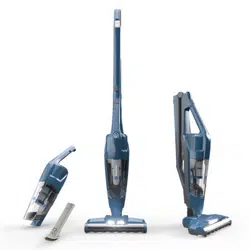
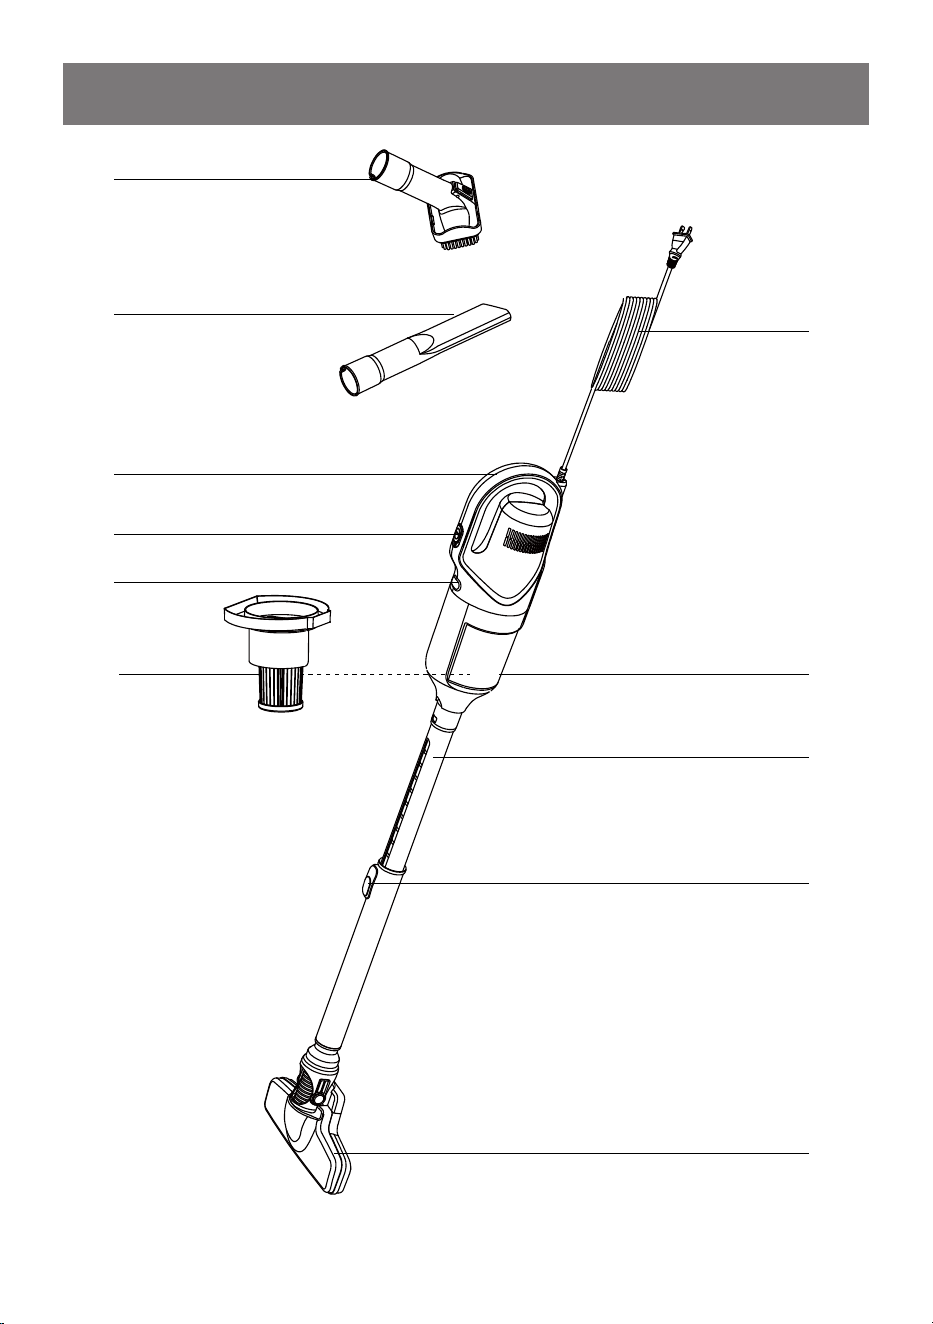
GETTING TO KNOW YOUR VACUUM
1
2
3
4
5
7
6
8
9
10
11
-6-
COMPONENTS
1. Power Cord
2. Dust Cup
3. Telescoping Wand
4. Wand Length Adjust Button
5. Floor Nozzle
6. Filter
7. Dust Cup Release Button
8. On/Off Switch
9. Handle
10.Crevice Tool
11.2 in1 brush tool
REPLACEMENT PARTS
Item Part No.
Filter 239096
Available online at www.amazon.com.
-7-
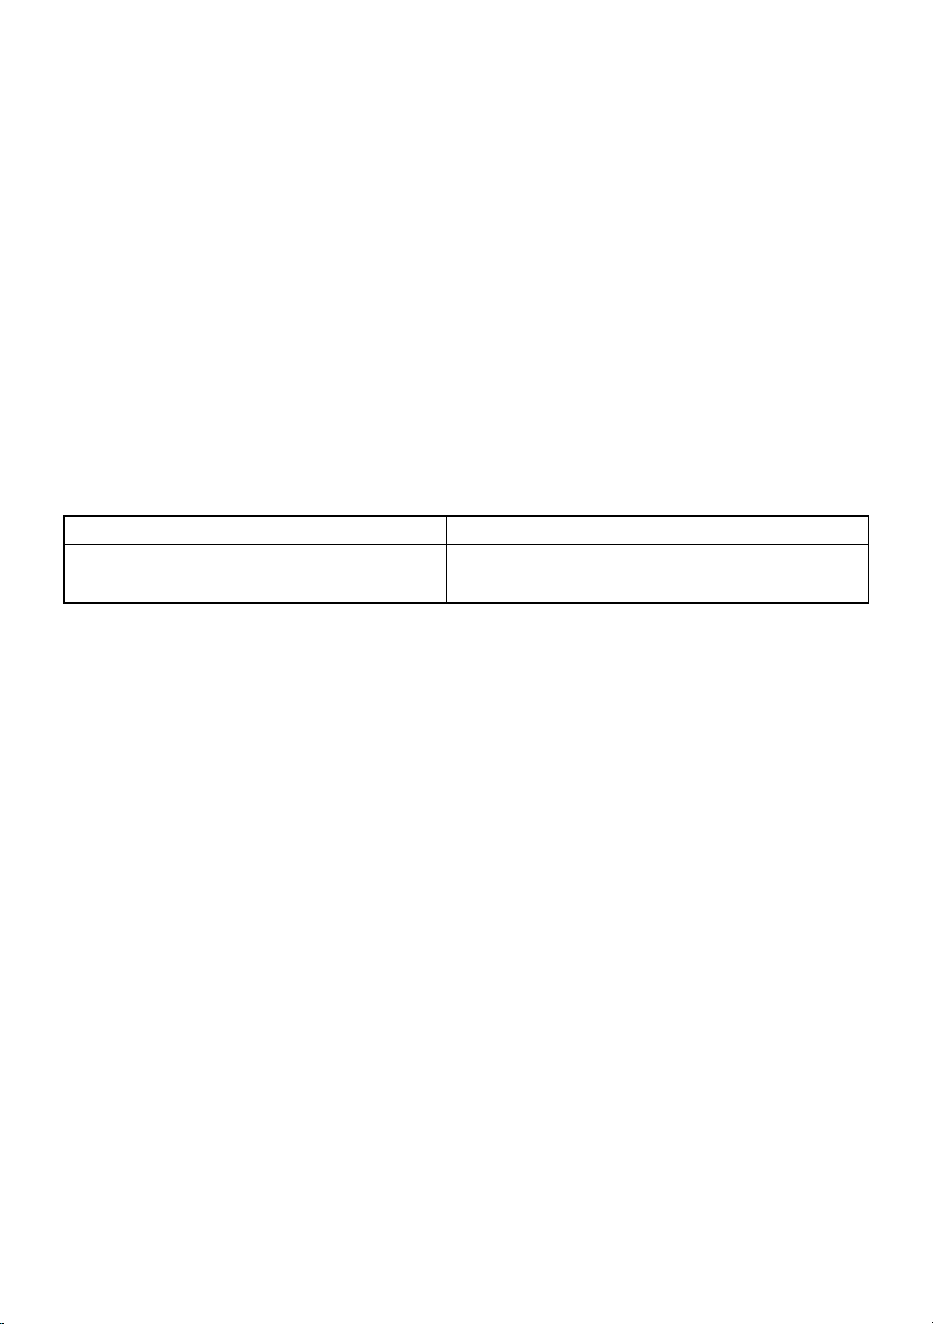
GENERAL ASSEMBLY INSTRUCTIONS
1. Align and insert the telescoping wand into the suction port of the vacuum body.
Vacuum Body
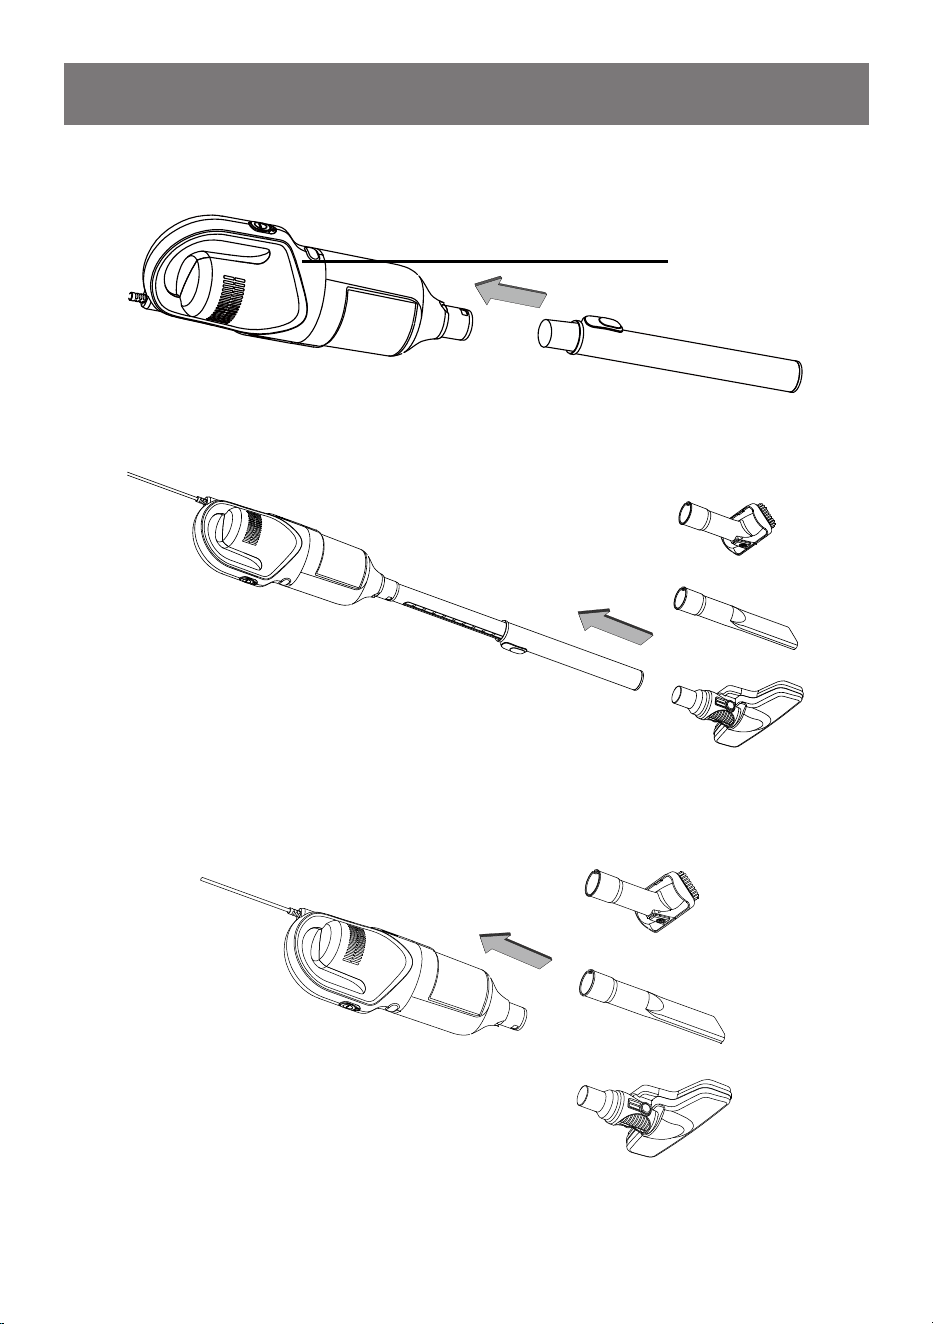
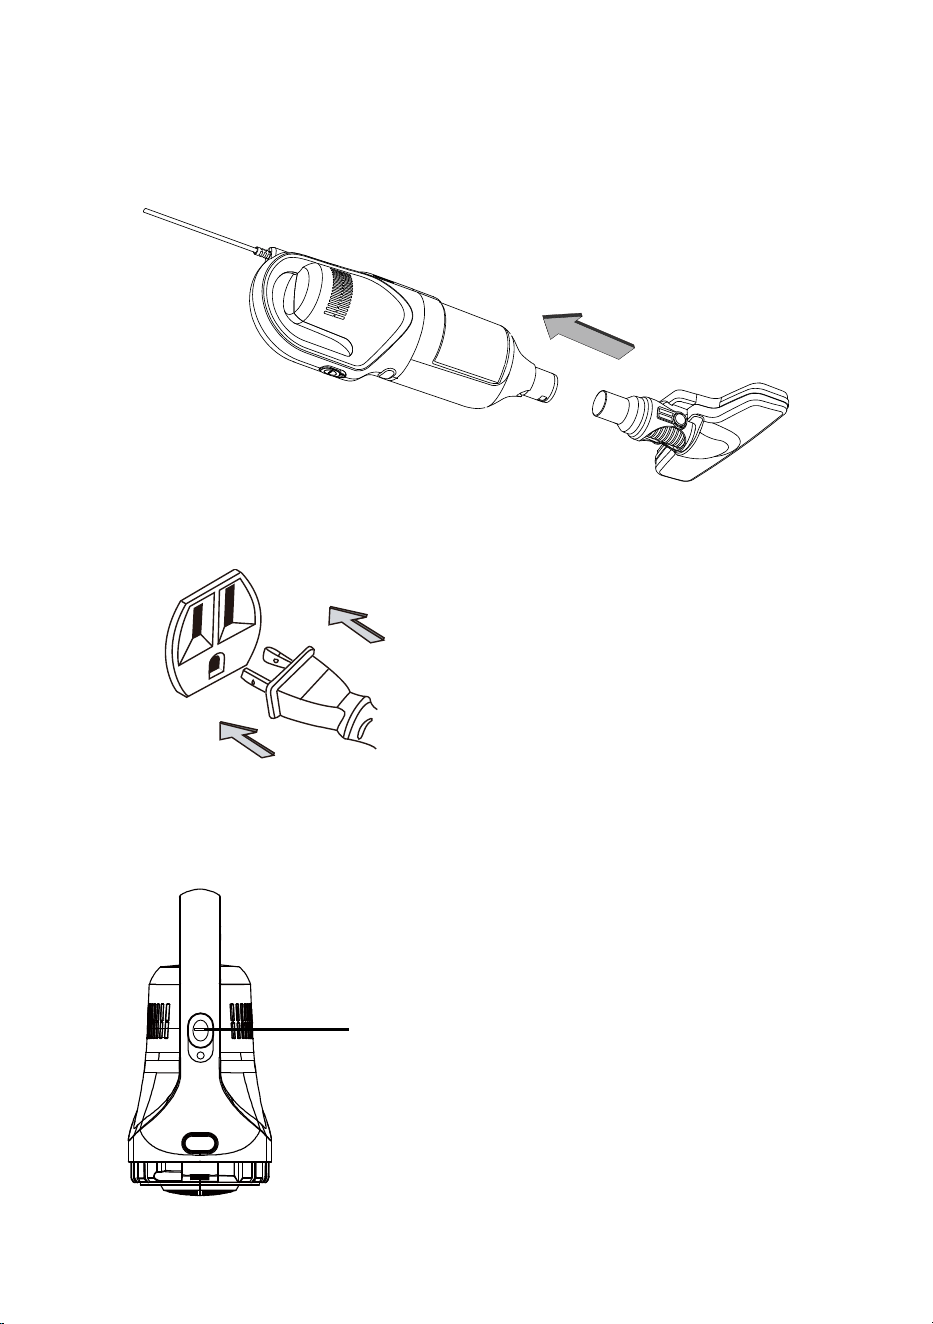
2. Insert the oor nozzle or accessory tools into the bottom of wand.
3. Optional: Insert the oor nozzle or accessory tools into the suction port of the
vacuum body.
-8-
OPERATING INSTRUCTIONS
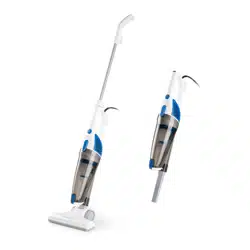
Before using, choose the stick or hand vacuum mode for cleaning.
NOTE: Make sure the vacuum cleaner is completely assembled and the dust cup
is empty before using.
1. Plug the power cord plug into an outlet located near the oor.
Using Your Vacuum Cleaner
WARNING
To reduce the risk of electric shock, this appliance has a polarized plug (one
blade is wider than the other). This plug will t in a polarized outlet only one
way. If the plug does not t fully in the outlet, reverse the plug. If it still does not
t, contact a qualied electrician to install the proper outlet. Do not change the
plug in any way.
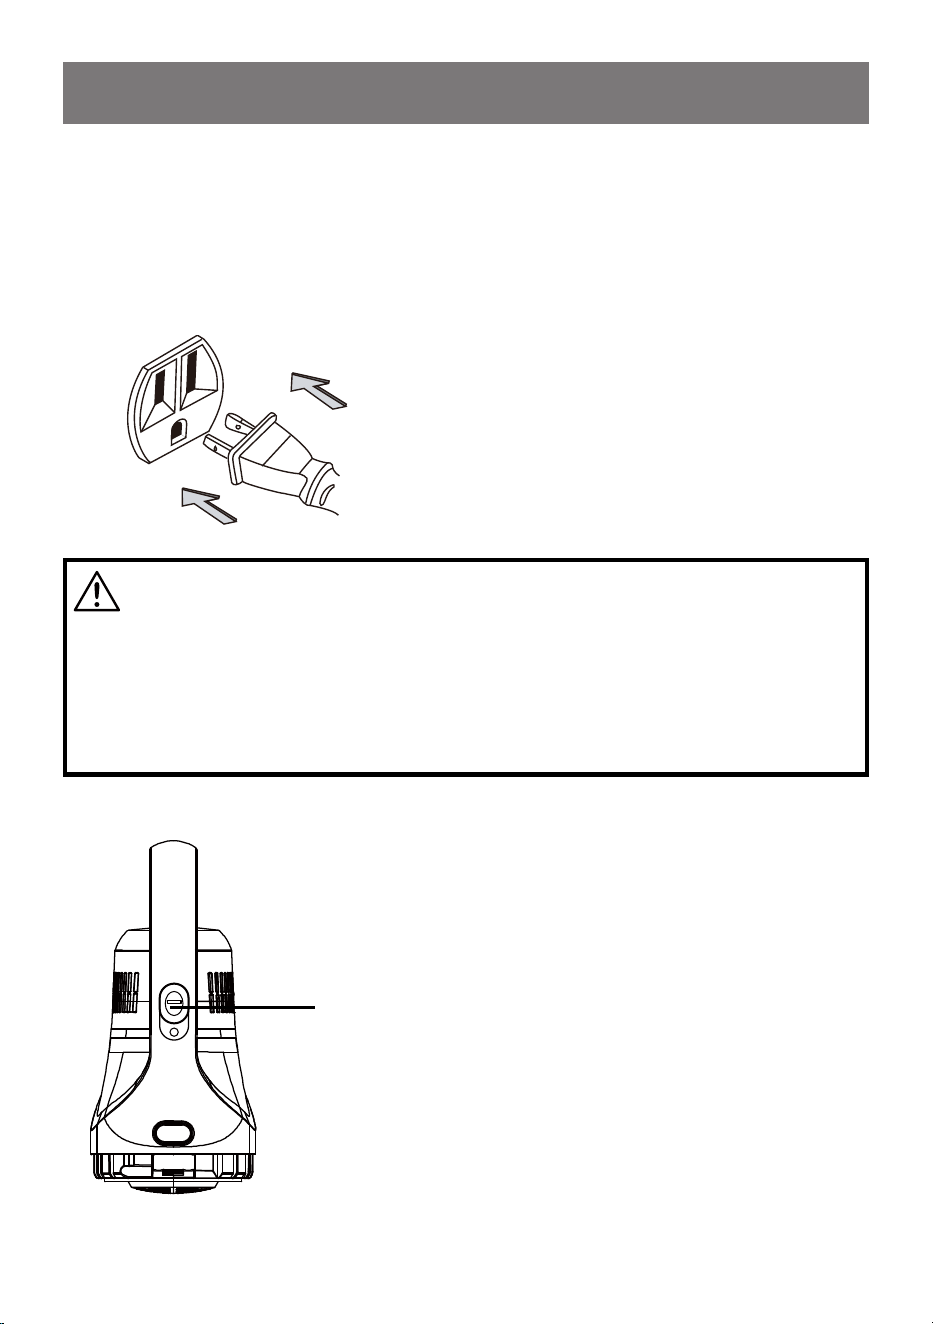
2. Slide the on/off switch to the ‘I’ position to start the vacuum.
On/Off Switch
I = ON
O = OFF
-9-
3. Once you have completed vacuuming, slide the on/off switch to the ‘O’ position
and unplug the power cord from the outlet.
WARNING
• When any abnormality/failure occurs, stop using the product immediately and
disconnect the power plug.
• DO NOT use outlets above counters.
• Damage of the cord resulting from the surrounding objects could occur.
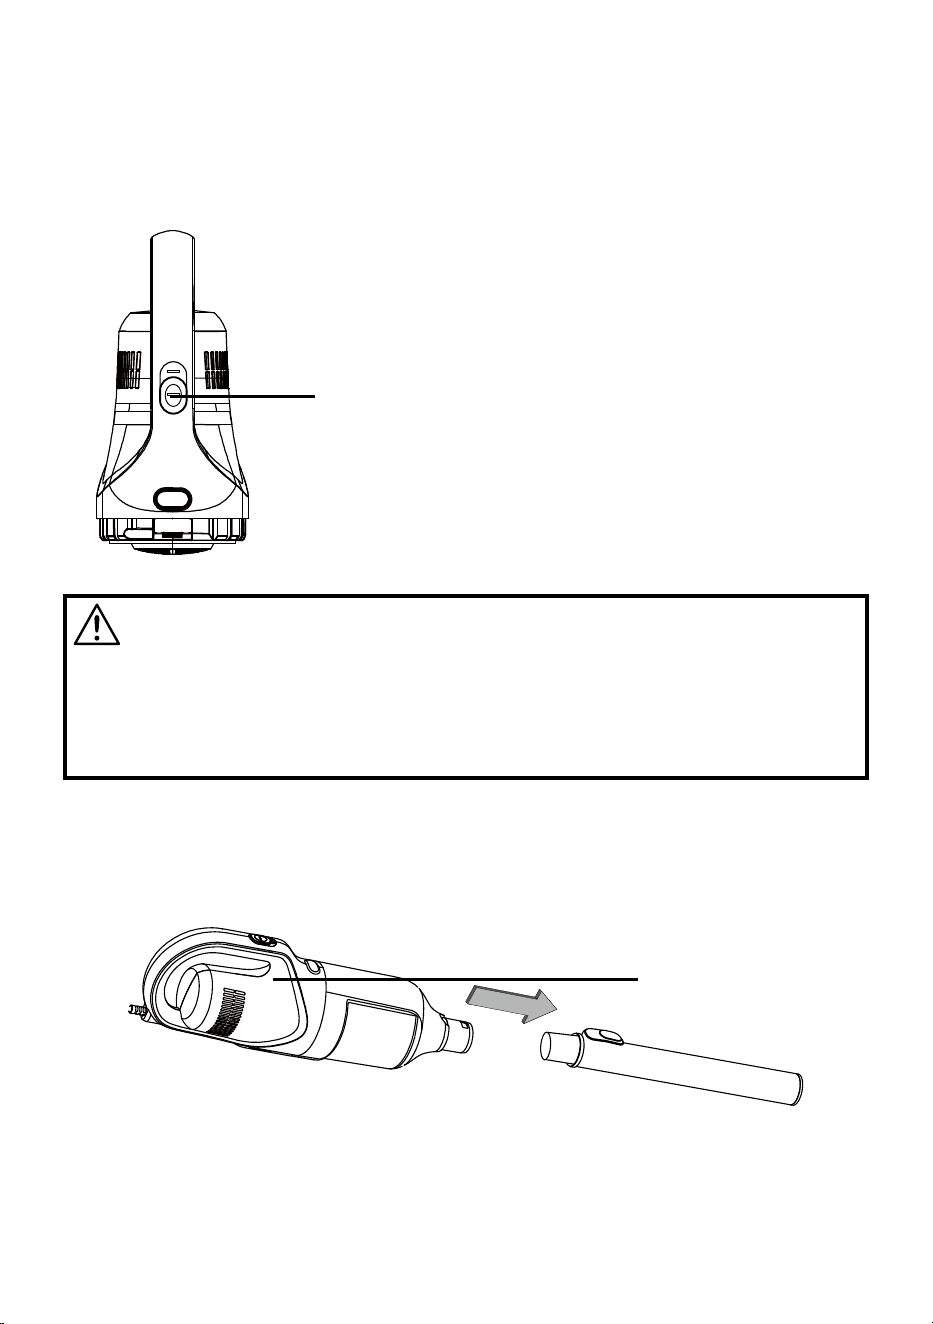
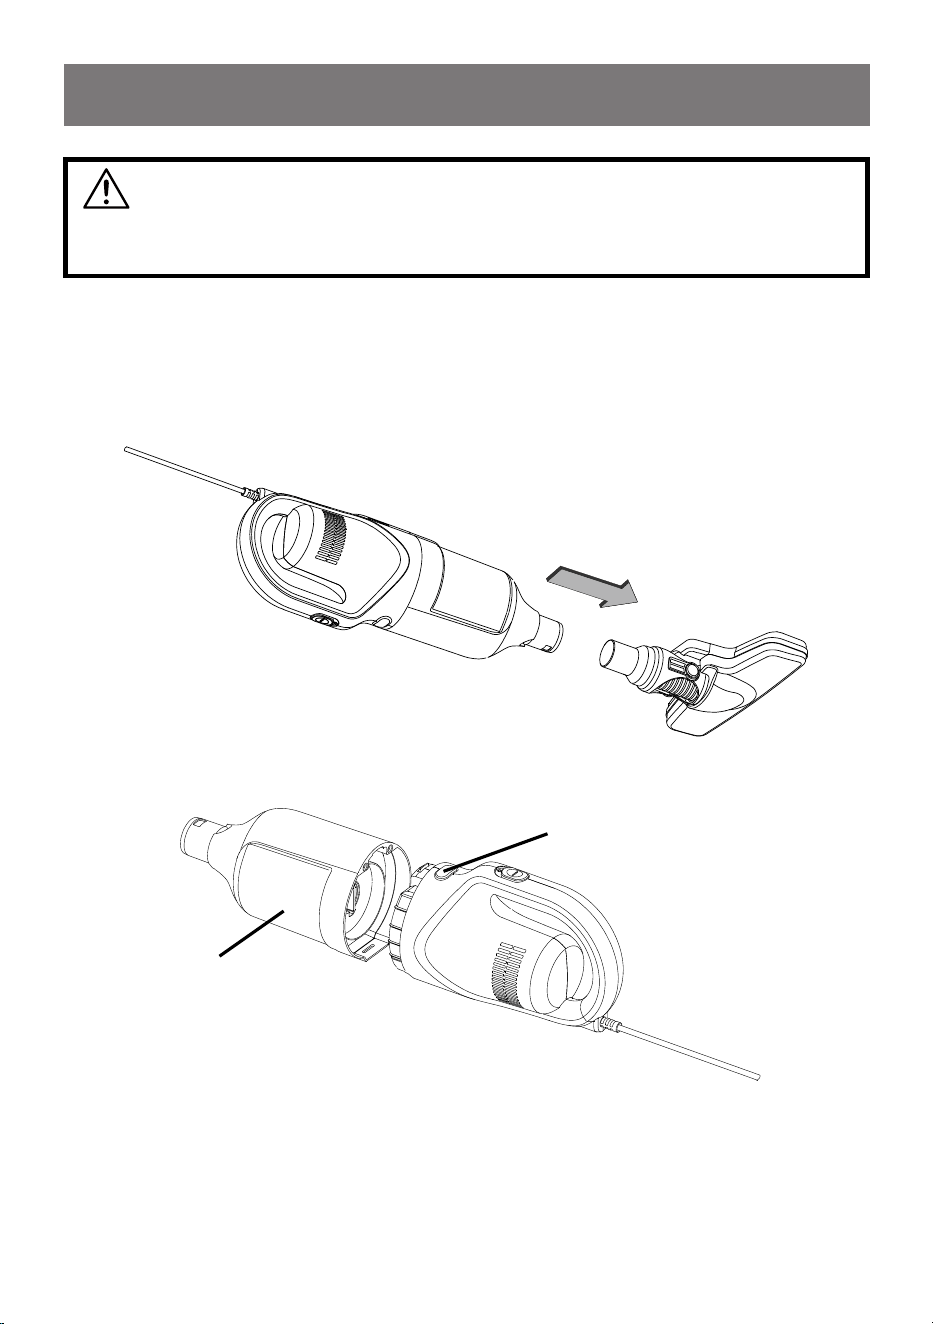
1. To remove the wand, pull the wand from the vacuum body.
Using Your Hand Vacuum
body
On/Off Switch
-10-
2. Insert the oor nozzle into the end of the vacuum.
3. Plug the power cord plug into an outlet located near the oor.
4. To turn the vacuum on, slide the on/off switch to the ‘I’ position.
On/Off Switch
I = ON
O = OFF
-11-
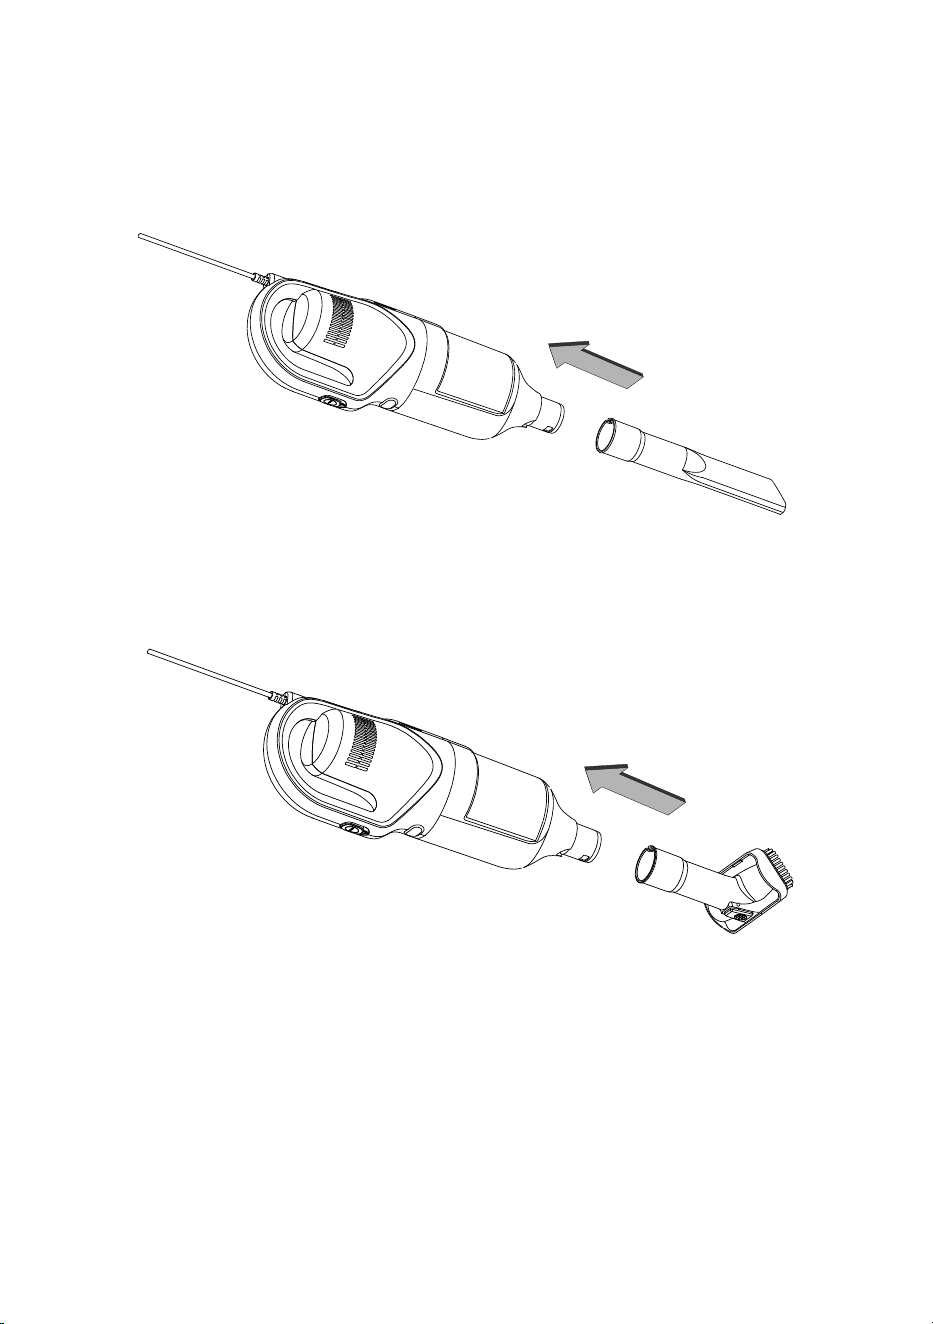
5. To use the crevice tool, insert one end of the tool into the hand vacuum for
cleaning corners, edges, drawers, etc.
6. To use the 2 in 1 brush tool, insert one end of the tool into the vacuum for
cleaning loose surfaces such as drapes, fabric sofa, bedsheets, etc.
7. Once you have completed vacuuming, slide the on/off switch to the ‘O’ position
and unplug the power cord from the outlet.
-12-
WARNING
Use care if vacuum cleaner is placed on stairs. If it falls, property damage could
result.
CAUTION
DO NOT block the inlet opening. The motor will over heat and could become
damaged.
Gather the power cord and store the vacuum cleaner in a dry, indoor area.
NOTE: The wand can be removed during storing.
Storing Your Vacuum
-13-
CAUTION
To reduce the risk of shock, disconnect the power cord, and turn off before
performing any service or maintenance.
MAINTAINING YOUR STEAM MOP
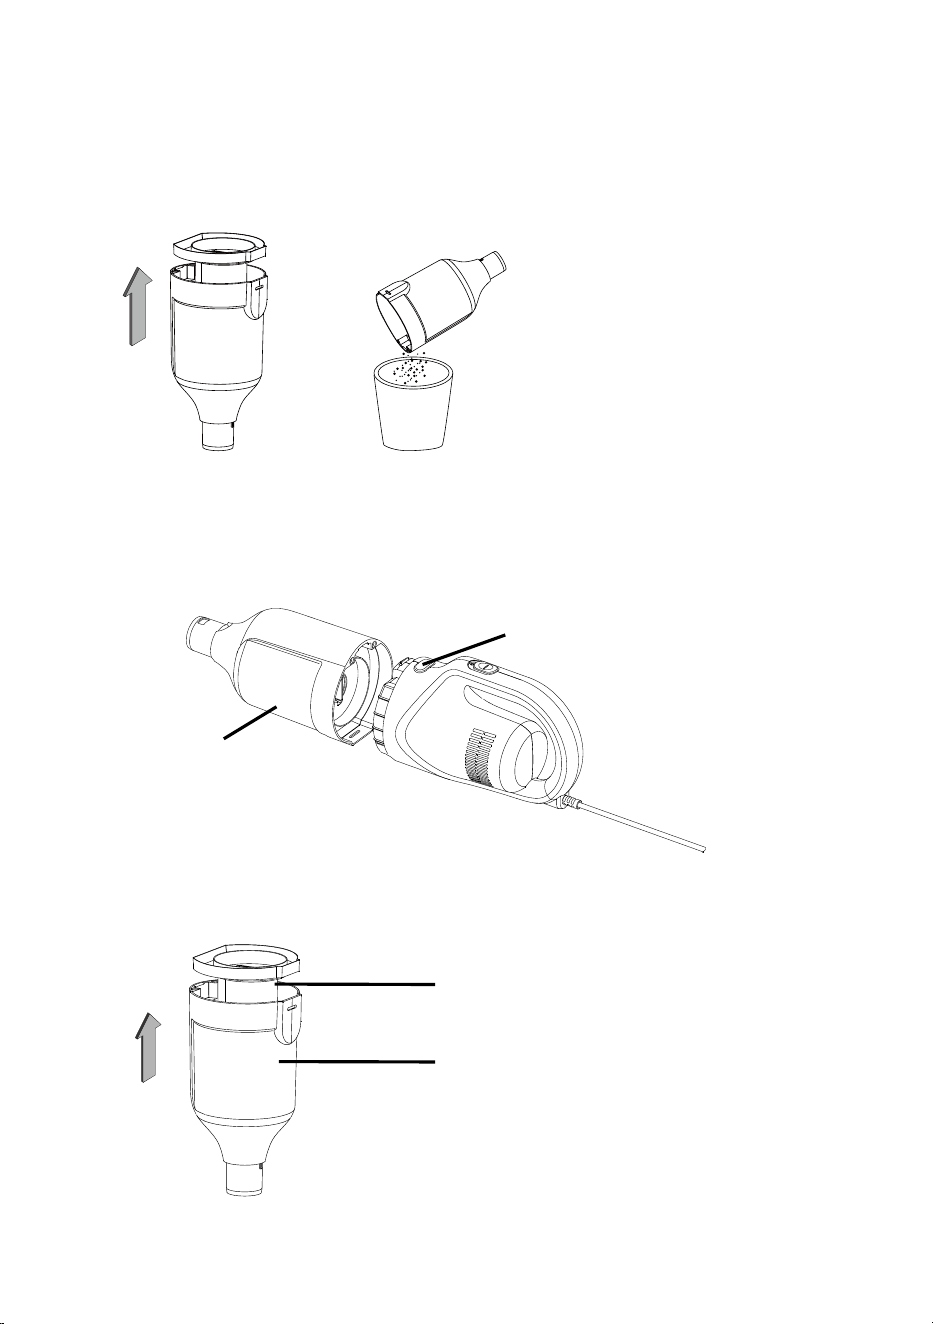
1. Remove the oor nozzle from the hand vacuum.
Emptying the Dust Cup
NOTE: Use dry cloth to clean the outside of the unit. Do not allow any kind of
liquid to enter the unit.
2. Press the dust cup release button to remove the dust cup from the main body.
Dust Cup Release Button
Dust Cup
-14-
3. Remove the lter from the dust cup. Empty the contents of the dust cup into
waste receptacle.
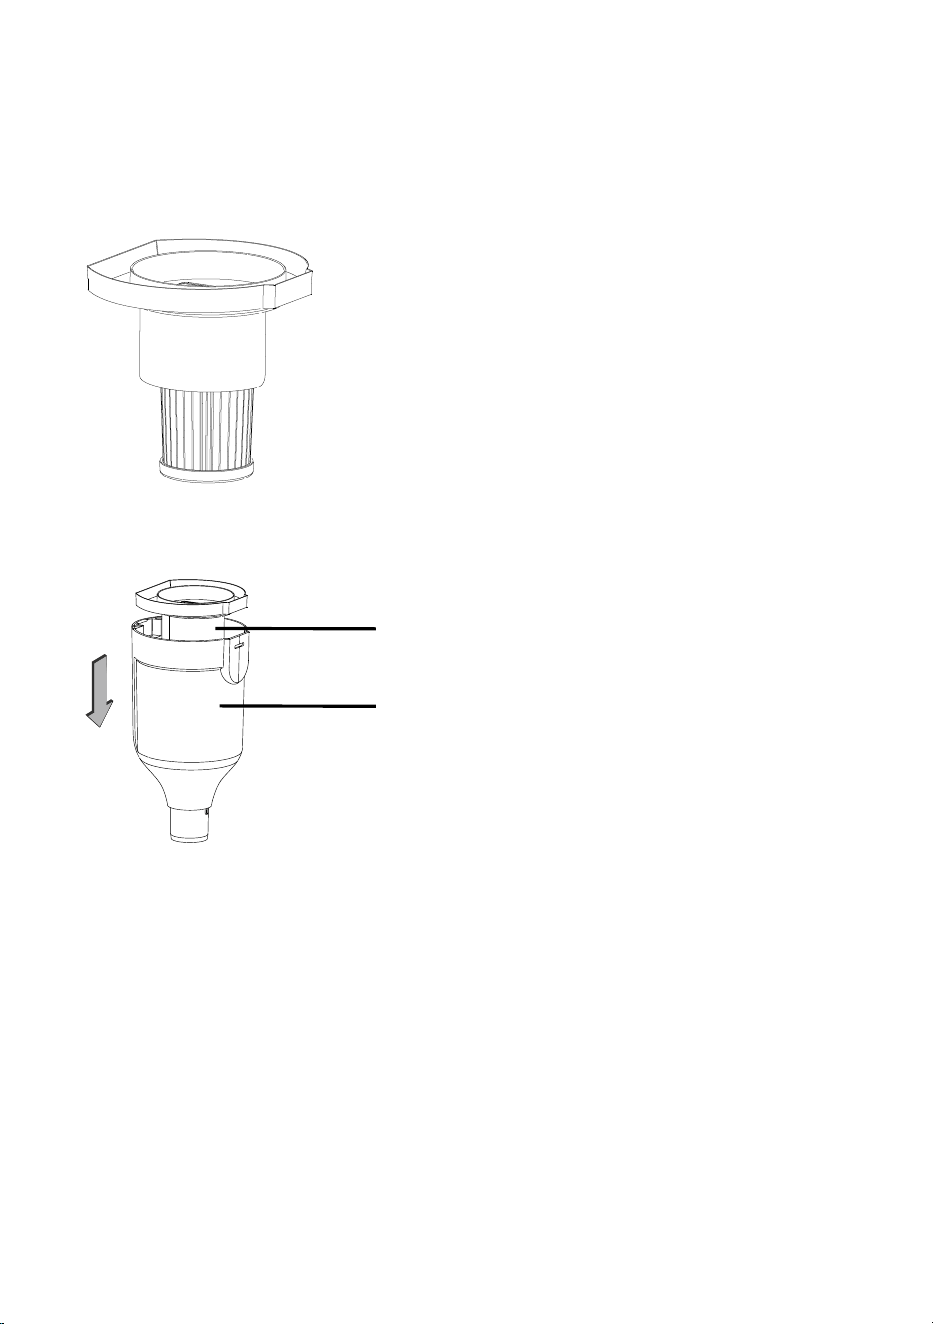
1. Press the dust cup release button to remove the dust cup from the hand
vacuum.
Cleaning the Filter
Dust Cup Release Button
Dust Cup
2. Remove the lter from the dust cup and clean the accumulated debris from the
lter.
Filter
Dust Cup
-15-
3. After repeated use, it may be necessary to wash the lter. Hand wash in
lukewarm water. After washing, set aside and allow to air dry for 24 hours.
24hrs
IMPORTANT: The lter must be completely dry before reuse.
4. Place the clean and dry lter back to the dust cup.
Filter
Dust Cup
-16-
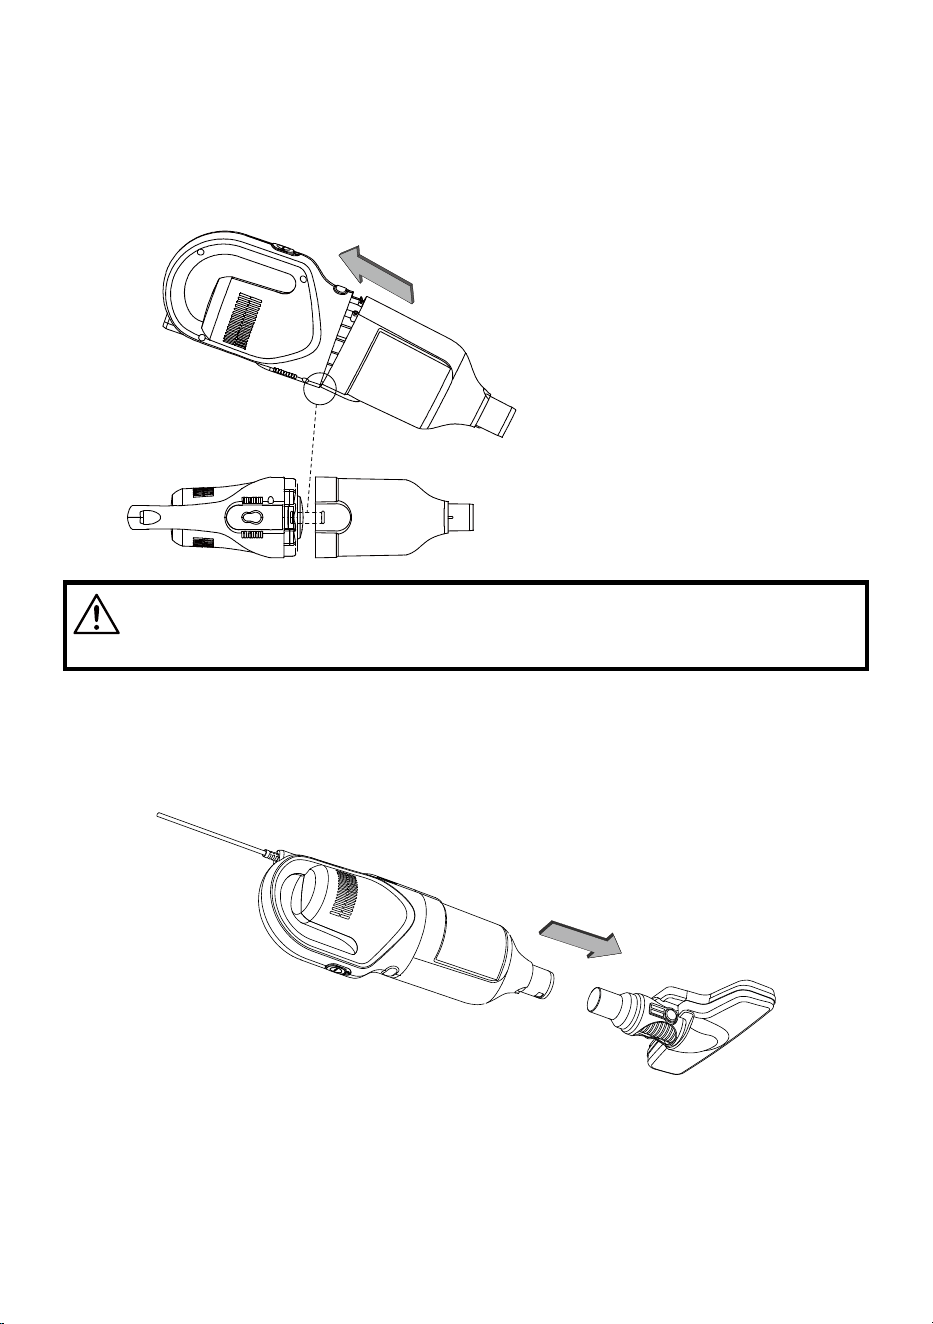
5. Align the slot at the back of the dust cup to the hand vacuum, and then push
the dust cup to the hand vacuum until you hear a click.
WARNING
Do not operate vacuum cleaner without lter installed.
1. To clean out the oor nozzle, remove the oor nozzle from the main vacuum
body.
Removing Floor Nozzle Blockages
2. Carefully remove any debris or blockage from the inside of the nozzle neck.
3. Reattach the oor nozzle onto the vacuum body.
NOTE: Do not use scissors or other sharp objects to remove a blockage from the
oor nozzle as these may damage the oor nozzle.
-17-
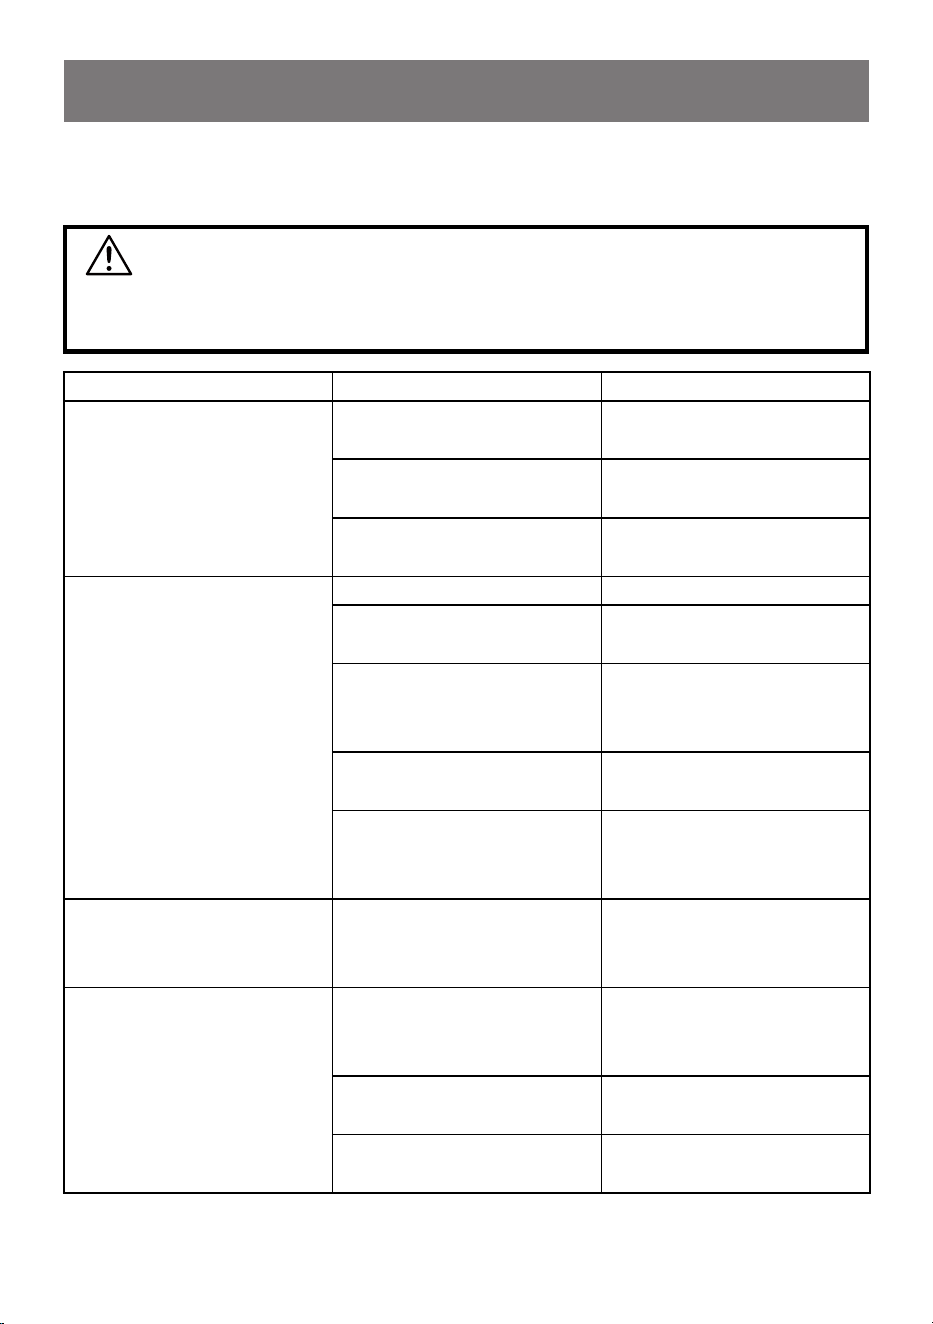
TROUBLESHOOTING
Should you have any problem(s) with your vacuum cleaner, review the table
below for solutions to minor performance issues.
WARNING
Disconnect electrical supply before performing maintenance to the vacuum
cleaner. Failure to do so could result in electrical shock or personal injury.
PROBLEM POSSIBLE CAUSE SOLUTION
Vacuum will not power on.
The plug is not plugged to
the wall outlet.
Be sure power cord plug is
fully plugged into outlet.
The on/off switch is not on
the ‘I’ ON position.
Slide the on/off switch to
the ‘I’ ON position.
The motor is damaged.
Contact with customer
service.
The job of dirt pick-up is
poor or suction power is
weak.
Dust cup is full. Empty dust cup.
Filter needs cleaning.
Follow lter cleaning
instructions on page 14-16.
There is a clog in the
vacuum.
Check the nozzle and dust
cup for clogs and remove
accordingly.
Filter needs to be
replaced.
Purchase online at
www.amazon.com.
Dust cup is not installed
correctly.
Check dust cup for correct
installation and ensure it is
snapped rmly in place.
Sound changes.
There is a clog in the
wand or lter.
Check the wand or lter
for clogs and remove
accordingly.
Dust escapes from
vacuum.
Filter is missing or
installed incorrectly.
Check lter for correct
installation. Follow
instructions on page 14-16.
Filter is damaged and
needs to be replaced.
Purchase online at
www.amazon.com.
Dust cup is installed
incorrectly.
Position dust cup correctly
and snap rmly into place.