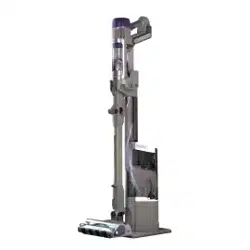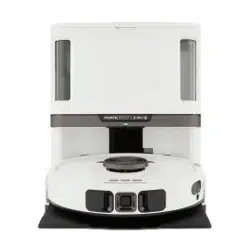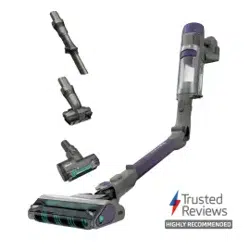
POWERDETECT
™
Speed
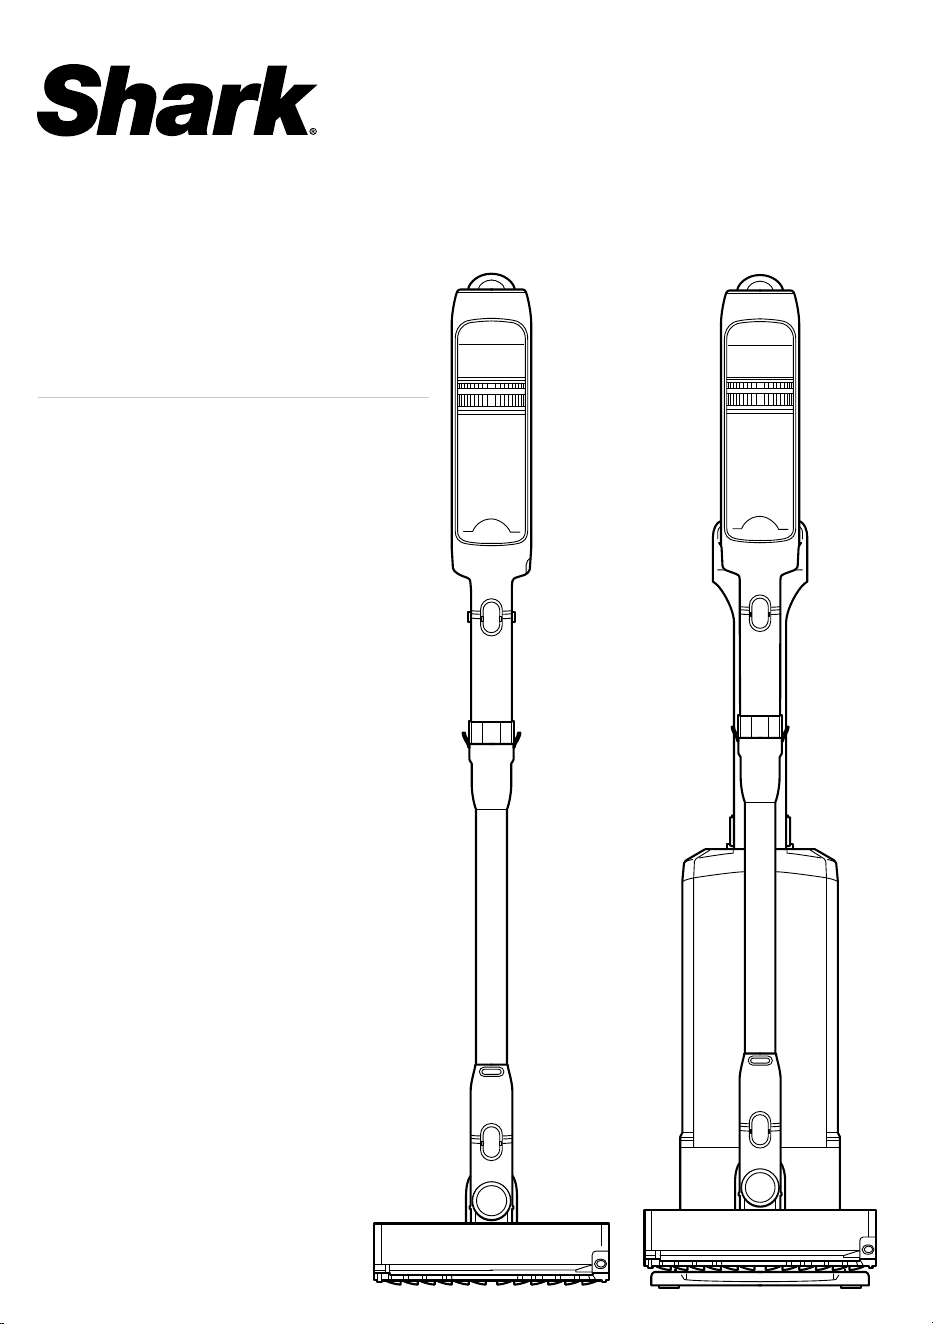
Clean & Empty Cordless Vacuum
IA1000 Series
IA3000 Series
OWNER’S GUIDE
sharkninja.comsharkninja.com
SAVE THESE INSTRUCTIONS
READ ALL INSTRUCTIONS BEFORE USING
THIS VACUUM:
1. This vacuum consists of a motorized
nozzle, wand, and handheld vacuum. These
components contain electrical connections,
electrical wiring, and moving parts that
potentially present risk to the user. The floor
nozzle, wand, and handheld vacuum contain
electrical connections.
2. Before each use, carefully inspect all parts
for any damage. If a part is damaged,
discontinue use.
3. Use only identical replacement parts.
4. This vacuum contains no serviceable parts.
5. Use only as described in this manual.
DO NOT use the vacuum for any purpose
other than those described in this manual.
6. With the exception of the filters and dust
cup, DO NOT expose any parts of the
vacuum to water or other liquids.
7. Keep the appliance and its cord out of reach
of children. DO NOT allow the appliance to
be used by children.
DO NOT allow to be used as a toy.
Close supervision is necessary when
used near children.
GENERAL USE
8. This appliance can be used by persons
with reduced physical, sensory, or mental
capabilities or lack of experience and
knowledge if they have been given
supervision or instruction concerning use of
the appliance in a safe way and understand
the hazards involved. Cleaning and user
maintenance shall not be made by children.
9. Always turn o the vacuum before
connecting or disconnecting any current
carrying hoses, motorized nozzles,
chargers, batteries, or other electrical or
mechanical parts.
10. DO NOT handle plug or vacuum with
wet hands.
11. DO NOT use without dust cup, HEPA and
Pre-motor filter in place.
12. Only use Shark® branded filters and
accessories. Failure to do so will void
the warranty.
13. DO NOT put any objects into nozzle or
accessory openings. DO NOT use with any
opening blocked; keep free of dust, lint,
hair, and anything that may reduce airflow.
14. DO NOT use if nozzle or accessory airflow is
restricted. If the air paths or the motorized
floor nozzle become blocked, turn the
vacuum o. Remove all obstructions before
you turn on the unit again.
15. Keep nozzle and all vacuum openings away
from hair, face, fingers, uncovered feet, or
loose clothing.
16. DO NOT use if vacuum is not working as it
should, or has been dropped, damaged, left
outdoors, or dropped into water.
17. Use extra care when cleaning on stairs.
18. DO NOT leave the vacuum unattended
while powered on.
19. When powered on, keep the vacuum
moving over the carpet surface at
all times to avoid damaging the
carpet fibers.
20. DO NOT place vacuum on unstable
surfaces such as chairs or tables.
21. DO NOT use to pick up:
a) Liquids
b) Large objects
c) Hard or sharp objects (glass, nails,
screws, or coins)
d) Large quantities of dust (including
drywall, fireplace ash, or embers).
DO NOT use as an attachment to power
tools for dust collection.
e) Smoking or burning objects (hot coals,
cigarette butts, or matches)
f) Flammable or combustible materials
(lighter fluid, gasoline, or kerosene)
g) Toxic materials (chlorine bleach,
ammonia, or drain cleaner)
22. DO NOT use in the following areas:
a) Poorly lit areas
b) Wet or damp surfaces
c) Outdoor areas
d) Spaces that are enclosed and may
contain explosive or toxic fumes or
vapors (lighter fluid, gasoline, kerosene,
paint, paint thinners, mothproofing
substances, or flammable dust)
WARNING
When using an electrical appliance, to reduce the risk of fire, electric shock, injury, or
property damage, basic precautions should always be followed, including the following:
IMPORTANT SAFETY INSTRUCTIONS
FOR HOUSEHOLD USE ONLY
23. Turn o the vacuum before plugging in or
unplugging the charger.
24. Turn o the vacuum before any adjustment,
cleaning, maintenance, or troubleshooting.
25. During cleaning or routine maintenance,
DO NOT cut anything other than hair, fibers, or
string wrapped around the brushrolls.
26. Allow all filters to air-dry completely before
replacing in the vacuum to prevent liquid
from being drawn into electric parts.
27. DO NOT modify or attempt to repair the
vacuum or the battery yourself, except as
indicated in this manual. DO NOT use the
battery or vacuum if it has been modified or
damaged. Damaged or modified batteries
may exhibit unpredictable behavior resulting
in fire, explosion, or risk of injury.
28. Always turn o this appliance before
connecting or disconnecting motorized
nozzle or hand tool.
BATTERY PACK
29. The battery is the power source for the
vacuum. Carefully read and follow all
charging instructions.
30. To prevent unintentional starting, ensure
the vacuum is powered o before picking
up or carrying the vacuum. DO NOT carry
the appliance with your finger on the
power switch.
31. For IA3000 Series, use only charging dock
XDCKIA3000NO. For IA1000 Series, only
use battery charger DK30A-263100H-U or
GQ30B-225100-AU.
32. Keep the battery away from all metal objects
such as paper clips, coins, keys, nails, or
screws. Shorting the battery terminals
increases the risk of fire or burns
33. Under abusive conditions, liquid may be
ejected from the battery. Avoid contact with
this liquid, as it may cause irritation or burns.
If contact occurs, flush with water. If liquid
contacts eyes, seek medical help.
34. Battery should not be stored at temperatures
below 3°C (37.4°F) or above 104°F (40°C) to
maintain long-term battery life.
35. DO NOT charge battery at temperatures
below 5°C (40°F) or above 104°C (104°F).
Charging improperly or at temperatures
outside of the specified range may damage
the battery and increase the risk of fire.
36. Store the appliance indoors. DO NOT
use or store it below 3°C (37.4°F). Ensure
the appliance is at room temperature
before operating.
37. DO NOT expose the battery to fire or
temperatures above 265°F (130°C) as it may
cause explosion.
38. Use appliances only with specifically
designated battery packs. Use of any other
battery packs may create a risk of injury
and fire.
39. Disconnect the battery pack from the
appliance before making any adjustments,
changing accessories, or storing appliance.
Such preventive safety measures reduce the
risk of starting the appliance accidentally.
40. For IA1000 and IA3000 Series, only use
battery pack XIABTR540US.
41. If the charging cord plug does not fit fully
into the outlet, reverse the plug. If it still does
not fit, contact a qualified electrician. DO
NOT force into outlet or try to modify to fit.
42. To reduce the risk of shock and unintended
operation, turn o power and remove the
Li-Ion battery before servicing.
43. Unplug the power cord from outlet when
not in use and before servicing.
44. DO NOT unplug by pulling on cord. To
unplug, grasp the plug, not the cord.
45. Turn o all controls before unplugging.
46. DO NOT pull or carry by cord, use cord as
a handle, close a door on cord, or pull cord
around sharp edges or corners. Do not run
appliance over cord. Keep cord away from
heated surfaces
47. The product’s power supply cord should be
directly plugged into an electrical outlet.
Extension cord should not be used
48. The length of the power supply cord
provided on the product is 1.2m.
NOTE: Have servicing provided by a qualified repair
person using only identical replacement parts. This will
ensure that the safety of the product is maintained.
sharkninja.comsharkninja.com
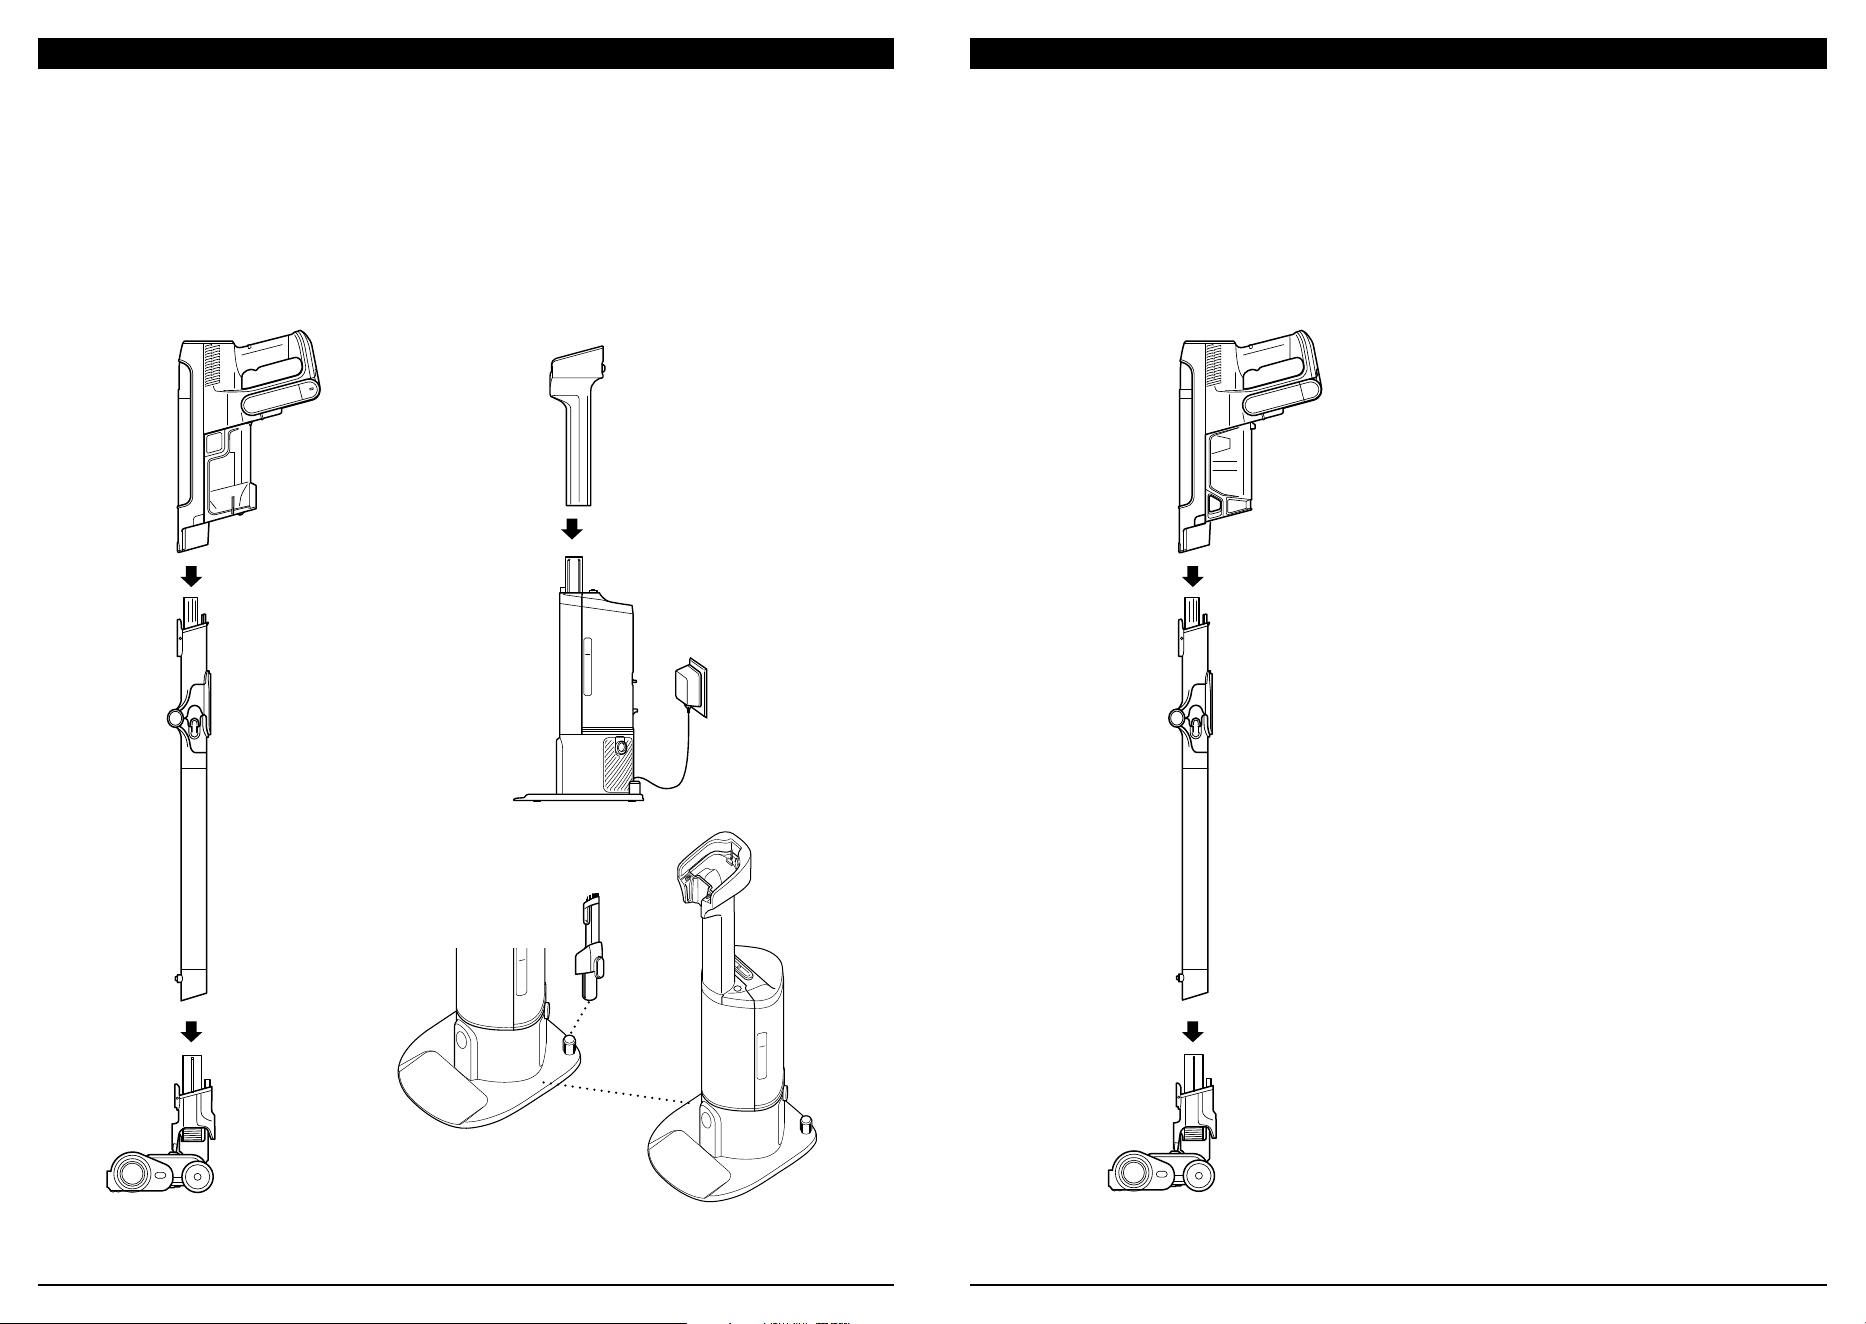
VACUUM AND DOCK ASSEMBLY (IA3000 ONLY) VACUUM ASSEMBLY (IA1000)
1. Slide the Wand onto the neck of the Floor
Nozzle until it clicks into place.
2. Align the Hand Vacuum nozzle opening
with the top of the wand and slide it on
until it clicks into place.
3. Make sure the Dock is facing upright. Slide
the Charging Post into the slot on front of
dock until it clicks.
4. Place the dock on the floor near a wall
outlet. Plug the Power Cord into the outlet.
5. Store the crevice tool accessory on the
mount on the dock.
For proper operation, ensure all components
are completely connected and clicked
into place.
1. Slide the Wand onto the neck of the Floor
Nozzle until it clicks into place.
2. Align the Hand Vacuum nozzle opening
with the top of the wand and slide it on
until it clicks into place.
For proper operation, ensure all components
are completely connected and clicked
into place.
4.
Power Cord
3.
Charging Post
Handheld
Vacuum
Handheld
Vacuum
Floor NozzleFloor Nozzle
2.
(Click)
2.
(Click)
1.
(Click)
1.
(Click)
MultiFLEX®
Wand
MultiFLEX®
Wand
Dock
5.
Accessory
Storage
sharkninja.comsharkninja.com
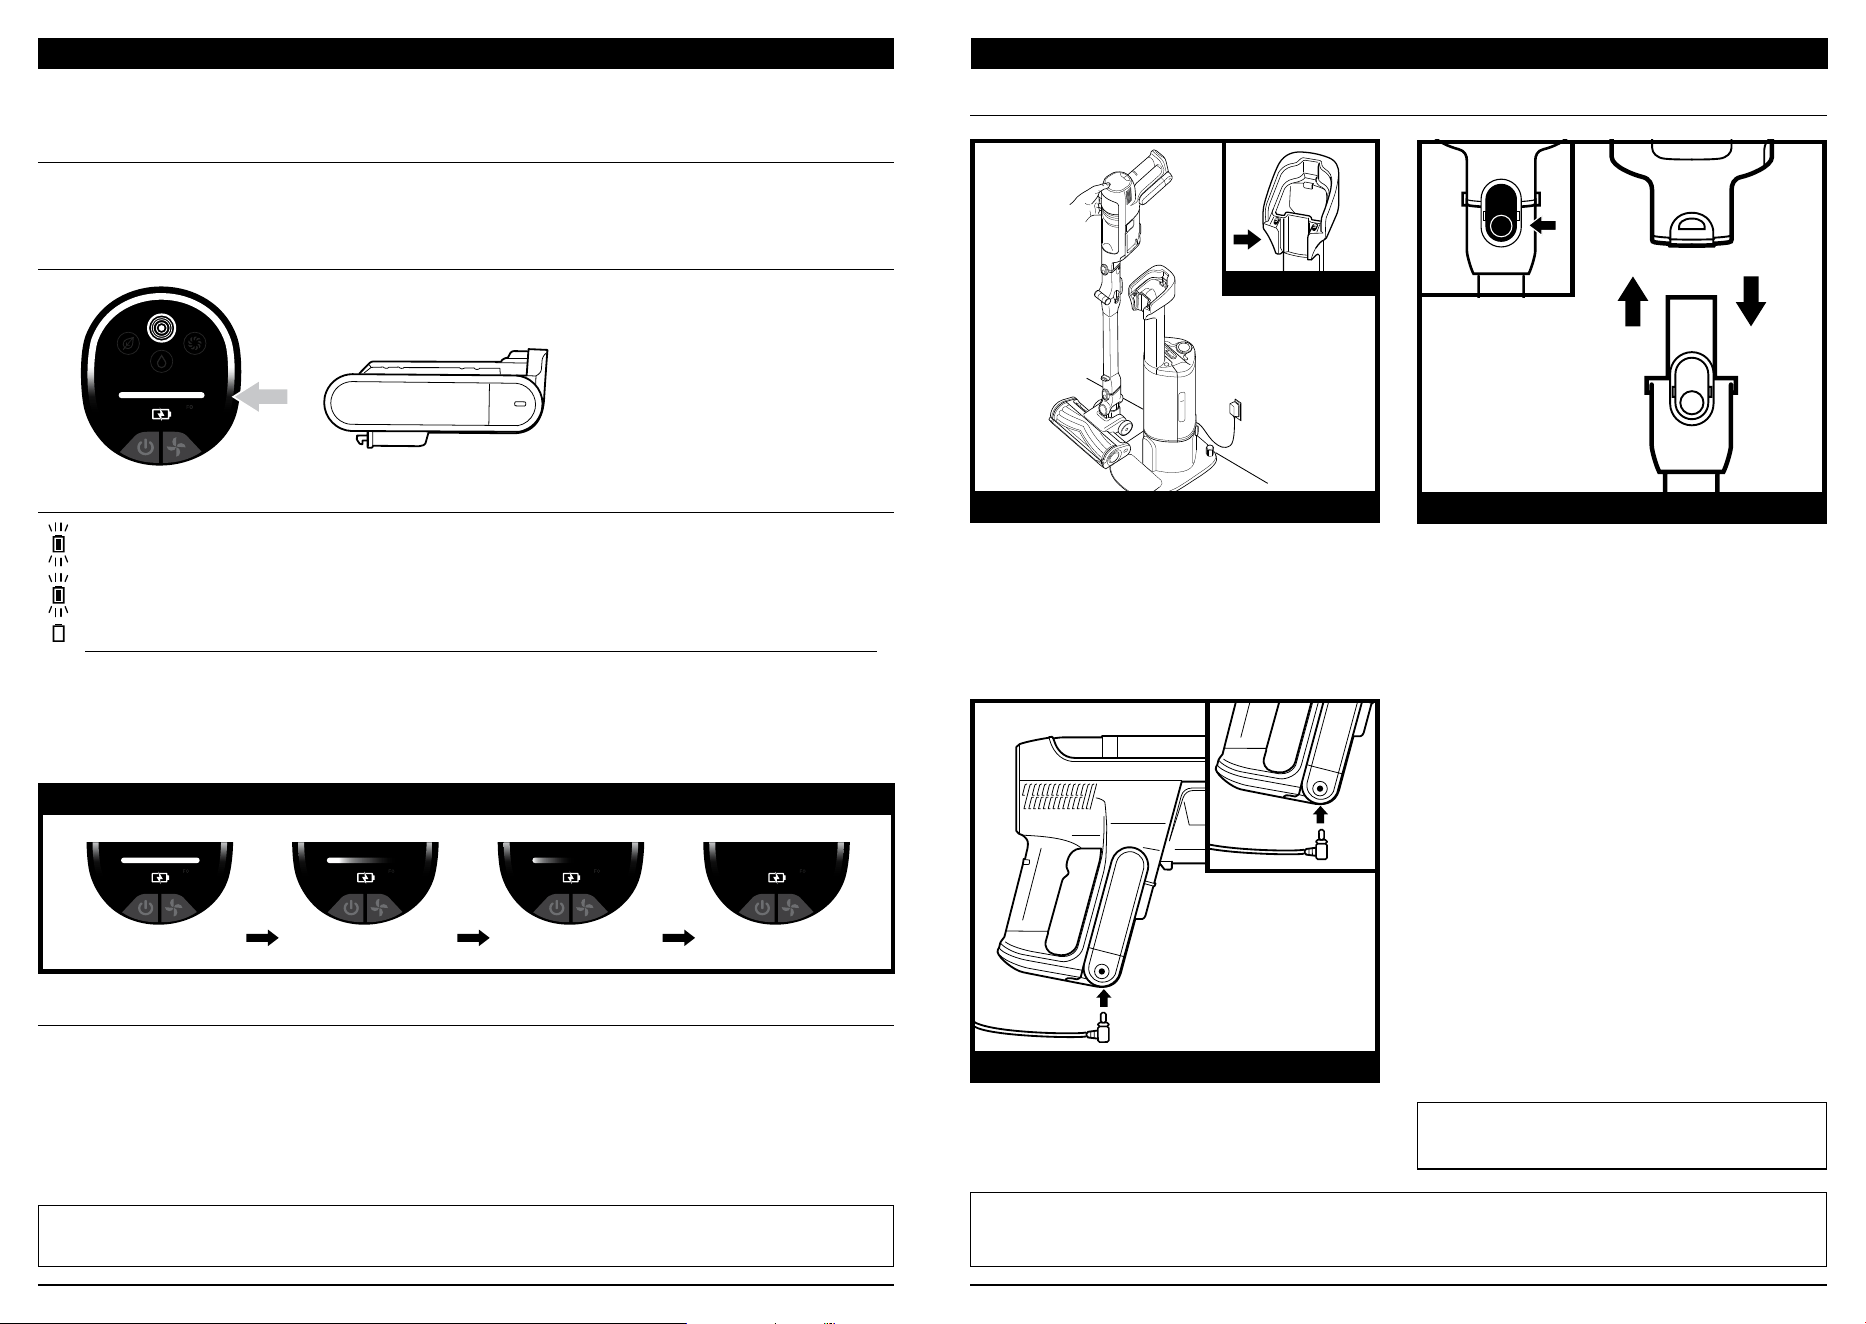
CHARGING
CHARGING WHILE IN STORAGE MODE
Charge the unit by placing it on the dock. Make
sure the contacts on the hand vac are aligned
with the contacts on the charging post. When
charging is complete and you need to use the
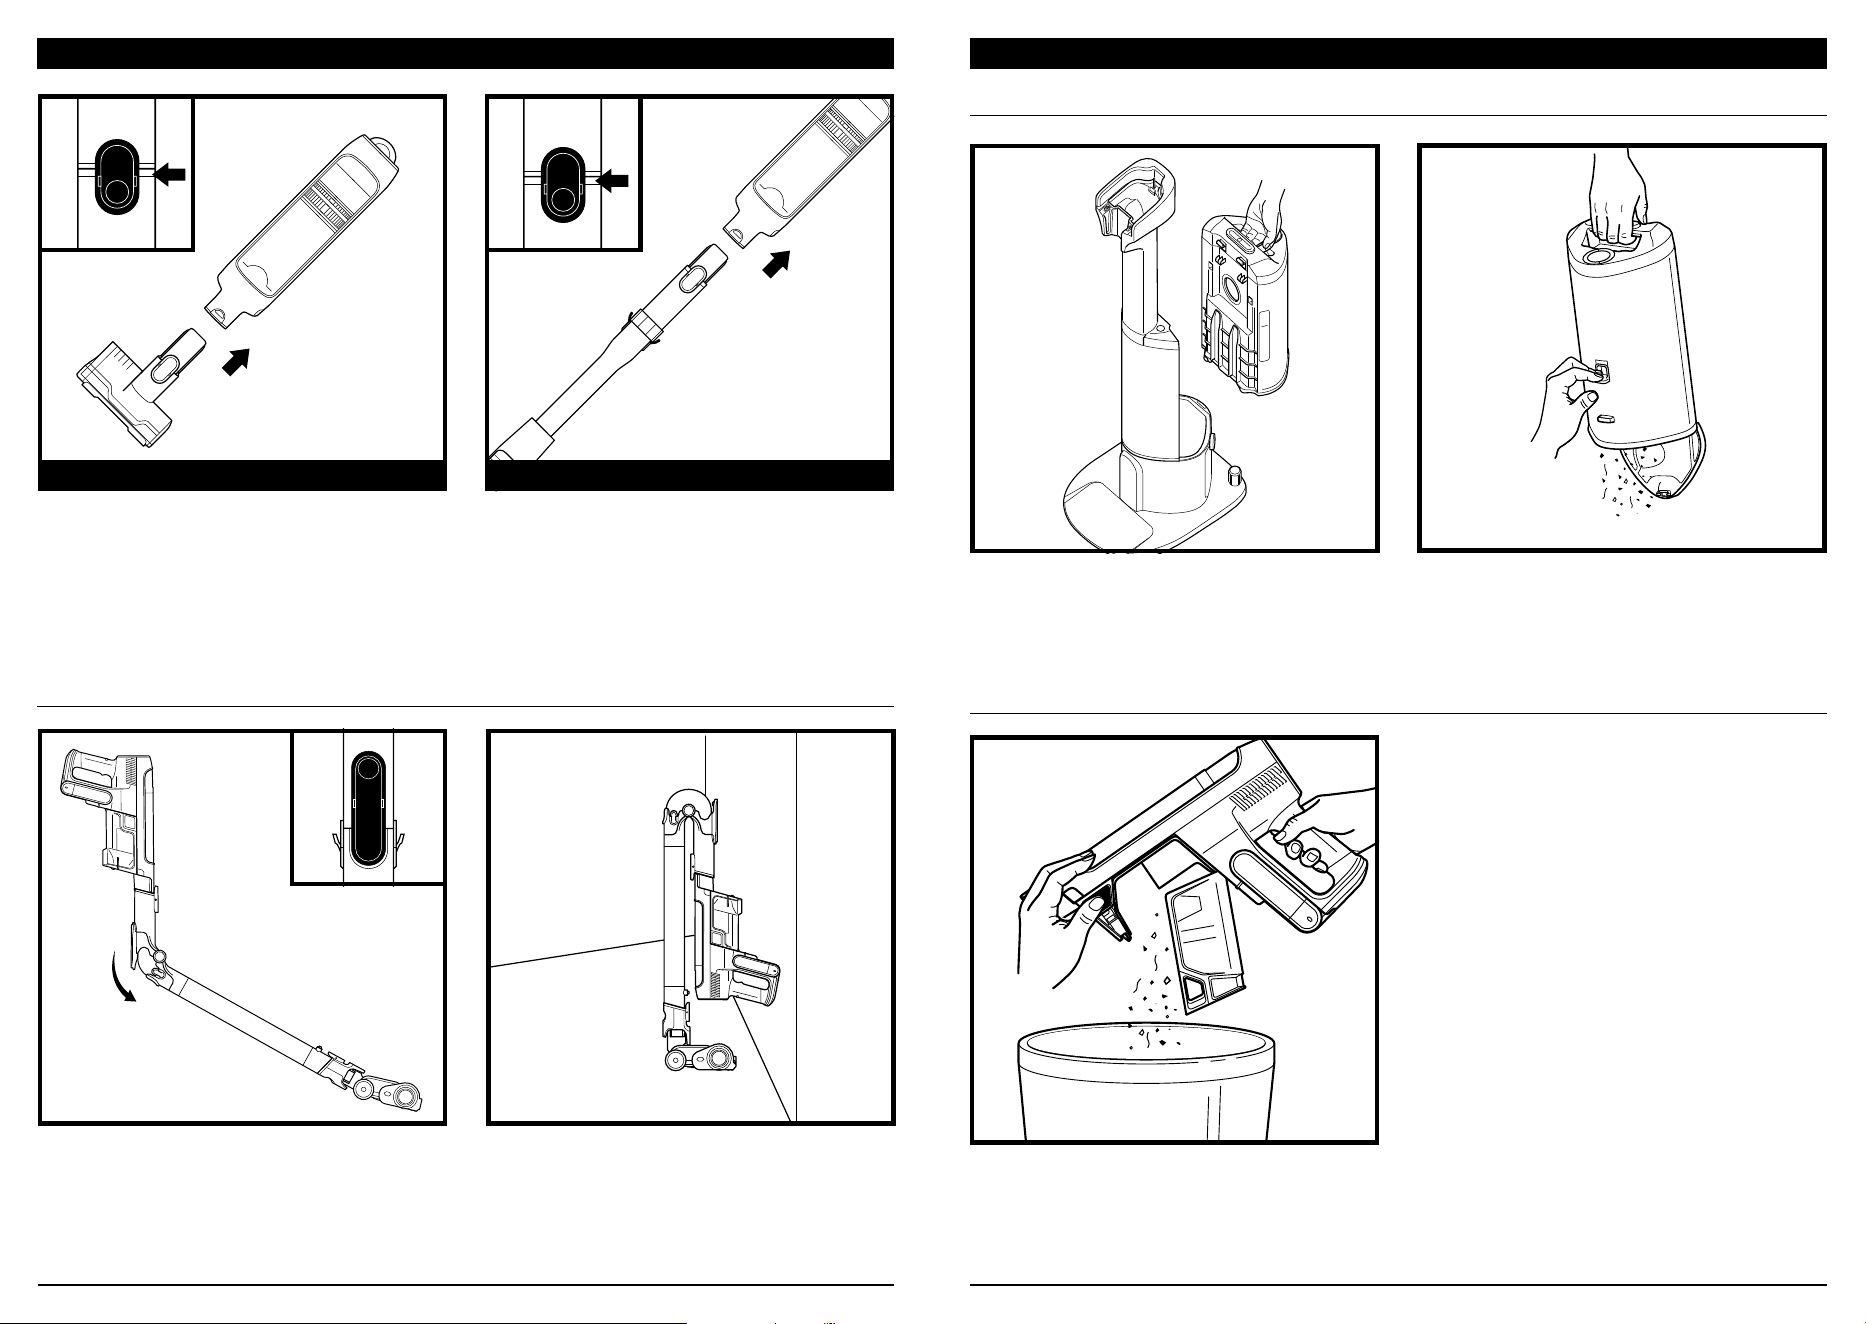
unit again, lift it o the dock.
To detach the hand vacuum from the wand,
press the front latch release button on the
hand vac where it meets the wand, then lift
o the hand vacuum. To reattach the hand
vacuum to the wand, align the hand vacuum
opening over the top of the wand and slide it
on until it clicks into place.
UPRIGHT DOCK CHARGING IA3000 SERIES
HAND VACUUM RELEASE BUTTONS
CONTACTS
NOTE: When the unit is docked properly, the charging lights on the battery will blink, indicating that charging has begun.
NOTE: The main unit comes with a partial charge. For maximum runtime, charge fully before first use (approximately
6 hours). Leaving the unit plugged in will not damage battery life.
LI-ION BATTERY
Prior to first use, charge the battery completely. A full charge takes approximately 6 hours.
With a full charge, the unit will have up to a 60-minute runtime*. Visit support.sharkninja.com
online for more information.
When the Shark
®
Li-ion battery needs to be replaced, dispose of it or recycle it in accordance
with local ordinances or regulations. In some areas, it is illegal to place spent lithium-ion
batteries in the trash or in a municipal solid waste stream. Return spent batteries to an
authorized recycling center or to the retailer for recycling. Contact your local recycling center
for information on where to drop o the spent battery.
*In ECO mode with the hand vacuum detached.
RECYCLING THE LI-ION BATTERY
LED BATTERY POWER AND CHARGING INDICATORS
NOTE: The Shark battery, like all lithium-ion batteries, will naturally decrease in capacity over time from the 100%
capacity of a new battery.
NOTE: To purchase an extra battery or other parts and
accessories, visit sharkninja.com/parts-support/
home-cleaning-parts/upright-vacuums
RUNTIMES PER FULLY CHARGED BATTERY
To charge the battery inside the handheld
vacuum, connect the charger to an electrical
outlet, then insert the charger plug into the port
below the handle on the handheld vacuum.
IN HANDHELD VACUUM IA1000 SERIES
Charging
LED on the battery pack will pulse yellow when reaching 0-75% charge.
LED on the battery pack will pulse green from 75% - 100% charge.
White LED the battery pack is fully charged.
NOTE: Full charge takes approximately 6 hours.
Additional Notes
1. LEDs turn o once the battery is fully charged.
2. Unit will not power on when charger is connected.
BATTERY CHARGING INFORMATION
Full Charge Half Charge Low Charge No Charge
Blinking
sharkninja.comsharkninja.com
USING YOUR VACUUM
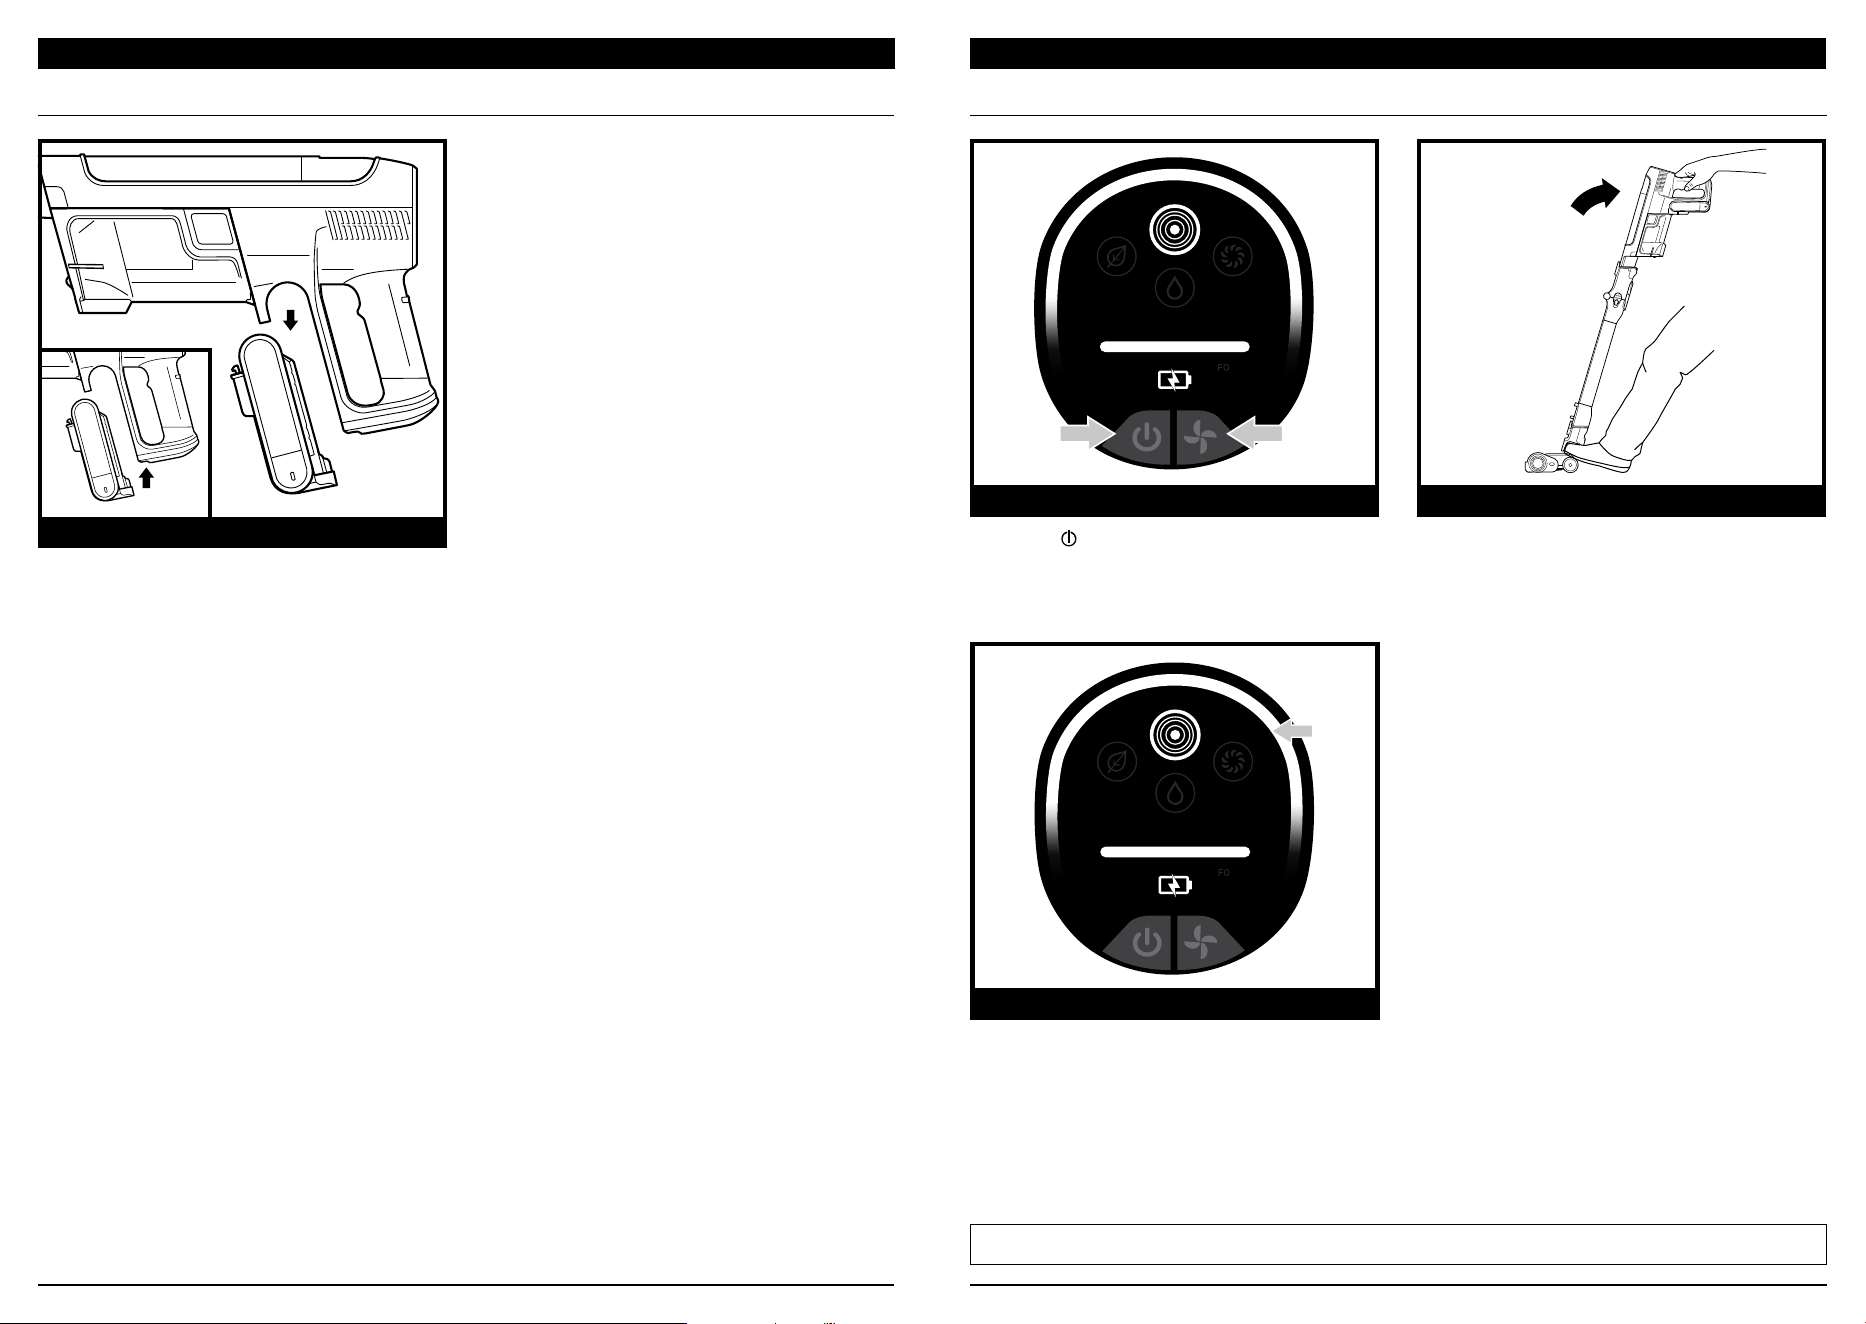
CONTROLS AND CLEANING MODES
Press the
button on the control screen
to turn on power. To turn o power, press
the button again. To toggle between ECO,
DETECT, and BOOST modes, press the
mode selection button.
POWER
When upright, the nozzle will lock to allow
for freestanding storage when the hand vac
is detached. To begin cleaning with the floor
nozzle, disengage the lock by stepping on
the nozzle and tilting the hand vac down.
UPRIGHT
BATTERY REMOVAL
REMOVING THE BATTERY
To remove the battery from the hand vacuum,
press the release tab on the battery cap and
slide out the battery. To reinstall, slide the
battery into the compartment in the handle
until it clicks into place.
BAT TERY
When the LED indicator light is white, this
means no heavy debris is detected and suction
power is normal. When the vacuum senses
heavy debris, the light will turn deep purple,
and suction will increase for more cleaning
power. When the indicator light turns light
purple, debris is being removed—continue
cleaning until the indicator turns white again.
CLEAN INDICATOR
NOTE: For best cleaning on ASTM and IEC cleaning tests, use BOOST mode.
sharkninja.comsharkninja.com
ABOVE-FLOOR CLEANING MAINTAINING YOUR VACUUM
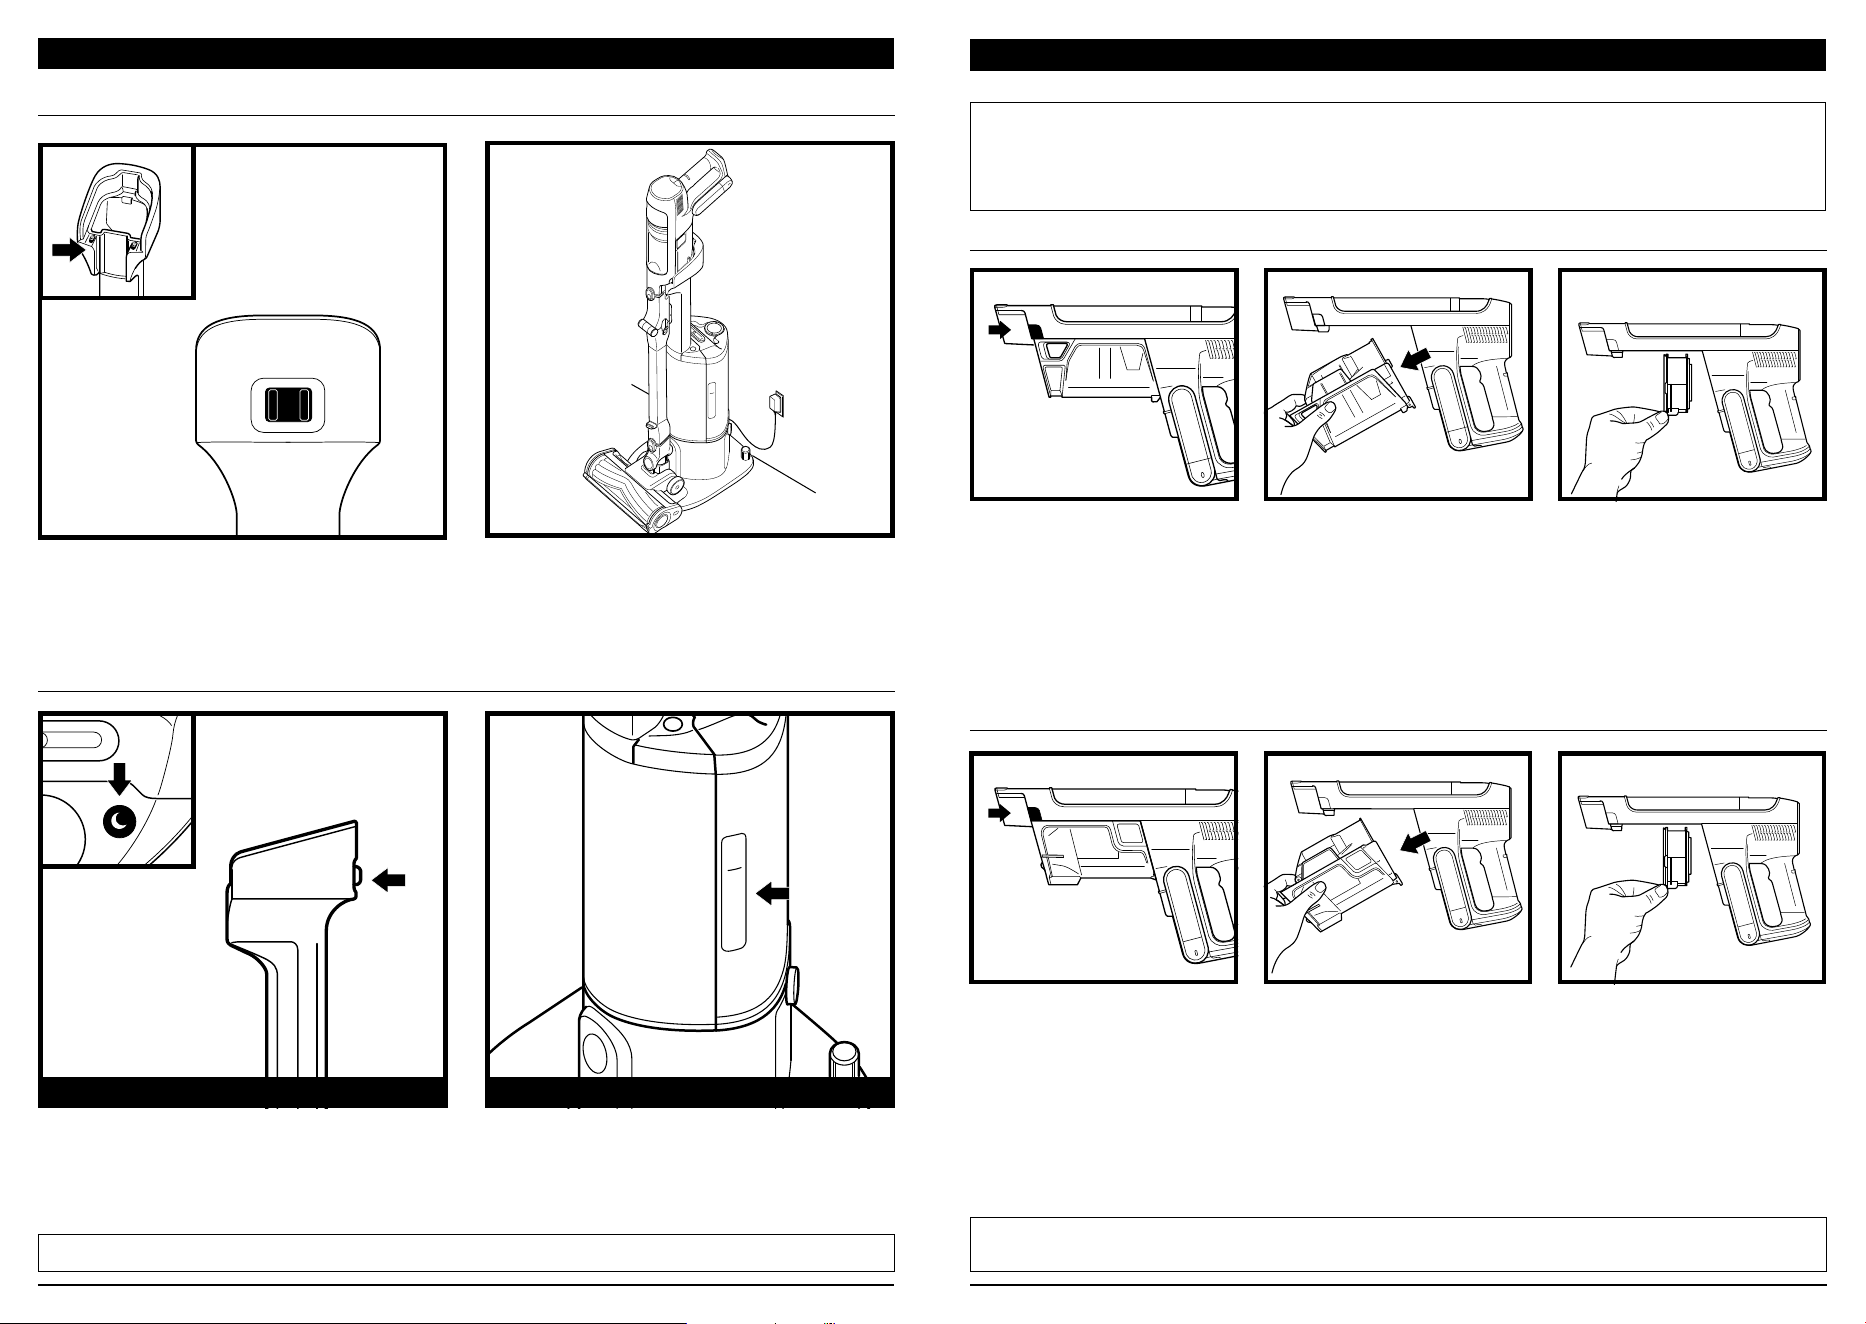
EMPTYING THE DOCK DUST BIN (IA3000 ONLY)
MULTIFLEX® WAND
EMPTYING THE HANDHELD VACUUM DUST CUP (IA1000 ONLY)
Empty the dock dust bin when the dust bin
window shows the bin is full. To remove the
bin, lift it out by the handle.
To empty the bin, hold it over the trash and
press the release button on the side. The
bottom will open to release the debris.
To empty the handheld vacuum (IA1000
Series) dust cup, turn o the power and hold
the hand vac over the trash. Press the release
button and the dust cup lid will drop open,
releasing debris.
To detach the floor nozzle from the wand,
step on the nozzle while pressing the
nozzle release button at the bottom of
the wand. Lift the wand to remove it. To
reattach the wand, align it over the neck
of the floor nozzle, then slide it on until it
clicks into place.
Detach the hand vacuum to clean above-floor
areas. Press the front latch release button on
the hand vac where it meets the wand, then lift
o the hand vacuum. To attach an accessory
to the hand vacuum, slide it into the opening
in the nozzle. To remove, press the front latch
release button on the hand vac where it meets
the wand, and slide out the accessory.
If your vacuum model includes the MultiFLEX
wand, you can adjust the angle to clean
under furniture and in other hard-to-reach
areas. Press the latch on the back of the
wand to adjust the angle. To return to the
original angle, straighten the wand until it
clicks securely into place.
ABOVE-FLOOR WITH WANDABOVE-FLOOR WITH HAND VACUUM
To store a vacuum with a MultiFLEX wand,
press the latch on the back of the wand and
fold the vacuum down into storage position.
Lean the folded unit against a wall or other
surface for more support.
sharkninja.comsharkninja.com
USING YOUR VACUUM
USING THE AUTO-EMPTY DOCK (IA3000 ONLY)
USING THE AUTO-EMPTY DOCK (IA3000 ONLY)
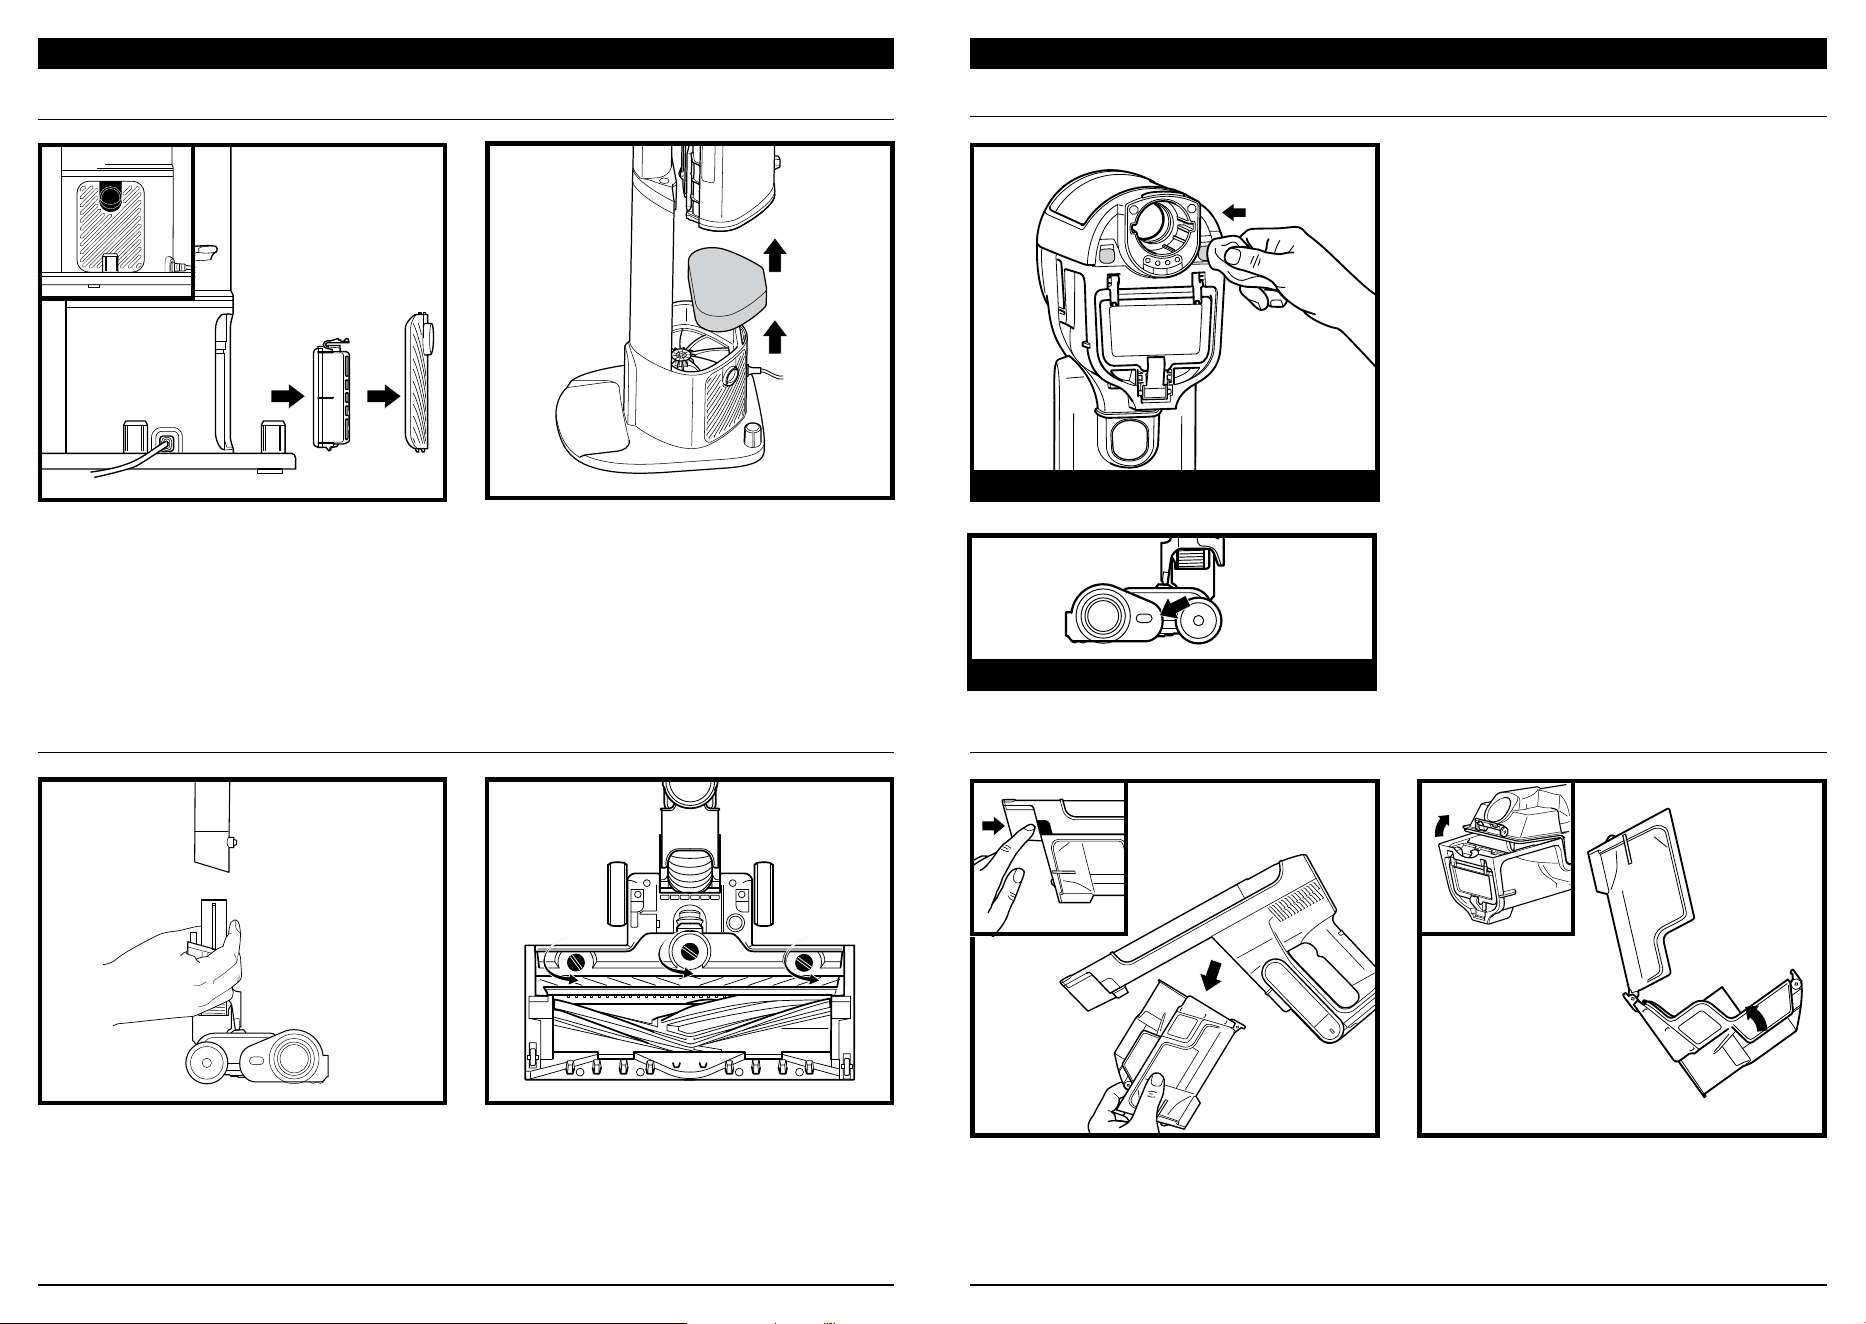
Place the vacuum on the dock in a downward
motion. Once properly attached, the automatic
evacuation process will begin. The evacuation cycle
will last for 15 seconds. Do not remove the vacuum
from the dock while evacuation is occurring.
Once evacuation is complete, the vacuum
will continue charging until it is removed
from the dock.
Note: Do not remove the vacuum while the evacuation cycle is taking place.
Use Quiet mode to dock and charge the
vacuum without automatic evacuation. To
activate Quiet mode, move the slider to
the right. To deactivate, move the slider to
the left. Do not use Quiet mode while the
vacuum is evacuating.
The Dust Bin Window will show how full the
dust bin is. When the window is full, remove
the dust bin and empty it.
DUST BIN WINDOW
MAINTAINING YOUR VACUUM
CLEANING THE HEPA FILTER (IA1000 SERIES)
CLEANING THE HEPA FILTER (IA3000 SERIES)
QUIET MODE
1. To access the HEPA filter,
press the Dust Cup Empty
button to open the dust
cup, then press the release
button and slide the dust
cup o the hand vac.
2. Press the filter release
button and gently pull
the HEPA filter out of the
hand vac. Rinse the filter
with water only and allow
it to air-dry completely
before reinstalling.
3. After the filter has been
rinsed and air-dried
completely, slide it back
into the hand vacuum.
4. For IA3000 Series only:
To release dust and debris
into the trash, pull the
lever on the bottom of the
dust cup and the bottom
lid will open.
1. To access HEPA filter, first
press the dust cup empty
button to open the dust
cup. Then press the dust
cup release button and
slide the dust cup o the
hand vac.
2. Press the filter release
button and gently pull
the HEPA filter out of the
hand vac. Rinse the filter
with water only and allow
it to air-dry completely
before reinstalling.
3. After the filter has been
rinsed and air-dried
completely, slide it back
into the hand vacuum.
4. For IA1000 Series only:
To release dust and debris
into the trash, pull the
lever on the bottom of the
dust cup and the bottom
lid will open.
IMPORTANT:
DO NOT
use soap when cleaning the filters. Use water only. The vacuum will not have suction if
the post-motor filter is not installed. Ensure that all filters are installed before using.
NOTE: Rinse the HEPA filter at least once a month to maintain suction power. More
frequent cleaning may be necessary with heavy use. To clean the filter, rinse it with water
only and allow it to air-dry completely for up to 48 hours before reinstalling. Tap o loose
dirt between washes when needed.
sharkninja.comsharkninja.com
MAINTAINING YOUR VACUUM
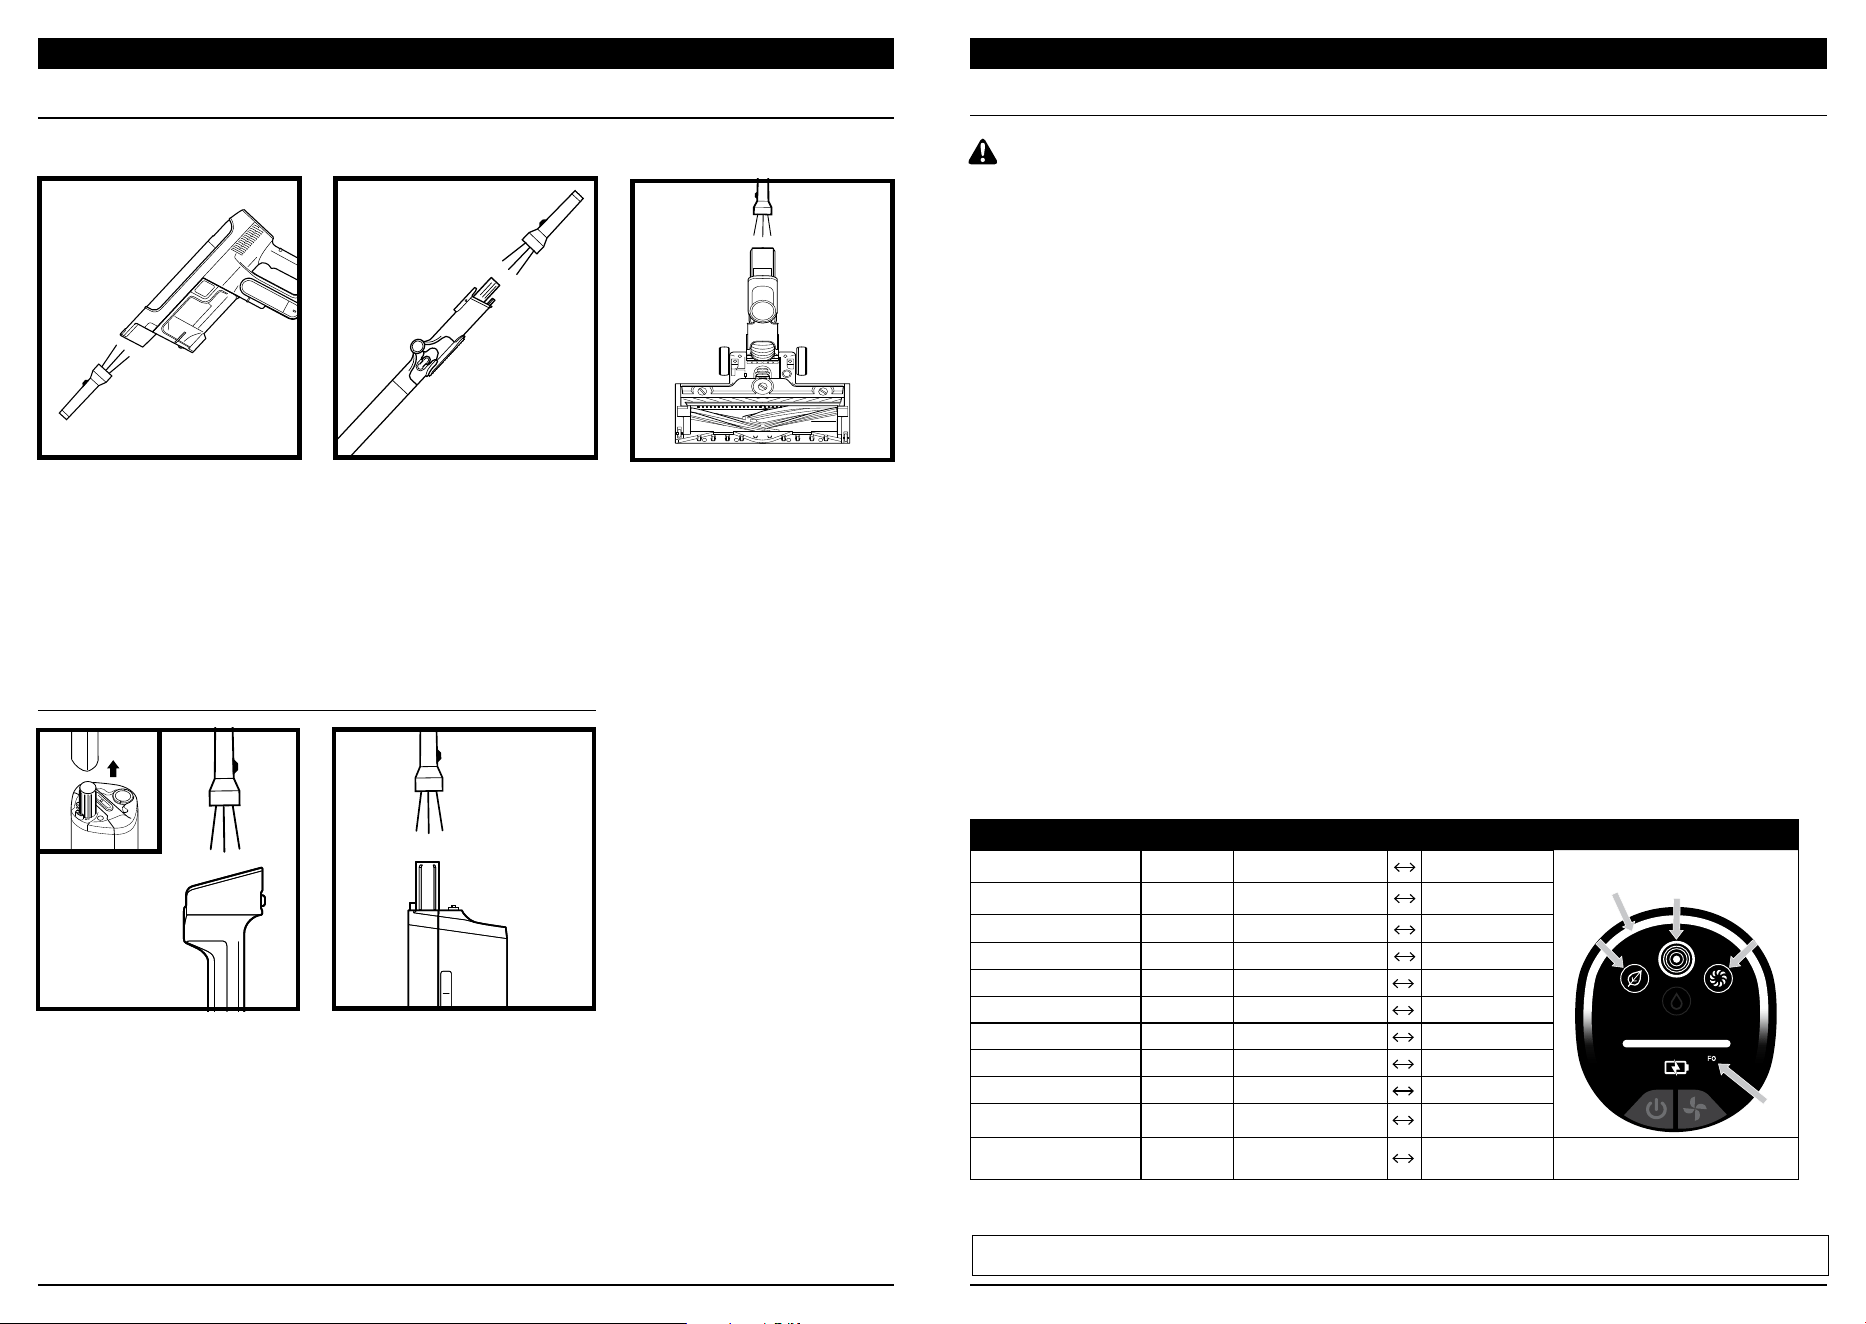
4. When reinserting the soleplate, make sure
to turn the screws to the locked position.
NOZZLE MAINTENANCE (ALL MODELS) EMPTYING THE HAND VACUUM DUST CUP (IA3000)
POWERFIN FLOOR NOZZLE
1. Turn o the vacuum.
2. Press the nozzle release button to detach
the nozzle from the wand (Fig. 1).
3. Turn the nozzle over and use a screwdriver
to loosen the screws to the unlocked
position (Fig. 2).
1. To remove the dust cup on your IA3000
hand vacuum, press the release button
and slide the dust cup off the hand vac
(Fig.1).
2. Hold the dust cup over the trash, then
press the Dust Cup Empty button. The lid
will drop open, releasing dust and debris.
(Fig. 2.)
CLEANING THE AUTO-EMPTY DOCK FILTER (IA3000 ONLY)
For best results, clean the dock filter at
least once a month, and replace it regularly.
To access the dock filter, remove the filter
door. Press the button at the bottom of
the door, then tilt the door and lift it o.
Remove the filter and rinse it with cold
water ONLY and allow it to air-dry for at
least 24 hours before reinstalling. After the
filter has been rinsed and dried, reinsert it
into the dock, then replace the filter door.
MAINTAINING YOUR VACUUM
CLEANING THE SENSORS
Make sure to clean the Detect sensors
regularly, as hair and other debris may build
up and obstruct them. If the sensors are
partially obstructed, DETECT mode will not
function as expected.
To clean the sensors:
1. Turn o power and remove the floor nozzle.
2. Locate the Dirt Detect sensor in the nozzle
of the hand vac (Fig. 1), on the top of the
nozzle (Fig. 2).
3. Gently wipe the sensors with a microfiber
cloth and remove all hair and debris.
4. Reattach the floor nozzle to the rest of the
unit and turn on power. Verify that the unit
is functioning normally.
DIRT DETECT SENSORS
Fig. 1
Battery
Dust cup
Air path
EDGE DETECT SENSOR
For successful auto-empty evacuation,
regularly maintain the Exhaust Foam Filter.
To access the filter, remove the dust bin, then
vacuum o any fine debris from the filter
surface. Lift the filter out of the dock, then
rinse it with water only (do not use soap).
Allow the filter to air-dry completely before
reinstalling it.
Fig. 1
Fig. 2
Fig. 2
Fig. 1
Fig. 2
sharkninja.comsharkninja.com
Vacuum is not picking up debris. No suction or light suction. Third indicator light on hand
vacuum is solid yellow.
(Refer to Checking for Blockages section for more information.)
1. Dust cup may be full; empty dust cup.
2. Check floor nozzle for blockages; clear blockages if required.
3. Remove any string, carpet fibers, or hair that may be wrapped around the brushroll.
4. Check connection between hand vacuum and wand for blockages; clear blockages if required.
5. Check filters to see if they need cleaning. Follow instructions for rinsing and completely air-
drying the filters before reinstalling them.
Vacuum lifts area rugs.
1. Make sure you are not engaging BOOST mode. Take care when vacuuming area rugs or rugs
with delicately sewn edges.
2. Turn o the unit to disengage from the carpet, then restart.
The brushroll in the floor nozzle doesn’t spin.
1. Immediately turn o the vacuum. Remove any blockages before turning the vacuum back on.
Make sure the hand vacuum is tilted back far enough for the brushroll to engage while in use.
2. If the floor nozzle has headlights and they are not illuminated, there is a connection issue
between the hand vacuum, wand, and nozzle. Try detaching the parts, then reconnecting them.
Vacuum turns o on its own.
There are several possible reasons for the vacuum turning o on its own, including blockages,
battery issues, and overheating. If vacuum turns o on its own, perform the following steps:
1. Turn on the vacuum and check the battery indicator lights on the hand vacuum. If recharging
is needed, make sure vacuum power is o, and place it on the charging dock.
2. Empty dust cup and clean filters (See the Maintaining Your Vacuum section above.)
3. Check wand, accessories, and inlet openings and remove any blockages.
4. Allow unit and battery to cool for at least 45 minutes, until they return to room temperature.
5. Press the On/O switch to restart the vacuum.
MAINTAINING YOUR VACUUM
TROUBLESHOOTING
WARNING: To reduce the risk of shock and unintended operation, turn o
power and remove the battery before servicing.
NOTE: If vacuum still does not operate properly, contact Customer Service at support.sharkninja.com or call 1-855-427-5127.
If you run over a hard or sharp object or notice a noise change while vacuuming, check for
blockages or objects caught in the brushroll.
Checking for Blockages in
the Hand Vacuum:
1. Turn o the vacuum.
2. Remove the hand vacuum from
the wand.
3. Check all intake openings
to the dust cup and remove
any debris or blockages.
Checking for Blockages
in the Charging Post:
1. Unplug the dock.
2. Remove the vacuum from
the dock.
3. Press the latch on the back
of the charging post and lift
the post away from the dock.
4. Check the end of the
charging post and top of
the dock for any debris or
blockages.
Checking for Blockages in
the Wand:
1. Turn o the vacuum.
2. Detach the hand vacuum and
floor nozzle from the wand.
3. Check both ends of the wand
for blockages and debris.
4. Clear away any debris or
blockages.
Checking for Blockages in
the Dock:
1. Unplug the dock.
2. Remove the vacuum from
the dock.
3. Remove the dust bin from
the dock.
4. Remove any debris or
blockages from all inlets
and openings.
Checking for Blockages in the
Floor Nozzle:
1. Turn o the vacuum.
2. Detach the wand from the
floor nozzle.
3. Clear any blockages and
release any debris from the
brushroll and floor nozzle.
4. Slide the brushroll back
into the nozzle, ensuring
everything is lined up and
in place.
CHECKING FOR BLOCKAGES IN THE VACUUM
CHECKING FOR BLOCKAGES IN THE AUTO-EMPTY DOCK
MAINTAINING YOUR VACUUM
Error Message Codes
Malfunction Component Error icons phase 1 Error icons phase 2 LED Icons
Nozzle Clog or Stalling Nozzle LED Ring is Flashing Purple No LEDs
Motor Failure During Startup Hand Vacuum ECO, DETECT, BOOST LEDs on ECO, DETECT LEDs on
Over-Temperature Protection Hand Vacuum ECO, DETECT, BOOST LEDs on BOOST, DETECT LEDs on
Over Current protection Hand Vacuum ECO, DETECT, BOOST LEDs on No LEDs
Short Protection Hand Vacuum ECO, DETECT LEDs on No LEDs
Overspeed Protection Hand Vacuum DETECT LEDs on ECO, BOOST LEDs on
Communication Failure Hand Vacuum ECO, DETECT LEDs on DETECT, BOOST LEDs on
Over-Temperature Protection Nozzle ECO, BOOST LEDs No LEDs
Short Protection Nozzle DETECT, BOOST LEDs on No LEDs
Debris Detection Failure Hand Vacuum F0 LED & LED Ring on No LEDs
Edge Detect Error Nozzle
F0 LED on, LED Ring on &
Headlight LEDs on
No LEDs NOTE: Error icons will blink for 0.5 seconds
ECO
Icon
DETECT
Icon
BOOST
Icon
FO
Icon
LED
Ring
sharkninja.comsharkninja.com
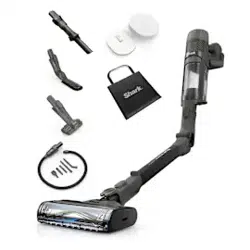
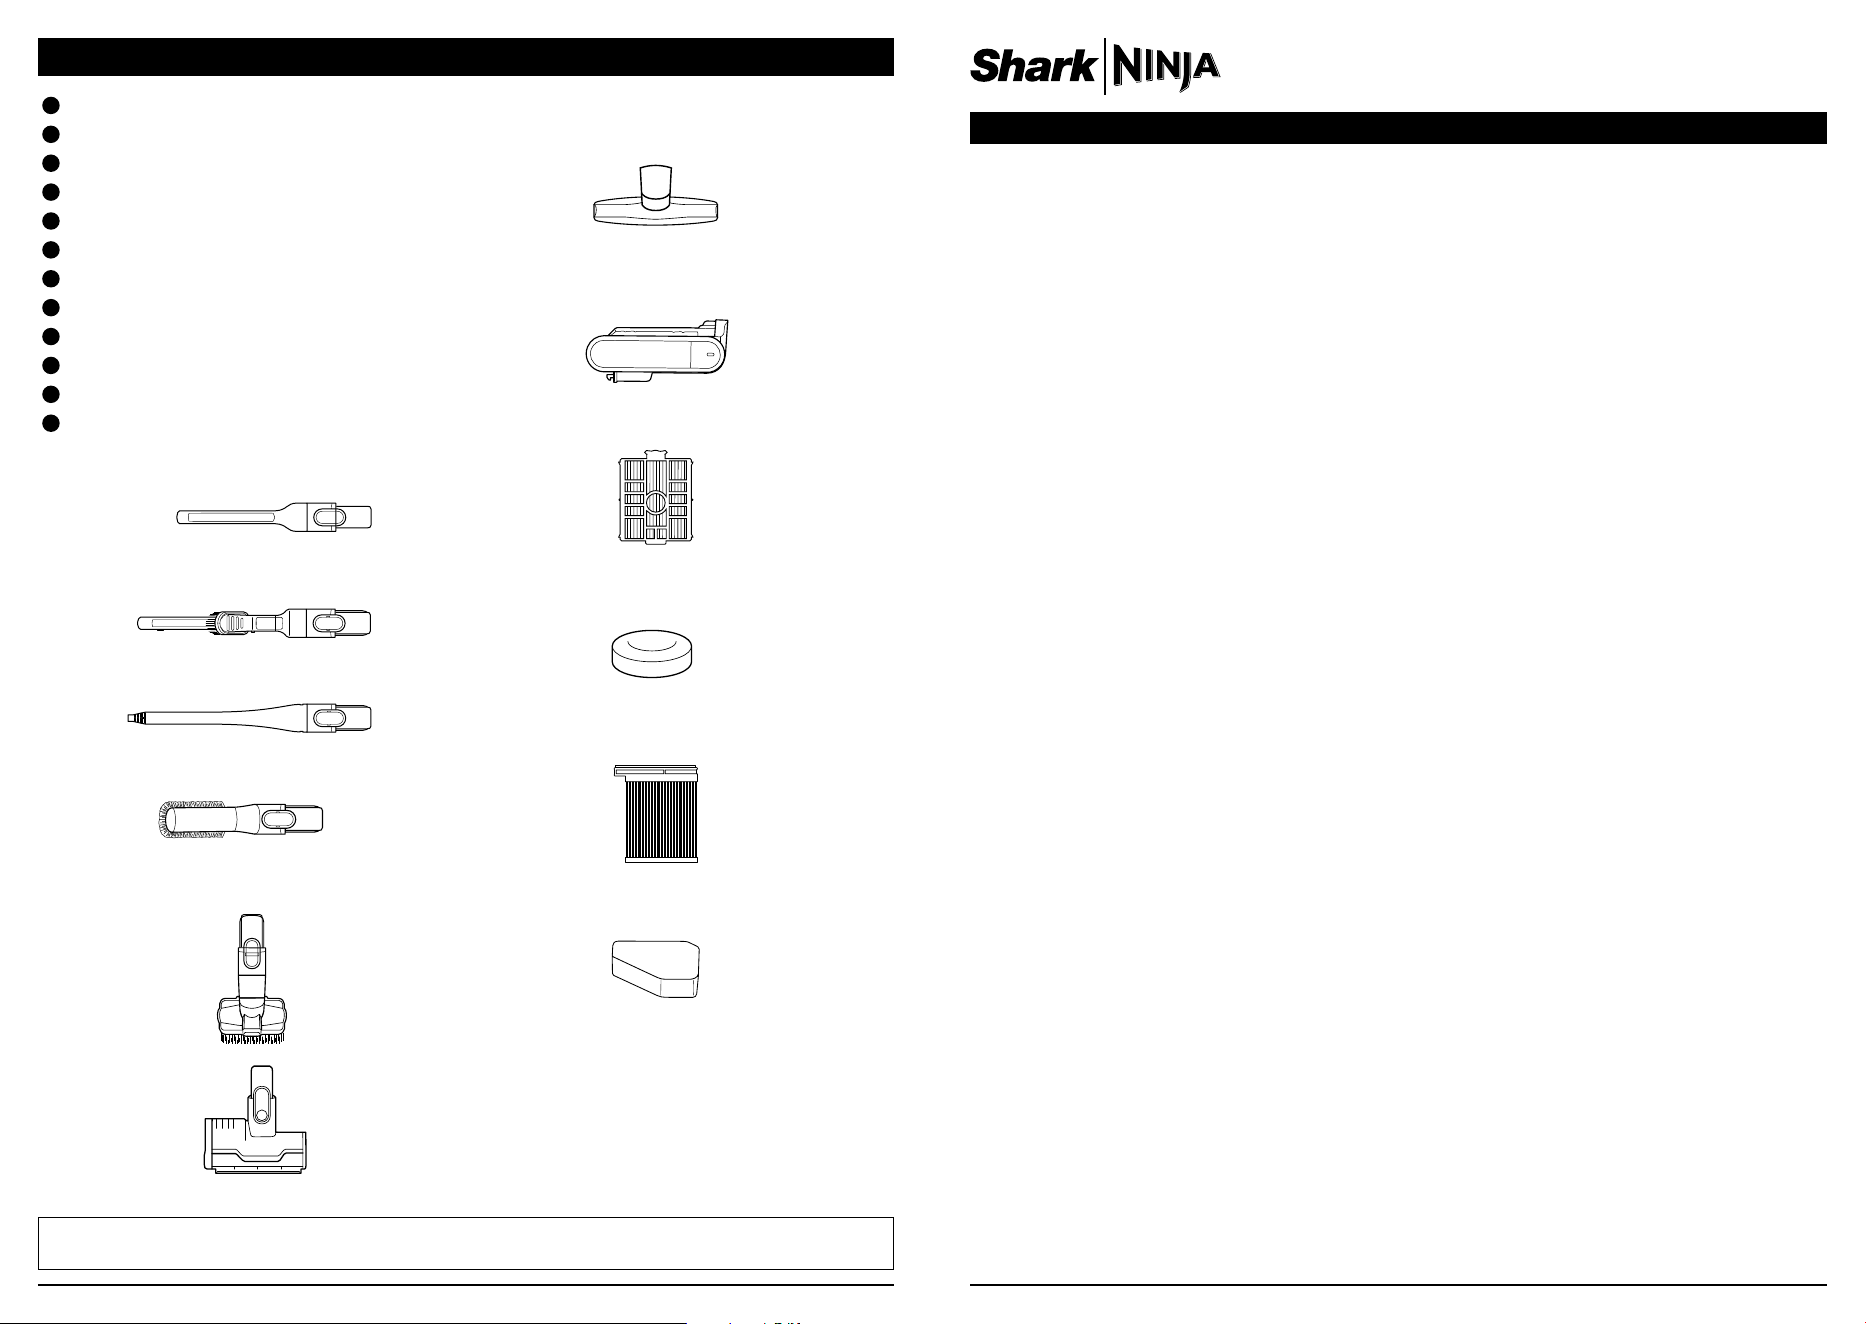
NOTE: Not all accessories come with all units. Please see the enclosed Quick Start Guide for your unit's configuration.
To order additional accessories, visit
sharkninja.com/parts-support/home-cleaning-parts/upright-vacuums
ADDITIONAL ACCESSORIES
A
Crevice Tool
B
Duster Crevice Tool
C
Flexible Crevice Tool
D
Anti-Allergen Brush
E
Pet Multi-Tool
F
Motorized Hand Tool
G
Wide Upholstery Tool
H
Replacement Battery
I
Auto-Empty Dock Post-Motor Filter
J
Hand Vacuum Pre-Motor Filter
K
Hand Vacuum Post-Motor HEPA Filter
L
Auto-Empty Dock Exhaust Foam Filter
D
C
F
B
A
G
E
H
I
J
K
L
FIVE (5) YEAR LIMITED WARRANTY
The Five (5) Year Limited Warranty applies to purchases made from authorized retailers of SharkNinja
Operating LLC. Warranty coverage applies to the original owner and to the original product only and is
not transferable.
SharkNinja warrants that the unit shall be free from defects in material and workmanship for a period
of five (5) years from the date of purchase when it is used under normal household conditions and
maintained according to the requirements outlined in the Owner’s Guide, subject to the following
conditions and exclusions:
California residents only:
The Five (5) Year Limited Warranty period begins on the original date of delivery or pickup.
What is covered by this warranty?
1. The original unit and/or non-wearable parts deemed defective, in SharkNinja’s sole discretion, will be
repaired or replaced up to five (5) years from the original purchase date.
2. In the event a replacement unit is issued, the warranty coverage ends six (6) months following the
receipt date of the replacement unit or the remainder of the existing warranty, whichever is later.
SharkNinja reserves the right to replace the unit with one of equal or greater value.
What is not covered by this warranty?
1. Normal wear and tear of wearable parts (such as foam filters, HEPA filters, pads, etc.), which require
regular maintenance and/or replacement to ensure the proper functioning of your unit, are not covered
by this warranty. Replacement parts are available for purchase at sharkninja.com/parts-support/
home-cleaning-parts/upright-vacuums.
2. Any unit that has been tampered with or used for commercial purposes.
3. Damage caused by misuse (e.g., vacuuming up water or other liquids), abuse, negligent handling, failure
to perform required maintenance (e.g., not cleaning the filters, not removing debris from the brushroll),
or damage due to mishandling in transit.
4. Consequential and incidental damages.
5. Defects caused by repair persons not authorized by SharkNinja. These defects include damages caused
in the process of shipping, altering, or repairing the SharkNinja product (or any of its parts) when the
repair is performed by a repair person not authorized by SharkNinja.
6. Products purchased, used, or operated outside North America.
How to get service
If your appliance fails to operate properly while in use under normal household conditions within the warranty
period, visit support.sharkninja.com for product care and maintenance self-help. Our Customer Service
Specialists are also available at 1-855-427-5127 to assist with product support and warranty service options,
including the possibility of upgrading to our VIP warranty service options for select product categories. So
we may better assist you, please register your product online at sharkninja.com/product-registration and
have the product on hand when you call.
SharkNinja will cover the cost for the customer to send in the unit to us for repair or replacement. A fee of
$25.95 (subject to change) will be charged when SharkNinja ships the repaired or replacement unit.
How to initiate a warranty claim
You must call 1-855-427-5127 to initiate a warranty claim. You will need the receipt as proof of purchase.
We also ask that you register your product online at sharkninja.com/product-registration and have the
product on hand when you call, so we may better assist you. A Customer Service Specialist will provide you
with return and packing instruction information.
How state law applies
This warranty gives you specific legal rights, and you also may have other rights that vary from state to
state. Some states do not permit the exclusion or limitation of incidental or consequential damages, so the
above may not apply to you.
sharkninja.comsharkninja.com
BATTERY REMOVAL AND DISPOSAL
This product uses a lithium-ion rechargeable and recyclable battery. When the battery no longer holds a
charge, it should be removed from the vacuum and recycled. DO NOT incinerate or compost the battery.
When your lithium-ion battery needs to be replaced, dispose of it or recycle it in accordance with local
ordinances or regulations. In some areas, it is illegal to place spent lithium-ion batteries in the trash or in a
municipal solid waste stream. Return spent battery to an authorized recycling center or to retailer for recycling.
Contact your local recycling center for information on where to drop o the spent battery.
The RBRC™ (Rechargeable Battery Recycling Corporation) seal on the lithium-ion battery indicates that the
costs to recycle the battery at the end of its useful life have already been paid by SharkNinja. In some areas,
it is illegal to place spent lithium-ion batteries in the trash or municipal solid waste stream and the RBRC
program provides an environmentally conscious alternative.
RBRC, in cooperation with SharkNinja and other battery users, has established programs in the United
States and Canada to facilitate the collection of spent lithium-ion batteries. Help protect our environment
and conserve natural resources by returning the spent lithium-ion battery to an authorized SharkNinja
service center or to your local retailer for recycling. You may also contact your local recycling center for
information on where to drop o the spent battery, or call 1-800-798-7398.
TIP: You can find the model and serial numbers on
the QR code label on the bottom of the back of the
hand vacuum and battery.
RECORD THIS INFORMATION
Model Number: �����������������������������
Date Code: ���������������������������������
Date of Purchase: ���������������������������
(Keep receipt)
Store of Purchase: ���������������������������
REGISTER YOUR PURCHASE
registeryourshark.com
TWO (2) YEAR LIMITED BATTERY WARRANTY
The Two (2) Year Limited Warranty applies to purchases made from authorized retailers of SharkNinja
Operating LLC. Warranty coverage applies to the original owner and to the original product only and is
not transferable.
SharkNinja warrants that the unit shall be free from defects in material and workmanship for a period
of two (2) years from the date of purchase when it is used under normal household conditions and
maintained according to the requirements outlined in the Owner’s Guide, subject to the following
conditions and exclusions:
What is covered by this warranty?
1. The original battery deemed defective, in SharkNinja’s sole discretion, will be replaced up to two (2)
years from the original purchase date.
2. In the event a replacement battery is issued, the warranty coverage ends six (6) months following the
receipt date of the replacement battery or the remainder of the existing warranty, whichever is later.
SharkNinja reserves the right to replace the unit with one of equal or greater value.
What is not covered by this warranty?
1. Normal wear and tear of the battery, which requires optimal temperature storage and operation to ensure
its proper functioning. Replacement batteries are available for purchase at sharkninja.com.
2. A battery that has been tampered with or used for commercial purposes.
3. Damage caused by misuse (e.g., vacuuming up water or other liquids), abuse, negligent handling, failure
to perform required maintenance (e.g., not cleaning the filters, not removing debris from the brushroll),
or damage due to mishandling in transit.
4. Consequential and incidental damages.
5. Defects caused by repair persons not authorized by SharkNinja. These defects include damages caused
in the process of shipping, altering, or repairing the SharkNinja product (or any of its parts) when the
repair is performed by a repair person not authorized by SharkNinja.
6. Products purchased, used, or operated outside North America.
How to get service
If your battery fails to operate properly while in use under normal household conditions within the warranty
period, visit support.sharkninja.com for product care and maintenance self-help. Our Customer Service
Specialists are also available at 1-855-427-5127 to assist with product support and warranty service
options. So we may better assist you, please register your product online at sharkninja.com/product-
registration and have the product on hand when you call.
SharkNinja will cover the cost for the customer to send in the unit to us for replacement. A fee of $20.95
(subject to change) will be charged when SharkNinja ships the replacement unit.
How to initiate a warranty claim
You must call 1-855-427-5127 to initiate a warranty claim. You will need the receipt as proof of purchase.
We also ask that you register your product online atsharkninja.com/product-registration and have the
product on hand when you call, so we may better assist you. A Customer Service Specialist will provide you
with return and packing instruction information when you call. A Customer Service Specialist will provide
you with return and packing instruction information.
How state law applies
This warranty gives you specific legal rights, and you also may have other rights that vary from state to
state. Some states do not permit the exclusion or limitation of incidental or consequential damages, so the
above may not apply to you.
TECHNICAL SPECIFICATIONS
Voltage: 18V
FCC WARNINGS
This equipment has been tested and found to comply with the limits for a Class B digital device, pursuant to parts 15 of the FCC Rules. These limits
are designed to provide reasonable protection against harmful interference in a residential installation. This equipment generates, uses, and can
radiate radio frequency energy and, if not installed and accordance with the instructions, may cause harmful interference to radio communications.
However, there is no guarantee that interference will not occur in a particular installation. If this equipment does cause harmful interference to radio
or television reception, which can be determined by turning the equipment o and on, the user is encouraged to try to correct the interference by one
or more of the following measures:
■ Reorient or relocate the receiving antenna.
■ Increase the separation between the equipment and receiver.
■ Connect the equipment into an outlet on a circuit dierent from that to which the receiver is connected.
■ Consult the dealer or an experienced radio/TV technician for help.
This Device complies with part 15 of the FCC rules. Operation is subject to the following conditions:
1 This device may not cause harmful interference
2 This device must accept any interference received, including interference that may cause undesired operation.
Changes or modifications not expressly approved by the party responsible for compliance could void the user’s authority to operate this device.
sharkninja.comsharkninja.com
NOTES NOTES
© 2026 SharkNinja Operating LLC. SHARK and MULTIFLEX are registered trademarks of SharkNinja Operating LLC.
POWERDETECT is a trademark of SharkNinja Operating LLC.
RBRC is a trademark of Rechargeable Battery Recycling Corporation.
IA3241�IB�MP�Mv2
PLEASE READ CAREFULLY AND KEEP FOR FUTURE REFERENCE.
This Owner’s Guide is designed to help you get a complete understanding of your new
Shark® POWERDETECT™ Speed Clean & Empty Cordless Vacuum.
SharkNinja Operating LLC
US: Needham, MA 02494
CAN: Ville St-Laurent, QC H4S 1A7
1-855-427-5127
sharkninja.com
Illustrations may dier from actual product. We are constantly striving to improve our products;
therefore the specifications contained herein are subject to change without notice.
This product may be covered by one or more U.S. patents. See sharkninja.com/patents for
more information.