
User Guide

2
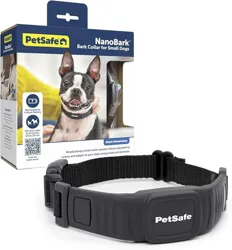
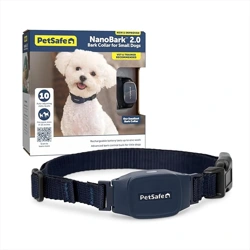
NanoBark
™
2.0
Bark Collar for Small Dogs
Before we start:
We know that teaching your dog when not to bark can
be challenging. Keep these things in mind as you begin
training:
We care about
your dog’s
safety.
This bark collar has a unique sensor
that provides the most reliable bark
detection available. The 10 correction
levels are designed specifically for
small- to medium-sized dogs and are
very gentle, even when levels need to
increase. As a safety feature, if your
dog barks 15 times or more within
an 80-second period, the bark collar
will automatically time out for 30
seconds.
Not all
barking
is bad.
Your dog barks for a variety of
reasons, many of which may be
desirable, such as warding off threats
or alerting you to unexpected visitors.
Reserve the use of the bark collar for
situations in which your dog’s bark is
excessive or obtrusive — for example,
maybe your dog loves to bark outside
late at night or greets your guests
a little too loudly. Appropriate and
consistent use of the bark collar
can substantially reduce and even
eliminate this nuisance barking.

3
Let’s take your dog from
yappy to happy.
Take care
to get the
rightfit.
Proper fit is essential to the
effectiveness and safety of the bark
collar. A bark collar worn too loosely
won’t accurately detect and correct
your dog’s barks, but a bark collar
worn too tightly (or too long) may
irritate your dog’s skin. Avoid leaving
the bark collar on your dog for more
than 12 hours a day, and please read
this guide and the customer care
guide thoroughly for important safety
information about how to fit and use
the bark collar.
Important: Do not use the bark collar
on dogs younger than 6 months old.
4
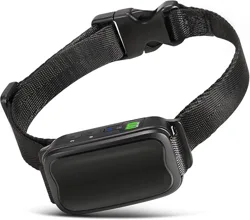
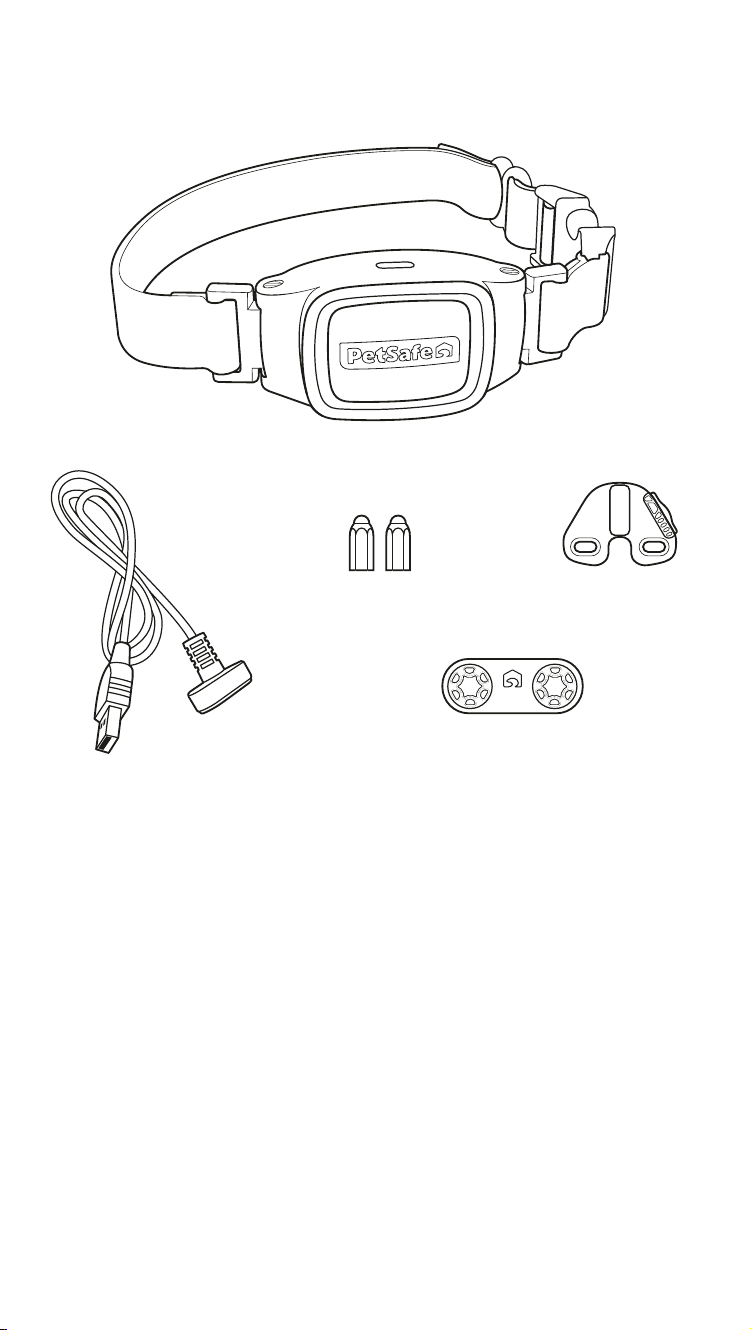
What you have:
How it works:
The bark collar starts learning your dog’s bark pattern after
the first two to three barks and automatically adjusts its
correction for your dog’s personality and barking habits.
There are 10 levels of static correction. The first time
your dog barks, they will receive the lowest level of
static correction. If they continue barking, the correction
intensity will increase with each successive bark until the
barking stops. This correction level becomes the starting
point the next time your dog barks. Once your dog
has learned to reduce their barking, the initial warning
corrections are automatically decreased.
Bark collar with short contact points
USB-A charging cable
(USB-A adaptor not included)
Test light
tool
Anti-strip
wrench
Long contact points
5
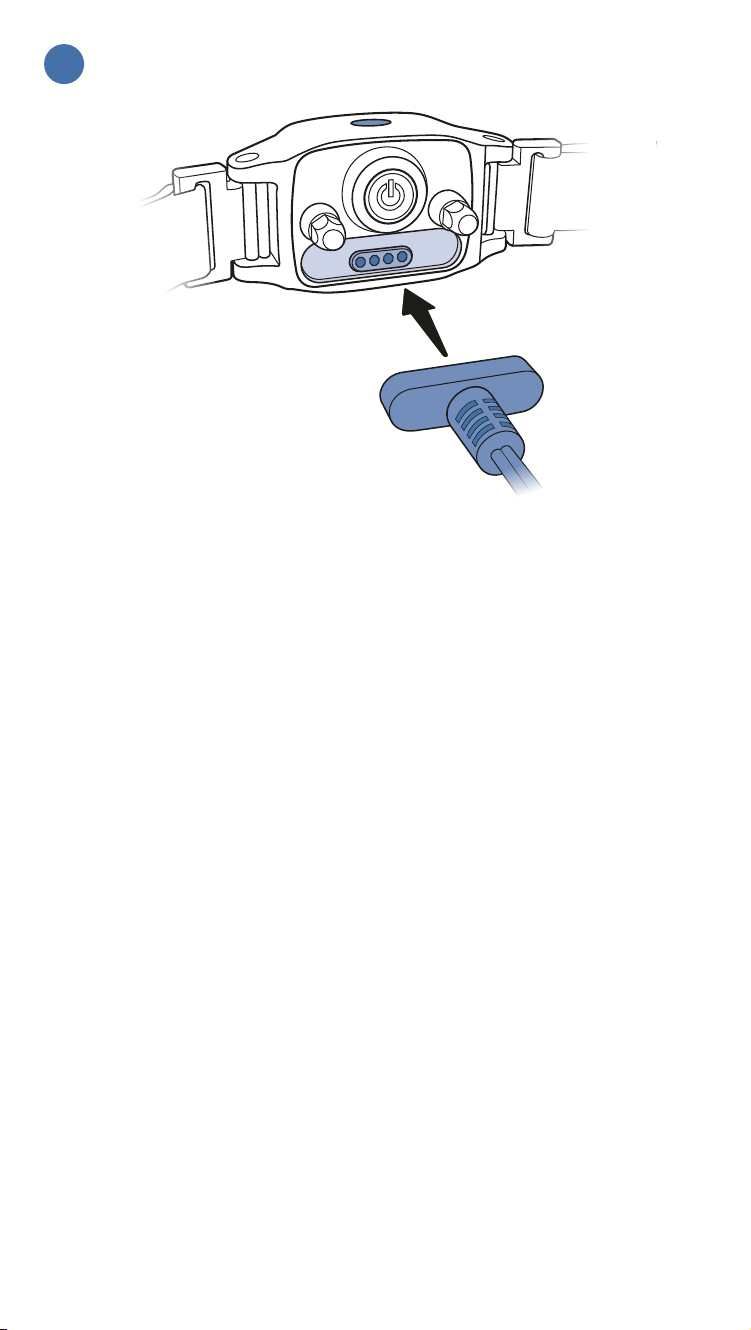
Connect the USB-A charging cable to the magnetic
charging port on the back of the collar and then plug
it in to a USB-A outlet or adaptor. Leave the bark collar
plugged in until it is fully charged; this will take about
2 hours.
The LED on the top of the bark collar will glow green
when the collar is charging and will turn off when the
bark collar is fully charged.
Average battery life is up to 7 days, depending on how
often your dog barks.
Charge the bark collar
1
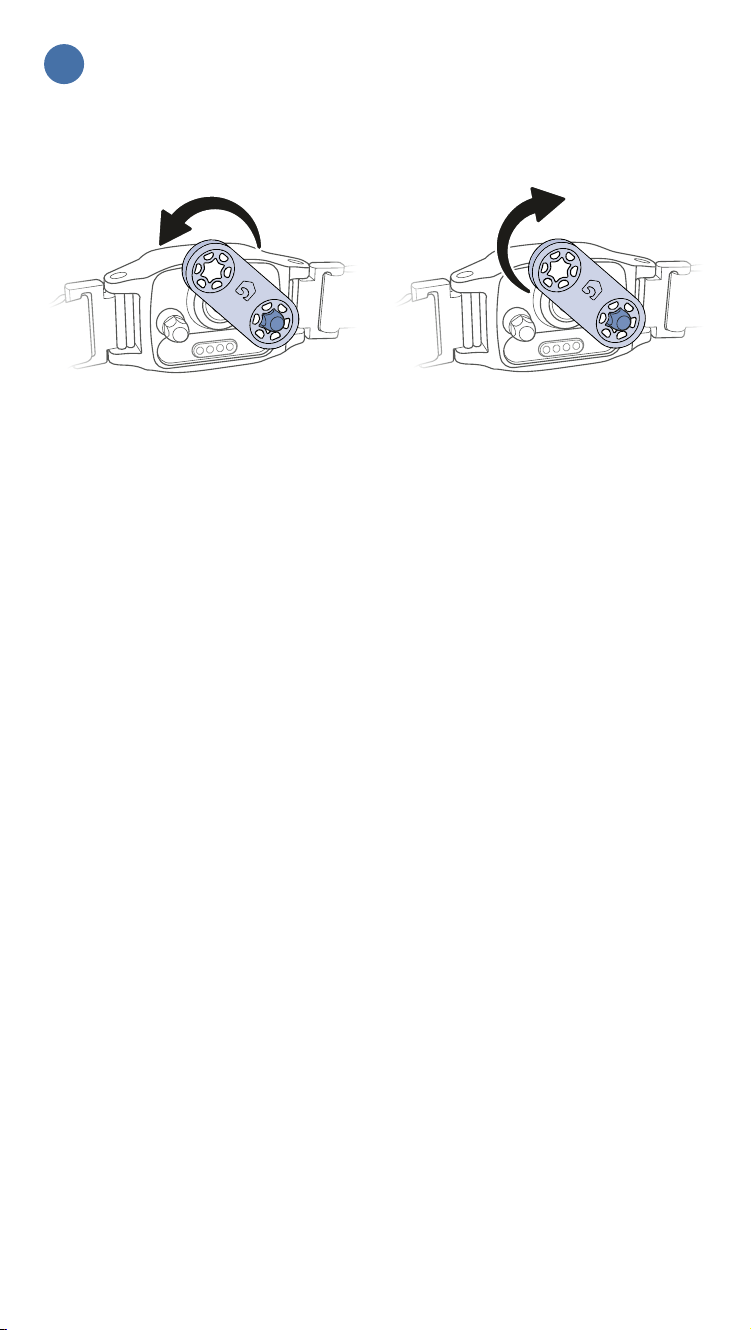
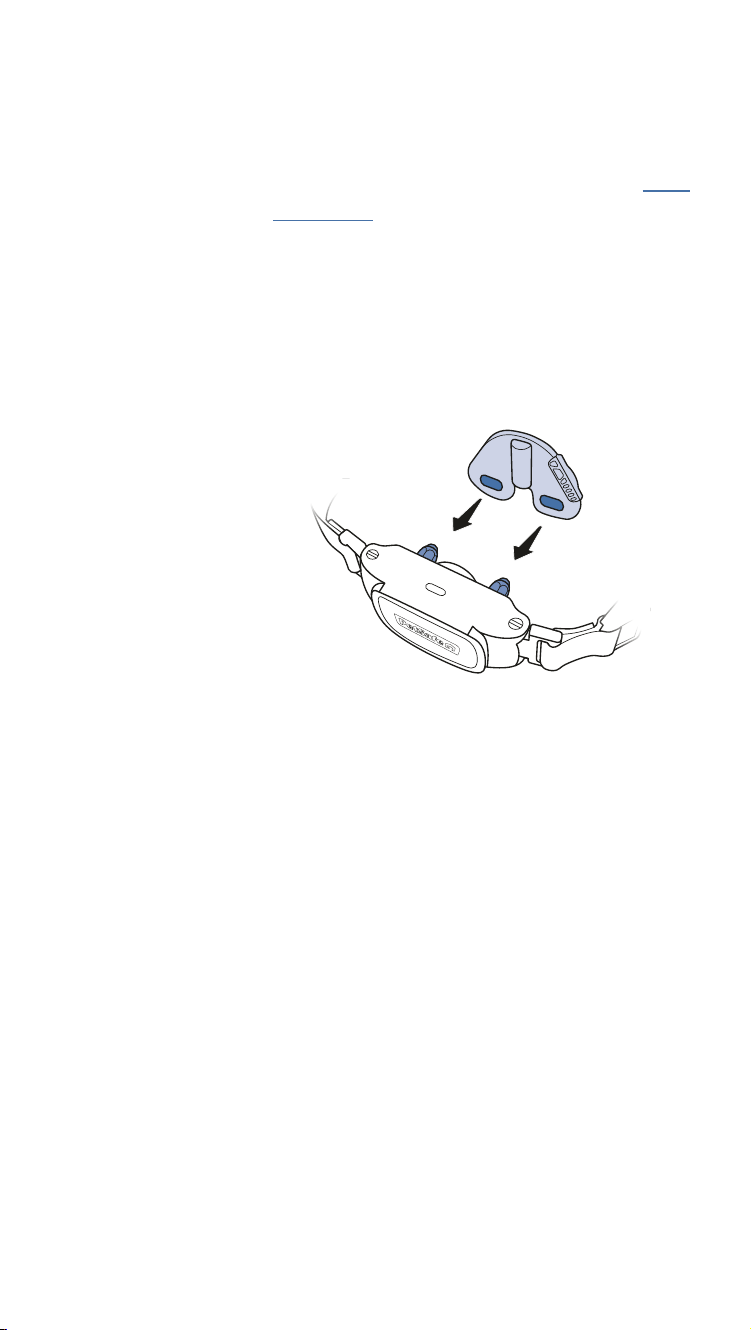
The bark collar comes with short contact points
preinstalled. If your dog has long or thick hair, it may
be necessary to switch to the long contact points
provided or trim (not shave) the hair around the
contact points to make sure that contact is consistent.
Important: Use the provided anti-strip wrench to
loosen and tighten the contact points. Do not use any
other tool to tighten the contact points; this can lead
to overtightening and may damage the collar.
To loosen: To tighten:
Select contact points
2
7
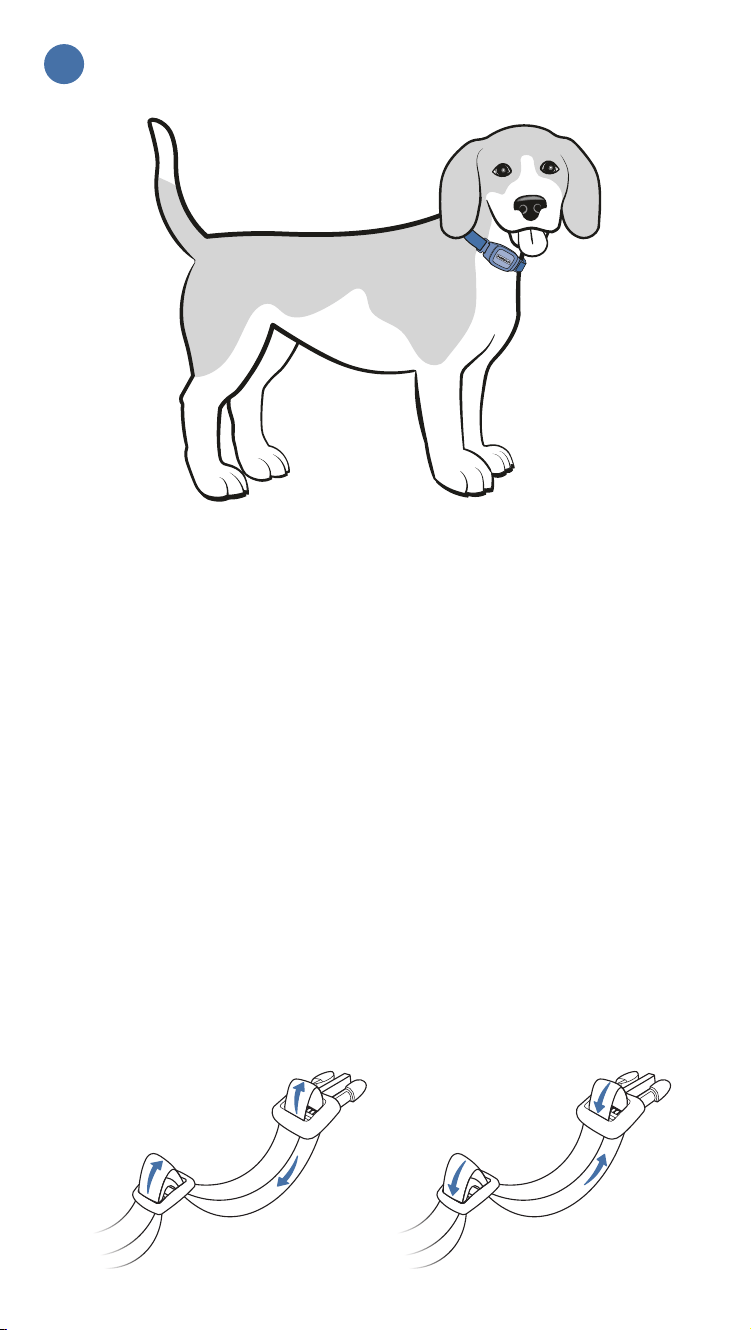
With your dog standing comfortably, place the bark
collar high around their neck, close to the ears. The
contact points should be centered directly under your
dog’s chin, touching the skin.
Check the tightness of the bark collar by inserting one
finger between the collar and your dog’s neck. The
fit should be snug but not constricting. If your dog
shakes their head (after fitting), the collar should not
move.
Remember to recheck the fit of the bark collar
frequently as your dog becomes comfortable
wearingit.
Important: Metal hardware or tags on other collars
can interfere with the bark collar and cause false
corrections. If your dog wears a second collar, it must
be non-metallic.
Fit the bark collar
3
To loosen: To tighten:
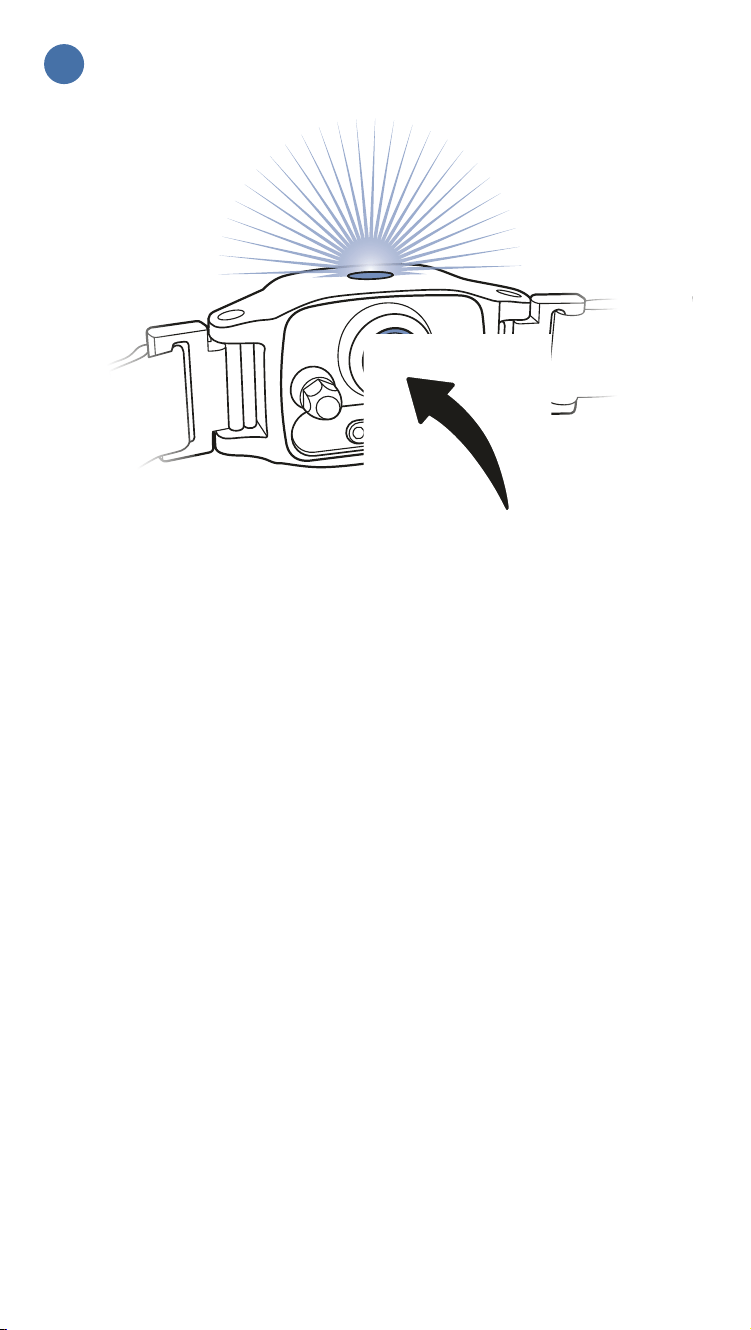
8
Turn the bark collar on by pressing and holding the
power button until the bark collar beeps low to high
and the LED on the top of the collar flashes green.
The LED will flash every 5 seconds (green or red) to
indicate battery charge.
Turn the bark collar on
4

9
Stay with your dog the first few times they wear
the bark collar. They may initially be startled by the
correction and bark more. If this happens, speak to
your dog in a calm, reassuring voice until they relax.
They’ll soon realize that the correction stops when
they are quiet.
You should notice a reduction in your dog’s barking
within the first couple of days of wearing the bark
collar. At this point, it is important to remember the
learning process is still not complete. Dogs will test
this new learning experience and may increase their
attempts to bark. This usually occurs during the
second week a dog wears the bark collar. If this does
occur, remain consistent and do not alter your use of
the bark collar.
Use the bark collar
5

10
If your dog barks and the bark collar doesn’t seem to be
correcting them:
Recheck
the fit.
The bark sensor uses vibration
to detect your dog’s bark. This is
what prevents the bark collar from
correcting your dog for other dogs’
barking or loud noises nearby.
If the bark collar is too loose, the
bark sensor will not be able to detect
the vibration of your dog’s vocal
cords and the bark collar will not
issue a correction. Likewise, if the
contact points are not in contact with
your dog’s skin, they will not feel a
correction if issued.
11
Test the
bark collar.
If you are certain you have fit the
bark collar properly to your dog but
it still doesn’t seem to be working,
complete the following steps to test
the bark collar. You will need the test
light tool.
1. With the bark collar charging, press
and hold the power button.
2. Continue to hold the power
button while disconnecting
the bark collar from the USB-A
charging cable.
3. When the LED turns blue, release
the power button and then hold
the test light tool to the collar’s
contact points.
After a 2-second delay, the bark
collar will be in test mode. For
each level, the collar will beep
and then the test light tool will
flash (level 1 = 1 beep, level 2 =
2 beeps, etc.).
4. When the test is complete, the
bark collar will beep high to low
and turn itself off. You can stop
the test at any time by pressing the
power button.

12
Remember these important tips when using your
bark collar:
Be consistent.
Use the bark collar in every situation
in which you want your dog to be
quiet. If your dog realizes they are not
wearing their bark collar, they may
resume unwanted barking habits,
which can delay their learning.
Attach
your leash
separately.
When using a leash, attach it to a
separate, non-metallic collar or
harness. Important: Please don’t
attach a leash to the bark collar, as
this puts too much pressure on the
contact points.
Maximize
battery life.
Turn off the bark collar when not
in use by pressing and holding the
power button until the bark collar
beeps high to low and the LED
flashes red and then turns off.
Turn down the noise.
Turn up the joy.

1-Year Limited Warranty | ©2026 Radio Systems Corporation
Model: PBC00-18240 | 400-2752/1
For important safety instructions, please see the customer care guide.
For questions or additional tips:
support.petsafe.com
We’re here to help!
NanoBark
™
2.0
Bark Collar for Small Dogs