
User Manual
Bark Collar
6
you'll hear a sound and the green LED will keep on.
2.Press the “M” bu�on again a�er turned on, you can choose
between the electronic shock and vibra�on func�on. The green
LED means the vibra�on mode, and the blue LED means the
electronic shock mode.
3.In the electronic shock mode, press the “S” bu�on for 2
seconds to start se�ng the electronic shock level, you'll hear a
rapid didi sound and the blue LED will flash.
There are 6 different levels of electronic shock s�mula�on
offered, press the “S” bu�on to set the suitable shock s�mula�on
level. The bigger the number is, the stronger the shock level will
be.
To quit se�ng the electronic shock level, press the “S” bu�on for
2 seconds and release it �ll you hear the didi sound and the blue
LED keeps on.
4.To check if the bark collar delivers the shock s�mula�on, please
whistle toward the sensor port as loudly as possible and put the
test light tool on the probes. It's delivering the electronic shock
s�mula�on if the test light tool is lighted(please see the below
Risk of skin damage
Please read and follow the instruc�ons in this manual.
The proper fit of the collar is important. A collar worn for too
long or made too �ght on the pet's neck may cause skin damage.
Ranging from redness to pressure ulcers; this condi�on is
commonly known as bed sores.
Things we would recommend to do
• Avoid leaving the collar on the dog for more than 10 hours per
day.
• If possible, re-posi�on the collar on the pet's neck every 1 to 2
hours.
• Check the fit to prevent excessive pressure; follow the
instruc�ons in this manual.
• Never connect a lead to the electronic collar; it will cause
excessive pressure on the contact points of the bark collar.
• When using a separate collar for a leash, don't put pressure on
the electronic collar.
• Wash the dog's neck area and the contacts of the collar weekly
with a damp cloth.
• Examine the contact area daily for signs of a rash or a sore.
• If a rash or sore is found, discon�nue the use of the collar un�l
Welcome
We aim to help you have the best companionship and the most
memorable moments with your dog together. This bark collar is
designed to safely and humanely eliminate nuisance barking.
Before ge�ng started, please take a moment to read through the
important safety informa�on.
Warnings
Not for use with aggressive dogs.
Do not use this product if your dog is aggressive, or if your dog is
prone to aggressive behavior. Aggressive dogs can cause severe
injury and even death to their owners and others.
If you are unsure if this product is appropriate for your dog,
please consult your veterinarian or a cer�fied trainer.
Cau�ons
Best fit
This product is not a toy. Keep it away from the reach of children.
Use it only for its bark stopping purpose.
This bark collar can be used with dogs of all sizes, but they are
par�cularly well suited for medium to large-sized dogs
.
3
the skin has healed.
• If the condi�on persists beyond 48 hours, see your veterinarian.
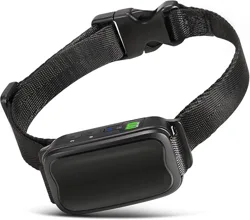
In the Box
Bark Control Device: to release different func�ons to control the
dog's bark
Test Light Tool:
to check if there is electronic shock s�mula�on
Contact Points:
to deliver the electronic shock s�mula�on
USB Charging Cable Cotton Webbing User Manual
User Manual
Bark Collar
Bark Control Device Contact Points Test Light Tool Webbing Slider
5
Step 2.Thread the Webbing through the Webbing Slider and the
Side Release Buckle
Step 3.
Screw the Probes
NOTE:
only do this if you are going to set the electronic shock
func�on. If you prefer the vibra�on mode, Step 3
can be ignored.
Test the Collar
1.Press the “M” bu�on for 2 seconds to turn the bark collar on,
4 5 6
DC5V
DC5V
4
LED Display: to show the sensi�vity level and shock s�mula�on
level
M Bu�on:
to power on or off; switch different modes
S Bu�on:
to adjust different sensi�vity levels or shock levels
Prepare the Collar
Step 1. Thread the Webbing through the Bark Control Device
1 2 3
LED Display
M Button
S Button
Sensor Port
For any urgent matter, please contact us at
21
Sorferina Dog Bark Collar

13
Q: Can I a�ach a leash to the bark collar?
A: No. This can result in pulling the contact points too �ghtly
against your dog’s neck. A�ach a leash to a separate,
non-metallic collar or a harness, making sure the extra collar
does not put pressure on the contact points.
Q: Nothing happened a�er I had whistled toward the sensor
port, what should I do?
A: Try to whistle as loudly as possible; if you can not trigger the
bark collar by whistling, try to download some dog barking
sounds from the internet to your cellphone, and feed the speaker
of the cellphone toward the sensor port when test the bark
collar. Make sure the barking sound downloaded is loud enough.
Q: The bark collar didn’t work a�er soaking in the water.
A: Our bark collar is designed with the rainproof feature. Please
make sure the charging port is sealed well by the rubber cover to
avoid ge�ng wet. We would recommend you to dry the bark
collar a�er your dog got caught in the rain. Please do not soak
the collar in the water for a long �me.
10
Charge the Collar
1. Li� the rubber cover protec�ng the charging port and connect
the USB charging cable.
2. Plug the charging cable into the USB end of the computer or
power bank. The le�er “C” on the LED screen will start flashing.
3. Recharges take no more than 2 hours. Although your bark
collar should be par�ally charged, you'll want to fully charge it
before using it for the first �me. The le�er “C” will keep on a�er
charging is complete.
4. When the bark collar is charged, replace the rubber cover.
Excessive charging can shorten ba�ery life. Only charge the bark
collar when any situa�on in the following occurs.
1) Use the collar for the first �me
2) When you see the low ba�ery indica�on
3) Charge the collar once every 60 days when not use for a long
�me
NOTE
:the le�er “L” will appear on the LED screen and start
flashing when the bark collar is in low ba�ery. And the device will
be turned off automa�cally a�er 3 minutes.
12
you should never shave your pet's neck as this may increase the
risk of skin irrita�on.
4.Check the �ghtness of the collar by inser�ng one finger
between the end of a contact point and your dog's neck (C). The
fit should be snug but not constric�ng.
5.Allow your dog to wear the collar for several minutes, and then
recheck the fit.
Check the fit again as your dog becomes more comfortable with
the collar.
6.For extra webbing, please cut it off and use a lighter to seal the
end.
NOTE:do not shave the pet's neck as this may increase the risk
of skin irrita�on. The collar should not be worn for more than 10
hours out of every 24-hour period. Leaving the collar on too long
could lead to skin irrita�on.
Frequently Asked Ques�ons
Q: How old does a pet have to be before using the bark collar?
A: Your pet should be at least 6 months old before using the bark
collar. The collar may be too large for dogs under 8 lb to wear
comfortably.
8
vibra�on mode and release it �ll you feel the vibra�on delivered
from the bark control device. To turn on the didi sound again,
please press the “S” bu�on for 2 seconds in the vibra�on mode
�ll you hear a long beep sound.
2.Make sure you have tested the bark collar before put it on your
dog's neck. Also, take 1 or 2 hours for your dog to get used to
wear the bark collar before turn it on and start the training.
How it Works
Our bark collar uses several features designed to shorten the
training phase and promote good behavior.
The following two charts will help you understand how our bark
collar works.
9
With Didi Sound
Without Didi Sound
MODE
1st-10th
11th
1st-10th
11th
Sound+
Vibra�on
6 �mes Vibra�on
Sleep Mode
3 seconds
Shock
Sleep Mode
3 seconds
6 �mes
Sound+
Shock
BARKS SOUND FUNCTION DURATION
MODE
Vibra�on
1st-10th
11th
1st-10th
11th
Vibra�on
Sleep Mode
3 seconds
Shock
Sleep Mode
3 seconds
Shock
BARKS FUNCTION DURATION
7
picture)
5.If you whistle toward the sensor port a�er selected the
vibra�on mode, you'll feel the bark control device vibrates a�er
the rapid didi sound.
6.There are 6 different sensi�vity levels offered for different dog
breeds, you can find a suitable level by pressing the “S” bu�on.
The bigger the number is, the more easily the bark collar will be
triggered.
7.Press the “M” bu�on for 2 seconds to turn the bark collar off.
NOTE:
1. You can shut off the annoying didi sound by se�ng in the
vibra�on mode. Press the “S” bu�on for 2 seconds in the
Whistle toward the
sensor port
11
Fit the Collar
Important: the proper fit and placement of the bark collar are
important for effec�ve opera�on. The contact points must have
direct contact with your dog's skin on the underside of his neck
(if you don't intend to set the electronic shock mode or didn't
screw the probes, please make sure the backside of the bark
collar has direct contact with your dog's neck).
1.Make sure that the collar is turned off.
2.Start with your dog standing comfortably (A).
3.Place the collar on your pet so that the LED screen is right side
up and the collar is directly under your dog's chin. Center the
contact points underneath your dog's neck, touching the skin (B).
NOTE
:it is some�mes necessary to trim the hair around the
contact points to make sure that contact is consistent. However,
A
B
C
A
B
C