©2020 Sonance. All rights reserved. Sonance is a registered trademarks of Dana Innovations. Due to continuous product improvement, all features and
specifications are subject to change without notice. For the latest Sonance product specification information visit our website: www.sonance.com
SONANCE • 991 Calle Amanecer • San Clemente, CA 92673 USA
PHONE: (949) 492-7777 • FAX: (949) 361-5151 • Technical Support: (949) 492-7777 • www.sonance.com
07.06.2020
INSTALLATION INSTRUCTIONS
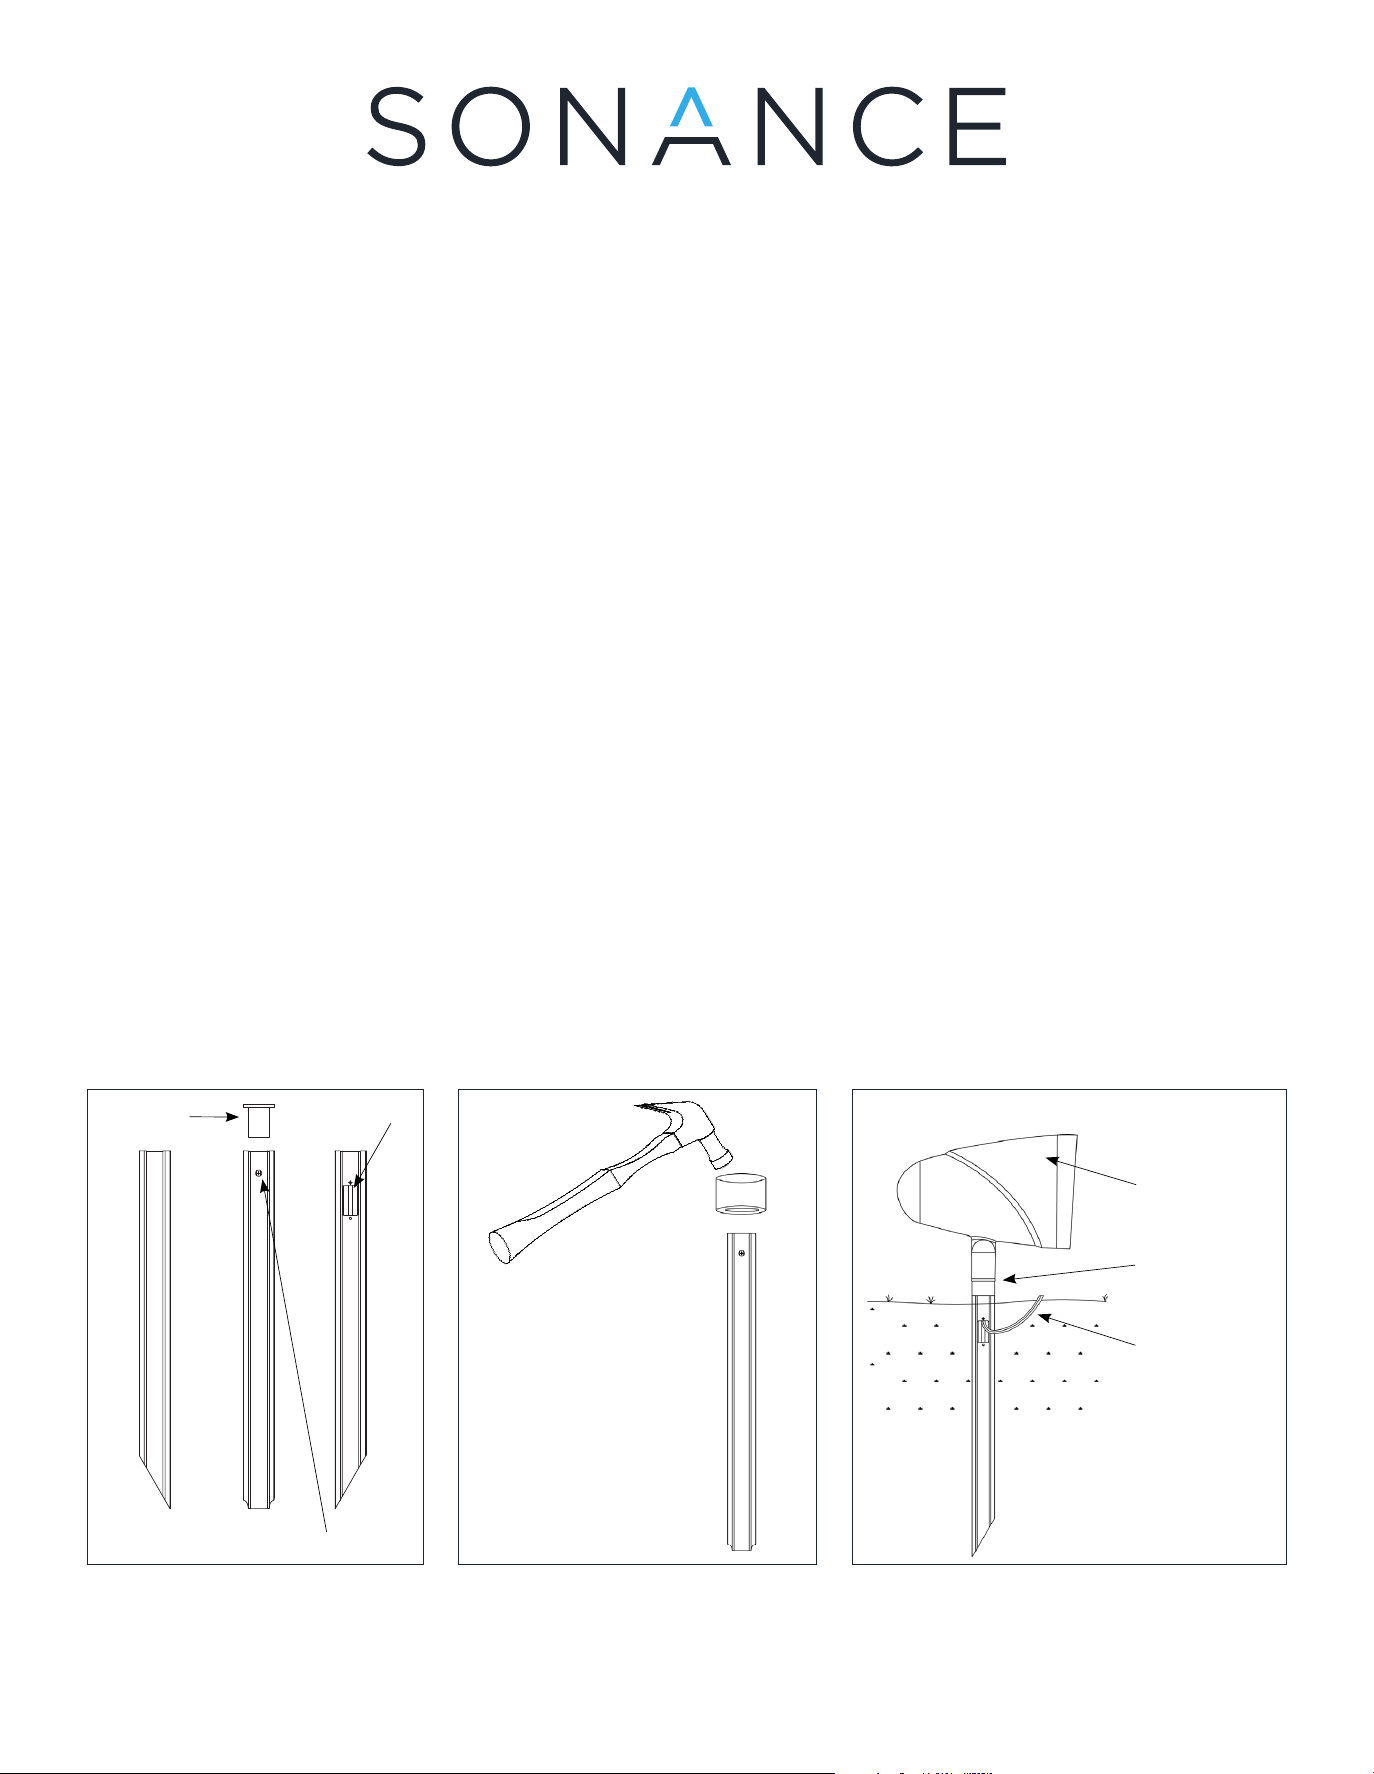
1. Remove the Satellite Mounting Plate from the top
of the stake by using an Allen Wrench to loosen
and remove the locking bolt from the side of the
stake. Lift the mounting plate straight up to remove
(see Figure 1).
2. Thread the mounting plate to the satellite speaker
and reserve for step 5.
3. Use a Phillips head screwdriver to remove the Wire
Through Plate on the side of the stake, held by two
screws (see Figure 1).
READ THIS DOCUMENT IN ITS
ENTIRETY BEFORE ATTEMPTING
INSTALLATION.
This stake is intended for installation in accordance
with the National Electrical Code and local code
specifications. Failure to adhere to these codes
and instructions may result in serious injury and/or
damage to the stake and will void the warranty. These
instructions cover most installation applications. For
any special applications not covered, please contact
Sonance for assistance.
4. Drive the stake into the ground (see Figure 2).
• For installation in soft soil: The stake can be installed
without excavating the soil. Place a block of wood or
the Sonance Premium Aluminum Installation Cap
(sold separately, part #: 93447) on top of the stake
and drive it into the ground by striking the wood or
cap with a hammer.
5. Take the reserved satellite with attached mounting
plate and thread the wire from the satellite through
the top of the stake to pull through the side opening
where the wiring plate used to be.
6. Place the satellite speaker and attached mounting
plate into the top of the stake, careful to position the
speaker toward the desired listening area and insert
then tighten locking bolt. To adjust the speaker
swivel in the threading of the mounting plate until
the desired position is achieved.
7. Connect satellite to cable per the installation
instructions for the satellite.
18” PREMIUM ALUMINUM GROUND STAKE | SONANCE LANDSCAPE SERIES
INSTALLATION GUIDE
Figure 2Figure 1
Speaker Wire
Satellite Locknut
Satellite Speaker
Satellite
Mounting Plate
Wire Through
Plate
Locking Bolt
Figure 3
