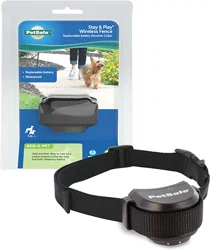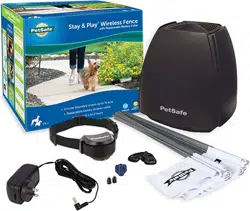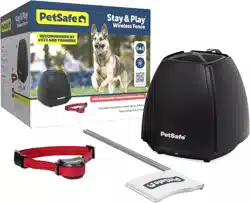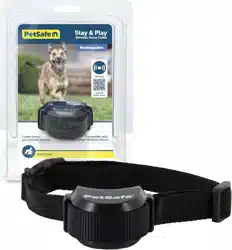
Stay & Play
®
Wireless Fence with
Replaceable Battery Collar
Congratulations
on your purchase!
Scan the QR code to access quick
start guides, support videos and
live chat. Your product comes with
a 1-year limited warranty.
Scan to access the
quick start guide
Wireless Fences
We’re here to help.
Access our Product
Support Site 24/7
Contact our U.S.-Based
Customer Care
Scan to access quick start guides,
support videos & live chat at
support.petsafe.com
We’re happy to help via phone
during business hours at
1-800-732-2677
KEEP THIS INSERT FOR FUTURE REFERENCE
400-2798PIF00-15001
Get Started!

2
Help keep your best friend safe on their home turf.
Stay & Play
®
Wireless Fence
with Replaceable Battery Collar
Before we begin
As you set up your new wireless fence, keep in mind:
This product creates a
wireless play area for
your pet to explore.
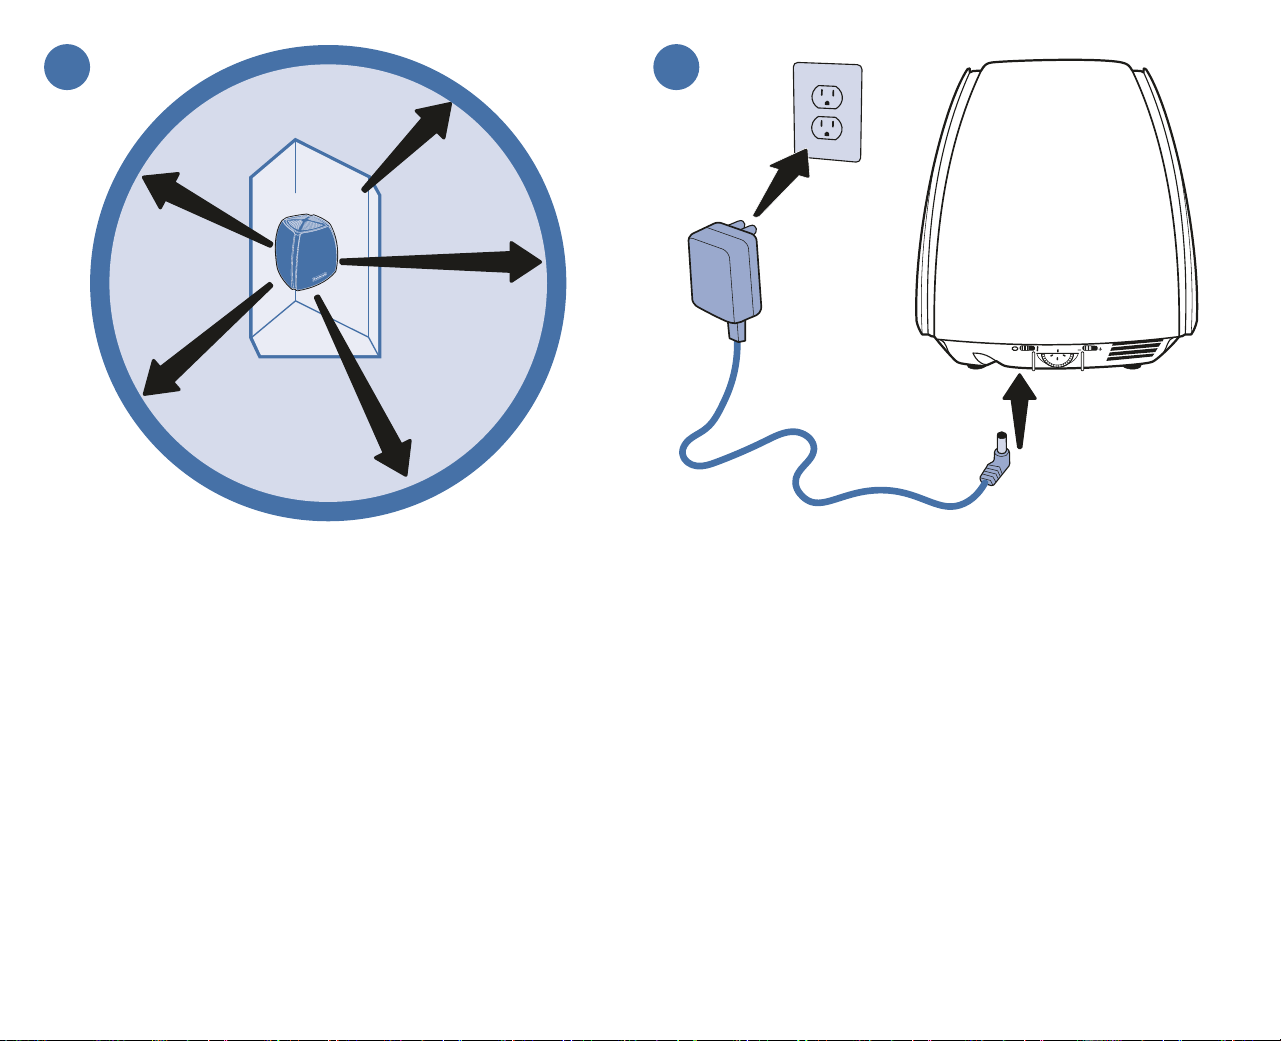
The transmitter emits a radio signal in a 5- to 105-foot radius in all directions, creating a circular
boundary called the pet area.
Small flags will visually reinforce where the boundary zone is. Once your dog is properly trained, you
will be able to remove the flags and allow your dog to roam freely in the pet area.
If your dog roams outside the pet area, the receiver collar sounds a warning tone, then delivers a static
correction through the contact points. The correction is designed to get your dog’s attention and prompt
them to return to the safety of the pet area.
It may take a few
tries to set up your
transmitter.
The transmitter is the source of the radio signal and will always be at the exact center of the pet area.
It should be placed off the floor in your home, away from any large metal objects. You may need to
move the transmitter a few times before you find the best spot.
It is important to
help keep your pet
comfortable and safe.
Important:
• Avoid leaving the receiver collar on your dog for more than 12 hours a day. Before beginning,
please read this guide and the Let us help! guide thoroughly for important safety information
about how to fit and use the receiver collar.
• Take care to choose the best correction level for your pet’s temperament. Many dogs respond well
to tone-only correction after proper training.
This product limits static correction duration to 15 seconds to prevent over-correction. In the unlikely
event your pet leaves the pet area, they will not receive a static correction upon their return.
Training time may
vary from pet to pet.
Properly training your pet is essential to the success of the wireless fence. The online training guide will
walk you through our recommended training method.
3
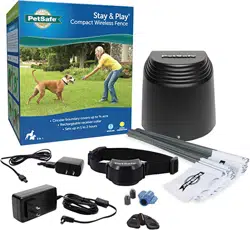
What you have
What you need
• Screwdriver
• Scissors
• Lighter
• Tape measure
• Non-metallic collar and leash
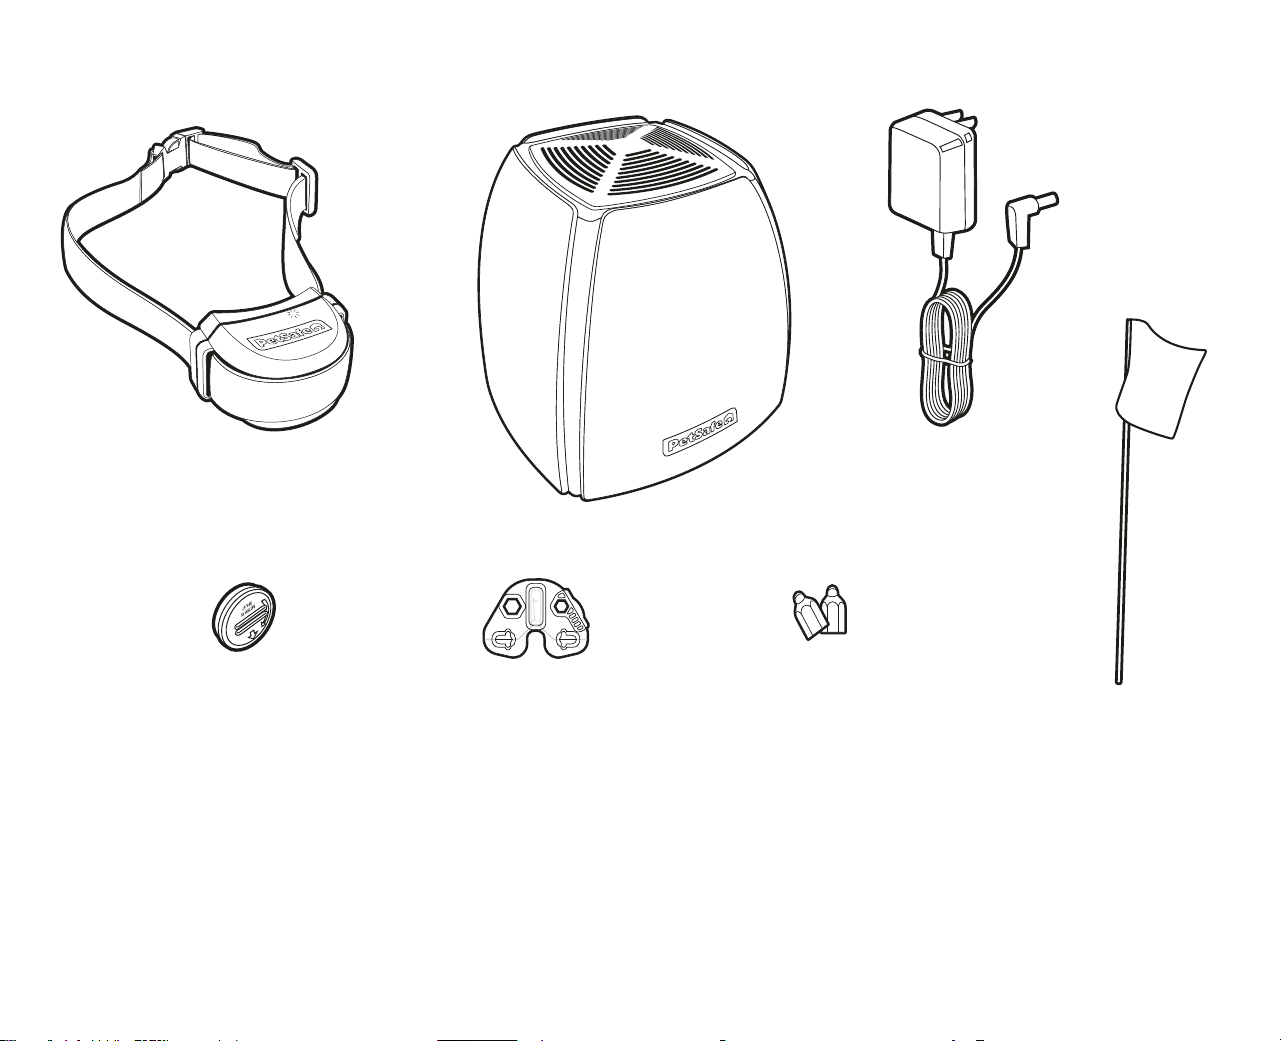
Receiver collar with
short contact points
RFA-67
battery
Test light
tool
Long
contact
points
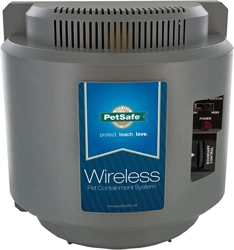
Transmitter
power adaptor
Flags
Transmitter
4
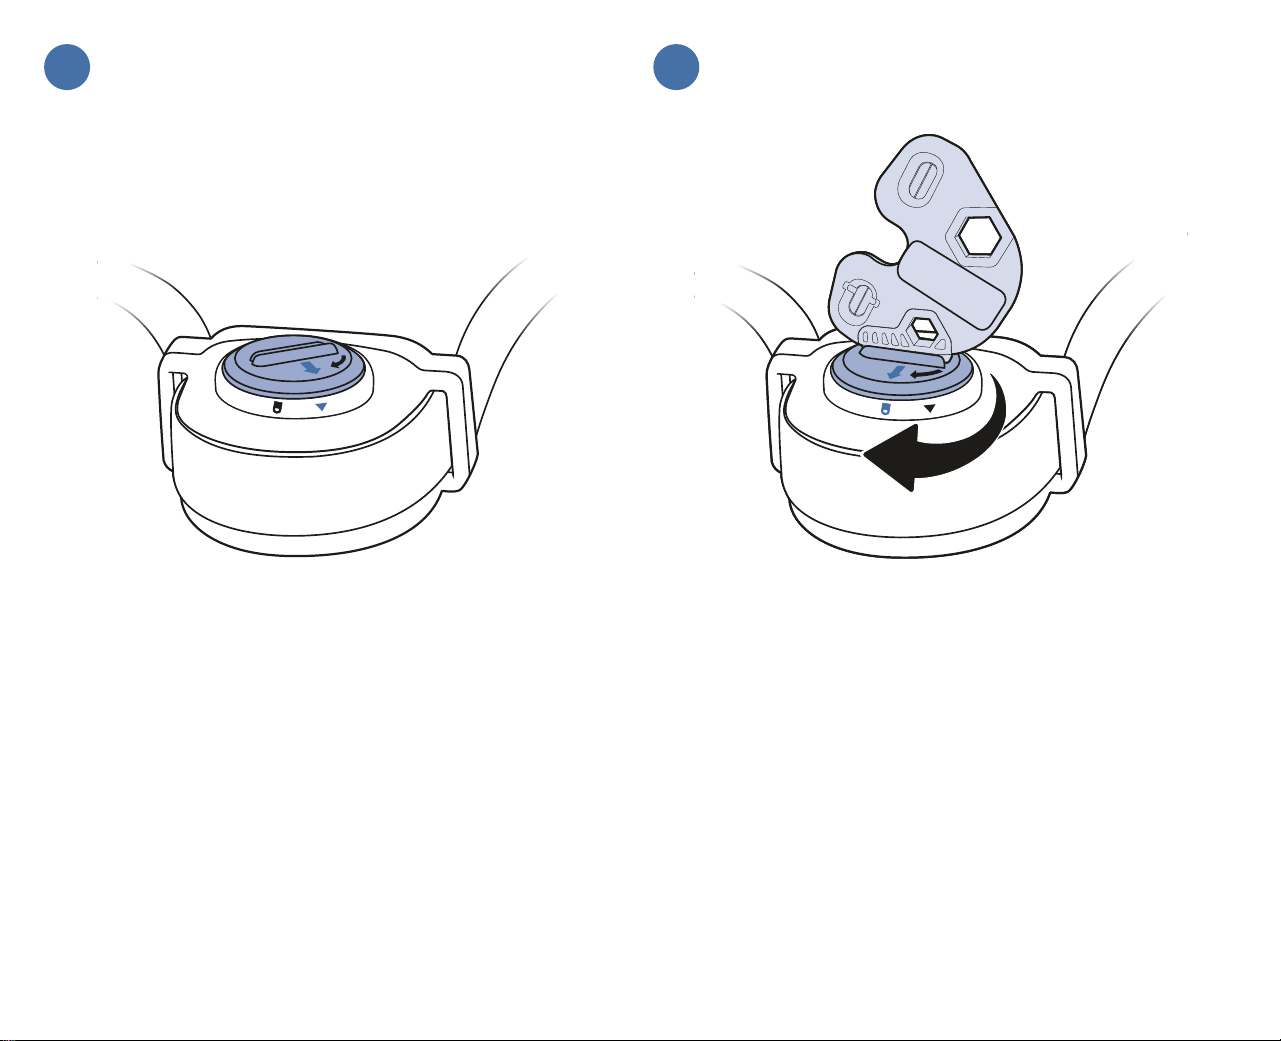
Locate the battery on the underside of the receiver collar. The arrow
on the battery should be lined up with the triangle on the receiver
collar. In this position, the battery is installed but is not yet locked in
place. This prevents the battery from draining prior to purchase.
Important: Always remove the receiver collar from your pet
before installing or replacing the battery.
Using the edge of the test light tool, rotate the battery clockwise
until the arrow on the battery lines up with the lock symbol on the
receiver collar.
The battery is now locked in place and powering the receiver
collar.
1 2
5
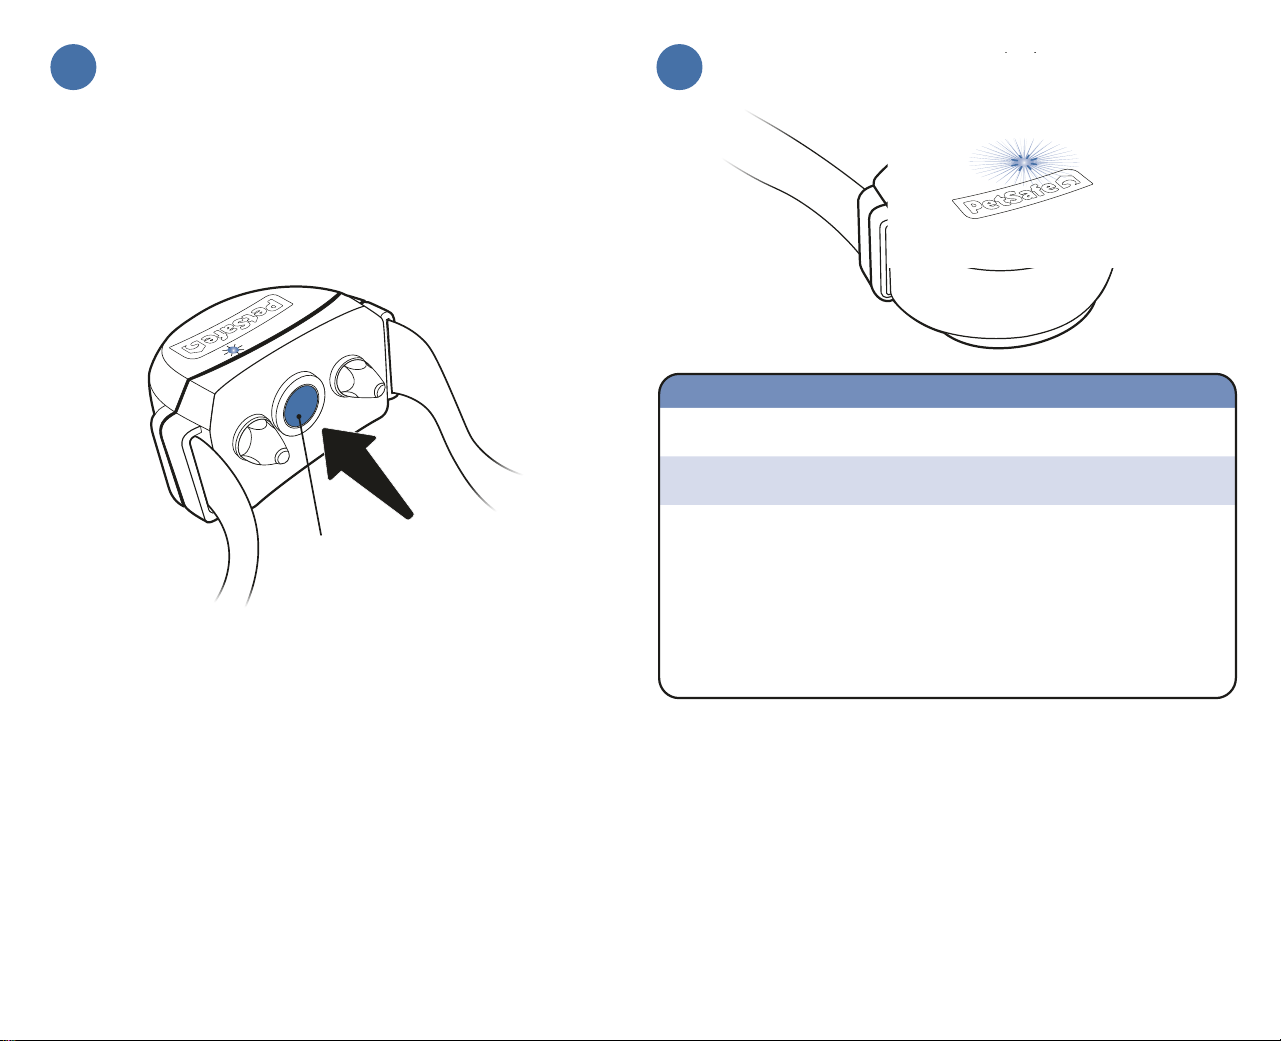
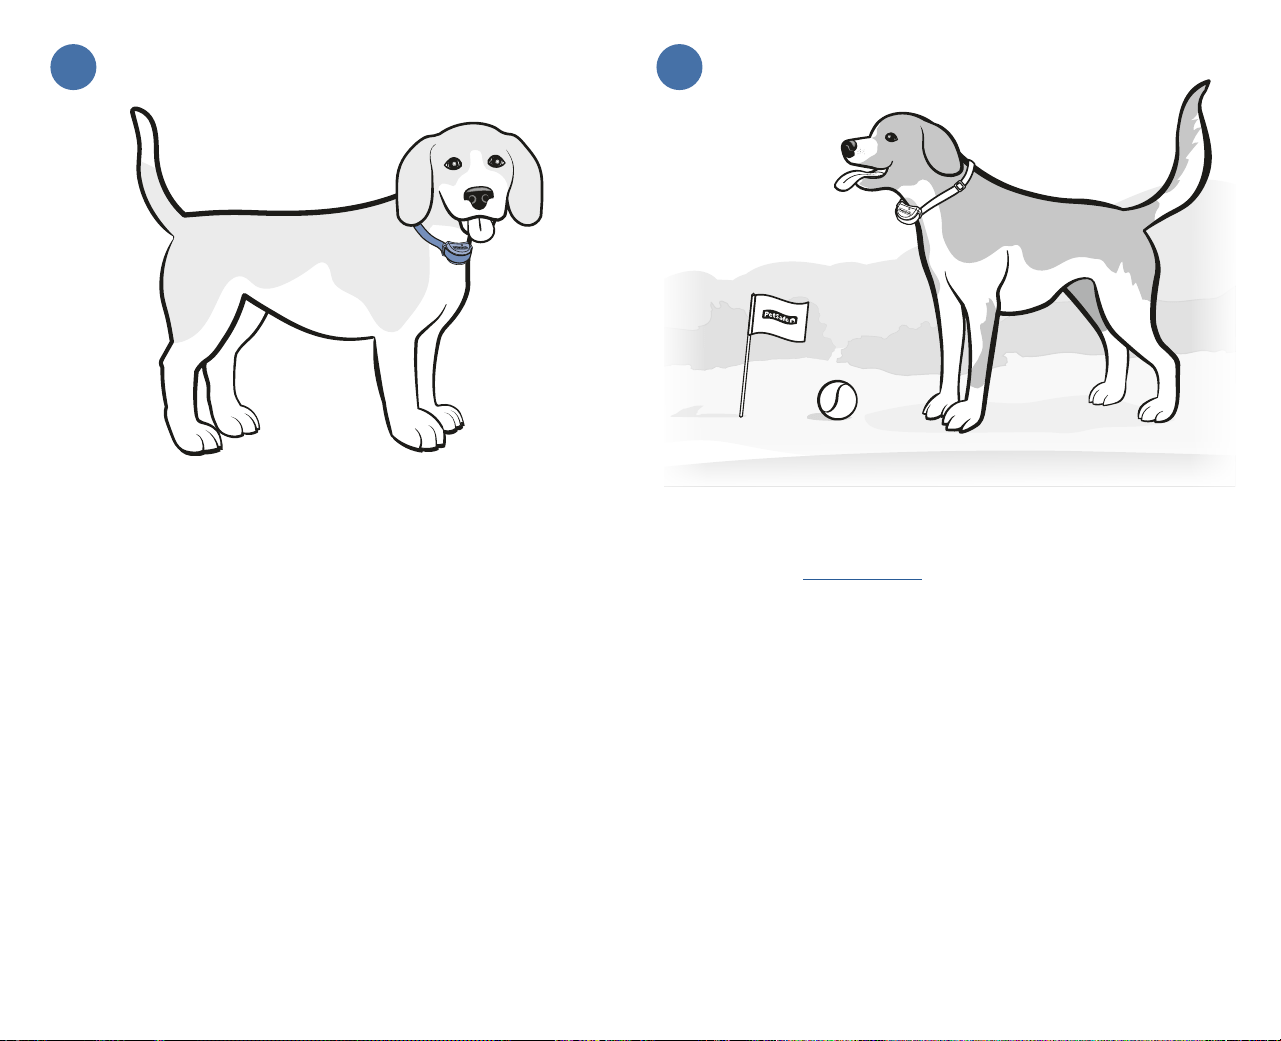
Turn the receiver collar on by pressing and holding the mode button
for 5 seconds.
The indicator light will glow for 5 seconds (green or red to
indicate battery status), and then will emit a series of red flashes
representing the current static correction level.
To determine the correction level, press the mode button once
and then count the red flashes (1 flash = level 1, 2 flashes = level 2,
and so on).
To increase the correction level, press the mode button once to view
the current correction level, then press the mode button again within
5 seconds. Each time you press the mode button within 5 seconds
of the previous set of flashes, the correction level increases by one.
The levels increase from 1 to 6, and then start over at 1.
We recommend setting the correction to level 2 (low static) or
above for setup.
3 4
Mode button
Indicator light Meaning
Green, 5 seconds continuous or slow
blinking (every 4 to 5 seconds)
The battery has sufficient charge.
Red, 5 seconds continuous or slow
blinking (every 4 to 5 seconds)
The battery charge is low; replace
the battery.
Red, quick flashing The number of flashes reveals the
current correction level:
1 flash = Tone only
2 flashes = Low static
3 flashes = Med-low static
4 flashes = Medium static
5 flashes = Med-high static
6 flashes = High static
6
5 6
If your neighbors use an in-ground fence system or robotic
lawn mower, you may need to reduce the pet area or move the
transmitter to minimize interference.
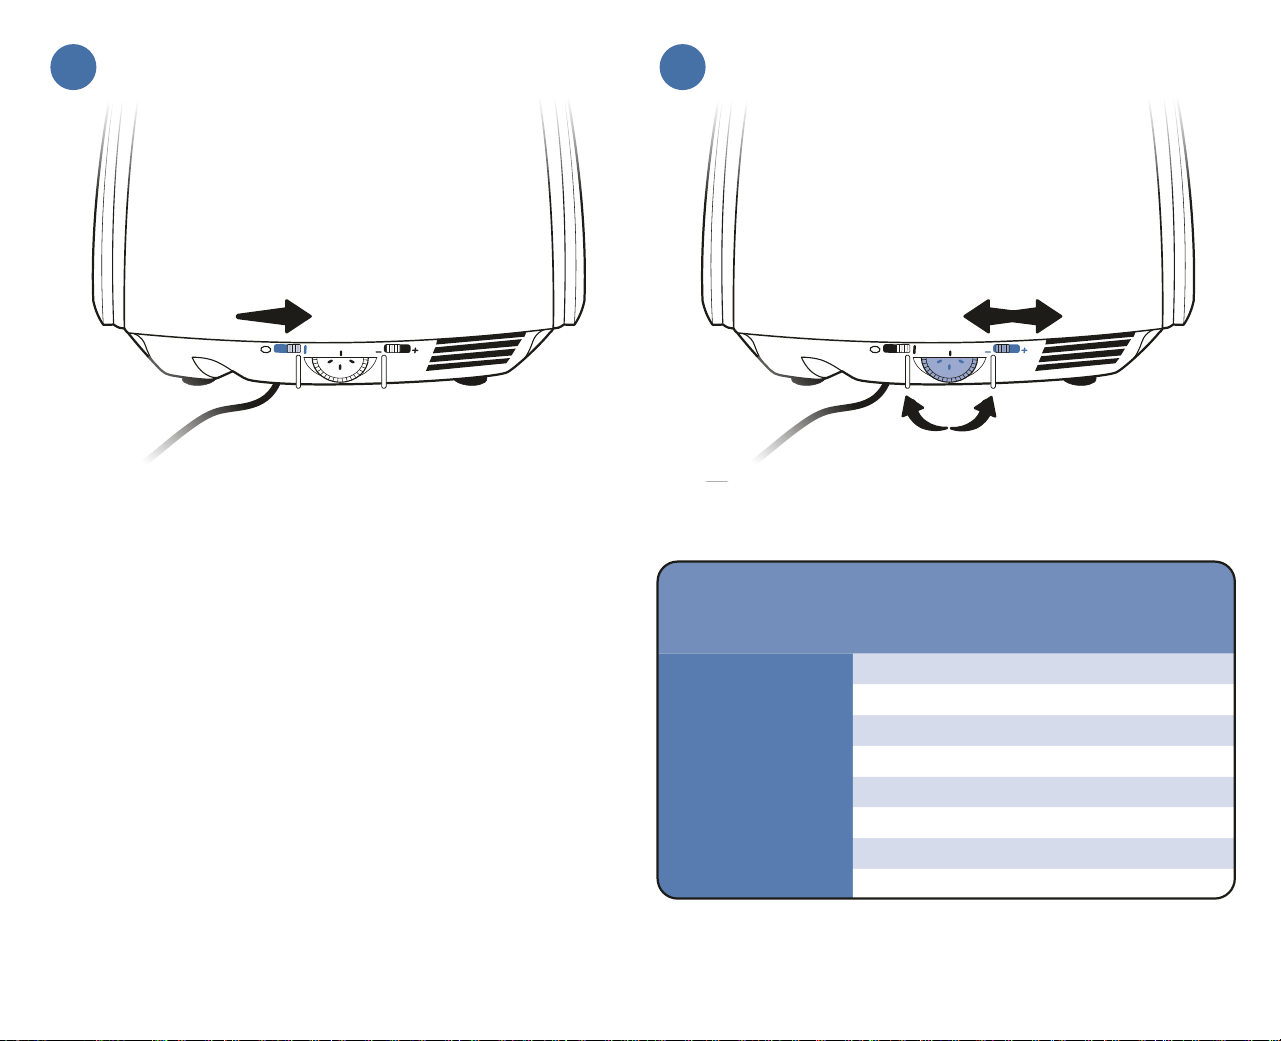
Make sure the transmitter is:
• On the ground level of your home, in a dry, well-ventilated area
where temperatures do not go below 15°F or above 104°F.
• At least 2 feet above the floor, mounted to a wall or placed on a
non-metal table or other hard surface to ensure proper ventilation.
• At least 3 feet from any large metal objects; these may affect
the size and shape of the pet area. Placing the transmitter in a
metal building, shed, or home with a metal roof can reduce its
maximum range.
Plug the power adaptor into a wall outlet, then insert the other end
into the power jack on the underside of the transmitter.
B
O
U
N
D
A
R
Y
Pet area
Transmitter
1
2
3
7
1
2
3
1
2
3
7 8
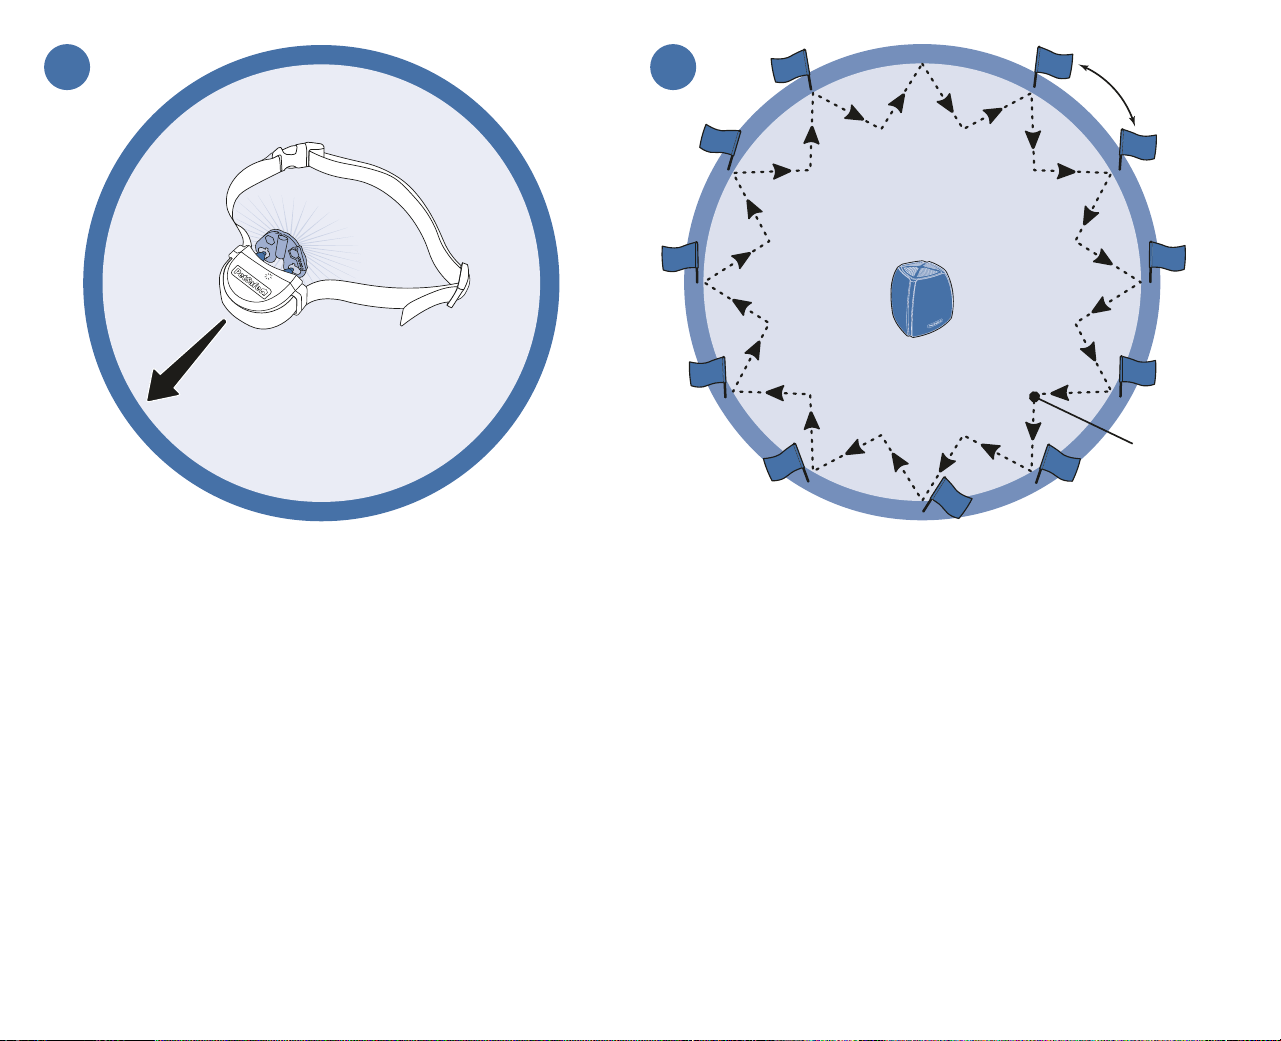
At the back of the transmitter, slide the power switch to the on (l)
position.
The light on the front of the transmitter glows blue when the
transmitter is powered on and functioning correctly.
Referring to the table below, set the boundary switch and boundary
control dial as needed to achieve the desired pet area radius:
You can determine this radius by measuring the distance between
the transmitter and the nearest edge of your planned boundary
zone.
Boundary
control
dial setting
Pet area radius,
with boundary switch set to:
— (low) + (high)
1 5 feet 5 feet
2 10 feet 20 feet
3 15 feet 35 feet
4 20 feet 50 feet
5 25 feet 65 feet
6 30 feet 80 feet
7 40 feet 95 feet
8 50 feet 105 feet
8
9 10
Once your boundary is set, it’s important to walk your yard and
make sure the pet area lies within your boundaries and stops
at least 10 feet away from any danger zones like roadways.
The easiest way to do this is to use your receiver collar and test
light tool.
Make sure that the transmitter and receiver collar are on and that
the receiver collar is set to correction level 2 or above.
Hold the test light tool contacts to the receiver collar contact points.
Walk toward a critical point in your yard, holding the receiver
collar about waist high, until the receiver collar emits a warning
tone and the test light tool flashes.
Repeat this process at every critical point, adjusting the boundary
settings or moving your transmitter as necessary.
Now that you’ve made the necessary adjustments to your pet area,
it’s time to place the boundary flags. These flags will act as a visual
aid for your dog during the training phase.
Hold the test light contacts to the receiver collar contact points and
walk toward the boundary zone while holding the collar at waist
height. As soon as the collar beeps, stop and place a boundary
flag in the ground. Walk back into the pet area until the collar stops
beeping (approximately 5 feet).
Repeat this process around the boundary zone until it is marked
with flags at least every 10 feet. The more flags you place, the
easier it will be for your dog to see where the boundary zone is.
B
O
U
N
D
A
R
Y
Pet area
B
O
U
N
D
A
R
Y
Transmitter
10 ft
Flag spacing
5 ft
Return distance
9
11 12
Turn off the receiver collar by pressing and holding the mode button
for 5 seconds. With your pet standing comfortably, place the
receiver collar around your dog’s neck. The PetSafe
®
logo should
be facing up, and the contact points should be centered directly
under your dog’s chin, touching their skin. If your dog has long or
thick hair, it may be necessary to switch to the long contact points
provided or trim (not shave) the hair around the contact points.
Important: Check the tightness of the receiver collar by inserting
one finger between the end of a contact point and your dog’s neck.
The fit should be snug but not constricting.
Once you are satisfied with the fit of the receiver collar, remove it
from your pet and trim it (making sure to allow room for growth or
a thicker winter coat). Seal the edge of the cut collar by applying a
flame along the frayed edge.
Important: Check the receiver collar fit frequently. Take the receiver
collar off when your dog is not using it. Remove the receiver collar
from your dog when indoors to avoid activation of the receiver collar.
Now that your wireless fence is up and running, it’s time to train
your pet. The first two weeks of training are the most important. We
have provided a training guide to make the training process quick,
easy and fun for you and your pet. With a little time and a lot of
praise, your pet will learn to roam freely within the pet area (while
avoiding the boundary zone).
Set your pal on the path
to success with some fun,
consistent training.
10
Additional helpful information
Mounting the transmitter
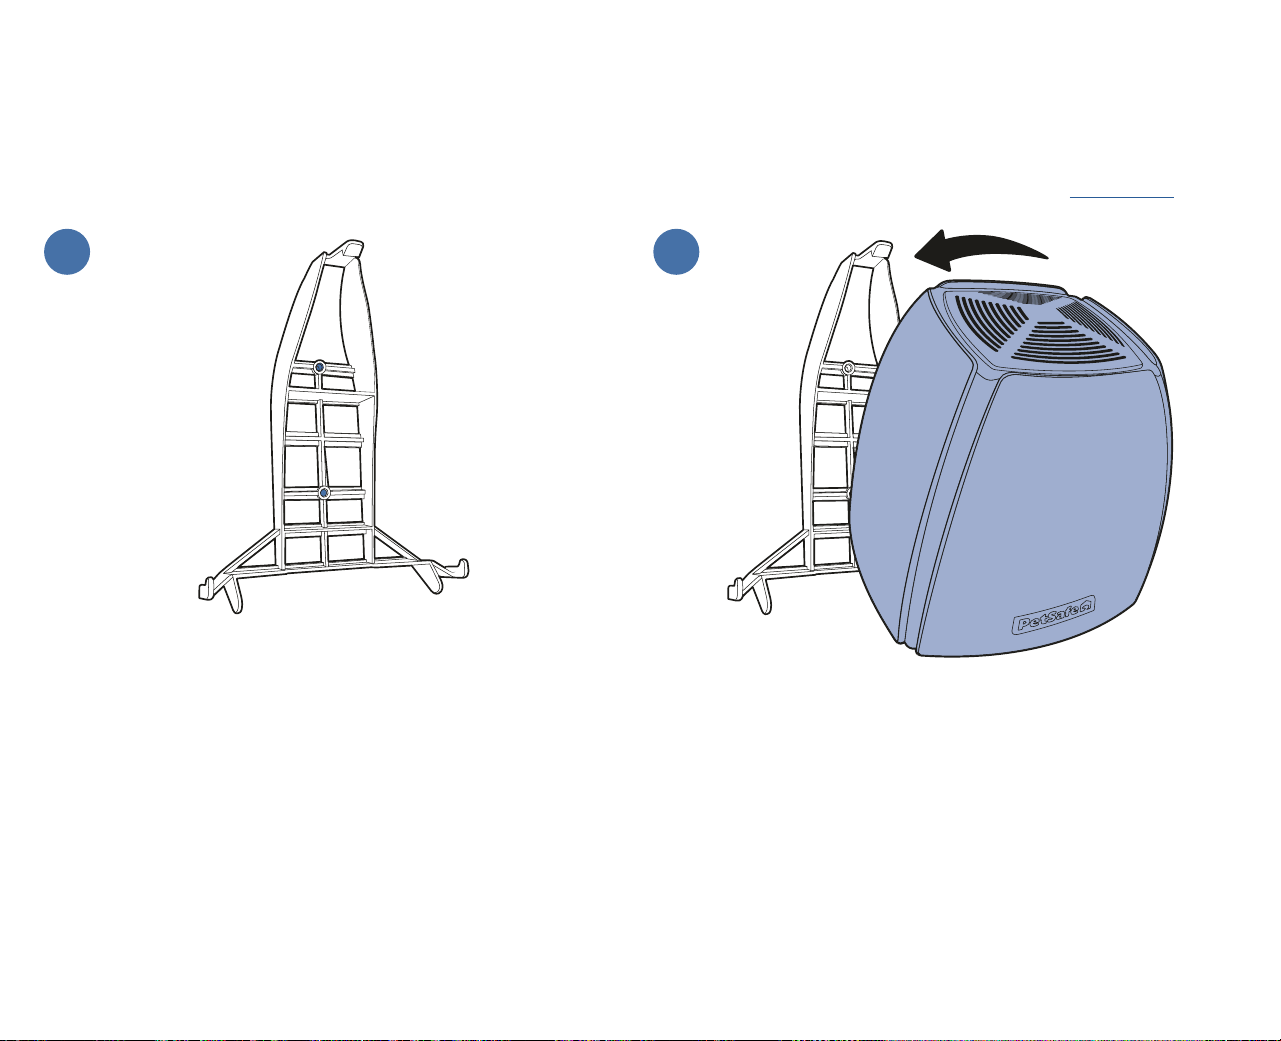
Once you have tested your fence system and are confident you have chosen the best transmitter location, you can wall mount the
transmitter if desired. You will need the Stay & Play
®
Transmitter Mounting Bracket and Hardware kit (sold separately on petsafe.com).
Hold the mounting bracket against the wall and mark the
hole locations.
Drill holes for the mounting screws or anchors. If you are mounting
the transmitter:
• Directly to wall studs, drill 1/16-inch pilot holes for the screws.
You will not need to use the provided anchors.
• In drywall, drill 1/4-inch holes in the marked locations and
insert an anchor into each hole.
Screw the bracket to the wall using the screws provided.
Place the bottom edge of the transmitter against the bracket,
making sure the screw recesses are over the bracket hooks on
both sides.
Rotate the transmitter up and push firmly until the top latch locks
into place.
Important: Mount transmitter no more than 6.5 ft. high.
1 2
11
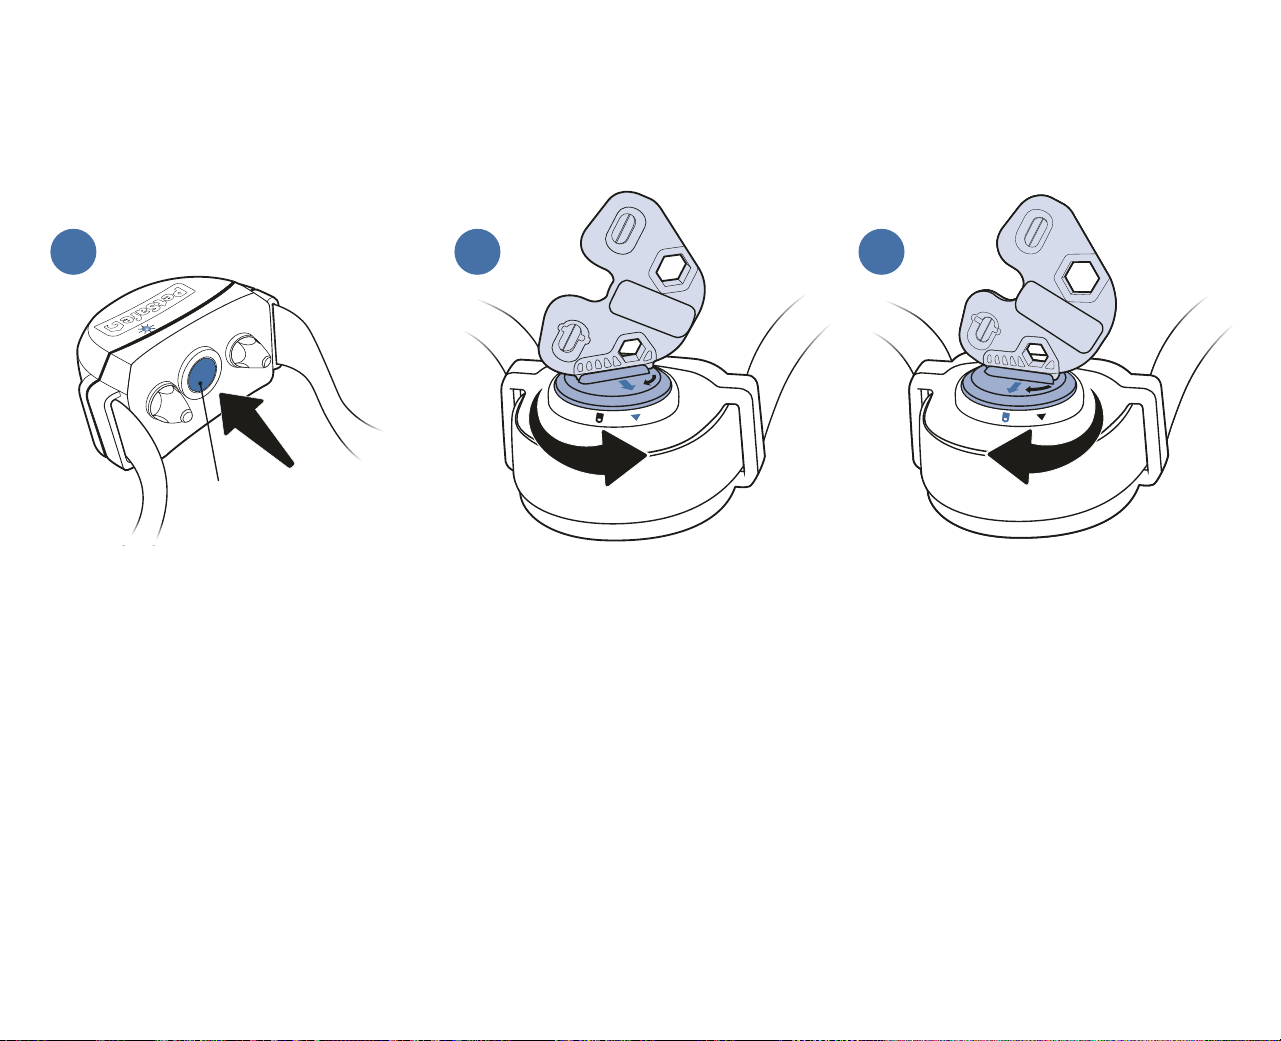
Mode button
Replacing the receiver collar battery
When the receiver collar indicator light starts blinking red every 4 to 5 seconds during operation, it’s time to replace the battery:
Resolving a power loss alarm
The transmitter has a built-in power loss alarm that will emit an intermittent tone for at least 20 minutes if the transmitter loses power. If
you hear this alarm, it means that your boundary is no longer active, and your pet is no longer being contained. Important: Before
attempting to resolve the alarm, make sure your pet is secure within your home and is not wearing the receiver collar.
Once you’re sure your pet is secure, resolve the alarm by ensuring the power adaptor is connected properly and is plugged into a
functioning power source. If the alarm is due to an ongoing power outage, you can stop the intermittent tone by unplugging the power
adaptor from the bottom of the transmitter — but remember to plug it back in once power is restored.
Important: Remove the receiver collar
from your pet.
Discharge all power by pressing and
holding the mode button for at least 30
seconds, until the indicator light is no
longer illuminated.
Use the edge of the test light tool to turn
the battery counterclockwise and release it
from the receiver collar.
Insert the new battery, lining up the arrow
on the battery with the triangle on the
receiver collar.
Use the edge of the test light tool to turn
the battery clockwise until the arrow on the
battery lines up with the lock symbol on the
receiver collar.
1 2 3
1-Year Limited Warranty | ©2026 Radio Systems Corporation | Model: PIF00-15001 | 400-2799
For important safety instructions, please see the Let us help! guide.
Understanding the receiver collar lights and tones
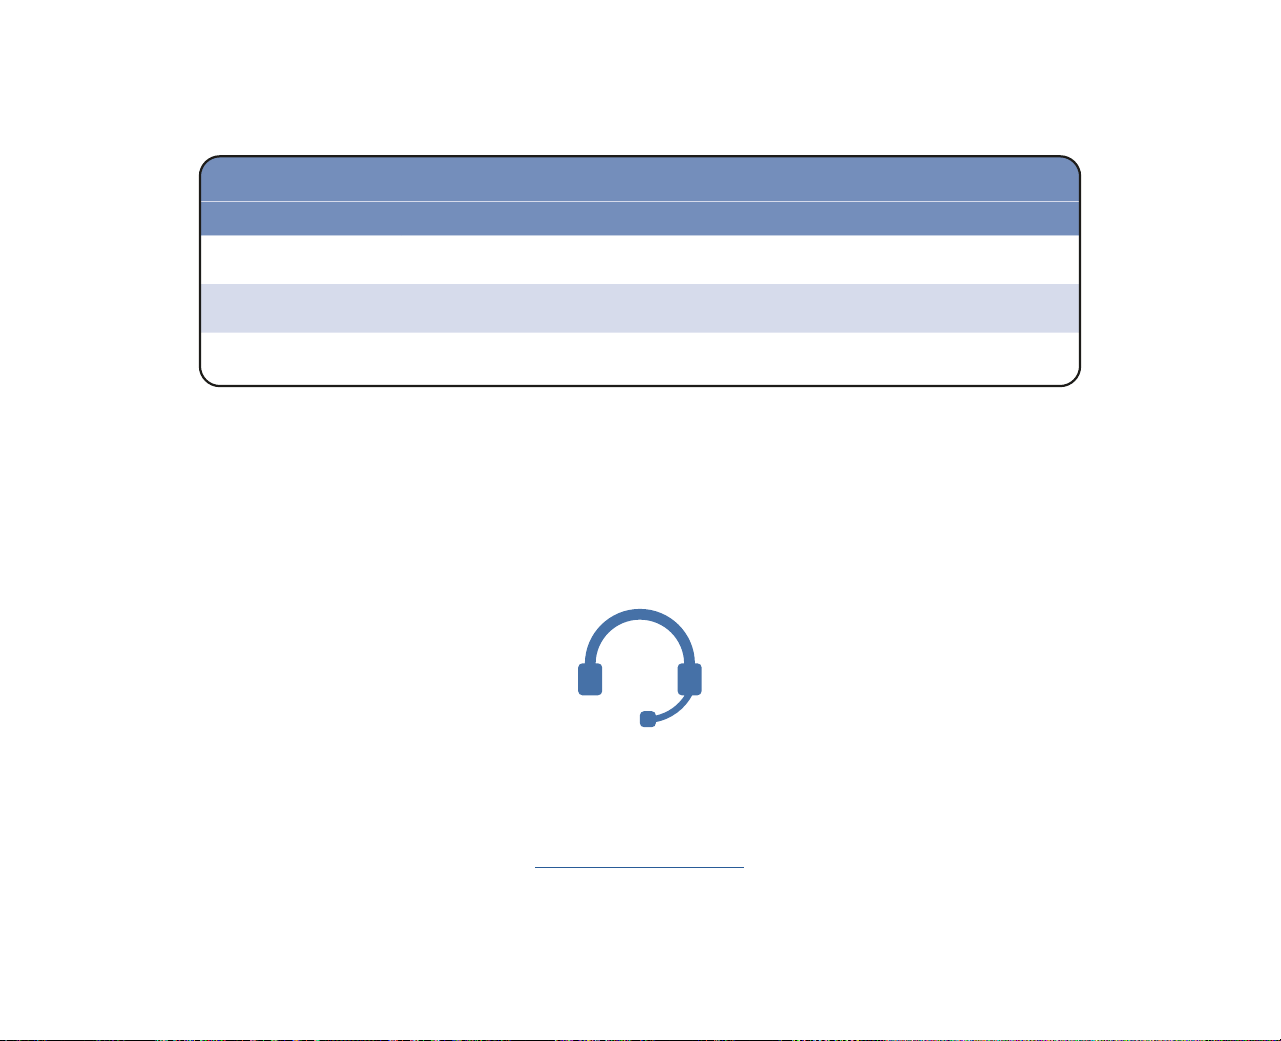
The table below explains the indicator lights and audible tones you will notice if your pet approaches or passes the boundary:
Receiver collar activation status
Indicator light Audible tone Meaning
Green, fast pulsating
(3 flashes per second)
Warning tone Your pet is receiving a warning tone.
Red, fast pulsating
(3 flashes per second)
Tone for duration of
static correction
Your pet is receiving a static correction (up to 15 second duration).
Green, continuous
(10 seconds)
No tone
Over-correction protection has been activated and the receiver collar
is locked for 10 seconds.
For questions or additional tips:
support.petsafe.com
We’re here to help!
Welcome!
PetSafe® brand is devoted to making sure you and your pet have what you need to live your best
life together. Before getting started, please take a moment to read through the important safety
information. If you have any questions or need extra support, visit our website or give us a call!
Hereinafter Radio Systems Corporation, Radio Systems PetSafe Europe Ltd., Radio Systems Australia
PTY Ltd. and any other affiliate or brand of Radio Systems Corporation may be referred to collectively
as “We” or “Us.”
Warranty - United States
This Product has the benefit of a limited manufacturer’s warranty. Complete details of the warranty
applicable to this Product and its terms can be found at petsafe.com and/or are available by
contacting your local Customer Care Center.
United States
Radio Systems Corporation, 10427 PetSafe Way, Knoxville, TN 37932 USA
Warranty - Australia and New Zealand
In compliance with the Australian Consumer Law, Warranties Against Defects, effective January 1,
2012, warranty details of this Product are as follows: Radio Systems Australia Pty Ltd. (hereinafter
referred to as “Radio Systems”) warrants to the original retail purchaser, and not any other purchaser
or subsequent owner, that its Product, when subject to normal and proper residential use, will be free
from defects in material or workmanship for a period of three (3) years from the purchase date. An
“original retail consumer purchaser” is a person or entity who originally purchases the Product, or
a gift recipient of a new Product that is unopened and in its original packaging. When serviced by
Radio Systems Customer Service, Radio Systems covers labour and parts for the first three years of
ownership; after the first three years, a service or upgrade charge will apply relative to replacement of
the Product with new or refurbished items at Radio Systems’ sole discretion.
The limited warranty is non-transferable and shall automatically terminate if the original retail consumer
purchaser resells the Radio Systems Product or transfers the property on which the Radio Systems
Product is installed. This Limited Warranty excludes accidental damage due to dog chews; lightning
damage; or neglect, alteration, and misuse. Consumers who purchase products outside of Australia,
New Zealand, or from an unauthorised dealer will need to return the Product to the original place of
purchase for any warranty issues.
Please note that Radio Systems does not provide refunds, replacements, or upgrades for change of
mind, or for any other reason outside of these Warranty terms.
Claims Procedure: Any claim made under this Warranty should be made directly to Radio Systems
Australia Pty Ltd. Customer Care Centre at:
Radio Systems Australia Pty Ltd., PO Box 3442, Australia Fair, QLD 4215, Australia
Australia Residents: 1800 786 608
New Zealand Residents: 0800 543 054
Email: [email protected]
To file a claim, a proof of purchase must be provided. Without a proof of purchase, Radio Systems will
not repair or replace faulty components. Radio Systems requests the Consumer to contact the Radio
Systems Customer Care Centre to obtain a Warranty Return number, prior to sending the Product.
Failure to do so may delay in the repair or replacement of the Product.
If the Product is deemed to be faulty within 30 days from date of original purchase, Radio Systems will
organise for a replacement to be sent in advance of returning the faulty Product. A Post Bag will be
included with the replacement Product for the return of the faulty Product. The Product must be returned
within 7 days of receiving the replacement. If the Product is deemed to be faulty after 30 days from the
date of original purchase, the consumer will be required to return the Product to Radio Systems at the
consumer’s own expense. Radio Systems will test and replace the faulty unit or its components and return
to the consumer free of charge, provided the Product is within its said warranty period. This warranty
is in addition to other rights and remedies available to you under the law. Radio Systems goods come
with guarantees that cannot be excluded under the Australia Consumer Law. You are entitled to a
replacement or refund for a major failure and for compensation for any other reasonably foreseeable
loss or damage. You are also entitled to have the goods repaired or replaced if the goods fail to be of
acceptable quality and the failure does not amount to a major failure.
Should you have any queries or require any further information, please contact our Customer Care
Centre on 1800 786 608 (Australia) or 0800 543 054 (New Zealand).
Important Safety Information
Explanation of Attention Words and Symbols Used in this Guide
This is the safety alert symbol. It is used to alert you to potential personal injury hazards.
Obey all safety messages that follow this symbol to avoid possible injury or death.
WARNING indicates a hazardous situation which, if not avoided,
could result in death or serious injury.
CAUTION, used with the safety alert symbol, indicates a hazardous
situation which, if not avoided, could result in minor or moderateinjury.
CAUTION, used without the safety alert symbol, indicates a
hazardous situation which, if not avoided, could result in harm to
yourpet.
NOTICE is used to address practices not related to personal injury.
Let us help!
Radio Systems Corporation
10427 PetSafe Way
Knoxville, TN 37932 USA
+1 (865) 777-5404
Radio Systems Australia Pty Ltd.
Suite 11001 Australia Fair Office Towers
36 Marine Parade
Southport, QLD 4215, Australia
+61 (0) 7 5556 3800
©2025 Radio Systems Corporation
401-092/12
United States: +1 (800) 732-2677
Australia: 1800 786 608
New Zealand: 0800 543 054
petsafe.com
Questions?
All Containment Products
• Do not use this product if your pet is aggressive or is prone to aggressive behavior. Aggressive pets
can cause severe injury and even death to their owner and others. If you are unsure whether this
product is appropriate for your pet, please consult your veterinarian or a certified trainer.
• This system is NOT a solid barrier. It is designed to act as a deterrent to remind pets to remain within
the established boundary by use of static correction. It is important that you reinforce training with
your pet on a regular basis. Since the tolerance level to static correction varies from pet to pet,
Radio Systems Corporation CANNOT guarantee that the system will, in all cases, keep a pet within
the established boundary. Not all pets can be trained to avoid crossing the boundary! Therefore,
if you have reason to believe that your pet may pose a danger to others or harm himself if he is not
kept from crossing the boundary, you should NOT rely solely upon this system to confine your pet.
Radio Systems Corporation shall NOT be liable for any property damage, economic loss or any
consequential damages sustained as a result of any animal crossing theboundary.
• To avoid electric shock, use transmitters and surge protectors indoors in dry locations only.
• INGESTION HAZARD: This product
contains a button cell or coin battery.
• DEATH or serious injury can occur if ingested.
• A swallowed button cell or coin battery can
cause Internal Chemical Burns in as little as
2 hours.
• KEEP new and used batteries OUT OF
REACH of CHILDREN.
• Seek immediate medical attention if a
battery is suspected to be swallowed or
inserted inside any part of the body.
• Remove and immediately recycle or dispose of use batteries according to local regulations and
keep away from children. Do NOT dispose of batteries in household trash or incinerate.
• Even used batteries may cause severe injury or death.
• Call a local poison control center for treatment and information.
• Compatible battery type RFA-67D-11 contains CR2032, RFA-188 contains CR 1/3N
• Nominal battery voltage 3V
• Non-rechargeable batteries are not to be recharged.
• Do not force discharge, recharge, disassemble, heat above 140° F/60° C or incinerate. Doing so
may result in injury due to venting, leakage or explosion resulting in chemical burns.
• For devices with rechargeable Lithium-Ion (Li-Ion) batteries; never incinerate, puncture, deform,
short-circuit, or charge with an inappropriate charger. Fire, explosion, property damage, or bodily
harm may occur if this warning is not followed.
• Ensure the batteries are installed correctly according to polarity (+ and -).
• Do not mix old and new batteries, different brands or types of batteries, such as alkaline, carbon-
zinc, or rechargeable batteries.
• Remove and immediately recycle or dispose of batteries from equipment not used for an extended
period of time according to local regulations.
• Always completely secure the battery compartment. If the battery compartment does not close
securely, stop using the product, remove the batteries, and keep them away from children.
• This product is not a toy. Keep it out of the reach of children.
• Proper fit of the collar is important. A collar worn for too long or made too tight on the pet’s neck
may cause skin damage ranging from redness to pressure ulcers. This condition is commonly known
as bed sores.
• Avoid leaving the collar on a pet for more than 12 hours per day.
• When possible, reposition the collar on the pet’s neck every 1 to 2 hours.
• Regularly recheck the fit to prevent excessive pressure; follow the instructions in this manual.
• You may need to trim the hair in the area of the contact points. However, never shave the dog’s
neck; this may lead to a rash or infection.
• Never connect a leash to a collar with contact points. It will cause excessive pressure on the
contactpoints.
• When connecting a leash to a separate collar, do not allow it to put pressure on the collar with
contact points.
• Wash the dog’s neck area and the contact points of the collar weekly with a damp cloth.
• Examine the contact area daily for signs of a rash or a sore.
• If a rash or sore is found, discontinue using this product until the skin has healed.
• If the condition persists beyond 48 hours, see your veterinarian.
• For additional information on bed sores and pressure necrosis, please visit our website.
• Proper training of your pet is essential to successfully using the system. During the first 2 weeks of
training, do not use the system without direct supervision of your pet.
• Always remove the collar from your pet before performing any transmitter/base unit testing or
adjustments. This will prevent unintended corrections.
• To prevent an unintended correction, remove the collar from your pet when indoors.
• The boundary zone must be tested whenever an adjustment is made to the transmitter/base unit
settings to prevent unintended corrections to your pet.
• To prevent an unintended correction, after the boundary flags have been placed, be sure to set the
static correction on the collar back to tone (or tone with vibration) only.
• Do not use an outlet protected with a residual current device (RCD) or ground fault circuit interrupter
(GFCI). The fence system will function properly, but in rare cases, nearby lightning strikes may cause
the RCD or GFCI to trip. Without system power, your pet may escape. You will have to reset the
RCD or GFCI to restore power to the system.
• If the collar is rechargeable, you should expect hundreds of recharge cycles from your battery.
However, do not charge your collar every night. Charging too often can reduce battery life.
For non-lithium batteries:
• Do not mix old and new batteries.
• Do not mix standard, alkaline or rechargeable batteries.
• Do not use rechargeable batteries.
In-ground Containment Products
• Underground cables can carry high voltage. Have all underground cables marked before you dig
to bury the boundary wire. In most areas, this is a free service. Do not install, connect or remove
your system during a lightning storm. If the storm is close enough for you to hear thunder, it is close
enough to create hazardous surges.
• To avoid risk of severe injury, follow all safety instructions for your power tools, and wear safety
goggles during use.
• Turn off power to outlet before you install or remove your surge protector.
• Risk of electrical shock or fire. Use the surge protector only with a duplex outlet with center screw.
Attach the unit with long screw supplied.
• If it is rechargeable, the battery should be charged in areas with temperatures ranging from 32°F
to 113°F / 0°C to 45°C. Recharging the battery outside of this temperature range can cause the
battery to overheat, explode or catch fire.
• Wire on top of the ground may be a trip hazard. Be careful when placing wires and testing
thesystem.
• Do not install the surge protector if there is not at least 30 ft. (10 m) or more of wire between the
electrical outlet and electrical service panel.
• Before you begin installing the boundary wire, turn the transmitter off.
• If using a YardMax™ product, do not change the transmitter setting from Traditional mode (B)
to YardMax™ mode (A) without verifying that the receiver collar will still contain your pet. If the
receiver collar fails the ReadyTest™ startup, the receiver collar is automatically turned off. Your pet
will not be contained.
• Avoid damaging the insulation of the loop wire; damage may cause areas of weak signal and lead
to failure of the boundary.
• Plug the surge protector into a grounded (3-prong) outlet that is within 5 ft. (1.5 m) of the fence
transmitter. ALWAYS use a grounded (3-prong) outlet to ensure maximum protection.
• Do not remove the ground prong from the surge protector plug. Do not use a 3-prong plug to
2-prong outlet converter. Doing so will make the surge protector ineffective against surges orspikes.
• Verify that the boundary loop and transmitter wires connect to the proper surge protector terminals.
Reversed connections will result in an increased risk of surge related damage.
• When mowing or trimming your grass, use care not to cut the boundary wire.
• To protect the transmitter, disconnect the boundary wire and unplug the power adaptor from the
outlet when the system will not be used for long periods of time or prior to thunderstorms. This will
prevent power surges from damaging the transmitter.
Wireless Containment Products
If the system loses power, it will not contain your pet. An Uninterruptible Power Supply (UPS) is
recommended for use with your wireless fence. Power outages can be unpredictable, and the use of a
UPS will provide you with some time to properly restrain your pet. In rare instances, if your pet is near
the boundary at the time when the power fails, it is possible that your pet will receive a correction.
This correction will time out at 15-30 seconds depending on the product. The collar is activated by the
absence of the containment signal.
While results will vary depending on the UPS manufacturer’s specifications the following are typical
examples to guide your choice of UPS:
• Using a 400 VA UPS a consumer should expect 3 hours of backup time.
• Using a 900 VA UPS a consumer could expect 8 hours of backup time.
If settings below maximum fence size are used, additional backup time may result. At minimum
fence size settings backup time may be more than two times the backup time estimated at maximum
fencesize.
Guardian™ GPS + Tracking Dog Fence and Guardian™ GPS 2.0 Dog Fence + Tracking
CAUTION: App notifications operate via cellular connections. Should signals be intermittent or
interrupted for any reason, or if your own phone’s data service is not functional for any reason, you will
not receive desired notices from the system in a timely manner or at all. Therefore, you should not rely
upon app notifications alone for the safe containment of your pet.
Guardian™ GPS Connected Customizable Fence and Guardian™ GPS Dog Fence
CAUTION: App notifications operate off your home WIFI connection. Should your WIFI fail or should
any system signals be intermittent or interrupted for any reason, or if your phone’s data service is not
functional for any reason, you will not receive desired notices from the system in a timely manner or at
all. Therefore, you should not rely upon app notifications alone for safe containment of your pet.
• Do not place anything on the top of the transmitter/base unit or cover any ventilation holes. This
may overheat the transmitter/base unit and cause early transmit failure.
• Do not place transmitter/base unit in a closet or any other confined, unventilated area.
• Do not place transmitter/base unit on a metal surface.
Battery Disposal
Separate collection of spent batteries is required in many regions. Check the regulations in
your area before discarding spent batteries. Please do not dispose of the unit in household or
municipal waste.
Perchlorate Material – special handling may apply.
See www.dtsc.ca.gov/hazardouswaste/perchlorate.
Important Recycling Advice
This equipment must be recycled. At the end of the product life, do not place it in the normal
municipal waste system. Please check the regulations in your area or return it to where it was
purchased so that it can be placed in our recycling system.
C
ompliance
FCC: USA
This device complies with part 15 of the FCC Rules. Operation is subject to the following two conditions:
(1) This device may not cause harmful interference, and (2) this device must accept any interference
received, including interference that may cause undesired operation.
NOTE: This equipment has been tested and found to comply with the limits for a Class B digital device, pursuant to part 15 of
the FCC Rules. These limits are designed to provide reasonable protection against harmful interference in a residential
installation. This equipment generates, uses, and can radiate radio frequency energy and, if not installed and used in
accordance with the instructions, may cause harmful interference to radio communications. However, there is no guarantee
that interference will not occur in a particular installation. If this equipment does cause harmful interference to radio or
television reception, which can be determined by turning the equipment off and on, the user is encouraged to try to correct
the interference by one or more of the following measures:
• Reorient or relocate the receiving ante
nna.
• Increase the separation between the equipment and the receiver.
•
Connect the equipment to an outlet on a circuit different from that to which the receiver isconnected.
• Consult customer care, the dealer, or an experienced radio/TV technician for help. CAUTION: Modification or
changes to this equipment not expressly approved by Radio Systems Corporation may void the user’s authority to
operate the equipment.
T
he device has been evaluated to meet general RF exposure requirement. To maintain compliance with FCC’s RF exposure
guidelines, the distance must be at least 20 cm between the radiator and your body and fully supported by the operating
and installation.
IC Warning
This device contains licence-exempt transmitter(s)/receiver(s) that comply with Innovation, Science and Economic
Development Canada's licence-exempt RSS(s). Operation is subject to the following two conditions:
(1) This device may not cause interference
(2) This device must accept any interference, including interference that may cause undesired operation of the device.
C'et apparail contient des emetteurs/recepteurs exempts de licence qui sont conformes aux normes CNR exemptes de
licence d'innovation, Sciences et Developpement economique Canada. Son fonctionnement est assujetti aux deux
conditions suivantes:
(1) Cet appareil ne doit pas causer d'interferences.
(2) Cet appareil doit accepter toute interference, y compris celles qui peuvent entrainer un fonctionnement indesirable
de l'appareil.
ACMA: Australia
This device complies with the applicable EMC requirements specified by the ACMA (Australian
Communications and Media Authority).
Terms of Use and Limitation of Liability
1. Terms of Use
The use of this product is subject to your acceptance without modification of the terms, conditions
and notices contained with this product. Use of this product implies acceptance of all such terms,
conditions, and notices. If you do not wish to accept these terms, conditions, and notices, please
return the product, unused, in its original packaging and at your own cost and risk to the relevant
Customer Care location together with proof of purchase for a full refund.
2. Proper Use
Proper Use includes, without limitation, reviewing the entire Product Manual and any specific
safety information statements. The specific temperament or size/weight of your pet may not
be suitable for this product. If you are unsure whether this product is appropriate for your pet,
please consult your veterinarian or certified trainer prior to use. For products used with pets
where training is desired, Radio Systems Corporation recommends that these training products
are not used if your pet is aggressive and accepts no liability for determining suitability in
individual cases.
3. No Unlawful or Prohibited Use
This product is designed for use with pets only. This product is not intended to harm, injure or
provoke. Using this product in a way that is not intended could result in violation of Federal,
State or local laws.
4. Limitation of Liability
In no event shall Radio Systems Corporation or any of its associated companies be liable for (i) any
direct, indirect, punitive, incidental, special or consequential damage and/or (ii) any loss or dam-
ages whatsoever arising out of or connected with the use or misuse of this product. The Purchaser
assumes all risks and liability from the use of this product to the fullest extent permissible by law.
5. Modification of Terms and Conditions
Radio Systems Corporation reserves the right to change the terms, conditions and notices
governing this product from time to time. If such changes have been notified to you prior to your
use of this product, they shall be binding on you as if incorporated herein.