Version: 1.1
Support Web: www.aiyin.com
Scan to:
help.aiyin.com
Please visit the website
"help.aiyin.com"to download
the printer driver and see the
installation tutorial
11
10
10
Installation For Printer Driver
Smartphone APP Setup
FAQs
11
Version: 1.1
6.Installation For Printer Driver
6.1 Install Beeprt Driver on Windows
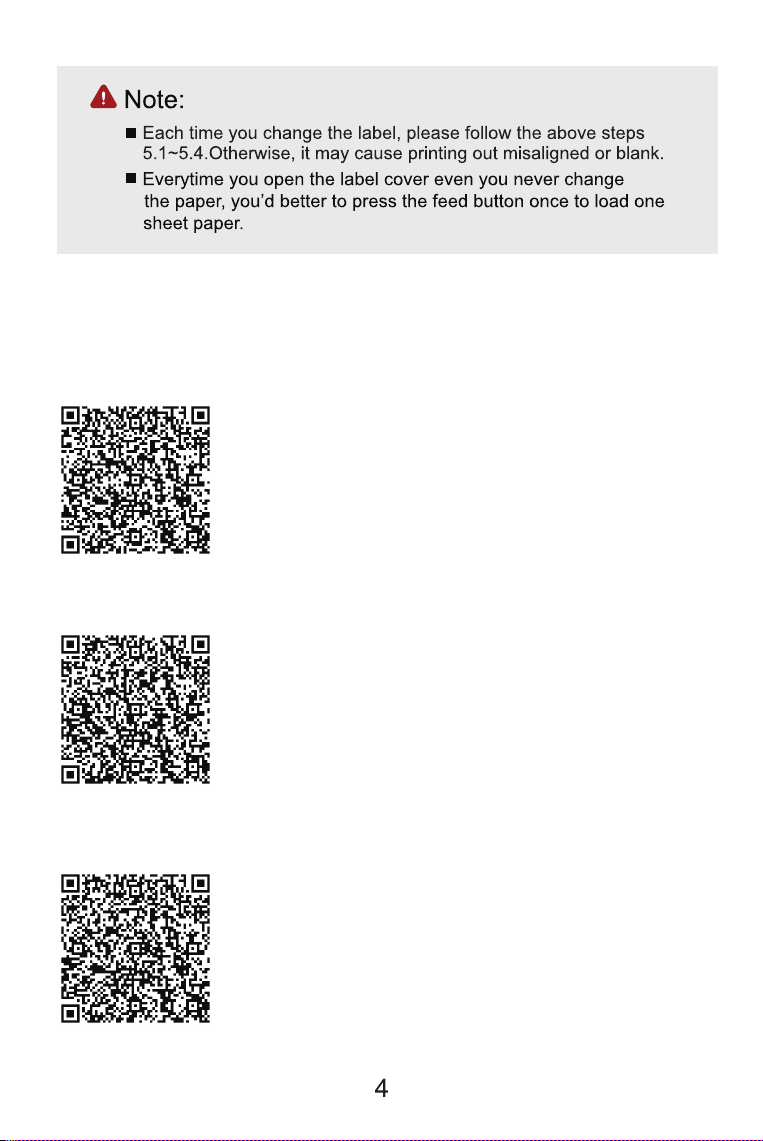
Scan the code to watch the windows driver
installation video.
6.2 Installation For Windows via Bluetooth
Scan the code to watch the windows bluetooth
installation video.
6.3 Installation For MacOS via USB Port
Scan the code to watch the MacOS Driver
installation video.
Note: The printer Bluetooth does not support
MacOS computers. Please use USB Port.
6.4 Installation For Chromebook via USB Port
Scan the code to watch the Chromebook Driver
installation video.
7.Smartphone APP Setup
“Label expert”. You can download it on Google Play Store and APP Store.
Or you can scan the QR code below to download the APP.
8.FAQs
You can scan the code or visit the website
( help.aiyin.com ) to view the FAQs.
iOS users scan this
code to download
Android users scan
this code to download

1. How to calibrate the label automatically/ identification?
This is the correct operation about how to calibrate the label automatically.
Important tips:
1. Please note that the side for peeling is always up.
2. Any time you change the labels, please do remember to run the
automatic self-study procedure. Otherwise, the labels will not be
printed properly.
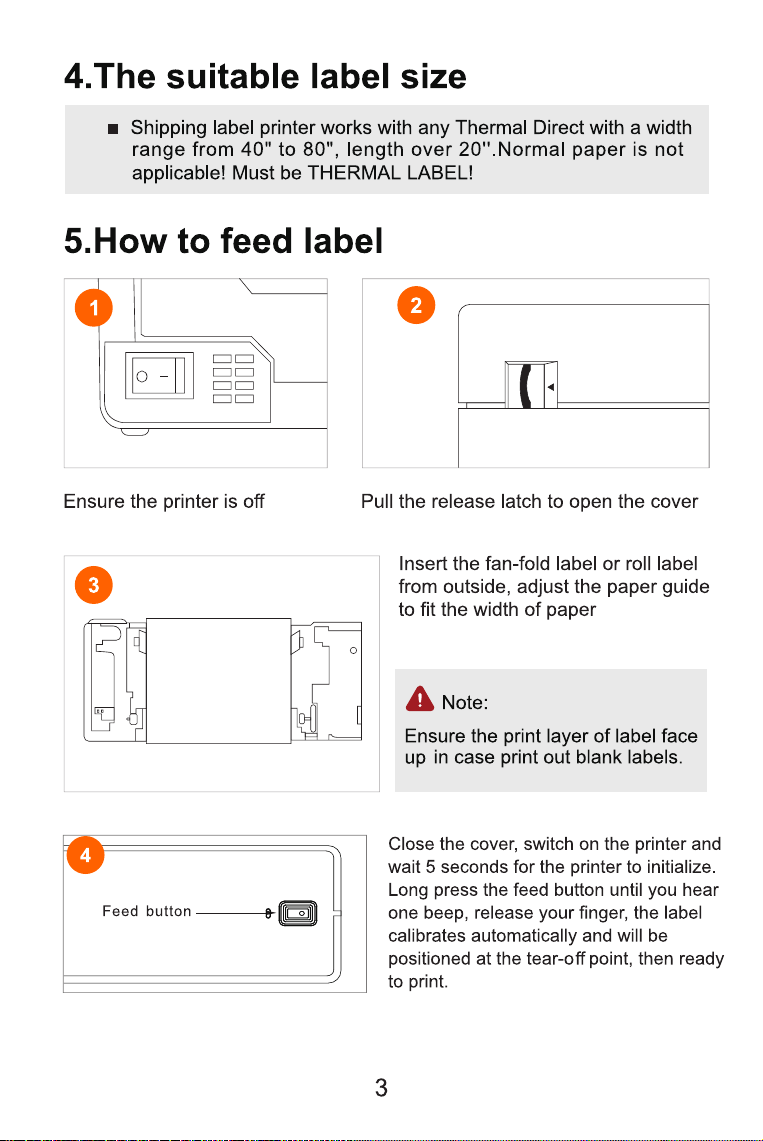
—Turn on the power, wait for 5 seconds, until the printer is initialized.
—Press and hold the top feed button for 5 seconds until you hear one
beep, then let it go, the label will move back and forth and stop at the
correct tear-off point. After this, you can start printing your labels.
2. It keeps flashing red light?
If flashing red is 2 times per second:
The printer top cover is not closed well. Check that the printer top cover
is completely closed.
If flashing red is every 2 seconds:
No label is loaded, it will be red. Ensure that the labels are loaded correctly.
Wrong paper size. Please automatic label identification
Label quality has an issue, the sensor can not detect it.
Please ensure to use the right quality label, suggest to order from beeprt
store.
3. Why Print Blank Page?
There may be several reasons for printing blank pages.
1. (most common)The peel-off side should be facing up when feeding the
labels, please follow the below picture and don't put it upside down, or
the printed page would be blank.

4. Why does it skip labels or continuously feed labels?
There are three main reasons:
1. If you change your label type or size. In this case, Label Printer does not
learn your label, this is the most common reason.
Solution1:
please run the automatic label identification again. (
To make sure your computer is not sending print commands to the printer,
disconnect the USB cable from your printer, then simply press and hold the
top circular button until you hear one beep, then your printer will load two
labels.
2. (most common) It's possible that the printer didn't recognize the label
size correctly yet. Please press and hold the feed button on the top until
you hear one“beep”sound then release, the label will automatically
move back and forth to load two labels. Then you can start printing. You
may print a print this Sample Label to check. Please click the link for more
details.
3. Please press and hold the feed button on the top until you hear two
“beep”sounds then release, your printer will load one test label. Please
check if the test label is normal, if it is, your printer is working well and the
problem is with the label or the settings.
4. (For Mac) Please sure the paper size under Print Preferences for label
printer is 4*6, not full size (8.5*11 or US letter).
5. sometimes the label from other brands does not work

5.Why my label comes out unclear/ low ink/blurry?
Cause: The resolution of the label file you printed is too low
Solution:
1. Please print the PDF file but not the picture. (most common reason)
Printed PDFs are better quality than photos. If you must use photos, you
should use high-quality images.
2. Print density and speed. (most common reason)
Within your printer preferences, you can set your "Density" and "Speed".
You can change the density to a larger number, it will help. Please check
the article in the How-Tos section about how to adjust density and speed.
for windows, 8-12 is recommended;
for mac 8-14 is recommended
for mobile devices, 6-8 is recommended
3. Page size
Please make sure the label you print is 4*6 inches in size.
If your label is full size (8.5*11), please crop your label using "Take a
snapshot" in Adobe Reader. Please check the article in the How-Tos
section about how to crop a 4*6 size page
Restart your computer, and please re-connect the USB cable to print and
try your print.
2. Your operating system is sending a longer / shorter label to Printer
Solution2:
Please ensure you have the correct label size:
For Windows
Go to the Control Panel -> Devices and Printers -> Right Click on Label
printer -> Printer Preferences -> Page Setting.
Select 4 x 6 labels
For Mac
Go to Print setup-> select4" x 6" size in the print prompt window
3. Another reason is the sensor that detects the paper is affected by dust,
if so, please clean the sensor with the alcohol swap or clean cloth.

6.It keeps printing the same label?
If this keeps happening, it is most likely because Label Printer hasn't
learned your label's properties. This is usually followed by a blinking
red light.
1) Please turn Label Printer off using the black switch and turn it on,
which can clear any pending print jobs.
2) Ensure you have several labels available behind or in Label Printer and
one label loaded for Label Printer to print.
3) Please press and hold the top button until you hear a beep, then let go.
This starts the automatic label identification and you should see your label
moving back and forth and stopping at the correct tear-off point.
4)When you see a green light, try your print and it should print perfectly
moving forward.
7.Barcode came out some black blocks/ thick?
Reason: the Density value is high
Solution:
1. Set the print Density value to about 4 in Preview( Mac system)
Please note: If you use the PDF software of Preview, the fond and barcode
are deepened automatically.
2. open the PDF file via Adobe Reader to print, the density value is 8-12
3. For windows, go to label printer--manage--printing preference-page
setup-density--(8-12)
4.Margins
Please make ensure the content takes up the whole label. If there are
extra borders, your design may be “shrunk” printed in a smaller size
resulting in fade content.
5. Dust or adhesive on the printer head.
Please try to clean the printer head with a clean cloth or alcohol.
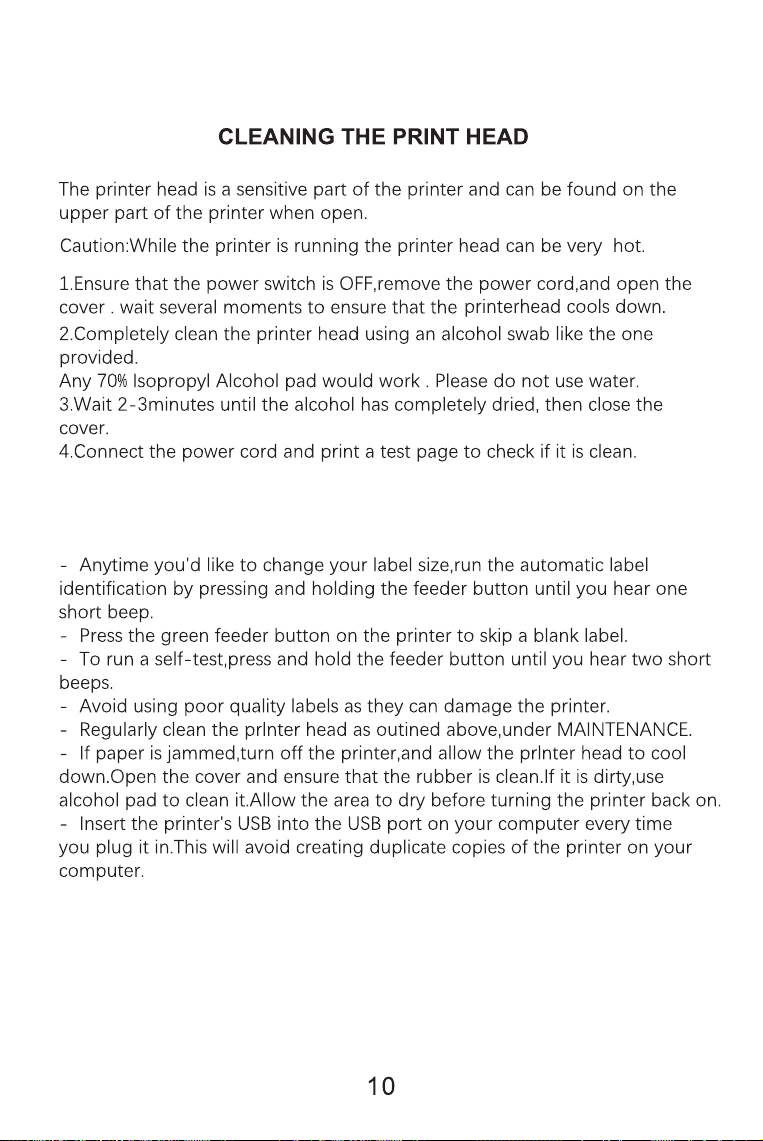
9.Maintanance
10.Pro tips
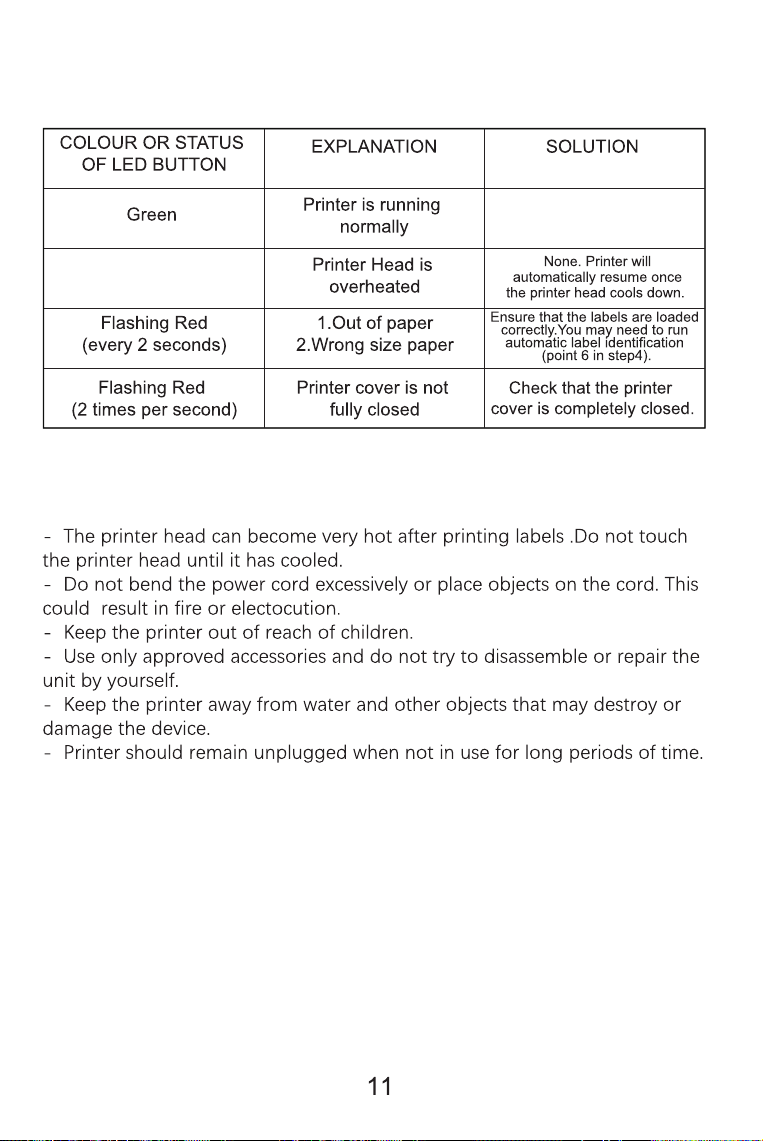
12.Safety tips
11.LED indicator
Flashing red
and green alternately

FCC WARNING
This device complies with part 15 of the FCC Rules. Operation is subject to
the following twoconditions:
(1) this device may not cause harmful interference, and
(2) this device must acceptany interference received, including interference
that may cause undesired operation.Any changes or modifications not
expressly approved by the party responsible for compliancecould void the
user's authority to operate the equipment.
NOTE: This equipment has been tested and found to comply with the limits
for a Class Bdigital device, pursuant to Part 15 of the FCC Rules. These limits
are designed to provide reasonable protection against harmful interference
in a residential installation. This equipmentgenerates, uses and can radiate
radio frequency energy and, if not installed and used in accordance with the
instructions, may cause harmful interference to radio communications.
However, there is no guarantee that interference will not occur in a particular
installation.If this equipment does cause harmful interference to radio or
television reception,which can be determined by turning the equipment off
and on, the user is encouraged to try to correct the interference by one or
more of the following measures:
-- Reorient or relocate the receiving antenna.
-- Increase the separation between the equipment and receiver.
-- Connect the equipment into an outlet on a circuit different
from that to which the receiver is connected.
-- Consult the dealer or an experienced radio/TV technician for help.
To maintain compliance with FCC’s RF Exposure guidelines, This equipment
should be installed and operated with minimum distance between 20cm the
radiator your body: Use only the supplied antenna.
WhatsApp
After-sales service
Index: www.aiyin.com
Driver: help.aiyin.com
E-mail: suppor[email protected]

