User Manual
20251216
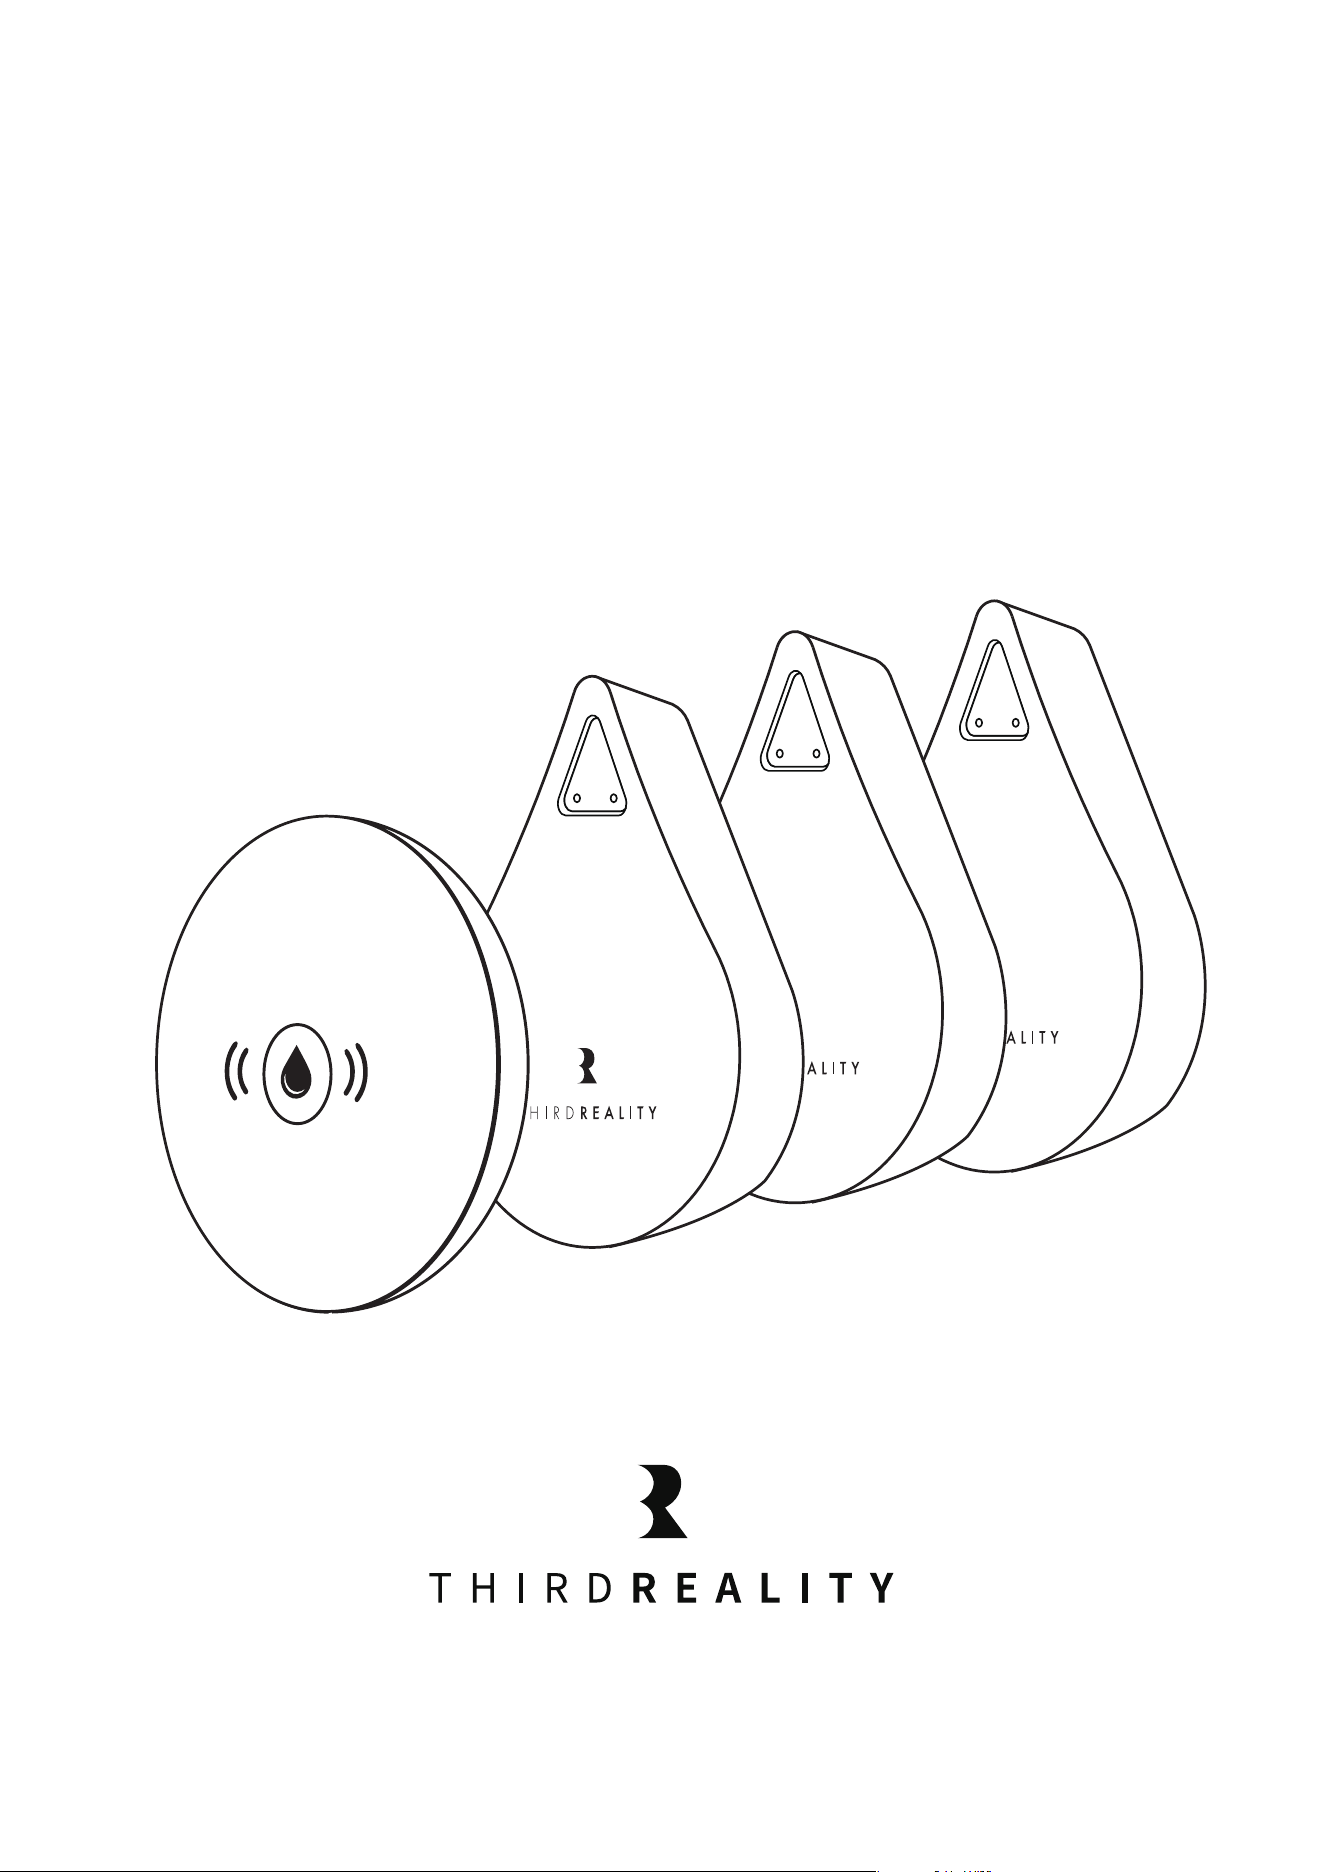
Smart WaterLeak Sensor Kit

Contents
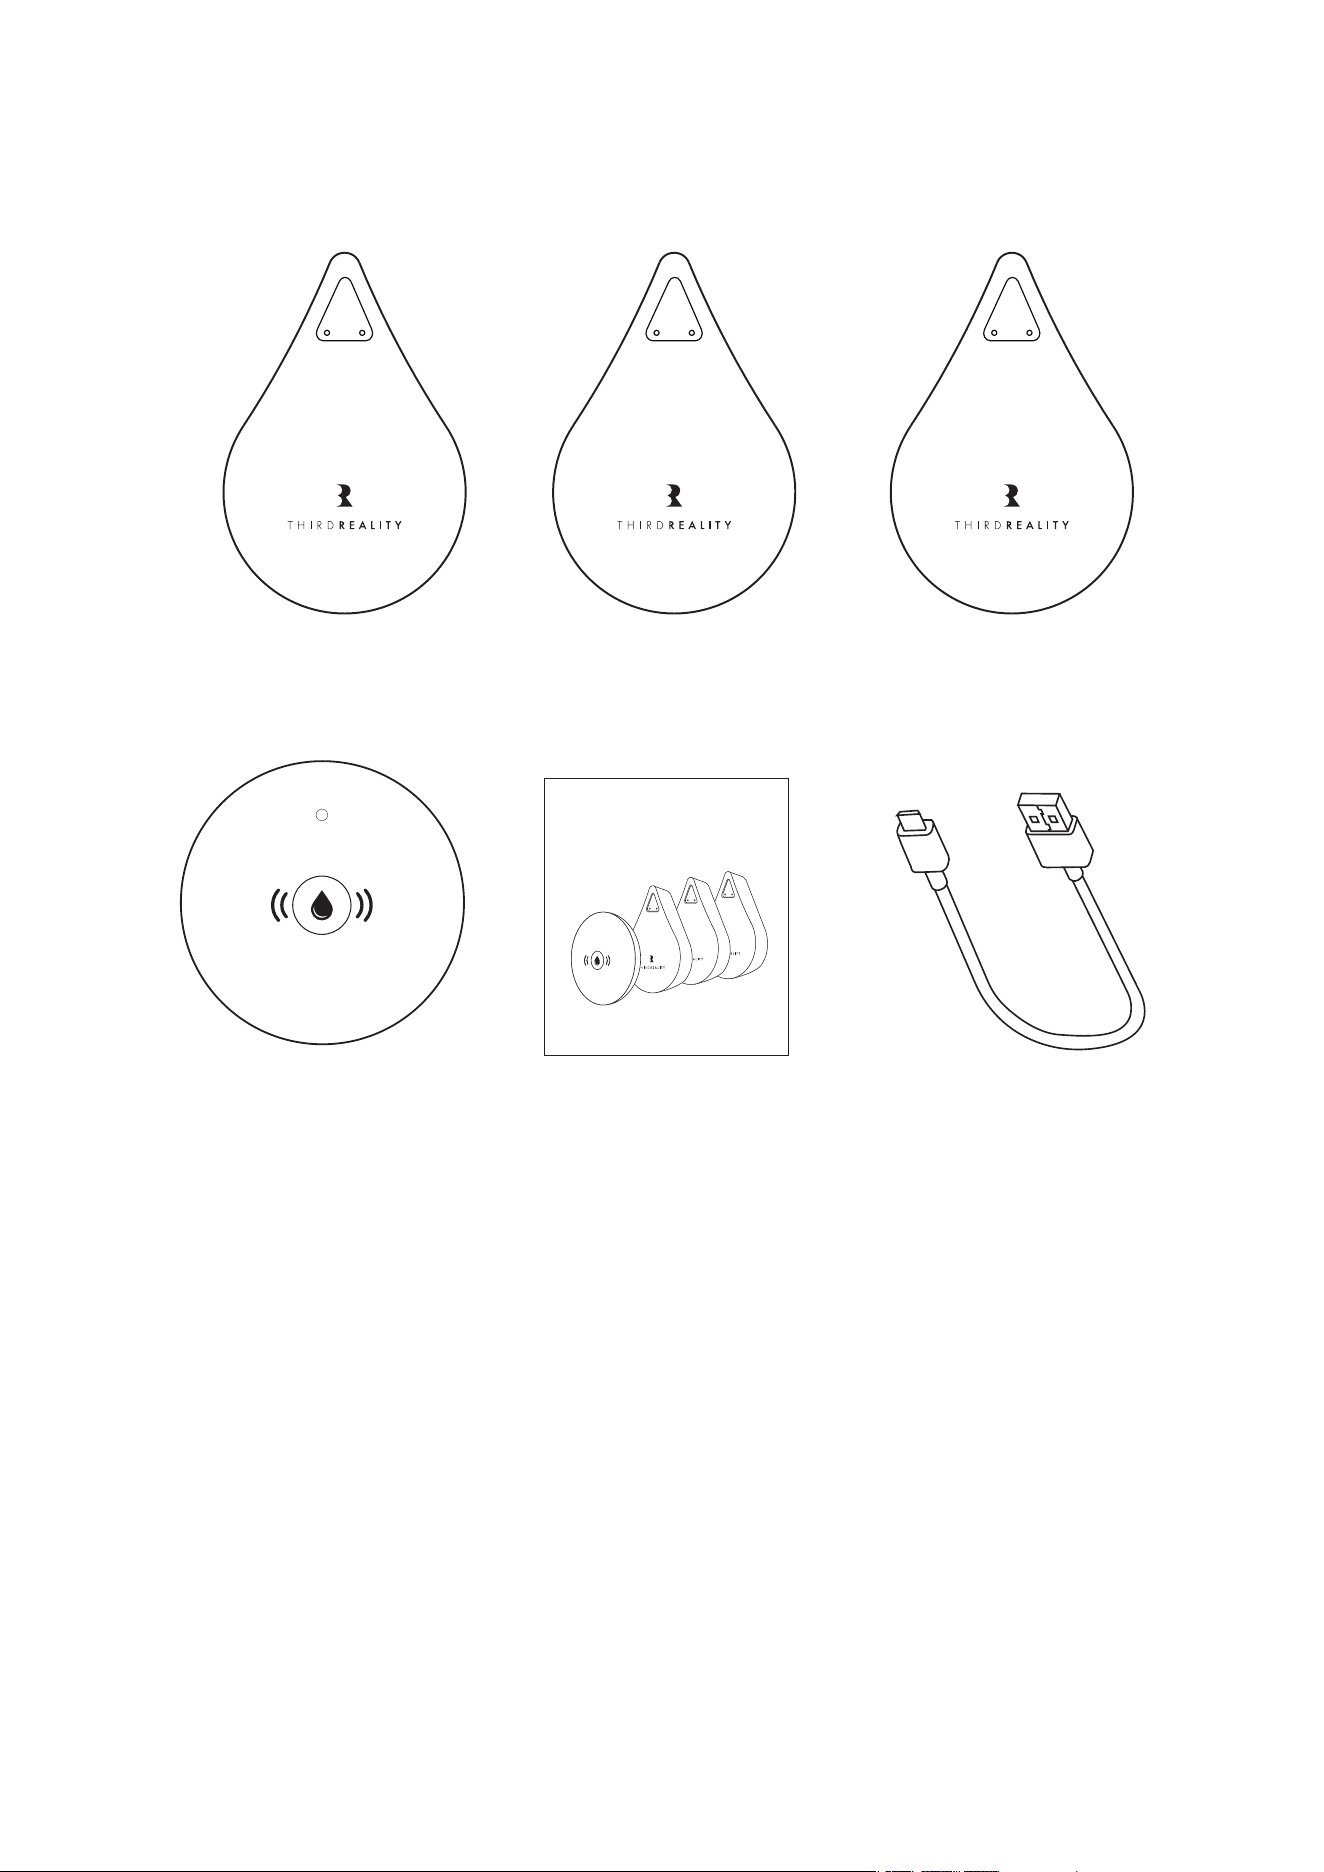
Package Contents
Product Overview
Product Specifications
LED Indicator Reference
Installation Instructions
Safety & Maintenance
Pairing with 3R-Installer App
Pairing with Apple Home
Pairing with Alexa
Pairing with Home Assistant
Troubleshooting
FCC Regulatory Conformance
RF Exposure
Limited Warranty
01
02
02
03
04
06
07
10
13
16
19
21
22
22
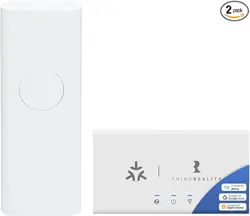
Package Contents
Note: Battery Not Included
Based on customer feedback, we found that AAA batteries are already
widely available in many households, and some users prefer to use
their own rechargeable batteries. For this product, AAA batteries are not
included in the package. Please install your preferred AAA batteries
before use.
01
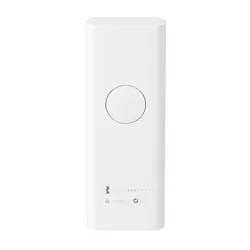
Main Controller
×1
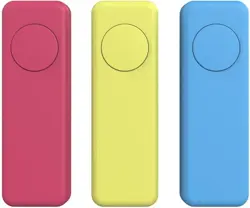
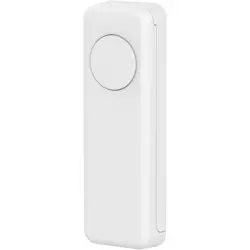
Water Leak Sensor
×3
Quick Start Guide
×1
USB Type-C Cable
×1
Matter WaterLeak Sensor Kit
Quick Start Guide
02
The Smart WaterLeak Sensor Kit is a smart home device designed to
detect water leaks or drips. It helps prevent property damage by activat-
ing alarms and sending alerts via your Matter-compatible smart home
system.
Product Overview
Product Specifications
Controller:
Power Input
Alarm Volume
Wireless Protocol
Max. number of connected sensors
Recommended Distance
Sensor:
Input
Recommended Distance
3V
Place each sensor within 100 meters
of the controller.
5V/1A [Type-C interface]
100dB
Matter over Wi-Fi
Up to 10 units
Place the controller within 20 meters
of the router.
LED Indicator Reference
03
Main Controller Unit
Sensor Unit
LED Status
Flashes once every 30 seconds
Off
Flashing slowly in Red
Flashing rapidly in Red
Description
Low Battery
Normal operation
Water leak detected
Ready to pair with the Main Controller
LED Status
Flashing slowly in Blue
Flashing rapidly in Blue
Off
Solid Blue
Blue light flashes 3 times
Flashing rapidly in Red
Flashing in Red and Blue
Description
Matter Pairing Mode
Connecting to Main Controller
Normal operation/ connected
Press the button once to enter sub-device
binding mode.
The mode remains active for 3 minutes. Press
the button again to exit before timeout.
Sub-device Successfully Bound:
Blue LED: 3 flashes Buzzer: 3 beeps
Device Error / Abnormal Condition
The alarm is triggered, accompanied by the
buzzer beeping.

04
Installation Instructions
Main Controller Installation
Connect the controller to a 5V/1A power adapter(not included)
using the TypeA-C cable provided in the package. Once powered
on, the LED indicator will light up.
Place the controller in a central location of your home or within 20
meters of your Wi-Fi router for a stable signal.
You can turn the alarm on or off by manually switching between
ON and OFF.
Note: Avoid installing the controller inside metal cabinets or near
strong interference sources (e.g., microwave ovens).This may
weaken or block the wireless signal.
1.
Sensor Unit Preparation
Pair with the Main Controller
Open the sensor cover, then install the battery(not included) to
activate the sensor. Place the sensor in locations where water leaks
are likely to occur or where you wish to monitor for potential leak-
age. Three Sensor Units are included in the package — no setup
required. Just power on and use.
2.
1)

Factory Reset & Deep Factory Reset
Factory Reset (Normal Use)
Press and hold for 5s until the red light turns on, the device will be
restored to factory settings and clear the network configuration.
Deep Factory Reset
Press and hold for 30 seconds until the red light flashes. This oper-
ation will clear all data, network settings, pairing information, and
user configurations of the device, including the pre-paired sensor
units in the package.
3.
Add additional sensor (purchased separately)
Bind the sensor to the controller
A.Press the central button of the main controller unit one time, the
blue light will stays on. Then press the internal button of the sensor
unit one time. The controller will flash the blue light three times
rapidly when the binding is successful.
B. Follow the on screen instructions in the 3R-Installer app to scan
or enter the ID number of the sensor unit, you will be able to add
new sensors to the controller.
After successful binding, you need to reconnect the controller to
the platform to display it in the app.
Tip: Any devices that were previously added manually (excluding
those included in the original kit) should be rebound as sub-de-
vices before pairing again.
05
2)

To ensure proper operation, avoid exposing the controller to high tem-
peratures or high humidity. When low battery is indicated, replace the
sensor batteries immediately to ensure proper operation. Regularly
inspect the water probe on the sensor and clean as needed to maintain
optimal detection sensitivity. Clean only with a soft cloth, slightly damp if
necessary. Do not use organic solvents or abrasive cleaners.
Binding the controller to a Matter Platform
Ensure the Main Controller is powered on.
Press and hold the central button 5s until the red light turns on and
then the LED indicator starts flashing slowly in blue - this means
the controller is now in pairing mode.
Open your preferred Matter-compatible app and Select “Add New
Device”.
Enter the numerical pairing code on the device or scan the OR code
in the user manual.
Follow the on screen instructions to complete setup.
Once pairing is completed, the LED on the controller will remain
steady then off in blue, indicating a successful connection.
Sensor status updates will appear automatically in your app.
4.
Safety & Maintenance
06

07
1.
2.
3.
4.
5.
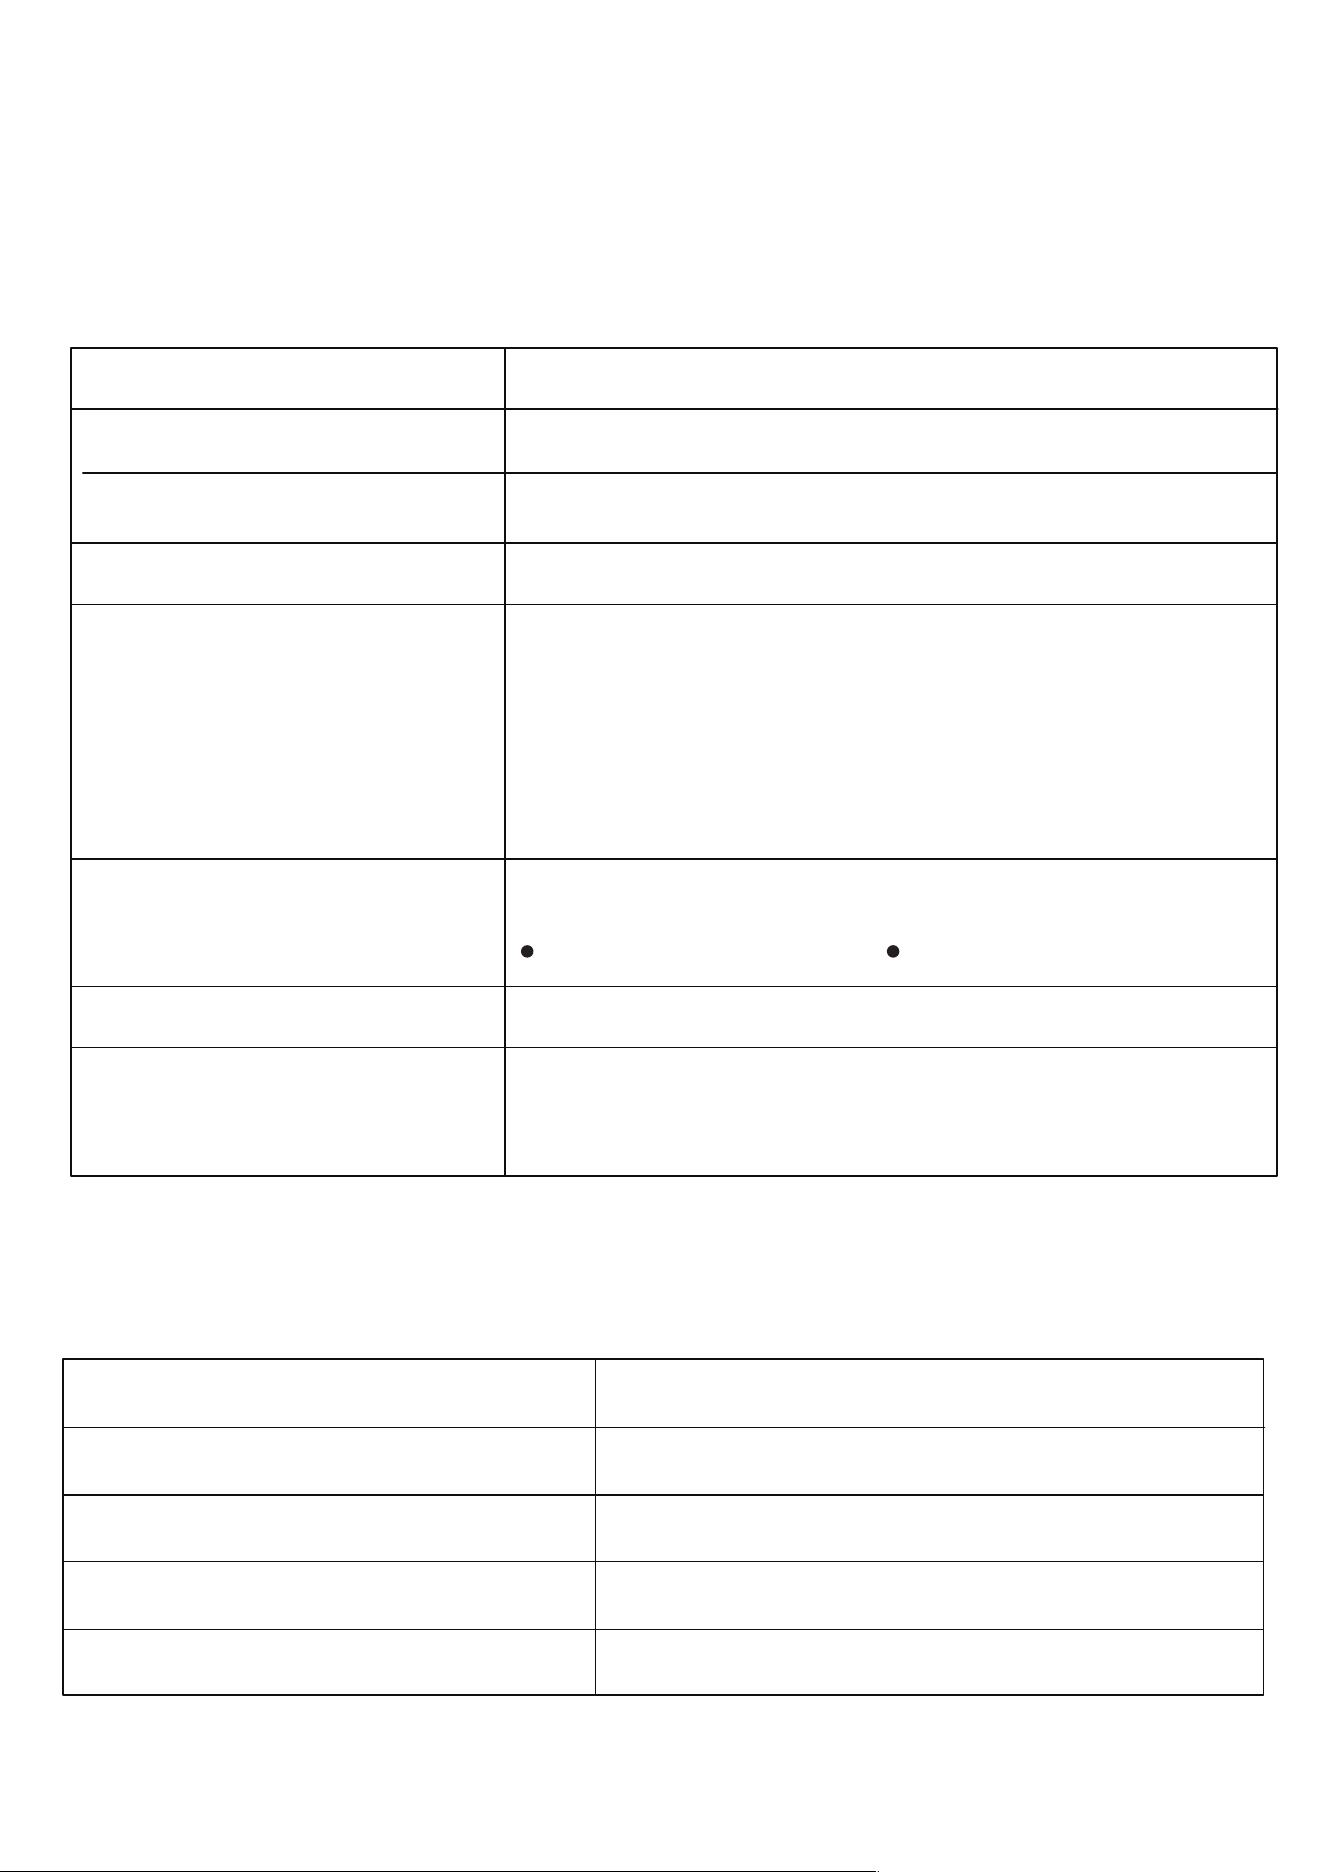
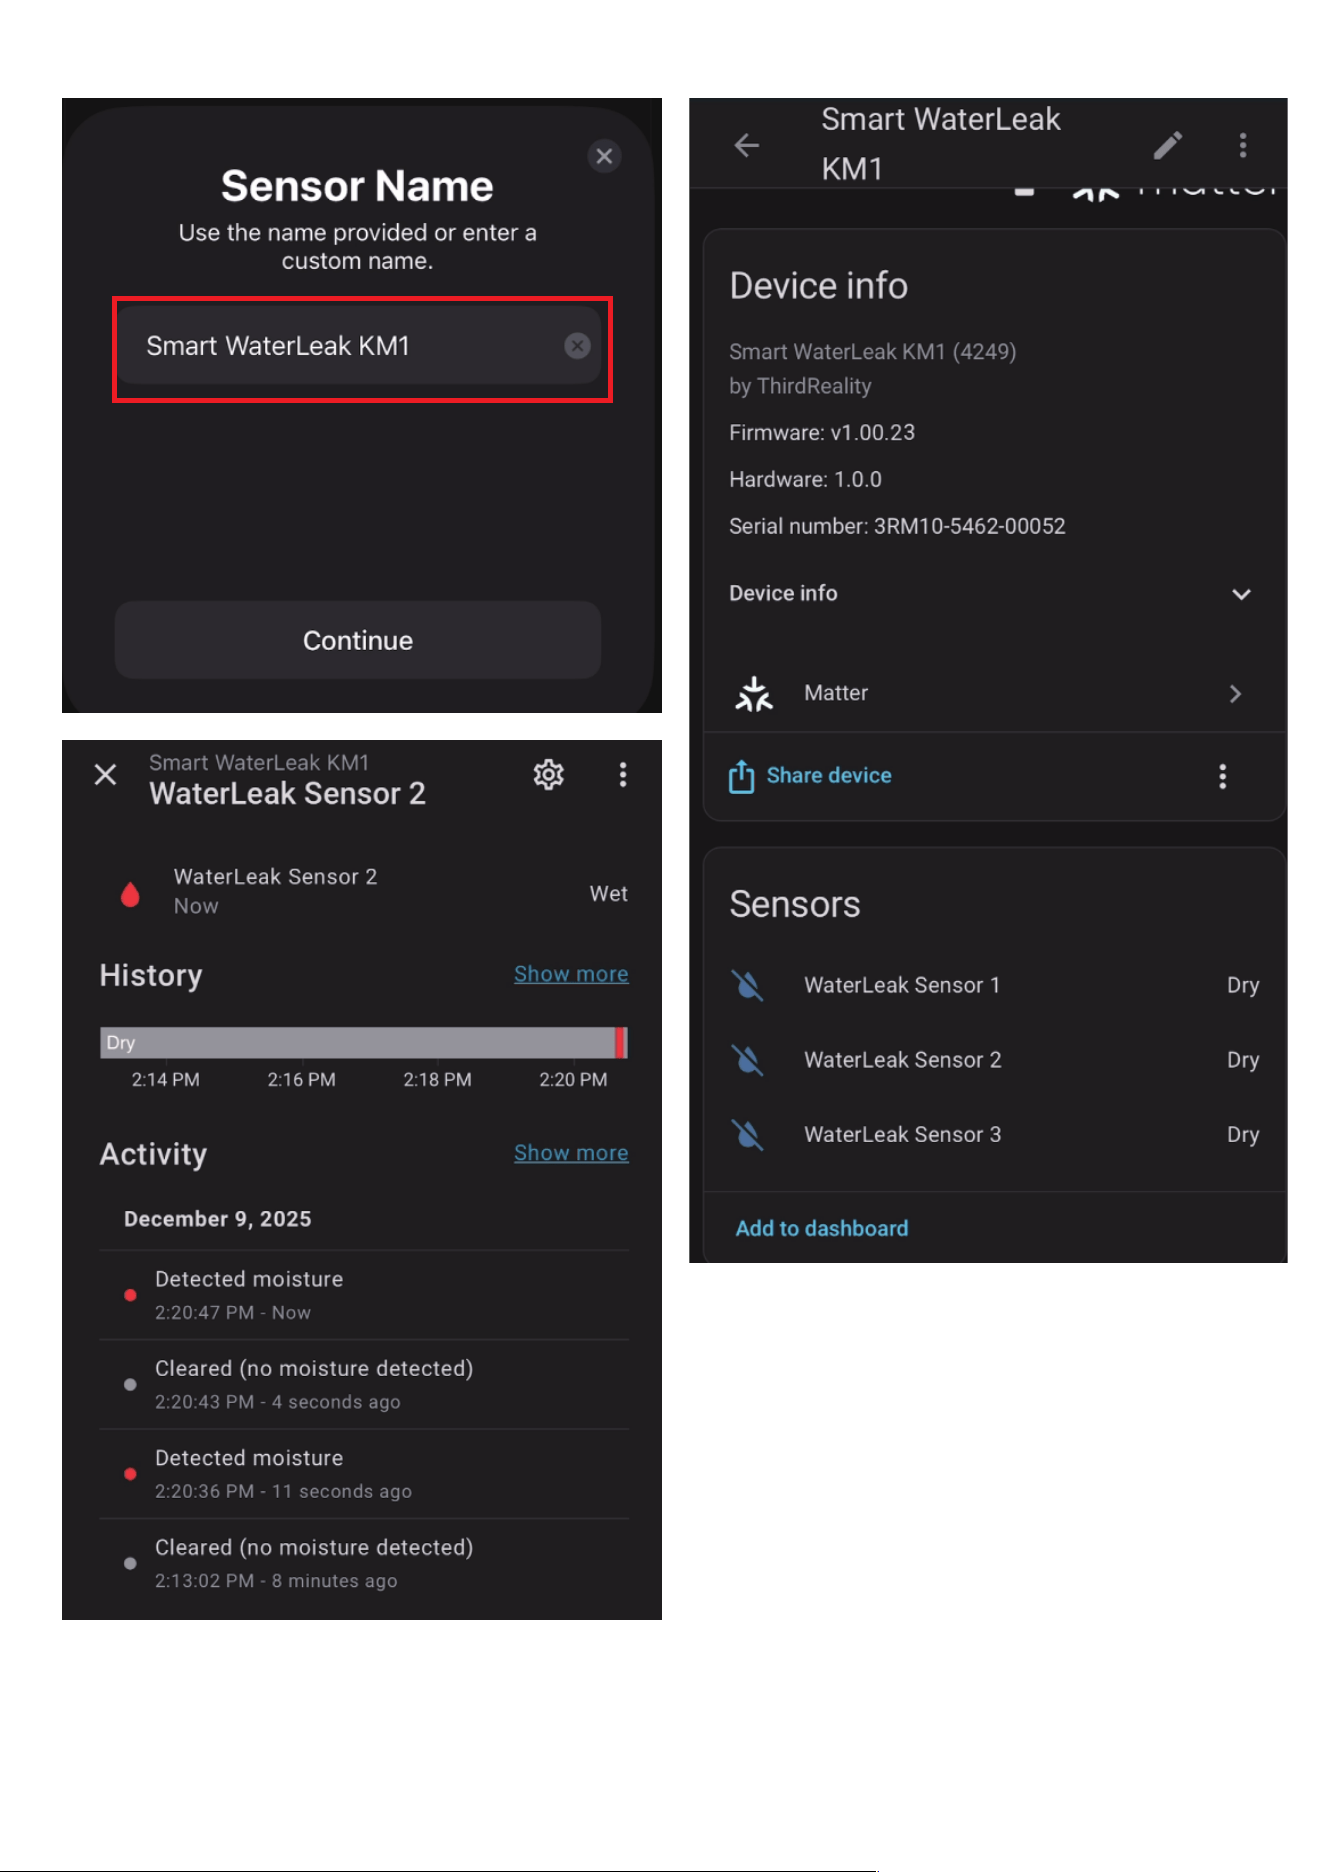
Pairing with 3R-Installer App
Download and install 3R-Installer App in App Store/Google Play
Store on your phone. Turn on Bluetooth on your phone, and make
sure it has a stable internet access through a 2.4GHz WiFi network.
Power up the main controller, the blue LED flashes slowly, indicat-
ing it is in pairing mode. If it is not in pairing mode, please press
and hold the button on the main controller to perform a factory
reset.
Tap + in the up right in 3R-Installer App, scan MATTER QR code on
the controller, follow the instructions in the app to complete setup.
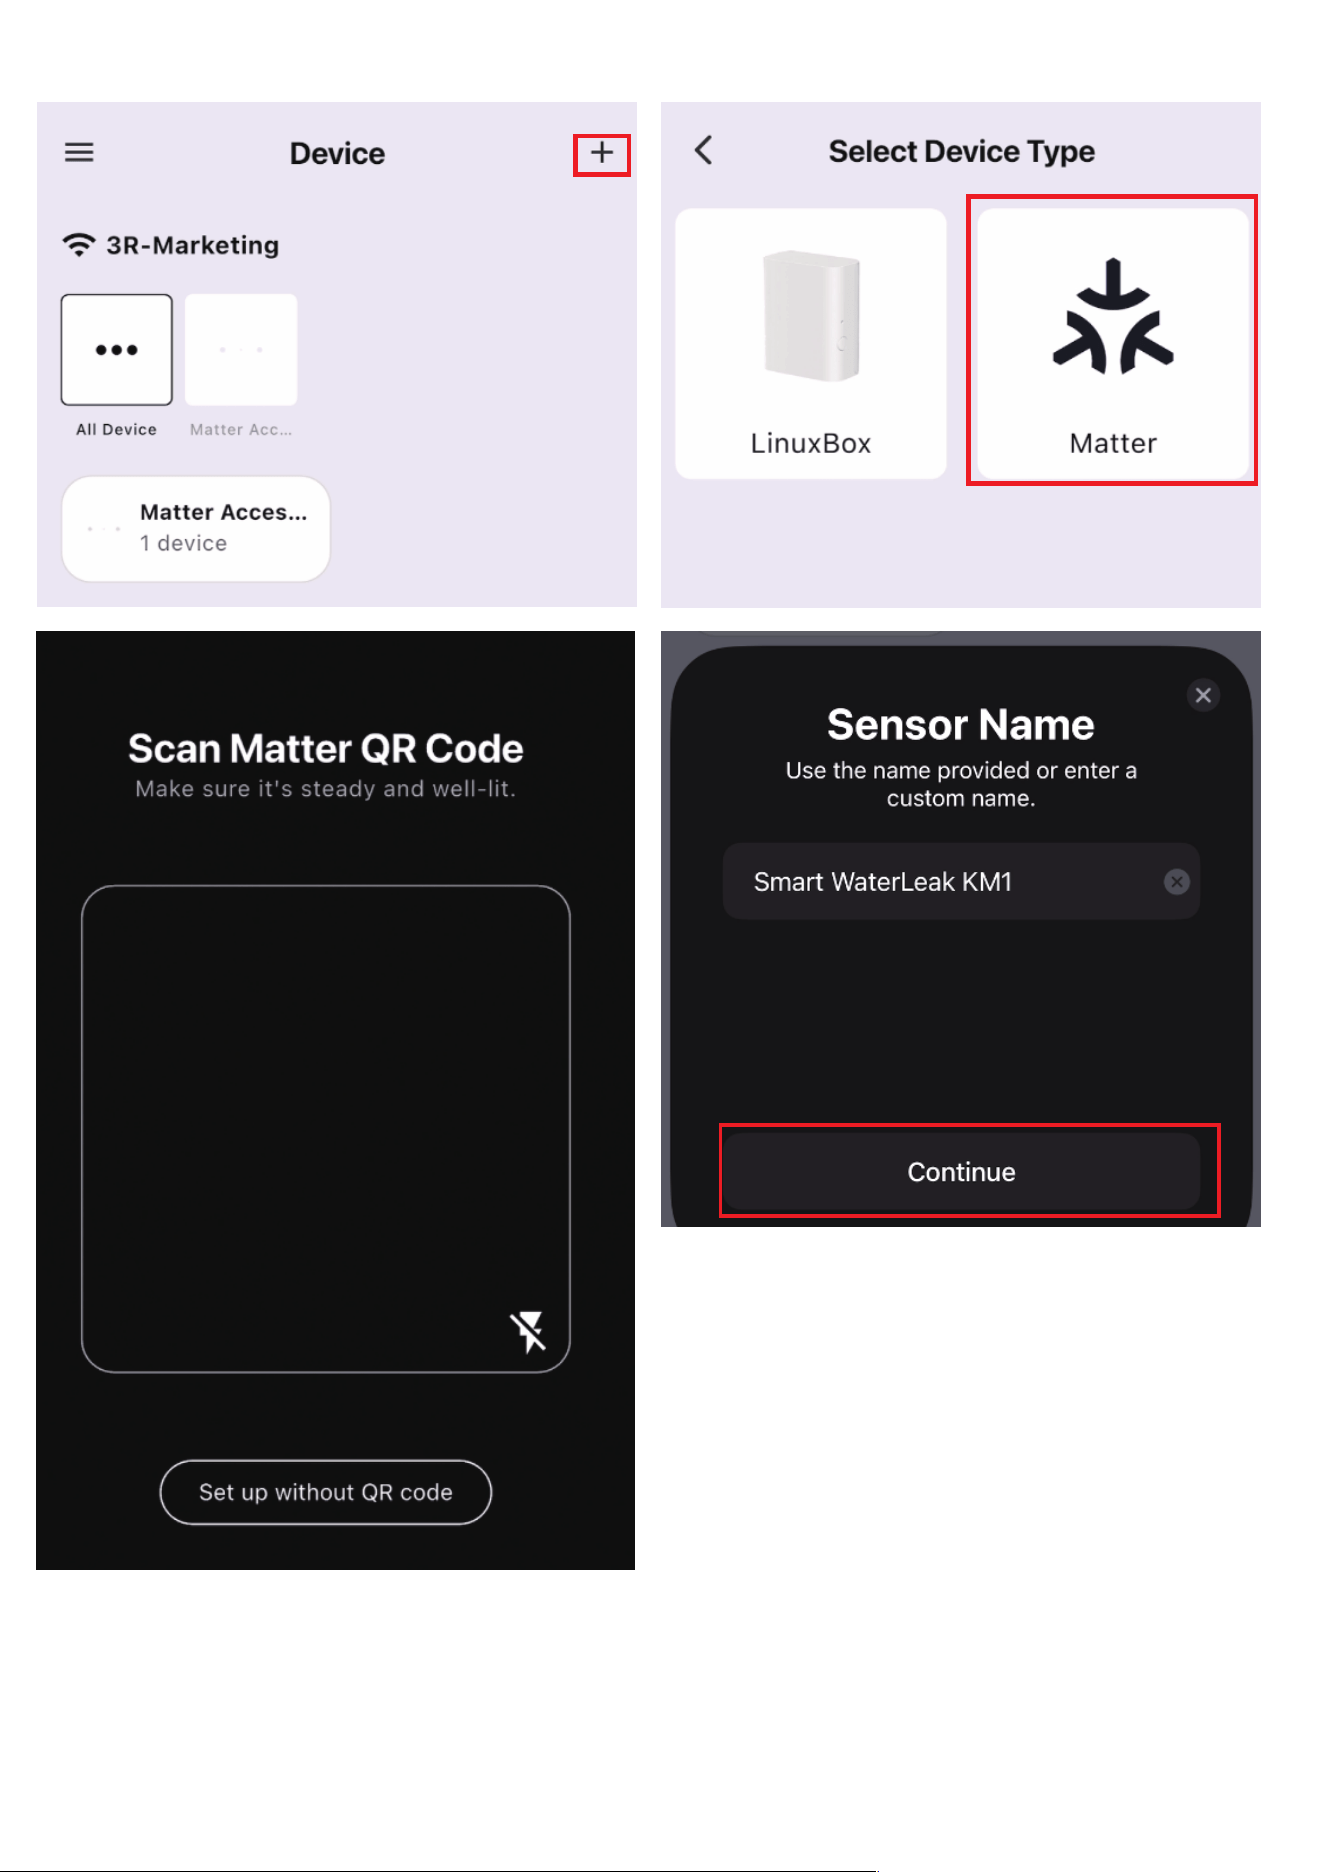
After pairing is complete, the sensors status will be automatically
updated and displayed in the app. Click the device icon to enter
the device page, then tap Check Updates for firmware OTA.
Important: Stay in this page during OTA. Exiting requires a restart
for OTA.
Tap Link with Matter Enable Services to add the main controller to
another Matter controller through multi-admin.
This Matter certified device can be paired to any Matter certified ecosys-
tems.
08
09

10
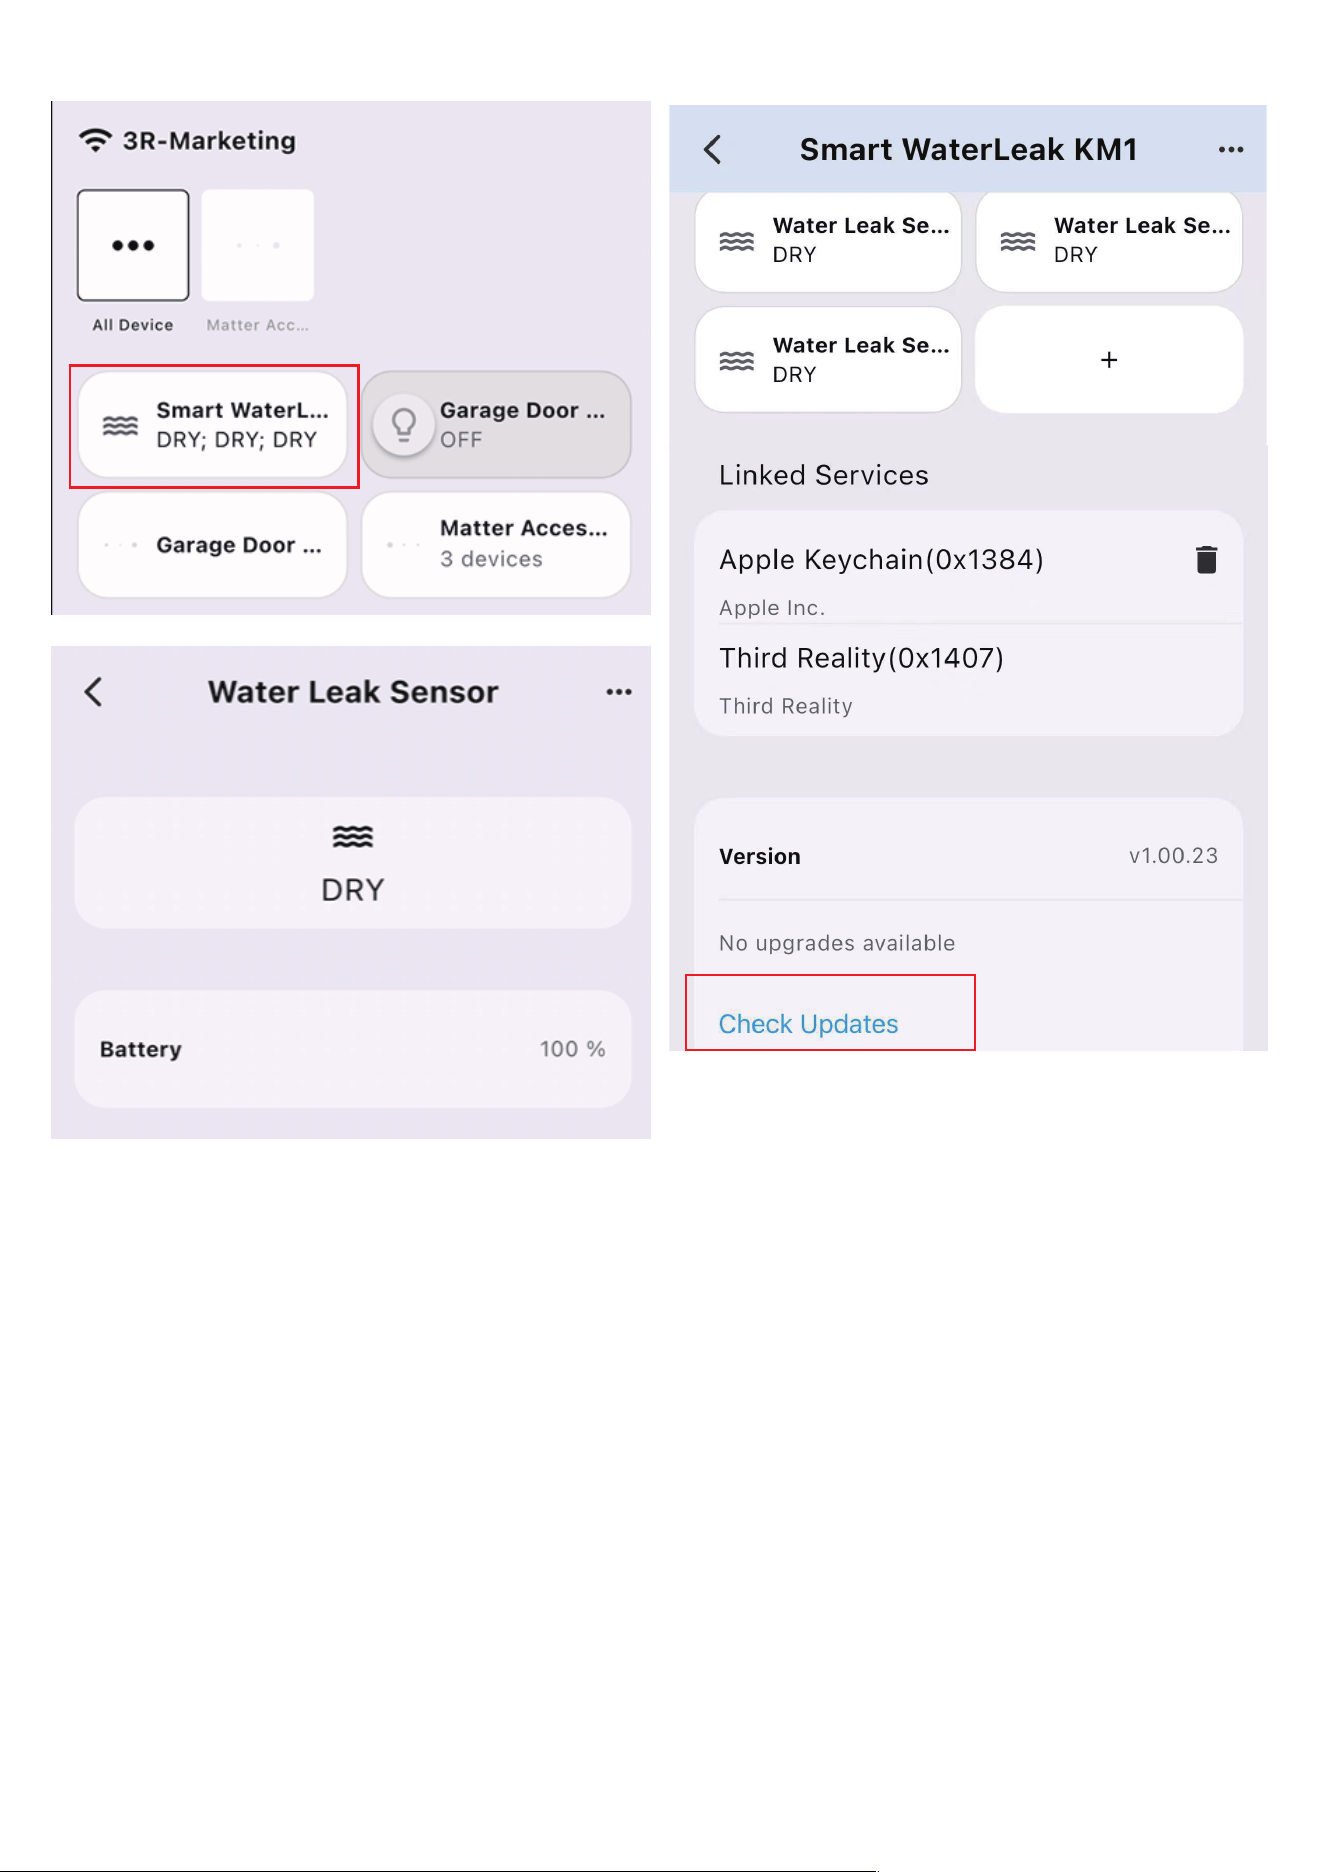
Compatibility:
IOS system: Version 16.6 or later.
Matter-supported Controller: Home Pod, Home Pod mini, or Apple TV.
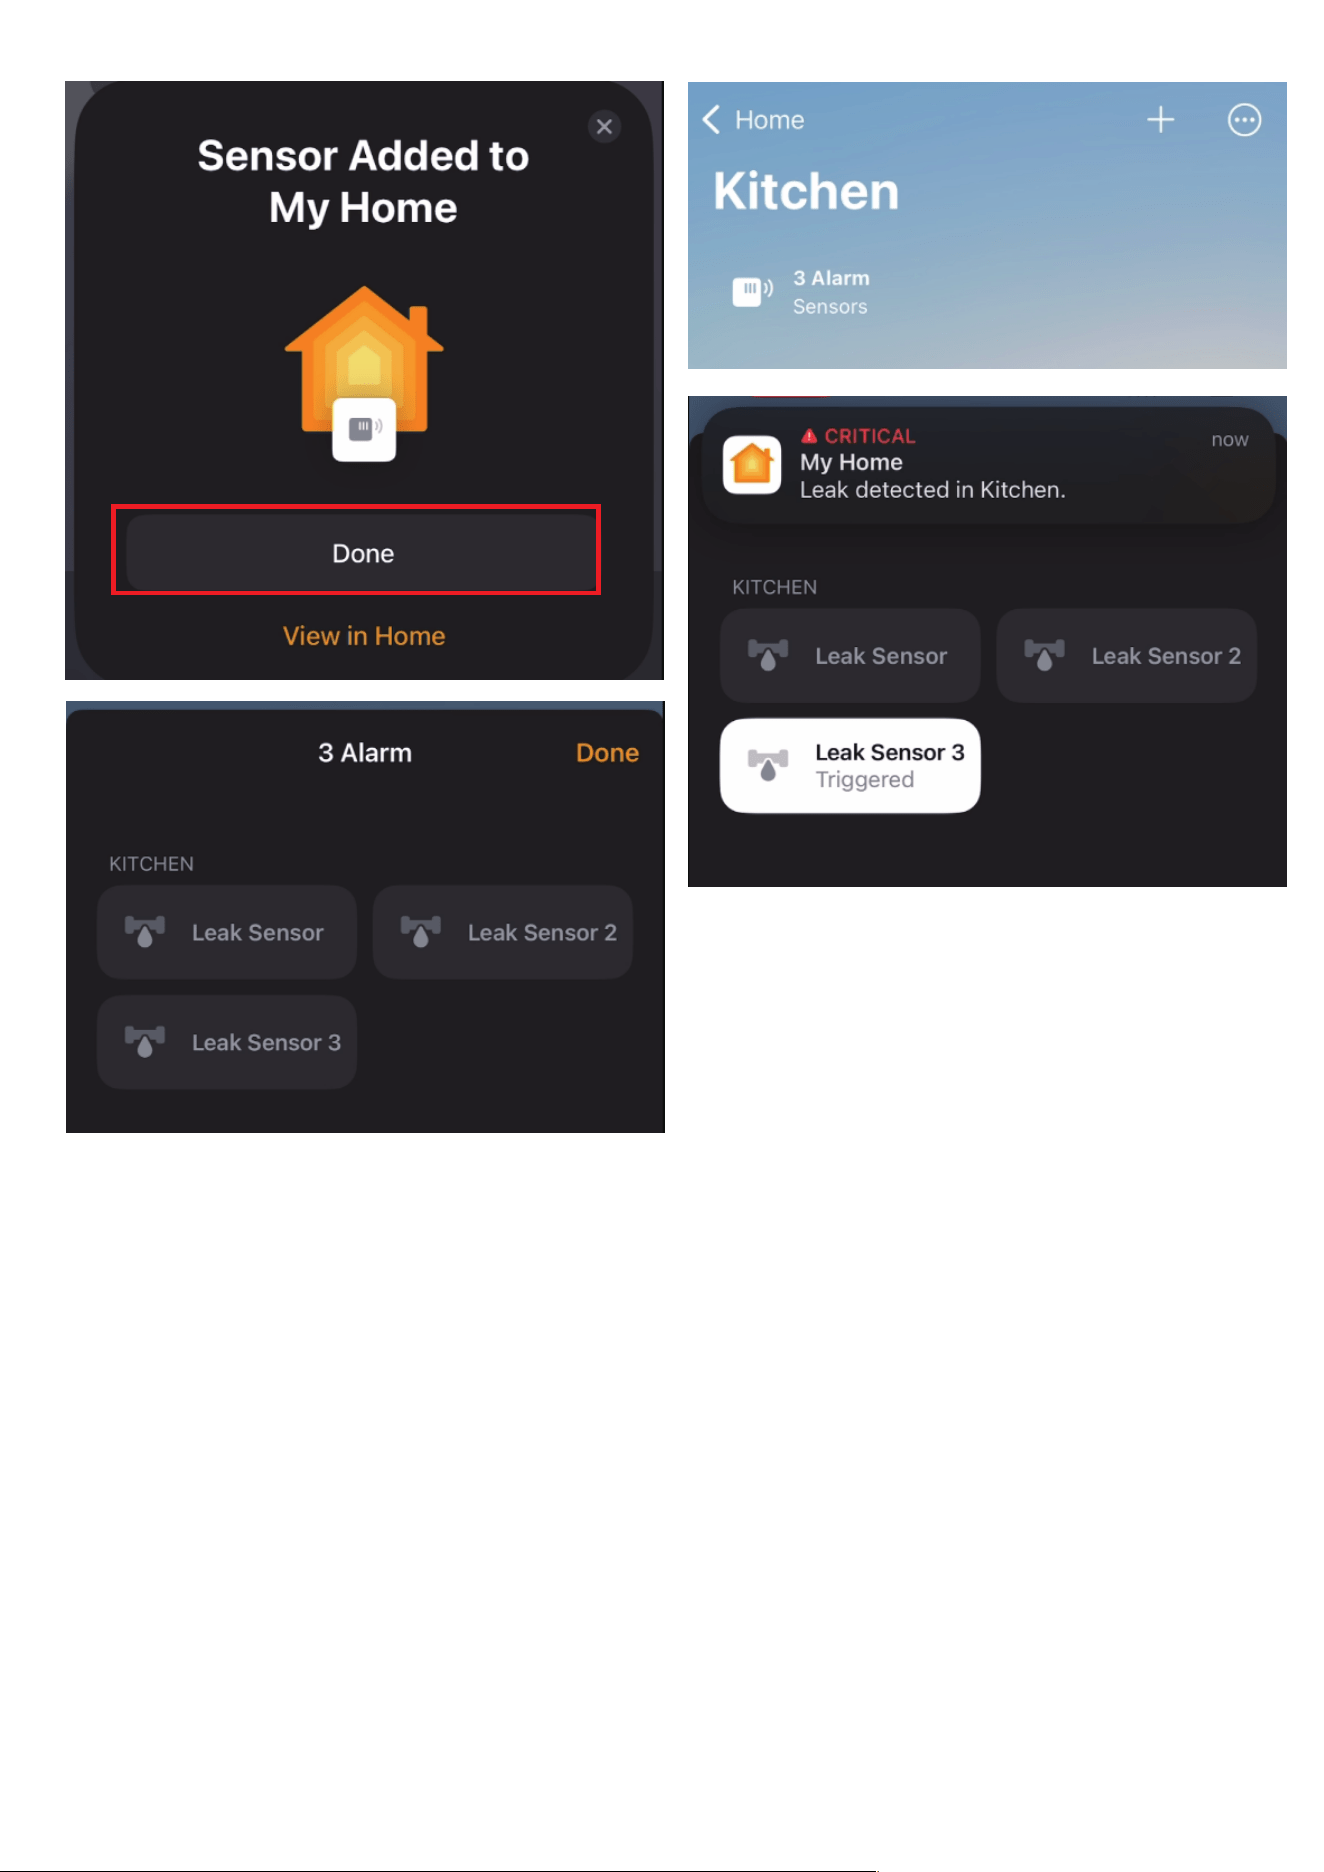
Launch your Home App. Tap+ and then tap Add or Scan Accessory
to add a new device.
Power up the main controller, the blue LED flashes slowly, indicat-
ing it is in pairing mode. If it is not in pairing mode, please press
and hold the button on the main controller to perform a factory
reset.
Tap + in the up right in Apple Home App. Scan the MATTER QR code
on your device. Once pairing is completed, you can choose a loca-
tion and set a name for your device.
After pairing is complete, the sensors status will be automatically
updated and displayed in the app. Then you can check your device
on the Device list and create automation for your device on the
Home app.
To connect the device to another MATTER certified ecosystem app,
you need to go to the app of the first ecosystem to generate a new
setup code. Go to the Device Settings page, scroll down, tap Turn
On Pairing Mode and then Copy Code. Launch the app of another
MATTER certified ecosystem, follow the setup instruction to enter
the setup code and follow the app instructions to complete the
setup.
1.
2.
3.
4.
5.
Pairing with Apple Home
11
12

Alexa app version:
Android: 2.2.542657.0 or later
IOS: 2.2.575623.0 or later
Set up your Amazon Alexa Speaker, connect your phone to your
WiFi router.
Power on the Main Controller, Press and hold the central button 5s
until the red light turns on, then the LED indicator starts flashing
slowly in blue - this means the controller is now in pairing mode.
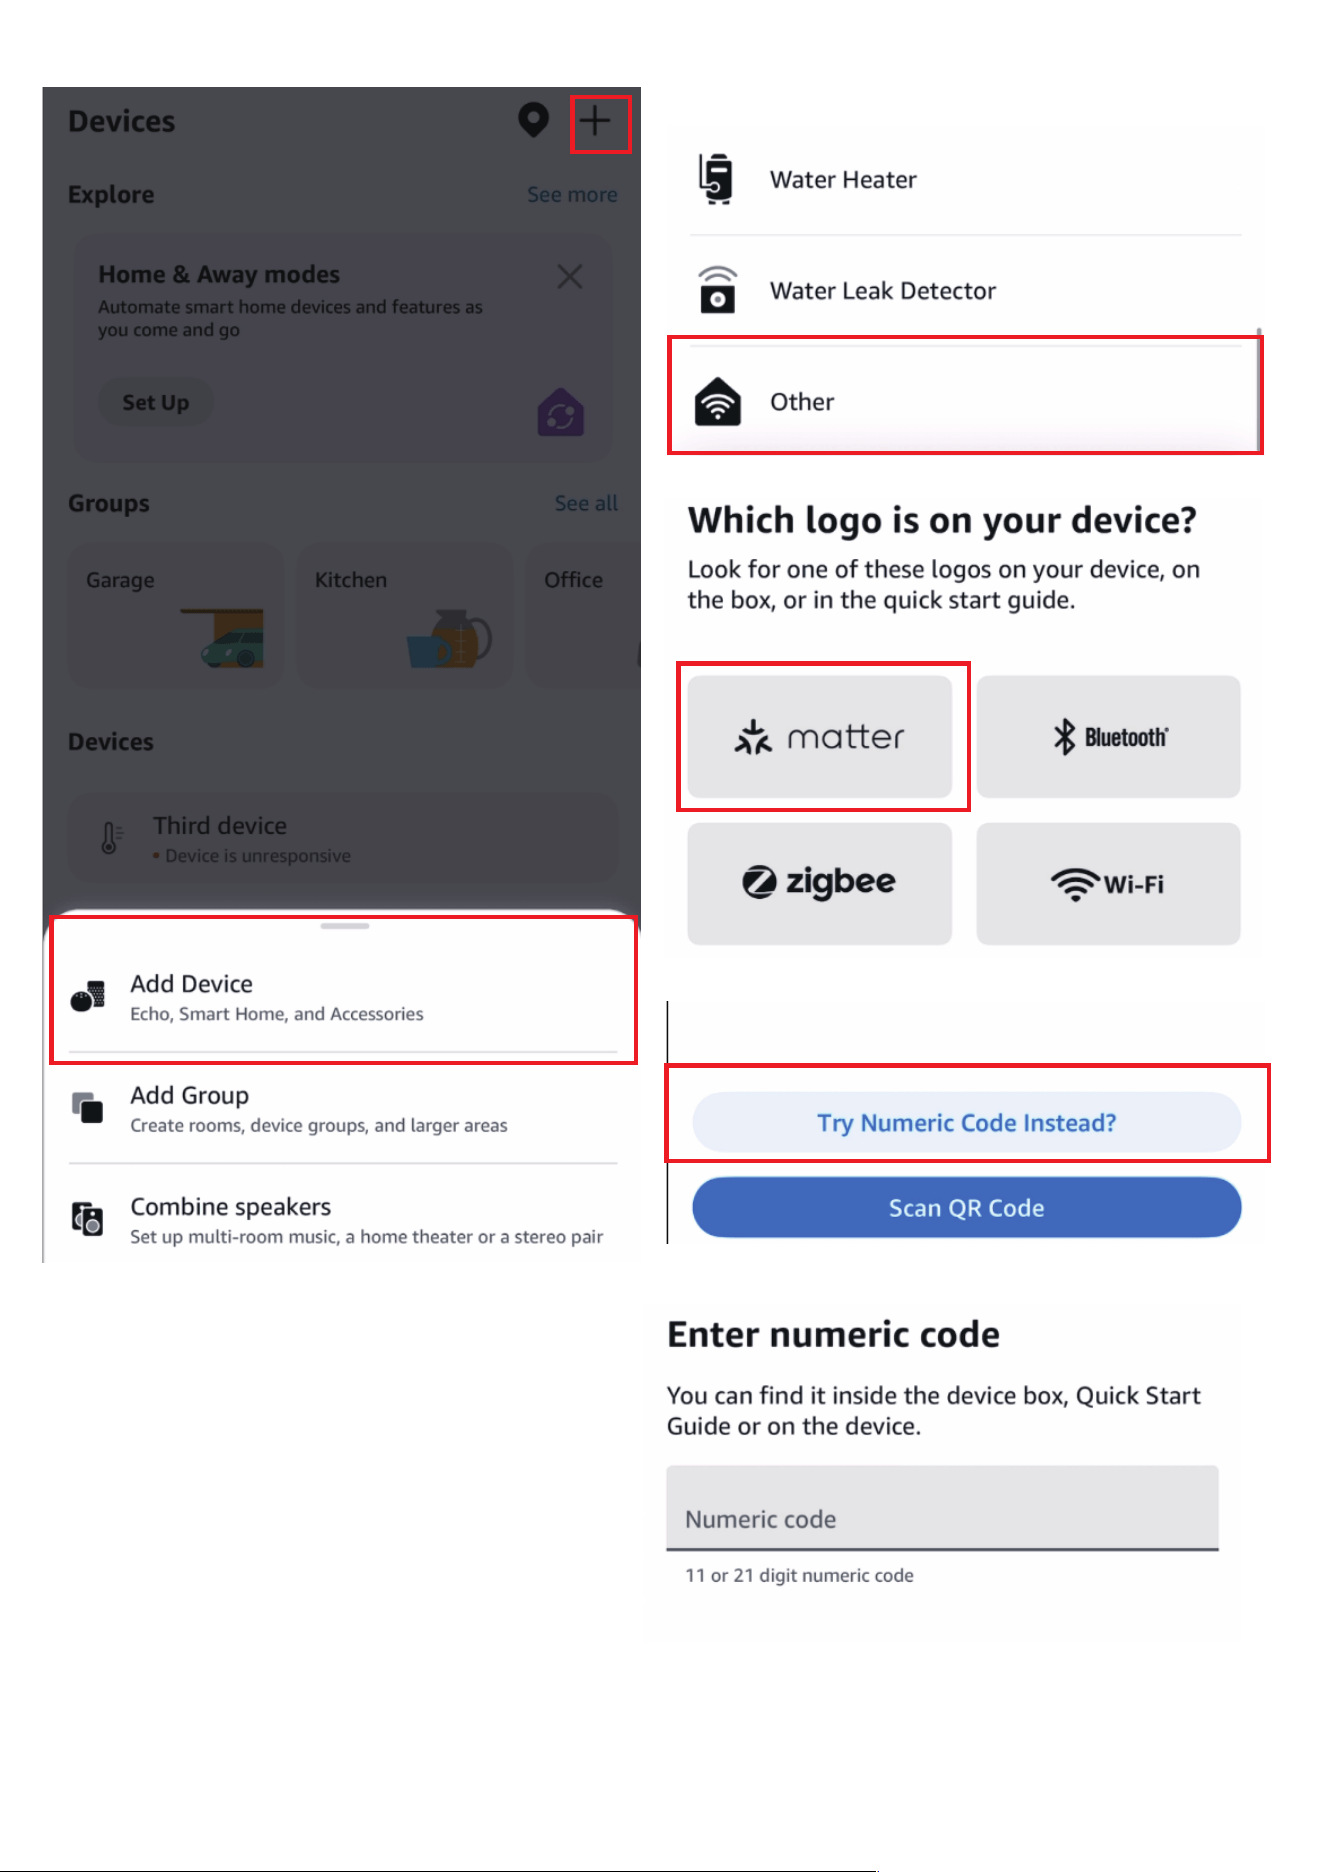
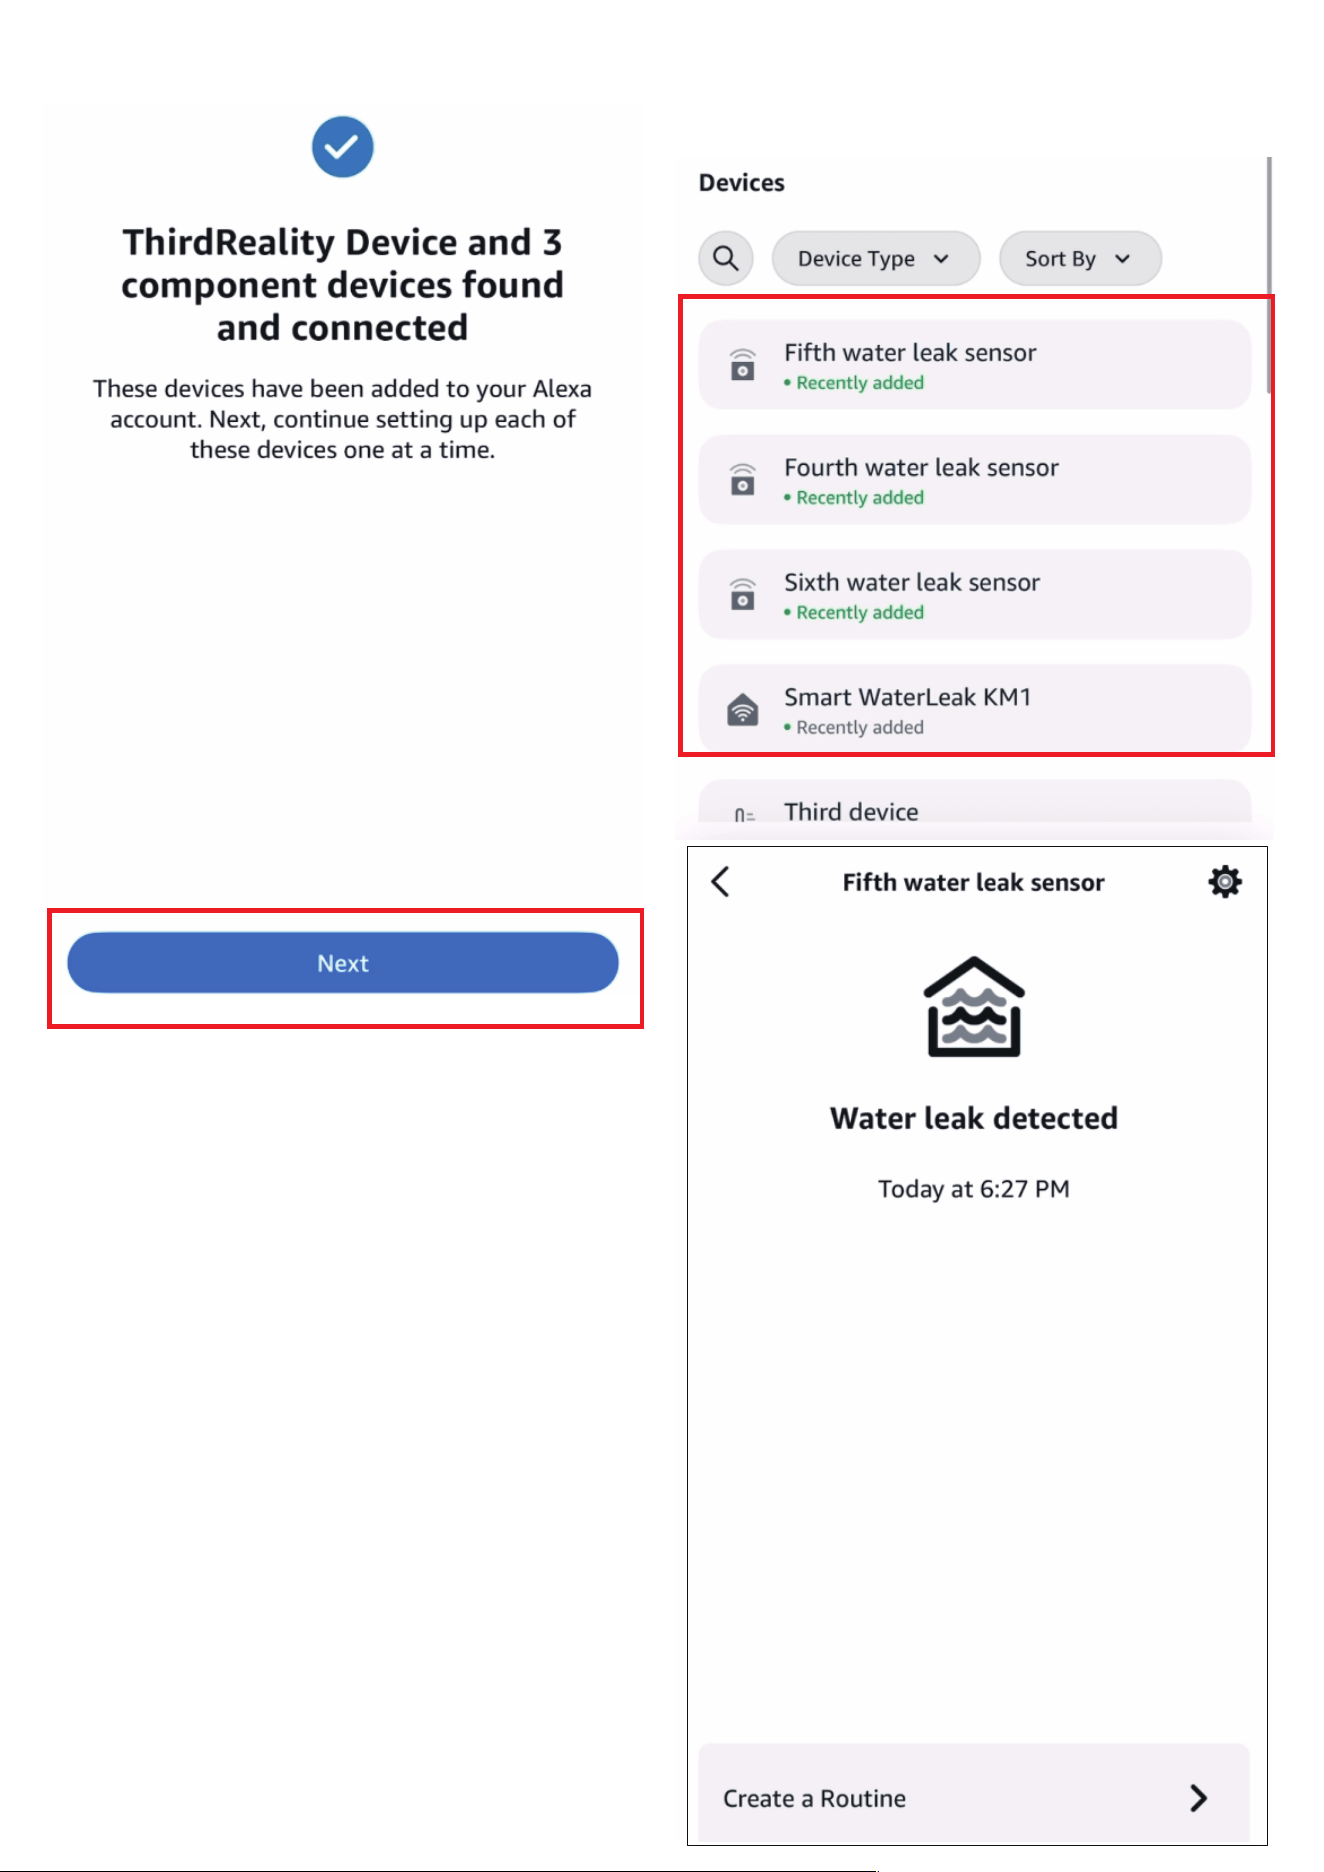
Open your Alexa app and sign in, tap + in the up right and follow
the instructions to add device. Make sure to connect the device and
the Echo Speaker to the same WiFi router.
After pairing is complete, the sensors status will be automatically
updated and displayed in the app. Then you can check your device
on the Device list and create automation for your device.
To connect the device to another MATTER certified ecosystem app,
you need to go to the app of the first ecosystem to generate a new
setup code. Go to the Device Settings page, scroll down, tap Turn
On Pairing Mode and then Copy Code. Launch the app of another
MATTER certified ecosystem, follow the setup instruction to enter
the setup code and follow the app instructions to complete the
setup.
1.
2.
3.
4.
5.
Pairing steps:
Pairing with Alexa
13
14
15

Compatibility: Home Assistant with Matter integration
Power up the main controller, the blue LED flashes slowly, indicat-
ing it is in pairing mode. If it is not in pairing mode, please press
and hold the button on the main controller to perform a factory
reset.
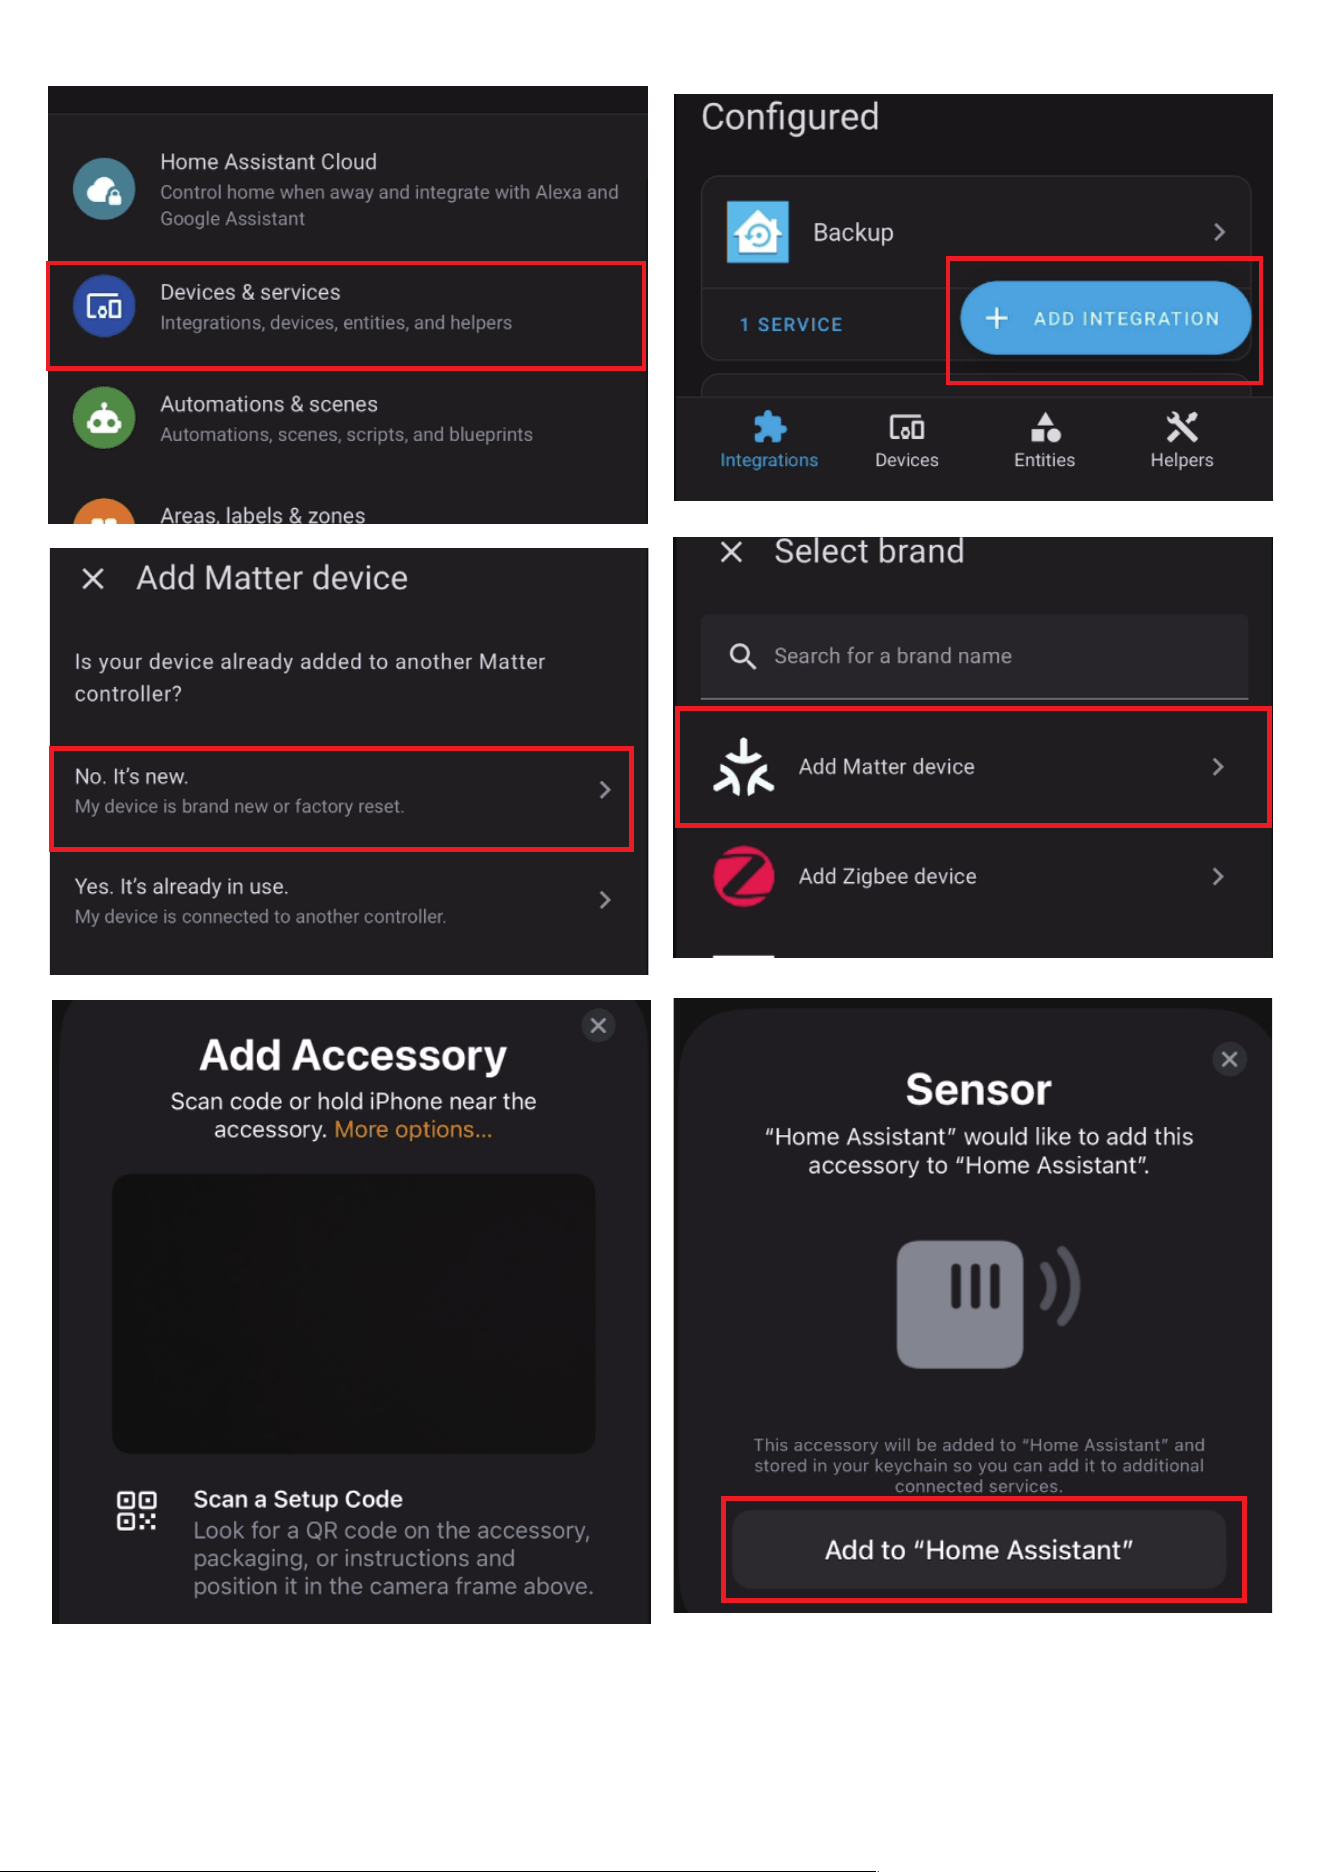
Use the Home Assistant App on your phone, go to Settings → De-
vices & Services, Click “+ Add Integration”, select “Matter”, and
follow the instructions to add the main controller by scanning the
QR code.
Once paired, the sensors status will be automatically updated and
displayed in the app. Then the device will show up in your HA dash-
board under “Devices”. You can also create automation for your
device.
To connect the device to another MATTER certified ecosystem app,
you need to go to the app of the first ecosystem to generate a new
setup code. Go to the Device Settings page, scroll down, tap Turn
On Pairing Mode and then Copy Code. Launch the app of another
MATTER certified ecosystem, follow the setup instruction to enter
the setup code and follow the app instructions to complete the
setup.
1.
2.
3.
4.
Pairing With Home Assistant
Zigbee Home Automation
16
17
18

Controller fails to power on?
Ensure the power adapter and cable are securely connected.
Sensor not responding?
Check and remove the insulation tab, or replace the battery if nec-
essary.
Device not appearing in the Matter app when pairing fails?
Press and hold the button on the controller until the LED turns red,
then refresh the device page and try again.
Experiencing weak signal or frequent disconnections?
Bring the controller closer to the sensors or reposition them for
optimal connectivity.
How to check the battery level of the sensor?
You may view the battery level of each sensor in the app. When a
sensor's battery is low, its LED indicator will flash red once every 30
seconds.
The main controller fails to operate properly after power-on?
For proper startup of the main controller, please refrain from hold-
ing the central button when powering on the controller.
1.
2.
3.
4.
5.
6.
Troubleshooting
19

20
Cannot delete the three sub-devices of the main controller?
The main controller is pre-configured with three water leak sensors
upon factory delivery.
You can perform Deep Factory Reset on the main controller to
replace the pre-paired sub-devices, but you cannot delete the
device.
The new device is not displayed in the app after successful bind-
ing.
You need to reconnect the controller to the platform to display it in
the app.
7.
8.

FCC Regulatory Conformance
This device complies with part 15 of the FCC rules. Operation is subject
to the following two conditions: (1) this device may not cause harmful
interference, and (2) this device must accept any interference received,
including interference that may cause undesired operation.
Changes or modifications not expressly approved by the party responsi-
ble for compliance could void the user’s authority to operate the equip-
ment.
NOTE: This equipment has been tested and found to comply with the
limits for a Class B digital device, pursuant to part 15 of the FCC Rules.
These limits are designed to provide reasonable protection against
harmful interference in a residential installation.
This equipment generates uses and can radiate radio frequency energy
and, if not installed and used in accordance with the instructions, may
cause harmful interference to radio communications. However, there is
no guarantee that interference will not occur in a particular installation.
If this equipment does cause harmful interference to radio or television
reception, which can be determined by turning the equipment off and
on, the user is encouraged to try to correct the interference by one or
more of the following measures:
21

RF Exposure
Limited Warranty
‐Reorient or relocate the receiving antenna.
‐Increase the separation between the equipment and receiver.
‐Connect the equipment into an outlet on a circuit different from that
to which the receiver is connected.
‐Consult the dealer or an experienced radio/TV technician for help im-
portant announcement.
NOTE: The manufacturer is not responsible for any radio or TV interfer-
ence caused by unauthorized modifications to this equipment. Such
modifications could void the user’s authority to operate the equipment.
This equipment complies with FCC radiation exposure limits set forth for
an uncontrolled environment.
This equipment should be installed and operated with minimum dis-
tance 20cm between the radiator and your body.
This transmitter must not be co-located or operating in conjunction with
any other antenna or transmitter.
For limited warranty, please visit
https://thirdreality.com/faq-help-center/
For customer support, please contact us at info@3reality.com or visit
www.thirdrealityreality com.
For questions on other platforms, visit the corresponding platform's
application/support platform.
22