Alerts
Menu Page
Tap the Menu Button at the upper left
of MOCREO Home Page to reach the
Menu Page, It Includes a variety of
options for the App as a whole.
Tap here to set the alerts (including Email
Alerts and App Push Notification) of the
whole App. And you also need to turn on
the te alert option in the Sensor Settings
Page to receive alerts from the specific
Sensor.
Alert Logs
Tap here to go to the Alerts Page, you will
see the historical alarm notifications for all
Sensors.
Settings
Tap here to set timezone, switch between
Celsius and Fahrenheit, and check the App
Version.
Hubs
Tap here you will see all the Hubs you have
bound and you can click on the Hub Card
to see specific information about the Hub
(IP Address, PAN, Firmware Version,
Hardware Version, SN, etc.). And you can
open Hub's Web Portal, name the Hub and
turn on the Schedule(set the Hub to stop
beeping at a specific time range and set
the cycle).
Support
If you encounter any problems in the
process of use please tap here to submit a
question, our technical staff will check your
problem remotely and reply to you within
24 hours.
FAQ
Tap here to go to the FAQ page of the
MOCRO website. If you encounter any
problems in using the product, you can
check here for solutions.
Tap here and all your unread alerts will turn
to read (grey alarm card means they are
read) And you can also close Hub beeping
remotely by tapping here.
Alerts Page
Tap the alert logs option at Menu
Page to reach the Alerts Page, and
you will see the historical alarm
notifications for all MOCREO Sensors.
Green Alert Card
Green alert card means means that the
temperature/humidity detected by the
Sensor has returned to within the set
threshold
Red alert card means the Sensor has
triggered an alarm. For ST3 Sensor, it will
send this notification when the Sensor
detects that the temp/humidity exceeds
the set threshold
Red Alert Card
Dismiss All
Setting Button
Tap here you will enter the Settings Page
for this Sensor to set the configuration.
Tap a Sensor card on the MOCREO
Home Page to reach the Sensor
Detail Page.
Sensor Detail Page
The hour, day, week, month buttons
change the time period of the graphs
shown on this page.
Time Period
Use two fingers to pinch
(Similar to zooming in on
a device) to see a larger or
smaller window of time.
Drag your finger left or right
to move the graph forward or
backward in time.
Temp & RH Graphs
24 25 26 27 28 29 30 31 32 33 34 35
12 13 14 15 16 17 18 19 20 21 22 23
1 2 3 4 5 6 7 8 9 10 11
2
3
4
7
15
16
17
19
20
21
22
31
34
34
34
35
Contents
.............................................
.......................................
.....................................
.......................................................
..............................................
.........................
.............................
....................................................
................................................
...........................................
.............................
........................................
..................................................
.......................................
.................................................
.......................................
Introduction
What‘s in the Box
Product Parameter
Setup
Installation
Test the Effective Distance
How the System Works
Battery
Calibration
Configuration
App Interface Overview
Troubleshooting
Warranty
Costumer Service
Disclaimer
FCC Statement
2
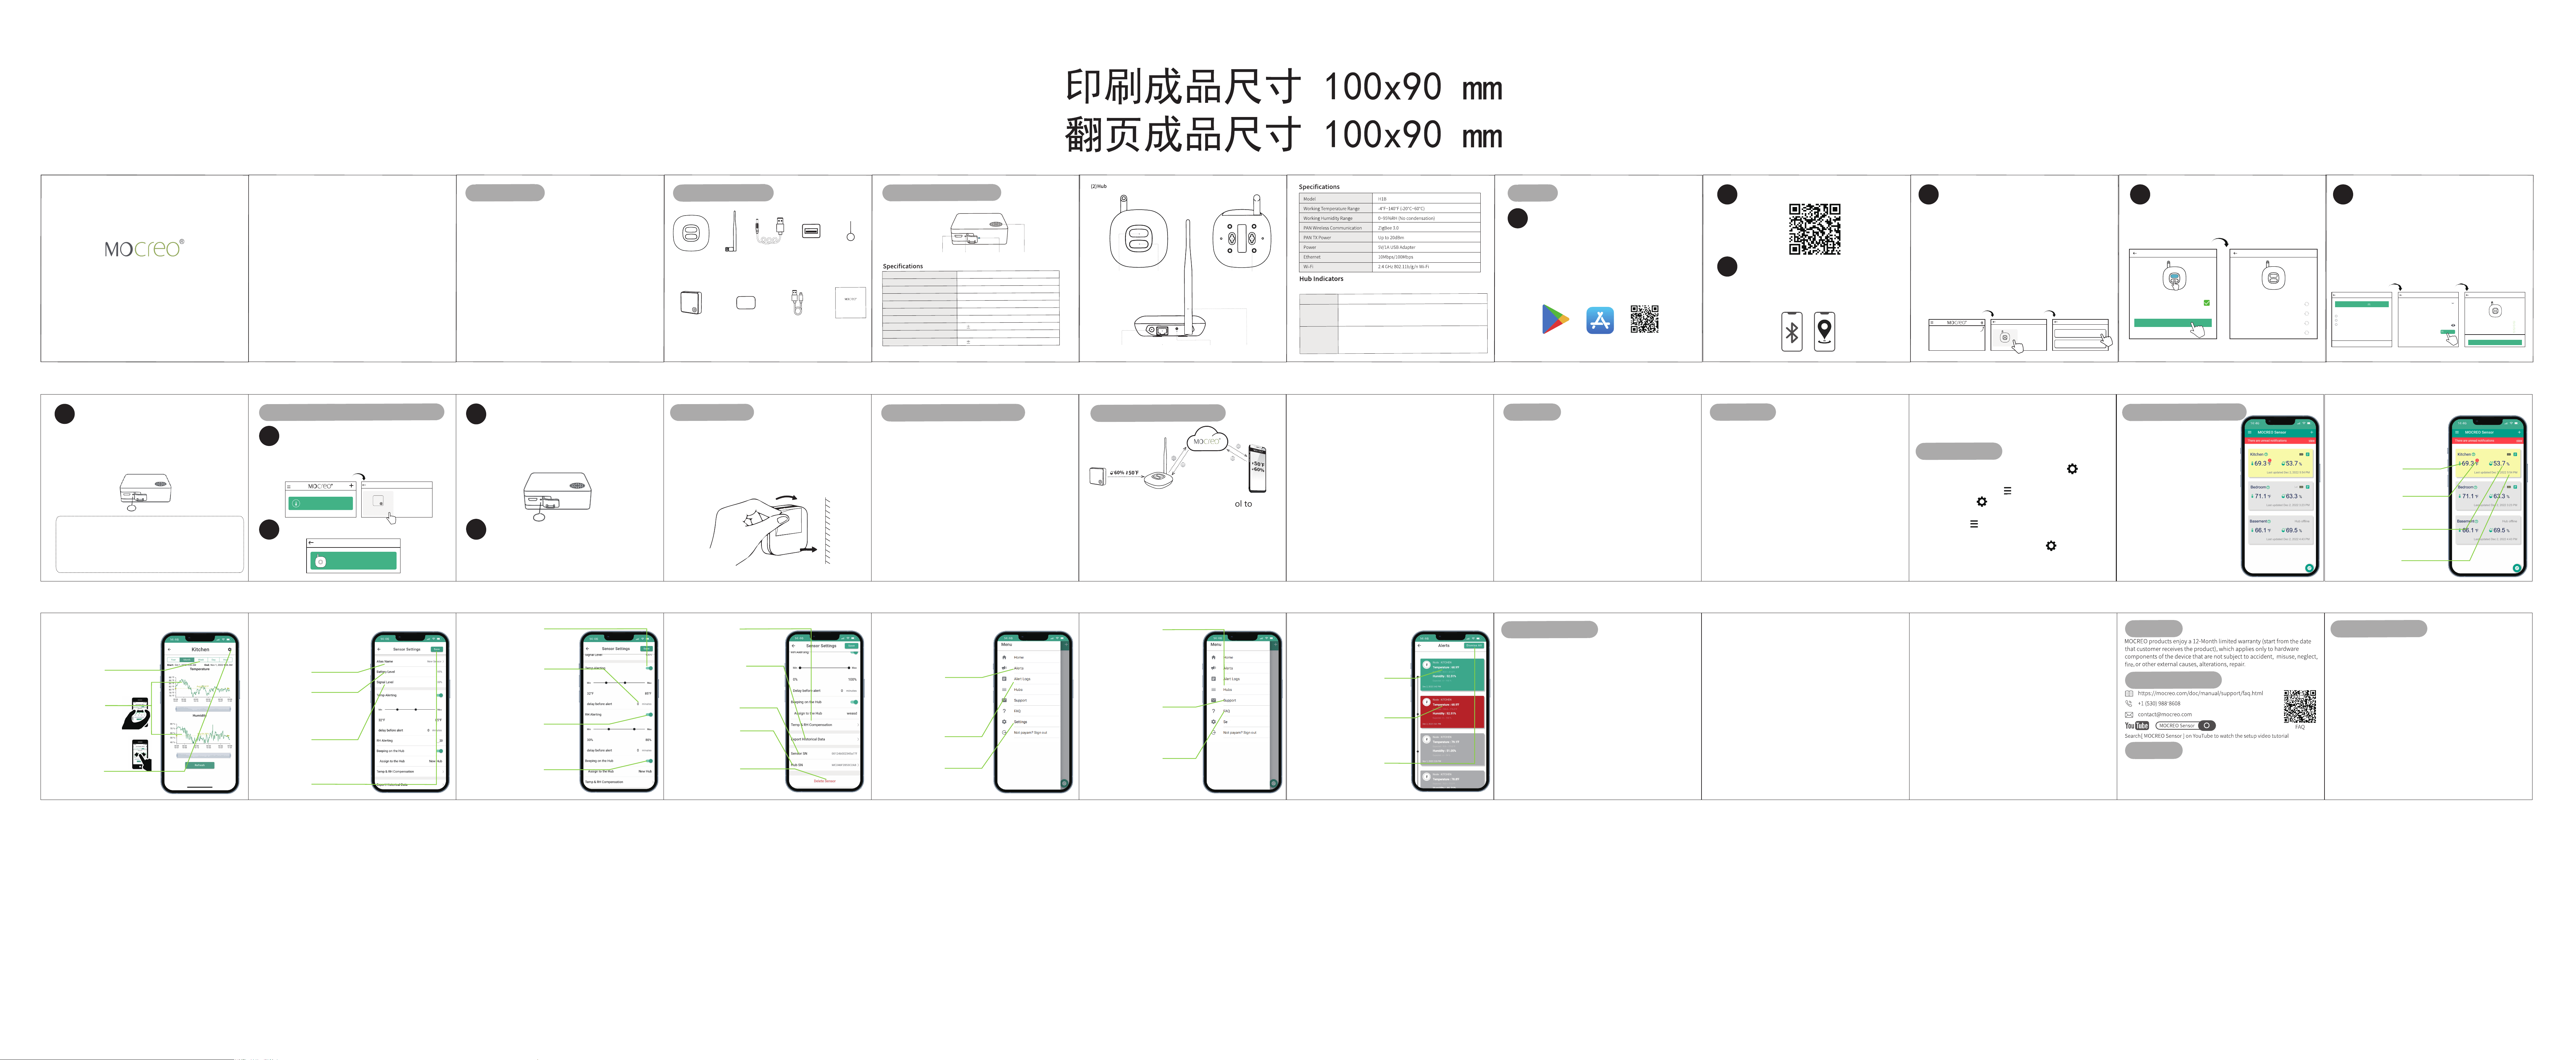
Setup Tutorial
3
Turn on the Bluetooth
Make sure the Bluetooth is ON during the whole
setup process. For Android, please also enable
GPS and agree to grant location permissions.
4
Add a Hub
Power up the Hub, Open the MOCREO App, log into
your MOCREO account. Tap the [+] Button at the
upper right of the MOCREO Home Page to add a
Hub, and select the type of network connection,
here is an example of Wi-Fi connction.
Tips: If you are using Ethernet to add a Hub,
please go to the "Customer Service" of this manual
(Page 35) and scan the FAQ QR code to get the
setup method.
No Hub linked yet? Click here
to link a new one
Select Product
Hub
Hub
Enter Setup Mode
Connect to Wi-Fi
Connect to Ethernet
5
Set the Hub Into Setup Mode
Press and hold the setup button of the Hub for 5s
until the Hub indicator light turns blue.
Scanning Devices
Preparing to set up your device
Scanning devices...
Connected over BLE
Read model/version OK
Scanned 2.4GHz Wi-Fi APs
Enter Setup Mode
Continue
Blue LED Flashing?
5s
6
Select the Wi-Fi and Enter
the Wi-Fi Password
Select the Wi-Fi SSID you want to connect to and
enter the Wi-Fi password, Supports 2.4GHz Wi-Fi
Only.
When "Congrats! Hub setup successfully!" appears
on the page, it means the Hub is successfully added.
The device connects to 2.4GHz WLAN only
Can’t find your Wi-Fi? Click here
......
Rescan
Wi-Fi List
xxxxxxxxxxx
Signal 71%
xxxxxxxxxxx
Signal64%
xxxxxxxxxxx
Signal55%
Wi-Fi List
Congrats! Hub setup successfully!
Return To Homepage
Preparing to set up your device
Connect the device to Wi-Fi AP
Register the device to the cloud server
Link the device to your account
Waiting to sync device information
Wi-Fi Connected
Input the Wi-Fi password
Encryption
xxxxxxxxxxxxxxx
Wi-Fi SSID
Password
Encrypted
Connect
Wi-Fi Info
- Place the paired ST3 Sensor in the location you
want to monitor.
The suggested distance between
the Hub and Sensor is within 32ft-49ft (Household
environment)
- Poke the Sensor pinhole for 1s and release.
- After 20~30 seconds, Tap the corresponding
Sensor card on the App to reach the Sensor
Settings Page and view the signal value (refer to
Page 26)., signal value stronger than 40% is ideal.
Test the Effectve Distance
● ST3 Sensor built- in 1800mAh rechargeable
lithium battery.
● The battery can last up to 2 years before it needs
to be charged again.
● Please charge the Sensor with a Micro USB
Cable and a 5V 1A power adapter.
● The battery percentage can be checked on the
App: Sensor Settings Page>Battery Level (Please
do not check the battery level while the device is
charging).
● When charging, the red indicator light will stay
on and when the red indicator light goes off it
means charging is complete.
● Low battery alert will be triggered when the
battery is below 10%(Including Email alerts and
APP notification).
Battery
Configuration
Save Button
Tap here to save your settings.
Export Historical Data
Tap here to export historical data, the data
exported to CSV format, you can organize
the data through Excel table form for easy
analysis.
Delete Sensor
Select "Delete Sensor" will completely
remove the Sensor from the App (it can
be re-added).
a. The Hub only supports 2.4 GHz (not 5 GHz) Wi-Fi
b. Please check if Bluetooth is turned on and’ if the
Hub is in setup mode during setup.
c. Check the Wi-Fi SSID and password of Wi-Fi, Wi-Fi
password length supports 8-64 ASCII (numbers 0-9,
English letters A-Z, a-z and regular English
punctuation) or hexadecimal characters (numbers
0-9, 16 of A/B/C/D/E/F). All other characters are not
supported
d. The device should be placed within the coverage
of the Wi-Fi signal. Please try to shorten the distance
Between the Hub and AP (Access Point). Reduce
obstacles like metal doors or multiple/thick walls.
1. The Hub Cannot Connect to Wi-Fi?
Troubleshooting
The Sensor Settings Page is where you
configure settings for an individual
Sensor.
Sensor Settings Page
Alias Name
Tap here to change the Sensor name.
Battery Level
This position shows the current battery
level of this Sensor. A low battery alarm
is triggered when the battery level drops
below 10%. More details please reach to
"Battery" section of this manual(Page 19).
Signal Level
This position shows the current signal level
of this Sensor. Sensor signal should be at
least 40% to ensure stable communication
between Hub and Sensor.
Sensor SN
This is the identification ID of the Sensor
Temp Alerting
Set a max/min temperature limit for this
Sensor here.When this Sensor exceeds
the limit, an alarm will be triggered.
Beeping on the Hub
When "Beeping on the Hub" option is
switched on, the Hub will buzzer as soon as
the Sensor exceeds the limit.
Temp & RH Compensation
Tap here you can calibrate the Sensor.
More details please reach to "Calibration"
section of this manual(Page 20).
Sensor Card
1) Yellow: The Sensor is online and
updates data normally (The Sensor
card will flash when the Sensor
status is changed or when the
Sensor is poked with a pin for 1s).
2) Grey: Sensor Offline/ Hub Offline
- When the Hub is offline, the
upper right corner of the Sensor
card shows "Hub offline".
- When Sensor is offline, “no
signal icon” will be displayed in the
upper right corner of Sensor card.
App Interface Overview
Tips: The following introduction is based
on MOCREO App version: 1.4.0. The
actual interface may vary with different
versions.
Warranty
Customer Service
Disclaimer
The contents of the manual about the use of the product and the introduction of
the App are for reference only, please refer to the actual situation for specific
application.If there are deviations in the instructions in the actual, pease contact
MOCREO Support for updates. This product is for detecting and monitoring only,
MOCREO is not responsible for any property damage or other consequences of
the use of this product.
ST3 Temperature Sensors Kit
User Manual
● MOCREO ST3 Thermo-Hygrometer Sensor Kit can
detect and record ambient temperature and humidity
in real-time.
● Detectable Tmperature Range: -4°F ~ 140°F.
● Detectable Humidity Range: 0~100%RH
● Three Alarm Methods: E-Mail Alert, App Push
Notification, Hub Beeping.
● If placing the ST3 Sensor in a refrigerator/ freezer
may weaken the signal, the Hub need to be placed
closer to the Sensor.
Introduction
What’s in the Box
5V 1A Power
Cable x1
Pin Clip
x1
Power Adapter
x1
Antenna
x1
Hub(H1B)
x1
ST3 Sensor
Adhesive
Micro USB Cable
x1
ST3 Temperature Sensors Kit
User Manual
User Manual
x1
(1) Thermo-Hygrometer Sensor
Product Parameter
Indicator Light Setup Button
LAN Port5V Power Input Factory Reset Button PAN Anetenna
Wall Mount Holes
There are 3 types of color of Hub indicators
Purple
Normal working condition
Blue
Red
The Hub is in setup mode (A long press on the Hub
setup button, then the Hub will enter the Hub-setup
mode)
1) Wi-Fi/ Ethernet not connected
2) The alarm event is triggered (When ST3 Sensor
detects that the temperature exceeds the set threshold)
1
Download MOCREO App
Search “MOCREO Sensor” on Google Play/ App
Store or scan the QR Code below to download
the MOCREO Sensor App and register a MOCREO
account on the App (MOCREO will send you a
confirmation Email, click on the confirmation to
complete the registration)
Google Play MOCREO App
Setup
App Store
7 Wake Up the Sensor
1s
Poke the Sensor pinhole with a pin for 1s and
release, then the indicator light of Sensor will
flash, and the Sensor will be woken up and
automatically paired the Hub.
The Sensor is factory-paired with the Hub. After
you have successfully added the Hub on the
App, simply poke the pinhole with a pin for 1s
then release and the Sensor will activate and
paired automatically
1. Please place the Hub at a relatively high position.
The suggested distance between the Hub and
Sensor is within 230ft (No obstacles, signal value
stronger than 40% is ideal).
2. Remove the adhesive film on the back, paste
directly in the desired area
Installation
distances and more obstacles mean weaker signals.
The MOCREO Hub uses a Wi-Fi (2.4GHz only)
or Ethernet to transmit data from the MOCREO
Sensors in range to the Internet. A cellular hotspot
with WiFi or Ethernet capability can also be used to
provide Internet access. Then, the MOCREO App
can be used to view your device data from
anywhere in the world.
The ST3 Sensors use ZigBee 3.0 protocol to
communicate with the Hub. Therefore, they are
limited to a ZigBee range centered on the Hub
(e.g., around the house). This range is affected by
distance and obstacles such as walls, windows,
water, radio interference, etc. In short, longer
How the System Works
InstallationHow to Add a Separate Sensor
Sensor Joins the Hub1
Tap the [+] Button at the upper right of the
MOCREO Home Page and select 'Climate Sensor
- ST3'.
Select the Hub
Unnamed
MC90380C629088
6s
3
Poke the Sensor
Poke the Sensor pinhole with a pin for 6s until the
blue indicator on the Sensor keeps flashes, then
release, at this point the Sensor enters setup mode
(Support adding multiple Sensors at the same time).
4
Add the Sensor
When “Sensor successfully paired” appears on the
page, it means the Sensor is successfully added.
● When the temperature or humidity changes
drastically, the ST3 Sensor requires some time to
calibrate the reading, it would take about 20
minutes for the ST3 to measure to proper ambient
temperature and humidity.
● The ST3 has a built-in Swiss-made SHT30-DIS-B
chip, which is a strictly calibrated industrial-grade
chip and is more accurate than ordinary consumer
chips. Calibration is usually not required, if you need
information about the chip, please check the FAQ.
● Calibration is only used to correct for small
variations of ±0.54°F (±0.3°C) and ±3%RH. If you
Calibration
find a bigger difference, which indicates a problem
with the calibration process or your Sensor, please
contact MOCREO Customer Service.
Alarm Signs will appears next to the
Temperature, It will only be displayed when
the Sensor triggers an alarm to alert you.
Alarm Signs
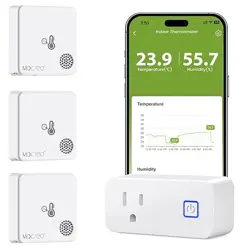
This is the main page of the MOCREO
App. It lists all Sensors in card form.
Each Sensor card shows the most
recent information the App has
obtained from the MOCREO Cloud.
MOCREO Home Page
The temperature latest detected by this
Sensor is shown here.
Temperature
Last updated is the lastest data reporting
time of Sensor.
Last Updated Timestamp
3. Cannot Receive Alerts from the App?
- Turn on the relevant permissions to the "MOCREO
Sensor" App.
- Shorten the distance and reduce obstacles between
the Sensor and Hub.
2. The Sensors do not Work?
a. The Sensor cannot be connected
- Take the Sensor to the Hub side (better within 3 ft),
poke the pinhole of the Sensor for 1 sec, then release.
- If it doesn't work, please Please re-add this Sensor,
For more details, please see the "How to Add a
Single Sensor" section of this manual (Page 13).
- Please try to restart the "MOCREO Sensor" App.
b. The Sensor data is not updated:
- Take the Sensor within 3 ft of the Hub and poke
the Sensor pinhole for 1 sec to make it back online.
- Shorten the distance and reduce obstacles
between the Sensor and Hub.
Delay Before Alert
Fill in here to set the alarm delay time. For
example, if you fill in 10 minutes, when the
temperature exceeds the threshold, the
alarm will not be triggered immediately,
but after 10 minutes.
Hub SN
This is the identification ID of the Hub to
which this Sensor is bound.
FCC Statement
FCC ID (Sensor) : 2A36D-ST4
FCC ID (Hub) : 2A36D-H1
This device complies with part 15 of the FCC Rules. Operation is subject to the
following two conditions:
(1) This device may not cause harmful interference.
(2) This device must accept any interference received, including interference
that may cause undesired operation.
Warning: Changes or modifications not expressly approved by the party
responsible for compliance could void the user's authority to operate the
equipment.
Note: This equipment has been tested and found to comply with the limits for
a Class B digital device, pursuant to part 15 of the FCC Rules.
These limits are designed to provide reasonable protection against harmful
interference in a residential installation. This equipment generates uses and can
radiate radio frequency energy and, if not installed and used in accordance
with the instructions, may cause harmful interference to radio communications.
However, there is no guarantee that interference will not occur in a particular
installation. If thisequipment does cause harmful interference to radio or
television reception, which can be determined by turning the equipment off
and on, the user is encouraged to try to correct the interference by one or
more of the following measures:
- Reorient or relocate the receiving antenna.
- Increase the separation between the equipment and receiver.
- Connect the equipment into an outlet on a circuit different from that to which
the receiver is connected.
- Consult the dealer or an experienced radio/TV technician for help.
Note:
1. To improve wireless stability, it is recommended
(a) Install the Sensor close to the Hub. It's better if the Hub
and the Sensor are in sight.
(b) Reduce the obstacles between the Hub and the Sensor.
(c) The Hub and Sensor should be placed far away from metal
objects or surfaces to avoid signal interference.
(d) Check if the Hub’s antenna is tightened and keep it
upright.
(e) Stay away from high power equipment, flammable
and explosive materials.
2. Precautions about the Sensor placement environment
(a) The Data Logger is non-waterproof, please avoid water
submerging and extreme temperature.
(b) The working temperature range of the Sensor is -40°F to
+257°F (-40°C to +125°C). When exceeding this range, the
data monitored might be inaccurate or the Sensor might be
damaged.
(c) The battery is rechargeable. It can be charged with the
.micro USB cable equipped. But the battery is not removable.
(v1.8)
【Name the Sensor】Tap Sensor Card > Button
on the Upper Right > Alias Name > Save
【Name the Hub】 Tap Button on the Upper Left
> Hubs > Click Button on the Hub Card > Name
> Save
【Alarm】Tap Button on the Upper Left > Alarm
> Set Alarm Model > Save
【Export Data】Tap Sensor Card > Button on the
Upper Right > Export Historical Data > Choose
Time Period > Export
N/A
Indicator Light
(Built in)
Setup
Pinhole
5V 1A
Charging Port
0.5
℉(0.3℃)
Temperature Accuracy
ST3
ZigBee 3.0
230ft/70m (No Obstacles)
2.4 X 2.4 X0.7inch (L x W x H)
55g
3.7V 1800mAh Lithium Battery
Wireless Connection
Communication Range
Dimensions
Weight (Including probe)
Battery (Rechargeable)
Temperature Measuring Rage
-4℉~ 140℉ (-20℃ ~ 60℃)
Model
0.3%
Hymidity Accuracy
Hymidity Measuring Rage
0 ~ 100%RH (-No Condensation)
Note: This product is designed for indoor use ony
2 Select the Hub
Select Product
No paired sensor? Click here.
Climate Sensor - ST3
The humidity latest detected by this
Sensor is shown here.
Humidity
ZigBee
RH Alerting
Set a max/min humidity limit for this
Sensor here.When this Sensor exceeds
the limit, an alarm will be triggered.