
1. About your Omni E25
1.1 What's in the Box
1.2 Overview
1.3 Button Controls
1.4 LED Indication
2. Preparing Your Omni E25
2.1 Prepare the Omni Station
2.2 Charge Your RoboVac
2.3 Download the App
2.4 Reset the Wi-Fi Connection
3. Using Your Omni E25
3.1 Important Tips Before Use
3.2 Mapping
3.3 Set Up No-Go Zone and No-Mop Zone
3.4 Schedule Cleaning
3.5 Select a Cleaning Mode
4. Using the Mopping System
5. Using RoboVac with Alexa, Siri, or Google Assistant Compatible
Devices
6. Enabling / Disabling Child Safety Lock
7. Cleaning and Maintenance
7.1 Clean the Dustbin and Filter
7.2 Clean the Rolling Brush
7.3 Clean the Side Brush and CornerRover Arm™
7.4 Clean the Sensors, Cameras, and Charging Pins
7.5 Clean the Dirty Water Tank
7.6 Clean the Cleaning Tray
8. Troubleshooting
9. Specifications
10. Customer Service
1. About your Omni E25
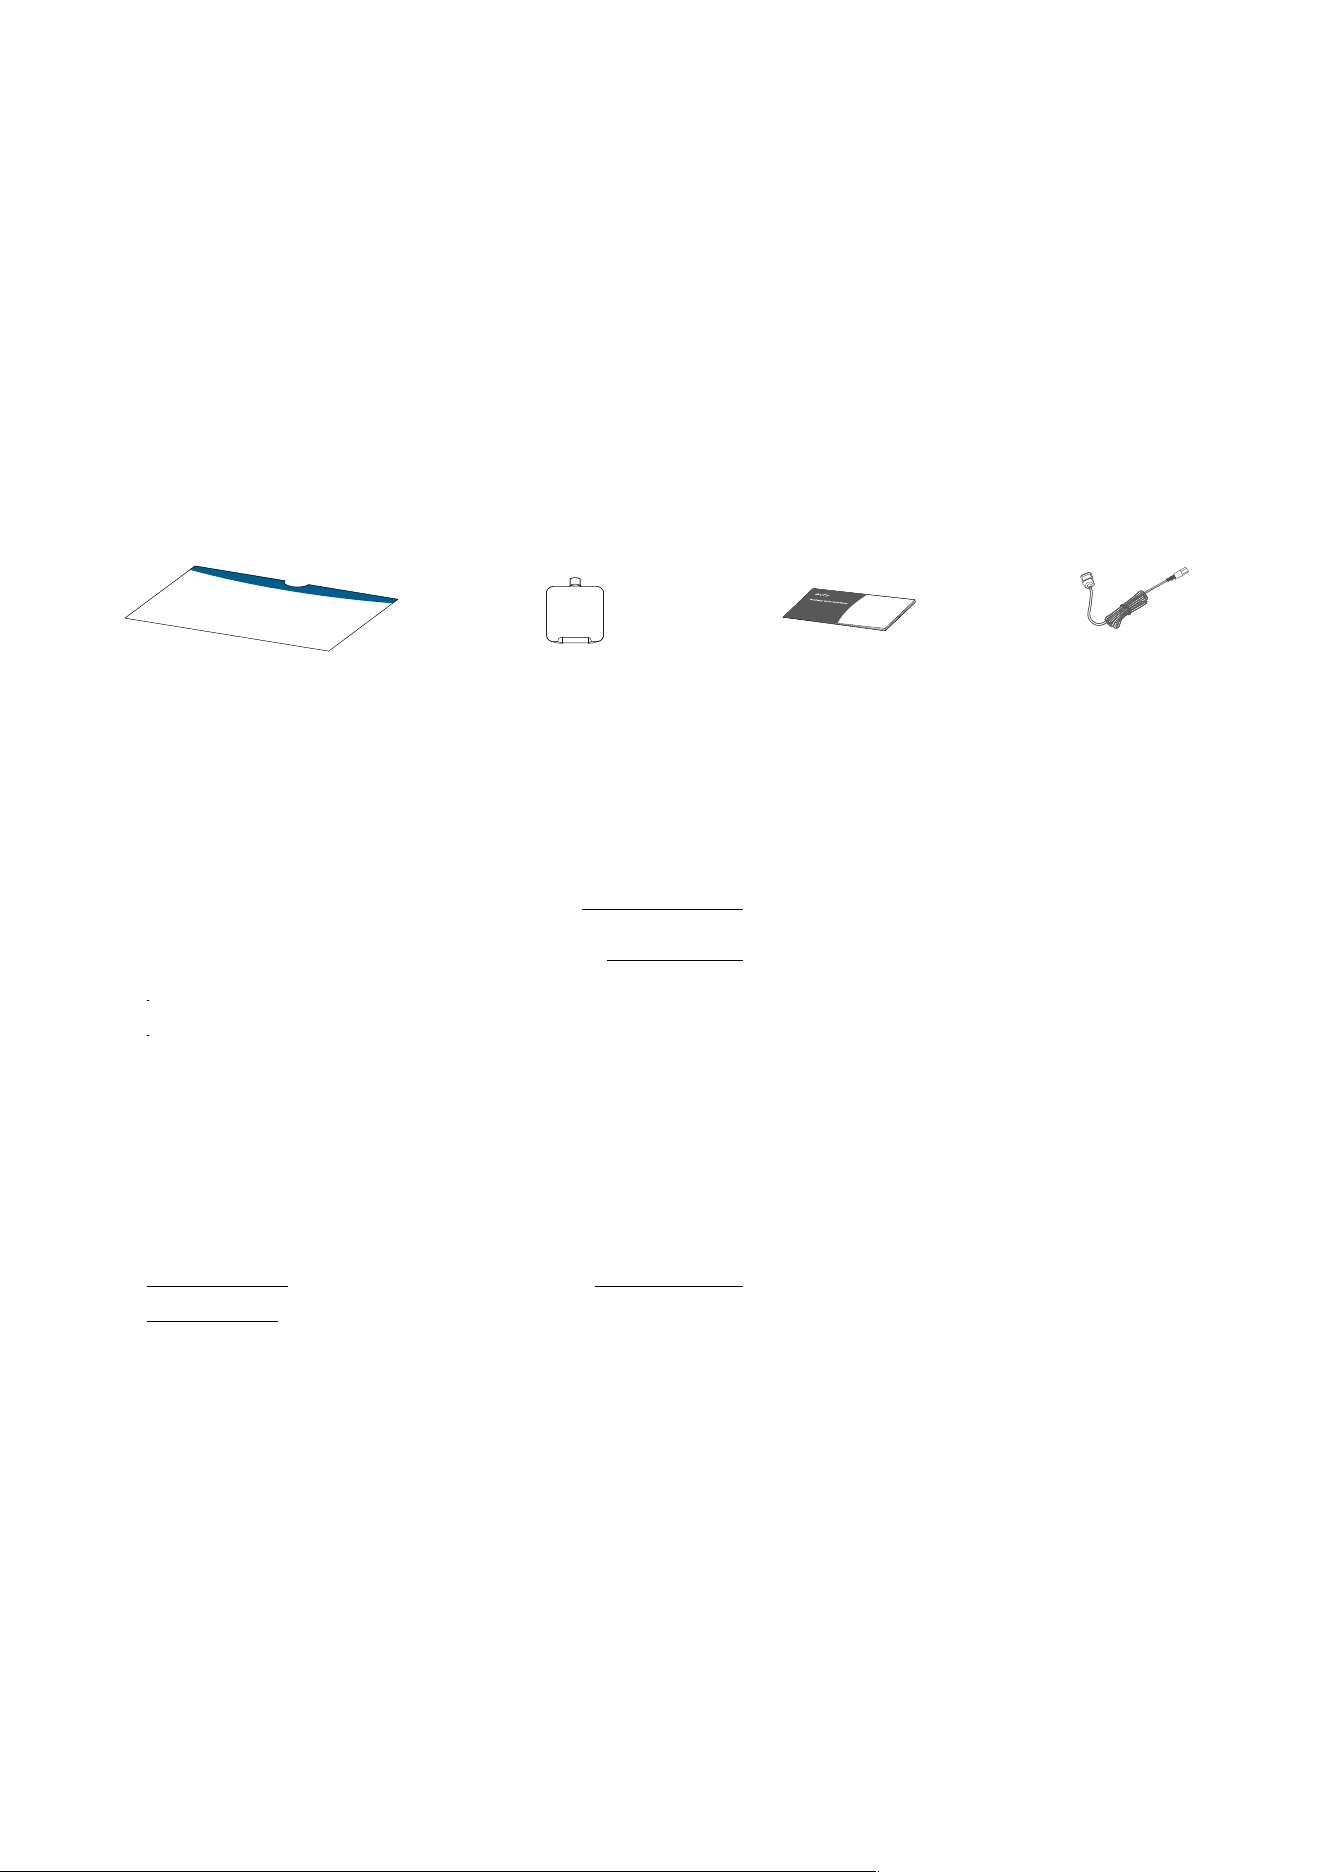
1.1 What's in the Box
Omni Station Robot Vaccum Cleaner (RoboVac) Detachable Base
Quick Start Guide Floor Cleaner Power Cord & AdapterSafety Sheet
1.2 Overview
❷
❹
❶
❸
❻
❼
❺
❶
RGB Camera+ LED Light
❷
Recharge Button and Power
Button
❸
Robot Cover
❹
Navigation Lidar
❺
Water Injection Port
❻
Dirty Water Collection Port
❼
Charging Contact Pins (×2)

❸
❹
❺
❶
❷
❽
❾
❼
❻
❶
Roller Mop
❷
Drop Sensors (×6)
❸
Wheels (×2)
❹
CornerRover Arm™
❺
Carpet Detection Sensor
❻
Swivel Wheel
❼
Side Brush
❽
DuoSpiral™ Rolling Brushes
❾
Brush Guard
❶
❷
❹
❸
❶
Dustbin
❷
Handle
❸
Release Latch
❹
Filter
❸
❶
❷
❹
❺
❻
❶
Detachable Base
❷
Cleaning Tray
❸
Disposable Dust Bag
❹
Dirty Water Tank
❺
Clean Water Tank
❻
LED Indicator
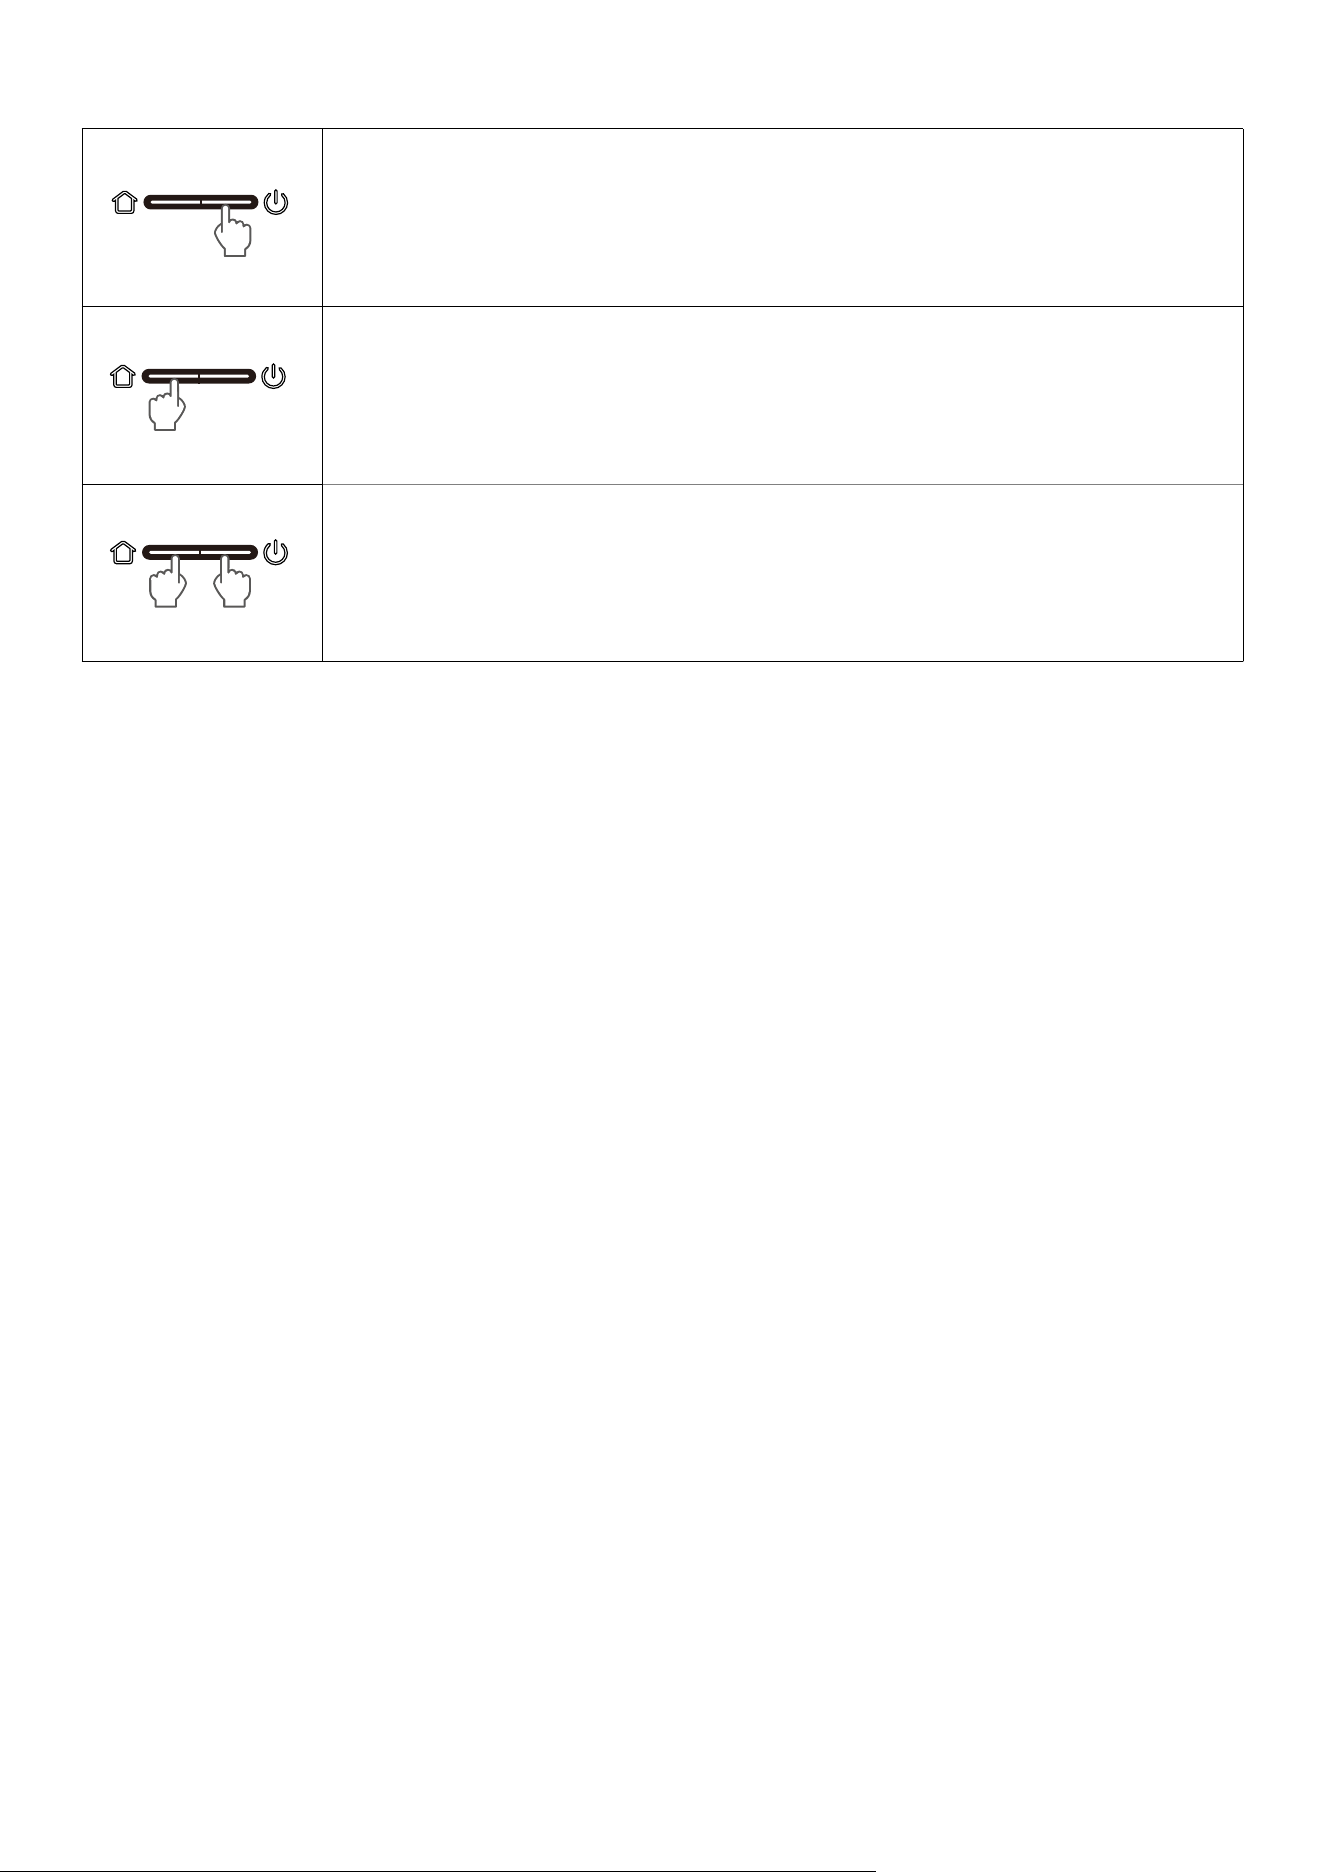
1.3 Button Controls
• Long press (3s): Power on or o
• Short press: Pause / resume the current task when working
• Short press: Return RoboVac to the Omni Station
• Long press simultaneously (3s): Reset the Wi-Fi connection

1.4 LED Indication
You can see the status of RoboVac and Omni Station from the LED indicators.
LED Indication Description Status
RoboVac
Pulsing white Powered On
Steady white Working normally
Breathing red Low battery
Steady red
• Low battery
• Error (Please refer to in-app
instructions for solutions)
Flashing red quickly
Error (Please refer to in-app
instructions for solutions)
Omni Station
The ring lights up in
white
Powered on
Steady white Working normally
Breathing white
Dust collection / Mop
cleaning
Steady red
Error (Please refer to in-app
instructions for solutions)
O Power disconnected
2. Preparing Your Omni E25
2.1 Prepare the Omni Station
1. Install the detachable base by pressing down both sides of it firmly.
• Make sure the detachable base is seamlessly connected to the Omni Station, otherwise RoboVac will fail
to return to the Omni Station smoothly.
2. Place the Omni Station in a location that has strong Wi-Fi signal and RoboVac can easily access. It is
recommended to place it against a wall and on a hard, level surface. Then connect the power cord to the Omni
Station and a wall outlet. When the Omni Station connects to AC power, the LED indicator of the clean water tank
will light up.
1.6 ft / 0.5 m
1.6 ft / 0.5 m
3.3 ft / 1 m
❶
❷
• The recommended clearance on the illustration is a suggested value based on testing, to ensure RoboVac
operates optimally, returns to the station for charging, and cleans the designated area eectively. You
may adjust the clearance distance as necessary to suit the actual working environment of RoboVac.
• Always keep the Omni Station plugged in to ensure the infrared connection between RoboVac and the
Omni Station is successful, otherwise RoboVac will not automatically return to it.
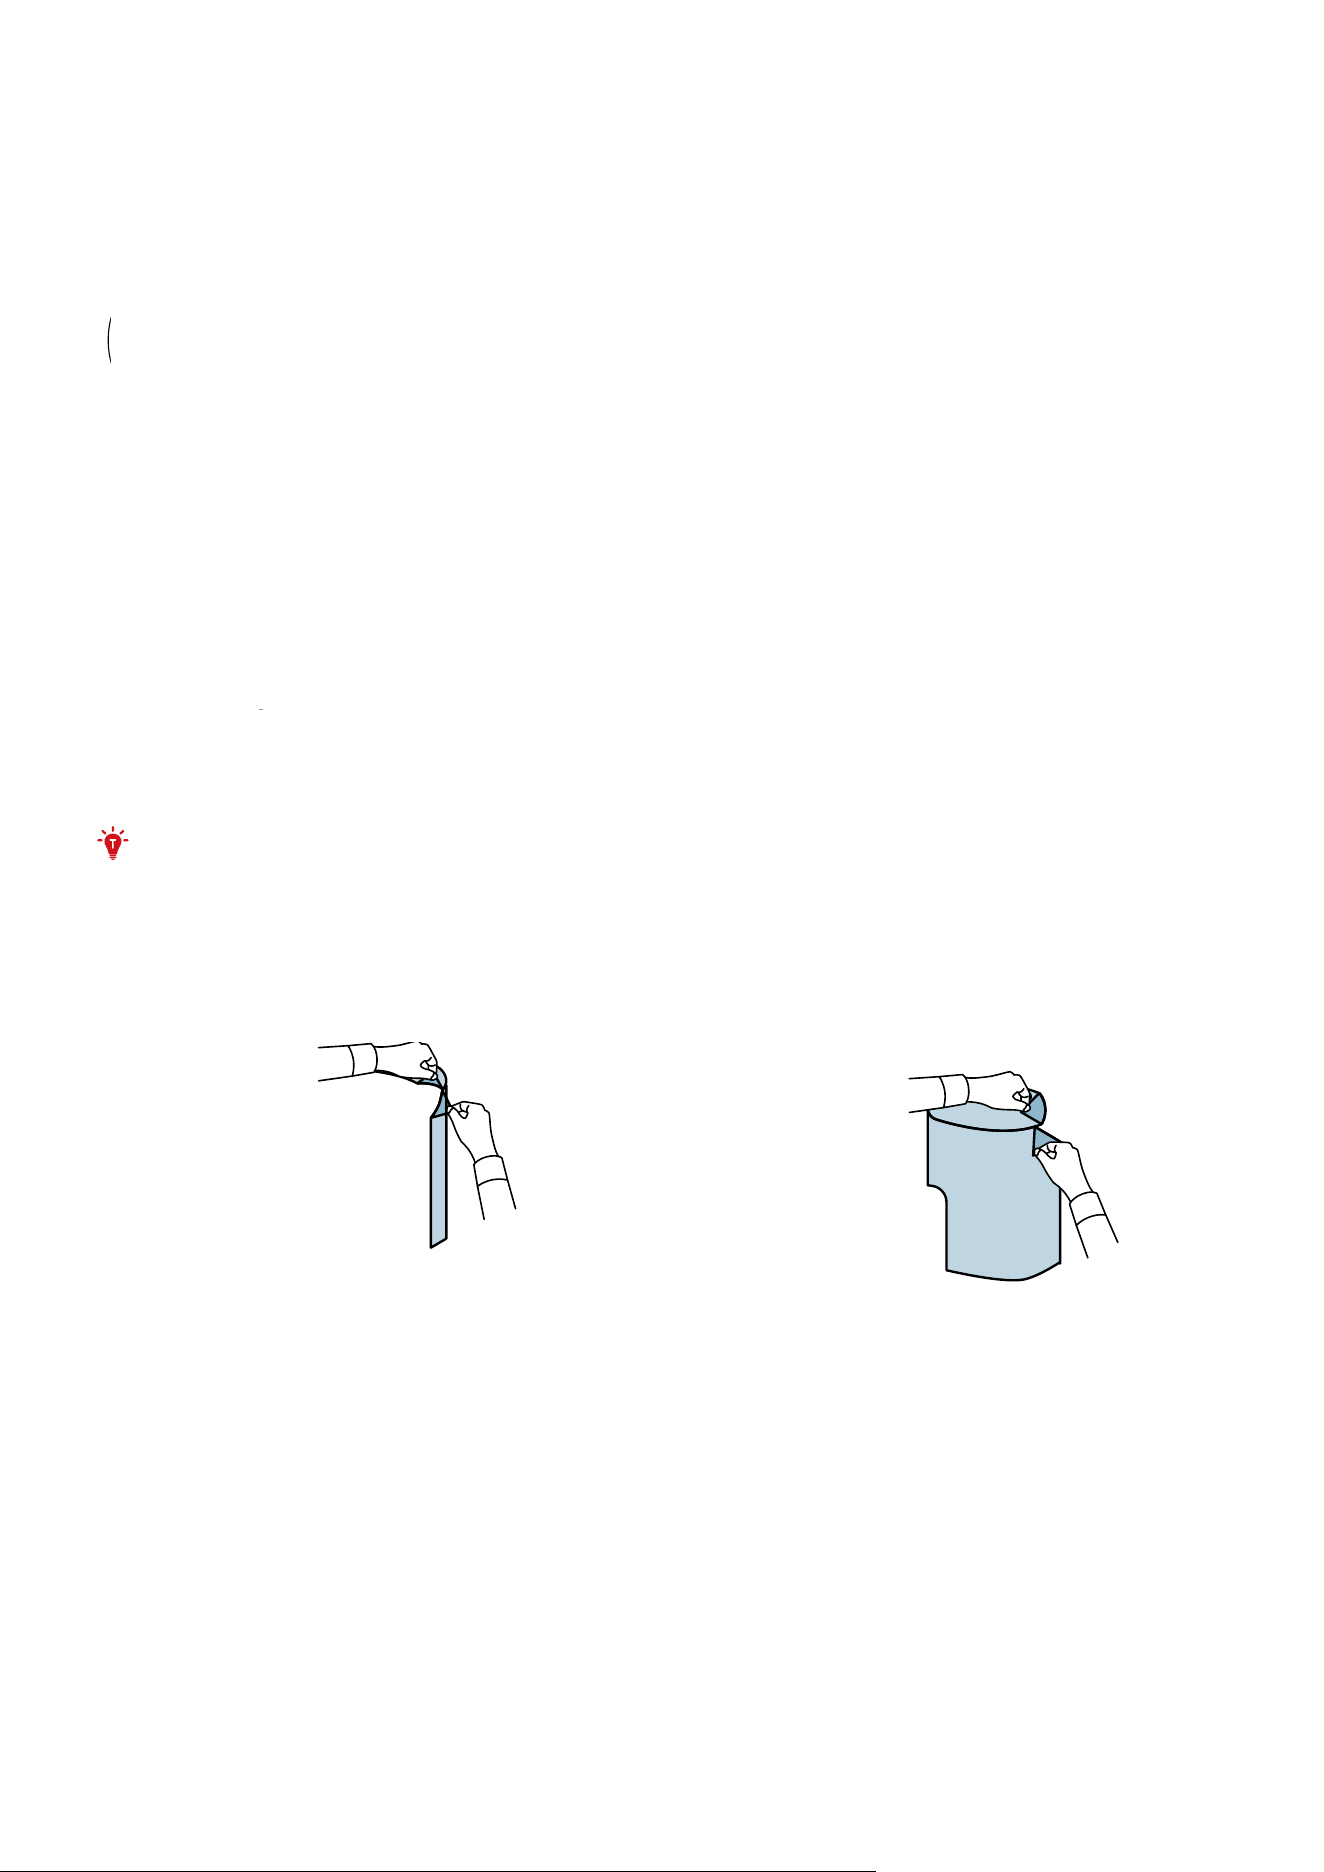
3. Remove the protective films on the clean water tank and dirty water tank.
4. Peel o the cover of the Floor Cleaner and install it on the Omni Station.

❶
❷
5. Fill the clean water tank with water until it reaches the MAX line, then reinstall the clean water tank.
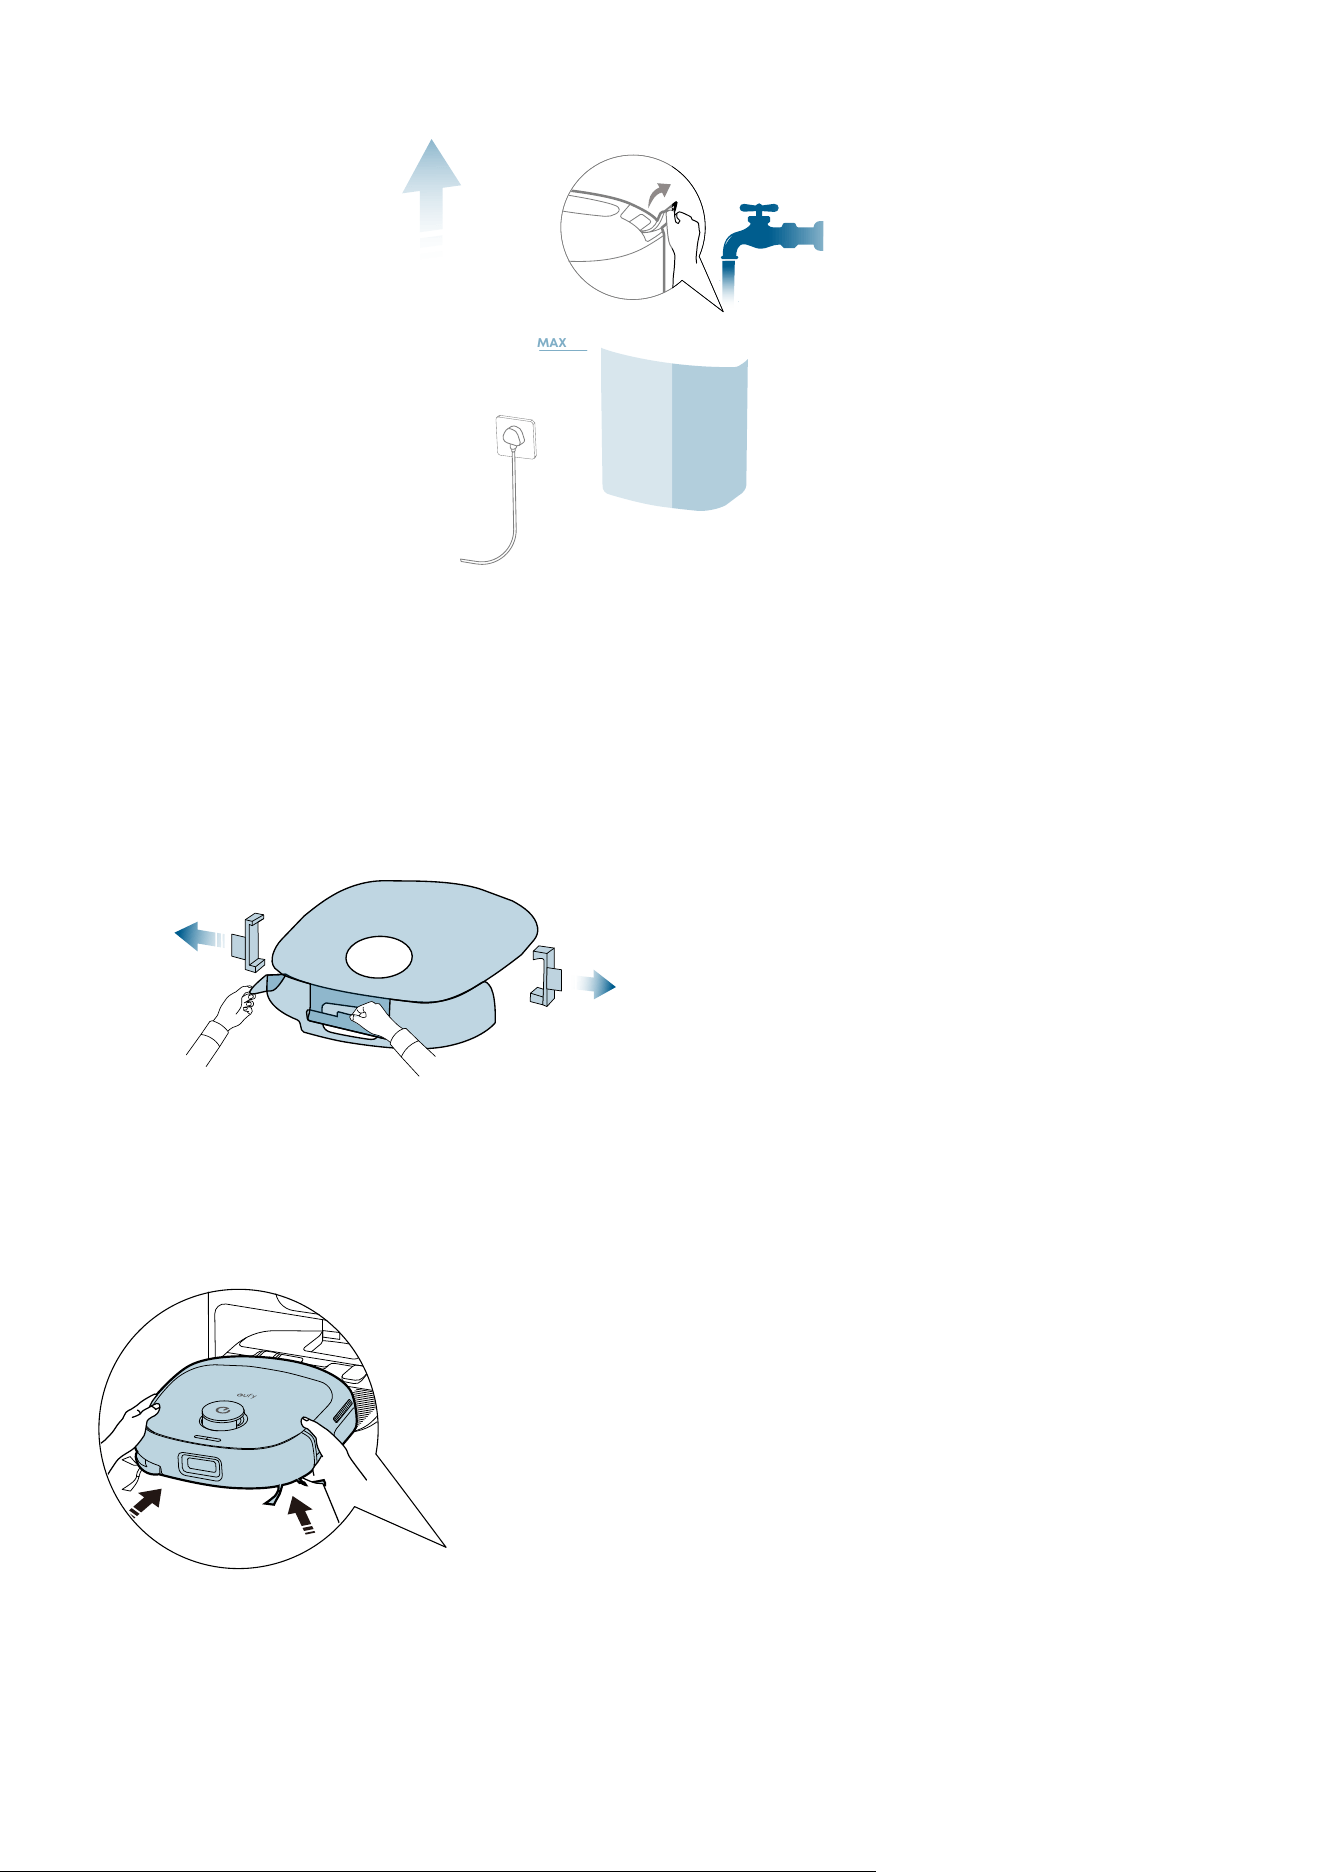
MAX
2.2 Charge Your RoboVac
1. Remove the foam blocks and all the protective films on RoboVac.
❶
❷
❸
❹
2. Attach RoboVac to the Omni Station. RoboVac will power on and start charging automatically.
2.3 Download the App

To enjoy all the available features, it is recommended to download the app.
1. Download the app from the App Store (iOS devices) or Google Play (Android devices). You can also get the app
by scanning the QR code printed on the Quick Start Guide (included in the package).
2. Open the app, create a new account or log into your own eufy account.
3. Tap the “+” icon to add the device.
4. Follow the instructions in the app to set up the Wi-Fi connection.
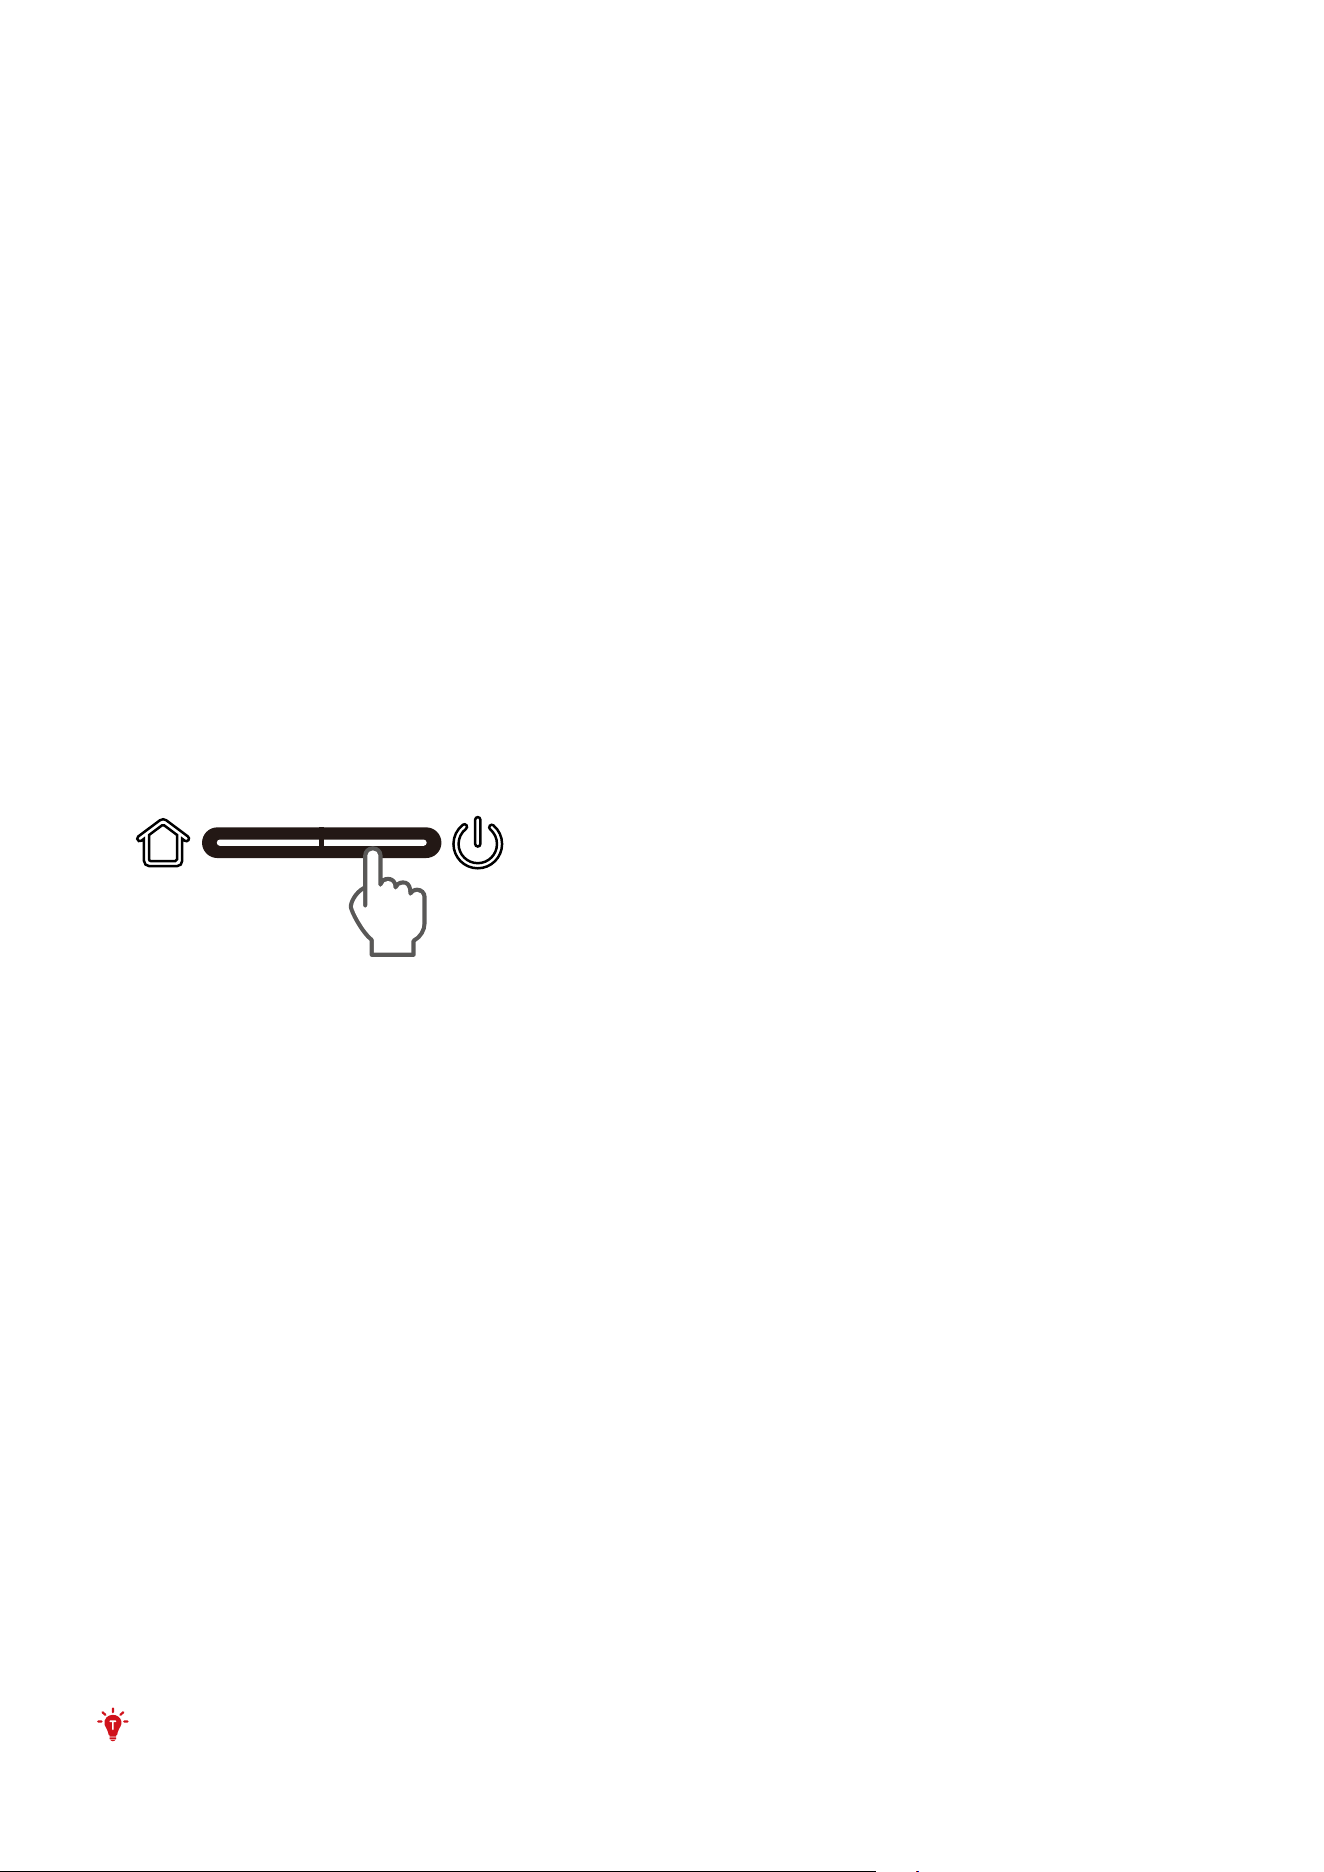
2.4 Reset the Wi-Fi Connection

If you bump into issues when connecting your RoboVac to the eufy app, try to reset the Wi-Fi connection.
Press and hold the power and recharge buttons simultaneously for 3 seconds until you hear a voice prompt.
3s
You will hear a voice prompt when the Wi-Fi connection has been reset, and the LED indicators on RoboVac will
quickly flash white. Now you can follow the instructions in the app to set up the Wi-Fi connection.
3. Using Your Omni E25
• All UI images shown in this section are for illustration only, and they may be subject to change due to
software updates. Please refer to the actual App interface for the most accurate information.
3.1 Important Tips Before Use
A. Remove power cords and small objects (socks/toys/slippers/towels/weighing scales, etc.) from the floor that
may entangle RoboVac.
B. Fold tasseled edges of rugs underneath to prevent tangling RoboVac. Avoid cleaning high-pile rugs or rugs
thicker than 0.83 in / 21 mm as they may cause RoboVac to malfunction.
C. Before mapping, it is strongly recommended to place physical barriers in front of fireplaces and certain areas (i.e.
air vents) that may cause damage to the robot if entered. For future use, set up virtual boundaries in the eufy app
to prevent the robot from falling down staircases.
D. Avoid vacuuming large amounts of water as it will potentially damage the device.
E. RoboVac may climb on top of objects less than 0.83 in / 21 mm in height. Remove these objects if possible.
F. Anti-drop sensors will prevent RoboVac from tumbling down stairs and steep drops in most cases. Sensors are
less eective if dirty or used on carpeted / reflective floors. Place physical barriers or set a “No-Go” zone to block
o areas where RoboVac may fall.
3.2 Mapping
This feature is designed to help your RoboVac eciently learn the layout of your home, ensuring thorough and
systematic cleaning. By creating a detailed floor plan, your RoboVac can navigate and clean with precision.
To maximize the eciency and accuracy of the mapping process, please follow these steps:
• Open All Doors: Ensure all doors within the cleaning area are open. This allows the robot to access and map
each room seamlessly.
• Block O Restricted Areas: If there are specific zones you don't want the robot to enter, use physical barriers to
block these areas. This can enhance mapping accuracy and prevent the robot from entering unwanted spaces.
After the mapping is completed, you can remove physical barriers, and set up restricted areas to prevent the
robot from entering those areas.
• Remove Obstacles: Clear any objects, such as toys, cables, or small furniture, that might obstruct path or
become entangled in its brushes. This helps RoboVac move freely and map the area without interruptions.

• Do Not Move the Base Station: Once the floor plan is created, avoid relocating the base station. RoboVac relies
on the base station as a reference point for navigation and mapping. Moving it may disrupt the accuracy of the
floor plan.
To start the mapping process, tap "Start" in the app.
3.3 Set Up No-Go Zone and No-Mop Zone
With the eufy app, you can set up a “No-Go Zone” or “No-Mop Zone” as a restricted area. This eliminates the need
to use physical barriers, including boundary strips. This feature is only designed for dividing the cleaning zones, not
for isolating hazardous areas.
3.4 Schedule Cleaning
With the eufy app, you can schedule RoboVac to start cleaning at a particular time.

• You can set the time and customize cleaning schedules from Sunday to Saturday on the eufy app. This
function is only available on the app.
• During the Do Not Disturb period, RoboVac will remain silent, with automatic dust collection and voice
notifications disabled.
3.5 Select a Cleaning Mode
You can start / pause cleaning or select the desired cleaning mode via the eufy app.
In each cleaning mode, you can further customize the modes, duration, water level, suction level, and other
settings.
3.5.1 House Cleaning Mode
Tap "Start" in the eufy app to enable House Cleaning mode.
After startup, RoboVac moves from the Omni Station and automatically determines its cleaning route. When
cleaning is finished, RoboVac automatically returns to the Omni Station.
• To pause cleaning, tap "Pause" in the eufy app, or press the power button on RoboVac.
3.5.2 Room Cleaning Mode
In this mode, your house is automatically divided into several rooms for cleaning in the eufy app. You can also
customize your room settings in the app. RoboVac will clean the selected rooms only and return to the Omni Station
after cleaning.
• Enable Room Cleaning mode only after RoboVac has created the map.
• It is recommended that RoboVac moves from the Omni Station to start room cleaning.

3.5.3 Zone Cleaning Mode
In this mode, you can set up a cleaning zone and customize its size in the eufy app, RoboVac will clean the selected
zone only.
4. Using the Mopping System
1. Start cleaning. RoboVac will automatically vacuum and mop. During mopping, you can choose between three
water levels via the eufy app.
2. To prevent the development of odors in the roller mop, be sure to activate the drying function after each
mopping task. We strongly recommend setting the drying mode to "Standard Drying" every time to ensure optimal
drying results and reduce unpleasant smells.
3. Regularly empty and clean the dirty water tank to prevent mildew or unpleasant smells. For instructions on how
to clean the dirty water tank, refer to the “Cleaning and Maintenance” section in this User Guide.
5. Using RoboVac with Alexa, Siri, or Google Assistant Compatible
Devices
Amazon Alexa or the Google Assistant are smart voice control devices that enable you to control RoboVac with
your voice.
Before you start, make sure:
• RoboVac is attached to the Omni Station to ensure there is enough power.
• RoboVac is connected with the eufy app.
• To control your RoboVac with Siri, make sure you have an iPhone or iPad running a recent version of iOS.
To control RoboVac with Alexa, Siri, or Google Assistant:
1. Click on the top left corner of eufy app's main interface, then find "Smart Integrations" in the dropdown menu.
2. Follow the on-screen instructions to complete the setup.
6. Enabling / Disabling Child Safety Lock
Activate the child safety lock in the eufy app: More Settings > Child Lock
Once the child safety lock is enabled, all buttons will be locked to prevent children from damaging the device or

accidentally getting hurt.
7. Cleaning and Maintenance
Prior to cleaning and maintaining, power o the device and unplug the power adapter. Any other servicing should
be performed by an authorized service representative.
For optimal performance, follow the instructions below to clean and maintain E25 regularly. The cleaning and
replacement frequency will depend on your usage habits.
For step-by-step instructions, check out our accessory maintenance video at: https://www.youtube.com/
watch?v=mu0r-H9dLyM
Recommended Cleaning and Replacement Frequency
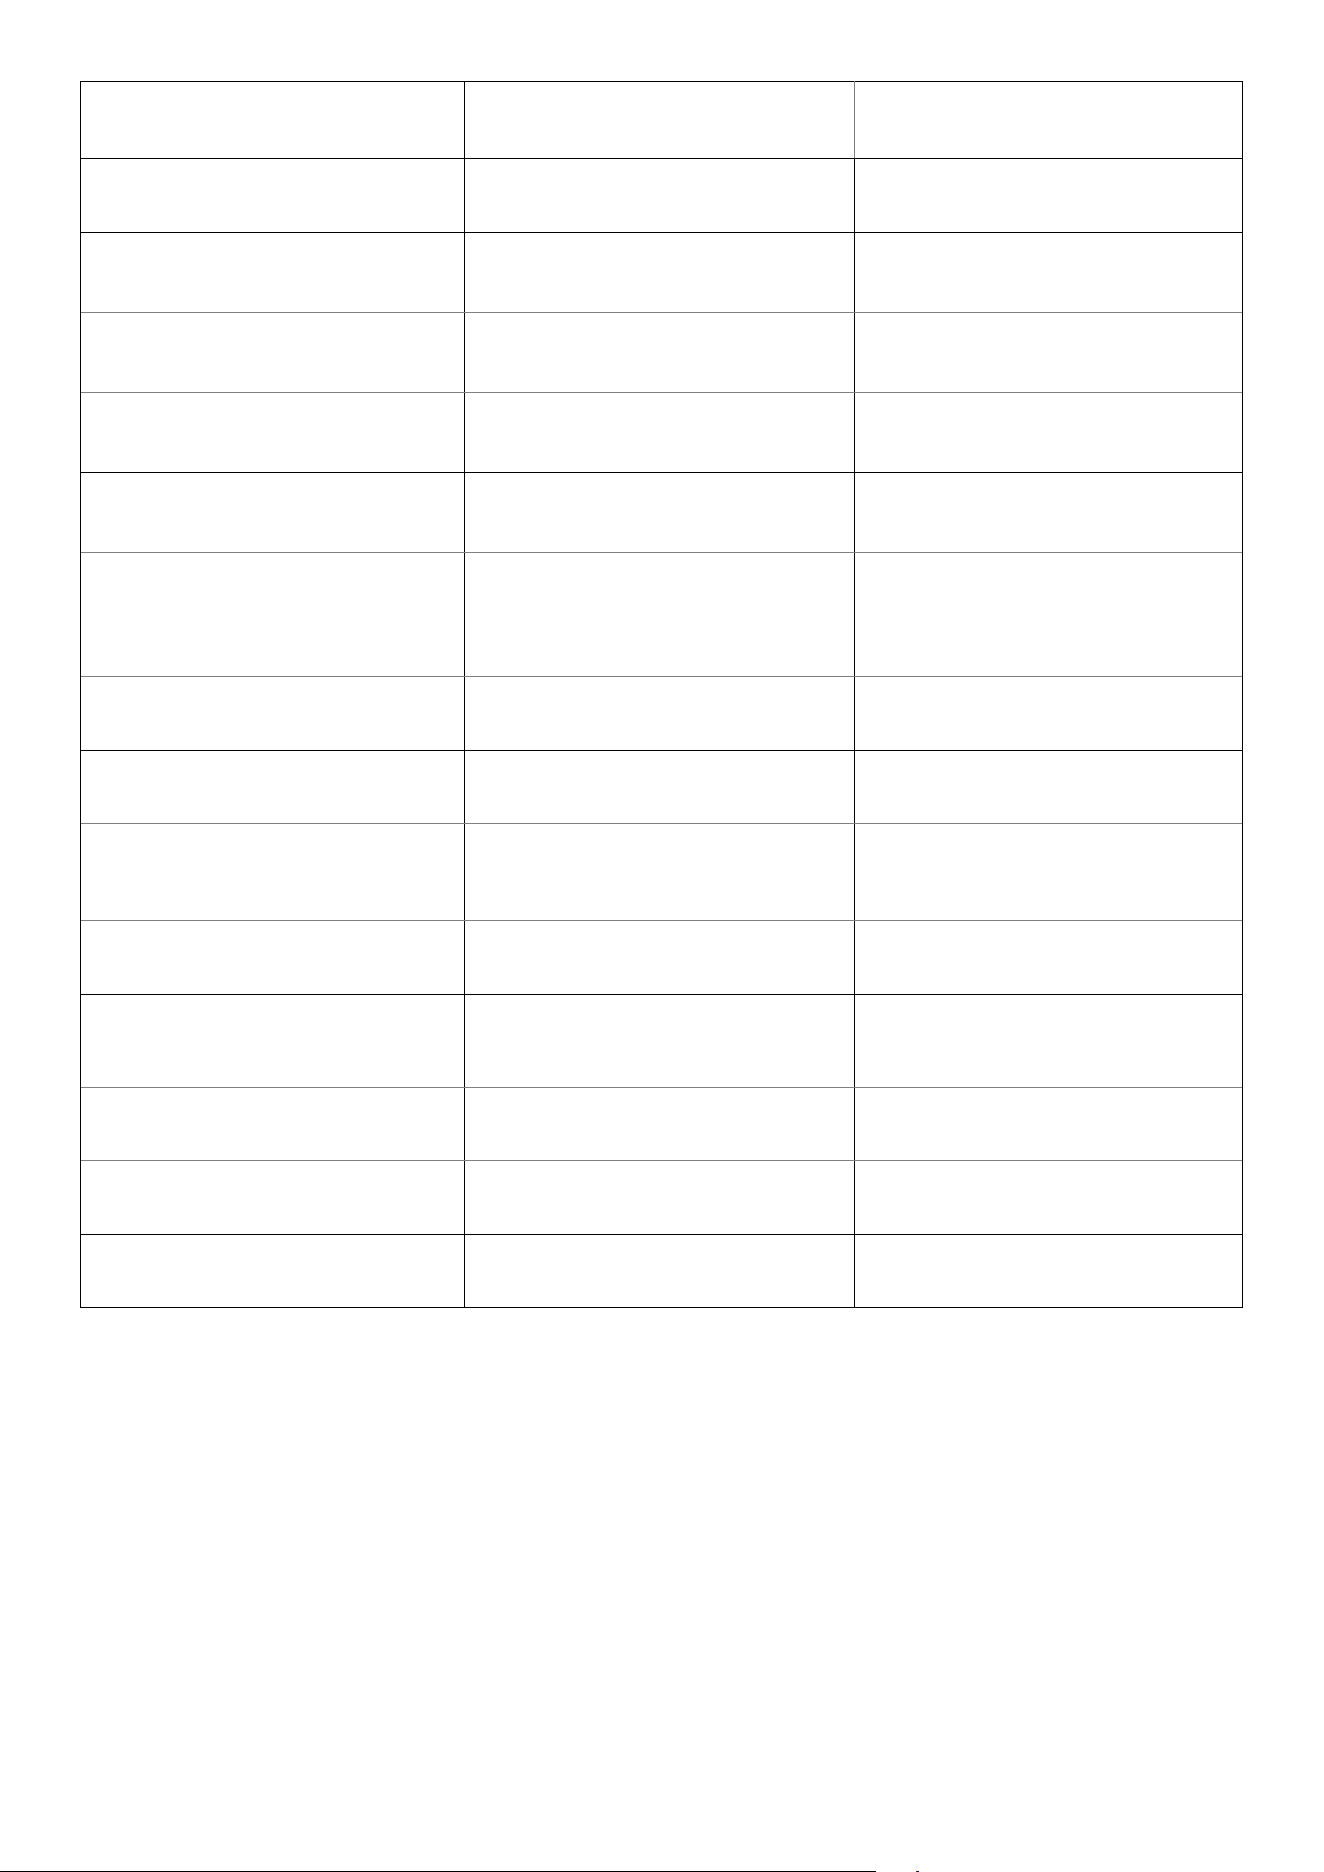
Components Cleaning Frequency Replacement Frequency
Dustbin Once a week -
Large Filter of Dirty Water
Reservoir
Once a month -
Filter Valve Assembly - Every 6 months
Dirty Water Tank of Omni Station
Empty and clean once a week (or
when full)
-
Dustbag -
Every 3 months (or when
prompted)
Cleaning Tray Every 2 weeks -
Roller Mop - Every 3-6 months
Filter Once a week Every 3-6 months
Side Brush
Once a month (or when the
side brush is tangled with hair /
prompted by an error)
Every 3-6 months (or when visibly
worn)
Brush Guard Once a month
Every 3-6 months (or when visibly
worn)
Rolling Brush
Once a month (or when the
side brush is tangled with hair /
prompted by an error)
Every 6 months
Sensors Once a month -
Charging Pins Once a month -
Swivel Wheel Once a month -
7.1 Clean the Dustbin and Filter

❶
Open the top cover and take out the Dustbin.
❷
Pull the release latch to open the cover. Take out the filter.
❸
Empty the dustbin.
❹
Tap the filter to remove dust.
❺
Rinse the Dustbin and filter thoroughly with water.
❻
Air-dry the Dustbin and filter completely before next use.
❼
Place the filter back into the Dustbin.
❽
Push the Dustbin back into the main unit.
❶ ❷ ❸ ❹
❺ ❻ ❼ ❽
• Do not use the filter if it is not completely dry, otherwise it may aect the cleaning performance.
• Do not use a brush, hot water, or any detergent to clean the filter.
7.2 Clean the Rolling Brush
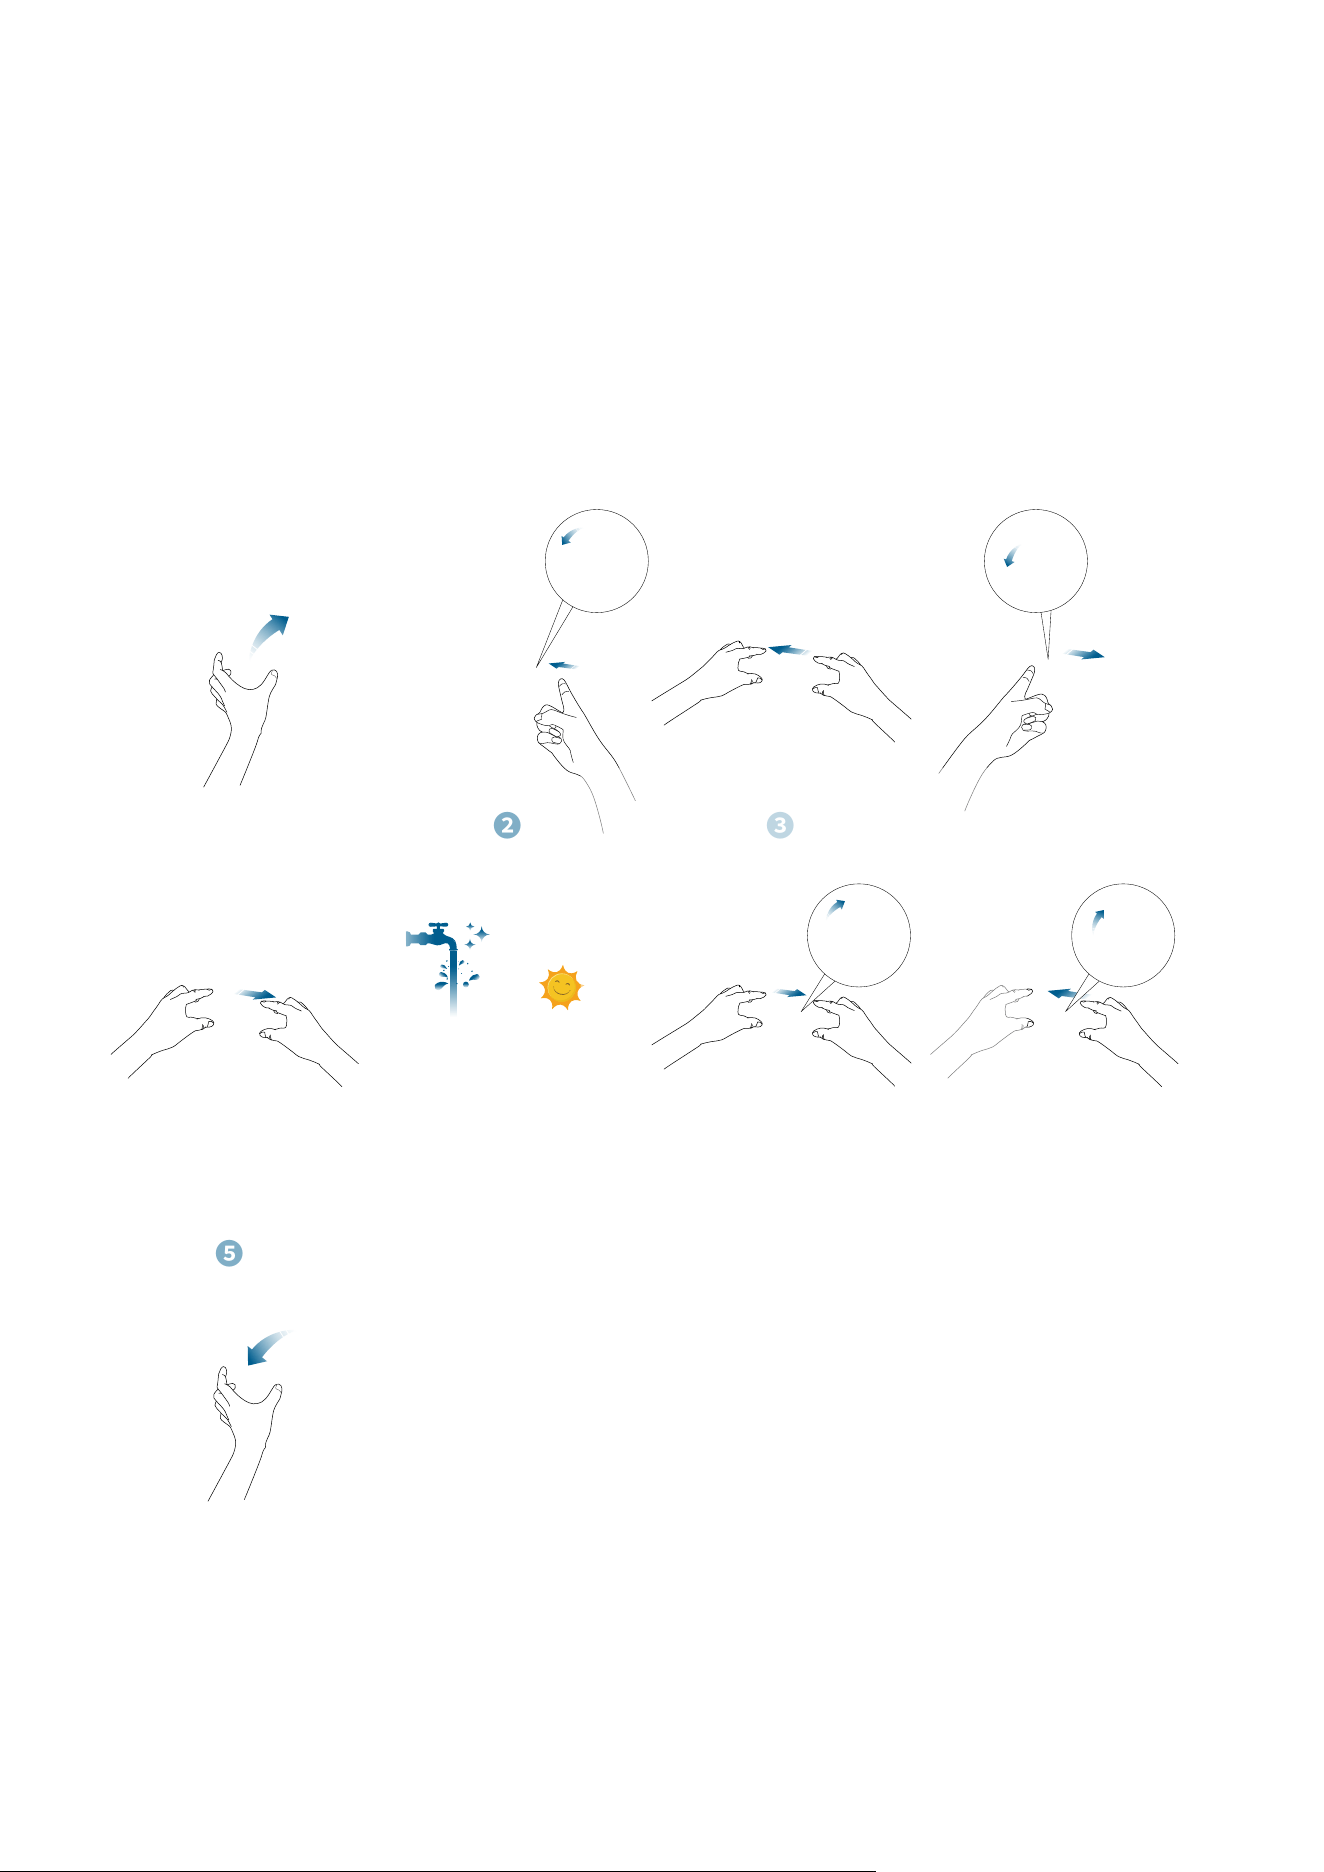
❶
Push the release tabs to unlock the brush guard.
❷
Push the side of one rolling brush inward and gently flip it up.
❸
Gently twist and pull out the rolling brush.
❹
Push the side of the other rolling brush inward and gently flip it up.
❺
Gently twist and pull out the other rolling brush.
❻
Rinse both rolling brushes and brush guard with running water. Air dry the rolling brushes and brush guard
completely before next use.
❼
Reinstall one side of the rolling brush and snap it into place.
❽
Reinstall the other side of the rolling brush and snap it into place.
❾
Press down to snap the brush guard into place.
❶ ❷ ❸ ❹
❺ ❻ ❼
❾
❽
①
②
① ②
①
②
①
②
①
②
7.3 Clean the Side Brush and CornerRover Arm™
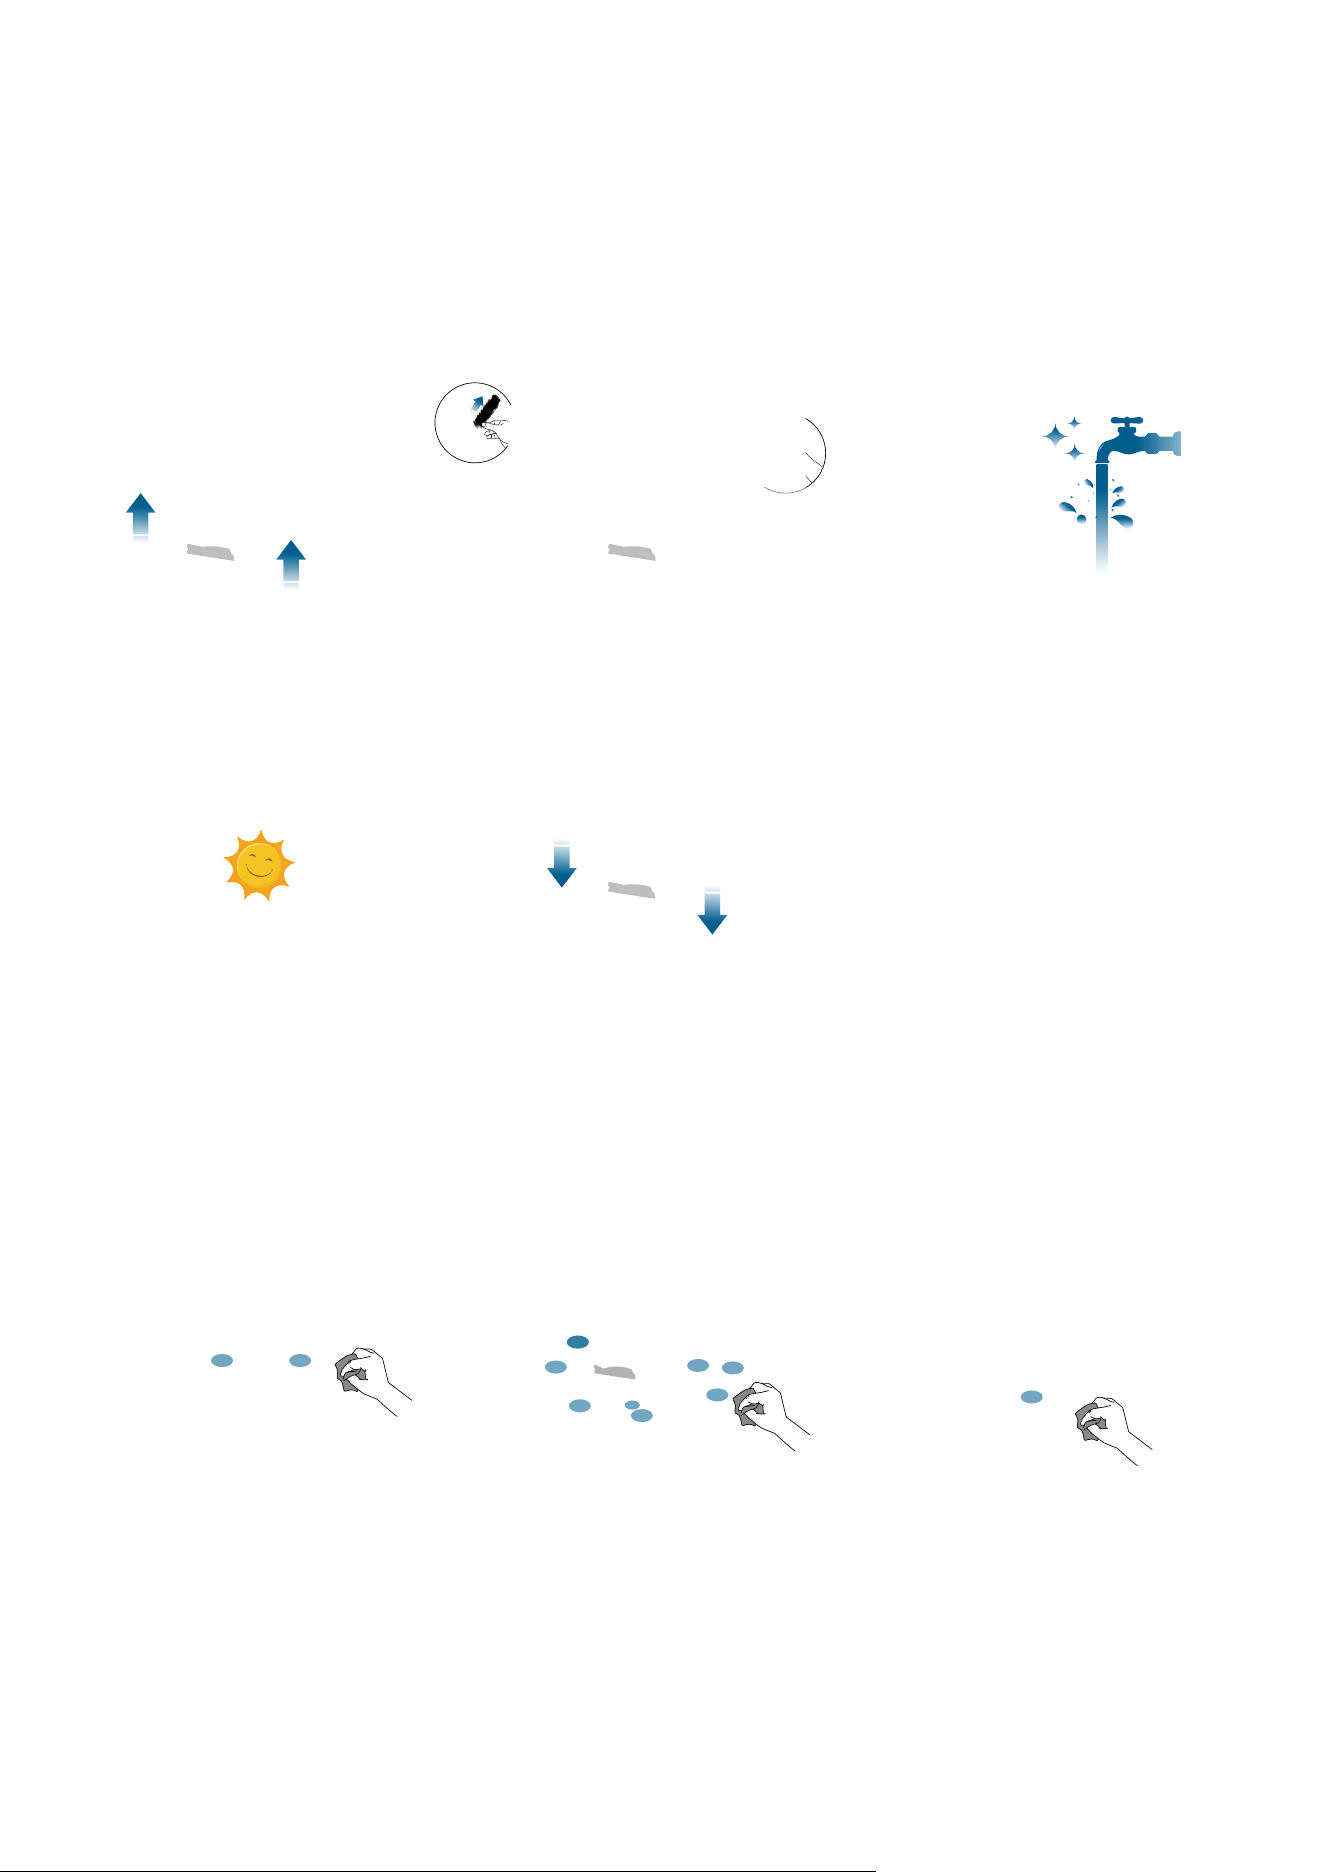
Foreign substances, such as hair, can easily get tangled in the side brush and CornerRover Arm™ , so it is best to
clean them regularly.
❶
Remove the side brush.
❷
Carefully unwind and pull o any hair or substances attached to the side brush and CornerRover Arm™ .
❸
Clean the side brush with water.
❹
Air dry the side brush before next use.
❺
Reinstall the side brush on the machine.
❶ ❷ ❸
❹ ❺
7.4 Clean the Sensors, Cameras, and Charging Pins
To maintain the best performance, clean the sensors and charging contact pins regularly.
• Dust o the sensors and charging contact pins using a soft cloth.
7.5 Clean the Dirty Water Tank

❶
Remove the dirty water tank from the Omni Station.
❷
Empty the dirty water tank.
❸
Rinse the dirty water tank thoroughly with running water.
❶ ❷ ❸
7.6 Clean the Cleaning Tray
❶
Remove the cleaning tray from the Omni Station.
❷
Rinse the cleaning tray thoroughly with water, and clean it with a brush.
❸
Place it back into the Omni Station.
❶ ❷ ❸
8. Troubleshooting
When an error occurs, please refer to the in-app instructions for solutions. If the problem persists, please contact
support@eufy.com for help.
9. Specifications
Model name T2353
Dimensions 346*327*111mm
Weight 11.46 lbs
Battery Li-ion 5200mAh DC14.6
Input 20V
⎓
1.8A
Maximum output power 60 W
Normal operating output
power
55 W
Cleaning Time
Vacuum Only Mode
Quiet Suction: 218min
Standard Suction: 126min
MAX Suction: 124min
Vacuum and Mop Mode
Quiet Suction: 145min
Standard Suction: 126min
MAX Suction: 114min
Charging Time 3.5h
Clean Water Reservoir 120ml
Dirty Water Reservoir 180ml
Model name T2353
Dimensions 369*461*436mm
Weight 15.92 lbs
Input
US/JP/KR/CA Version: 100-127V, 50-60Hz;
EU/UK/AU/MEA Version: 220-240V, 50-
60Hz;
Power (Dry and Charge) 130W MAX
Power (Dust Collection) 900W
Clean Water Tank 2.5L
Dirty Water Tank 1.8L
Disposable Dust Bag
Capacity
3L
• As voltages vary across dierent countries and regions, we recommend purchasing the machine version
specific to your location to avoid potential safety hazards and equipment damage.

10. Customer Service
Contact Us:
support@eufy.com
www.eufy.com
(US/CA) +1 (800)994 3056
(UK) +44 (0) 1604 936 200
(DE) +49 (0) 69 9579 7960
(JP) +81 03 4455 7823
For video tutorials, FAQs, warranty policies, and more information, please visit https://support.eufy.com/
Hereby, Anker Innovations Limited declares that this device is in compliance with The Product Security and
Telecommunications Infrastructure (Security Requirements for Relevant Connectable Products) Regulations 2023.
For the Statement of Compliance, visit the website: https://www.eufy.com/uk/psti-related.
A. the equipment does not have a standby mode or other equivalent state in terms of energy eciency
requirements, power management function or the ability to deactivate wireless network connections mode;
B. the power consumption of the equipment is likely to be higher than other equipment models meeting these
functional requirements.
1. Power consumption in standby mode: ≤ 0.5 W
2. Power consumption in standby mode with Display: ≤ 0.8 W
3. Power consumption in networked standby mode: ≤ 2 W
4. Power management: ≤ 20 min