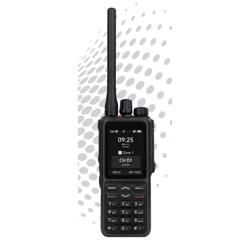

USER'S MANUAL
780
Business DMR Radio
FUNCTION MEETS REQUIREMENT.

User Instruction
Please read the manual carefully before using this product.So that you can
easily operate the radio.When you are using this product ,we think that you
have read the manual
● Please keep the manual, in order to offer reference or user of this product
● This product relates to upgrade or improve .the company reserves without
prior notice to change this manual at any time bove the rights of software
and hardware specifications
All specifications mentioned product specifications and information is only
for reference
● Although all words carefully check ,it is hard to avoid errors, the company
reserves the final interpretation

CONTENTS
Important Safety Information
GETTNG STARTED
Basic operation
PTT button
LED indicator
Switching Between Analog and Digital Mode
Volume switch
Making and receiving calls
Selecting a zone
Selecting a Channel
Receiving and Responding to a Radio Call
Receiving and Responding to a Group Call
Receiving and Responding to a Private Call
Receiving an All Call
Making a Radio Call
Scan Lists
Scan
Contact Settings
Call Log Features
Emergency Operation
Sending an Emergency Alarm with Call
Text Message Features
01
03
04
04
04
04
04
05
05
05
05
06
06
06
07
07
08
08
08
09
10
10
Main Features
●
IP�� waterproofed
●
�.� inch Screen
●
Channel:����
●
contacts:����
●
Zone: ��
●
Roaming
●
●
Encryption: ARC�, AES���, AES���
●
GPS: Beidou / GPS/ Glonass(optional)
●
Man down
●
Mic gain level adjustable
●
Factory reset
●
Recorder(��� hours)(optional)
●
VOX
●
Updated(MCU, DSP, LOGO reboot)
●
Noise cancellation
●
Emergency alarm
●
End tone elinimation
●
Work alone
●
Single call/ all call/ group call
●
TDMA dual time slot
●
Battery saving function
Bluetooth: version �. (optional)
�

Important Safety Information
RF Energy Exposure and Product Safety Guide for Portable Two-Way Radios
ATTENTION!
This radio is restricted to Occupational use only.Before using the radio, read the RF Energy
Exposure and Product Safety Guide for Portable Two-Way Radios which contains important
operating instructions for safe usage and RF energy awareness and control for Compliance
with applicable standards and Regulations.
If the radio has been submersed in water, shake the radio well to remove any water that may be
trapped inside the speaker grille and microphone port. Trapped water could cause decreased
audio performance.
If the radio's battery contact area has been exposed to water, clean and dry battery contacts on
both the radio and the battery before attaching the battery to the radio. The residual water could
short-circuit the radio.
If the radio has been submersed in a corrosive substance(e.g.saltwater), rinse the radio and
battery in fresh water then dry the radio and battery.
To clean the exterior surfaces of the radio, use a diluted solution of mild dish washing detergent
and fresh water (i.e. one teaspoon of detergent to one gallon of water).
Never poke the vent (hole) located on the radio chassis below the battery contact. This vent
allows for pressure equalization in the radio. Doing so may create a leak path into the radio and
the radio's submersibility may be lost.Never obstruct or cover the vent, even with a label.
Ensure that no oily substances come in contact with the vent.
Encryption
Noise cancellation
Man down
VOX
USB mode
TX admit
Power saving
Lone Worker
Locking and Unlocking the Keypad
Setting the Squelch Level
Setting the Power Level
Turning the Voice Operating Transmission (VOX)Feature On or Off
Setting the Display Backlight Timer
Adjusting the Display Brightness
Turning the Global Positioning System (GPS) On or Off
Checking the Radio Alias and lD
Checking the GPS Information
Specification
Guarantee
01
12
13
15
15
15
16
16
17
17
17
18
18
18
19
19
20
20
21
GETTNG STARTED
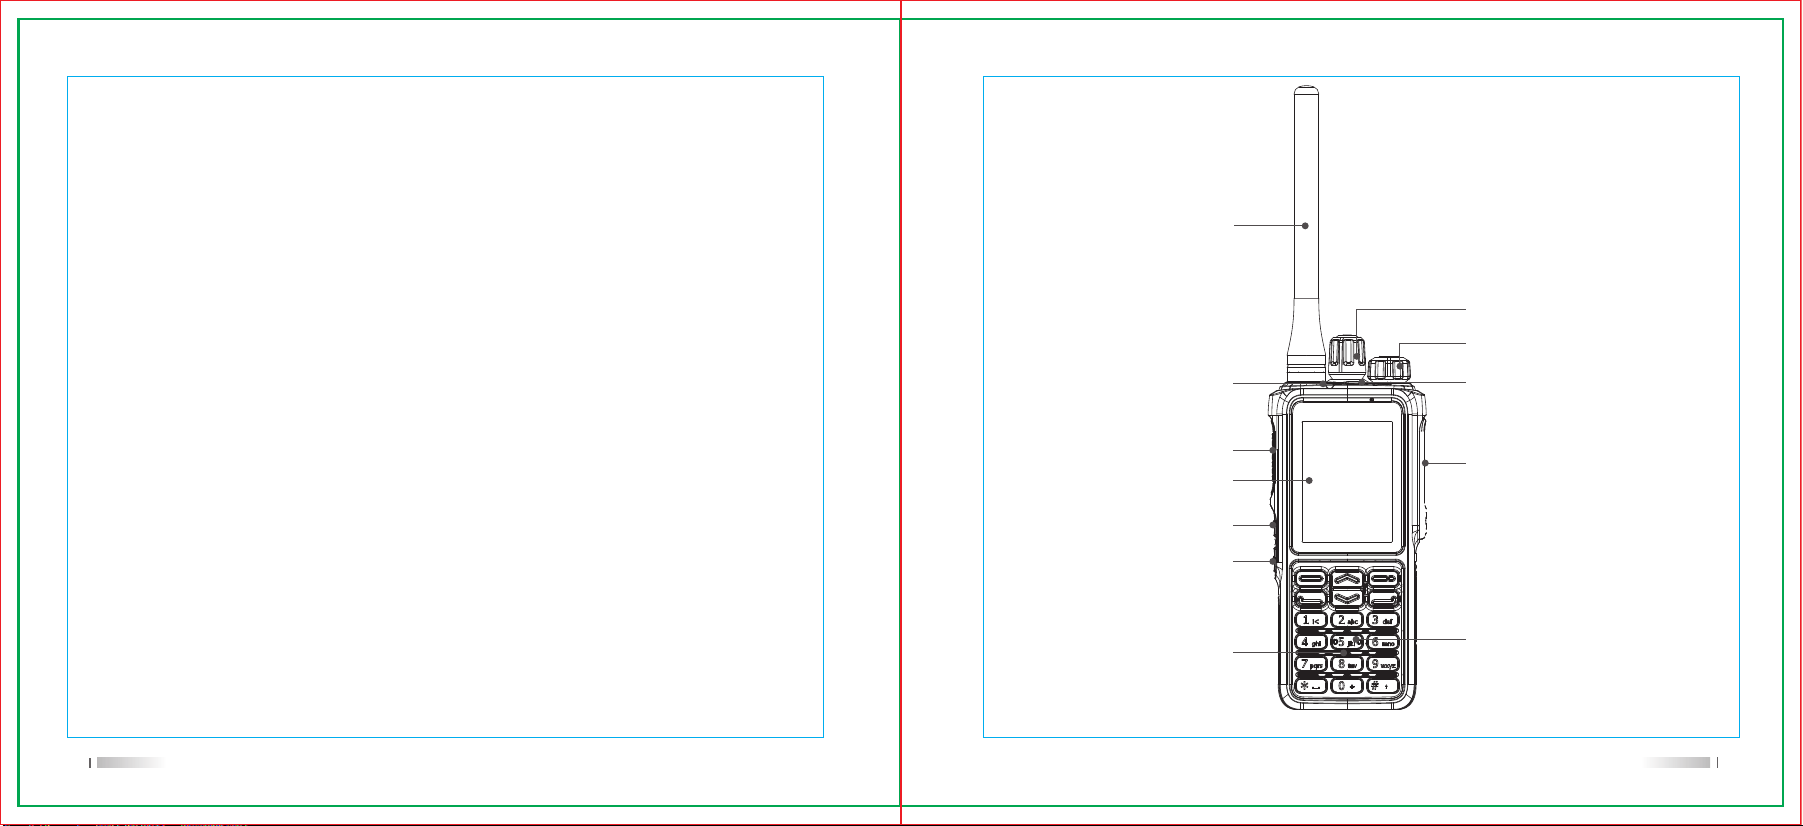
Get familiar with the radio
03
02
Antenna
Channel knob
On/off/volume knob
PTT
Side key 1
Side key 2
Keypad
Mic
Universal connector for accessories
LED Indicator
LED
Emergency key
The radio with antenna attached properly is designed to be submersible to a maximum depth of
1 meter (3.28 feet) and a maximum submersion time of 30 minutes. Exceeding either maximum
limit or use without antenna may result in damage to the radio.
When cleaning the radio, do not use a high pressure jet spray on the radio as this will exceed
the 1 meter depth pressure and may cause water to leak into the radio.
Caution: Do not disassemble the radio. This could damage radio seals and result in leak paths
into the radio. Radio maintenance should only be done in service depot that is equipped to test
and replace the seal on the radio.

Basic operation
PTT button
While a call is in progress, the PTT button allows the radio to transmit to other radios in the call.
Press and hold down PTT button to talk. Release the PTT button to listen.
The microphone is activated when the PTT button is pressed.
While a call is not in progress, the PTT button is used to make a new call
LED indicator
Blinking red
Radio is transmitting , receiving an emergency transmission, has failed the self-test upon
powering up
Switching Between Analog and Digital Mode
Each channel in your radio can be configured as analog or digital channel.Use the Channel
Selector Knob to switch between an analog or a digital channel. You can find D or A in the
channel to indicate it is digital or analog.
The channel can be set in the software.
Volume switch
Rotate the power/volume knob clockwise, when it powers on,continue to rotate the knob to
adjust the volume.
Note: You can monitor the background sound and adjust the volume.
Making and receiving calls
Selecting a zone
The radio support up up 5 zones and 1024 channels: using the menu key to access the menu ,
use up and down to Zone and press confirm key to select.
Selecting a Channel
Transmissions are sent and received on a channel.Depending on your radio's configuration, each
channel may have been programmed differently to support different groups of users or supplied
with different features. After selecting the relevant Zone select the relevant channel you require to
transmit or receive on.
Turn the programmed Channel Selector Knob to select the channel, subscriber alias or lD, or
group alias or lD.
Receiving and Responding to a Radio Call
Once the channel, subscriber lD, or group lD is displayed, you can proceed to receive and
respond to calls.
The LED lights up solid green while the radio is transmitting and blinks green when the radio is
receiving.
Note: The LED lights up solid green while the radio is transmitting
To unscramble a privacy-enabled call, your radio must have the same Privacy Key, OR the same
Key Value and Key lD (programmed by your dealer), as the transmitting radio (the radio you are
receiving the call from).
05
04

Receiving and Responding to a Group Call
To receive a call from a group of users, your radio must be configured as part of that group.When
you receive a Group Call (while on the Home screen), the LED blinks green. The Group Call icon
appears in the screen.. The second text line displays the group call alias. Your radio unmutes and
the incoming call sounds through the radio's speaker.
Hold the radio vertically 1 to 2 inches (2.5 to 5.0cm) from your mouth.
lf the Channel Free Indication feature is enabled, you hear a short alert tone the moment the
transmitting radio releases the PTT button, indicating the channel is free for you to respond.
Press the PTT button to respond.
Release the PTT button to listen
Receiving and Responding to a Private Call
A Private Call is a call from an individual radio to another individual radio.
When you receive a Private Call, the LED blinks green. The Private Call icon appears in the
screen. Your radio unmutes and the incoming call sounds through the radio's speaker.
Hold the radio vertically 1 to 2 inches (2.5 to 5.0cm) from your mouth.
lf the Channel Free Indication feature is enabled, you hear a short alert tone the moment the
transmitting radio releases the PTT button, indicating the channel is free for you to respond.
Press the PTT button to respond
Release the PTT button to listen
Receiving an All Call
An All Call is a call from an individual radio to every radio on the channel. lt is used to make
important announcements requiring the user's full attention,
When you receive an All Call, a tone sounds and the LED blinks green.
The Group Call icon appears in the screen.The first text line shows the caller alias. The second
text line displays all call. Your radio unmutes and the incoming call sounds through the radio
speaker.
Once the All Call ends, the radio returns to the previous screen before receiving the call. An All
Call does not wait for a predetermined time before ending
lf the Channel Free Indication feature is enabled,you hear a short alert tone the moment the
transmitting radio releases the PTT button, indicating the channel is now available for use.
You cannot respond to an All Call.
Making a Radio Call
After selecting your channel, you can select a subscriber alias or lD, or group alias or lD by using.
The Channel Selector Knob.
Scan Lists
Scan lists are created and assigned to individual channels/groups. Your radio scans for voice
activity by cycling through the channel/group sequence specified in the scan list for the current
channel group.
Your radio can support up to 4 scan lists, with a maximum of 10 members in a list. Each scan list
supports a mixture of both analog and digital entries.You can add, delete, or prioritize channels
by editing a scan list
1.Use Menu key to access menu
07
06
2.Up or down key to scan and press confirm key to select
3.Up or down key to scan list and press confirm key to select
4.Use up or down key to view the member on the list .
Scan
When you start a scan, your radio cycles through the programmed scan list for the current
channel looking for voice activity.
The LED blinks green.
During a dual mode scan, if you are on a digital channel, and your radio locks onto an analog
channel, it automatically switches from digital mode to analog mode for the duration of the call.
For the analog radio , only can scan the analog signal.
Contact Settings
Contacts provides “address-book" capabilities on your radio. Each entry corresponds to an alias
or lD that you use to initiate a call.
Each entry, depending on context, associates with one of five types of calls: Group Call, Private
Call, All Call.
Call Log Features
Your radio keeps track of all recent outgoing,answered, and missed Private Calls. Use the call
log feature to view and manage recent calls.
You can perform the following tasks in each of your call lists:
View
Message
Delete
Delete all
Emergency Operation
Emergency call button is on the top of radio.
An Emergency Alarm is used to indicate a critical situation. You are able to initiate an Emergency
at any time on any screen display even when there is activity on the current channel.
It has 2 type: LOCAL SOS /CALL SOS
Receiving an Emergency Alarm
On receiving an emergency alarm the emergency icon appears, a tone sounds, the LED blinks
red and the radio displays the emergency caller alias
09
08
Sending an Emergency Alarm with Call
This feature allows you to send an Emergency Alarm to a group of radios. Upon acknowledge-
ment by a radio within the group, the group of radios can communicate over a programmed
Emergency channel.
Text Message Features
Your radio is able to receive data, for example a text message, from another radio or an e-mail
application
The maximum length of characters for a text message, including the subject line (seen when
receiving message from an e-mail application), is 140whereas for receiving this is 280 charac-
ters.
The radio exits the current screen once the in activity timer expires. Any text message in the
writing/editing screen will automatically be saved to the Drafts folder.
Note: For the Arabic language, the text entry orientation is from right to left.
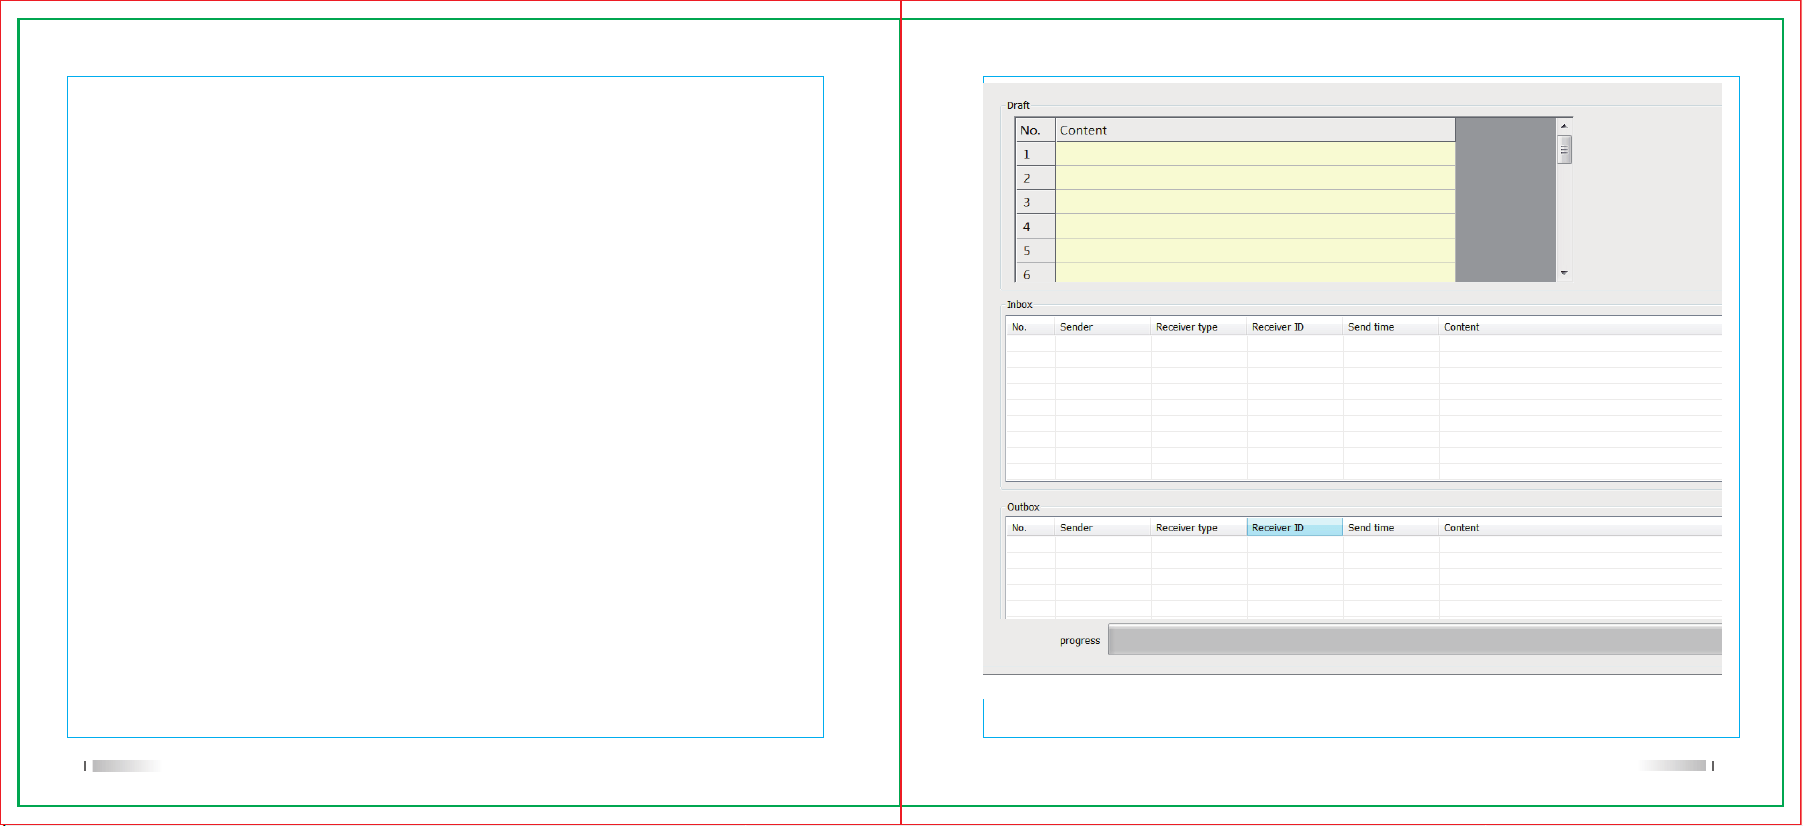
In the menu , users can find the Inbox and Out box, also edit the new message and shortcuts
SMS( Which need to set in the software)
11
10
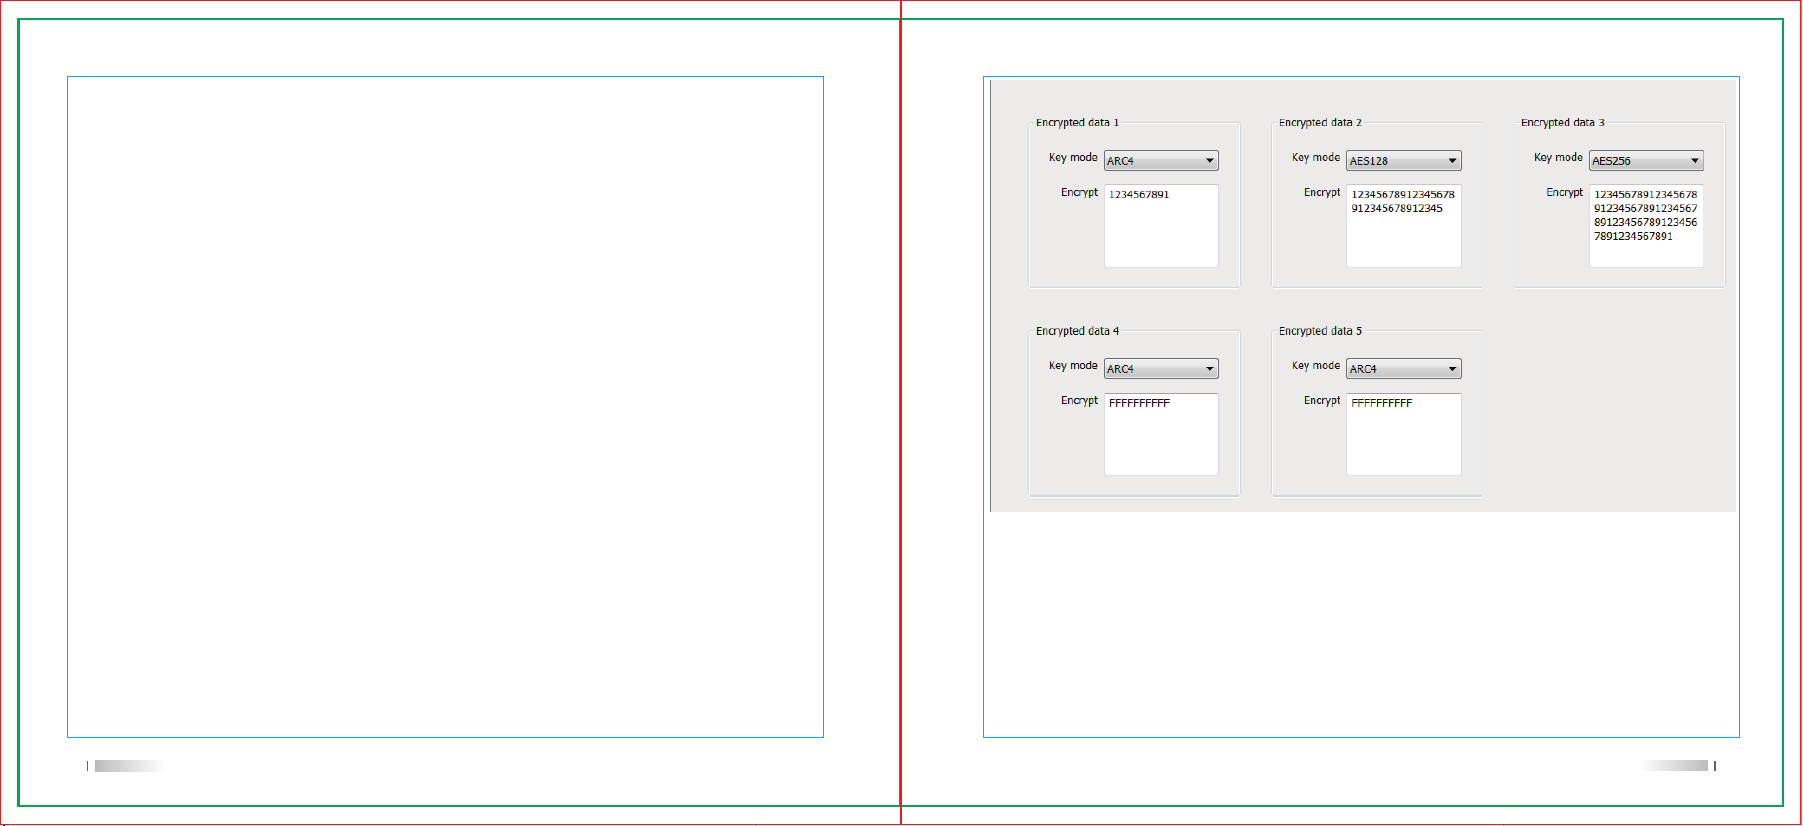
Encryption
If enabled, this feature helps to prevent eavesdropping by unauthorized users on a channel by
the use of a software-based scrambling solution.The signaling and user identification portions
of a transmission are not scrambled.
Your radio must have privacy enabled on the channel to send a privacy-enabled transmission,
although this is not a necessary requirement for receiving a transmission. While on a
privacy-enabled channel,the radio is still able to receive clear (unscrambled)transmissions.
Your radio supports 3 types of privacy:
ARC4
AES128
AES256
Only one of the privacy types above can be assigned to the radio.
To unscramble a privacy-enabled call or data transmission, your radio must be programmed to
have the same Privacy Key (for Basic Privacy), or the same Key Value and Key lD (for
Enhanced Privacy)as the transmitting radio.
If your radio receives a scrambled call that is of a different Privacy Key, or a different Key Value
and Key lD, you will either hear a garbled transmission(Basic Privacy) or nothing at all
(Enhanced Privacy).
The LED lights up solid green while the radio is transmitting and blinks green rapidly when the
radio is receiving an ongoing privacy-enabled transmission.
Noise cancellation
Noise cancellation, uses a technology called Active Noise Control to reduce unwanted
ambient sound by generating an opposite sound wave that cancels out the original sound
waves. It is most effective on constant, low to medium-frequency noises like engine hum or
background chatter. While it enhances the listening experience by creating a peaceful audio
environment, it does not eliminate distinct or sudden sounds, as these change too quickly for
the technology to process and cancel.
13
12
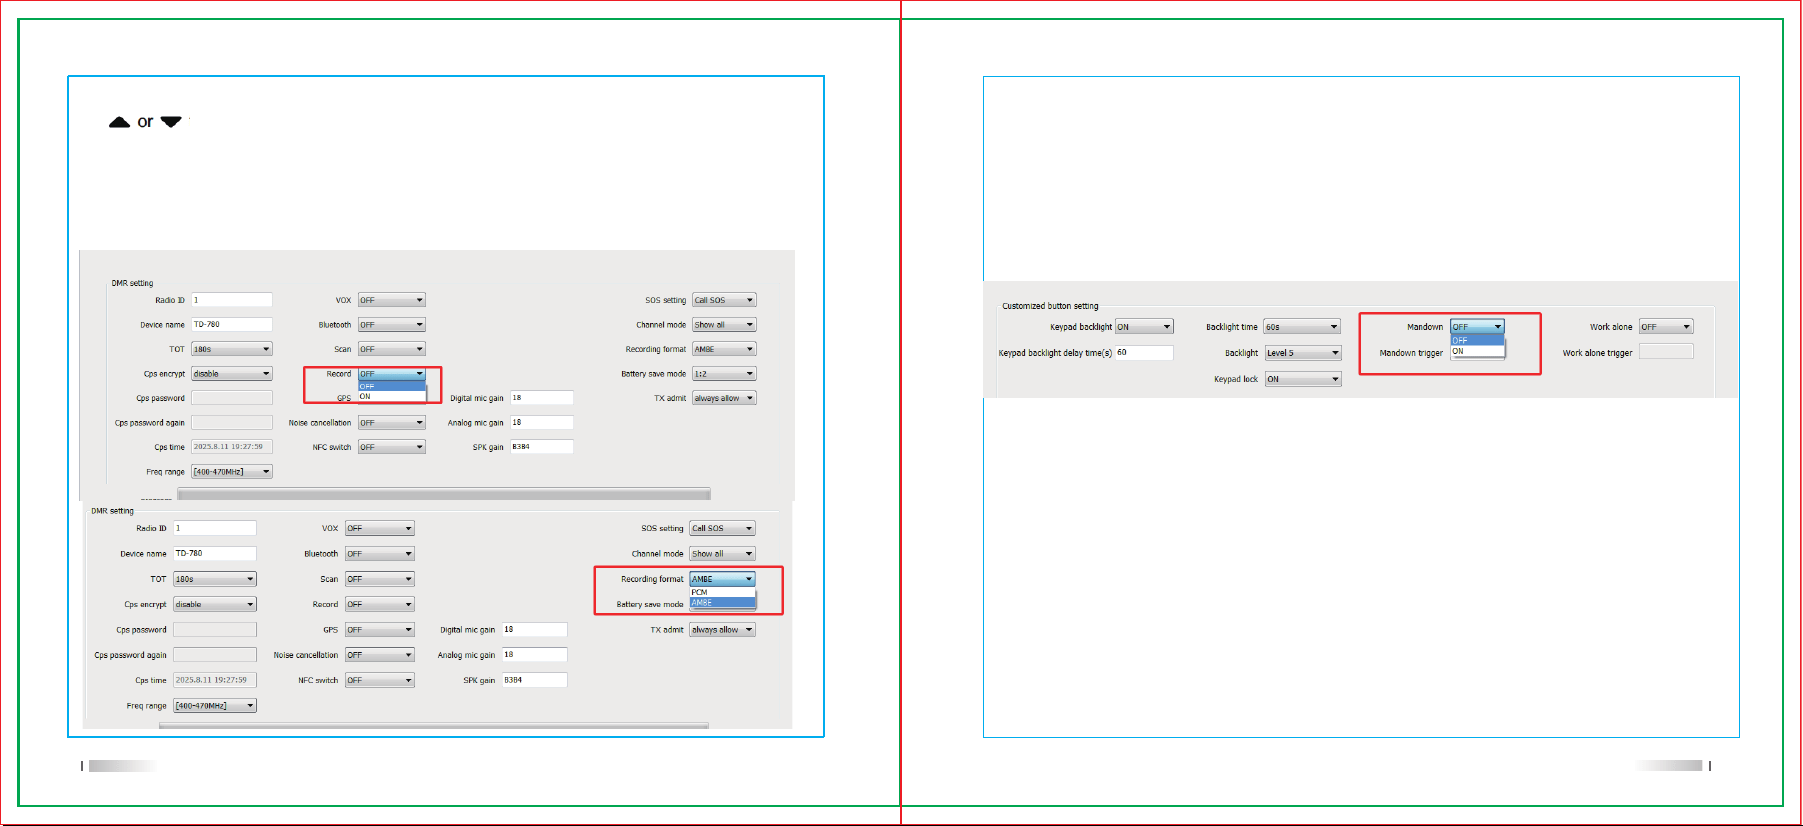
Press menu key to access the menu.
Use to setting , choose the noise cancellation on or off
Recording
You can set the recording on via the software , after that can use the menu to choose
recording on or off.
There are 2 format of the recording. You can choose it in the software.
VOX
VOX voice control allows you to transmit using only your voice, without having to press the
PTT transmit button. Transmission automatically stops when you stop speaking. This feature
can be turned on/off using the programming software or the device menu.
When VOX voice control is enabled on your radio channel, speaking into the microphone
automatically turns on transmission and sends voice. When you stop speaking, the radio
automatically stops transmitting and waits for reception.
Note: VOX can only be enabled when the noise reduction function is enabled.
USB mode
You can set the radio to be which kind of USB mode.
Avaliable value:record mode, Disk mode
Man down
A man down function is a safety feature on two-way radios and personal safety devices that
automatically detects a fall or prolonged lack of movement, triggering an alarm to alert others or
a central control center. It uses tilt switches and other sensors to identify when a user is in a
horizontal position or motionless for a set duration, providing a safety net for lone workers in
hazardous environments by enabling quick alerts and location tracking to facilitate timely
emergency response.
15
14
Power saving
Power saving mode can be set in the frequency programming software or in the device menu.
Off: No power saving;
1:1: The wake-up and sleep ratio is 1:1;
1:2: The wake-up and sleep ratio is 1:2;
1:4: The wake-up and sleep ratio is 1:4.
Note: 1:4 is the most power-efficient, but may result in more word dropouts at the start of a call.
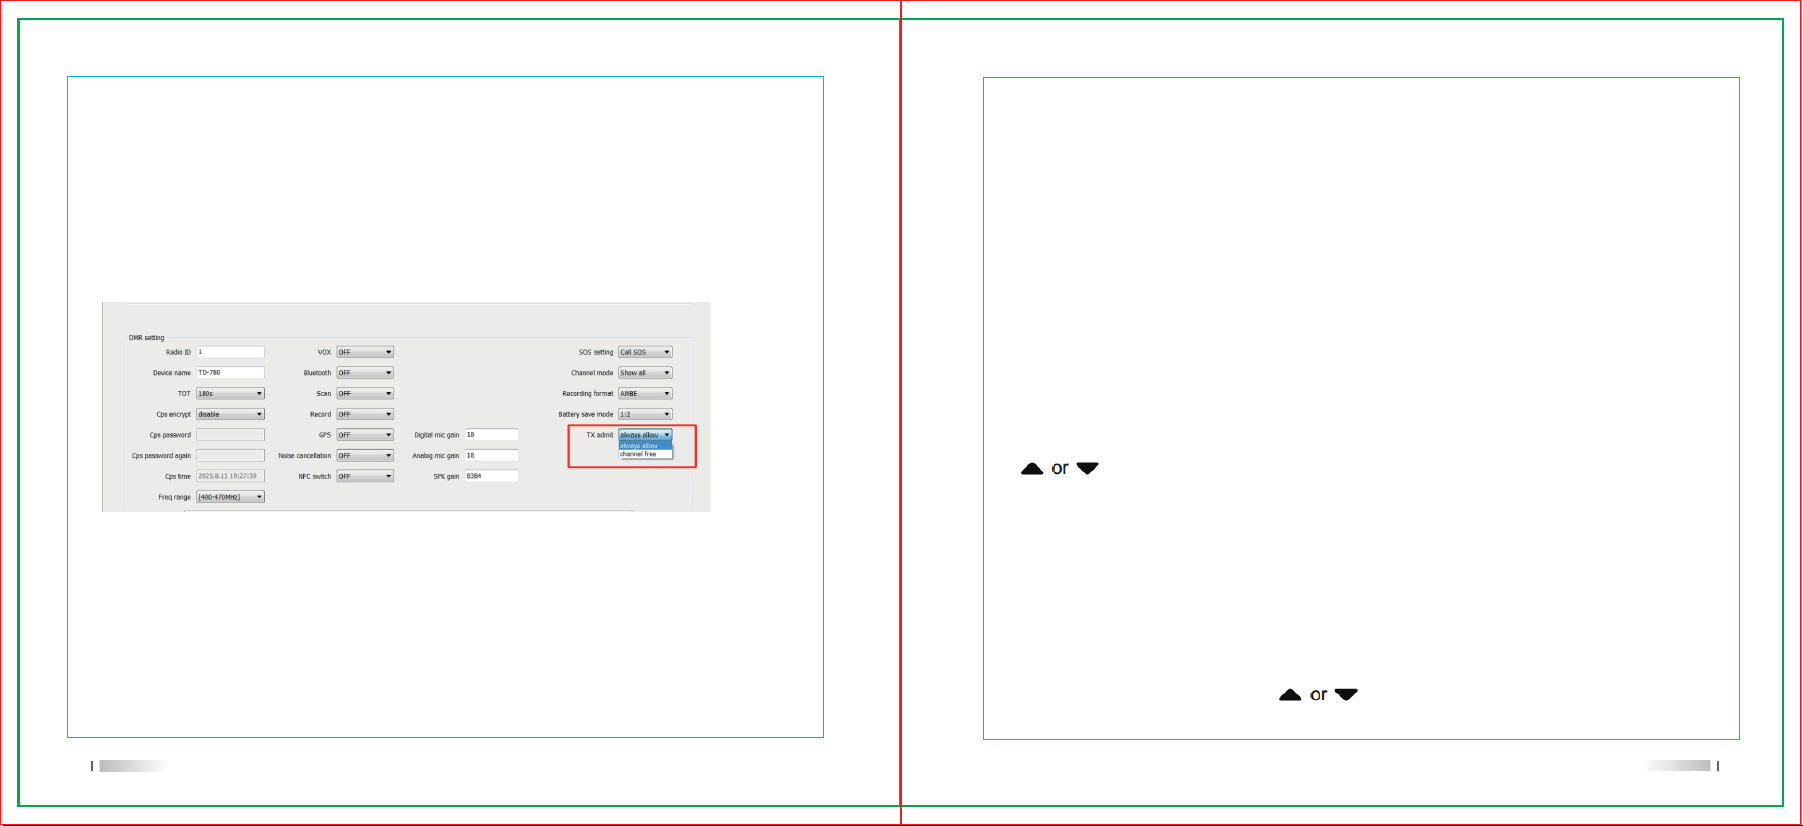
TX admit
The TX admit function is a setting on DMR radios that determines when a radio can transmit,
with options like "Channel Free," "Color Code Free," and "Always". "Channel Free" is the most
restrictive, allowing transmission only when no signal or noise is present. "Color Code Free"
allows transmission when no other signal on the same color code is detected, useful for repeater
use. "Always" permits transmission at any time, even during an ongoing call. The best setting
depends on the radio's use case, such as "Color Code Free" for repeaters or "Always" for
simplex or hotspot use.
Lone Worker
This feature raises an emergency if there is no user activity, such as any radio button press or
activation of the channel selector, for a predefined time.
Before raising the emergency, when the in activity timer expires, the radio warns the user via an
audio indicator.
If there is still no acknowledgement by the user before the predefined reminder timer expires, the
radio initiates an Emergency Alarm.
Locking and Unlocking the Keypad
You can lock your radio's keypad to avoid in advertent key entry.
To lock/unlock your radio's keypad.
Steps:
Press menu key to access the menu.
Use to setting , choose the keypad lock and press menu to select.
After the keypad is locked, the display shows Keypad Locked and returns to the Home
screen.After the keypad is unlocked, the display shows Keypad unlocked and returns to the
Home screen.
Setting the Squelch Level
You can adjust your radio's squelch level to filter out unwanted calls with low signal strength or
channels that have a higher than normal background noise.
Press Menu key to access the menu to squelch level and press menu key to select
Available value: on, level 1/2....9
17
16
Setting the Power Level
You can customize your radio's power setting to high or low for each channel.
High enables communication with radios located at a considerable distance from you. ... enables
communication with radios in closer proximity.
Press Menu key to access the menu to squelch level and press menu key to select
Available value:HI/LOW
Turning the Voice Operating Transmission (VOX)Feature On or Off
This feature allows you to initiate a hands-free voice activated call on a programmed channel.
The radio automatically transmits, for a programmed period,whenever the microphone on the
VOX capable accessory detects voice.
Pressing the PTT button during radio operation will disable VOX.
To re-enable VOX:Turn the radio off and power it on again.
Setting the Display Backlight Timer
You can set the the radio's display backlight timer as needed. The setting also affects the Menu
Navigation Buttons and keypad back lighting accordingly.
follow the procedure described next to access this feature via the radio menu.
The display backlight and keypad back lighting are automatically turned off if the LED indicator
is disabled
Press Menu key to access the menu to squelch level and press menu key to select
Available value:always on/ 10S/20S....120S
Adjusting the Display Brightness
You can adjust radio's display brightness as needed.
Adjust the Display Brightness , there are 2 methods:
1.Press the side key to increase or decrease the brightness
2.Use the menu , to choose the brightness and use the to choose the desired items.
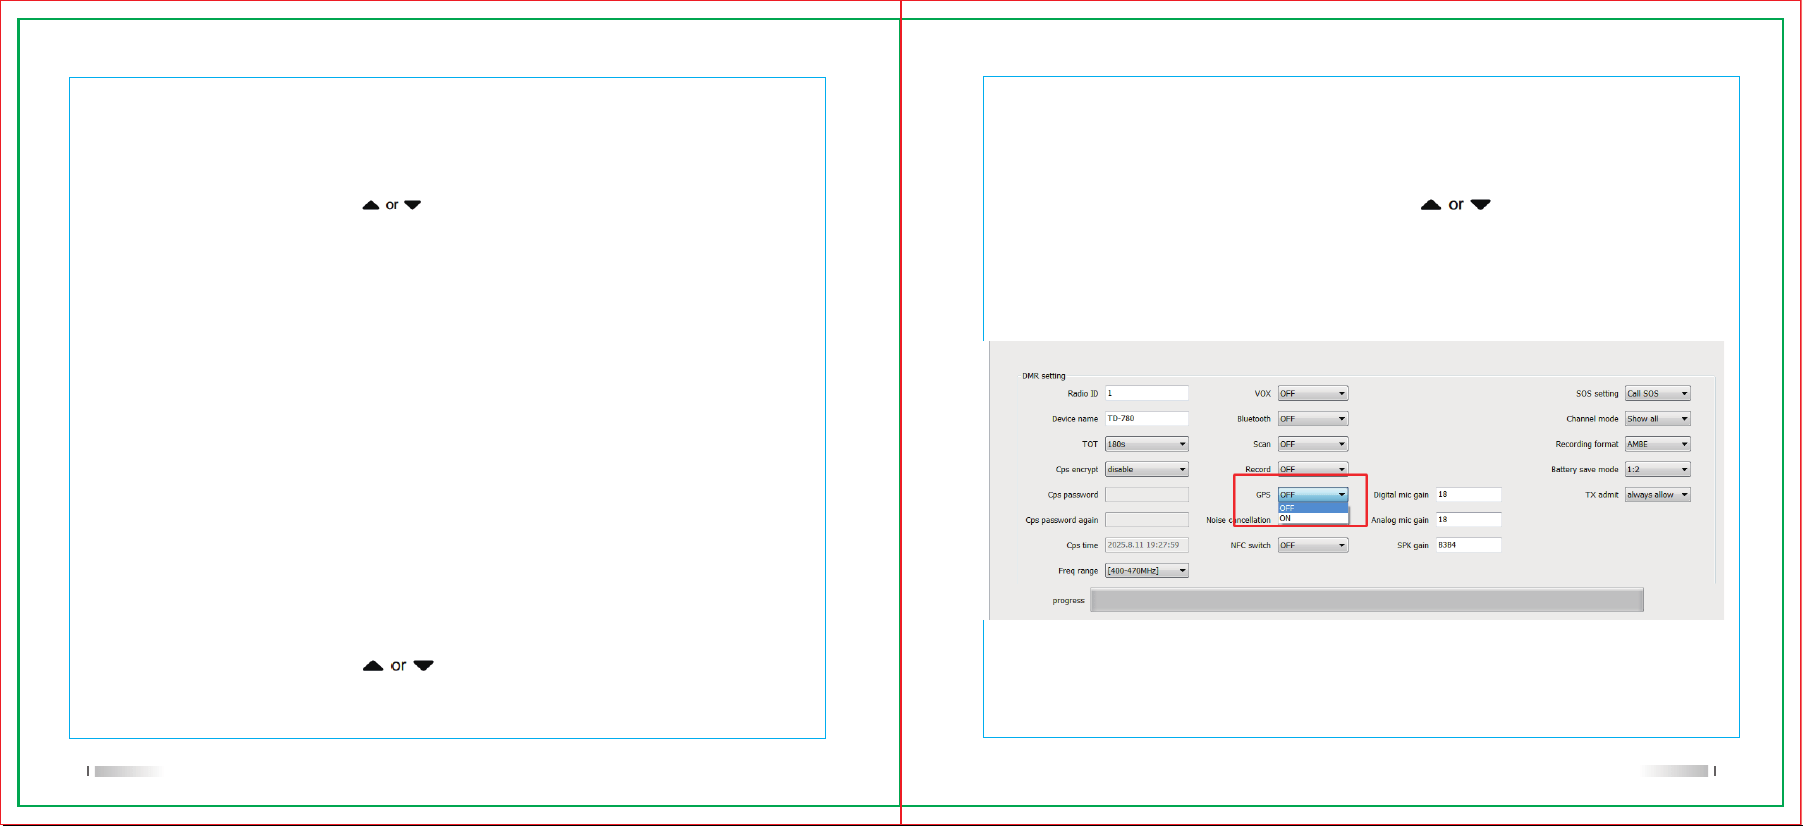
Turning the Global Positioning System (GPS) On or Off
GPS is a satellite navigation system that determines the radio's precise location.
The GPS function only can open in the software , if use menu , it will shows: not authorized”
19
18
Specification
Checking the Radio Alias and lD
This feature displays the lD of your radio.
Follow the procedure described next to access this feature via
the radio screen.
Press menu key to access the menu.
to setting and press menu key to radio info
Checking the GPS Information
Displays the GPS information on your radio, such as values
of:
Time
DATE
Latitude
Longitude
Satellites
21
20
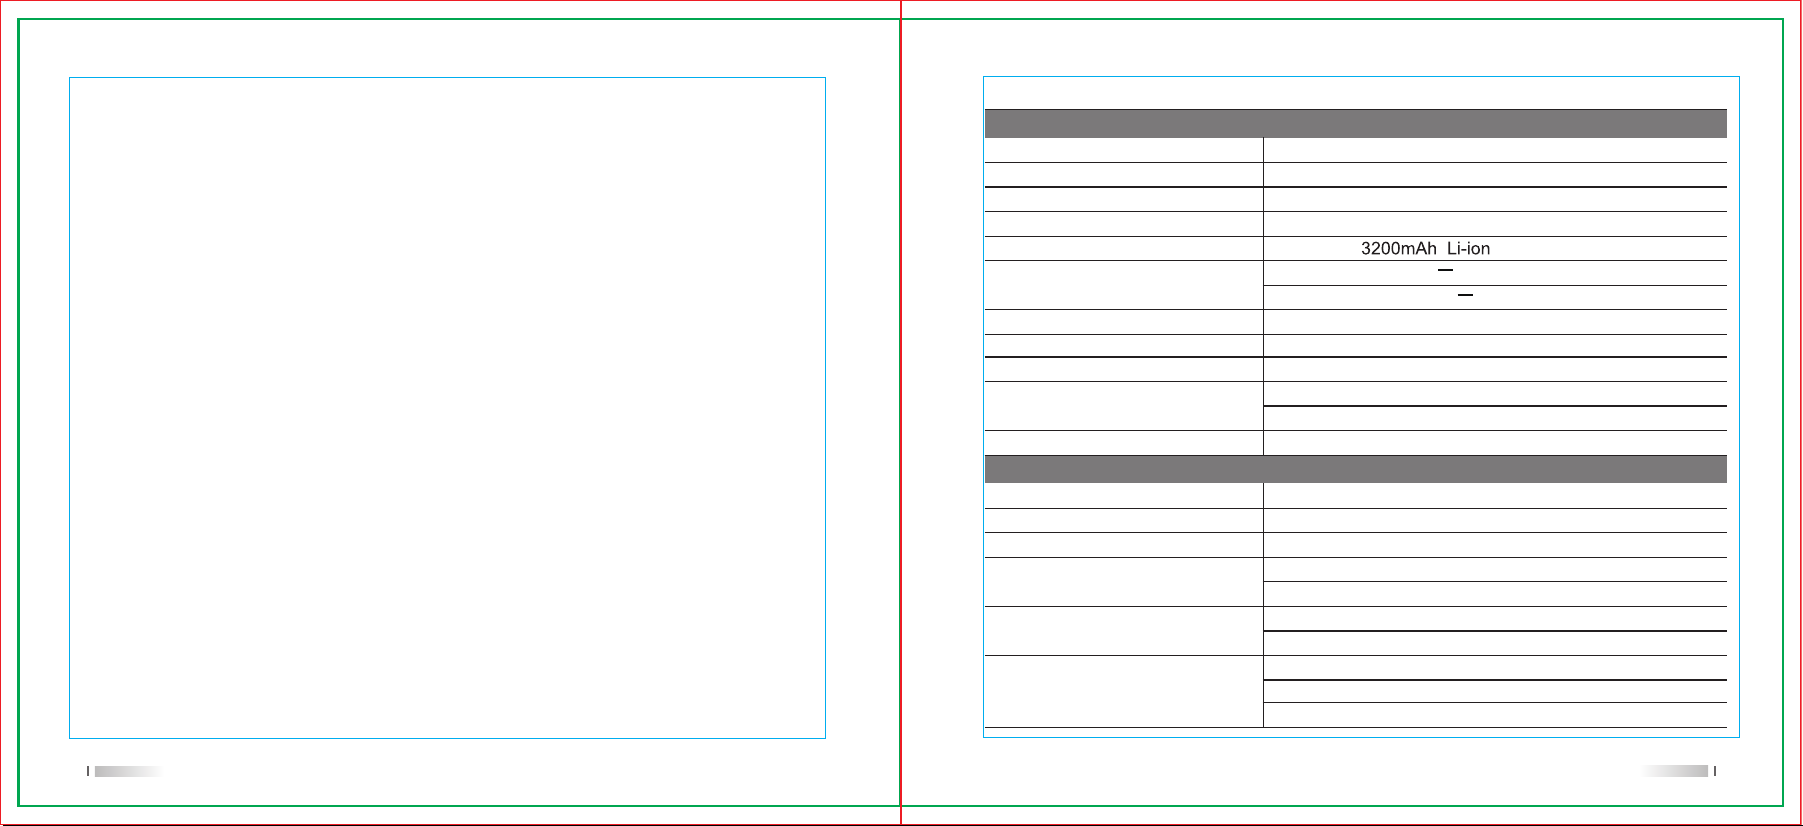
Gerenal
400-470
1024
64
7.4V
In:DC12V---1A max
Out:DC8.7V---1A max
1.5W(
< 3%
+1d B ~-3d B
Analog for 12hours
Digital for 16hours
300 hours
Frequency
Channel
Zone
Voltage
Battery capacity
Charger voltage
Audio power
Audio distortion
Audio response
Working time(5:5:90)
Recorder
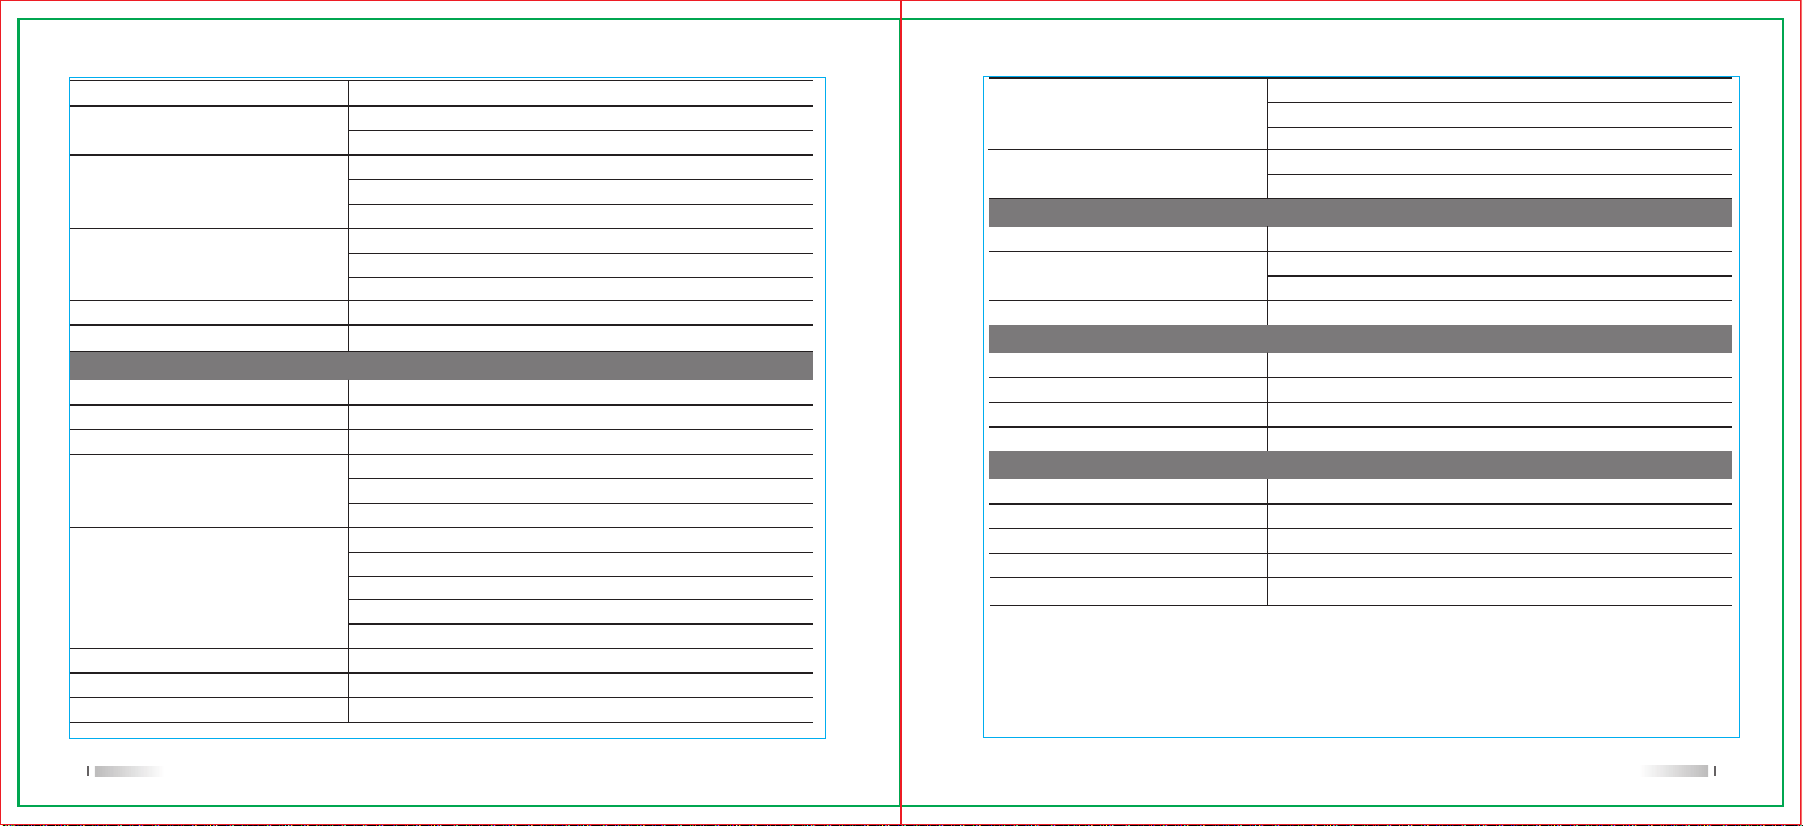
Transmitter
High: W Low:2W
±0.5ppm
12.5KHz/20KHz/25KHz
30MHz~1GHz≤-36dBm
1GHz~12.75GHz<-30dBm
70dB@20/25KHz
12.5KHZ:11K0F3E
20KHz:14K0F3E
25KHz:16K0F3E
TX power
Frequency stability
Channel space
Spurious emission
Adjacent channel power
FM modulation mode
5
23
22
Receiver
12.5KHz/20KHz/25KHz
0.22uV(12dB SINAD)
0.22uV(BER 5%)
TIA-603D:70dB
ETSI:65dB
TIA603A:[email protected]
70dB@20KHz/25KHZ
TIA603D:[email protected]
70dB@20KHz/25KHZ
ETS1:[email protected]
70dB@20KHz/25KHz
<-57dBm(TIA603D)
TIA-603:[email protected]/20/25KHz
ETS1:[email protected]/20/25KHz
Spcace
Analog sensitivity
Digital sensitivity
Inter modulation
Adjacent channel selectivity
Conducted spurious
Spurious response
suppression
Location
GPS
Activate time
Horizontal position accuracy
BEIDOU/GPS/GLONASS
clod start:<1 minute
Hot start: < 10s
<5M
Working environment
Temperature range
Standby temperature range
Shock and vibration
IP rate
-30~+60℃℃
-40~+85℃
MIL-STD-810H
IP68
Size
Dimension
Antenna
Weight
Connector
Charger method
35*63*152(mm)
SMA
337±5(g)
M6-16Pin
Desk charger/TYPEC
4FSK digital
modulation mode
Modulation MAX deviation
Hum and noise
Protocol
Vocoder type
12.5KHz(data only):7K60FXD
12.5KHz(Voice only):7K60F1D
12.5KHZ(data+voice):7K60F1W
±2.5KHz @ 12.5KHZ
±4.0KHz @ 120KHz
±5.0KHz @ 25KHz
40dB @ 12.5KHz
43dB @ 20KHz
45dB @ 25KHZ
FM+DMR
AMBE++/NVOC
FM Noise
Block
-43dB@20KHz
-45dB@25KHz
TIA-603D:80dB
ETSI:84dB
Note:The FCC version only supports 12.5K
Please cut along with this line
The FCC version only supports 12.5K

