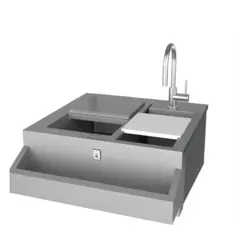
ASSEMBLY INSTRUCTIONS
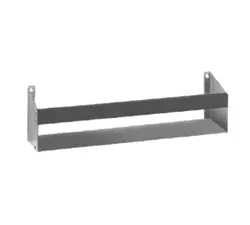
Spec-Bar
®
Single Speed Rails
CAUTION
inSPECt COntEntS iMMEDiAtELY AnD FiLE CLAiM WitH DELiVERinG CARRiER FOR AnY DAMAGE.
SAVE YOUR BOX AND ALL PACKING MATERIALS.
YOu ARE RESPOnSiBLE FOR DAMAGE tO YOuR unit iF REtuRnED
iMPROPERLY PACKED.
inStRuCtiOn SHEEt
#389291
Eagle Foodservice Equipment, Eagle MHC, and SpecFAB
®
are divisions of Eagle Group. ©2021 by the Eagle Group
• 100 Industrial Boulevard, Clayton, Delaware 19938-8903 U.S.A.
• Phone: 302/653-3000 • 800/441-8440
• Fax: 302/653-2065 • www.eaglegrp.com
Step 1 - Assemble bottle support and
one of the brackets.
• Lay bottle support with
solid plastic side up.
• Insert screws through left
or right bracket, as shown.
DO NOT FULLY TIGHTEN.
Step 2 - Install remaining bracket.
Insert screws through
bracket, as shown. DO
NOT FULLY TIGHTEN.
Step 3 - Install bottle stay.
IMPORTANT: Make sure
the solid plastic surface
faces the REAR of the
speed rail.
Insert screws through
brackets, as shown. DO
NOT FULLY TIGHTEN.
Tighten all screws securely
AFTER installing speed rail
onto your equipment.
See reverse side for Spec-Bar
®
Double Speed Rails.
EG9943 Revised 05/21
Parts List
1 8 Screw, 1/4–20 x 1˝
2 1 Bottle Stay
3 1 Bottle Support
4 1 Left Bracket
5 1 Right Bracket
6 1 Snap-On Clear Molding
#
Quantity description
#1
#2
#3
#4
#5
#6
bottle
support
right end
bracket
screws
screws
left end
bracket
bottle
stay
clear
molding
(End)
Step 4 - Affix bottle labels
(not included) onto top
of stay, as needed. Snap
clear molding onto bottle
stay.
Eagle Foodservice Equipment, Eagle MHC, and SpecFAB
®
are divisions of Eagle Group. ©2021 by the Eagle Group
• 100 Industrial Boulevard, Clayton, Delaware 19938-8903 U.S.A.
• Phone: 302/653-3000 • 800/441-8440
• Fax: 302/653-2065 • www.eaglegrp.com
ASSEMBLY INSTRUCTIONS
Spec-Bar
®
Double Speed Rails
#1
#2
#3
#3
#4
#5
#6
#2
Parts List
1 16 Screw, 1/4–20 x 1˝
2 2 Bottle Stay
3 2 Bottle Support
4 1 Left Bracket
5 1 Right Bracket
6 2 Snap-On Clear Molding
#
Quantity description
Step 1 - Assemble front bottle support and
both end brackets.
• Position one of the two
bottle supports, with solid
plastic side up, between
brackets at front set
of holes.
• Insert screws through
each bracket, as shown.
DO NOT FULLY TIGHTEN.
Step 2 - Install rear
bottle support.
• Position remaining bottle
support, with solid
plastic side up, between
brackets at rear set
of holes.
• Insert screws through
each bracket, as shown.
DO NOT FULLY TIGHTEN.
Step 3 - Install bottle stays.
IMPORTANT: Make sure the
solid plastic surface of each
bottle stay faces the REAR
of the speed rail.
• Position one of the two
bottle stays at rear set of
holes.
• Insert screws through each
bracket, as shown. DO NOT
FULLY TIGHTEN.
• Repeat with remaining bottle
stay set front set of holes.
Step 4 - Affix bottle labels
(not included) onto top of
each stay, as needed.
Snap clear molding
onto each bottle stay.
Tighten all screws
securely AFTER
installing speed rail
onto your equipment.
bottle
support
front bottle
support
right end
bracket
screws
screws
bottle
support
left end
bracket
rear bottle
stay
clear
molding
clear
molding
(End)
CAUTION
inSPECt COntEntS iMMEDiAtELY AnD FiLE CLAiM WitH DELiVERinG CARRiER FOR AnY DAMAGE.
SAVE YOUR BOX AND ALL PACKING MATERIALS.
YOu ARE RESPOnSiBLE FOR DAMAGE tO YOuR unit iF REtuRnED
iMPROPERLY PACKED.
See reverse side for Spec-Bar
®
Single Speed Rails.