2
1
7
8
3
4
5
9
116
10
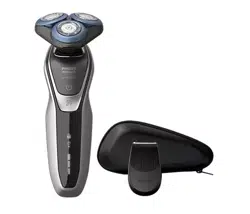
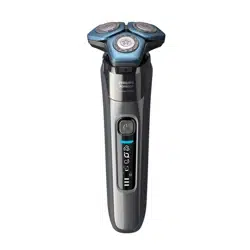
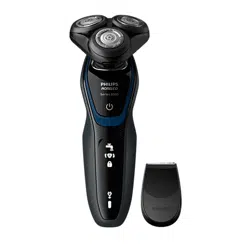
Tripleheader shaver
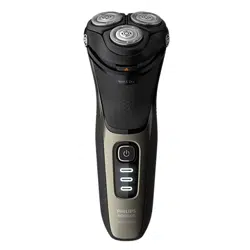
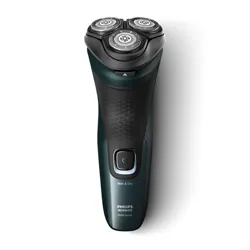
S1143
X3001
X3052
T
ri
p
leheader shaver
Manufactured for:
Philips Personal Health
a division of Philips North America LLC
P.O. Box 10313, Stamford, CT 06904
This symbol on the product’s nameplate means it
is listed by Underwriters’ Laboratories, Inc.
Norelco and Tripleheader are registered trademarks of
Philips North America LLC.
PHILIPS and Philips shield are registered trademarks of
Koninklijke Philips N.V.
©2026 Philips North America LLC. All rights reserved.
3000.105.8963.5 ( 21/04/2026 )
2
3
NOT INCLUDED
4
NOT INCLUDED
5
6
7
8
9
10
11
12
13
14
15
16
17
18
19
2yrs
20
21
1
2
22
23
24
25
2
1
26
27
28
English
IMPORTANT SAFETY INSTRUCTIONS
When using an electric product, basic precautions
should always be followed, including the following:
Read all instructions before using this product.
DANGER
To reduce the risk of electric shock:
- To charge the product, only use a USB power
source on a certied product with output
rating 5V, ≥ 1A. For safe charging in a moist
environment (e.g. in a bathroom), only use an
IPX4 (splash-proof) power source. A suitable
power source (e.g. Philips HQ87) is available via
www.philips.com/support. If you need support
nding the correct USB power source, contact
Philips support at 1-800-243-3050. Using a non-
certied USB power source may cause hazards or
serious injuries.
- Keep the USB cable and the USB power source dry.
- Do not reach for a corded product that has fallen
into water. Unplug immediately from the power
outlet.
- Do not place or store the product where it can
fall or be pulled into a tub or sink. Do not place or
drop the product into water or other liquid.
- This product does not work while it is connected
to the power outlet. Except when charging, always
unplug this product from the power outlet.
- Remove USB power source from power outlet and
product before cleaning.
WARNING
To reduce the risk of burns, re, electric shock, or
injury to persons:
- This product is only intended for shaving facial
hair and scalp hair. Scalp hair must be shorter than
1.5mm.
- Only use this product on skin that is undamaged
and not aected by skin growths, skin disease or
severe skin irritation.
- This product is not intended for use by persons
(including children) with reduced physical, sensory
or mental capabilities, or lack of experience
and knowledge, unless they have been given
supervision or instruction concerning use of the
product by a person responsible for their safety.
Children should be supervised to ensure that they
do not play with the product.
- Use this product only for its intended household
use as described in this manual. Misuse can lead to
hazards or serious injuries. Do not use attachments
not recommended by Philips North America
LLC. Accessories supplied may vary for dierent
products.
- Never operate this product if it has a damaged
USB power source, if it is not working properly,
after it has been dropped or damaged, or after
the product or the USB power source has been
dropped into water. For assistance call 1-800-243-
3050.
- Keep the USB cable and the USB power source
away from heated surfaces.
- Never drop or insert any object into any opening.
- Do not use the USB power source in or near a
power outlet that contains an electric air freshener
to prevent damage to the USB power source.
- Do not use product outdoors or operate where
aerosol (spray) products are being used or where
oxygen is being administered.
- Always check shaving heads (guards and cutters)
before using the product. Do not use the product
if cutters or guards are damaged, as injury may
occur.
- Always attach the USB cable to the USB power
source and the product rst, then attach the USB
power source to the power outlet. To disconnect,
set all controls to 'o' position. Then remove the
USB power source from the power outlet.
- Plug USB power source directly into power outlet.
Do not use an extension cord.
- Unplug USB power source before plugging in or
unplugging the product.
- Only use original Philips accessories or
consumables.
- Charge, use and store the product at a
temperature between 40 °F / 4.5°C and
95°F/35°C.
- Keep product and batteries away from re and
do not expose them to direct sunlight or high
temperatures.
- If the product becomes abnormally hot or smelly,
changes color or if charging takes longer than
usual, stop using and charging the product and
contact Philips.
- Do not place products and their batteries in
microwave ovens or on induction cookers.
- Do not open, modify, pierce, damage or dismantle
the product or battery to prevent batteries
from heating up or releasing toxic or hazardous
substances. Do not short-circuit, overcharge or
reverse charge batteries.
- If batteries are damaged or leaking, avoid contact
with the skin or eyes. If this occurs, immediately
rinse well with water and seek medical care.
- When you handle batteries, make sure that your
hands, the product and the batteries are dry.
- To avoid accidental short-circuiting of batteries
after removal, do not let battery terminals come
into contact with metal objects (e.g. coins,
hairpins, rings). Do not wrap batteries in aluminum
foil. Tape battery terminals or put batteries in a
plastic bag before you discard them.
SAVE THESE INSTRUCTIONS
Introduction
Congratulations on your purchase and welcome to
Philips Norelco!
To fully benet from the support that Philips
Norelco oers, register your product at
www.philips.com/register.
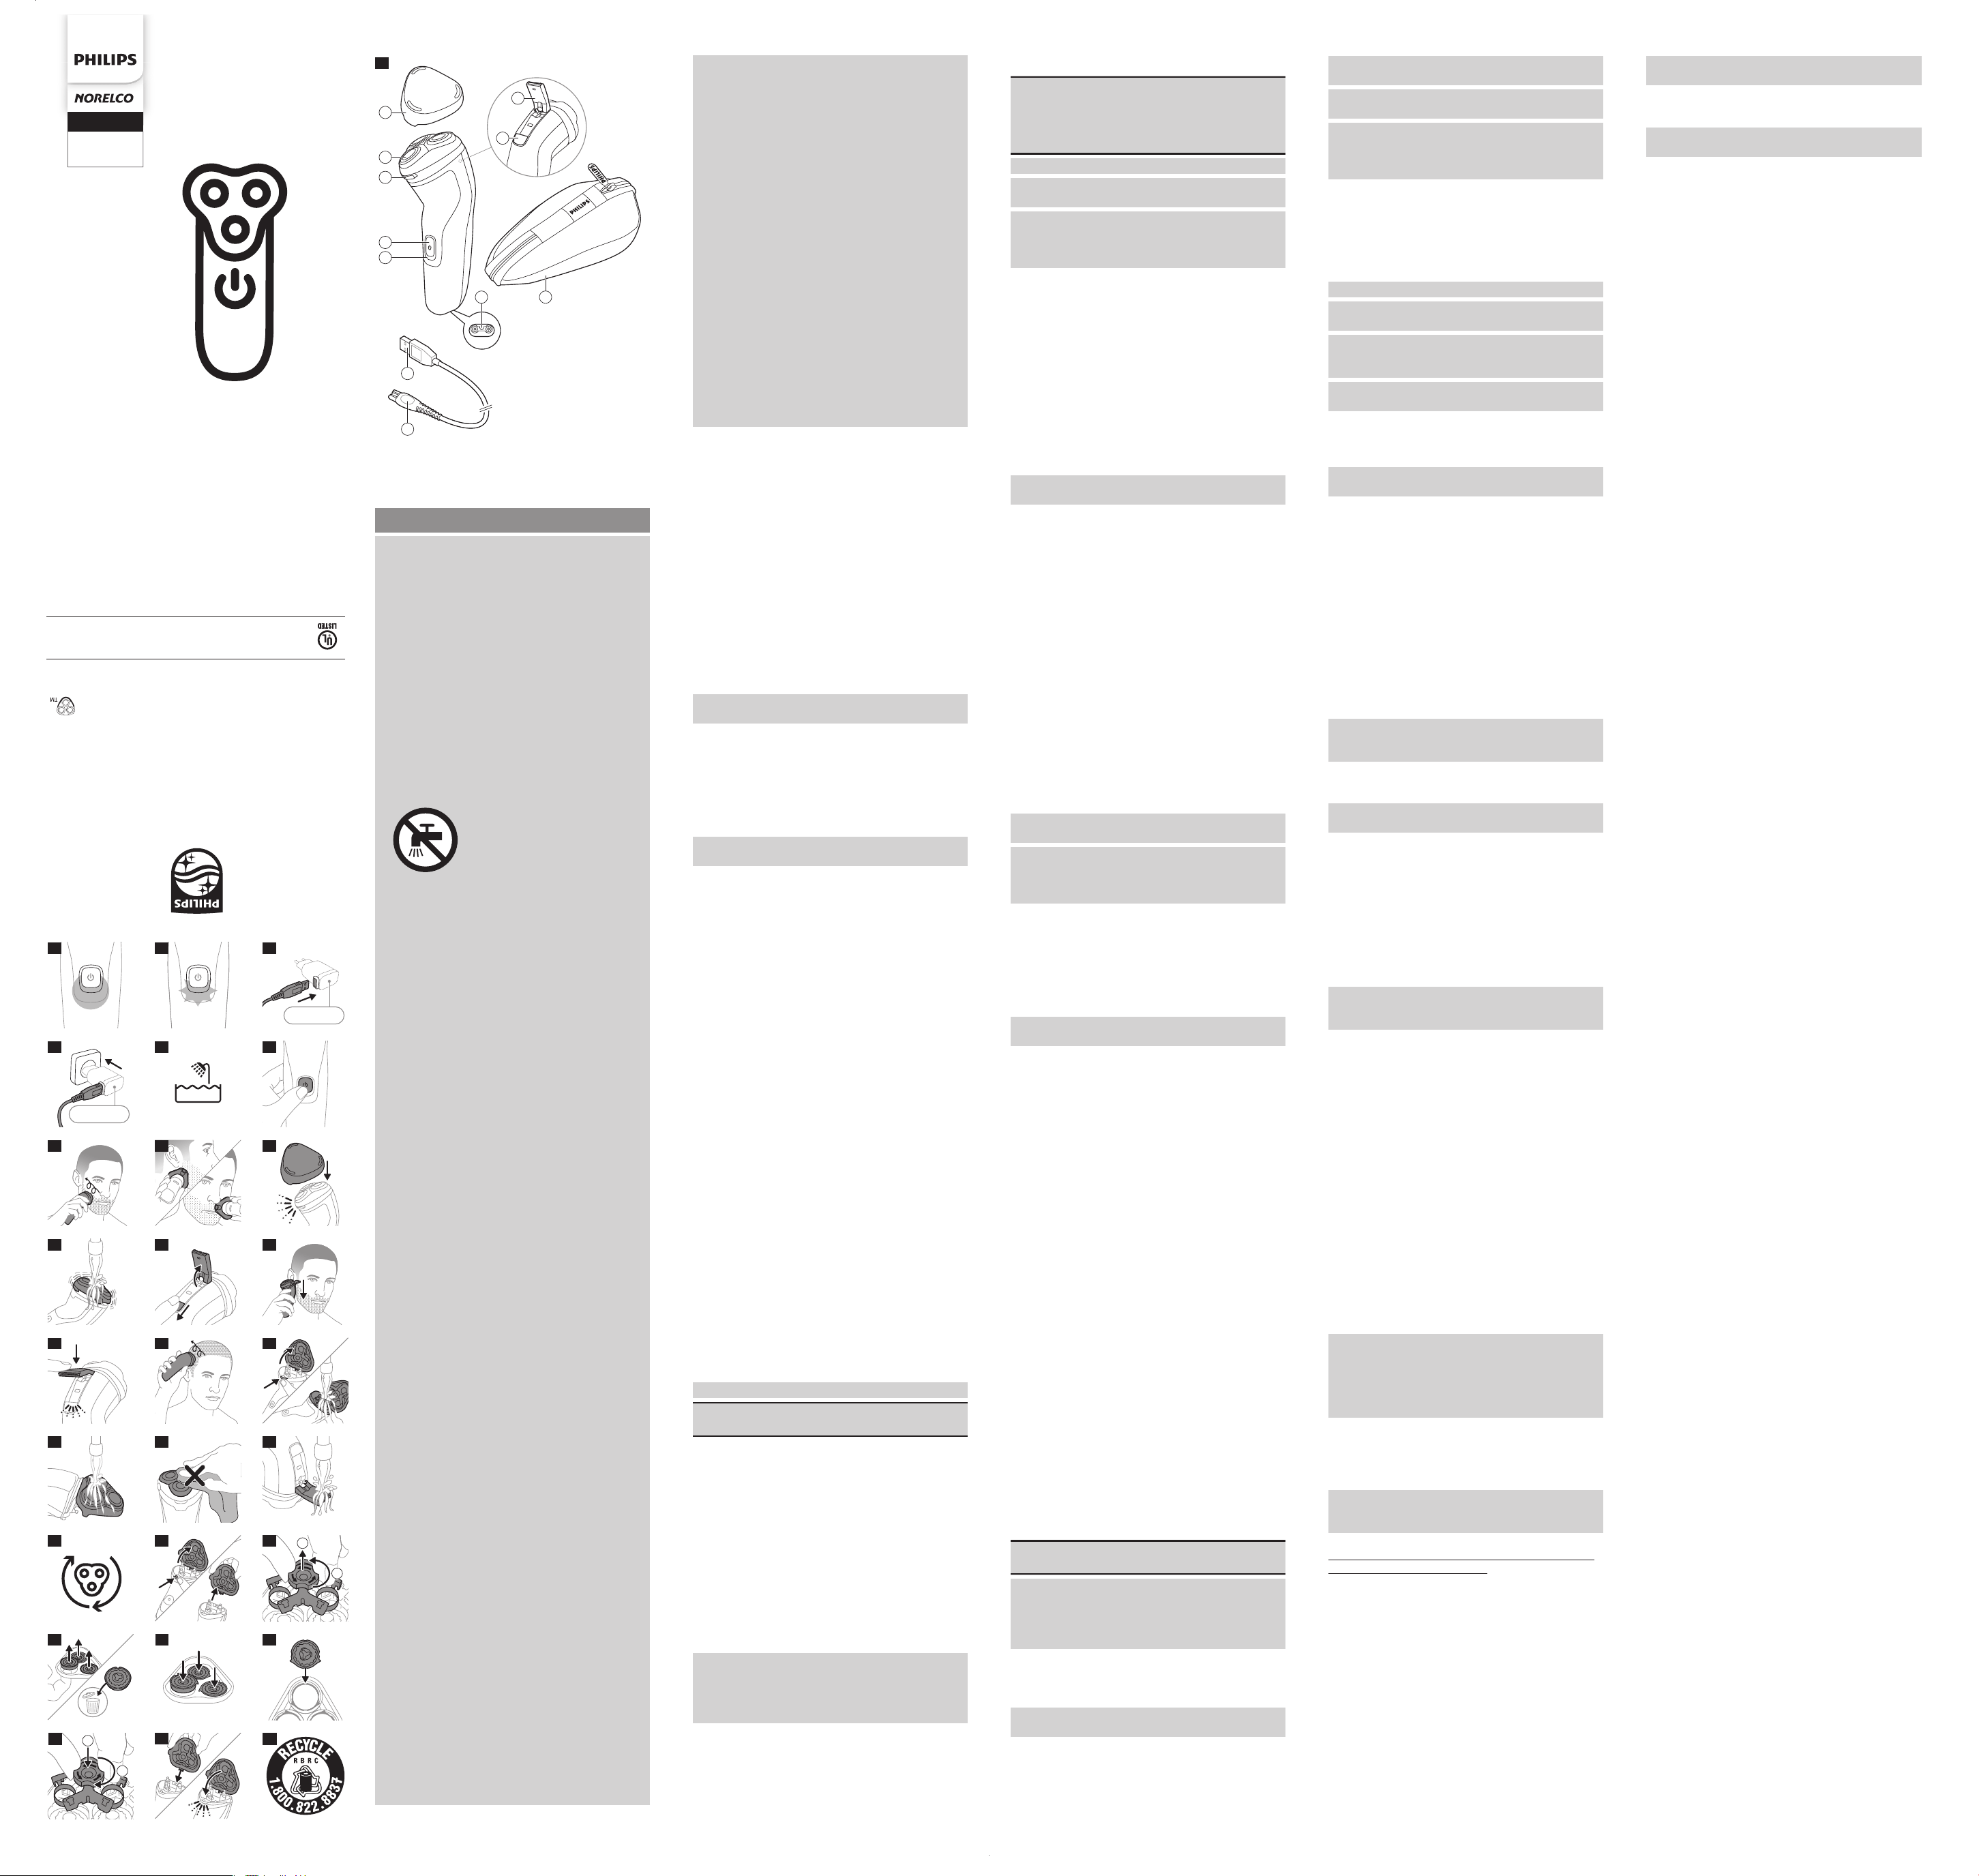
General description (Fig. 1)
1 Protective cap
2 Shaving unit
3 Shaving unit release button
4 On/o button
5 Charging light
6 Socket for small plug
7 Pop-up trimmer
8 Trimmer release slide
9 USB cable
Note: A suitable power source (e.g. Philips HQ87)
is available via www.philips.com/support.
10 Small plug
11 Travel pouch (X3052 only)
Charge indications
Battery fully charged
When the battery is fully charged, the charging light
lights up white continuously (Fig. 2).
Note: After approx. 30 minutes, the charging light
goes out to save energy.
Battery low
When the battery is almost empty (when there are
only 5 or fewer shaving minutes left), the charging
light ashes orange (Fig. 3).
When you switch o the product, the charging light
continues to ash orange for a few seconds.
Charging
When the shaver is charging, the charging light
ashes white (Fig. 3).
Quick charge (X3001 and X3052 only)
When you start charging the empty battery, the
charging light ashes white quickly. After approx. 5
minutes the charging light ashes white slowly. The
shaver now contains enough energy for a 5-minute
shave.
Charging
- If the product is subjected to a major change
in temperature, pressure or humidity, let it
acclimatize for 30 minutes before using.
- Do not charge the shaver in a pouch or travel case.
Charge the shaver before you use it for the rst time
and when the charging light indicates that the battery
is almost empty.
When you charge the shaver for the rst time or after
a long period of disuse, let it charge until the charging
light lights up continuously.
- Charging takes approx. 8 hours (S1143 only), or 1
hour (X3001 and X3052 only).
- Quick charge (X3001 and X3052 only): After
approx. 5 minutes of charging, the battery
contains enough energy for one full shave.
- A fully charged shaver has a shaving time of up to
40 minutes (S1143 and X3001 only) or 50 minutes
(X3052 only).
Note: You cannot use the product while it is charging.
Danger: Keep the USB cable and the USB power
source dry.
Charging with a USB power source
1 Make sure that the product is switched o.
2 Insert the small plug of the USB cable into the
socket in the bottom of the product.
3 Insert the USB plug into the USB power source (not
included) (Fig. 4).
4 Insert the USB power source into the power outlet
(Fig. 5).
5 The charging light on the product will indicate the
charging status (see 'Charge indications').
6 After charging, remove the USB power source
from the power outlet and pull the small plug out
of the product.
X3052 only
Note: Before rst use charge the shaver for 3 hours
without interruptions and until the charging light
shows that the battery is full. This is needed to make
maximum use of the battery capacity. All future
charges will take 1 hour.
Using the product
Always check the product and all accessories
before using. Do not use the product or any
accessory if it is damaged, as this may cause
injury. Always replace a damaged part with
one of the original type.
This product is only intended for household use.
For hygienic reasons, the product should only be
used by one person.
Note: This product is waterproof (Fig. 6). It is suitable
for use in the bath or shower and for cleaning under
the tap with water. For safety reasons, this product
can only be used without cord.
Switching the product on and o
To switch the product on or o, press the on/o
button once (Fig. 7).
Shaving
S1143 only
For the best results on skin comfort, pre-trim your
beard if you have not shaved for 3 days or longer.
1 Switch on the shaver.
2 Move the shaver in circular movements over your
skin to catch hair growing in all directions (Fig. 8).
Make sure each shaving head is fully in contact
with the skin. Exert gentle pressure for a close,
comfortable shave.
Note: Do not press too hard, as this can cause skin
irritation.
3 Use the narrow sides of the shaving unit to shave
in hard-to-reach areas such as along your jawline
and under your nose (Fig. 9).
4 Switch o and clean the product after each use
(see 'Cleaning and maintenance').
5 Put the protective cap on the product to protect
the shaving heads during storage and travel (Fig.
10).
X3001 and X3052 only
For the best results on skin comfort, pre-trim your
beard if you have not shaved for 3 days or longer.
You can use this product either wet or dry, or even
in the shower. For a wet shave, apply some water
and shaving foam or gel to your skin and rinse the
shaving heads under the tap with warm water before
following the steps below.
1 Switch on the shaver.
2 Move the shaver in circular movements over your
skin to catch hair growing in all directions (Fig. 8).
Make sure each shaving head is fully in contact
with the skin. Exert gentle pressure for a close,
comfortable shave.
Note: Do not press too hard, as this can cause skin
irritation.
Note: If you are shaving with gel or foam, rinse the
shaving unit regularly during your shave to ensure
that it continues to glide smoothly over your skin
(Fig. 11).
3 Use the narrow sides of the shaving unit to shave
in hard-to-reach areas such as along your jawline
and under your nose (Fig. 9).
4 Switch o and clean the product after each use
(see 'Cleaning and maintenance').
5 Put the protective cap on the product to protect
the shaving heads during storage and travel (Fig.
10).
Note: Make sure you rinse all foam or shaving gel o
the product.
21-Day adaptation process
- 21 Day Trial and Conversion Process. It is a fact that
your skin and beard need time to adjust to a new
grooming system.
- Use your new shaver exclusively for 3 weeks to
fully enjoy the closeness of a Philips Norelco shave.
- At rst you may not get as close a shave as you
expect, or your face may even become slightly
irritated. This is normal since your beard and skin
will need time to adjust. Invest 3 weeks and you'll
soon experience the full joy of your new shaver.
- Stick with it! If you alternate shaving methods
during the adjustment period, it may make it more
dicult to adapt to the Philips Norelco shaving
system.
- If you are still not convinced after 21 days, Philips
Norelco will refund you the full purchase price as
long as the request is received within 45 days of
purchase.
Trimming with pop-up trimmer
You can use the trimmer to groom your sideburns and
moustache.
1 Push the trimmer release slide downwards to open
the trimmer (Fig. 12).
2 Press the on/o button once to switch on the
product (Fig. 7).
3 Hold the trimmer perpendicular to the skin and
move the product downwards, exerting gentle
pressure (Fig. 13).
4 Switch o the product and clean the trimmer after
each use to prevent clogging and damage (see
'Cleaning and maintenance').
5 Close the trimmer ('click') (Fig. 14).
Head shaving
Warning: Pre-trim your hair if it is longer than
1.5mm.
X3001 and X3052 only: You can use this product
either wet or dry, or even in the shower. For a wet
shave, apply some water and shaving foam or gel to
your skin and rinse the shaving heads under the tap
with warm water before following the steps below.
1 Switch on the shaver.
2 Move the shaver in circular movements over your
head, and shave in the direction of hair growth
(Fig. 15).
Note: Shaving against the direction of hair growth
may cause skin irritation.
3 Stretch your skin with your free hand so the blades
can lift and cut hair. Make sure each shaving
head is fully in contact with the skin. Exert gentle
pressure for a close, comfortable shave.
Note: Do not press too hard, as this can cause skin
irritation.
Note: Regularly remove cut hair from the hair
chamber.
Note: If you are shaving with gel or foam, rinse the
shaving unit regularly during your shave to ensure
that it continues to glide smoothly over your skin
(Fig. 11). (X3001 and X3052 only)
4 Switch o and clean the product after each use
(see 'Cleaning and maintenance').
5 Put the protective cap on the product to protect
the shaving heads during storage and travel
(Fig. 10).
Cleaning and maintenance
Regular cleaning guarantees better shaving results.
Never clean, remove or replace the shaving unit
while the shaver is switched on.
Do not touch shaving heads with hard objects
as this may dent or damage the precision-made
slotted shaving head.
Do not use abrasives, scourers or aggressive liquids
such as gasoline or acetone to clean the shaver.
Cleaning the shaver
Clean the shaver after every shave for optimal shaving
performance.
Always check if the water is too hot, to prevent
burning your hands.
While rinsing shaving heads, water may drip out
of the base of shaver. This is a normal occurrence.
Internal electric parts are in a waterproof
compartment so the shaver will be protected against
water damage.
1 Press the on/o button once to switch on the
product (Fig. 7). Rinse the shaving unit with cold or
lukewarm water (Fig. 11).
2 Press the on/o button to switch o the product.
Press the shaving unit release button to open the
shaving unit (Fig. 16). Rinse the shaving unit and
hair chamber with lukewarm water (Fig. 16).
3 Rinse the outside of the shaving unit with
lukewarm water (Fig. 17).
4 Carefully shake o excess water and let the shaver
air dry.
Never dry the shaving unit with a towel or
tissue, as this may damage the shaving heads
(Fig. 18).
5 Close the shaving unit.
Cleaning the pop-up trimmer
Caution: Never dry the trimmer teeth with a towel
or tissue, as this may damage the trimmer teeth.
Clean the trimmer after each use to prevent clogging
and damage.
1 Switch o the shaver.
2 Push the trimmer release slide downwards to open
the trimmer (Fig. 12).
3 Switch on the shaver and rinse the pop-up trimmer
under warm water (Fig. 19).
4 Switch o the shaver after cleaning.
5 Carefully shake o excess water and let the pop-up
trimmer air dry.
6 Close the trimmer ('click') (Fig. 14).
Tip: For optimal performance, lubricate the teeth of
the pop-up trimmer with a drop of mineral oil every
six months (oil not included).
Replacement
Replacing the shaving heads
For maximum shaving performance, we advise you to
replace the shaving heads every two years (Fig. 20).
Replace damaged shaving heads immediately.
Always replace the shaving heads with original Philips
Norelco shaving heads (see 'Accessories').
1 Switch o the shaver.
2 Press the shaving unit release button to open the
shaving unit. Pull the shaving unit o the shaver
(Fig. 21).
3 Turn the lock counterclockwise and remove the
retaining frame. Place it aside in a safe place
(Fig. 22).
4 Remove the shaving heads from the shaving unit.
Discard the used shaving heads immediately to
avoid mixing them with the new shaving heads
(Fig. 23).
5 Place new shaving heads in the shaving unit
(Fig. 24).
Note: Make sure that the shaving heads with
the projections t exactly onto the hooks of the
shaving head holder when placing them (Fig. 25).
The shaving heads supplied with the shaver either
have notches or projections. Both shaving systems
are the same.
6 Put the retaining frame back into the shaving unit
and turn the lock clockwise (Fig. 26).
7 Insert the hinge of the shaving unit into the slot in
the top of the shaver. Then close the shaving unit
(Fig. 27).
Note:If the shaving unit does not close smoothly,
check if you have inserted the shaving heads
properly and if the retaining frame is locked.
This product has no other user-serviceable parts. For
assistance call 1-800-243-3050.
Storage
- Make sure the product is switched o. Remove the
USB power source from the power outlet and the
product before storing the product in a safe, dry
location where it will not be crushed, banged, or
subject to damage.
- Do not wrap cord around the product when
storing.
- Store cord and other accessories in a safe location
where these will not be cut or damaged.
- Do not place or store the product where it can
fall or be pulled into a tub or sink, water or other
liquid while plugged in.
Put the protective cap on the shaver to prevent
damage (Fig. 10).
Note: Always let the shaver dry completely before
storing.
Storage in travel case (X3052 only)
Store the shaver in the travel pouch supplied.
Note: Make sure the shaver is dry before you store it in
the travel pouch.
Accessories
Replacement parts and accessories may be
purchased at a store near you or on our website
www.philips.com/store.
The following accessory is available:
- SH30 Philips Norelco replacement shaving heads
Assistance
For assistance, visit our website:
www.philips.com/support or call toll free
1-800-243-3050.
Disposal
- This product contains a rechargeable NiMH battery
which must be disposed of properly.
- Contact your local town or city ocials for
battery disposal information. You can also call
1-800-822-8837 or visit: www.call2recycle.org
for battery drop-o locations (Fig. 28).
- For assistance, visit our website:
www.philips.com/support or call 1-800-243-
3050 toll free.
- Your product is designed and manufactured with
high quality materials and components, which can
be recycled and reused. For recycling information,
please contact your local waste management
facilities or visit: www.recycle.philips.com.
Full Two-Year Warranty
Philips warrants its products for a specic period of
time after the rst date of purchase. If the product
is purchased in the USA, Philips North America LLC
(USA) or, if the product is purchased in Canada, Philips
Electronics Ltd., warrants this new product against
defects in materials or workmanship for a period of
two years from the date of purchase (as evidenced
by a valid proof of purchase), and agrees to replace
any defective product without charge. Philips will
refund the purchase price if it is unable to provide
replacement.
Parts that are subject to normal wear and tear,
accessories, replacement batteries and consumables
such as blades and foils, are not covered by the terms
of this warranty.
IMPORTANT: This warranty does not cover damage
resulting from accident, misuse or abuse, lack of
reasonable care, the axing of any attachment
not provided with the product or loss of parts or
subjecting the product to any but the specied
voltage.*
NO RESPONSIBILITY IS ASSUMED FOR ANY
SPECIAL, INCIDENTAL OR CONSEQUENTIAL
DAMAGES.
For more information and in order to obtain warranty
service, simply go to www.philips.com/support.
NOTE: This warranty gives you specic legal rights,
and you may also have other rights which vary from
state to state, province to province or country to
country. Some states do not allow the exclusion or
limitation of incidental or consequential damages, so
the above exclusion and limitations may not apply to
you. This warranty is transferable.
*Read enclosed instructions carefully.
THE WARRANTY DOES NOT COVER THE
FOLLOWING:
- Indirect or consequential damages, such as loss
of time, loss of data, or loss of income. Some
states do not allow the exclusion or limitation of
incidental or consequential damages, so the above
limitation may not apply to you.
- Compensation for activities done by yourself,
such as regular maintenance, installing rmware
updates, or saving data.
THE WARRANTY DOES NOT APPLY:
- If the proof of purchase, model number, serial
number, or production date code on the product
has been made illegible.
- If the product was purchased as faulty stock.
- If the defect is the result of abuse or excessive use
outside the intended purpose.
- If the defect is caused by environmental
conditions, connecting peripherals, additional
equipment, or accessories (including software)
that are not in accordance with the user manual.
- If the unit has been damaged, including but not
limited to damage by animals, lightning, abnormal
voltage, re, natural disaster, transportation, or
water (unless the user manual expressly states that
the product may be rinsed).
- For non-electrical parts, normal wear and tear,
accessories, replacement batteries or replacement
of consumable parts such as blades and foils.
- If the product does not function properly because
it was not originally designed for use in the
country where the product is used, which may
occur if you import the product.
- If the product does not function properly due to
problems with connection with service providers,
such as for the internet.
45-DAY MONEY-BACK GUARANTEE
If you are not fully satised with your product send
the product back and we’ll refund you the full
purchase price.
The product must be shipped prepaid by insured
mail, insurance prepaid, have the original sales
receipt, indicating purchase price and date of
purchase.
We cannot be responsible for lost mail.
The product must be postmarked no later than 45
days after the date of purchase. Philips reserves
the right to verify the purchase price of the
product and limit refunds not to exceed suggested
retail price.
To obtain the money-back guarantee service,
please go to www.PhilipsMoneyBack.com and
follow the simple 3-step process.
Delivery of refund check will occur 6–8 weeks after
receipt of returned product.
1
3000.105.8963.5 S11XX X3000 USA.indd 2-6
3000.105.8963.5 S11XX X3000 USA.indd 2-6
2026/4/21 10:52:28
2026/4/21 10:52:28
Español
INSTRUCCIONES IMPORTANTES DE
SEGURIDAD
Cuando utilice un producto eléctrico, siempre
debe seguir las precauciones básicas, incluidas las
siguientes:
Lea todas las instrucciones antes de usar este
producto.
PELIGRO
Para reducir el riesgo de descarga eléctrica:
- Para cargar el producto, use solo una fuente de
alimentación USB en un producto certicado
con valores de salida de 5V, ≥ 1A. Para la carga
segura en ambientes húmedos (por ejemplo, en
un baño), use solo una fuente de alimentación
IPX4 (a prueba de salpicaduras). Una fuente
de alimentación adecuada (por ejemplo,
Philips HQ87) se encuentra disponible en
www.philips.com/support. Si necesita asistencia
encontrando la fuente de alimentación USB
correcta, comuníquese con asistencia de Philips al
1-800-243-3050. Usar una fuente de alimentación
USB no certicada podría causar lesiones graves o
peligrosas.
- Mantenga el cable USB y la fuente de alimentación
USB secos.
- No intente agarrar un producto con cable que
haya caído al agua. Desconéctelo inmediatamente
del enchufe de la pared.
- No coloque ni guarde el producto en un lugar
desde donde pueda caerse a una bañera o
fregadero. No coloque el producto en un lugar
desde donde pueda caerse al agua o a cualquier
otro líquido ni sumerja el producto en ningún tipo
de líquido.
- Este producto no funciona mientras está
conectado al enchufe de pared. Excepto cuando se
esté cargando, siempre desenchufe este producto
del enchufe de pared.
- Desconecte la fuente de alimentación USB del
tomacorriente y del producto antes de limpiarlo.
ADVERTENCIA
Para reducir el riesgo de quemaduras, incendio,
descarga eléctrica o lesiones:
- Este producto está diseñado exclusivamente
para afeitar el vello facial y el cuero cabelludo. La
longitud del cabello debe ser menor a 1.5mm.
- Use este producto únicamente sobre piel sana y
que no se vea afectada por crecimientos cutáneos,
enfermedades cutáneas o irritaciones graves.
- Este producto no está destinado a personas
(adultos o niños) con capacidades física, sensorial
o mental disminuidas, o que no tengan los
conocimientos o la experiencia necesarios, a
menos que una persona responsable de su
seguridad los supervise o los instruya sobre el uso
del producto. Evite que los niños jueguen con este
producto.
- Use este producto solo para el uso doméstico
previsto como se describe en este manual. El
uso inadecuado puede causar posibles riesgos o
lesiones graves. No use accesorios que no estén
recomendados por la corporación Philips North
America LLC. Los accesorios incluidos pueden
variar según el producto.
- Nunca use este producto si tiene una fuente
de alimentación USB dañada, si no funciona
correctamente, después de haberse caído o
dañado o después de que el producto o la fuente
de alimentación USB se hayan caído al agua. Para
solicitar asistencia 1-800-243-3050.
- Mantenga el cable USB y la fuente de alimentación
USB lejos de supercies calientes.
- No deje caer ni introduzca ningún objeto en
ninguna abertura.
- No utilice la fuente de alimentación USB dentro
o cerca de un tomacorriente que contenga un
aromatizador eléctrico para prevenir daño a la
fuente de alimentación USB.
- No use el producto a la intemperie ni lo use
donde se estén usando productos de aerosol
(atomizador) o donde se esté administrando
oxígeno.
- Siempre revisa los cabezales de afeitado (las
protecciones y las cuchillas) antes de usar la
afeitadora. No uses la afeitadora si las cuchillas o
las protecciones están dañadas, ya que podrías
lastimarte.
- Siempre conecte el cable USB a la fuente de
alimentación USB y al producto primero, y
luego conecte la fuente de alimentación USB al
tomacorriente. Para desconectar, ponga todos
los controles en la posición 'o'. Luego, retire la
fuente de alimentación USB del tomacorriente.
- Enchufe la fuente de alimentación USB
directamente al tomacorriente. No use un cable de
extensión.
- Desconecte la fuente de alimentación USB antes
de conectar o desconectar el producto.
- Use únicamente accesorios o productos
consumibles originales de Philips.
- Cargue, utilice y guarde el producto a una
temperatura entre 40 °F / 4.5°C y 95 °F / 35°C.
- Mantenga el producto y las baterías lejos del
fuego y no los exponga a la luz solar directa ni a
altas temperaturas.
- Si el producto se pone anormalmente caliente,
despide un olor extraño, cambia de color o tarda
más tiempo de lo normal en cargarse, deje de
usarlo y de cargarlo, y comuníquese con Philips.
- No coloque los productos y sus baterías en hornos
microondas ni en ollas de inducción.
- No abra, modique, perfore, dañe ni desarme
el producto o la batería, para evitar que las
baterías se calienten o liberen sustancias tóxicas
o peligrosas. No provoque un cortocircuito,
sobrecargue ni invierta la posición de las baterías.
- Si las baterías se dañan o tienen fugas, evite el
contacto con la piel o los ojos. Si esto sucede,
enjuague bien inmediatamente con agua y
busque atención médica.
- Cuando manipule las baterías, asegúrese de que
sus manos, el producto y las baterías estén secas.
- Para evitar un cortocircuito en las baterías después
de la extracción, no permita que las terminales
de las baterías entren en contacto con objetos
metálicos (p. ej., monedas, horquillas, anillos).
No envuelva las baterías en papel de aluminio.
Cubra las terminales de las baterías con cinta
o colóquelas en una bolsa de plástico antes de
desecharlas.
CONSERVE ESTAS INSTRUCCIONES
Introducción
¡Felicitaciones por su compra y bienvenido a
PhilipsNorelco!
Para obtener el máximo benecio del soporte
que ofrece PhilipsNorelco, registre el producto en
www.philips.com/register.
Descripción general (Fig. 1)
1 Tapa protectora
2 Unidad de afeitado
3 Botón de liberación de la unidad de afeitado
4 Botón de encendido/apagado
5 Luz de carga
6 Toma para clavija pequeña
7 Cortadora emergente
8 Botón deslizante de apertura de cortadora
9 Cable USB
Nota: Una fuente de alimentación adecuada (por
ejemplo, Philips HQ87) se encuentra disponible en
www.philips.com/support.
10 Conector pequeño
11 Bolsa de viaje (X3052 solamente)
Indicaciones de carga
Batería completamente cargada
Cuando la batería está completa, la luz de carga
permanece encendida de forma continua en color
blanco (Fig. 2).
Nota: Después de 30 minutos aproximadamente, la
luz de carga se apaga para ahorrar energía.
Batería baja
Cuando la batería está casi agotada (cuando quedan
5minutos o menos de tiempo de afeitado) la luz de
carga parpadea en color naranja (Fig. 3).
Cuando apaga el producto, la luz de carga parpadea
en naranja de manera continua por unos pocos
segundos.
Carga
Cuando la afeitadora se está cargando, la luz de carga
parpadea en color blanco (Fig. 3).
Carga rápida (X3001 y X3052 únicamente)
Cuando comience a cargar la batería vacía, la luz
de carga parpadea rápidamente en color blanco.
Después de aproximadamente 5 minutos, la luz de
carga parpadea en blanco lentamente. La afeitadora
ahora contiene carga suciente para un afeitado de
5 minutos.
Carga
- Si el producto está sujeto a un cambio
de temperatura, presión o humedad de
consideración, déjelo aclimatar durante
30minutos antes de utilizarlo.
- No ponga a cargar la afeitadora si se encuentra
dentro de una funda o estuche de viaje.
Cargue la afeitadora antes de usarla por primera vez
y cuando la luz de carga indique que la batería está
casi agotada.
Cuando cargue la afeitadora por primera vez o
después de no haberla utilizado durante mucho
tiempo, déjela cargar hasta que las luces de carga se
iluminen de manera continua.
- La carga tarda aproximadamente 8horas
(S1143 únicamente) o 1hora (X3001 y X3052
únicamente).
- Carga rápida (X3001 y X3052 únicamente):
Después de cargarla durante alrededor de cinco
minutos, la batería tendrá suciente energía para
una afeitada completa.
- Una afeitadora completamente cargada otorga
un tiempo de afeitado de hasta 40minutos
(S1143 y X3001 únicamente) o 50minutos (X3052
únicamente).
Nota: No puede usar el producto mientras se carga.
Peligro: Mantenga el cable USB y la fuente de
alimentación USB secos.
Carga con la fuente de alimentación USB
1 Asegúrese de que el producto esté apagado.
2 Inserte el enchufe pequeño del cable USB en el
puerto que se encuentra en la parte inferior del
producto.
3 Inserte el enchufe USB en la fuente de
alimentación USB (no incluida) (Fig. 4).
4 Inserte la fuente de alimentación USB en el
tomacorriente (Fig. 5).
5 La luz de carga en el producto indicará el estado
de carga (ver 'Indicaciones de carga').
6 Después de cargarla, retire la fuente de
alimentación USB del tomacorriente y retire la
clavija pequeña del producto.
X3052 únicamente
Nota: Antes del primer uso, cargue la afeitadora
durante 3horas sin interrupciones y hasta que la
luz de carga de batería indique que la batería está
cargada. Es necesario hacer esto para aprovechar la
capacidad de la batería al máximo. Todas las demás
cargas tardarán 1 hora.
Uso del producto
Siempre revise el producto y todos los
accesorios antes de usarlo. No use el producto
ni ningún accesorio si está dañado, ya que esto
puede causar alguna lesión. Siempre reemplace
una pieza dañada con una del tipo original.
Este producto fue diseñado exclusivamente para
uso doméstico.
Por motivos de higiene, el producto debe
emplearse únicamente por una persona.
Nota: Este producto es a prueba de agua (Fig. 6). El
producto es adecuado para su uso en el baño o la
regadera y puede limpiarse colocándolo bajo el agua
de la llave. Por razones de seguridad, este producto
solamente se puede usar sin cable.
Encendido y apagado del producto
Presione el botón de encendido/apagado una vez
para encender o apagar el producto (Fig. 7).
Afeitado
S1143 únicamente
Para obtener los mejores resultados de confort sobre
la piel, recorte su barba si no se ha afeitado durante 3
días o más.
1 Encienda la afeitadora.
2 Mueva la afeitadora sobre la piel con movimientos
circulares para atrapar todos los vellos que crecen
en todas las direcciones (Fig. 8). Asegúrate de que
cada unidad de afeitado esté siempre en contacto
total con la piel. Ejerza una suave presión para una
afeitada al ras y cómoda.
Nota: No presione demasiado fuerte ya que esto
puede producir irritación en la piel.
3 Use los lados estrechos de la unidad de afeitado
para afeitarse en lugares difíciles de alcanzar,
por ejemplo, a lo largo de la línea de la quijada y
debajo de la nariz (Fig. 9).
4 Desconecte y limpie el producto después de cada
uso.
5 Coloque la tapa protectora del producto para
proteger los cabezales de afeitado durante el
almacenamiento y los viajes (Fig. 10).
X3001 y X3052 únicamente
Para obtener los mejores resultados de confort sobre
la piel, recorte su barba si no se ha afeitado durante 3
días o más.
Puede usar este producto en húmedo o en seco, e
incluso en la regadera. Para una afeitada en húmedo,
aplíquese algo de agua y espuma o gel de afeitar
en la piel y enjuague los cabezales de afeitado con
agua tibia de la llave antes de seguir los pasos que se
detallan a continuación.
1 Encienda la afeitadora.
2 Mueva la afeitadora sobre la piel con movimientos
circulares para atrapar todos los vellos que crecen
en todas las direcciones (Fig. 8). Asegúrate de que
cada unidad de afeitado esté siempre en contacto
total con la piel. Ejerza una suave presión para una
afeitada al ras y cómoda.
Nota: No presione demasiado fuerte ya que esto
puede producir irritación en la piel.
Nota: Si se afeita con espuma o gel de afeitar,
enjuague la unidad de afeitado con regularidad
durante el afeitado para asegurar que se siga
deslizando suavemente sobre la piel (Fig. 11).
3 Use los lados estrechos de la unidad de afeitado
para afeitarse en lugares difíciles de alcanzar,
por ejemplo, a lo largo de la línea de la quijada y
debajo de la nariz (Fig. 9).
4 Desconecte y limpie el producto después de cada
uso.
5 Coloque la tapa protectora del producto para
proteger los cabezales de afeitado durante el
almacenamiento y los viajes (Fig. 10).
Nota: Asegúrese de enjuagar toda la espuma o gel de
afeitar del producto.
Proceso de adaptación de 21 días
- Prueba de 21 días y proceso de adaptación. Es un
hecho que la piel y la barba tardan algún tiempo
en acostumbrarse al nuevo sistema de arreglo
personal.
- Utilice su nueva afeitadora únicamente 3 semanas
para disfrutar completamente de un afeitado
Philips Norelco al ras.
- Es posible que al principio no obtenga la afeitada
al ras que espera e incluso es posible que su rostro
se irrite levemente. Esto es normal, ya que la barba
y la piel necesitan tiempo para ajustarse. Invierta 3
semanas y pronto podrá disfrutar al máximo de su
nueva afeitadora.
- Sea perseverante. Si alterna entre métodos de
afeitado durante el período de adaptación, será
más difícil acostumbrarse al sistema de afeitado de
Philips Norelco.
- Si después de 21 días todavía no está satisfecho
con los resultados, Philips Norelco le reembolsará
el precio total de la compra, siempre que la
solicitud de reembolso se reciba dentro de los 45
días posteriores a la compra.
Recortar con la cortadora emergente
Puede usar la cortadora para recortar las patillas y el
bigote.
1 Deslice el botón de apertura de la cortadora (Fig.
12) hacia abajo para abrirla.
2 Presione el botón de encendido/apagado una vez
para encender el producto (Fig. 7).
3 Sostenga la cortadora perpendicular a la piel
y mueva el producto hacia abajo, presionando
ligeramente (Fig. 13).
4 Apague el producto y limpie la cortadora después
de cada uso para evitar que se obstruya o se dañe
(ver 'Limpieza y mantenimiento').
5 Cierre la cortadora ("clic") (Fig. 14).
Cabezal de afeitado
Advertencia: Realice un corte previo si su
cabello es más largo de 1,5mm.
X3001 y X3052 únicamente: Puede usar este producto
en húmedo o en seco, e incluso en la regadera. Para
una afeitada en húmedo, aplíquese algo de agua
y espuma o gel de afeitar en la piel y enjuague los
cabezales de afeitado con agua tibia de la llave antes
de seguir los pasos que se detallan a continuación.
1 Encienda la afeitadora.
2 Mueva la afeitadora sobre su cabeza con
movimientos circulares y afeite en dirección al
crecimiento del vello (Fig. 15).
Nota: Afeitar a contrapelo puede causar irritación
en la piel.
3 Estire bien la piel con su mano libre de manera que
las navajas se levanten y corten el vello. Asegúrate
de que cada unidad de afeitado esté siempre en
contacto total con la piel. Ejerza una suave presión
para una afeitada al ras y cómoda.
Nota: No presione demasiado fuerte ya que esto
puede producir irritación en la piel.
Nota: Elimine el cabello cortado del depósito de
vello regularmente.
Nota: Si se afeita con espuma o gel de afeitar,
enjuague la unidad de afeitado con regularidad
durante el afeitado para asegurar que se siga
deslizando suavemente sobre la piel (Fig. 11).
(X3001 y X3052 únicamente)
4 Desconecte y limpie el producto después de cada
uso.
5 Coloque la tapa protectora del producto para
proteger los cabezales de afeitado durante el
almacenamiento y los viajes (Fig. 10).
Limpieza y mantenimiento
Una limpieza frecuente garantiza los mejores
resultados de afeitado.
Nunca limpie, retire ni reemplace la unidad de
afeitado cuando la afeitadora esté encendida.
No toque los cabezales de afeitado con objetos
duros ya que esto podría deformar o dañar el
cabezal de afeitado que cuenta con ranuras de
precisión.
No utilice agentes abrasivos ni líquidos agresivos
como la gasolina o la acetona para limpiar la
afeitadora.
Limpieza de la afeitadora
Limpie la afeitadora después de cada rasurada para
un óptimo rendimiento del afeitado.
Revise siempre si el agua no está muy caliente, para
evitar quemarse las manos.
Al enjuagar los cabezales de afeitado, es posible que
salga agua por la base de la afeitadora. Esto es algo
normal. Las partes eléctricas internas se encuentran
en un compartimiento impermeable para que la
afeitadora quede protegida contra el daño del agua.
1 Presione el botón de encendido/apagado una vez
para encender el producto (Fig. 7). Enjuague la
unidad de afeitado con agua fría o tibia (Fig. 11).
2 Presione el botón de encendido/apagado
para apagar el producto. Presione el botón de
liberación de la unidad de afeitado para abrir la
unidad de afeitado (Fig. 16). Enjuague la unidad
de afeitado y la cámara de acumulación de vello
con agua tibia (Fig. 16).
3 Enjuague la parte exterior de la unidad de afeitado
con agua tibia (Fig. 17).
4 Elimine cuidadosamente el exceso de agua y deje
que la afeitadora se seque al aire.
Nunca seque la unidad de afeitado con una
toalla o pañuelo desechable, ya que esto puede
dañar los cabezales de afeitado (Fig. 18).
5 Cierre la unidad de afeitado.
Limpieza de la cortadora emergente
Precaución: Nunca seque los dientes de la
cortadora con una toalla o paño, ya que esto puede
dañar el dentado de recorte.
Limpie la cortadora después de cada uso para evitar
que se obstruya o se dañe.
1 Apague la afeitadora.
2 Deslice el botón de apertura de la cortadora (Fig.
12) hacia abajo para abrirla.
3 Encienda la afeitadora y enjuague la
cortadora emergente debajo del agua caliente.
4 Apague la afeitadora después de limpiarla.
5 Elimine cuidadosamente el exceso de agua
y deje que la cortadora emergente se seque al aire.
6 Cierre la cortadora ("clic") (Fig. 14).
Sugerencia: Para obtener un rendimiento óptimo,
lubrique los dientes de la cortadora emergente con
una gota de aceite mineral cada seis meses (el aceite
no está incluido).
Sustitución
Reemplazo de los cabezales de afeitado
Para un rendimiento de afeitado óptimo, le
aconsejamos que reemplace los cabezales de afeitado
cada dos años (Fig. 20). Reemplace los cabezales de
afeitado dañados inmediatamente.
Siempre reemplace los cabezales de afeitado con
cabezales originales de Philips Norelco.
1 Apague la afeitadora.
2 Presione el botón de apertura de la
afeitadora para abrir la unidad de afeitado. Retire
la unidad de afeitado de la afeitadora (Fig. 21).
3 Gire el bloqueo a la izquierda y retire el
soporte de retención. Colóquelo a un lado en un
lugar seguro (Fig. 22).
4 Retire los cabezales de afeitado de la
unidad de afeitado.
Deseche inmediatamente los cabezales de
afeitado usados para evitar mezclarlos con los
nuevos cabezales de afeitado (Fig. 23).
5 Coloque los nuevos cabezales de afeitado
en la unidad de afeitado (Fig. 24).
Nota: Asegúrese de que los salientes de los
cabezales de afeitado encajen exactamente en los
ganchos del sostenedor al colocarlos (Fig. 25). Los
cabezales de afeitado provistos con la afeitadora
tienen ranuras o salientes. Ambos sistemas de
afeitado son iguales.
6 Vuelva a colocar el sostenedor de retención
en la unidad de afeitado y gire la cerradura a la
derecha (Fig. 26).
7 Inserte la bisagra de la unidad de afeitado
en la ranura que está en la parte superior. Luego
cierre la unidad de afeitado (Fig. 27).
Nota:Si la unidad de afeitado no cierra con
facilidad, compruebe si insertó los cabezales
de afeitado correctamente o si el soporte de
retención está bloqueado.
Este producto no contiene otras piezas que requieran
mantenimiento. Para solicitar asistencia, comuníquese
al 1-800-243-3050.
Almacenamiento
- Asegúrese de que el producto esté apagado.
Retire la fuente de alimentación USB del
tomacorriente y del producto antes de guardarlo
en un lugar seguro y seco donde no pueda
aplastarse, golpearse o dañarse.
- No enrolle el cable alrededor del producto para
guardarlo.
- Guarde el cable y otros accesorios en un lugar
seguro donde no sufran cortes ni daños.
- No coloque ni guarde el producto en un lugar
desde donde pueda, de algún modo, caerse a una
bañera, lavabo o dentro de cualquier recipiente
que contenga agua o líquido.
Nota: Siempre deje secar completamente la
afeitadora antes de guardarla.
- Coloque la tapa protectora de la afeitadora para
prevenir daños (Fig. 10).
Almacenamiento en el estuche de viaje
(únicamente X3052)
Guarde la afeitadora en la bolsa de viaje suministrado.
Nota: Asegúrese de que la afeitadora esté seca antes
de guardarla en el estuche de viaje.
Accesorios
Puede adquirir los accesorios y partes de reemplazo
en la tienda más cercana a su domicilio o a través de
nuestro sitio web www.philips.com/store.
El siguiente accesorio está disponible:
- Cabezales de afeitado de repuesto Philips Norelco
SH30.
Asistencia
Para asistencia, visite nuestro sitio web:
www.philips.com/support o llame al número
gratuito1-800-243-3050.
Desecho
- Este producto posee una batería recargable NiMH
que debe desecharse apropiadamente.
- Comunícate con los funcionarios locales o de la
ciudad para obtener más información acerca del
manejo nal de la batería. Además, puede llamar
al 1-800-822-8837 o consultar: www.call2recycle.
org para conocer los lugares (Fig. 28) donde se
pueden desechar las baterías.
- Para asistencia, visite nuestro sitio web:
www.philips.com/support o llame a la 1-800-
243-3050 línea sin costo.
- Su producto está diseñado y fabricado con
materiales y componentes de alta calidad, que
pueden ser reciclados y reusados. Para obtener
información sobre el reciclaje, contacte a las
instalaciones de manejo de residuos locales o
visite: www.recycle.philips.com.
Garantía Total de Dos Años
La garantía de Philips cubre los productos por un
período de tiempo especíco después de la primera
fecha de compra. La garantía de Philips North America
LLC (EE.UU.) cubre este producto nuevo comprado
en EE.UU. contra defectos de materiales o mano
de obra por un período de dos años a partir de la
fecha de compra (como se evidencia mediante un
comprobante de compra válido) y acepta reemplazar
cualquier producto defectuoso sin cargo. Si el
producto fue comprado en Canadá, la garantía es de
Philips Electronics Ltd. Philips reembolsará el total de
la compra si no puede proporcionar el reemplazo.
Las piezas que están sujetas a desgaste normal,
accesorios, baterías de repuesto y consumibles
como cuchillas y láminas, no están cubiertos por los
términos de esta garantía.
IMPORTANTE: Esta garantía no cubre ningún daño
que surja como resultado de un accidente, del uso
indebido o abuso, de la falta de cuidado razonable,
del uso de cualquier accesorio no provisto con el
producto, de la pérdida de piezas o del uso del
producto bajo un voltaje no especicado.*
NO SE ASUME NINGÚN TIPO DE RESPONSABILIDAD
POR CUALQUIER DAÑO ESPECIAL, FORTUITO O
RESULTANTE.
Para obtener más información y el servicio de
garantía, vaya a www.philips.com/support.
NOTA: Esta garantía le brinda derechos legales
especícos y usted también puede tener otros
derechos los cuales varían de estado a estado, de
región en región o de país en país. En algunos estados
no se permite la exclusión o la limitación de los daños
fortuitos o resultantes, de modo que es posible
que las limitaciones o exclusiones mencionadas
anteriormente no apliquen a su caso. Esta garantía es
transferible.
*Lea las instrucciones adjuntas atentamente.
LA GARANTÍA NO CUBRE LO SIGUIENTE:
- Daños indirectos o resultantes, como pérdida de
tiempo, pérdida de datos o pérdida de ingresos.
En algunos estados no se permite la exclusión o la
limitación de los daños fortuitos o resultantes, de
modo que es posible que la limitación mencionada
anteriormente no aplique a su caso.
- Compensación por actividades que usted realizó,
como mantenimiento periódico, instalación de
actualizaciones de rmware o almacenamiento
de datos.
LA GARANTÍA NO SE APLICA A:
- Si el comprobante de compra, número de modelo,
número de serie o código de fecha de producción
del producto se han vuelto ilegibles.
- Si el producto fue comprado como producto
defectuoso.
- Si el defecto es resultado de un abuso o uso
excesivo diferente del n previsto.
- Si el defecto es causado por condiciones
ambientales, conexión de periféricos, equipos
adicionales o accesorios (incluido el software) que
no estén de acuerdo con el manual del usuario.
- Si la unidad ha sufrido daños, incluidos, entre
otros, daños causados por animales, rayos, voltaje
anormal, incendio, desastre natural, transporte o
agua (a menos que el manual del usuario indique
expresamente que el producto puede enjuagarse).
- Para piezas no eléctricas, desgaste normal,
accesorios, baterías de repuesto o reemplazo de
piezas consumibles como cuchillas y láminas.
- Si el producto no funciona correctamente porque
no fue diseñado para su uso en el país donde se
utiliza el producto, lo que puede ocurrir si importa
el producto.
- Si el producto no funciona correctamente debido
a problemas de conexión con los proveedores de
servicios, como Internet.
GARANTÍA DE DEVOLUCIÓN DE SU
DINERO POR 45DÍAS
Si no está completamente satisfecho con su producto,
envíelo de regreso y le reembolsaremos el total de la
compra.
El producto debe enviarse por correo certicado
pago, con seguro prepago, junto con el recibo
original de compra, donde se indique el precio y la
fecha de compra.
No asumimos ninguna responsabilidad por los
paquetes perdidos.
El paquete del producto debe contar con
matasellos que no supere los 45días a partir de
la fecha de compra. Philips se reserva el derecho
a vericar el precio de compra del producto y
limita los reembolsos al precio de venta minorista
sugerido.
Para obtener el servicio de la garantía
de devolución del dinero, diríjase a
www.PhilipsMoneyBack.com y siga el proceso
sencillo de 3 pasos.
La entrega del cheque de reembolso ocurrirá de 6
a8 semanas después de la recepción del producto
devuelto.
3000.105.8963.5 S11XX X3000 USA.indd 7-12
3000.105.8963.5 S11XX X3000 USA.indd 7-12
2026/4/21 10:52:29
2026/4/21 10:52:29