(QMR\SHDFHRIPLQG
6FDQWKH45FRGHDQGUHJLVWHU
\RXUDSSOLDQFHWRGD\
6WD\XSGDWHGRQEHWWHUOLYLQJVHUYLFHVVDIHW\
QRWLFHVDQGVKRSIRUDFFHVVRULHV
([DFWORFDWLRQRI45FRGHPD\YDU\GHSHQGLQJRQDSSOLDQFHPRGHO
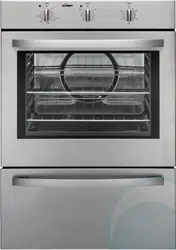
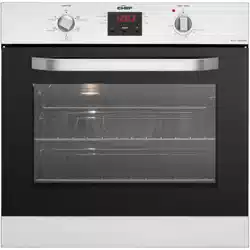
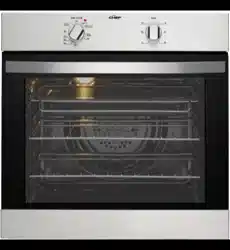
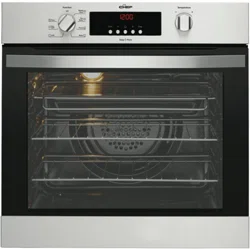
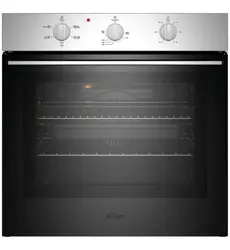
CVE6312DC
CVE6312SC

EN User Manual | Oven
IMPORTANT INFORMATION THAT MAY IMPACT YOUR
MANUFACTURER'S WARRANTY
Adherence to the directions for use in this manual is extremely important for health and
safety. Failure to strictly adhere to the requirements in this manual may result in personal
injury, property damage and affect your ability to make a claim under the Electrolux man
ufacturer’s warranty provided with your product. Products must be used, installed and op
erated in accordance with this manual. You may not be able to claim on the Electrolux
manufacturer’s warranty in the event that your product fault is due to failure to adhere to
this manual.
1. SAFETY INFORMATION........................... 2
2. SAFETY INSTRUCTIONS......................... 4
3. INSTALLATION..........................................5
4. GENERAL OVERVIEW..............................6
5. BEFORE FIRST USE.................................6
6. DAILY USE.................................................7
7.
HINTS AND TIPS.......................................8
8. CARE AND CLEANING........................... 10
9. TROUBLESHOOTING............................. 11
10. WARRANTY - AUSTRALIA AND NEW
ZEALAND................................................ 12
11. ENVIRONMENTAL CONCERNS...........14
1. SAFETY INFORMATION
Before the installation and
use of the appliance read the
supplied instructions careful
ly. The manufacturer is not
responsible for any injuries or
damage that result from in
correct installation or usage.
Always keep the instructions
in a safe and accessible loca
tion for future reference.
1.1 Children and
vulnerable people safety
• This appliance can be used
by children aged from 8
years and above and per
sons with reduced physical,
sensory or mental capabili
ties or lack of experience
and knowledge if they have
been given supervision or
instruction concerning the
use of the appliance in a
safe way and understand
the hazards involved. Chil
dren of less than 8 years of
age and persons with very
extensive and complex dis
abilities shall be kept away
from the appliance unless
continuously supervised.
• Children should be super
vised to ensure that they do
not play with the appliance.
• Keep packaging away from
children and dispose of it
properly.
• WARNING: The appliance
and its accessible parts be
come hot during use. Keep
2 ENGLISH

children and pets away dur
ing use and cooling.
• Activate the child safety de
vice, if available.
• Children must not clean or
maintain the appliance
without supervision.
1.2 General Safety
• This appliance is for cook
ing purposes only.
• This appliance is designed
for single household do
mestic use in an indoor en
vironment.
• This appliance may be
used in offices, hotel guest
rooms, bed & breakfast
guest rooms, farm guest
houses, and other similar
accommodation where
such use does not exceed
average domestic usage
levels.
• Do not use the appliance
before installing it in the
built-in structure.
• Disconnect the appliance
from the power supply be
fore carrying out any main
tenance.
• If the supply cord is dam
aged, it must be replaced
by the manufacturer, its au
thorised service centre or
similarly qualified persons
to avoid an electrical haz
ard.
• WARNING: Ensure that the
appliance is switched off
before replacing the lamp
to avoid the possibility of
electric shock.
• WARNING: The appliance
and its accessible parts be
come hot during use. Care
should be taken to avoid
touching heating elements
or the surface of the appli
ance cavity.
• Always use oven gloves to
remove or insert accesso
ries or ovenware.
• Do not install the appliance
behind a decorative door in
order to avoid overheating.
• Do not use a steam cleaner
to clean the appliance.
• Do not use harsh abrasive
cleaners or sharp metal
scrapers to clean the glass
door since they can scratch
the surface, which may re
sult in shattering of the
glass.
ENGLISH 3
2. SAFETY INSTRUCTIONS
2.1 Installation
WARNING!
Only a qualified person must install this
appliance.
• Remove all the packaging.
• Do not install or use a damaged
appliance.
• Follow the installation instructions
available on our website.
• Be careful when moving the appliance, as
it is heavy. Use safety gloves and
enclosed footwear.
• Do not pull the appliance by the handle.
• Install the appliance in a safe and suitable
location that meets installation
requirements.
• Keep the minimum distance from other
appliances and units.
• Before mounting the appliance, ensure it
is level and that the door opens without
any restraint.
• The appliance is equipped with an electric
cooling system. It must be operated with
the electric power supply.
2.2 Electrical connection
WARNING!
Risk of fire and electric shock.
• All electrical connections should be made
by a qualified electrician.
• Make sure the parameters on the rating
plate are compatible with the electrical
ratings of the mains.
• The appliance must be earthed. Always
use a correctly installed shockproof
socket.
• Do not use multi-plug adapters and
extension cables.
• Avoid damaging the mains cable and plug.
If replacement is needed, it must be done
by our Authorized Service Centre.
• Do not let mains cables touch or come
near the appliance door or the niche
below, especially when it operates or the
door is hot.
• Shock protection of live and insulated
parts must be fastened securely and
should not be removable without tools.
• Connect the appliance only at the end of
installation. Ensure access to the mains
plug after installation.
• If the mains socket is loose, do not
connect the mains plug.
• Do not disconnect the appliance by pulling
on the mains cable. Always pull on the
mains plug.
• Use only correct isolation devices: line
protecting cut-outs, fuses (screw type
fuses removed from the holder), earth
leakage trips and contactors.
• The electrical installation must have an
isolation device that disconnects the
appliance from the mains at all poles, with
a contact opening width of at least 3 mm.
• This appliance is supplied with a main
plug and a main cable.
2.3 Use
WARNING!
Risk of injury, burns and electric shock or
explosion.
• Do not change the specification of the
appliance.
• Ensure ventilation openings are not
blocked.
• Do not let the appliance stay unattended
during operation.
• Turn off the appliance after each use.
• Be careful when opening the appliance
door during operation, as hot air and
flammable vapors from ingredients can be
released.
• Do not operate the appliance with wet
hands or when it comes in contact with
water.
• Do not apply pressure on the open door.
• Do not use the appliance as a work
surface or as a storage surface.
• Keep sparks and open flames away from
the appliance when the door is open.
• Do not place flammable products near the
appliance.
• Do not use the appliance as a space
heater.
WARNING!
Risk of damage to the appliance.
• To prevent damage or discoloration to the
enamel:
4 ENGLISH
– do not place aluminum foil directly on
the cavity bottom.
– do not put water directly into the hot
appliance.
– do not leave moist dishes and food in
the appliance after cooking.
– be careful when removing or installing
accessories.
• Enamel or stainless steel discoloration
does not affect performance of the
appliance.
• Use a deep pan for moist cakes, as fruit
juices can cause permanent stains.
• Always cook with the appliance door
closed.
• If the appliance is installed behind a
furniture panel, do not close the panel
during use or until the appliance is fully
cooled to prevent heat and moisture
damage.
• Concerning the lamp(s) inside this product
and spare part lamps sold separately:
These lamps are intended to withstand
extreme physical conditions in household
appliances, such as temperature,
vibration, humidity, or are intended to
signal information about the operational
status of the appliance. They are not
intended to be used in other applications
and are not suitable for household room
illumination.
• Use only lamps with the same
specifications.
• To repair the appliance contact the
Authorised Service Centre. Use original
spare parts only.
2.4 Care and cleaning
WARNING!
Risk of injury, fire, or damage to the appli
ance.
• Turn off and unplug the appliance before
maintenance.
• Ensure the appliance is cold to avoid glass
breakage. If the door glass panels are
damaged, contact the authorized service
centre for replacement.
• Clean and dry the appliance, its cavity,
and accessories after each use to prevent
steam condensation, corrosion, and
surface deterioration.
• Check the product regularly for signs of
deterioration that may make it unsuitable
for food contact, such as cracks, blisters,
delamination, shrinkage, stickiness,
corrosion, or other visible changes in
texture or appearance. Follow cleaning
and care instructions to prevent
deterioration.
• Use a microfibre cloth, warm water, and
neutral detergents for cleaning the
appliance and accessories. Do not use
abrasive products, pads, solvents, sharp-
edged or metal objects.
• Follow safety instructions on packaging
when using an oven spray.
2.5 Disposal
WARNING!
Risk of injury or suffocation.
• Contact your municipal authority for
information on how to dispose of the
appliance.
• Disconnect the appliance from the mains,
then cut off and dispose of the electrical
cable.
3. INSTALLATION
WARNING!
Refer to Safety chapters.
3.1 General Information
CAUTION!
Follow local municipal building codes and
all relevant statutory regulations, espe
cially AS/NZS 3000.
• Use the level on the front and rear forms
of the appliance to level it and prevent the
telescopic runners from moving.
• Under the control panel, there are two
mounting holes on each side. Fit the black
screws with the plastic spacers provided.
• The surrounding kitchen cabinets must be
able to withstand 70°C.
• This appliance is supplied with a 10 A
power cord for 'Plug & Play' which must be
connected to a 10 A powerpoint.
ENGLISH 5
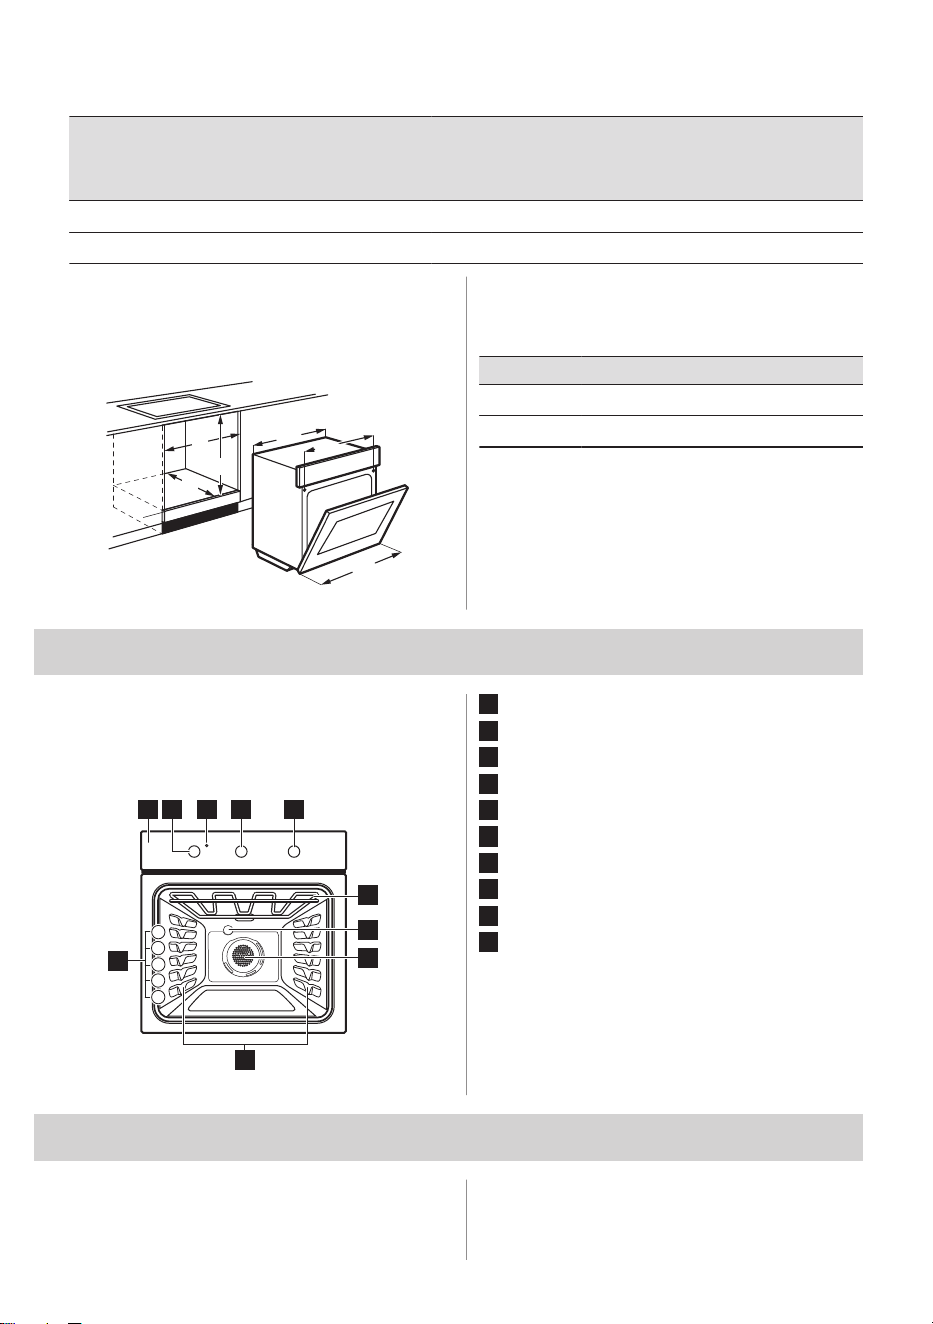
3.2 Technical data
Technical data
Model
Product dimensions (h
x w x d) (mm)
Electrical con
nection (V/Hz)
Min. fuse
rating (A)
Max.
power
rating
(kW)
Max. cur
rent rating
(A)
CVE6312DC 597 x 596 x 568 220-240 / 50 16 2.3 9.6
CVE6312SC 597 x 596 x 568 220-240 / 50 16 2.3 9.6
3.3 Installing the appliance
Check if the dimensions of the furniture meet
the installation requirements.
C
A
B
596
561
582
Installation requirements
A - width (mm), B - height (mm), C - depth
(mm)
Installation requirements
Type A B C
Flush fit 600 600 min. 581
Proud fit 565 590 min. 560
4. GENERAL OVERVIEW
10
9
5
4
1
2
3
431 52
8
7
6
1
Control panel
2
Knob for the heating functions selection
3
Indicator light
4
Knob for the oven temperature selection
5
Knob for the timer
6
Heating element
7
Oven lamp
8
Fan
9
Formed shelf supports
10
Shelf positions
5. BEFORE FIRST USE
5.1 Initial preheating and cleaning
1. Clean the appliance with a microfibre
cloth, warm water, and mild detergent.
6 ENGLISH
2. Remove all accessories from the
appliance.
3. Preheat the empty appliance to remove
any odours. Ventilate the room.
4. Set the function and the temperature
to 180°C, let the appliance operate for 30
min.
5. Turn off the appliance and let it cool.
6. Clean the appliance again. Replace
accessories and shelf supports.
6. DAILY USE
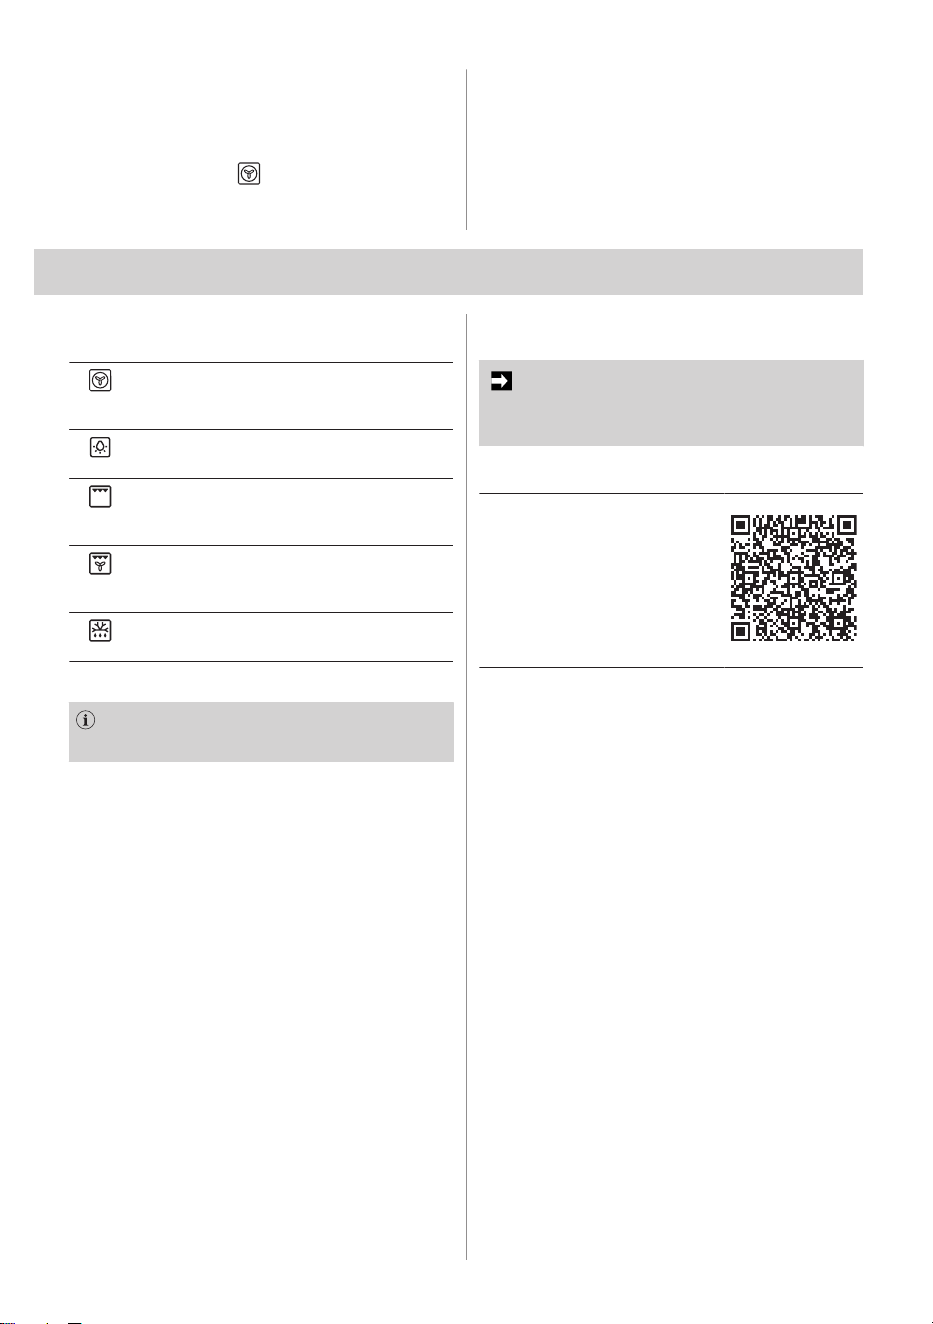
6.1 Heating functions
.
Fan bake - Multi-shelf cooking, reheat
ing cooked foods, pastries and com
plete oven meals.
Light only - To switch on the oven
lamp without a heating function.
Grill - Grilling meat, toasting bread.
Use with a deep pan under a wire
shelf. Preheat for 3 min.
Fan grill - Roasting larger pieces of
meat. Use with a deep pan under a
wire shelf. Set temperature to 180°C.
Defrost - Defrosting, raising dough,
drying fruit/vegetables/herbs.
6.2 Setting: Heating functions
The indicator comes on when the oven
heats up.
1. Turn on the appliance.
2. Turn the function knob to select a heating
function.
3. Turn the temperature knob in a clockwise
direction to select a temperature. Using
this knob the other way can result in
damage of the thermostat.
4. To deactivate the appliance turn the
function knob in any direction and the
temperature knob anti-clockwise to the off
position.
Operating the 120-minute timer
Turn the knob clockwise to set the timer. For
times under 15 min, turn the knob past the
40min mark first, then back to the desired
time. The timer rings once it returns to zero.
Operating the temperature knob
Set the temperature by turning the knob
clockwise until the indicator light turns on.
The oven maintains the set temperature by
switching the heating on and off. After cook
ing, turn the knob back anticlockwise, and
never force it fully around clockwise to avoid
damaging the thermostat.
IMPORTANT
The oven function must be selected be
fore setting the temperature.
6.3 Accessories
Accessories
.
Accessories available de
pending on model. Scan the
QR code to check how to use
accessories supplied with
your appliance. You can or
der optional accessories sep
arately. For more informa
tion, please contact your lo
cal supplier.
Insert the accessory (wire shelf / tray) be
tween the guide bars of the shelf support.
Make sure that the shelf touches the back of
the oven interior.
If your tray has a slope, position it towards
the back of the oven interior.
If there is an inscription on the accessory,
make sure it is facing you.
If you are using a tray with holes place the
tray / pan underneath, to collect dripping liq
uids.
Fitting trays to shelf supports:
With the front edge raised, slide the tray into
the oven. Then lower it and push fully in so
that it does not interfere with the closed oven
door.
ENGLISH 7
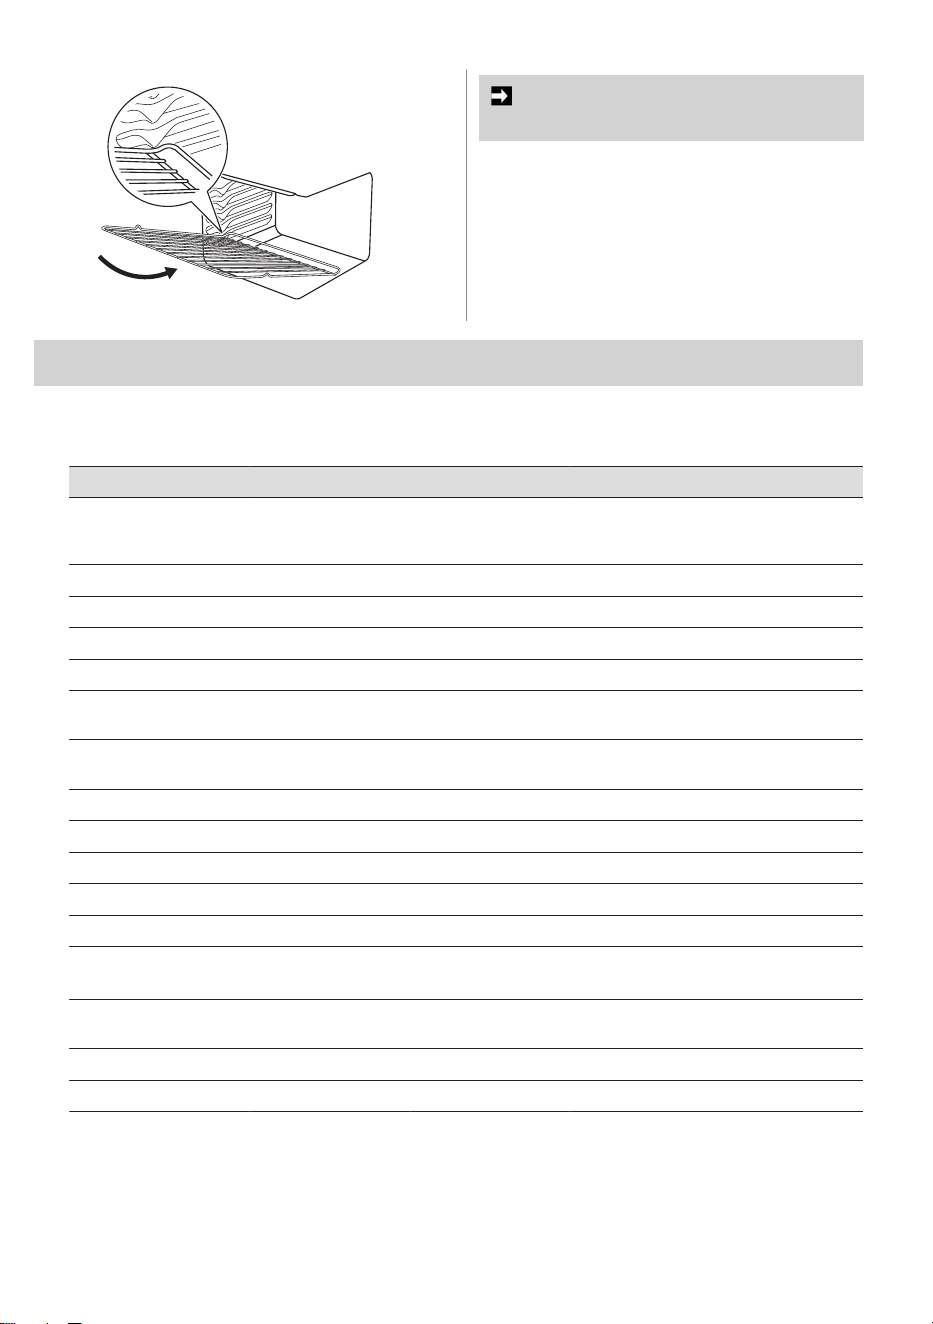
IMPORTANT
The top ledge is not a shelf position.
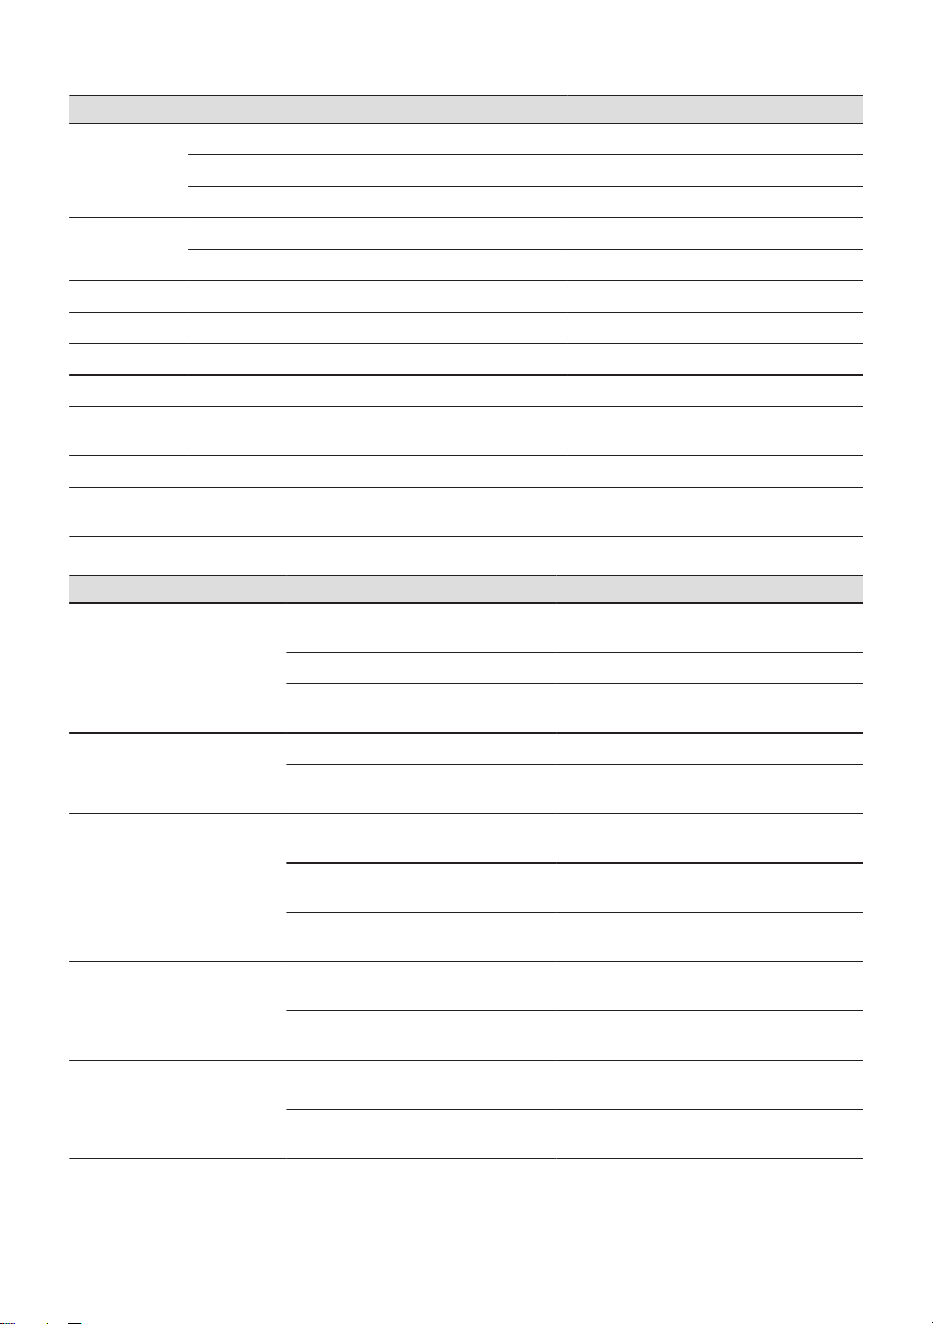
7. HINTS AND TIPS
7.1 Cooking recommendation
Bakery products
Food Non fan mode
Fan mode
1)
Time (min)
Temperature (°C)
Shelf position
(counted from
bottom up)
Temperature (°C)
Plain or fruit scones 220 2 210 10 - 15
Rolled biscuits 170 2 150 10 - 15
Spooned biscuits 190 2 180 12 - 15
Shortbread biscuits 160 1 or 2 150 30 - 35
Hard individual mer
ingues
110 2 100 90
Soft individual merin
gues
180 2 165 15 - 20
Pavlova - 6 eggs 110 1 100 75
Patty cakes 190 3 180 15 - 20
Sponge - 4 eggs 180 2 170 20 - 30
Shallow butter cake 180 2 170 25 - 40
Rich fruit cake 140 2 130 180
Shortcrust cornish
pastry
2)
200 2 180 40 - 45
Shortcrust custard
tart
200/180 1 180/160 10/35
Cream puffs 210 2 200 25 - 30
Yeast bread 210 1 200 25 - 30
1)
Any shelf position.
2)
Turn down temperatures and times shown.
8 ENGLISH
Meat/poultry/fish
Food Temperature (°C) Time (min per kg)
Beef
Rare 200 35 - 40
Medium 200 45 - 50
Well done 200 55 - 60
Lamb
Medium 200 40
Well done 60
Veal Well done 180 60
Pork Well done 200 60
Chicken 180 45 - 50
Duck 180 - 200 60 - 70
Turkey 180
40 - 45 (<10kg)
35 - 40 (>10kg)
Fish 180 20
Guide to better grilling: steak - 15 - 20 min, chops - 20 - 30 min, fish - 8 - 10 min, bacon - 4 - 5
min.
Dealing with cooking problems
Problem Main cause Remedy
Uneven cooking
Incorrect shelf position or tray
placement
Place food in the centre of the oven.
Poor air circulation Rotate food during cooking.
Grill tray affecting thermostat
Remove the grill tray when using
baking modes.
Baked products too
brown on top
Oven not preheated Preheat the oven.
Tins too large or unevenly
spaced
Use correct-size tins and space them
evenly.
Baked products too
brown on bottom
Temperature too high or food
too low
Lower temperature or cook one shelf
higher.
Dark metal or glass tins
Use light-coloured tins or reduce
temperature by 10°C.
Oven door opened too often
Do not open the door until at least
half the cooking time has passed.
Cakes with thick,
cracked crust
Temperature too high or cake
too high in oven
Lower the temperature or cook one
shelf lower.
Batter over-mixed or tin too
deep
Mix only until combined and use the
recommended tin size.
Baked products pale or
undercooked
Temperature too low or cooking
time too short
Increase the temperature or extend
cooking time.
Incorrect tin size or shelf posi
tion
Use correct tin size and cook one
shelf higher.
ENGLISH 9
Problem Main cause Remedy
Cakes fallen in the cen
tre
Temperature too low or door
opened too early
Raise temperature and keep door
closed until the last quarter of cook
ing time.
Incorrect ingredient proportions Check the recipe.
Roast meat and pota
toes not brown (fan
mode)
Poor air circulation
Place food on a rack to allow air cir
culation.
Meat loses juices Pierced during cooking Turn meat with tongs, not a fork.
Grilled meat over
cooked outside, raw in
side
Grill position too high Grill at a lower insert position.
Grilled chops or steaks
curl
Fat not cut Cut fat every 2cm.
Pizza toppings burnt Shelf position too high Use a lower shelf.
8. CARE AND CLEANING
8.1 Notes on cleaning
• Clean the interior of the appliance and the
accessories after each use with a
microfibre cloth, warm water and a mild
detergent.
• Clean stains with a mild detergent.
• Use a cleaning solution for metal surfaces.
• Clean and check the door gasket around
the frame of the cavity.
• Dry the interior of the appliance only with a
microfibre cloth after each use.
• Do not use abrasive cleaner or sharp-
edged objects to clean the appliance or
the accessories.
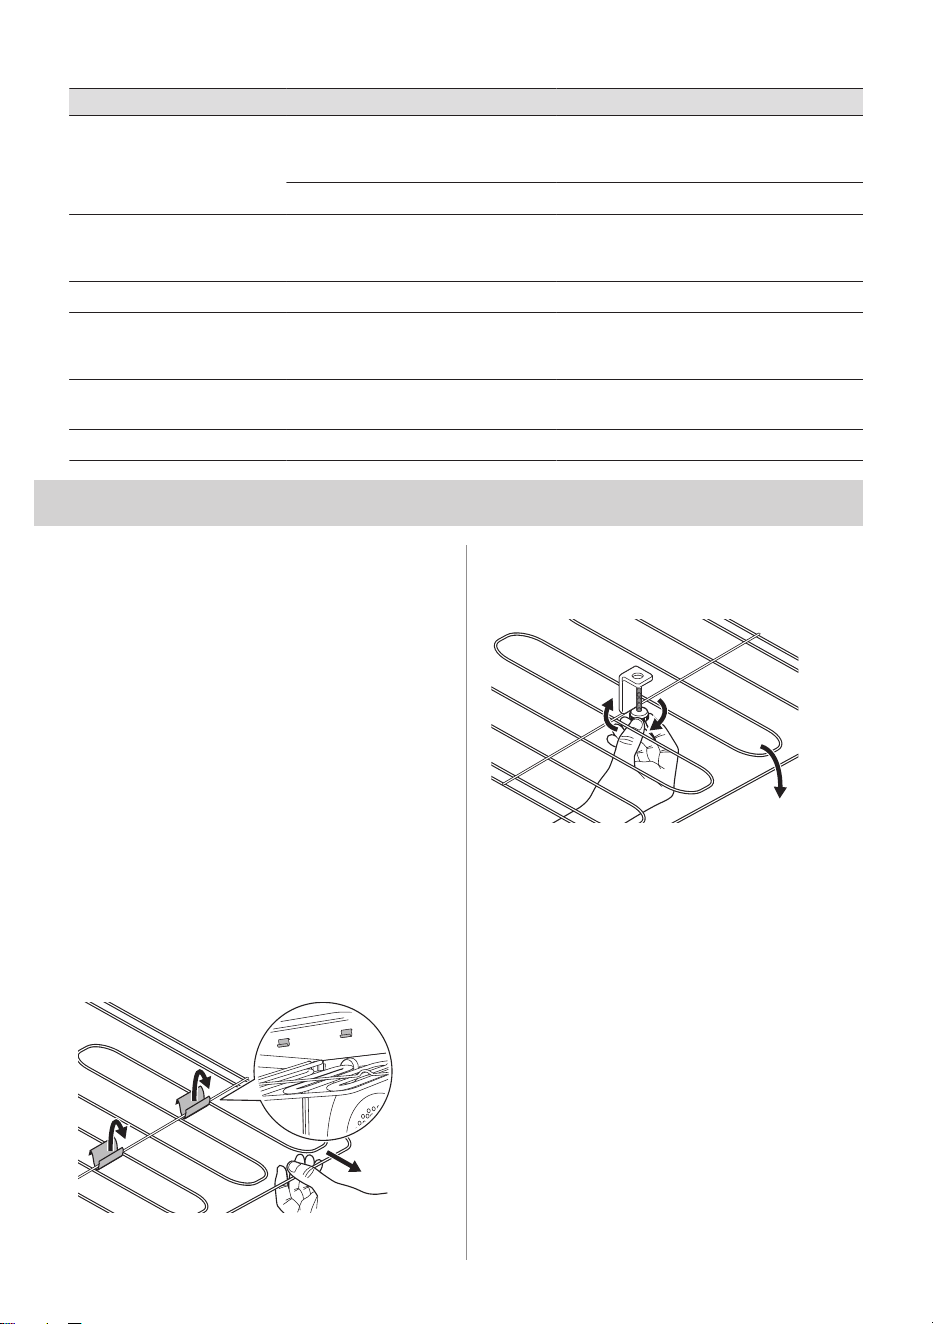
8.2 Removing grill
1. Turn off the appliance and wait until it is
cold to clean it.
2. For retaining clips models: Push the
edge of the grill clips towards back of the
oven. The grill drops down freely.
3. For rotating latch models: Rotate the
grill latch 180º. The grill drops down
freely.
4. Clean the oven ceiling with warm water, a
soft cloth and a mild detergent. Let it dry.
5. Install the grill in the opposite sequence.
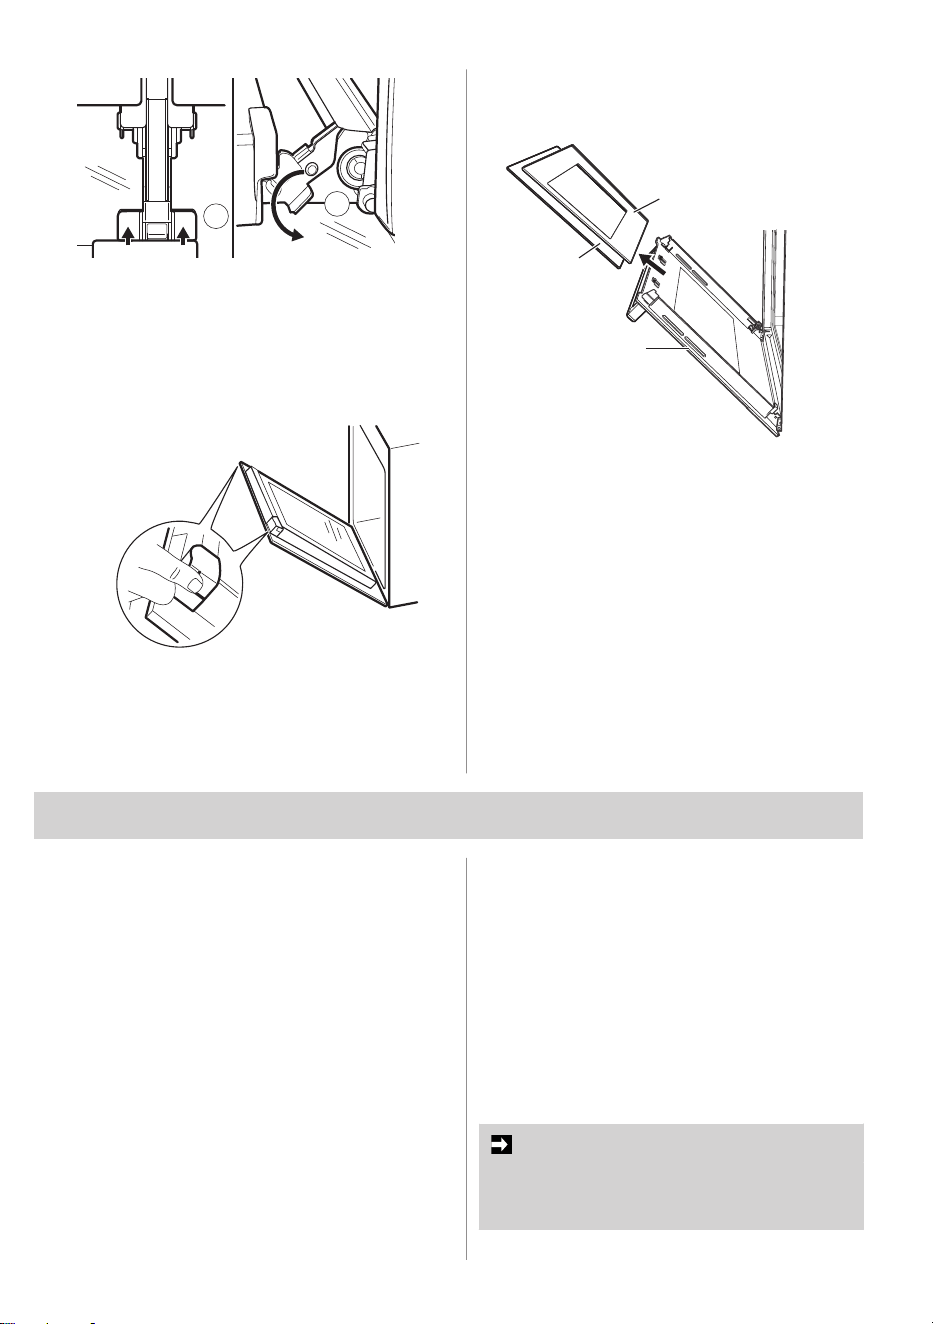
8.3 Removing and installing door
The door is heavy.
1. Make sure the appliance is cold.
2. Fully open the door.
3. Press the hinge levers on both sides of
the door.
10 ENGLISH
A
A
4. Close the door partially until it stops, then
lift it off the hinges.
5. Place the door on a soft cloth on a stable
surface.
6. Release two endcaps holding the glass
panels in place.
7. Remove the inner glass panel (C) and the
middle glass panel (B) from the oven
door. The outside glass (A) cannot be
removed for cleaning. Clean the panels
with water and soap using a non abrasive
sponge and then dry them thoroughly. Do
not clean the glass panels in the
dishwasher.
A
B
C
After cleaning, do the above steps in the op
posite sequence.
During assembly, make sure the painted sur
face is facing down.
8.4 Replacing the lamp
Disconnect the appliance from the mains and
wait until it is cold.
1. To replace the oven lamp, turn and
remove the glass cover.
2. Clean the glass cover.
3. Insert a high temperature resistant lamp.
4. Install the glass cover.
9. TROUBLESHOOTING
9.1 Troubleshooting
If you cannot find a solution to the problem
yourself, contact your dealer or an Authorised
Service Centre. Service details are on the rat
ing plate, located on the front frame. It is visi
ble when you open the door. Do not remove
the rating plate.
Appliance problems:
• If the oven or grill does not operate, check
if the household fuse is not blown or the
power supply is not off.
• If the light does not work, check if the lamp
is not blown or loose in the socket.
• If the light does not turn on when the door
is opened, the lamp may need replacing.
• If the condensation builds up, reduce the
amount of water used in cooking.
• If the door cannot be replaced after
removal, attach the hinge lever to its
correct position.
• If the shelves are tight in the oven, check if
they are in a correct orientation.
• If a tray slides out of the oven, check if the
oven cavity is level.
• If hot air blows from above the door, it
means that the oven is venting ensuring
proper air circulation.
• If the oven door seals are loose, this is
normal. The seals function correctly when
the oven door is closed.
IMPORTANT
If the household fuse continues to blow,
contact the Electrolux Customer Care
Centre.
ENGLISH 11

9.2 Service data
If you cannot find a solution to the problem
yourself, contact your dealer or an Authorised
Service Centre.
The necessary data for the service centre is
on the rating plate. The rating plate is located
on the front frame of the appliance. It is visi
ble when you open the door. Do not remove
the rating plate from the appliance.
We recommend that you write the data
here:
.
Model (MOD.) :
Product number
(PNC):
Serial number (S.N.):
10. WARRANTY - AUSTRALIA AND NEW ZEALAND
FOR SALES IN AUSTRALIA AND NEW ZEA
LAND
APPLIANCE: CHEF BUILT-IN OVENS,
COOKTOPS, FREESTANDING COOKER
AND WARMING DRAWER
This document sets out the terms and
conditions of the product warranties for
Chef Appliances. It is an important docu
ment. Please keep it with your proof of
purchase documents in a safe place for
future reference should there be a manu
facturing defect in your Appliance. This
warranty is in addition to other rights you
may have under the Australian Consumer
Law.
1. In this warranty:
a) ‘ACL’ or ‘Australian Consumer Law’
means Schedule 2 to the Competition
and Consumer Act 2010;
b) ‘Appliance’ means any Electrolux
product purchased by you and
accompanied by this document;
c) ‘ASC’ means Electrolux’s authorised
serviced centres;
d) 'Chef' is the brand controlled by
Electrolux Home Products Pty Ltd of
163 O'Riordan Street, Mascot NSW
2020, ABN 51 004 762 341 in respect
of Appliances purchased in Australia
and Electrolux (NZ) Limited
(collectively "Electrolux") of 3-5 Niall
Burgess Road, Mount Wellington, in
respect of Appliances purchased in
New Zealand;
e) ‘Warranty Period’ means the period
specified in clause 3 of this warranty;
f) ‘you’ means the purchaser of the
Appliance not having purchased the
Appliance for re-sale, and ‘your’ has a
corresponding meaning.
2. Application: This warranty only applies
to new Appliances, purchased and used
in Australia or New Zealand and is in
addition to (and does not exclude, restrict,
or modify in any way) other rights and
remedies under a law to which the
Appliances or services relate, including
any nonexcludable statutory guarantees
in Australia and New Zealand.
3. Warranty Period: Subject to these terms
and conditions, this warranty continues
for in Australia for a period of 24 months
and in New Zealand for a period of 24
months, following the date of original
purchase of the Appliance.
4. Repair or replace warranty: During the
Warranty Period, Electrolux or its ASC
will, at no extra charge if your Appliance
is readily accessible for service, without
special equipment and subject to these
terms and conditions, repair or replace
any parts which it considers to be
defective. Electrolux may, in its absolute
discretion, choose whether the remedy
offered for a valid warranty claim is repair
or replacement. Electrolux or its ASC may
use refurbished parts to repair your
Appliance. You agree that any replaced
Appliances or parts become the property
of Electrolux.
5. Travel and transportation costs:
Subject to clause 7, Electrolux will bear
the reasonable cost of transportation,
travel and delivery of the Appliance to
and from Electrolux or its ASC. Travel
and transportation will be arranged by
Electrolux as part of any valid warranty
claim.
6. Proof of purchase is required before you
can make a claim under this warranty.
7. Exclusions: You may not make a claim
under this warranty unless the defect
claimed is due to faulty or defective parts
12 ENGLISH

or workmanship. This warranty does not
cover:
a) light globes, batteries, filters or similar
perishable parts;
b) parts and Appliances not supplied by
Electrolux;
c) cosmetic damage which does not
affect the operation of the Appliance;
d) damage to the Appliance caused by:
– negligence or accident;
– misuse or abuse, including failure
to properly maintain or service;
– improper, negligent or faulty
servicing or repair works done by
anyone other than an Electrolux
authorised repairer or ASC;
– normal wear and tear;
– power surges, electrical storm
damage or incorrect power supply;
– incomplete or improper
installation;
– incorrect, improper or
inappropriate operation;
– insect or vermin infestation;
– failure to comply with any
additional instructions supplied
with the Appliance;
In addition, Electrolux is not liable under
this warranty if:
a. the Appliance has been, or Electrolux
reasonably believes that the
Appliance has been, used for
purposes other than those for which
the Appliance was intended, including
where the Appliance has been used
for any non-domestic purpose;
b. the Appliance is modified without
authority from Electrolux in writing;
c. the Appliance’s serial number or
warranty seal has been removed or
defaced
8. How to claim under this warranty: To
enquire about claiming under this
warranty, please follow these steps:
a. carefully check the operating
instructions, user manual and the
terms of this warranty;
b. have the model and serial number of
the Appliance available;
c. have the proof of purchase (e.g. an
invoice) available;
d. telephone the numbers shown below.
9. Australia: For Appliances and services
provided by Electrolux in Australia:
Electrolux goods come with guarantees
that cannot be excluded under the
Australian Consumer Law. You are
entitled to a replacement or refund for a
major failure and for compensation for
any other reasonably foreseeable loss or
damage. You are also entitled to have the
Appliance repaired or replaced if the
Appliance fails to be of acceptable quality
and the failure does not amount to a
major failure. 'Acceptable quality' and
'major failure' have the same meaning as
referred to in the ACL.
10. New Zealand: For Appliances and
services provided by Electrolux in New
Zealand, the Appliances come with a
guarantee by Electrolux pursuant to the
provisions of the Consumer Guarantees
Act, the Sale of Goods Act and the Fair
Trading Act. Where the Appliance was
purchased in New Zealand for
commercial purposes the Consumer
Guarantee Act does not apply.
11. Confidentiality: You accept that if you
make a warranty claim, Electrolux and its
agents including ASC may exchange
information in relation to you to enable
Electrolux to meet its obligations under
this warranty.
Table title
Important Notice
Before calling for service, please ensure that the steps listed in clause 8 above have been followed.
Table title
AUSTRALIA
FOR SERVICE
or to find the address of your nearest
authorised service centre in Australia
PLEASE CALL 13 13 49
For the cost of a local call
FOR SPARE PARTS
or to find the address of your nearest
spare parts centre in Australia
PLEASE CALL13 13 50
For the cost of a local call
ENGLISH 13
Table title
NEW ZEALAND
FOR SERVICE
or to find the address of your nearest
authorised service centre in New Zealand
PLEASE CALL 0800 10 66 10
FOR SPARE PARTS
or to find the address of your nearest
state spare parts centre in New Zealand
PLEASE CALL 0800 10 66 20
ECook_Warr_Jul19
11. ENVIRONMENTAL CONCERNS
Recycle materials with the symbol . Put the
packaging in relevant containers to recycle it.
Help protect the environment and human
health by recycling waste of electrical and
electronic appliances. Do not dispose of ap
pliances marked with the symbol with the
household waste. Return the product to your
local recycling facility or contact your munici
pal office.
Customer Care Centre
Contact us if you need more help
Australia
phone:............................................... 13 13 49
email:......... [email protected]
website:...................... chefappliances.com.au
WE ARE PART OF
THE ELECTROLUX FAMILY.
TO ADD A TOUCH OF PROFESSIONAL
INSPIRATION TO YOUR HOME,
VISIT ELECTROLUX.COM
*
14 ENGLISH

15

701139023-A-142026