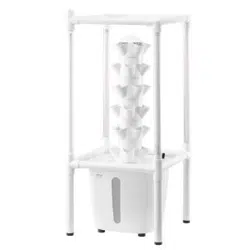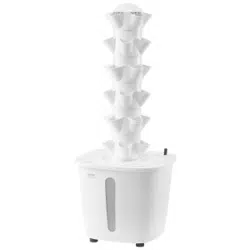
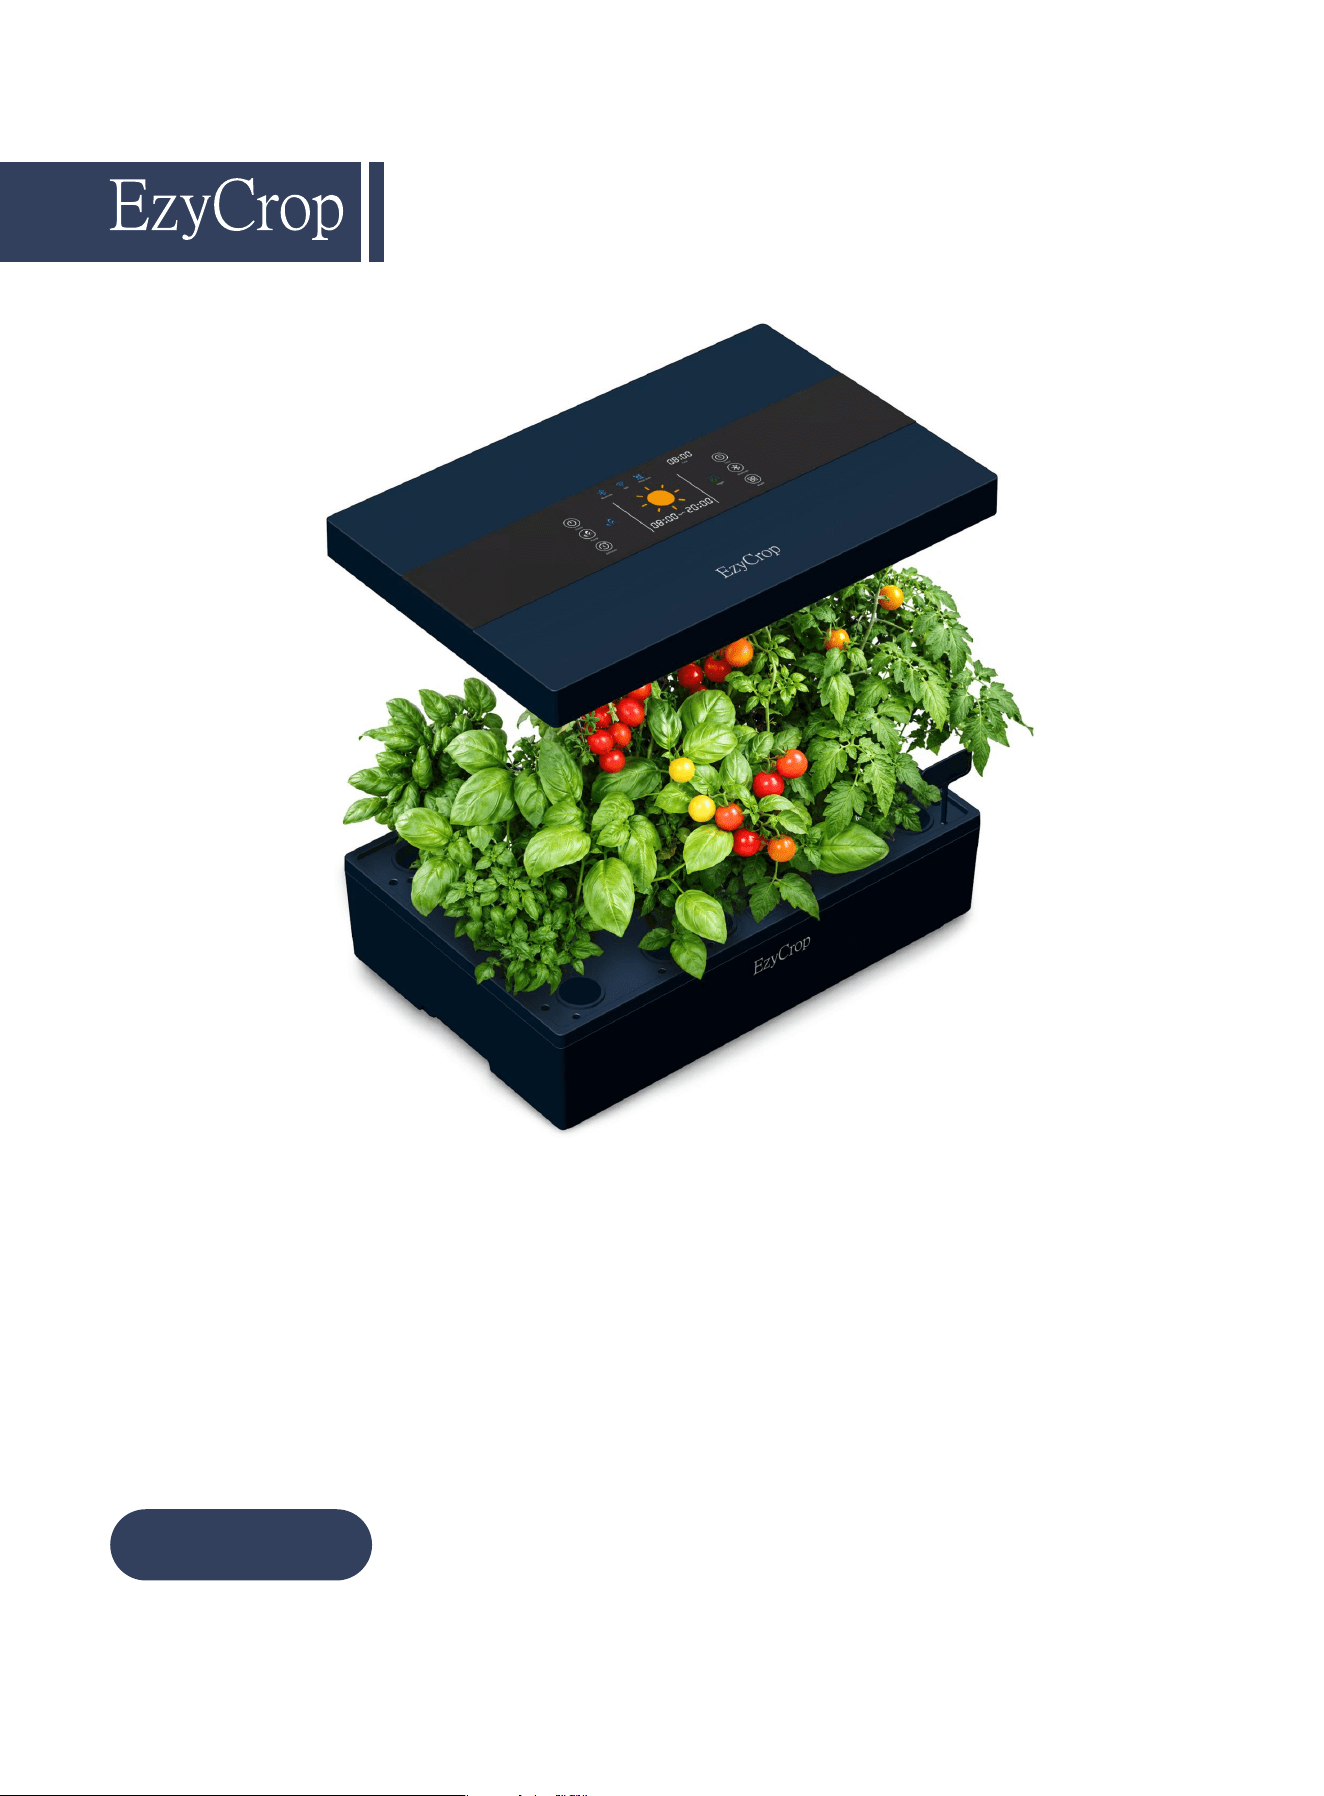
EZYCROP
Hydroponics
Growing System
HG��-BW
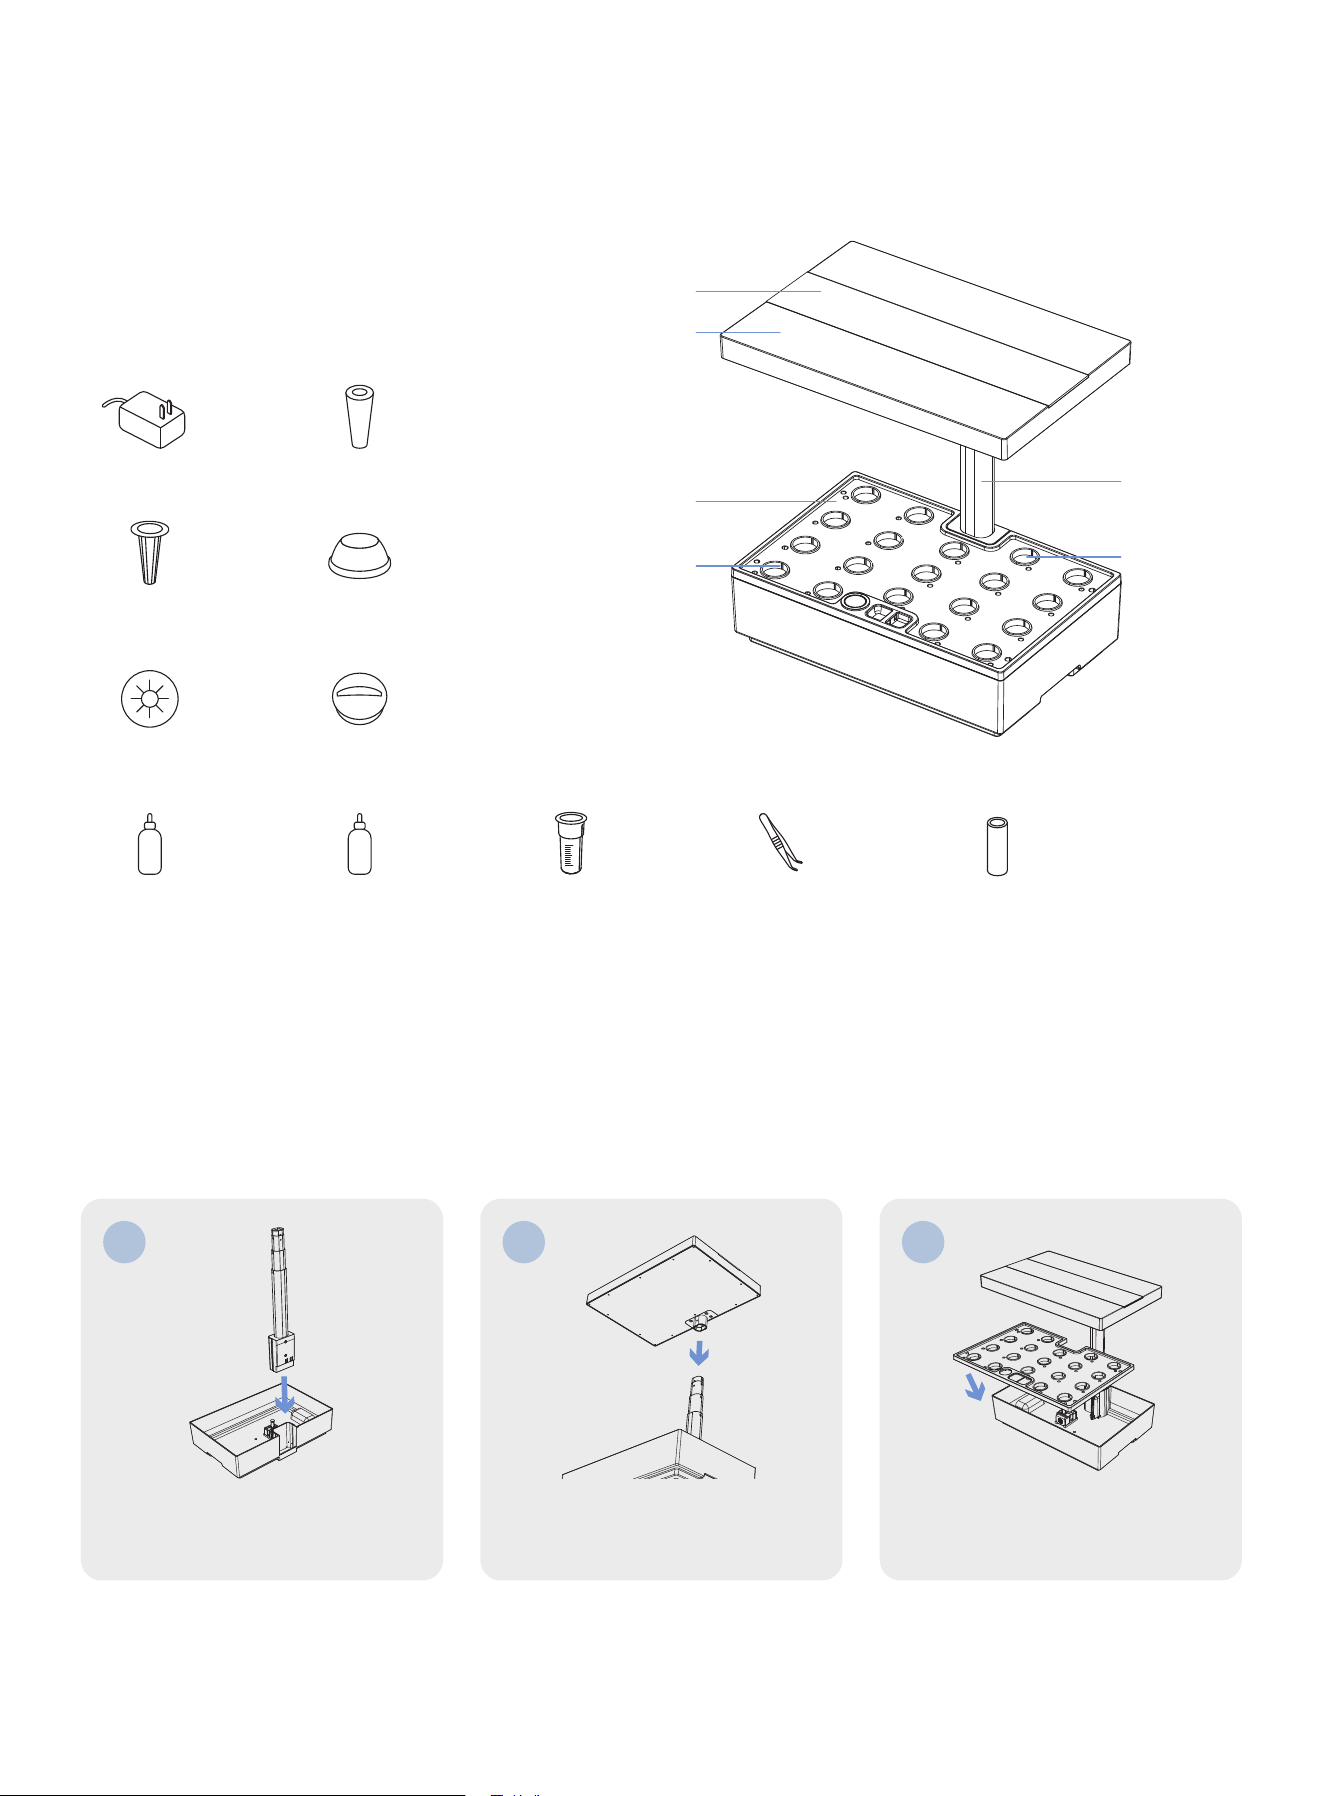
Included In Package
01
Light Panel
Operation Screen
Water Tank
Standard Rowing
Tray
Extendable Rod
Basket
Plug Adapter Sponge
��
Basket Kit
��
Germination Cover
��
Light-blocking Sticker
��
Grow Deck Cover
Support Frame �
A Solid Nutrient
A B
B Solid Nutrient
Shade Cover
�
Water Indicator Tweezers
Easy Set Up
02
�
Attach the light panel to the Extendable
rod.
�
Align the side seams on both sides, match
the sliding grooves, and install the
adjustable rod into the water tank.
�
Place the standard planting tray on the
water tank.
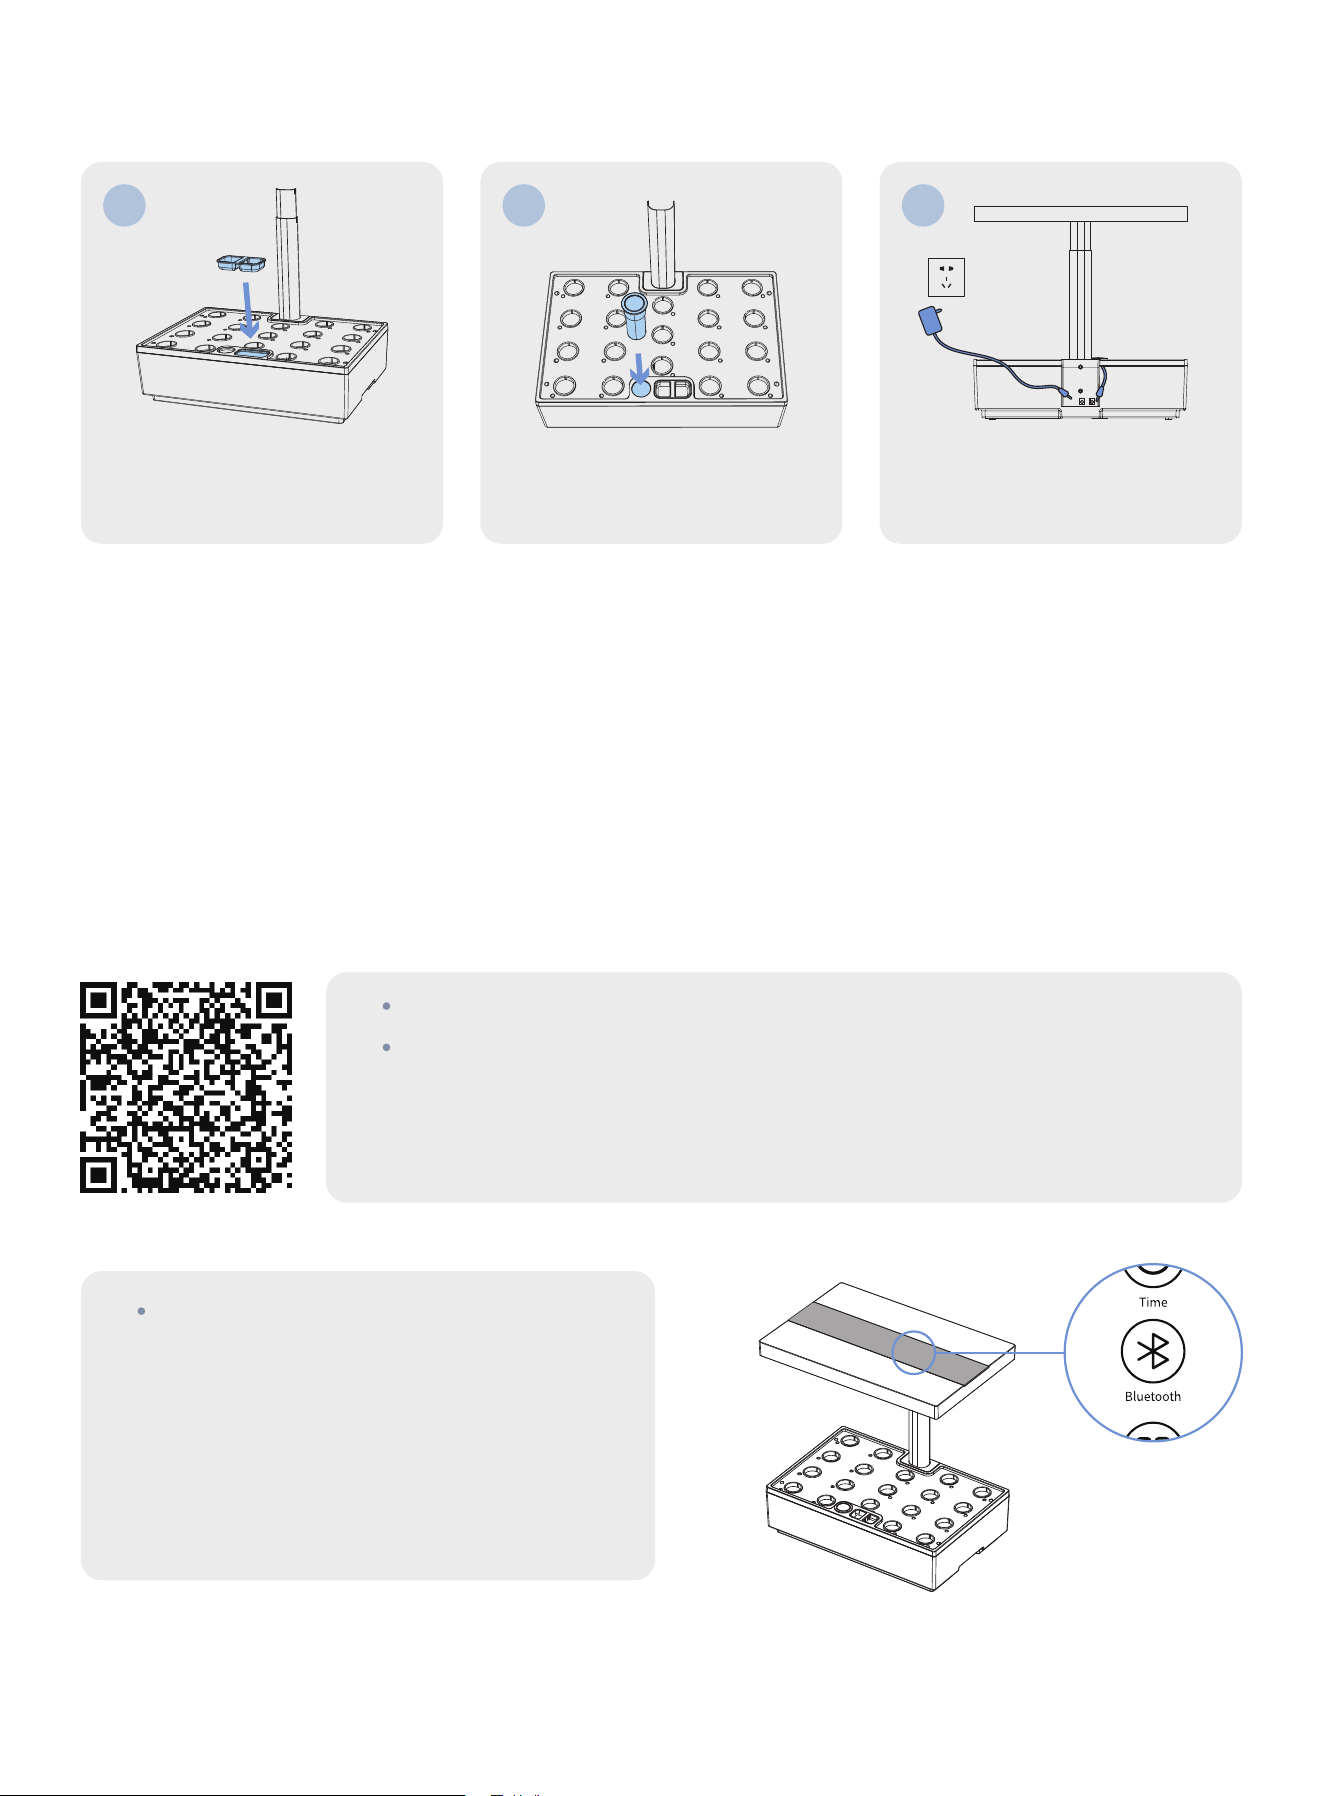
Snap the water cover into place.
� �
Remove the components from inside
the water tank and install the water
level float as shown in the picture.
�
Insert the water pump's power cord into
the DC jack on the back of the water
tank, then connect the power adapter.
Device User Guide (App)
03
You can control this device using the EzyCrop app or the buttons on the display
screen. We recommend using the app for easier operation. To use the device
without the app, skip to Step ��.
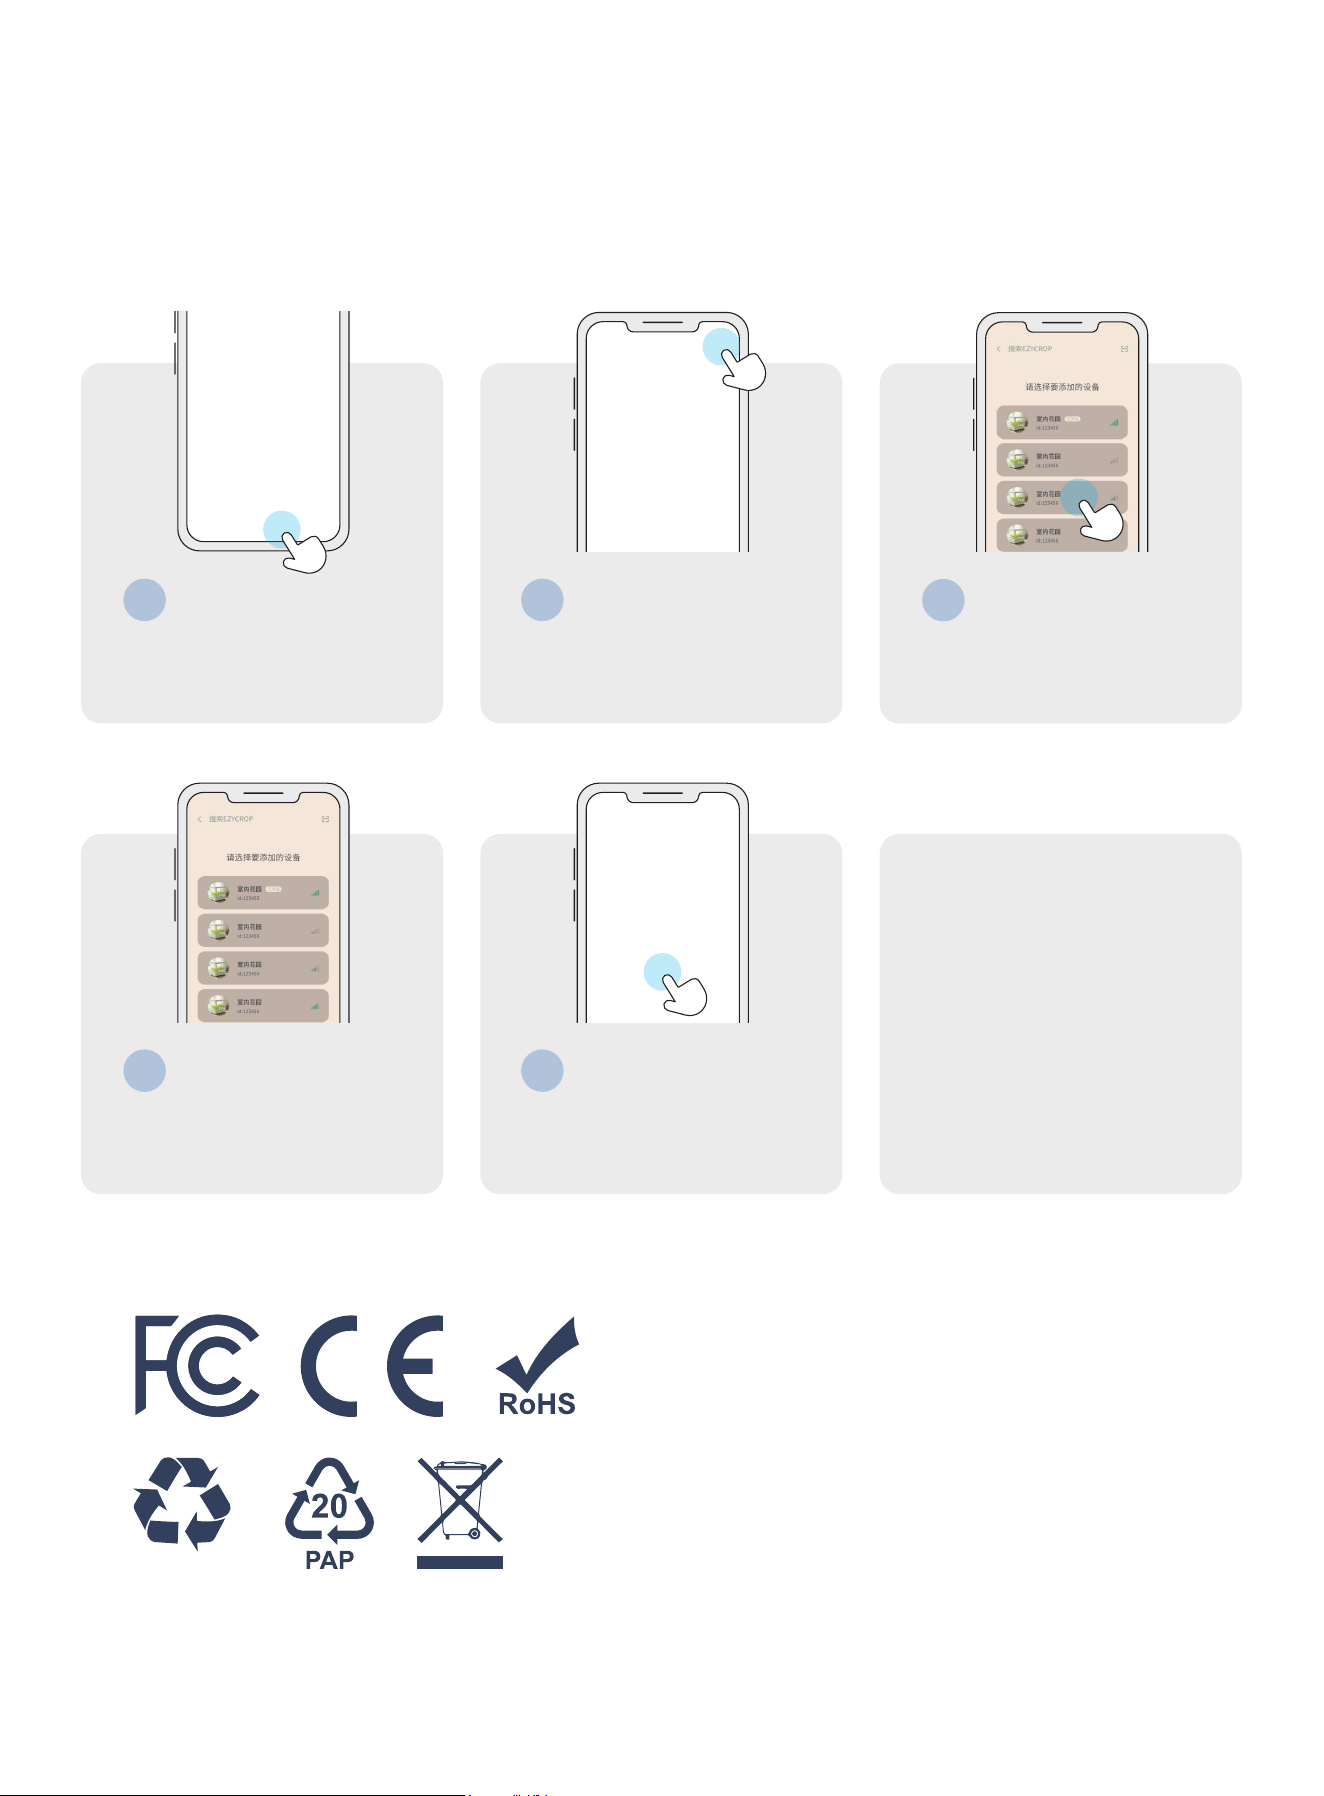
You can scan this QR code or directly search EZYCROP on Apple store or Google play to download the App.
Open the EZYCROP App and follow the guidelines below to setup the network.
If the App Store requests mobile phone authorization, it is because the App includes a free plant diary feature that
requires photo access. This authorization is used solely for the App's functionality.
Long press Bluetooth button for � seconds, and pair with
the App after the beep.
Wi-Fi indicator solid on: Connection established.
Wi-Fi indicator flashing (wave pattern): Connection failed / Not
connected.
Setup the Network
04
�
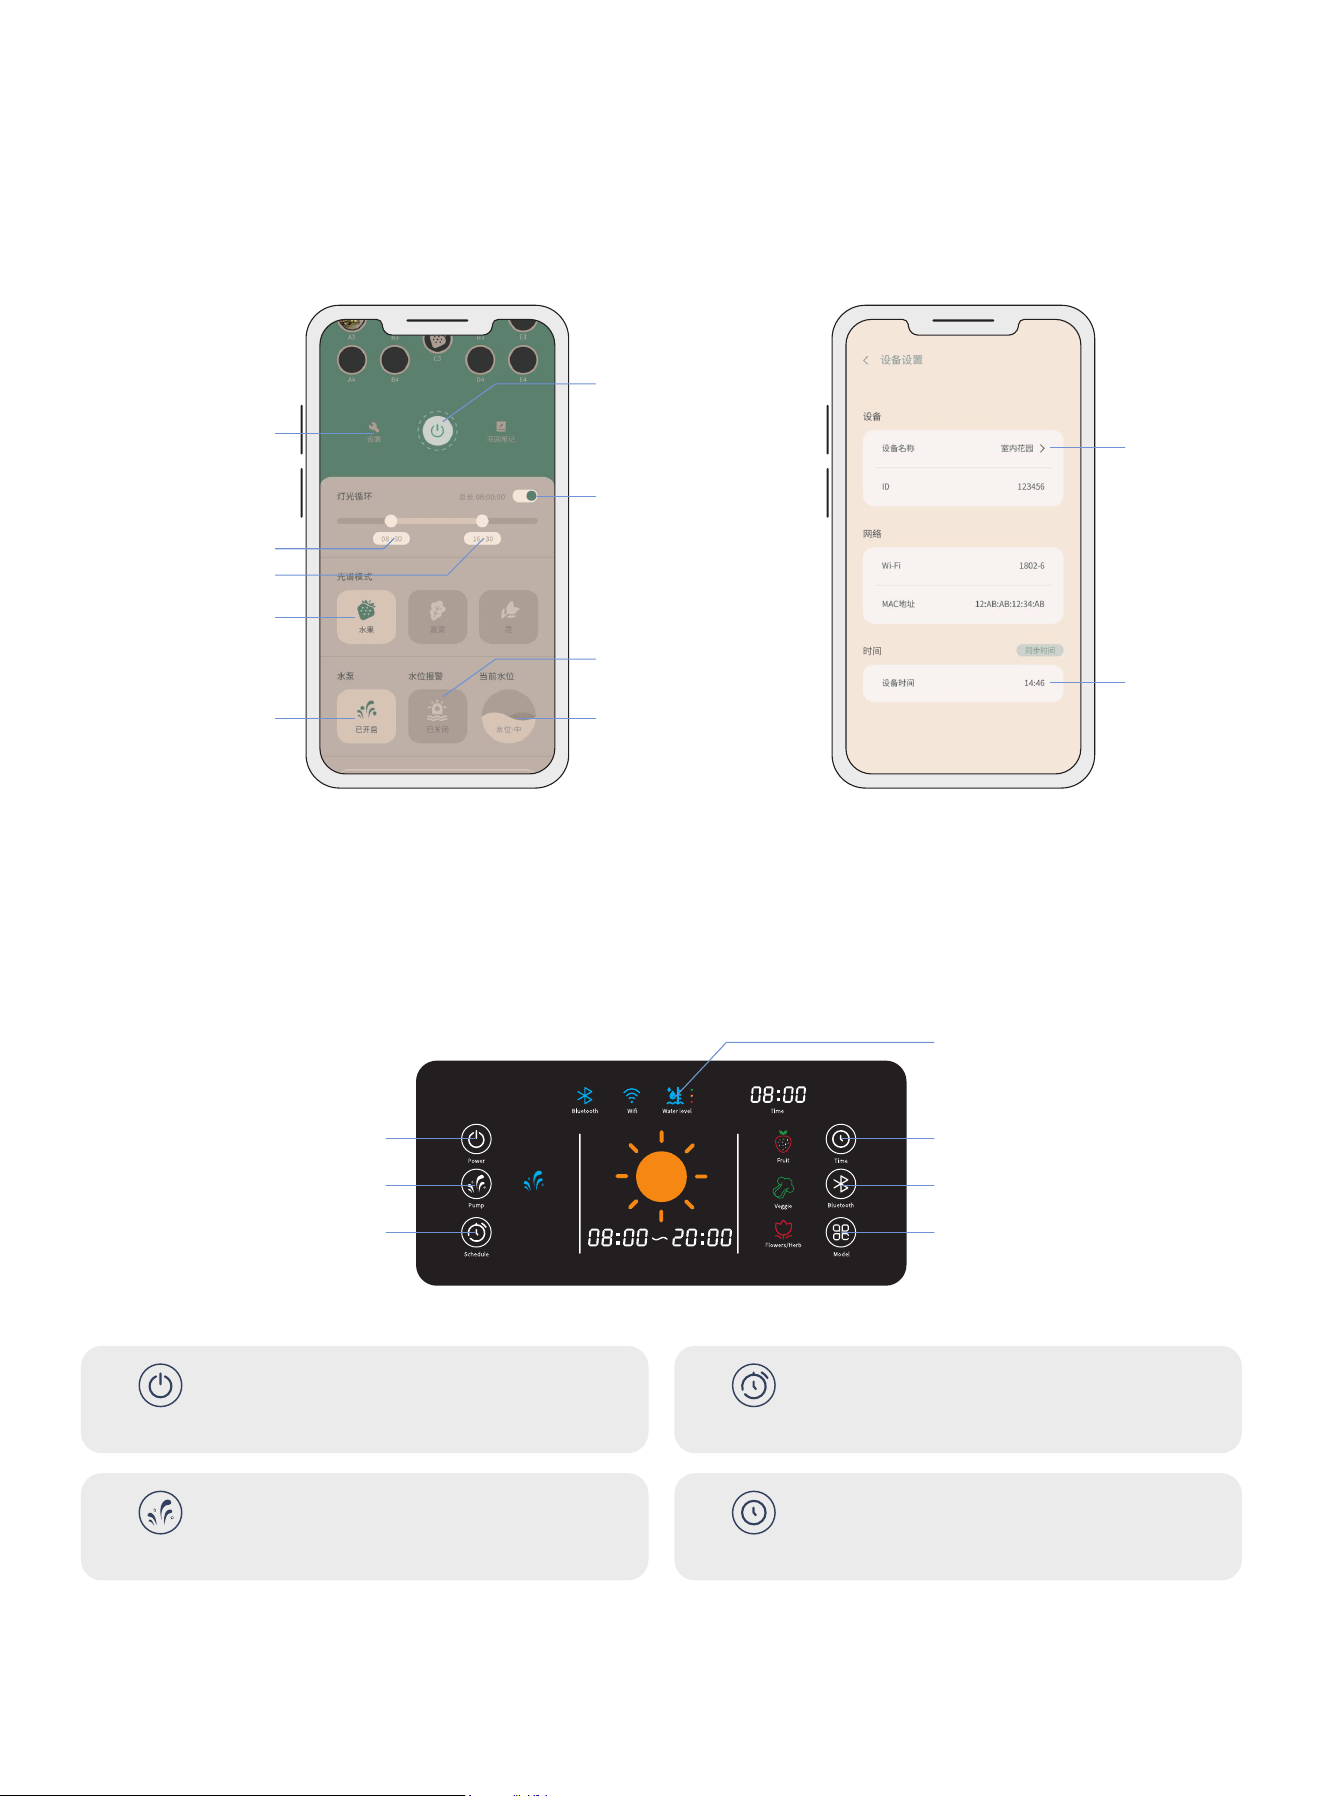
On the home screen, tap “Devices” at
the bottom.
Device Dashboard
Tap the “+” icon to start searching for
nearby devices.
�
Add Device
�
Choose HG��-BW from the list to start
pairing. Please keep your phone close
to the device.
Select Your Device
�
Select a Wi-Fi network to connect your
device, and enter your Wi-Fi
password.
Connect to Wi-Fi
If you are unable to successfully connect to
the Wi-Fi, please check the following:
A. Ensure that you have entered the correct
Wi-Fi password. Double-check that the
password in the input field is accurate,
including letter case and length.
B. Contact your router service provider to
check if your network combines both �GHz
and �.�GHz frequencies. If it does, ask them
to split your Wi-Fi into two separate SSIDs
with different passwords. This will ensure
that the device connects to the �.�GHz
Wi-Fi.
Tap device to open the control page.
�
Get Started
PLEASE RECYCLE
Control with the App
05
Light Start Time
Model
Settings
Water Pump On/Off
Light Finish Time
Power On/Off
Low Water Level Alert
On/Off
Light Switch
Water Level
Name
System's
Current Time
Device User Guide (Touch Panel)
(On the top of the light panel)
06
Power On/Off
Water Pump
Schedule
Time
Water Level
Bluetooth
Model
Upon successful connection, the device will emit a beep.
Press the 'Power' button to turn on the LED light. It will
automatically switch to 'Fruits' mode for the first use. For
subsequent uses, it will resume the last selected mode.
Power On/Off
The water pump icon stays lit when paused, and flashes
when the pump is running.
Water Pump
Set a personalized ��-hour cycle for your indoor garden.
Simply program the desired operating hours for the light and
water pump. The device will automatically follow your
schedule, turning on and off at the exact times you set to
maintain an optimal growing environment.
Schedule
Set the system's current time to ensure your scheduled
lighting and watering cycles run accurately. Adjust the hours
and minutes to match your local time.
Time
Enable Bluetooth on your phone and connect to the device
through the App. This allows you to control all features and
receive real-time updates directly from your mobile device.
You can also capture photos of your plants' growth and share
them with the community to exchange tips and inspiration.
Bluetooth
Flowers, Herbs & Seed Breeding Mode: Ideal for the
blooming stage, growing herbs, and seed propagation.
Vegetables Mode: Suitable for the seedling stage of plants
and the full growth cycle of leafy greens.
Fruits Mode: Designed for the fruiting stage.
Model
Low Water Level Alert: Triggers an alert when water is
running low to remind you to refill.
High Water Level Display: Shows the current high water
level for easy monitoring.
Water Level
How to Plant
07
�
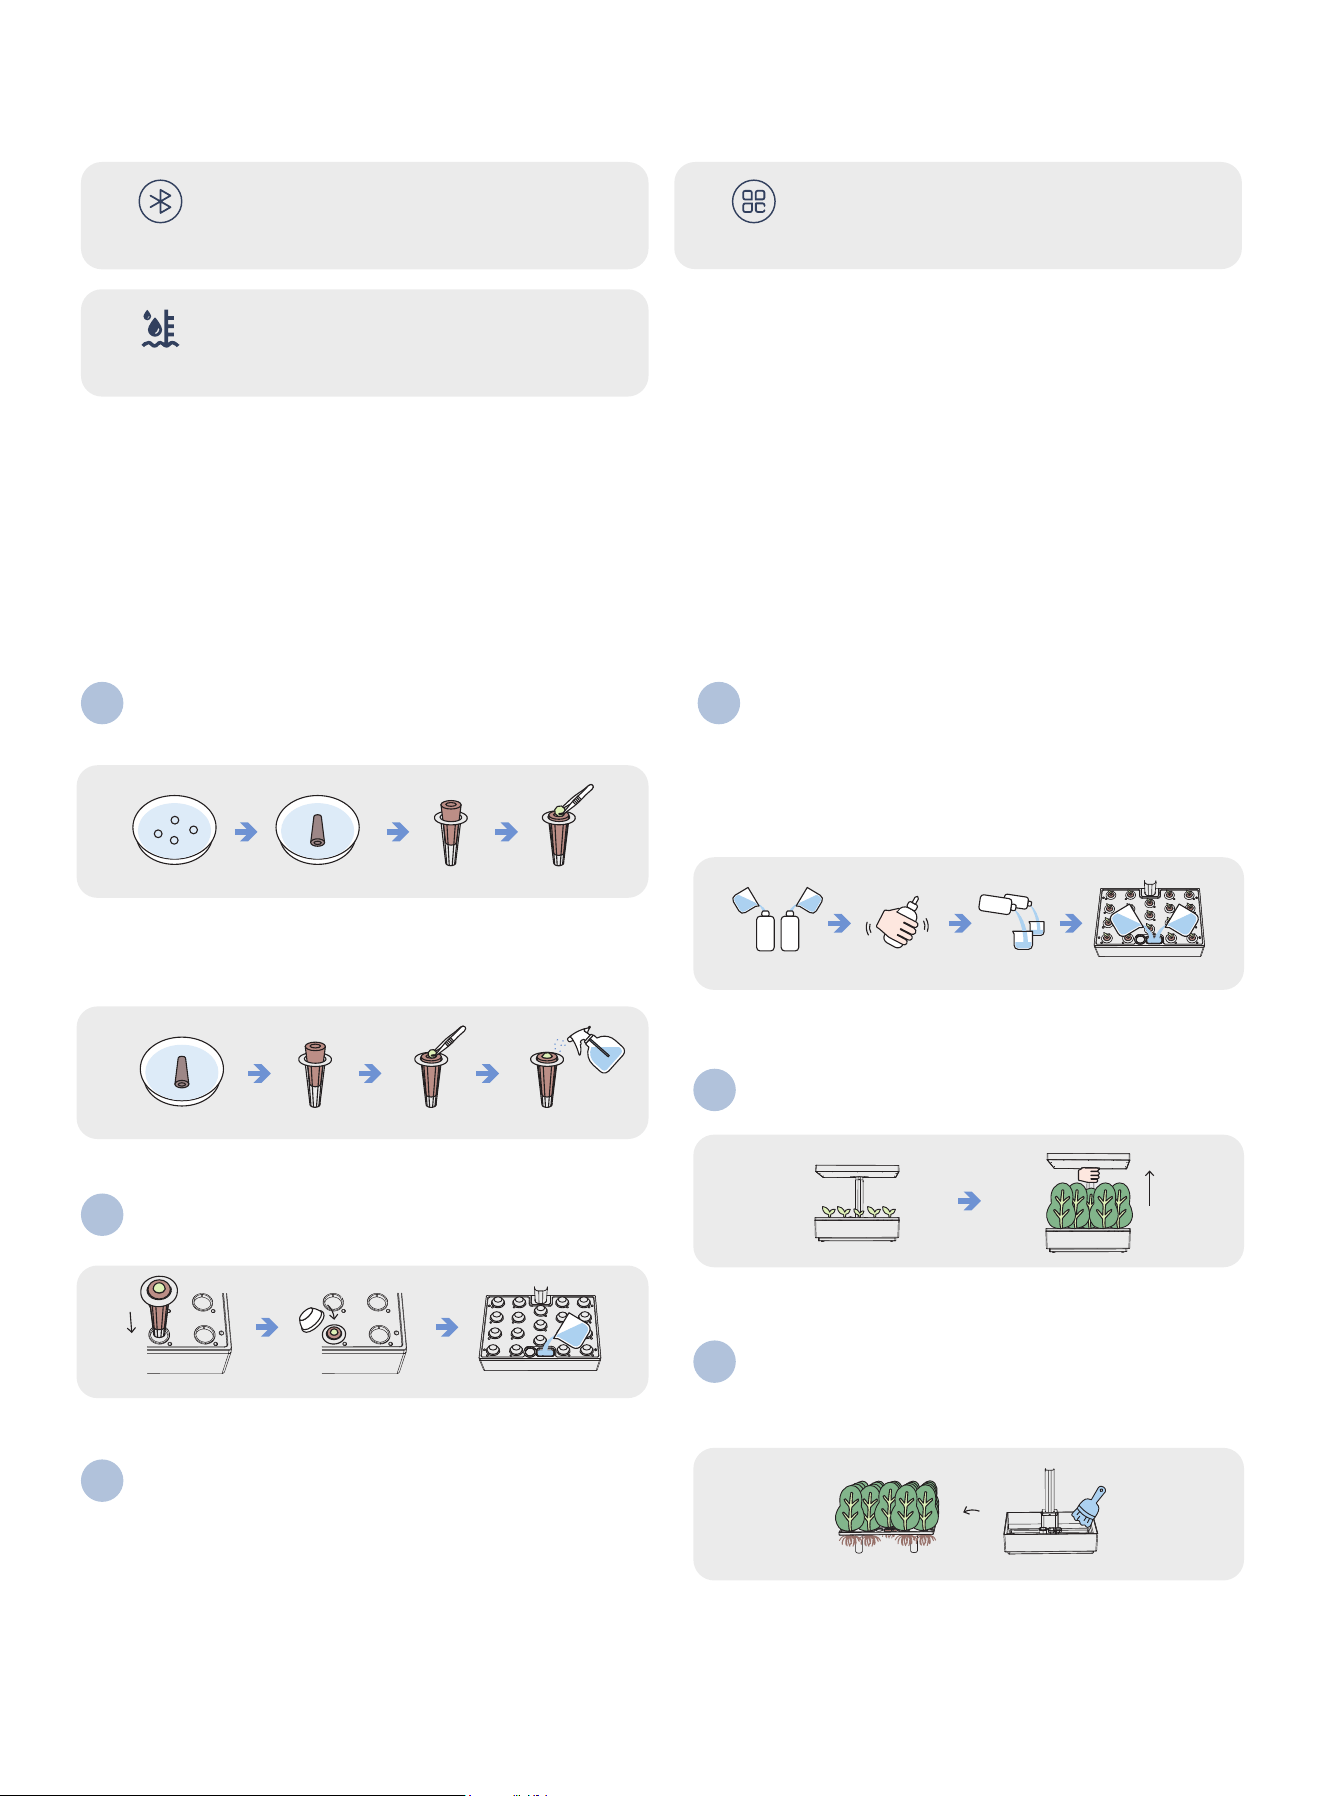
For large seeds like lettuce, basil, and tomato, soak them in water for
�-�� hours prior to planting. Use tweezers to place them onto soaked
sponges.
For small seeds like mint, petunia, and dianthus, use tweezers to
place them directly onto soaked sponges. Lightly mist the seeds to
keep them moist.
�
Insert the seed pod into the planting opening, attach the grow dome,
and fill with water up to the �L (Max) mark.
�
Tap the power button on the app to start the device. Select
'Vegetables Mode' during germination and sprouting, or switch to
'Flowers / Fruits Mode' for blooming and fruiting. If you are growing
herbs, simply select 'Herbs Mode'.
You can also set these modes directly through the touch panel.
�
The grow dome should be removed after seed germination.
After the seeds begin to sprout, add Plant Food A & B as needed to
support plant growth. Prepare the stock solutions by adding
���ml of purified water to the Fertilizer A and B bottles. When
adding nutrients to the system, the recommended ratio is ��ml of
Nutrient A and ��ml of Nutrient B per �L of water.
BA
A
B
B
A
A
B
A
�
The height of the light panel should be adjusted periodically to
accommodate plant growth.
�
When cleaning the water tank, if plants are already growing in the
grow deck, remove the grow deck from the unit and place it on the
support frames. This keeps the grow deck elevated and helps
prevent damage to the plant roots.
�
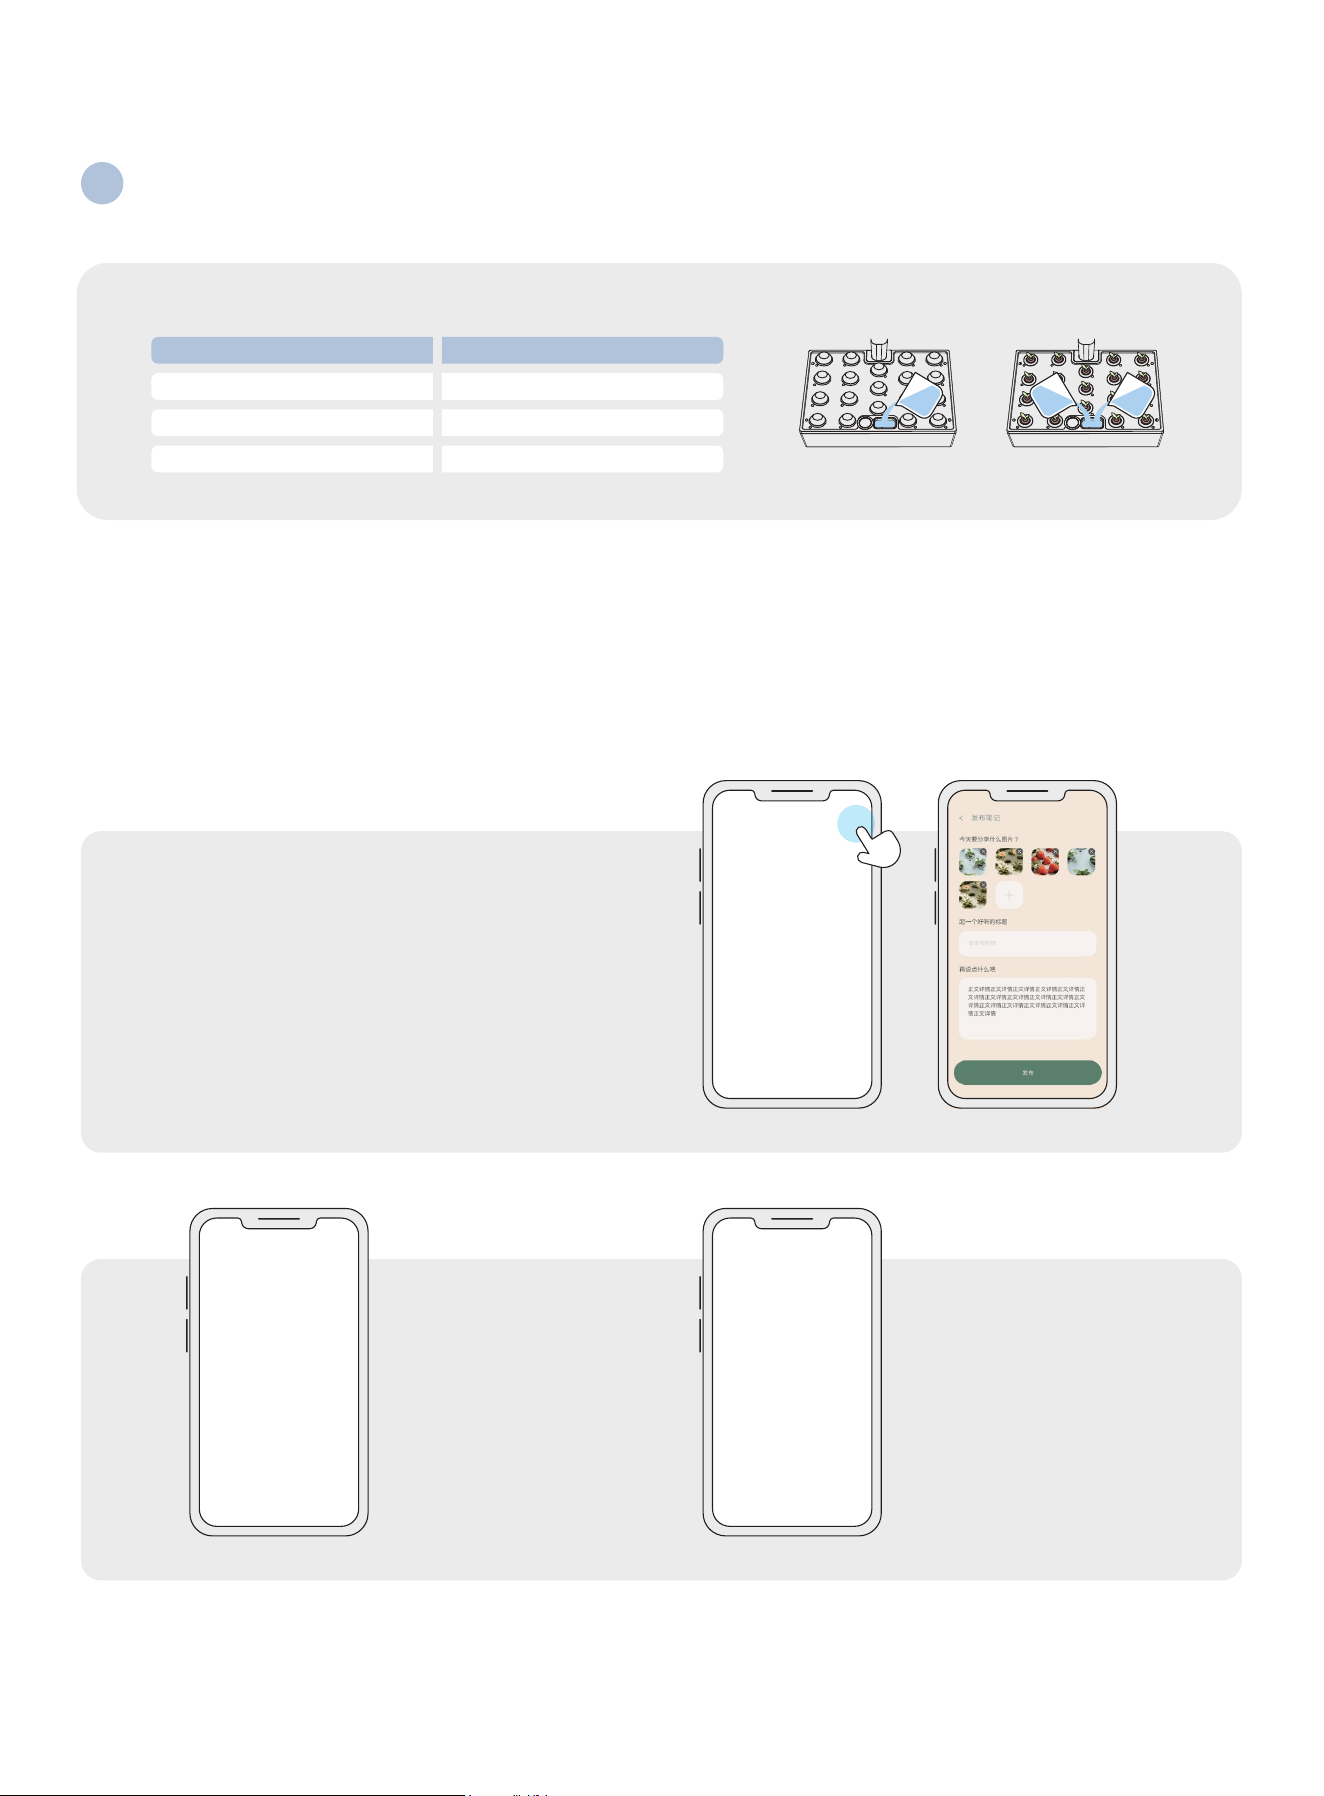
If the water level drops below �L, please add water and nutrients again. Refer to the proportion sheet for the correct mixing ratio.
You can accurately check the current water level by observing the position of the float indicator.
Nutrient Ratio Chart
Add Water Nutrient
�L �ml A + �ml B
�L ��ml A + ��ml B
�L ��ml A + ��ml B
B
A
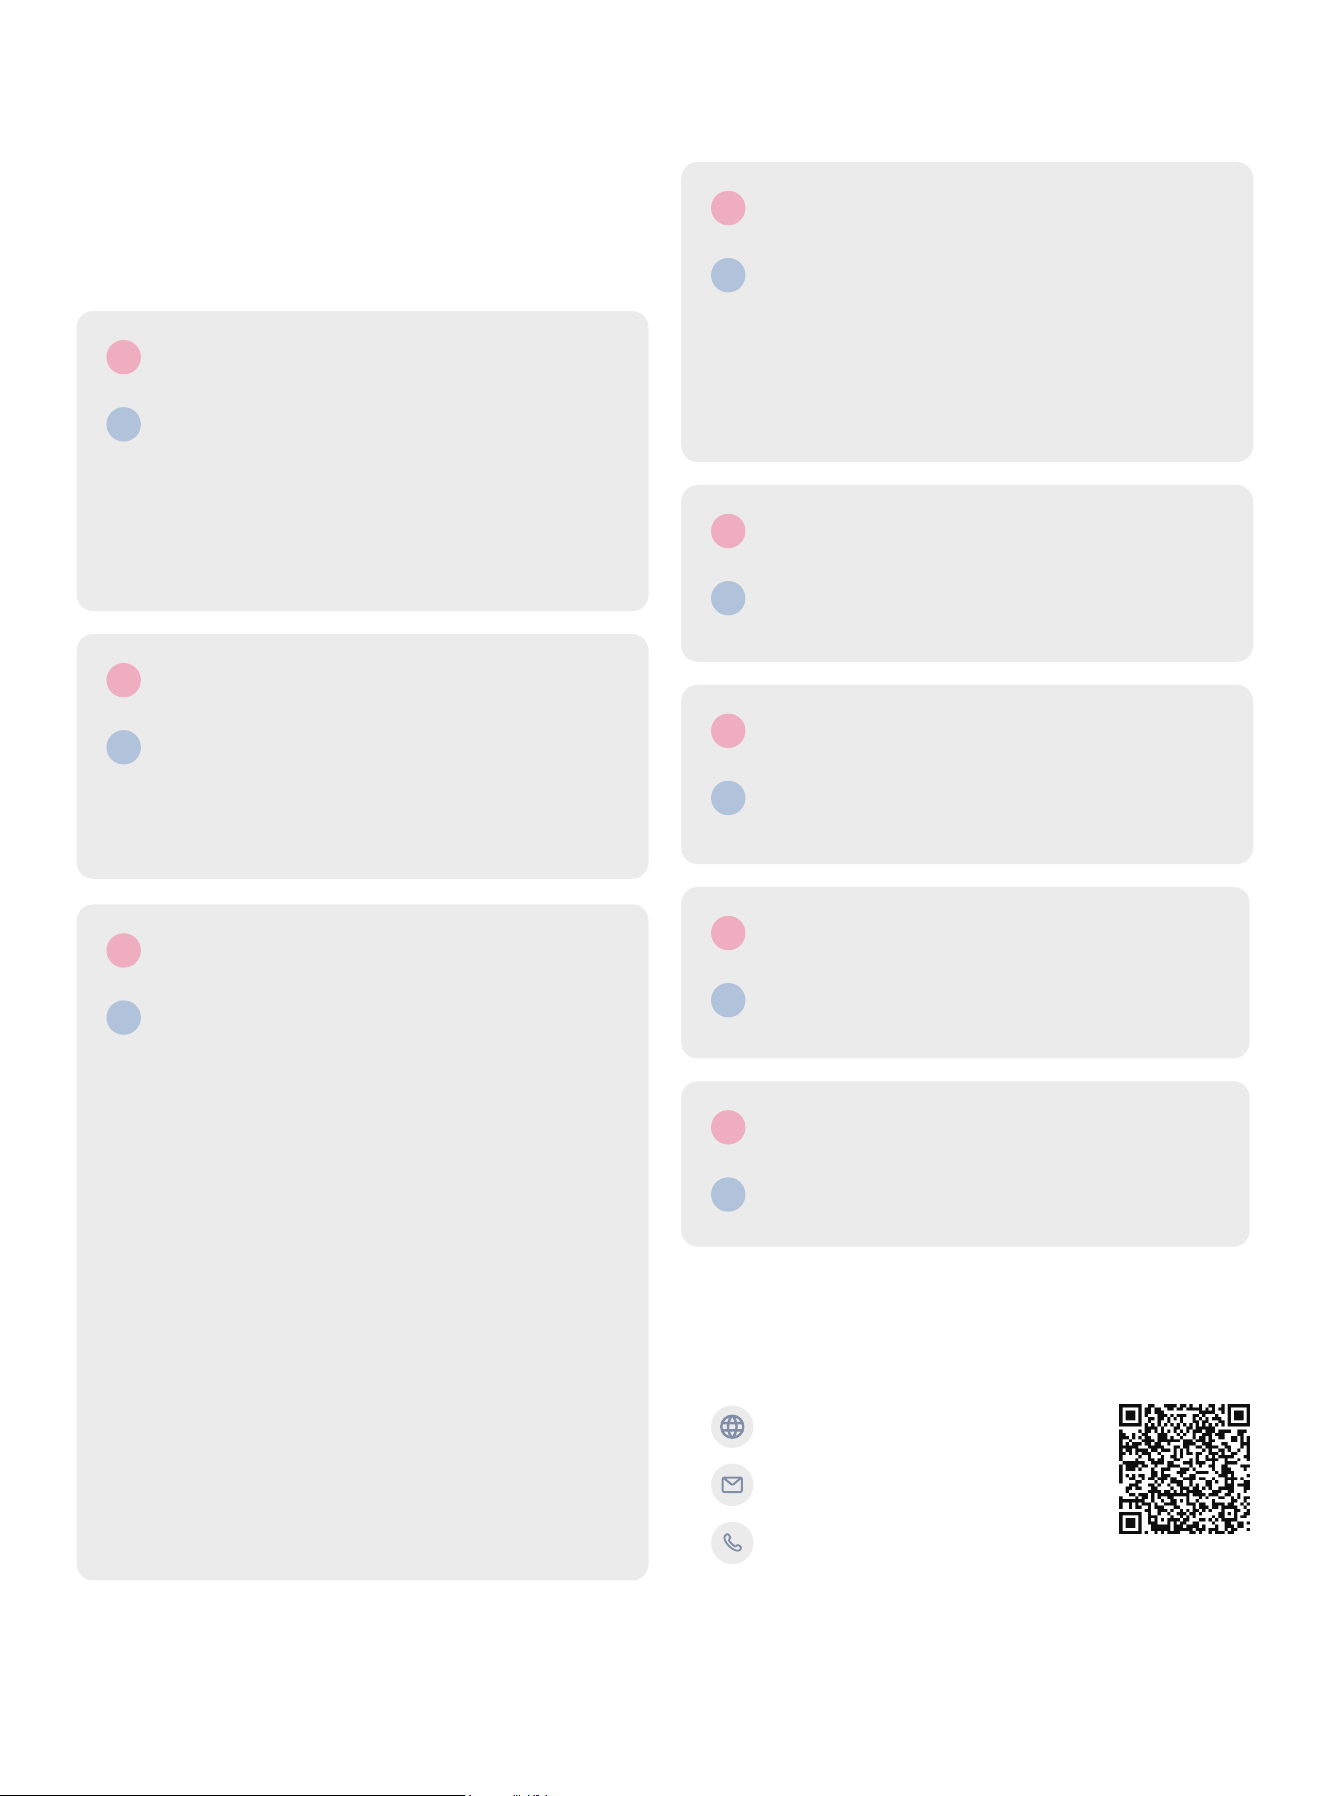
Share Your Growing Results
08
On the app home page, Tap the “+” icon to upload
photos and your story.
Share your planting photos
and progress in the
community, and connect with
fellow growers to exchange
tips and inspiration.
Swap tips with fellow indoor
farmers.
It’s not just a hobby; it’s a
movement.
Q
Why are only a few plants growing, or why are they wilting
quickly?
A
Seed-Related Questions: Seed quality plays an important role in plant
growth. For best results, we recommend using seeds from reputable
brands that are suitable for hydroponic growing systems and
appropriate for your indoor temperature conditions.
Planting & Operation Questions: If you are using manual mode, make
sure the plant food is mixed with water at the correct ratio. Avoid using
too much plant food, as an overly concentrated solution may affect
plant growth. Also, keep the LED grow light approximately � inches
above the plants.
Q
Can I transplant sponge-grown plants into other pots or my
garden?
A
Yes. Once the plant has developed strong roots, and you can see white
roots extending from the grow sponge, you may transplant it into
another pot or your garden.
Our grow sponges are made from biodegradable bio-carbon materials
that are designed to gradually break down in soil over time. For best
results, we recommend transplanting the plant together with the grow
sponge to help improve the survival rate.
FAQS
Q
Can the grow sponges be reused?
A
We do not recommend reusing the grow sponges, as they may not
work as effectively after the first use. Reusing sponges from previous
plants may also introduce bacteria or increase the risk of plant disease.
The white grow baskets and blackout covers can be reused after
thorough cleaning.
To support a more sustainable growing experience, we offer affordable
grow sponge refill packs at a discounted price in the same store where
you purchased your device.
Q
My water pump has weak water flow.
A
This may be caused by plant root debris or mineral buildup blocking
the pump. Please clean the water tank and pump area. If the problem
persists, contact our customer service team for assistance.
Q
Why is my water pump not working properly?
A
The water level may be too low. Please check the water level and add
water if needed. If the problem persists, please contact our customer
service team for assistance.
Q
How often should I clean the water tank?
A
We recommend cleaning the water tank after each growing cycle. This
helps remove plant debris, mineral buildup, and any residue left in the
tank.
Q
Will my settings be saved if the device loses power?
A
Yes. Your settings will be saved automatically and will remain after the
device is powered off or after a power outage.
Q
Why does mold or algae grow on the sponges, and how can
it be prevented or treated?
To help prevent and treat mold or algae buildup, follow
these steps:
A
Mold or algae growth is often affected by water quality, air humidity,
and seed quality.
To help reduce the risk of mold or algae, we recommend choosing
seeds carefully:
A. Check the expiration date or shelf life before purchasing seeds.
B. Avoid using seeds that appear white or green. For best results,
choose high-quality seeds with darker colors, such as gray, brown, or
black.
C. Check the surface of the seeds. Good-quality seeds usually have a
smooth, firm surface and a slight natural shine.
D. Look at the shape of the seeds. Well-formed, symmetrical seeds are
usually better for planting. Deformed or uneven seeds may indicate
poor quality or immaturity.
E. Purchase seeds from reliable brands or trusted distributors.
A. Fully drain and rinse the water tank. Discard any grow sponges or
plants that have come into contact with mold or algae. Clean any used
grow baskets and covers, and keep all accessories in the system clean.
B. During the planting and seedling stages, cover the grow sponge and
the top of the white grow basket with the included seed pod stickers.
Use blackout covers on any unused pods to help block light from
entering the water tank, as light exposure can encourage mold and
green algae growth.
www.ezycrop.shop
Customer Support
phoenix@ignovatech.com
+�� ���� ����
Download App
FCC Caution.
This device complies with part 15 of the FCC Rules. Operation is subject to the following two conditions: (1)
This device may not cause harmful interference, and (2) this device must accept any interference received,
including interference that may cause undesired operation.
Any Changes or modifications not expressly approved by the party responsible for compliance could void
the user's authority to operate the equipment.
Note: This equipment has been tested and found to comply with the limits for a Class B digital device,
pursuant to part 15 of the FCC Rules. These limits are designed to provide reasonable protection against
harmful interference in a residential installation. This equipment generates uses and can radiate radio
frequency energy and, if not installed and used in accordance with the instructions, may cause harmful
interference to radio communications. However, there is no guarantee that interference will not occur in a
particular installation. If this equipment does cause harmful interference to radio or television reception,
which can be determined by turning the equipment off and on, the user is encouraged to try to correct the
interference by one or more of the following measures:
-Reorient or relocate the receiving antenna.
-Increase the separation between the equipment and receiver.
-Connect the equipment into an outlet on a circuit different from that to which the receiver is connected.
-Consult the dealer or an experienced radio/TV technician for help.
*RF warning for Mobile device:
This equipment complies with FCC radiation exposure limits set forth for an uncontrolled environment. This
equipment should be installed and operated with minimum distance 20cm between the radiator & your body
.