QUICK START GUIDE
FIELDSENTINEL
™
ADD-A-DOG
®
COLLAR
with
2 WWW.SPORTDOG.COM
WELCOME
Thank you for choosing the SportDOG
®
Brand FieldSentinel
™
Add-A-Dog
®
Collar. With proper use, this system will help you train your dog
efficiently and safely.
The Quick Start Guide will get you and your dog started with this remote
training system. For the best experience, review this guide thoroughly.
For more detailed information, we recommend
visiting our online support page which provides
guidance for pairing your Collar and Handheld,
information on the Collar stim ranges, etc. You can
easily access it by scanning the QR code provided.
To get the most protection out of your warranty and to be notified for
critical updates, please register your product within 30 days at
www.sportdog.com. By registering and keeping your receipt you will
enjoy the product’s full warranty and, should you ever need to call
the Customer Care Center, we will be able to help you faster. Most
importantly, your valuable information will never be given or sold to
anyone. Complete warranty information is available online at www.
sportdog.com.
OTHER IMPORTANT INFORMATION
Use of this product implies acceptance of any and all terms, conditions,
and notices related to this product including, but not limited to, those
found in this Quick Start Guide and the Insert containing important
Regulatory Compliance and Safety information.
2 WWW.SPORTDOG.COM 3WWW.SPORTDOG.COM
STEP 1: CHARGE YOUR COLLAR
4
hrs
FPO
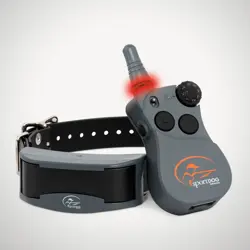
To power the Collar ON, press and release the power button. The Collar
will beep and the Indicator Light will flash blue then green or red
depending on the battery status. After several seconds, the health sensor
lights will glow steady green.
To power OFF, press and hold the button until the Collar beeps and light
is red.
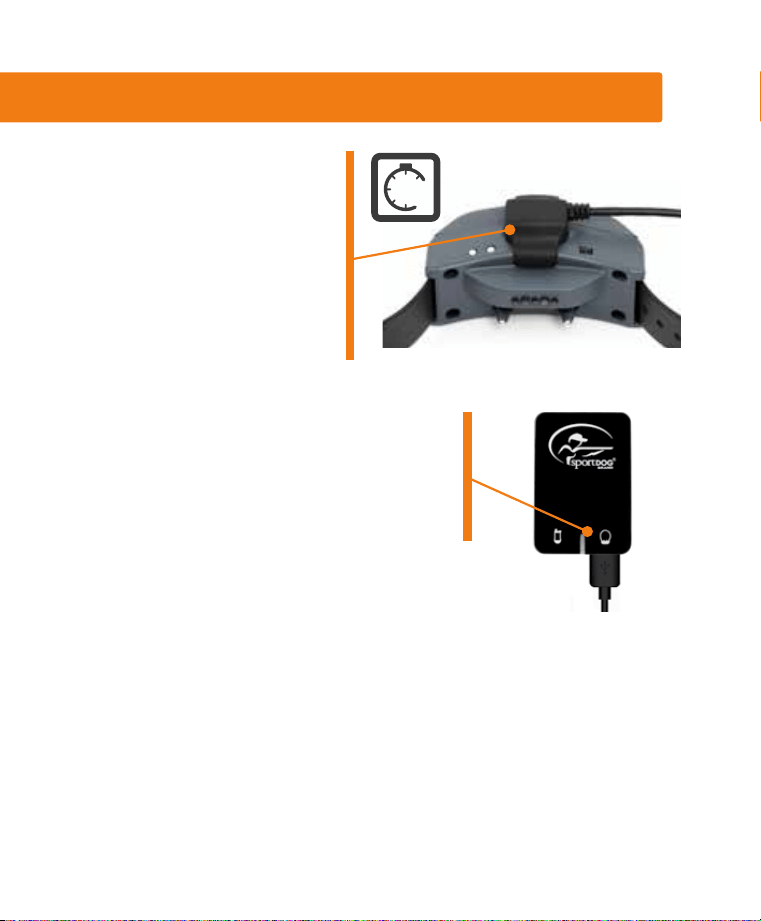
1. Snap the charging clip on
the Collar by aligning the
brass contacts on the clip
to the connection points on
the Collar and matching
up the SportDOG
®
logos.
The Collar takes 4 hours to
charge.
2. Connect the USB end on the charging
cable to the wall adapter and plug into a
standard wall outlet. The Collar Indicator
Light will be solid green while charging
and flash green when fully charged.
4 WWW.SPORTDOG.COM
STEP 2: FIT THE COLLAR ON
YOUR DOG
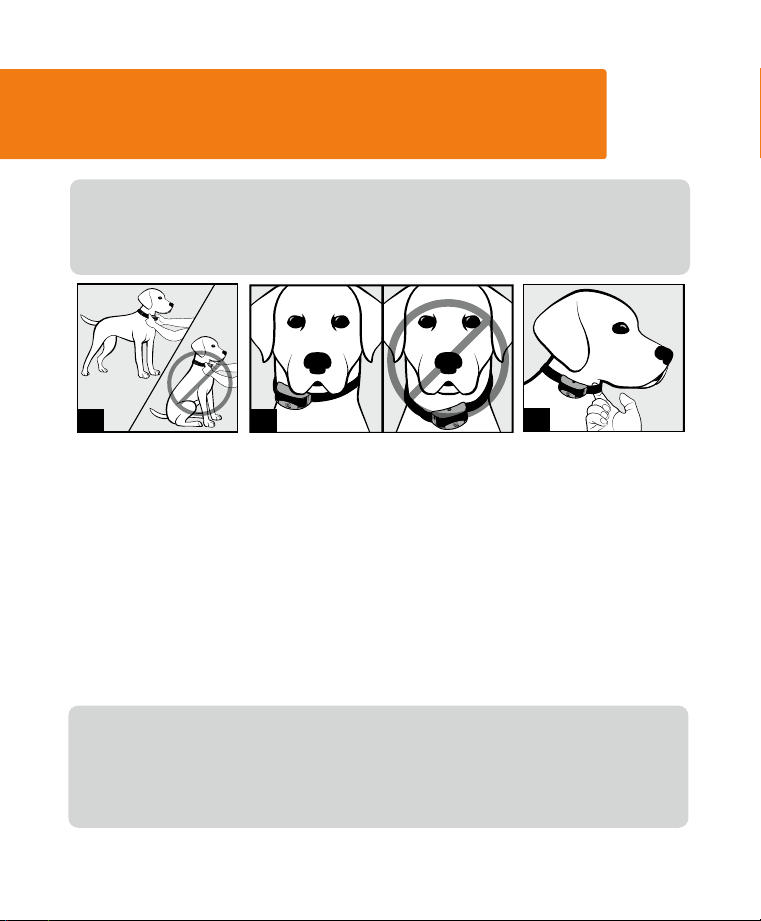
PROPER FIT AND PLACEMENT OF THE COLLAR IS IMPERATIVE FOR
EFFECTIVE TRAINING AND USE. THE HEALTH SENSORS AND CONTACT
POINTS MUST HAVE DIRECT CONTACT WITH YOUR DOG’S SKIN.
1
2
3
1. Your dog should be standing comfortably while fitting the collar.
2. Position the collar as high as possible on your dog’s neck and slightly
to either side, not directly centered. Buckle the collar so that it fits
snuggly.
3. You should only be able to fit one finger between the strap and your
dog’s neck. This will help ensure the health sensor and the contact
points are both touching your dog’s skin. If your dog has a long or
thick coat, trim the hair around the contact points to ensure contact
with the skin.
Check the fit again after your dog becomes more comfortable wearing it
and adjust as necessary.
NOTE: If using an additional Collar (such as GPS), it should be located
beneath this training collar.
4 WWW.SPORTDOG.COM 5WWW.SPORTDOG.COM
STEP 3: HOW TO CHANGE THE
HANDHELD MODE
Your FieldSentinel
™
Handheld has multiple 2-Dog operational modes to
allow you to select the best match for your type or style of training.
Should you choose to update your FieldSentinel Handheld mode to
something other than Mode 1 in the Toggle Switch UP position, refer to
the mode chart on the following page and use the below steps. Otherwise,
move to STEP 4 to match both Collars to your system.
TO CHANGE THE MODE
1. Adjust both the Intensity Dial and Toggle Switch
to match your desired mode from the chart on
page 6.
2. Turn the Remote Transmitter over and remove
the belt clip (if attached).
3. Using a pen or the tine on the buckle of your
collar strap, press and release the Mode
Button. When the Mode Button is pressed, the
Transmitter Indicator Light will be solid in color.
When it is released, it will flash a number of
times that corresponds to the mode selected.
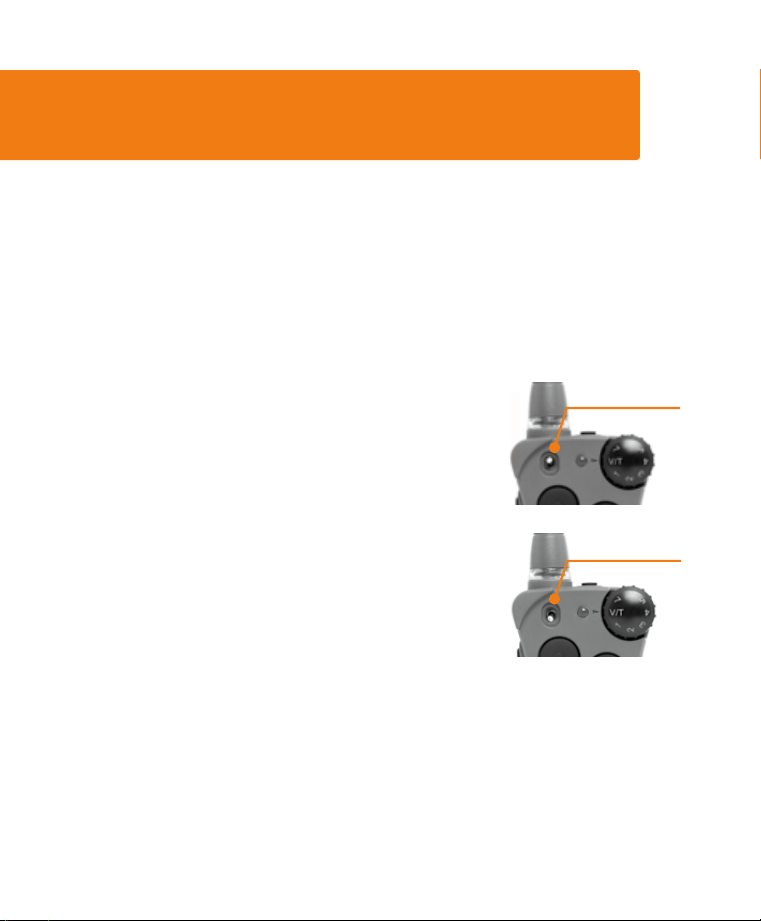
For example, if mode 6:a is desired, switch the toggle to the a position
and adjust the Intensity Dial to Level 6. Once the Mode Button has been
depressed, the Transmitter Indicator Light will be solid, and once the
Mode Button is released, the Handheld Indicator Light will flash 6 times.
TOGGLE SWITCH
IN THE
a POSITION
TOGGLE SWITCH
IN THE
b POSITION
6 WWW.SPORTDOG.COM
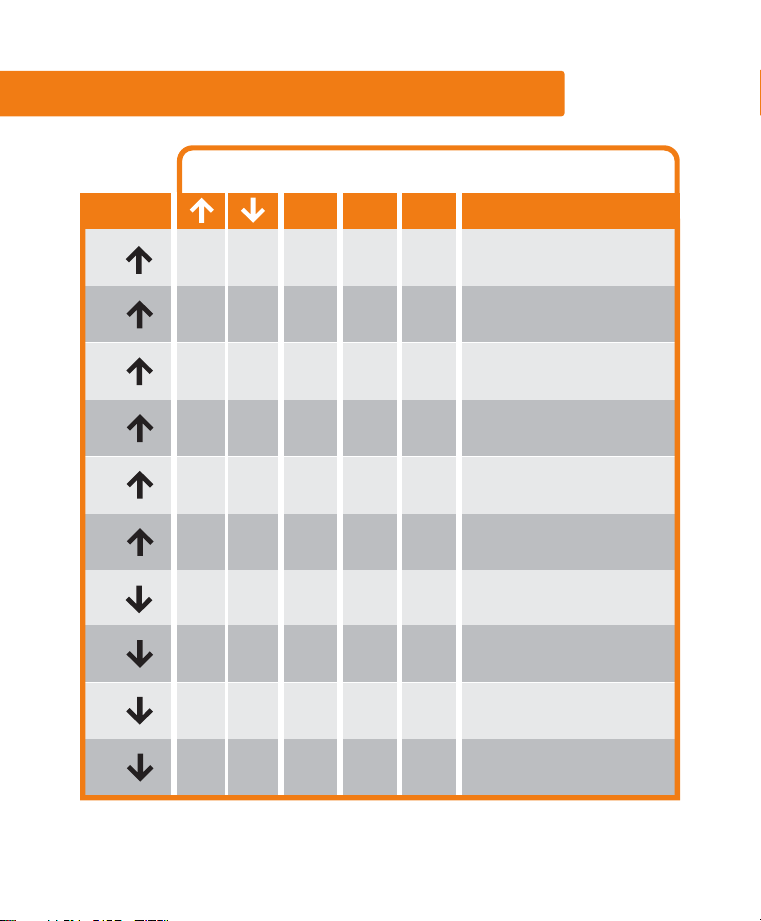
MODE CHART: 2-DOG MODES
1
D1 D2
C
If dial is set to V/T,
all buttons are TONE
If dial is set to V/T,
all buttons are VIBE
If dial is set to V/T,
button B is TONE
D1 D2
D1 D2 T C V
D1 D2 V C T
2
3
4
MODE
BUTTON FUNCTIONS
B CA
NOTES
1
D1 D2 T C M
If dial is set to V/T,
buttons B & C are VIBE
If dial is set to V/T,
buttons B & C are TONE
D1 D2 V C M
D1 D2 T R C
D1 D2 V R C
D1 D2 T R M
D1 D2 V R M
2
3
4
5
6
HIGH
C
MEDIUM
C
LOW
C
HIGH
C
MEDIUM
C
LOW
If dial is set to V/T,
buttons B & C are VIBE
If dial is set to V/T,
buttons B & C are TONE
If dial is set to V/T,
buttons B & C are VIBE
If dial is set to V/T,
buttons B & C are TONE
If dial is set to V/T,
button B is VIBE
6 WWW.SPORTDOG.COM 7WWW.SPORTDOG.COM
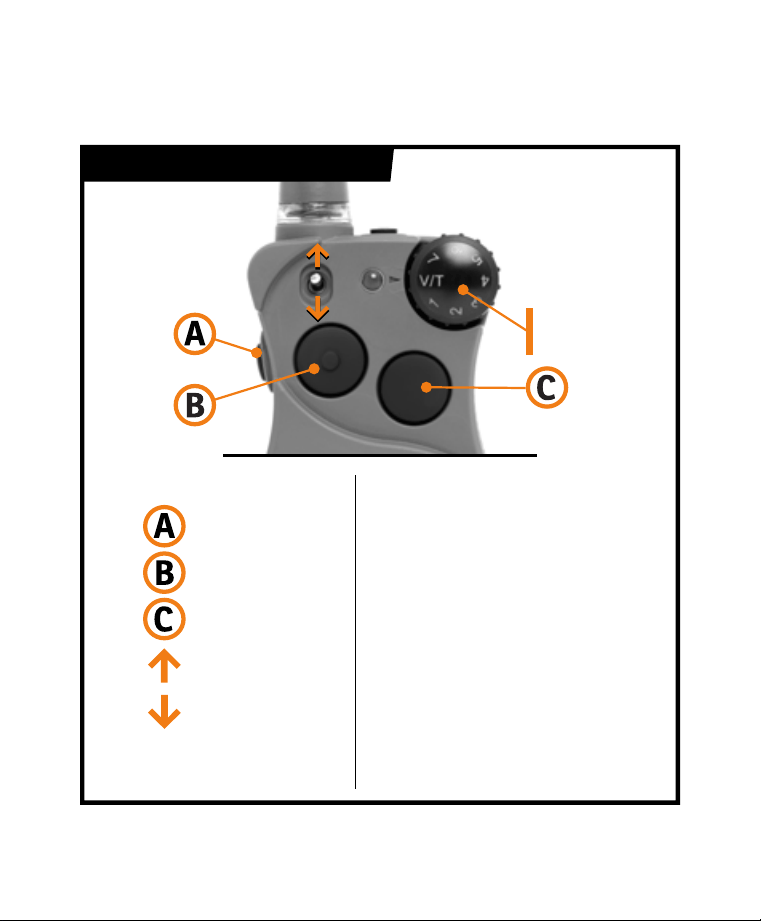
MODE CHART LEGEND
Side Button
1-7
V/T
D1/D2
C
R
M
T
V
Upper Button
Lower Button
Toggle Up
Toggle Down
Intensity Dial
set to V/T
Intensity Dial set to
a number, 1-7
Dog 1 or Dog 2
Continuous Static Stim.
Rising Static Stim.
Momentary/Nick
Static Stim.
Tone
Vibe
INTENSITY
DIAL

8 WWW.SPORTDOG.COM
STEP 4: PROGRAM THE SYSTEM
FOR 2-DOG OPERATION
A SportDOG
®
Add-A-Dog
®
Collar (FS-AD) must be purchased to train an
additional dog with your FieldSentinel
™
system.
TWO-DOG OPERATION
SportDOG Collars can be set to respond to either the a or b toggle
position on the Remote Transmitter. Once you have a multi-dog mode
selected, make sure the Toggle Switch is in the a position to program the
first collar using these steps:
1. Turn off the Collar Receiver.
2. Press and hold the On/Off Button on the Collar. The Indicator Light
will come on, then turn off in 4-5 seconds. If the On/Off Button is
released too early, the Indicator Light will begin its normal flashing.
If this occurs, start over from beginning.
3. After the Indicator Light has turned off, release the On/Off Button.
4. Press and hold the Upper Button on the Handheld until the Collar
Indicator Light flashes 5 times. If the Collar Indicator Light does not
flash 5 times, start over from beginning.
5. To program the second Collar, repeat Steps 1 through 4, but with the
toggle switch in the b position.
NOTE: Should you wish to raise or lower the stim range
setting on either collar, detailed instructions can be
found on our support site. Scan the QR code found here.

8 WWW.SPORTDOG.COM 9WWW.SPORTDOG.COM
BATTERY
This Collar operates on one Li-Ion battery pack. Only replace with battery
received from the Customer Care Center.
• Batteries should never be removed from the battery compartment for
charging.
• Rechargeable Lithium Ion (Li-Ion) batteries are not memory sensitive, do not
require depletion before charging, and cannot be over charged.
• The battery comes partially charged from the factory, but will require a full
charge before the first use.
• When storing the unit for long periods, remember to regularly give batteries
a full charge. This should be done once every 3 to 4 months.
• You should expect hundreds of recharge cycles from your battery. However,
all rechargeable batteries lose capacity over time relative to the number of
recharge cycles they experience. This is normal. If your operating time drops
to half of the original life, contact the Customer Care Center to purchase a
new battery.
• The battery should last for a period of 3-5 years. When a battery needs
replacement, you can order a new pack by contacting our Customer Care
Center.
AT END OF PRODUCT LIFE, USE THESE BATTERY REMOVAL INSTRUCTIONS FOR
FINAL DISPOSAL (DO NOT OPEN THE COLLAR UNTIL YOU HAVE RECEIVED THE
REPLACEMENT):
• Using a 3/32 Hex Key for your Collar, remove the case screws.
• Remove the case back or cover.
• Remove the old battery pack.
These instructions are not valid for repair or battery replacement. To avoid
invalidating your warranty, please contact the Customer Care Center for help in
replacing your battery with one that is specifically approved by Radio Systems
Corporation.

10 WWW.SPORTDOG.COM
SKU number: FS-AD
Collar - FCC ID: KE3-3003444, IC: 2721A-3003444
Contains: FCC ID: QOQ-GM240S, IC: 5123A-GM240S
This equipment complies with FCC and RSS-102 radiation exposure limits set forth
for an uncontrolled environment and meets the FCC and RSS-102 radio frequency
(RF) Exposure Guidelines. This equipment should be installed and operated
keeping the radiator at least 20 cm or more away from person’s body.
Cet équipement est conforme aux limites d’exposition aux rayonnements de la
FCC et RSS-102 établies pour un environnement non contrôlé et respecte les
directives d’exposition aux radiofréquences (RF) de la FCC et RSS-102. Lors de
l’installation ou de l’utilisation de cet équipement, tenez-vous à plus de 20 cm de
distance du radiateur.
FCC
This device complies with part 15 of the FCC Rules. Operation is subject to the
following two conditions: (1) This device may not cause harmful interference, and
(2) this device must accept any interference received, including interference that
may cause undesired operation.
NOTE: This equipment has been tested and found to comply with the limits
for a Class B digital device, pursuant to part 15 of the FCC Rules. These limits
are designed to provide reasonable protection against harmful interference
in a residential installation. This equipment generates, uses, and can radiate
radio frequency energy and, if not installed and used in accordance with the
instructions, may cause harmful interference to radio communications. However,
there is no guarantee that interference will not occur in a specific installation. If
interference does occur to radio or television reception, which can be determined
by turning the equipment off and on, the user is encouraged to try to correct the
interference by one or more of the following measures:

10 WWW.SPORTDOG.COM 11WWW.SPORTDOG.COM
• Reorient or relocate the receiving antenna.
• Increase the separation between the equipment and the receiver.
• Connect the equipment to an outlet on a circuit different from that to which the
receiver is connected.
• Consult customer care, the dealer, or an experienced radio/TV technician for
help.
CAUTION: Modification or changes to this equipment not expressly approved
by Radio Systems Corporation may void the user’s authority to operate the
equipment.
IC
This device complies with Industry Canada licence-exempt RSS standard(s).
Operation is subject to the following two conditions: (1) this device may not
cause interference, and (2) this device must accept any interference, including
interference that may cause the undesired operation thereof.
Le présent appareil est conforme aux CNR d’Industrie Canada applicables
aux appareils radio exempts de licence. L’exploitation est autorisée aux deux
conditions suivantes : (1) l’appareil ne doit pas produire de brouillage, et (2)
l’utilisateur de l’appareil doit accepter tout brouillage radioélectrique subi, même
si le brouillage est susceptible d’en compromettre le fonctionnement.
©2023 RADIO SYSTEMS CORPORATION
Radio Systems Corporation • 10427 PetSafe Way • Knoxville, TN 37932
YU400-2556
SUPPORT.SPORTDOG.COM