
Read before use.
Retain manual for future reference.
Easy Guide to
Digital Camera

Table of Contents
Warnings
...............................................................................................
1
Precautions
.........................................................................................
1
About Camera
........................................................................................
2
System Requirements
.........................................................................
2
Camera Parts
.............................................
..........................................
2
Battery Charging
..............................................................................
5
Power On/Off
... ....................................................................................
6
Camera Settings
..................................................................................
6
Insert & Format Card
.......................................................................
8
Format Card
.. ............................
...........................................................
8
Camera Operation
...............................................................................
9
Fill Light
............................................................................................
10
Media Playback
...................................................................................
11
Connect to PC
.............................................................................
........
12
Charging Mode
.....................................................................................
12
Storage Mode
........................................................................................
12
Webcam
......... ... .......................................................................................
12
Wi-Fi App Guide
.... .............................................................................
13
Camera Care
...... ... ...............
.................................................................
13
Troubleshooting
..................................................................................
13
Supplementary Info
...........................................................................
14
WARNING
Reduce fire & electric shock risks:
1. Keep device away from rain and moisture.
2. No liquid containers (e.g. vases) on the device.
3. Keep batteries away from direct sun and heat sources.
4. Never swallow batteries to prevent chemical burns.
5. Store all batteries out of kids’ reach. Stop use if battery
compartment cannot close tightly.
6. See a doctor right away if a battery is swallowed or stuck
in body parts.
PRECAUTIONS
Wrong battery use may cause rupture, fire or chemical burns.
Follow rules below:
1.Do not take apart.
2.Do not squeeze, hit, drop or step on battery packs.
3.Avoid short circuits; keep metals off battery terminals.
4.Do not leave above 60°C (140°F), e.g. direct sun or hot
cars.
5.Do not burn batteries.
6.Do not touch damaged or leaking Li-ion batteries.
7.Keep battery packs away from children.
8.Keep battery surfaces dry.
9.Only use designated battery models to avoid burst, fire or
injury.
10.Discard old batteries as instructed.
11.Plug charger/adapter into nearby wall sockets. Unplug when
faulty. Power lights do not cut power off.
12.Do not use chargers in tight gaps between walls and furniture.
13.Restart app or replug USB cables if static/EMI breaks data
transfer
1
Camera Guide
System Requirements
PC specs for photo/video transfer:
. Intel Pentium 2.0GHz+; Windows XP or newer
. 2GB RAM, 40GB free disk, standard USB port
. 1GB+ GPU, 1080p or higher resolution
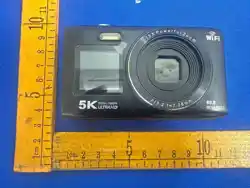
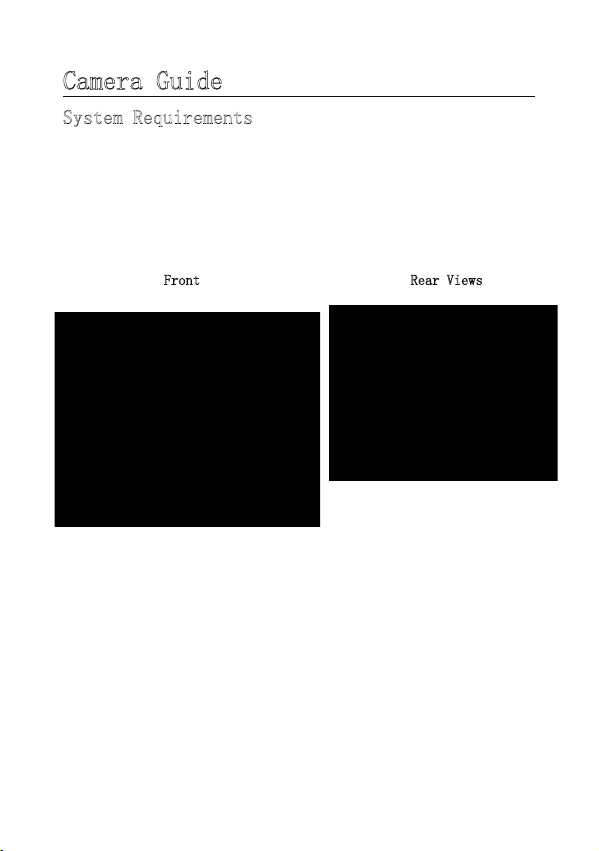
Front
Rear Views
1:1.3" Screen
2:Fill Light
3:Rear Lens
4:2.8" Screen
5:Power Indicator
6:Zoom In
7:Zoom Out
8:Up / Fill Light Shortcut
9:Right / DISP
10:OK / Mode Switch
11:Menu
12:Down / Playback / Delete
13:Dual Screen Toggle
14: QSET Quick Settings / Left
2

Camera Diagrams Bottom View
Left Side View
5:Type-C USB Port
3:Tripod Mount
4:Battery & SD Card Slot
1:Power Button
2:Photo/Record Button
3
Button/Indicator Functions
Power Button
Power On/Off
Short press to pause recording
Shutter Button
Take photos
Half-press to focus
Start/stop recording
Indicator Light Red: Charging / Blue: Working
“+” Zoom In / Volume Up
“-” Zoom Out / Volume Down
Up Button
Select Up
Turn fill light on/off
Right Button
Select Right
Double short press to lock screen
OK Button
Confirm
Open mode menu
Down Button
Select Down
Open media gallery
Delete files
Left Button
Select Left
Short press for quick settings
MENU Button Open/exit menu
Dual Screen Switch Short press to toggle front/rear display
USB Port
Charge via USB cable
Connect to computer via USB
4

Battery Charging
1.Open the battery cover, insert the battery in the
indicated direction, then close the cover.
2.Charge the camera with the supplied USB cable and a
5V/1A–5V/2A adapter.
*Red indicator light on while charging.
*Light turns off automatically when fully charged.
*Full charge takes about 2 hours.
*Fully charged battery supports around 70 minutes of recording.
5
Power On/Off Camera
Press the Power Button to turn on the camera.
Hold the Power Button for 3 seconds to power off.
Notes:Long press the Power Button to boot for first use.
Long press the Power Button to start after installing a new battery.
Camera Settings
Customize camera parameters via the menu.
Press the MENU Button after powering on to enter settings.
Menu Interface
1:
2:System Settings
6
Current Mode Submenu
MENU Button
Power Button
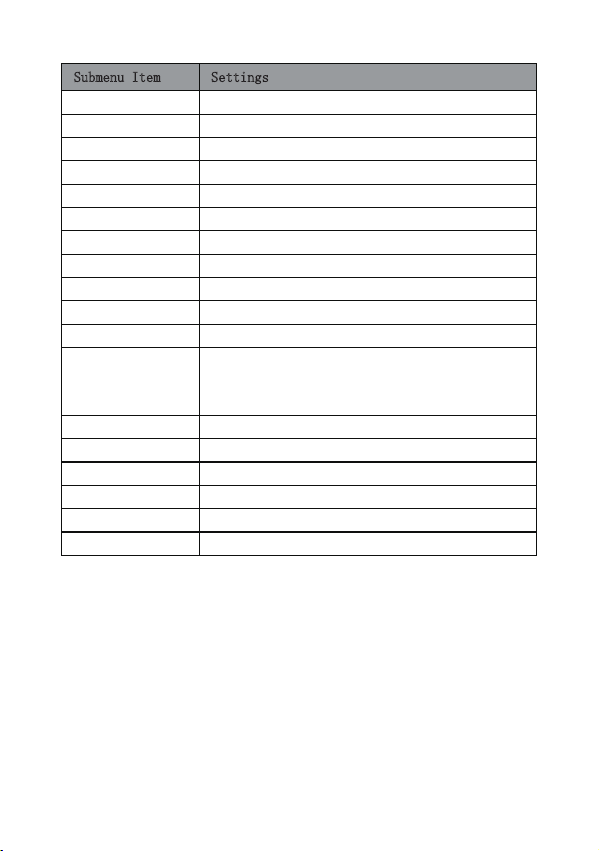
Submenu Item Settings
Image Rotation On / Off
Icon Display On / Off
Focus Mode Auto Focus / Manual Focus
Wi-Fi Hotspot On / Off
APP Guide Scan QR for tutorial
Light Frequency Auto / 50Hz / 60Hz
LED Indicator On / Off
Auto Screen Off Off / 30s / 1min / 2min
Auto Power Off Off / 3min / 5min / 10min
Beep Volume High / Mid / Low / Off
Power Tone On / Off
Language
Simplified Chinese, Traditional Chinese,
English, Japanese, Korean, Russian, German,
French, Italian, Spanish, Portuguese, Thai,
Dutch, Polish, Swedish, Romanian
Date Format Y/M/D, M/D/Y, D/M/Y
Time Setup Hour / Minute / Second
Date Setup Year / Month / Day
Format Storage Format / Cancel
Device Info Model & Firmware Version
Factory Reset Confirm / Cancel
7
Insert & Format Memory Card
Recommend Class 10 or faster memory card.
1.Insert the card in the indicated direction until you hear a click.
Insert card as shown, align
edges and corners.
2.Push the card inward to eject it automatically.
Format Memory Card
Format the card before first use.
Press MENU to open settings, switch to System Settings via
Left/Right button.
Scroll up/down to select Format, press OK to confirm formatting.
Note:
If the file system is incompatible, a prompt "Unsupported file
system, format now?" will pop up. Follow the steps above to
format the card.
8
Formatting erases all unrecoverable data. Back up important files
to PC first.
Camera Operation
Camera defaults to photo mode after power-on.
Press MODE to open mode selection. Navigate with arrow keys, press
MODE again to confirm.
Icon Mode Description
Video Standard video recording
Camera Take single photos
Slow Video Record slow-motion clips
Timer Photo Auto shoot after set seconds
Loop Video Overwrite old footage continuously
Burst Photo Take multiple photos in sequence
Time-lapse Compress long footage into short clips
9
Normal Video
Timer Photo Take single photo after set seconds
Each mode has its own menu. Select mode, press MENU to adjust
settings.
Press shutter to take photos, auto-saved to SD card.
In video mode: press shutter to start/stop recording; power button
pauses/resumes recording.
1:Shutter Button (Start/Stop Video)
Press once to record, press again to stop.
2:Indicator Light
Flashes during recording.
3:Digital Zoom Buttons
Zoom In / - Zoom Out
Fill Light
Video mode: Press Up key to turn fill light on/off quickly.
Photo mode: 3 flash modes, switch via Up key.
10
No Flash
Auto Flash
Force Flash

Note:Auto flash only triggers in dark environments; Force flash
stays on all the time.
Press playback button to view videos & photos on SD card, switch
files with left/right keys.
Current File / Total Files
Fig 1: Video Playback Fig 2: Photo Preview
1:Use +/- keys to zoom in/out when viewing photos.
Use +/- keys to adjust volume when playing videos.
2:OK: Play / Pause video
3:MENU: Check photo/video details
11
4:In playback mode, press MENU for multi-select delete. Use arrow
keys to select files, press OK to confirm, then MENU to delete.
5:Press to exit photo/video playback.
Connect to Computer
1. Connect camera Type-C port to PC USB port with the supplied
cable.
2. Camera powers on automatically with USB options. Select via
Up/Down keys and OK to confirm.
Charging Mode
Storage Mode
Webcam Mode
Camera can record normally. Power off for faster charging.
Storage Mode
Use camera as webcam for live streaming.
12
Wi-Fi APP Operation Guide
Wi-Fi APP Download
Note:When used as webcam, only digital zoom works; other functions
are unavailable.
WI
Press MENU → Left/Right to System Settings → Up/Down to
"APP Guide" → OK to view tutorial. Scan QR code to download APP.
Camera Care & Maintenance
(1)Remove battery for long-term storage; store ≤30°C
dry & dust-free.
(2)Fully discharge battery before storage to extend lifespan.
(3)Discharge fully at least every 3 months after full charge.
(4)Wipe lens/screen gently with soft clean cloth for dust/stains.
(5)Do not drop or subject camera to heavy impact/vibration.
Troubleshooting
Refer to this section for camera malfunctions.
1.
(1)Low battery: recharge or replace battery.
(2)Please check if the battery is inserted backwards.
(3)Battery insulating film not removed.
13
Camera fails to power on after battery insertion
2.Battery won’t charge
(1)Red charging light flashes: battery loose or poor contact.
Reinstall battery till light turns on (off when fully charged).
(2)No charging light: charger not connected properly, check wiring.
(3)Ambient temp below 10°C may slow or stop charging.
3.
Pressing buttons rapidly causes freezing. Remove battery to restart.
Tip: Do not tap buttons quickly while recording or shooting; a
waiting icon will show normally.
4.
(1)Use Class10 SD card, max 256GB.
(2)Check if card is inserted backwards.
(3)Format the card first when using on camera for the first time.
Additional Notes
(1)Do not insert foreign objects into card slot.
(2)Brief unstable screen after power-on is normal, not a fault.
(3)Color fringing at image edges comes from lens optics, not
malfunction.
(4)Warm SD card after long use is normal.
(5)Warm screen after long use is normal.
14
Camera freezes
SD card not detected

This device complies with part 15 of the FCC Rules. Operation is subject to the following
two conditions: (1) this device may not cause harmful interference, and (2) this device
must accept any interference received, including interference that may cause undesired
operation.
Any changes or modifications not expressly approved by the party responsible for
compliance could void the user's authority to operate the equipment.
NOTE: This equipment has been tested and found to comply with the limits for a Class B
digital device, pursuant to Part 15 of the FCC Rules. These limits are designed to provide
reasonable protection against harmful interference in a residential installation. This
equipment generates, uses and can radiate radio frequency energy and, if not installed
and used in accordance with the instructions, may cause harmful interference to radio
communications. However, there is no guarantee that interference will not occur in a
particular installation.
If this equipment does cause harmful interference to radio or television reception,
which can be determined by turning the equipment off and on, the user is encouraged
to try to correct the interference by one or more of the following measures:
-- Reorient or relocate the receiving antenna.
-- Increase the separation between the equipment and receiver.
-- Connect the equipment into an outlet on a circuit different from that to which the
receiver is connected.
-- Consult the dealer or an experienced radio/TV technician for help.
The device has been evaluated to meet general RF exposure requirement. The device can
be used in portable exposure condition without restriction