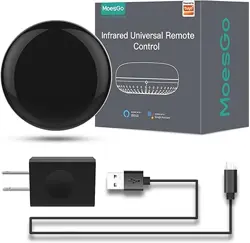

WiFi Smart Remote IR Controller
16
Preparation for Use Add Device
① Download MOES App on App store or scan the QR
code .
② Registration or Log in.
• Download “MOES” Application.
• Enter the Register/Login interface; tap “Register” to
create an account by entering your phone number to
get verification code and “Set password”. Choose
“Log in” if you already have a MOES account.
1 2
3
5
4
6 7
11
8
9
10
12
Scan the QR code to configure the network guide.
13
Method One:
Method Two:
Reset Button
Network
Configuration
Indicator
Power Outlet
Bitte scannen Sie den QR-Code hier für eine Anleitung
in deutscher Sprache
Por favor escanear el código QR aquí para
instrucciones en español
Veuillez scanner le QR code ici pour des instructions
en français
Пожалуйста, отсканируйте QR-код здесь, чтобы
получить инструкции на русском языке.
Leia o código QR aqui para obter instruções em
português
SERVICE
RECYCLING INFORMATION
Trouble Shooting Guide
Why MoesGo’S Smart Universal Remote can’t control
the appliance?
Make sure if the network works well in Smart IR
(Touch any button on the smart app remote side,
if the indicator light works fine ,then network ok )
Check if there is obstacle between remote and
appliance, within 8 meters
Confirm if the original remote control is Infrared
control (Press the remote control after warding
off the remote control head with hand or other
object, if appliance do not work, it’s Infrared
control. If not work, it should be Bluetooth or
radio frequency control)
Step 1:
Step 2:
Step 3:
FAQ
Device
AC
AC
STP
STP
TV
TV
Device
Voice Control Instruct
Alexa command list
Alexa, turn on 'device name'
Alexa, turn off 'device name'
Alexa, set 'device name' temperature to ** degrees
Alexa, increase 'device name' temperature
Alexa, decrease 'device name' temperature
Alexa, turn on 'device name'
Alexa, turn off 'device name'
Alexa, channel up on 'device name'
Alexa, channel down on 'device name'
Alexa, volume up/down 'device name'
Alexa, change channel of 'device name' to 'channel number'
same as STP
Google Home command list
Hi google,turn on/turn off the 'device name'
Hi google,turn on/turn off the 'device name'
Hi google,turn on/turn off the 'device name'
Hi google, set 'device name' temperature to ** degrees
Hi google, make 'device name' warmer/cooler
Note: After MOES has been wakened up, you may say
“Cancel “or “Stop” to exit MOES or say “Nothing”
when you hear “what can I do for you ”. Then you can
say “OK Google, talk to MOES” to start voice control.
Open Google Home App; tap( )on the upper left
corner; select “More Settings” to enter the next
interface.
Choose “Services” in the options bar and select
“MOES” to enter the next interface.
Tap “ MOES ”, then sign in your smart Life
Account.
Tap “Link Now”, after your MOES account had
linked to Google Assistant, the smart devices will
automatically appear.
Firstly ,you need to say “OK Google, talk to MOES” to
wake up the MOES. Then you can control the device by
instructions like these:
Turn on the/Turn off the
14
15
16
17
18 19 20 21 22 23
24
Have paired Device with MOES and named it with a
recognizable name.
Have finished setting up Google Home
Step 1:
Step 2:
Step 3:
Step 4:
25 26
27
Thank you for your support and purchase at we
MoesGo, we are always here for your complete
satisfaction, just feel free to share your great
shopping experience with us.
If you have any other need,please do not hesitate to
contact us first,we will try to meet your demand.
BK01
Product Information
Product Name________________________________________
Product Type_________________________________________
Purchase date________________________________________
Warranty Period_______________________________________
Dealer Information_____________________________________
Customer's Name_____________________________________
Customer Phone______________________________________
Customer Address_____________________________________
______________________________________________________
Maintenance Records
Failure date Cause Of Issue Fault Content Principal
WARRANTY CARD
28
Smart life,Smart future
Q: Built-in Battery included?
A: No built-in battery,need connect with power
directly(USB Line only);
Q: 5G wifi supportable?
A: Only support 2.4G wifi, no 5G wifi acceptable
Q: Is this IR universal works with internal code library?
A: Code library keeps in cloud, you must connect with
internet
Q: Appliance compatible?
A: Support majority leading top brand include TV /STP
/AC/DVD
Q: Brand Applicable?
A: Please check brand list in App
Q: Smart Device compatible?
A: Google Alexa, ECHO
Q: Can they go through-wall or control AC from up
stair or down stair?
A: No, Infrared cannot go through-wall
Q: Is this device work with WIFI? Must they use with
smart gateway?
A: MoesGo Smart IR work completely with WIFI control,
no smart gateway required
Q: How many home appliances can MoesGo Smart IR
control at the same time?
A: MoesGo Smart IR can control multiple appliances in
one room through “MOES” APP;
Q: What is the scope can MoesGo Smart IR works?
A: Within Diameter 16 meters.
Q: How to use MoesGo Smart IR learning function?
A: Please check copy button instruction.
Moes application is much more compatible than Tuya
smart / smart life application. It also provides a new
customized service for controlling scenes through Siri,
widgets and scene recommendation.
(Note: Tuya smart / Smart Life app is still working, but
moes app is highly recommended)
① ②
③Scan this QR code
1.Make sure your phone is connected to Wi-Fi and
Bluetooth.
3.Open MOES App,then the prompt page will
automatically show on the screen.Click “Add”, Select
the device you want to add and click “+”.
4.Enter Wi-Fi Password and click “Next”,waiting for
completing the connection.Add the device successfully,
you can edit the name of the device to enter the
device page by click “Done” .
5.enjoy your smart life with home automation.
2.Reset:Press and hold the reset button for at least
5 seconds until the network configuration indicator
blinks.
Google Assistant –Activate Smart Life in Google Home App
3:Support Skill List
Preparation
You can control the devices by instructions like these:
Alexa(or Echo, turn on the Devices
Alexa(or Echo),turn off the Devices.
Note: Echo is one of the wake –up names, which can
be any of the three names (Settings) Alexa, Echo,
Amazon.
Have downloaded the Google Home App-compatible
With Android(4.2 or higher) or ISO(8.0 or higher)
smartphones or tablet.
Have registered your google Account.
2:Control Device by Voice
Note: The name of the device must be consistent
with the addition of MOES.
You can also group the device and give instructions
to control them together.
1: Support learning of 38K carrier frequency, if you cannot
receive instruction from original remote, the main reason
maybe mismatching of carrier frequency. In this case, you
cannot learn the instruction from original remote.
2: Insure MoesGo SMART IR receive instruction regularly,
please do not long press original remote to give instruction,
a short press should be enough.
Rechristen.
Save settings.
If need to change or add more button, you can choose
up right corner “Edit” button for help.
Step 4:
Step 5:
NOTICE
Enable MOES Skill in Alexa App
Control the device by voice
1:Discover Device
1.If you have finished to install MOES then open
Amazon Alexa App: sign in your Alexa account and
enter password.
Select MOES in the search results, and then click
“Enable Skill”.
Then input the user name and password of
MOES APP that you had previously registered.
After the above operation is successful, you can
control the device via Echo.
Firstly, you need to say to the Echo:
Echo (or Alexa), discover my devices.
Echo will start to find the device which is added in the
MOES APP.
It will take about 20 seconds, then Echo will tell you the
result.
You can also click “Discover devices” in Alexa APP, then it
will show the devices that have been found successfully .
Choose your own WiFi and wait for a few minutes.
After an introduction video, click next step, it will
enter Home page automatically. Now the Echo had
connected to Wi-Fi successfully.
Choose “Skill” in the option bar, and then search
“MOES” in the input box.
2.Click the menu on the left corner-click “Settings:
choose “Set up a new device”(choose a device ,like
Echo)Note: When the below page appears, long
press the small dot on your Echo device until the
light turns to yellow. Then Click Continue on App
Note: at this moment, the mobile
phone cannot open a variety of VPN
software.
Step 3:
Step 2:
Step 1:
Set your Echo speaker by Alexa APP
Add Remote Control
Copy Button Operation
Choose your existing appliance and add remote , such as
Air conditioner, TV,STB, TV box, FAN (support more than
4000+main brand).
If you cannot find the remote which is able to control
appliance, you can learn the function through copy
button.(Notice: Currently copy button function only support
TV / STB /TV BOX / FAN, exclude Air conditioner)
Click to enter the connected device
Click the edit button in the upper right corner
Select "Copy button" in the popup menu bar
Click the DIY button.
Click “next step”.
Press your original remote button, APP will
redirect to next step automatically.
Click the on/off button
Press your original remote button, APP will redirect
to next step automatically.
Finish copying one button, you should press the
related button on APP to check if works fine.
If you can’t find your IR appliance in existed
appliance form, you may ask DIY function for help.
You may continuously choose to copy more or press
the up right corner “Done” to save.
DIY OPERATION
You can also choose “Copy button” function to learn if
some of the appliance cannot be controlled.
Step 3:
Step 4:
Step 5:
Step 6:
Step 2:
Step 1:
Step 3:
Step 2:
Step 1:
Command the Device through Your Voice.
Thank you for your trust and support to our products,
we will provide you with a two-year worry-free
after-sales service (freight is not included), please do
not alter this warranty service card, to safeguard your
legitimate rights and interests. If you need service or
have any questions, please consult the distributor or
contact us.
Product quality problems occur within 24 months from
the date of receipt, please prepare the product and the
packaging, applying for after-sales maintenance in the
site or store where you purchase; If the product is
damaged due to personal reasons, a certain amount of
maintenance fee shall be charged for repair.
We have the right to refuse to provide warranty service
if:
1. Products with damaged appearance, missing LOGO
or beyond the service term
All products marked with the symbol for separate
collection of waste electrical and electronic
equipment (WEEE Directive 2012/19 / EU) must be
disposed of separately from unsorted municipal
waste. To protect your health and the environment,
this equipment must be disposed of at designated
collection points for electrical and electronic
equipment designated by the government or local
2. Products that are disassembled, injured, privately
repaired, modified or have missing parts
3. The circuit is burned or the data cable or power
interface is damaged
4. Products damaged by foreign matter intrusion
(including but not limited to various forms of fluid,
sand, dust, soot, etc.)
authorities. Correct disposal and recycling will help
prevent potential negative consequences
for the environment and human health.
To find out where these collection points
are and how they work, contact the
installer or your local authority.
EVATOST CONSULTING LTD
Address: Suite 11, First Floor, Moy Road Business
Centre, Taffs Well, Cardiff, Wales, CF15 7QR
Tel: +44-292-1680945
Email: [email protected]
AMZLAB GmbH
Laubenhof 23, 45326 Essen
Made in China
YUEQING NOVA ELECTRONICS CO.,LTD
Address: 3th Floor, Building 2, Power Science
and Technology Innovation Center, NO. 238,
Wei 11 Road, Yueqing Economic Development
Zone, Wenzhou, Zhejiang, China
Tel:+86-577-62625592
After-sale Service:[email protected]
Manufacturer: