S1 Electricity measure Smart control
Programmable Socket
(Instruction Manual)
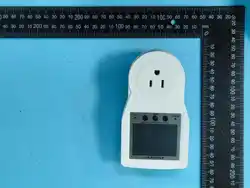
This equipment is used for Smart on-off control, safety protection
control, Programmable control, Internet of Things data transmission
and wireless control, accumulative power, calculation of electricity
bill And measure detailed parameters such as current voltage,
current, power and frequency.
Product type and attributes:Product type nd attributes:
Introduction to the operation of function interface switching and
measurement interface value setting:
Introduction to the operation of function interface switching and
measurement interface value setting:
Introduction to the operation of the background setting interface:
-1-
-2-
-3-
-4-
Setting method and application of safety protection function:
Short press the "+" key to go to the security protection page, short press the "M" key, and the
voltage hundred digits of the overvoltage automatic power-off bar will flash, then short press
the "+" or "-" keys to adjust the value, short press the "M" key again, the voltage tens will flash
and can be adjusted. Continue with this method, flashing the value of the over-current power
column and can be adjusted, after the adjustment is completed, long press the "M" key to save
or flash to stop the system to automatically save. The set protection threshold value can be
increasedby5~10%accordingtoyourapplicationvalue,soastoensurenormaluseandalso
have the power-off protection function (the set protection value will also run in the background
of other interfaces). When the input voltage or the power value of the current flow exceeds the
threshold you set, the system will instantly cut off the power and use the horn to prompt, and
at the same time display an alarm message on the display for you to check. At this time, if the
user's button signal or infrared remote control signal is not received, the product will continue
to power off. Until the user releases the danger and presses any key or remote control key on
the host, the system will return to the protection interface and automatically be in the off state,
waiting for the user to reset or restart the power.
Security protection settings skills for charging, such as applying smart power off
(Category A) to electric vehicles or full power failure of mobile phones:
Security protection settings skills for charging, such as applying smart power off
(Category A) to electric vehicles or full power failure of mobile phones:
Short press the "+" button to go to the smart power-off category A page and select the "on"
state, observe and record the charging power value of the charged device once after it is fully
charged; Then, add 2~5W on the basis of this value, which is the power value of how many
watts of your full automatic power-off setting is less than the continuous value and turn on
the "auto" gear. In this way, when the system detects that the current power value is less than
the power value you set and continues for the recharge time you set, the system displays the
power-off icon and cuts off the power output, thereby protecting your device(The longer the
duration you set, the longer the subsequent charging time is when it is fully charged, so as to
ensure that the device can be fully charged and at the same time double-monitoring to achieve
accurate and autom tic power-off for safe charging protection).
Tips for viewing the progress bar and countdown in the lower right corner of the display
interface:
When the system detects that the measured power value is less than the power value you set,
the system starts counting down, and the progress bar is calculated according to the duration
ratio you set. The progress bar decreases and changes color from yellow to red until the end of
the power failure. When the power value measured by the system is greater than the power
value you set at a certain moment, the countdown will be cleared immediately, and the
progress bar will fill up instantly, and then a new round of detection will be performed.
setting skills, such as applying smart power off (Class B) to avoid loss of electricity bills
caused by people leaving home for a long time and forgetting to turn off the device:
setting skills, such as applying smart power off (Class B) to avoid loss of electricity bills
caused by people leaving home for a long time and forgetting to turn off the device:
Short press the "+" button to go to the smart power-off type B page and select the "on" state.
Observe and record the minimum power value of the connected device when it is powered on.
Then, subtract 5~25W on the basis of this value. This is how many watts of power should be set
for your connection and turn it on to the "auto" gear. In this way, when the system detects that
the current power value is greater than the power value you set, it will judge that your device
has been powered on. At this time, the system starts to count down to the duration value you
set, and the system determines that you may have forgotten to turn off the device because you
left home and automatically cut off the power, so as to achieve the purpose of people
Setting method, such as applying the timing power supply page to timing charging
devices such as mobile phones or electric vehicles:
Setting method, such as applying the timing power supply page to timing charging
devices such as mobile phones or electric vehicles:
Short press the "+" button to go to the timing power supply page, set the time you are expected
to be fully charged by the charging device, and then press the "+" button to enter the automatic
mode. The system is powered on and the countdown reaches the time you set. When the system
automatically cuts off the power output on time, the speaker emits a beep and the display shows
a red cut off interface.
This product is available in Bluetooth version, smart WiFi version, and smart WiFi
curve version. Please refer to the user manual and purchase for details!
This product user manual is applicable to different types of sockets such as CN/US
plug/EU plug/FR plug/UK plug/AU plug/BR plug/JP plug, etc!
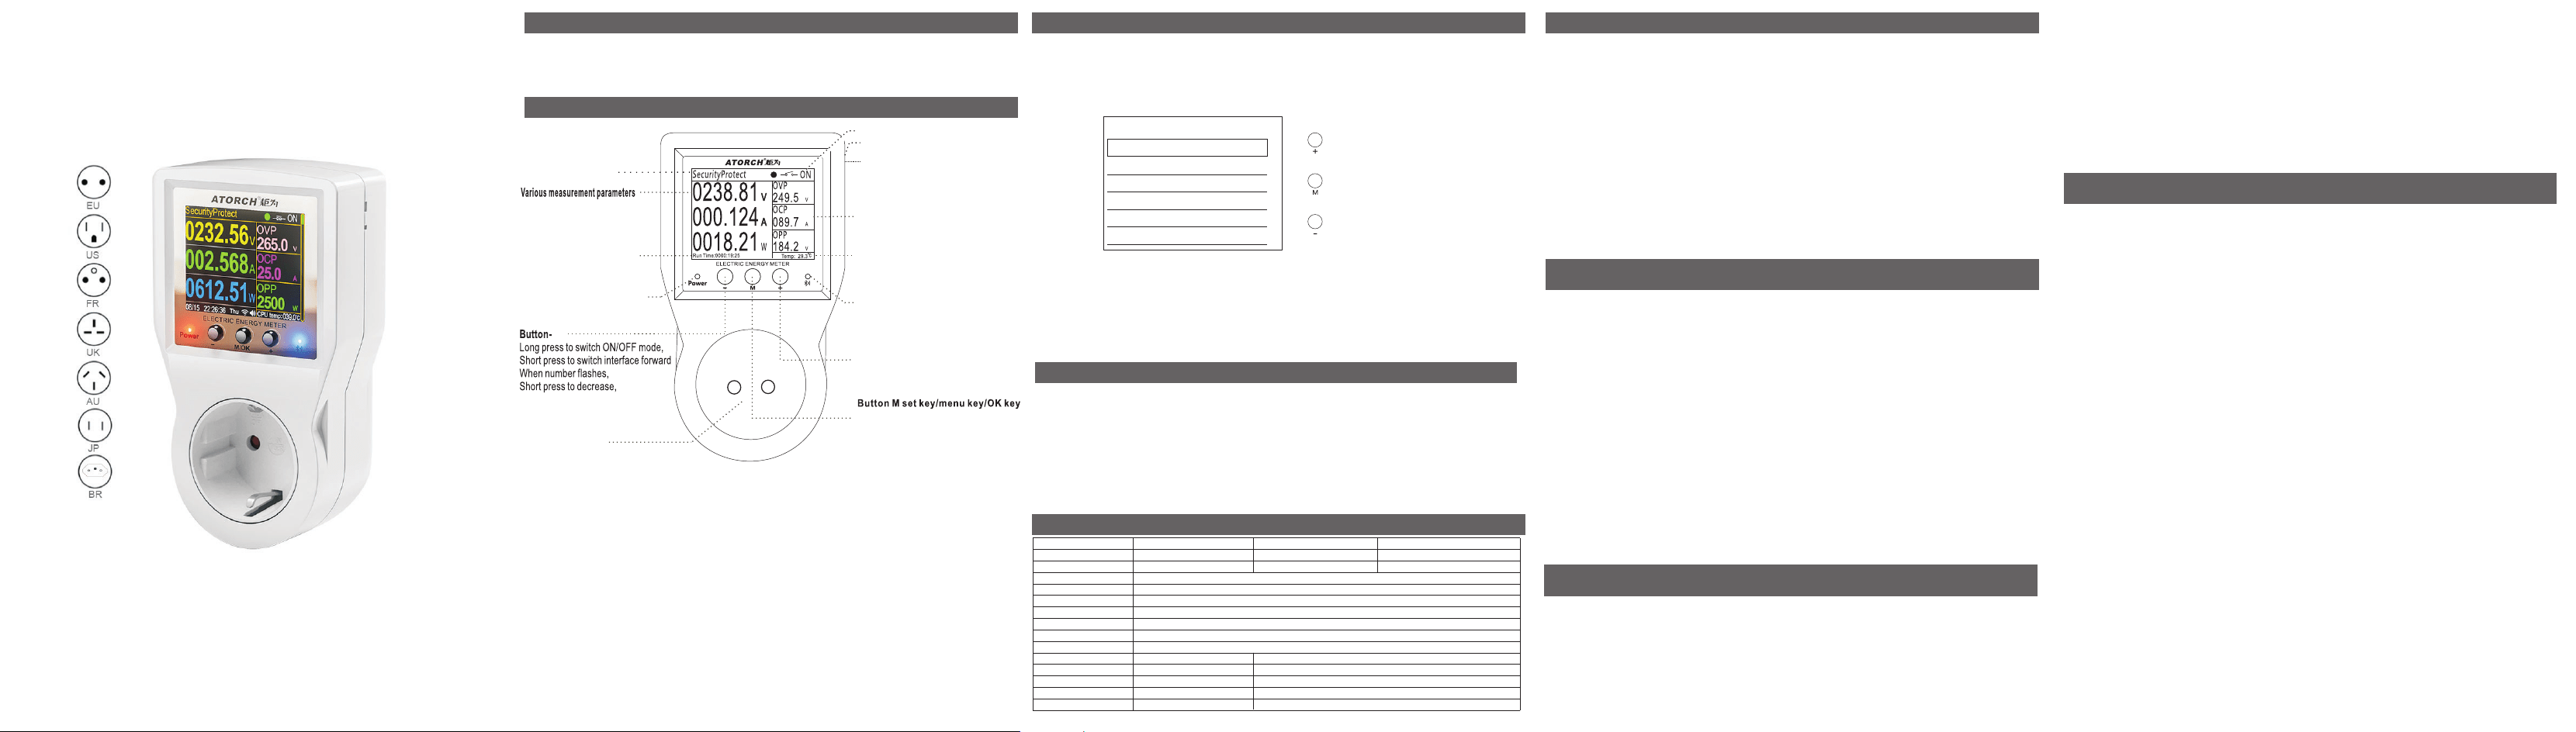
Key operation method and interface introduction:
Function title bar
Time and online icon
(Display running time when
not connected to the Internet
, display calendar,when
connected to the Internet)
Power supply indicator
ON/OFF/Auto switch
Multifunctional display bar
Internal CPU temperature
display of the device
Bluetooth indicator
(when you purchase the Bluetooth
version, this light will display the
Bluetooth status, the WIFI version
will not display)
Button +
Long press to switch ON/OFF mode,
Short press to switch interface back.
When the number flashing,
ong press to add continuously
Short press to add.
L
Output socket interface
CN/EU/UK/US/FR/AU/BR/JP
eg. plug options
Normal power supply, this light is on
Electrical parameters:
WiFi version: Scan the QR code displayed on the host to download the Smart Life APP or Tuya APP,
and operate according to the methods and steps displayed on the interface to connect to the Internet
Bluetooth version: Search for E_test in the Apple app or scan the Android code to download and install
it, then click the icon to open the APP, then click the Bluetooth icon in the upper left corner of the interface
to enter the list and display the S1B-BLE model, and then click the model to automatically return to the
main interface of the APP. At this time, the bluetooth icon of the host changes from the original gray to
blue and you hear the beeping sound of the speaker, which means that the connection to the computer
is successful, and the data starts to be transmitted and displayed synchronously.
Warning: If the model S1B-BLE cannot be displayed after clicking the Bluetooth icon in the upper left
corner of theAPP interface, please enter your mobile phone settings to open the storage permission
and location information options of this APP! After these two items are fully turned on, return to the APP
interface and then enter to display the model correctly.
Bluetooth connection or WiFi connection steps:
use set ingsuse settings
Long press "M" button to enter the background settings interface, then short press
"+"/ "-" button to select the settings section up and down, press the M key to enter
the parameter adjustment interface, short press "+"/ "-" button to adjust
parameters, and then short press or long press "M" button to return to the previous
menu. When in the background interface, you can also long press "M" button to
quickly return to the front-end function measurement interface
1) Overvoltage, overcurrent and undervoltage protection threshold: when this threshold is reached, an alarm
interface will pop up, and the output will be turned off if the relay type is used;
2) Standby screen: If it is set to simple measurement, it will enter the measurement interface mode with large
numbers when the standby time is reached;
3) Clear the accumulated data: press the "+" button to this column, and the word "OK" will pop up to make it clear
that the accumulated electricity bill data is zero;
4) WiFi settings reset: If you have changed the WiFi network account password environment, please reset this
column to reconfigure the network;
5) Restore factory settings: restore all data to factory values (short press the M key to this column
and then long press the "+" key for 3 seconds to reset the system)
Short press to enter the column or
confirm exit
Long press to confirm parameters and exit
Short press up and down to select a column
or adjust parameters
Long press continuously adjusts parameters
Short ress up and down to select a column
or adjust parameters
Long press continuously adjusts parameters
Product name: S1 Bluetooth socket S1 smart WiFi socket
model number: S1B S1BW
Test voltage: AC85-265V / 50-60Hz
Test current: 0-10A max 16A
Test power: Max 3680W
Power range: 0-99999Kwh
±1%
Power factor: 0-1.00PF
Product size: 133X76X73mm
Curve function
Mobile control: E-test APP Tuya or smart life APP
Firmware upgrade: Not support
Power-off memory: Support Support
Other functions: None
-10°C~+60°C
:
Function
Bluetooth version
WIFI version
Measurement accuracy:
Operating temperature:
Get Internet time, calendar and weather data display.
WiFi remote networking firmware upgrade
accidentally forgetting to turn off the equipment and causing the equipment to run for a long
time when no one is left, which consumes huge electric energy and causes huge loss risks.
When the power is automatically disconnected, the system horn will beep several times, and
at the same time, a red power-off information interface will be displayed. At this time, if the
system detects any key signal or your device's remote control signal and mobile phone APP
and other key signals, it can resurrect and return to the smart power-off interface, and
automatically turn on the power again and start the next round of smart power-off process.
A worker who travels frequently, carelessly forgot to
turn off the air conditioner at home before a business trip. The air conditioner was turned on
for a few months during the business trip. After returning home, he found that he had used
thousands of kilowatt-hours of electricity and caused a loss of thousands of yuan.
This feature comes from a real story:
APP software and download address:
Safety warning:
http://www.atorch.cn
(Please refer tothe official website for more details)
The input of this product is strong electricity. Do not touch
the metal parts with electricity during use. Be sure to pay attention to safety
< BenFang Sys Settings
01 Language. /
02 Display Brightness.
03 Standby Brightness.
04 Enter Standby Time.
.
26 Exit.
WiFi Calendar Energy Statistics version
S1 WiFi Calendar Energy Statistics socket
S1BWP
None Voltage current power curve
Support voltage, current, and power curve display
Connect power supply as shown in the diagram, and the display screen will light up.
Short press “+" or " -" button to cycle forward or backward to switch between various
function display interfaces. Long press "M" button to enter the system background
settings interface. Short press "M" button on the front-end interface, and the
corresponding number will flash. Then adjust the value by short press "+"/"-" button.
During the flashing, you can continue to short press "M" button to switch the number
of digits and adjust the following numbers. When the flashing stops, System will auto
save and display word , or long press "M"button to save immediately ; Long press
and holding "+"/"-" keys in normal times will cycle left and right to switch between
several switch modes such as "ON, OFF, and AUTO"
"OK"
Long press "M" button on the front-end interface to enter the back-end settings interface, and
then short press "+" / "-" button to select the desired settings column up and down. Press "M"
button to enter the parameter adjustment interface, and short press "+" / "-" button to adjust
parameters. Short press or long press "M" button again to return to the previous menu. When
in the back-end interface, you can also long press "M" button to quickly return to the front-end
function measurement interface.
.
.
(The continuous optimization and updates of the product and the differences in
User manual will not be notified separately. Please understand.)
CPU
Short press to flash the set number,
repeat the short press to switch positions
and set the number
Long press to enter the set background,
short press to enter or confirm while in
the background
()Optional
Reserved interface for temperature and
humidity control instrument
Reserved temperature controllerinterface
(When o a temperature controller or temperature
and humidity controller, this interface can be used
with a temperature probe. Somefunctions in this
manual can be used as reference settings.)
rder
Active power: P=U*I*cosφ
P=Powr(W) ;U Voltage(V);I=current(I)
Cos Power factor 0 00 1 00PF
=
φ= ( . - . )
FC C Statement
This device omplies ith art 15 f he CC ules peration s ubject o he ollowing wo
conditions 1 his evice ay ot ause armful nterference nd 2 his evice ust ccept
any interference eceived ncluding nterference hat ay ause ndesired peration
Note his quipment as een ested nd ound o omply ith he imits or lass igital
device ursuant o art 15 f he CC ules hese imits re esigned o rovide easonable
protection against armful nterference n esidential nstallation his quipment enerates
uses and an adiate adio requency nergy nd f ot nstalled nd sed n ccordance ith he
instructions ay ause armful nterference o adio ommunications owever here s o
guarantee that nterference ill ot ccur n articular nstallation f his quipment oes
cause harmful nterference o adio r elevision eception hich an e etermined y urning
the equipment ff n n he ser s ncouraged o ry o orrect he nterference y ne r
more of he ollowing easures
Reorient r elocate he eceiving ntenna
Increase he eparation etween he quipment nd eceiver
Connect he quipment nto n utlet n ircuit ifferent rom hat o hich he eceiver s
connected
Consult he ealer r n xperienced adio V echnician or elp
Note he rantee s ot esponsible or ny hanges r odifications ot xpressly pproved y
the party esponsible or ompliance uch odifications ould oid he ser uthority o
operate the quipment
The device as een valuated o eet eneral F xposure equirement
To maintain ompliance ith CC F xposure uidelines he istance ust e t east 20 m
between the adiator nd our ody nd ully upported y he perating nd nstallation
configurations of he ransmitter nd ts ntenna
.
:( ) , ( )
,.
:
,.
.,
,
,.,
.
,
,
:
-.
-.
-
.
-/.
:
.'
.
.
',
,
().
cwpotFRO isttf t
Td mnc h i a td ma
ri i tmcu o
Te hb t af tc wtl faC Bd
ptpotFRTladtpr
hi iar i Te g
cr r f e a ini au ia wt
mc h i tr c H t in
iwnoiapiIted
itrotrwcbdbt
oa o t u ie tt tc t i bo o
tf m
or t r a
ts b te ar
te i ao oac d f t tw tr i
td oae r Tt fh
TG inr fac om ne a b
rfc sm cvtusat
e
hb e tm g Re r
cwFsRegtdmbalc
raybafs bto ai
tt aia s