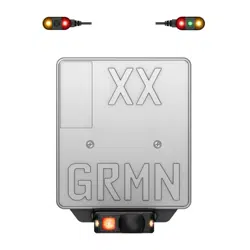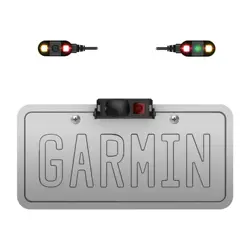
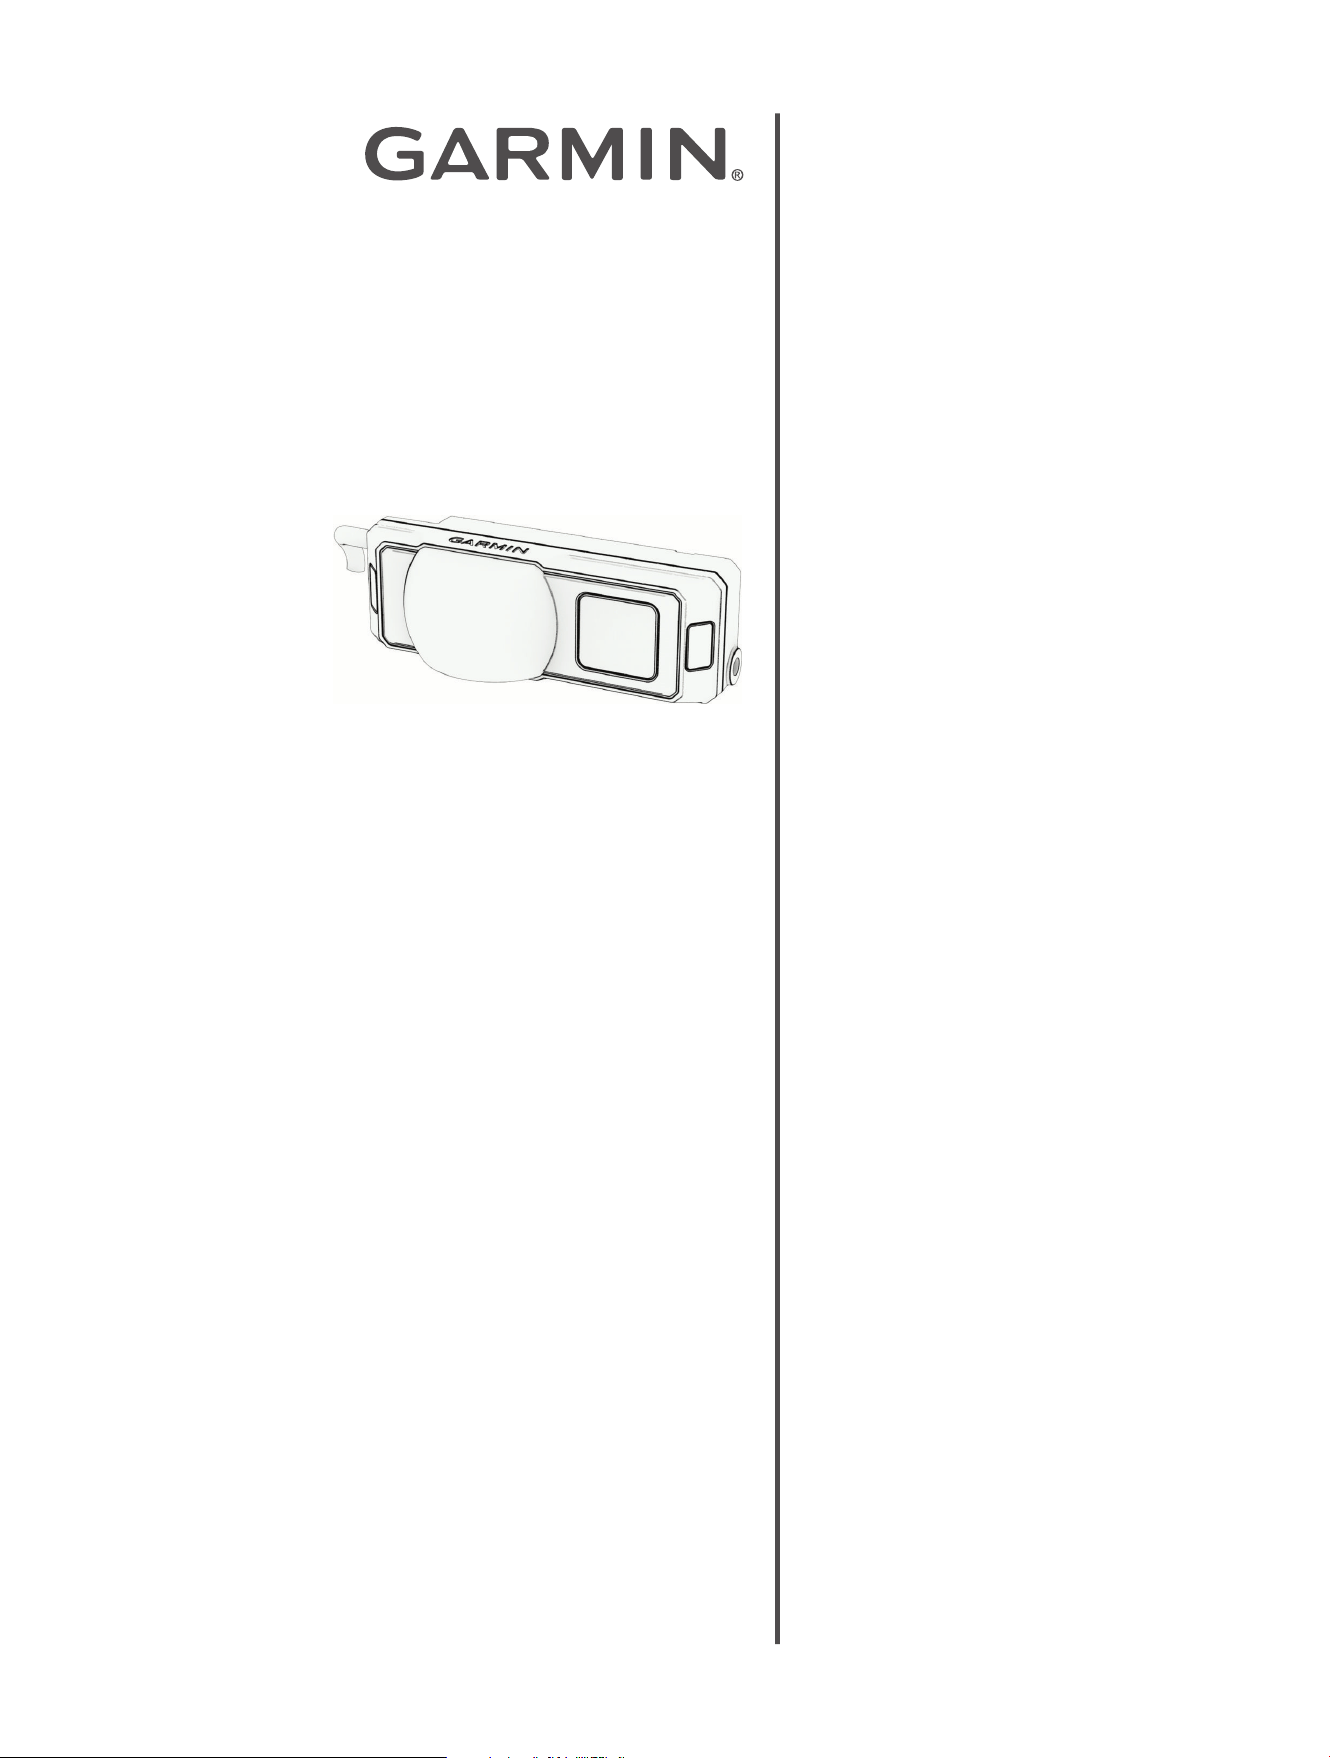
GARMINCATALYST
™
R1
Racing Radar
Owner's
Manual

Table of Contents
Introduction......................................3
Getting Started................................ 3
Device Overview.............................. 4
Radar Status LED.......................... 4
Indicator Lights............................ 5
Status Icons................................ 6
Tools Needed..................................7
Installation....................................... 8
Mounting Considerations.................. 8
Installing the Indicators.....................9
Mounting the Indicators with
Brackets..................................... 9
Mounting the Indicators with
Adhesive.....................................9
Mounting the Indicators with Cable
Ties..........................................10
Mounting the GarminCatalyst
™
R1
Racing Radar.................................11
Installing the Adhesive Mount........ 11
Installing the Radar in the Mount.... 12
Checking the Radar Angle................ 12
Wiring Diagram.............................. 13
In-line Fuse Cable........................14
The GarminCatalyst
™
R1 racing radar
System and the GarminCatalyst
Radar App...................................... 16
Pairing the GarminCatalyst
™
R1 racing
radar System with Your Phone.......... 16
Viewing Radar on the GarminCatalyst
™
Radar App.................................... 16
Adjusting Alert Sensitivity................ 17
Driver Awareness Features and
Alerts............................................. 18
Device Information......................... 19
Device Care...................................19
Cleaning the Device..................... 19
Radar Detection............................. 19
Specifications............................... 19
Troubleshooting............................. 20
Restarting the Device...................... 20
Resetting the Device....................... 20
Exiting Demo Mode........................ 20
My device is overheating................. 20
Introduction
WARNING
See the Important Safety and Product Information guide in the product box for product warnings and other
important information.
Garmin
®
strongly recommends having an experienced installer with the proper knowledge of electrical systems
install the device. Incorrectly wiring the power cable can result in damage to the vehicle, the battery, or the
device and can cause bodily injury.
The device can improve situational awareness. It is not a replacement for driver attentiveness, good judgement,
or checking mirrors and blind spots. Always maintain awareness of your surroundings, and operate the vehicle
in a safe manner. Failure to do so could result in serious injury or death.
The device, including the sensor, must be securely mounted and must remain stable in all operating conditions.
The mounting options outlined here may not be compatible with all vehicles and may require additional
hardware. Failure to securely mount this device could result in poor product performance and could cause
the device to detach from its mount, which could damage the device or the vehicle and could cause serious
personal injury.
This device is intended only for recreational use on a racetrack. Never use this device on public roadways.
Failure to follow this warning may result in an accident causing property damage, serious personal injury, or
death. You are responsible for using this device in a safe and prudent manner.
If the radar device becomes dismounted or is not sending radar data, Garmin recommends that you stop driving
and check the devices in a safe location. Failure to do so could result in serious injury or death.
Failure to install this device according to these instructions could result in serious personal injury, damage to
the vehicle or device, or poor product performance.
Adverse weather conditions and wet driving surfaces may interfere with the operation of the device. Avoid using
the device in these conditions.
Routinely inspect the device and remove any dirt, debris, or other obstructions. Failure to do so could result in
poor product performance or may interfere with the operation of the the device.
CAUTION
To avoid possible personal injury, always wear safety goggles, ear protection, and a dust mask when drilling,
cutting, or sanding.
NOTICE
When drilling or cutting, always check what is on the opposite side of the surface to avoid damaging the vehicle.
These installation instructions do not apply to a specific vehicle type, and are meant as a guide when
installing this product on your vehicle. For questions specific to your vehicle, you should contact the vehicle
manufacturer.
Getting Started
You can use the GarminCatalyst
™
R1 racing radar system with the GarminCatalyst Radar app on your phone.
You can also use the GarminCatalyst R1 racing radar system as a standalone device without a screen (Radar
Status LED, page4). This list provides an overview of the installation and setup tasks.
1 Install the indicators (Installing the Indicators, page9).
2
Install the mount (Mounting the GarminCatalyst
™
R1 Racing Radar, page11).
3 Install the GarminCatalyst R1 racing radar system in the mount (Installing the Radar in the Mount, page12).
4 Adjust the radar angle (Checking the Radar Angle, page12).
5
Pair your phone (Pairing the GarminCatalyst
™
R1 racing radar System with Your Phone, page16).
6 Check for updates in the GarminCatalyst Radar app.
For the best experience, you should keep the software on your device up to date. Software updates provide
changes and improvements to privacy, security, and features.
Introduction
GarminCatalyst™ R1 Racing Radar
Owner's Manual
3
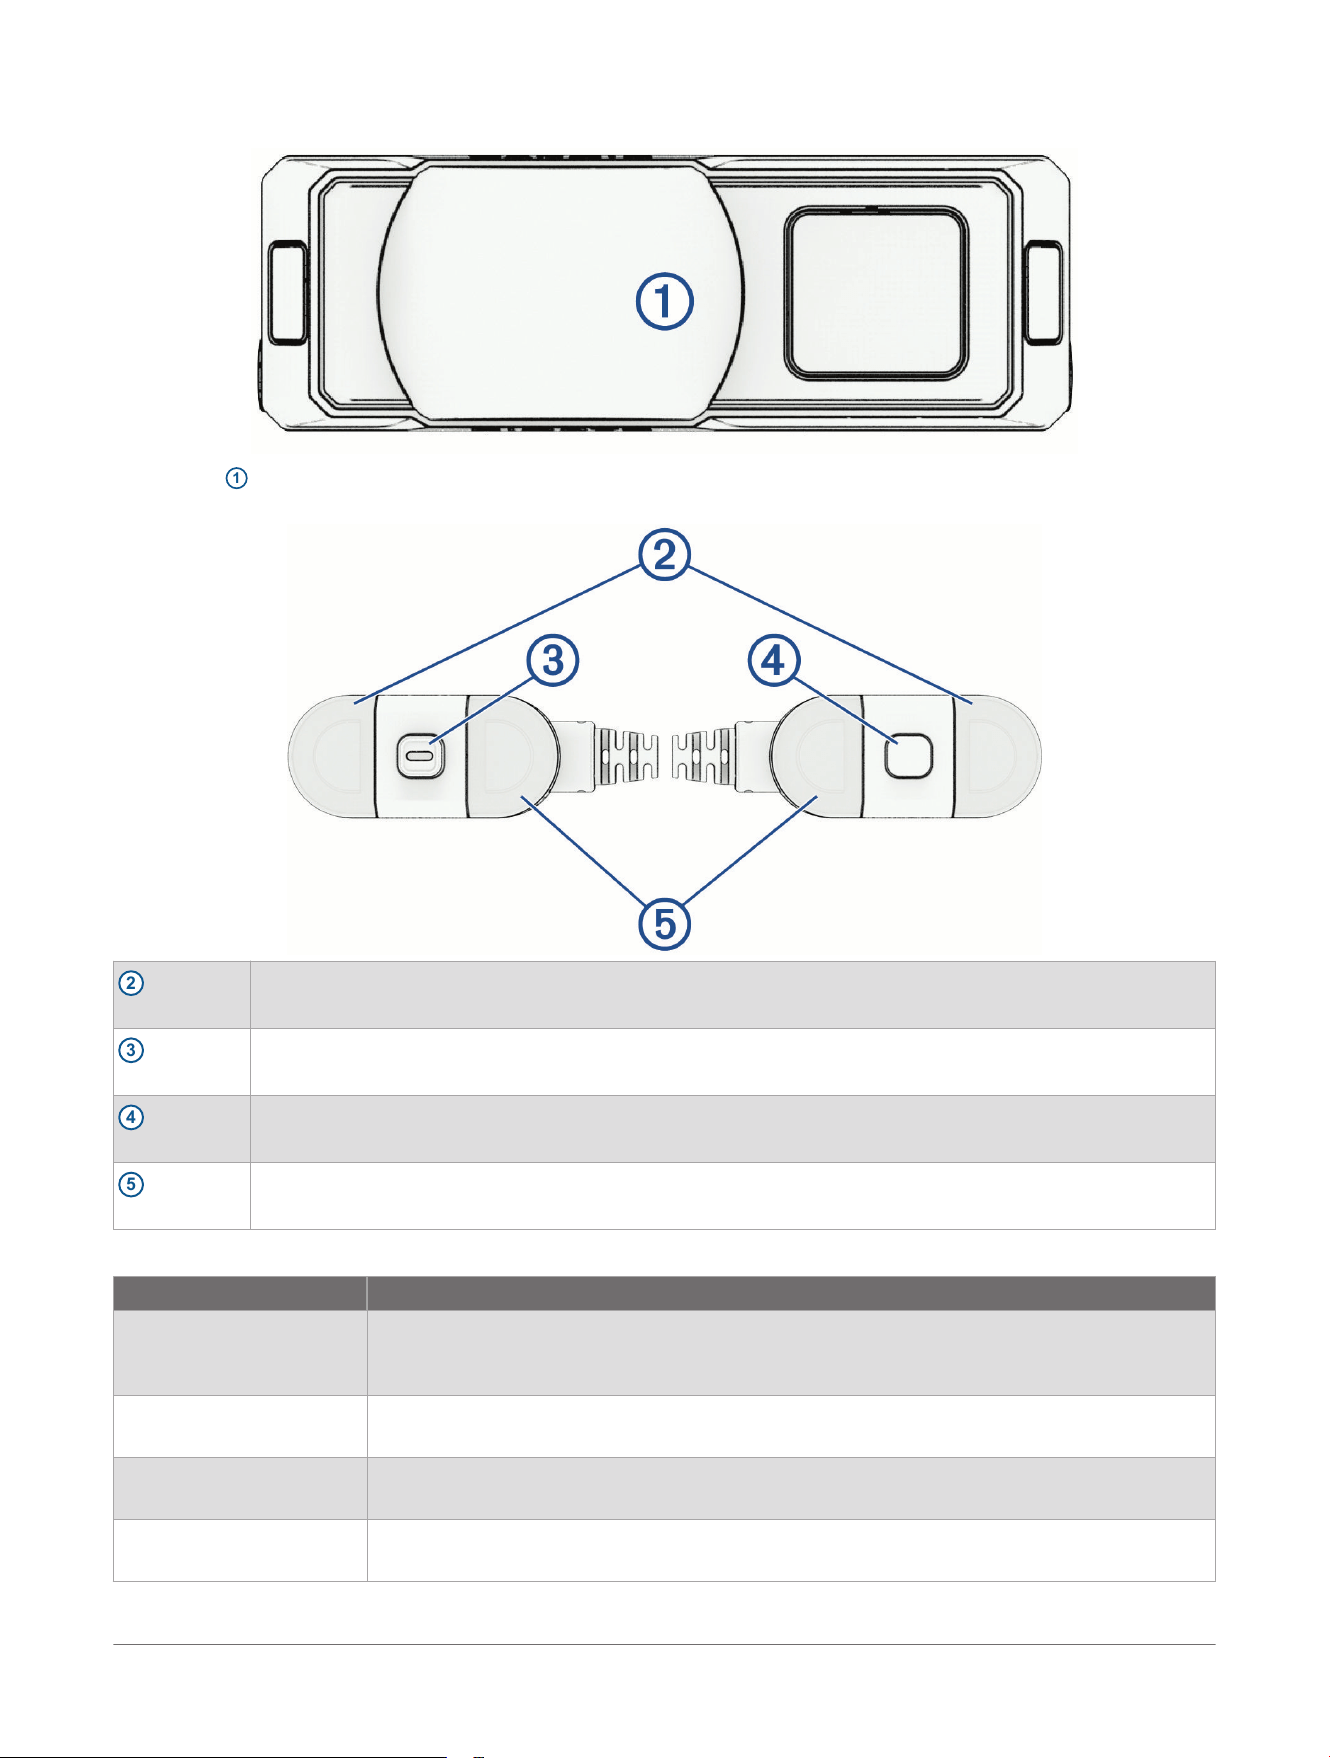
Device Overview
The device
1
may be oriented with the cable exiting to the left or right, depending on which fit is most suitable
for your vehicle.
2
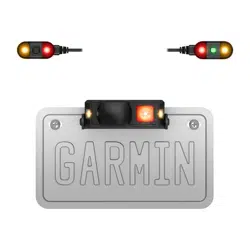
Amber LEDs
Indicates a car is behind the driver approaching from the right or left side (Indicator Lights, page5).
3
Device button
Powers the device on or off or enters the device into pairing mode.
4
Status LED
Indicates the radar status or distance to the closest target that is not approaching from the right or left
side (Radar Status LED, page4).
5
Red LEDs
Indicates a car is approaching in the lane directly behind the driver (Indicator Lights, page5).
Radar Status LED
LED Activity Status
Flashing blue Bluetooth
®
The device is in Bluetooth pairing mode. The light will flash for three minutes, until a
Bluetooth device is paired, or until the device button is pressed.
Solid yellow Demo
The device is in demo mode.
Solid orange Error
The device is experiencing degraded performance because the rear sensor is obstructed.
Solid red Error
The device is not operational because of a system error.
4 GarminCatalyst™ R1 Racing Radar
Owner's Manual
Introduction
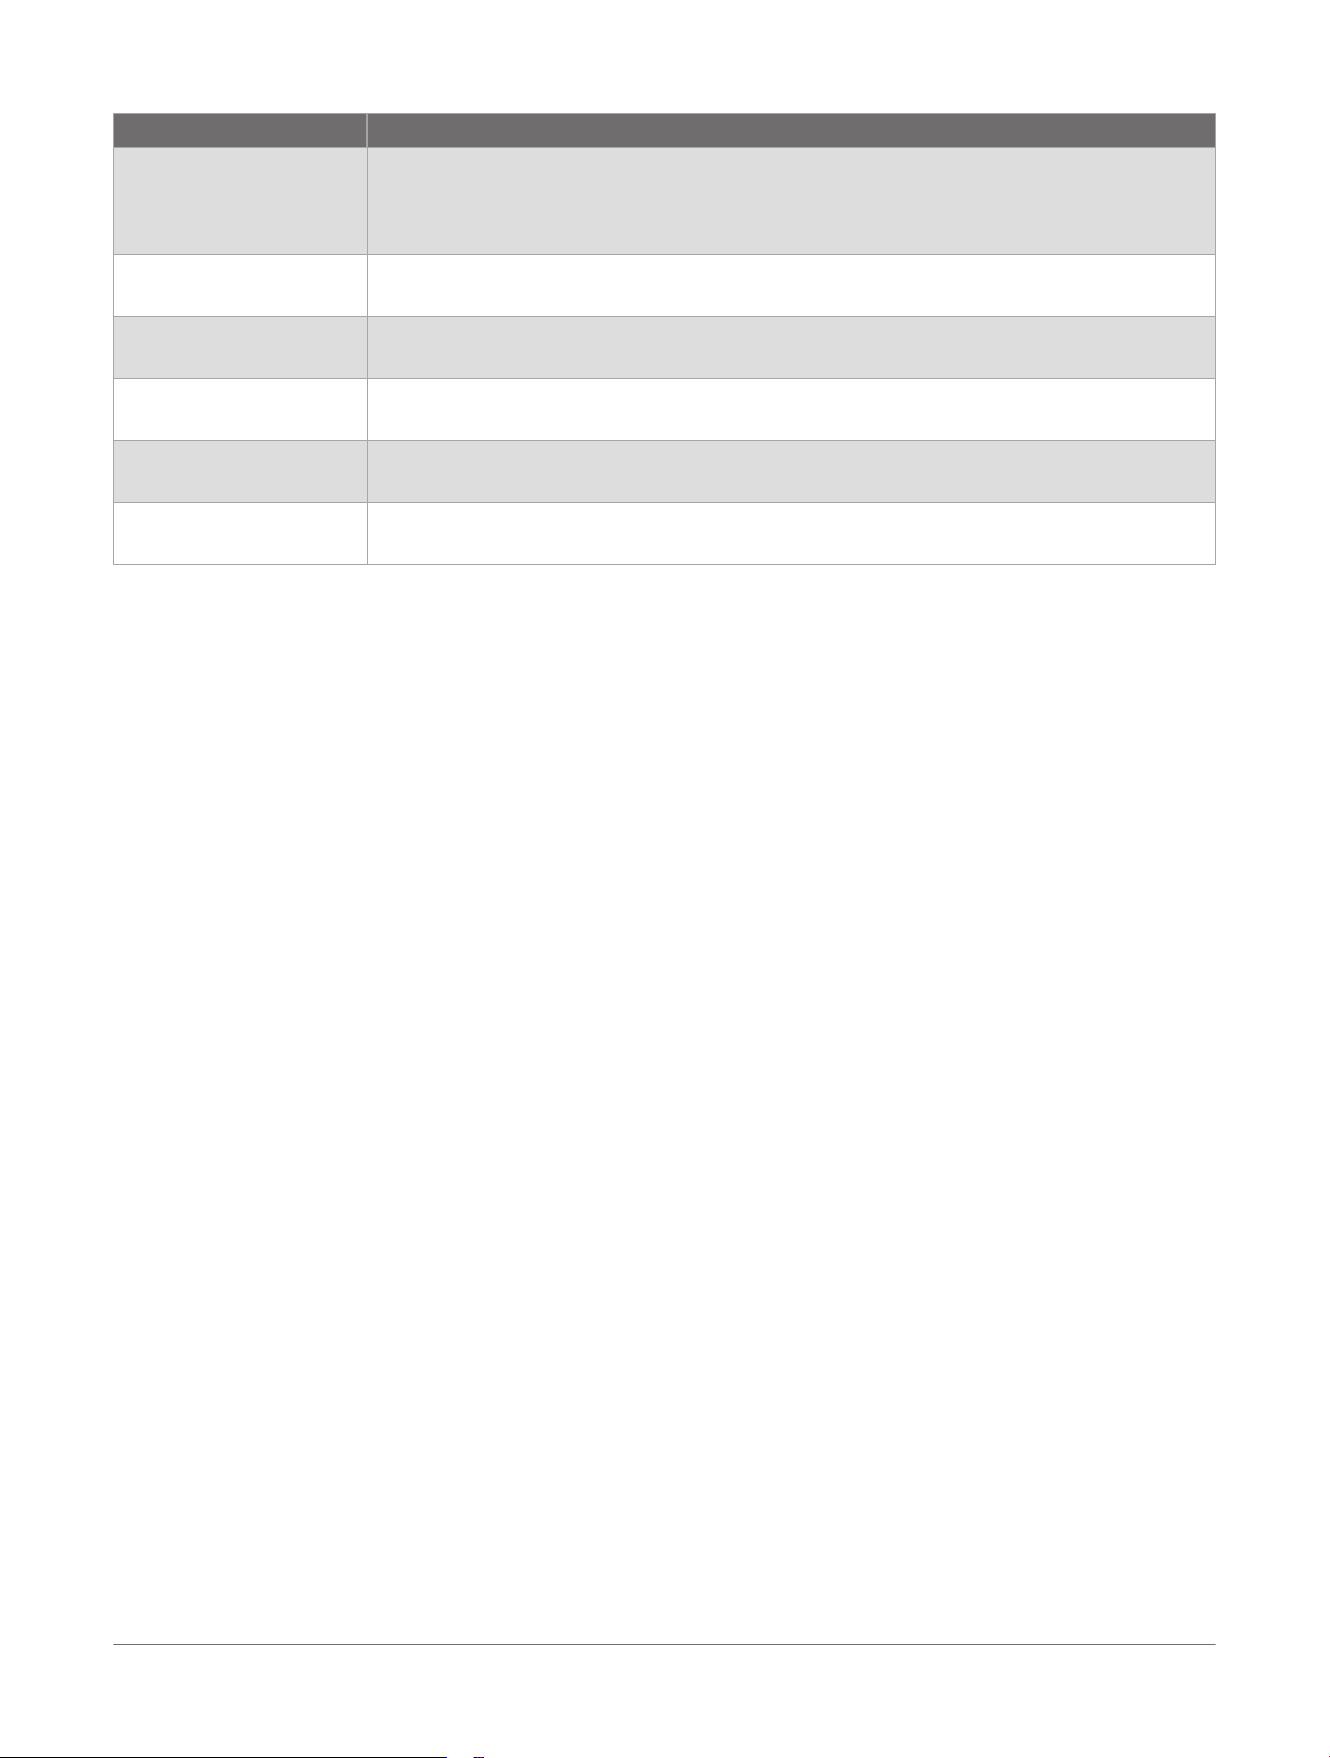
LED Activity Status
Solid blue to red Normal operation
While traveling above 15 mph, colors progressively change from cool colors (blue, green)
when the vehicle is around 70 m (229 ft.) away through to warm colors (yellow, orange,
red) when the vehicle is around 9 m (29 ft.) away.
Solid blue Normal operation
The device features are limited because the vehicle is traveling under 15 mph.
Single yellow flash (after
button press)
Normal operation
The indicator lights are enabled, and radar detection is working.
Solid or flashing magenta Update
The device is performing a software update and is disabled until the update is complete.
20 green flashes on
startup
Update
The device performed a successful update.
20 red flashes on startup Update
The device failed to perform a software update.
Indicator Lights
The lights on the right and left of each indicator flash amber or red to indicate the distance and position of an
approaching vehicle. The middle LED on the right indicator shows the current radar status (Radar Status LED,
page4).
Introduction
GarminCatalyst™ R1 Racing Radar
Owner's Manual
5
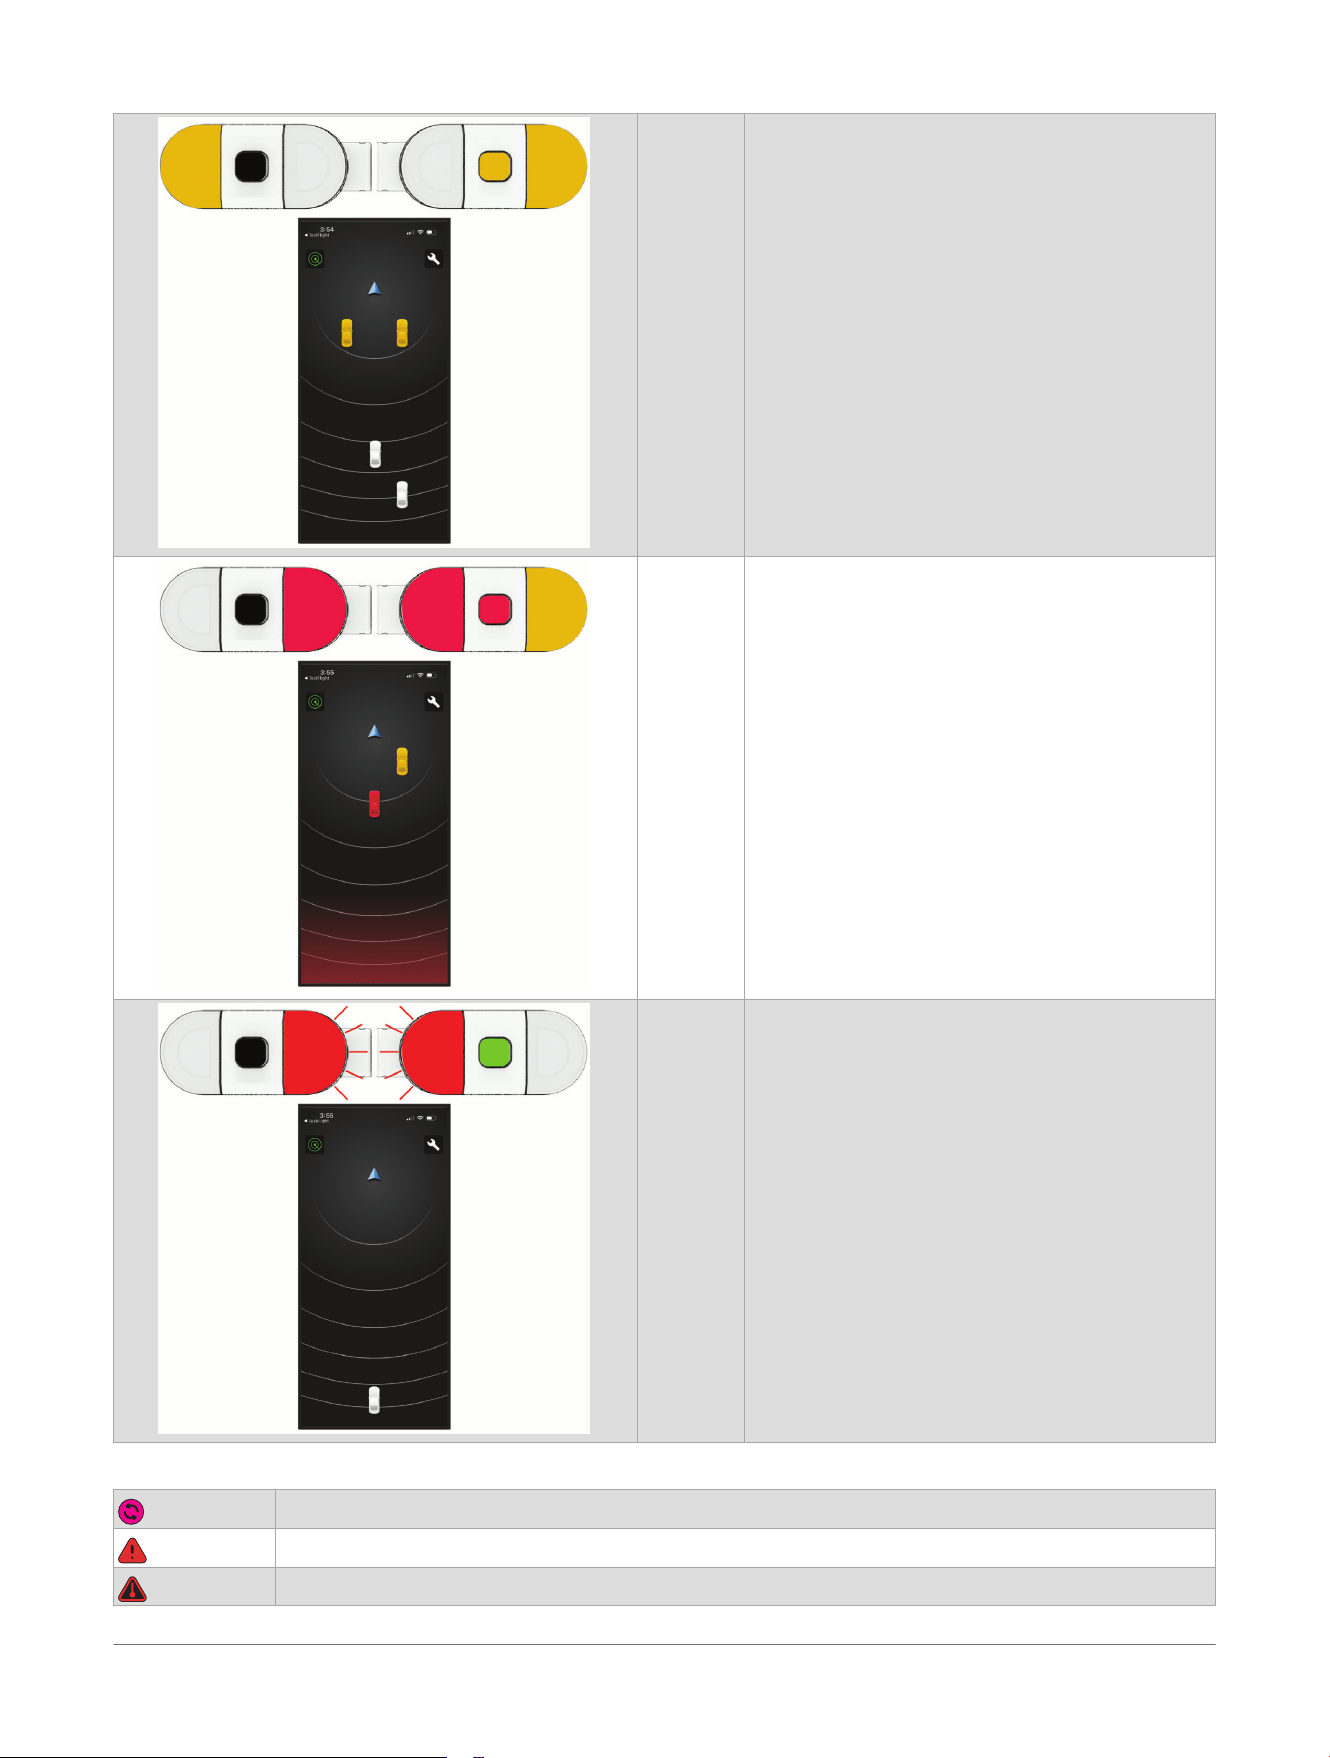
Amber
lights
A car is behind the driver approaching from the
left or right side. The side that the light is on
indicates which side the car is on.
Solid red
lights
A car is approaching in the lane directly behind
the driver. The side that the light is on indicates
which side the car is on.
Lights
flash red
• 3 red flashes: Closest vehicle is 9 seconds
away.
• 2 red flashes: Closest vehicle is 6 seconds
away.
• 1 red flash: Closest vehicle is 3 seconds away.
Status Icons
Software update
Frequency interference
Overheating
6 GarminCatalyst™ R1 Racing Radar
Owner's Manual
Introduction

Tools Needed
• 2.5 mm hex wrench (included)
• Adhesive strips (included)
• Cable ties (included)
• Cutters to trim cable ties
• Screws or bolts to secure the devices (M4 screws included)
Introduction GarminCatalyst™ R1 Racing Radar
Owner's Manual
7
Installation
Mounting Considerations
WARNING
Failure to mount the device without the appropriate vertical or horizontal clearance could cause degraded
performance or could interfere with vehicle operations, causing an accident possibly resulting in property
damage, serious personal injury, or death.
Failure to ensure sufficient cable slack could result in poor product performance, property damage, or serious
personal injury.
When installing the device in a vehicle, do not place the device where it obstructs the driver’s view of the road
or interferes with vehicle operating controls, such as the pedals, steering wheel, or transmission levers. Do not
place unsecured on the vehicle dashboard. Do not place the device in front of or above any airbag.
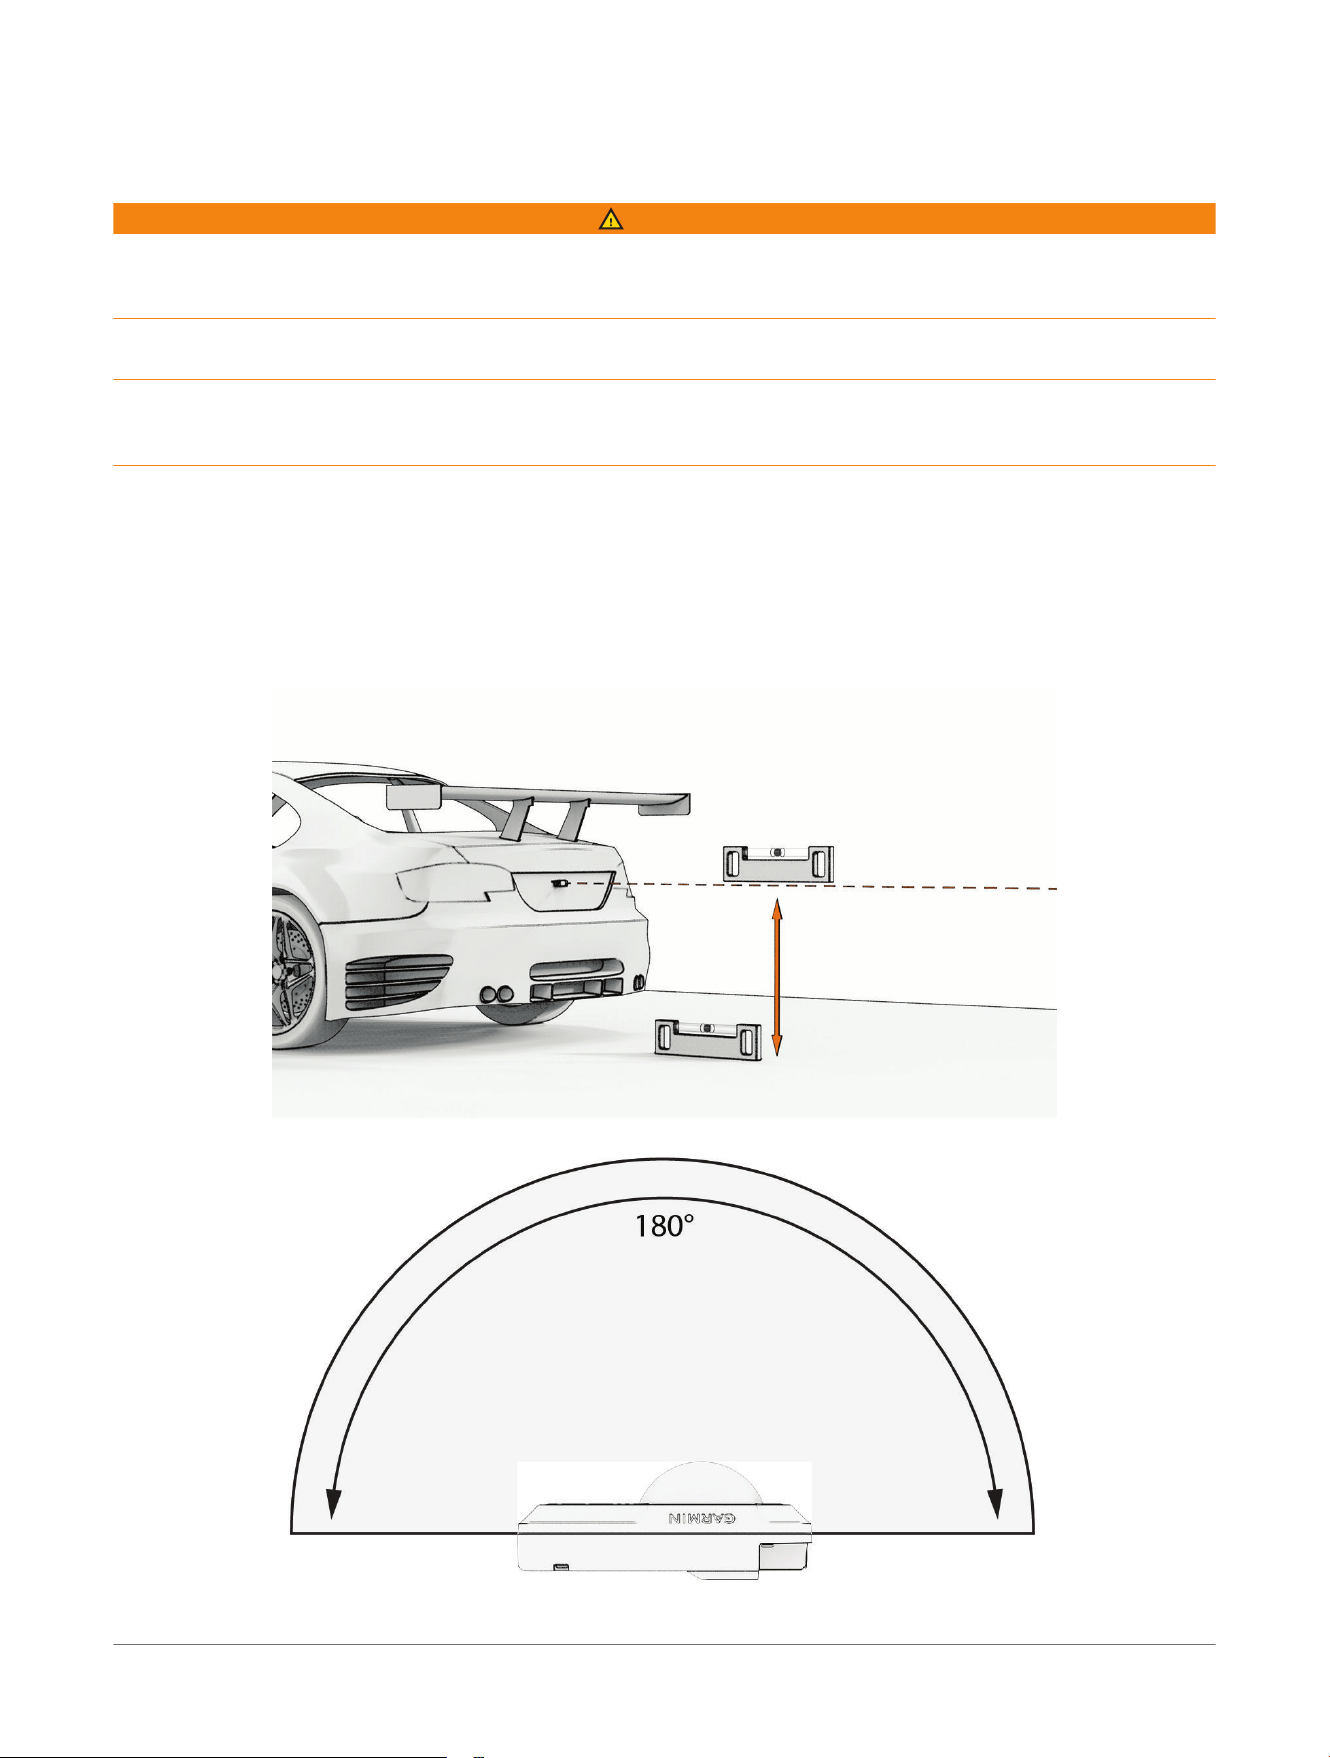
When selecting a location to mount the device, observe these considerations before permanently mounting it.
• Ensure adequate clearance around the device.
• You must mount the device in a location where it is not exposed to extreme temperatures, such as the
exhaust.
• Installing the device higher on the back of the vehicle provides a better radar view.
• The included surface mount bracket can be fastened to the back of the vehicle using self-tapping, panhead
screws or adhesive.
• Ensure the device faces backward and is level and parallel to the road.
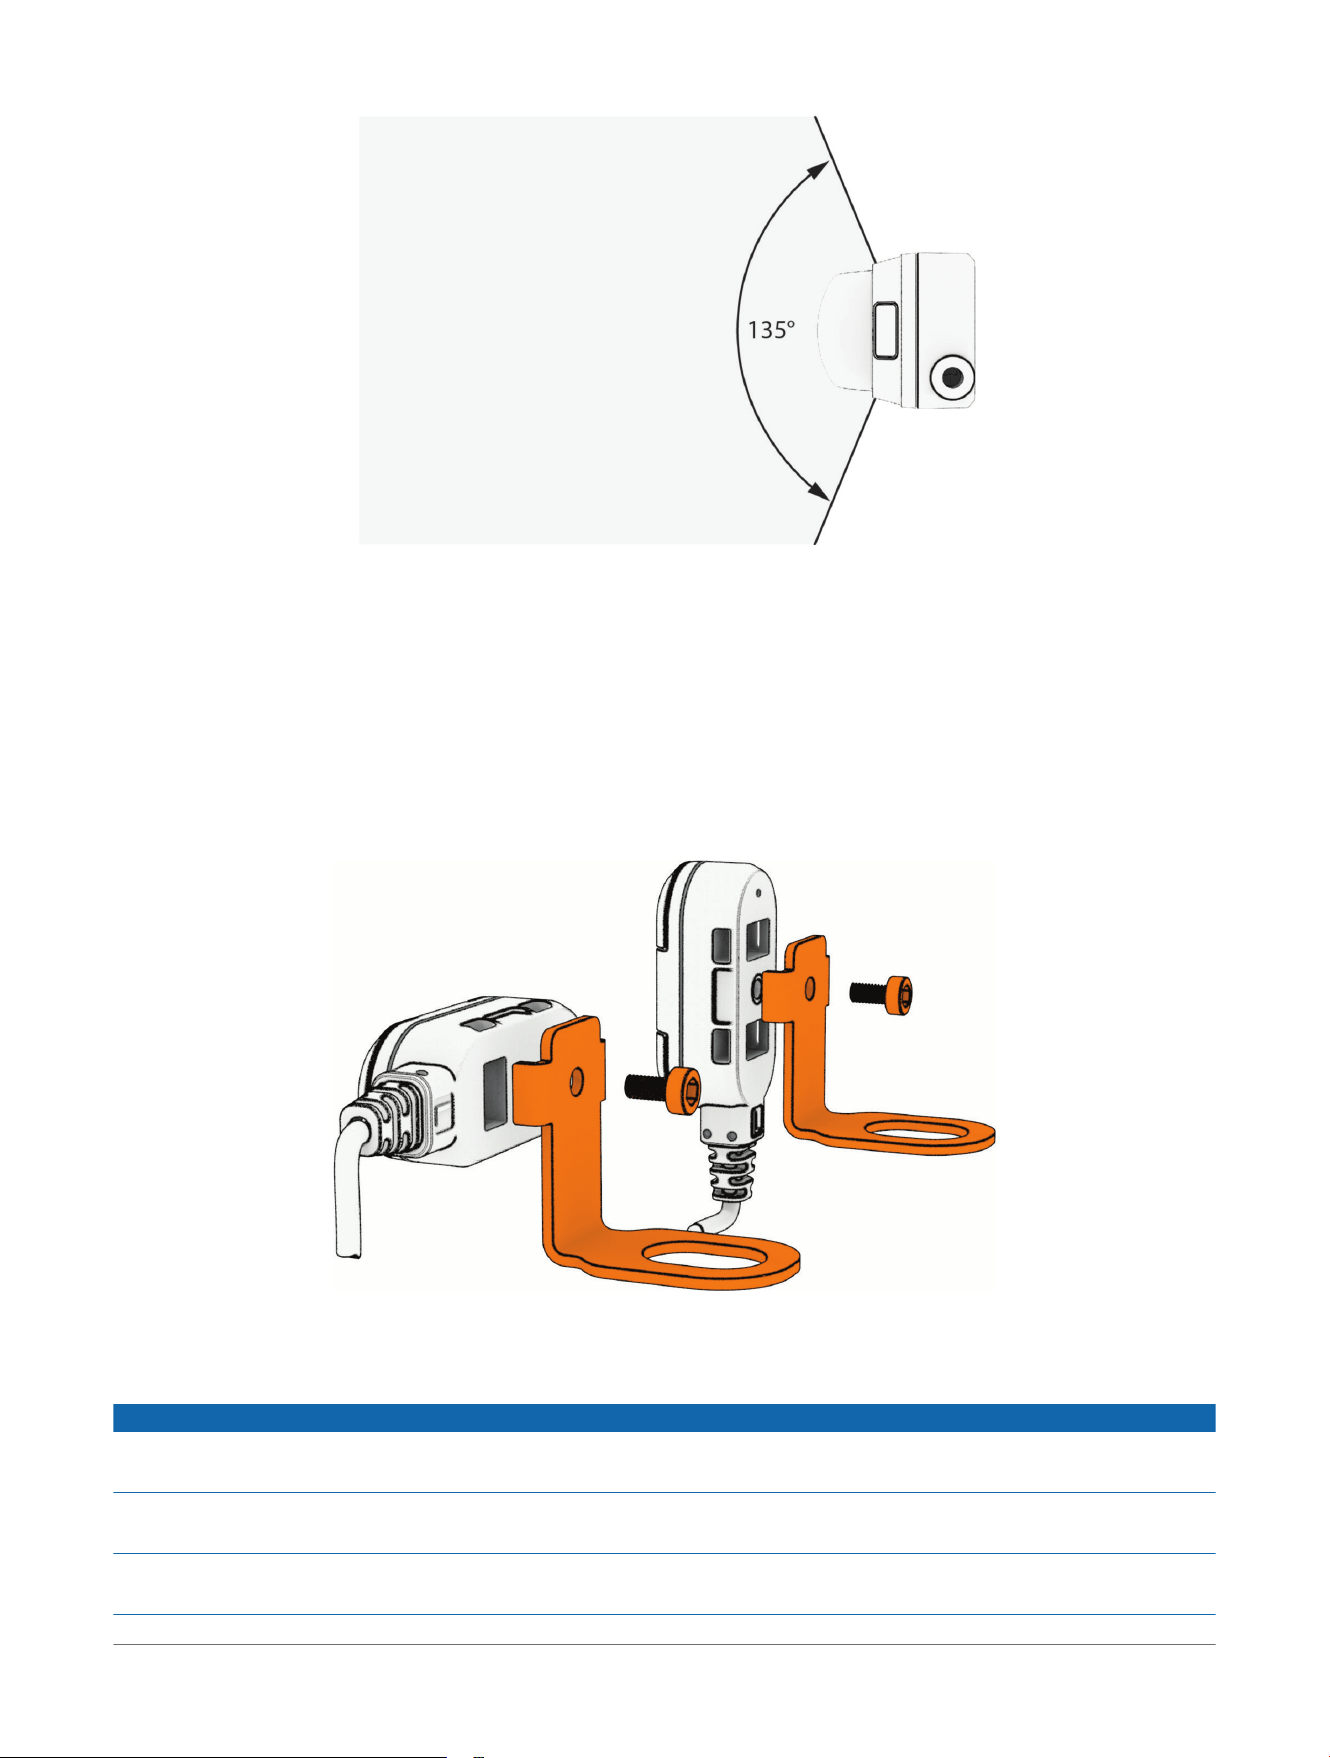
• Ensure the device has 180 degrees of horizontal clearance.
• Ensure the device has 135 degrees of vertical clearance.
8
GarminCatalyst™ R1 Racing Radar
Owner's Manual
Installation
Installing the Indicators
The device includes parts for multiple indicator installation solutions. Custom mounts may require additional
hardware. The indicators are labeled on the back, with the L indicator to be positioned on the left side and the R
indicator to be positioned on the right side. Ensure the indicators are visible in your peripheral vision while you
are looking straight ahead.
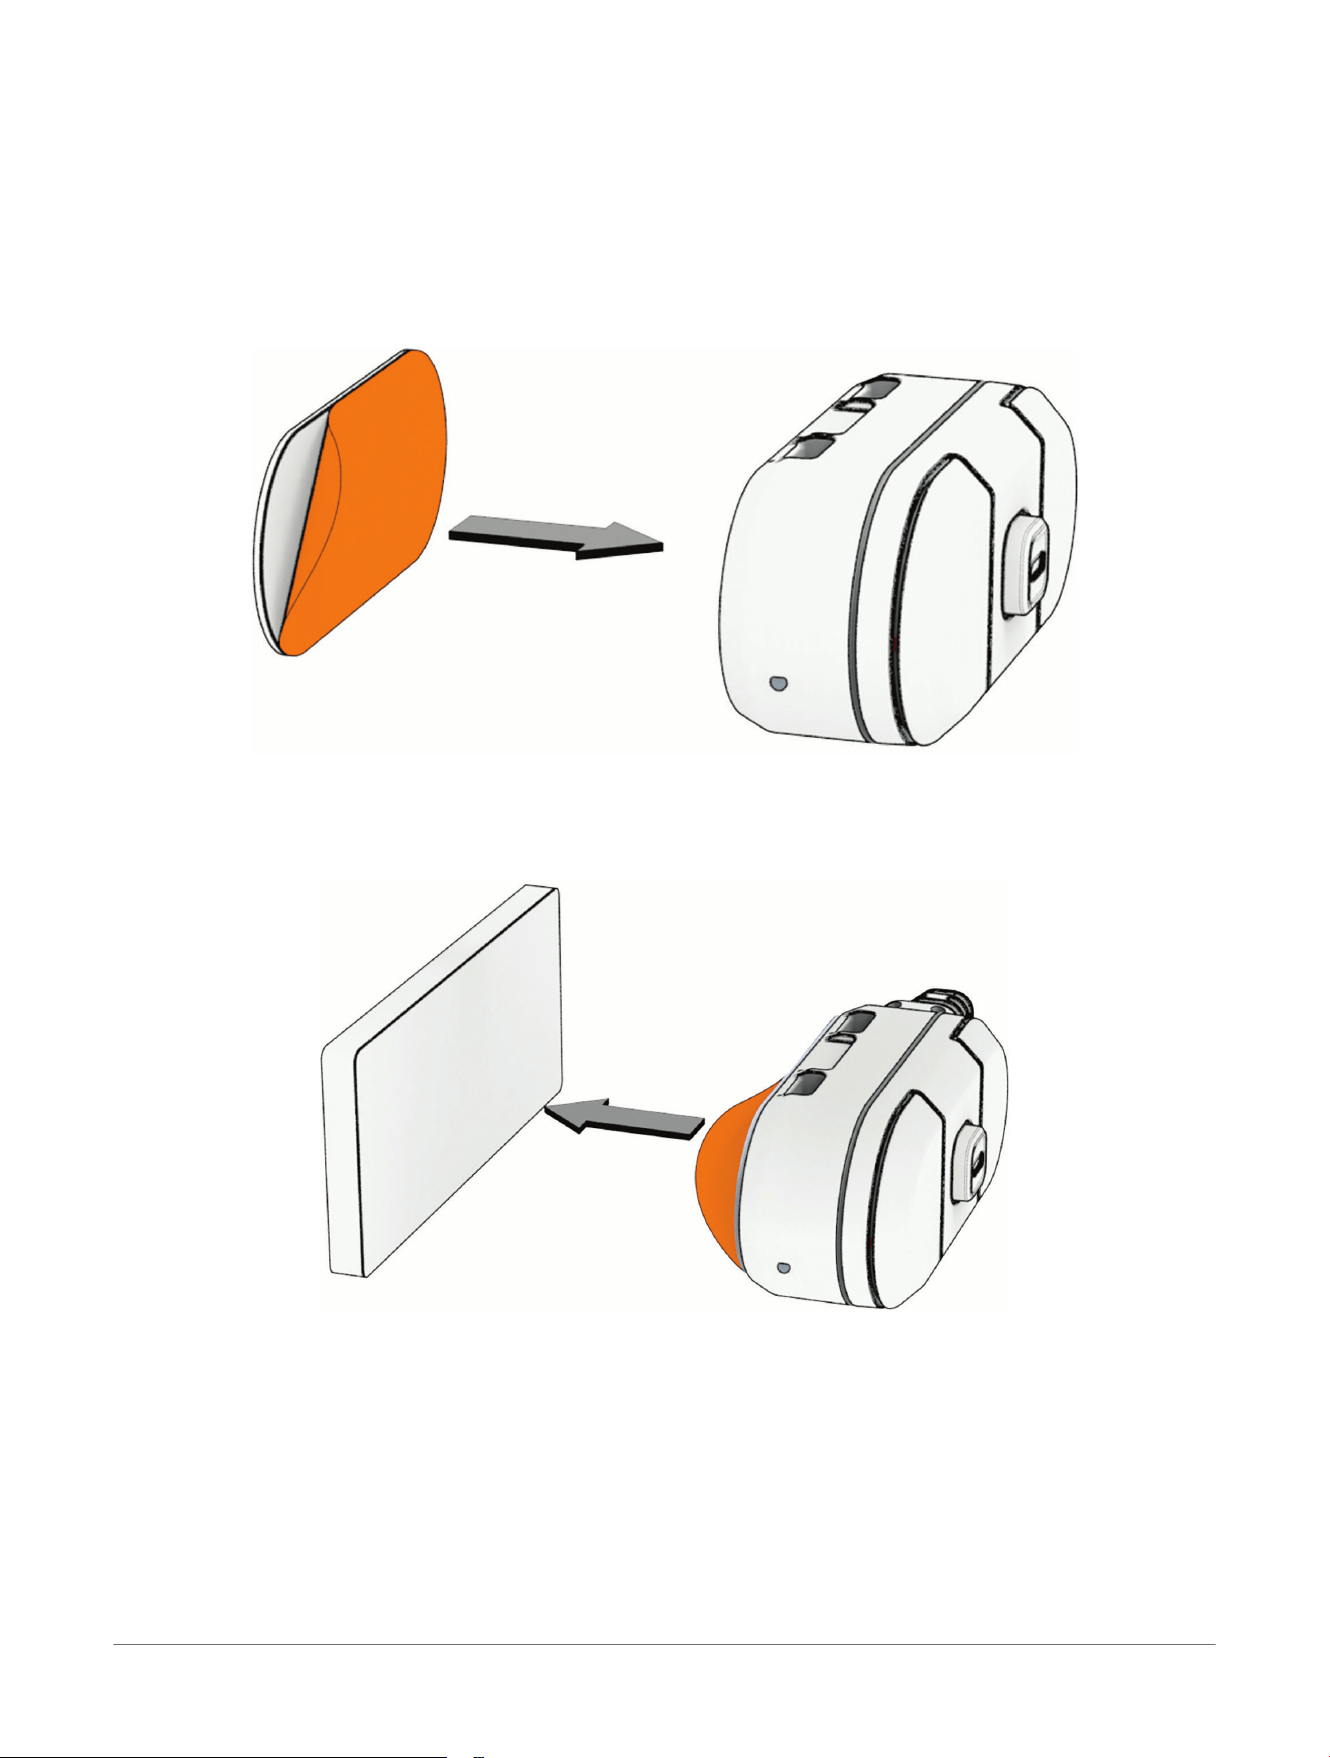
Mounting the Indicators with Brackets
Before you mount the indicators, determine whether the indicator should be placed vertically or horizontally and
which side each indicator should be placed on. Each indicator is marked with L or R to align with the left or right
side from the driver's position.
1 Attach the bracket to the back of the indicator using the included screw.
2 Place the bracket in the appropriate location in your vehicle with the indicator facing the driver.
3 Repeat steps 1 and 2 to install the other indicator on the other side.
Mounting the Indicators with Adhesive
NOTICE
The adhesive mount is intended for a long-term installation and can be difficult to remove. You should carefully
consider the mounting location before you install the mount.
You should allow the mount to remain in place at room temperature for 24 hours before completing installation
and using the device.
For the best results, the ambient temperature should be from 21° to 38°C (from 70° to 100°F) while installing
with adhesive. The adhesive may not bond correctly if the temperature is outside this range.
Installation
GarminCatalyst™ R1 Racing Radar
Owner's Manual
9
Before you mount the indicators, determine whether the indicator should be placed vertically or horizontally on
your vehicle and which side each indicator should be placed on. Each indicator is marked with L or R to align
with the left or right side from the driver's position.
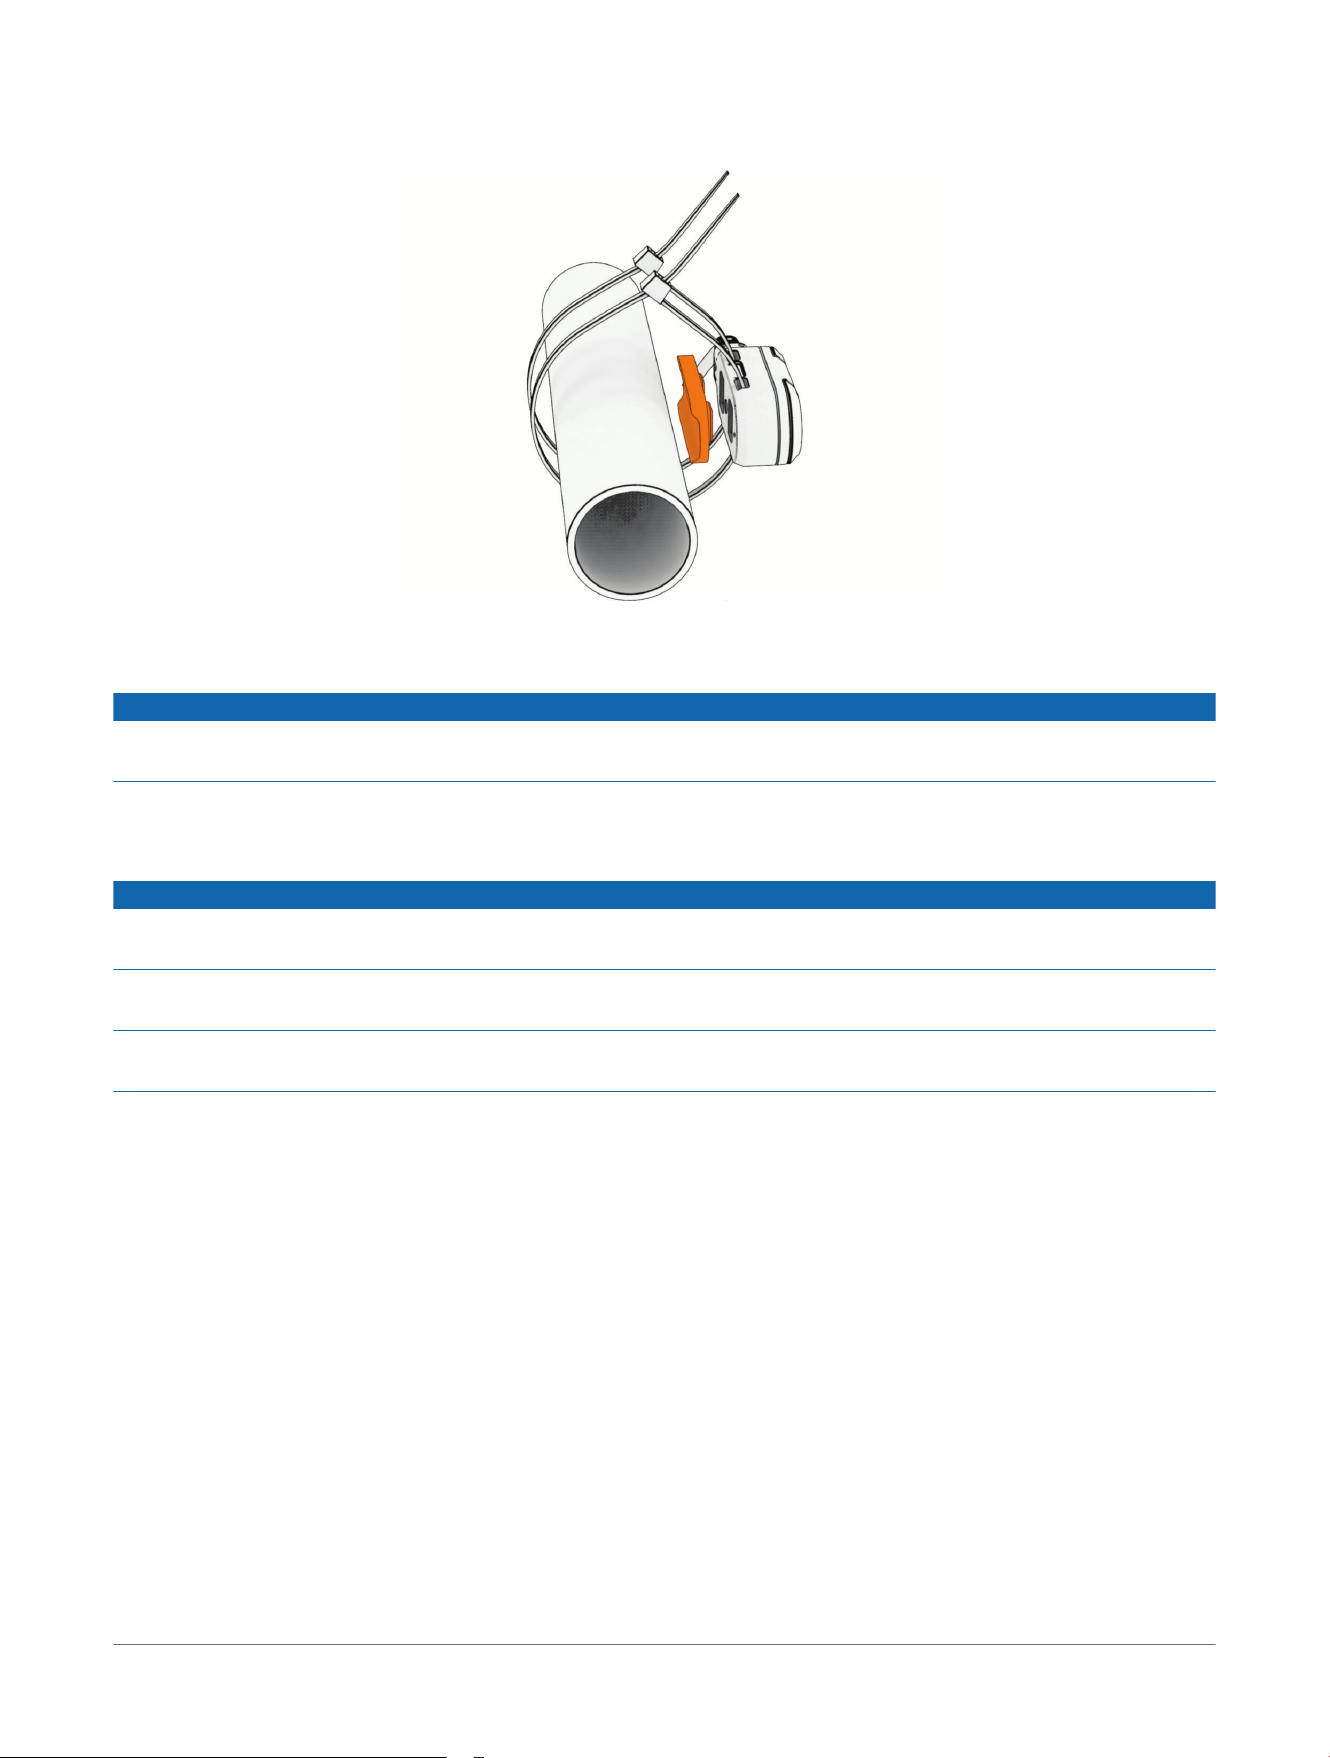
Before you mount the indicators with adhesive, ensure the surface areas are completely flat.
1 Clean the surface area and the back of the indicators using water or isopropyl alcohol and a lint-free cloth.
The surface must be free of dust, wax, oils, or coatings.
2 Remove the protective film from the adhesive.
3 Apply the adhesive to the back of the indicator.
TIP: The adhesive is extremely sticky. Do not touch the adhesive to the surface until the indicator is properly
positioned and aligned.
4 Remove the protective film from the other side of the adhesive, and position the indicator over the mounting
location.
TIP: The adhesive is extremely sticky. Do not touch the adhesive to the surface until the indicator is properly
positioned and aligned.
5 Press the indicator firmly onto the surface, and maintain pressure for 30 seconds.
6 Repeat steps 1 through 5 to install the other indicator.
Mounting the Indicators with Cable Ties
Before you mount the indicators, determine whether the indicator should be placed vertically or horizontally on
your vehicle and which side each indicator should be placed on. Each indicator is marked with L or R to align
with the left or right side from the driver's position.
1 Position the indicator facing toward the driver and in a location where it is visible without needing to look
away from the road.
10
GarminCatalyst™ R1 Racing Radar
Owner's Manual
Installation
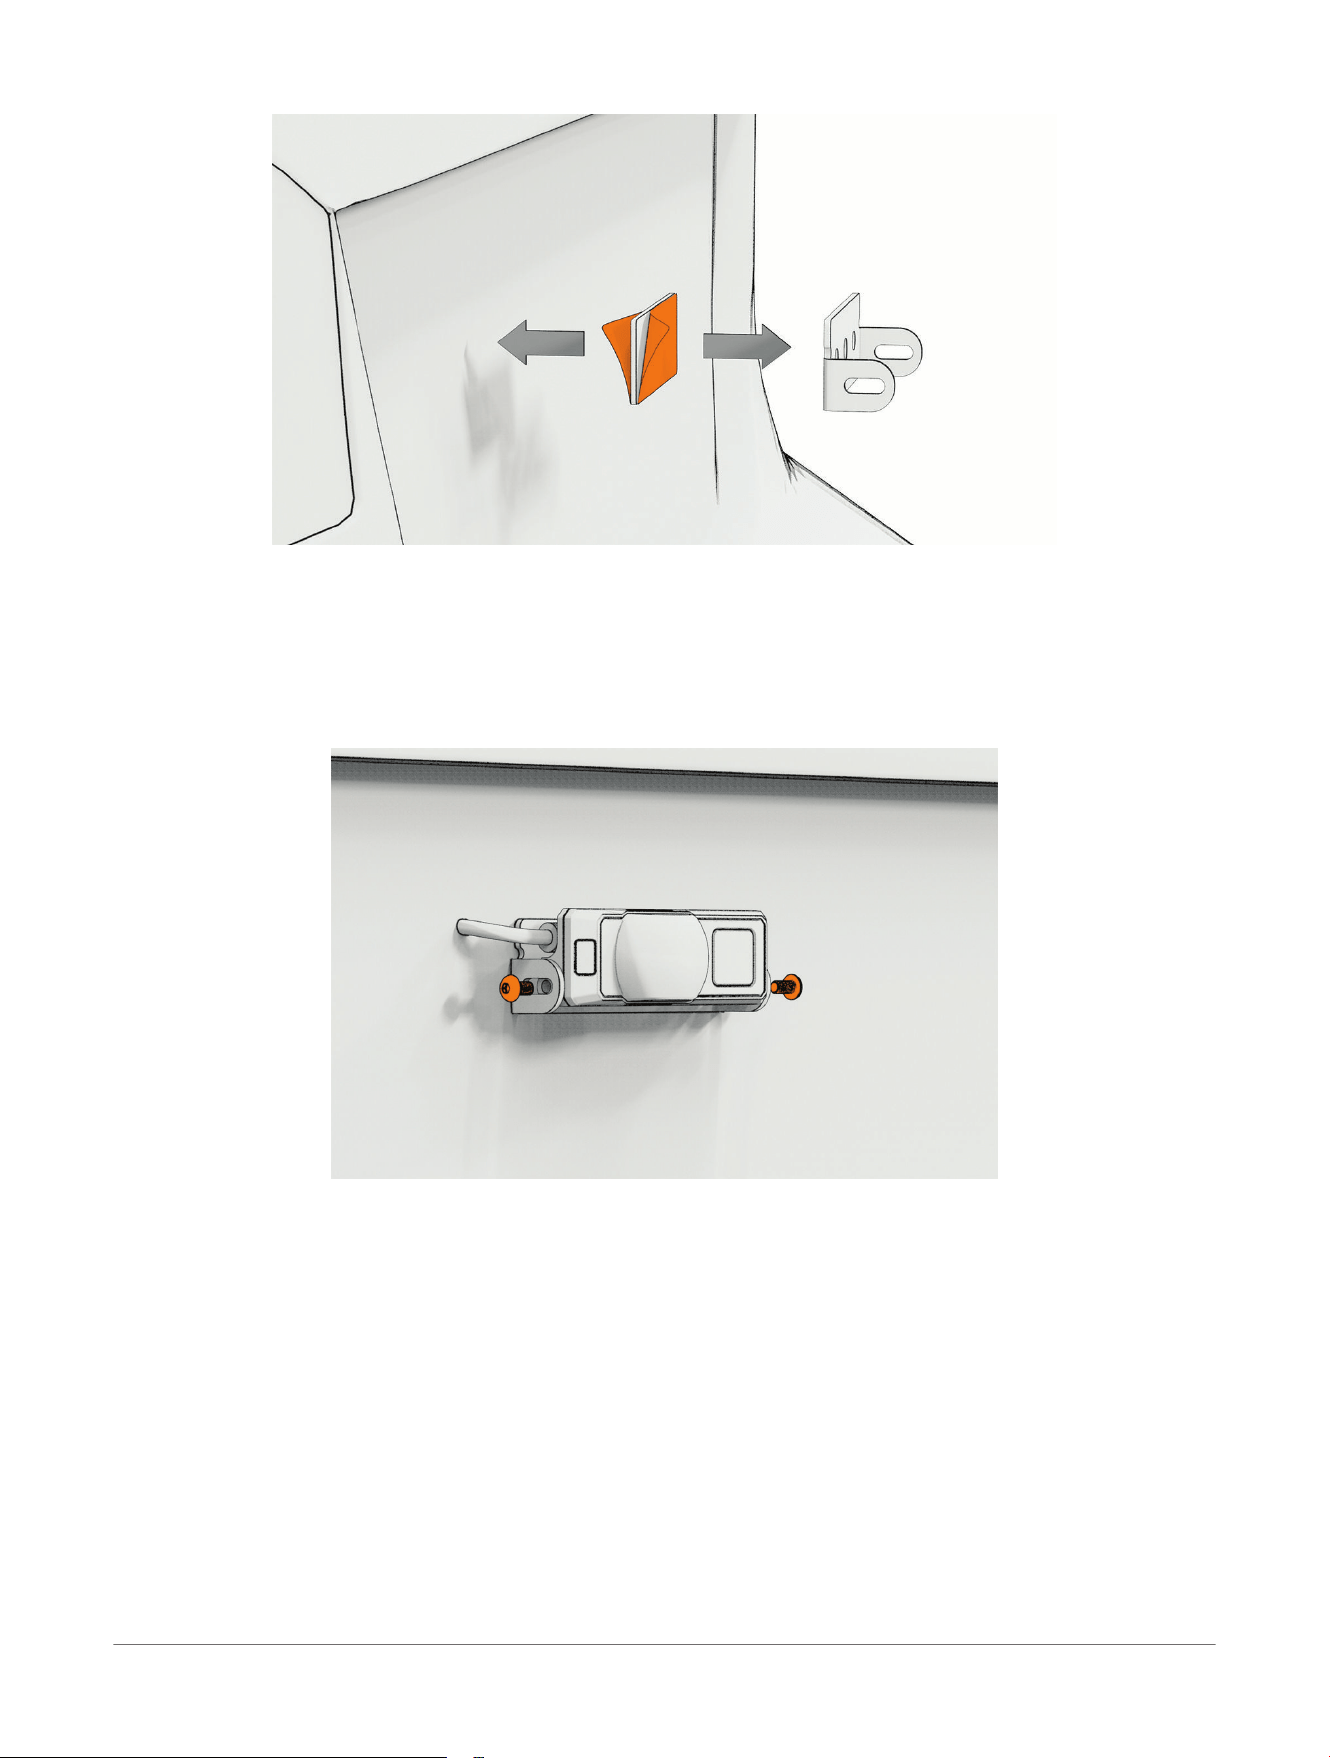
2 Mount the indicator to a location such as a roll cage bar or mirror stem using zip ties and the included
mounting pad.
3 Repeat steps 1 and 2 for the indicator on the other side.
Mounting the GarminCatalyst
™
R1 Racing Radar
NOTICE
It is the user's responsibility to mount and operate the device in compliance with all applicable laws and
ordinances.
The GarminCatalyst R1 racing radar system includes parts for a surface mount. Custom mounts may require
additional hardware.
Installing the Adhesive Mount
NOTICE
The adhesive is intended for a long-term installation and can be difficult to remove. You should carefully
consider the mounting location before you install the mount.
You should allow the mount to remain in place at room temperature for 24 hours before completing installation
and using the device.
For the best results, the ambient temperature should be from 21° to 38°C (from 70° to 100°F) while installing
with adhesive. The adhesive may not bond correctly if the temperature is outside this range.
Before you install the mount with adhesive, ensure the surface area is completely flat.
If screws cannot be used for installation, you can install the GarminCatalyst
™
R1 racing radar system using the
included adhesive strip.
1 Plan a path for the cable so that it does not interfere with the operation and function of your vehicle.
2 Clean the mount and the area of the vehicle where you want to place the device using water or alcohol and a
lint-free cloth.
The surface must be free of dust, wax, oils, or coatings.
3 Remove the protective film from the adhesive, and press it into place on the mount.
TIP: The adhesive is extremely sticky. Do not touch the adhesive to the surface until the indicator is properly
positioned and aligned.
4 Remove the protective film from the other side of the adhesive strip, press the mount into place on the
vehicle, and hold the mount for 30 seconds to ensure proper adhesion.
Installation
GarminCatalyst™ R1 Racing Radar
Owner's Manual
11
5 Secure the cable, and connect it to the battery and GarminCatalyst R1 racing radar system.
Installing the Radar in the Mount
1
Place the GarminCatalyst
™
R1 racing radar system into the mount, with the lens facing outward.
NOTE: The radar system automatically detects orientation and can be mounted with the red light to the left
or right, depending on which fit is more appropriate for your vehicle.
2 Secure the device into the mount using the included M4 screws.
Checking the Radar Angle
You can adjust the radar angle to provide the best view for your vehicle.
1 Ensure the system is facing straight backward from the vehicle.
2 Drive to a level area with a clear view behind your vehicle.
3 Use a 2.5 mm hex wrench to loosen the two screws that hold the radar to the mount.
4 Tilt the radar left or right.
NOTE: If approaching vehicles appear too far to your left side, adjust the angle so that the radar sensor
points more to the left side. If the vehicles are too far to the right, adjust the radar sensor to point more to the
right side.
12
GarminCatalyst™ R1 Racing Radar
Owner's Manual
Installation
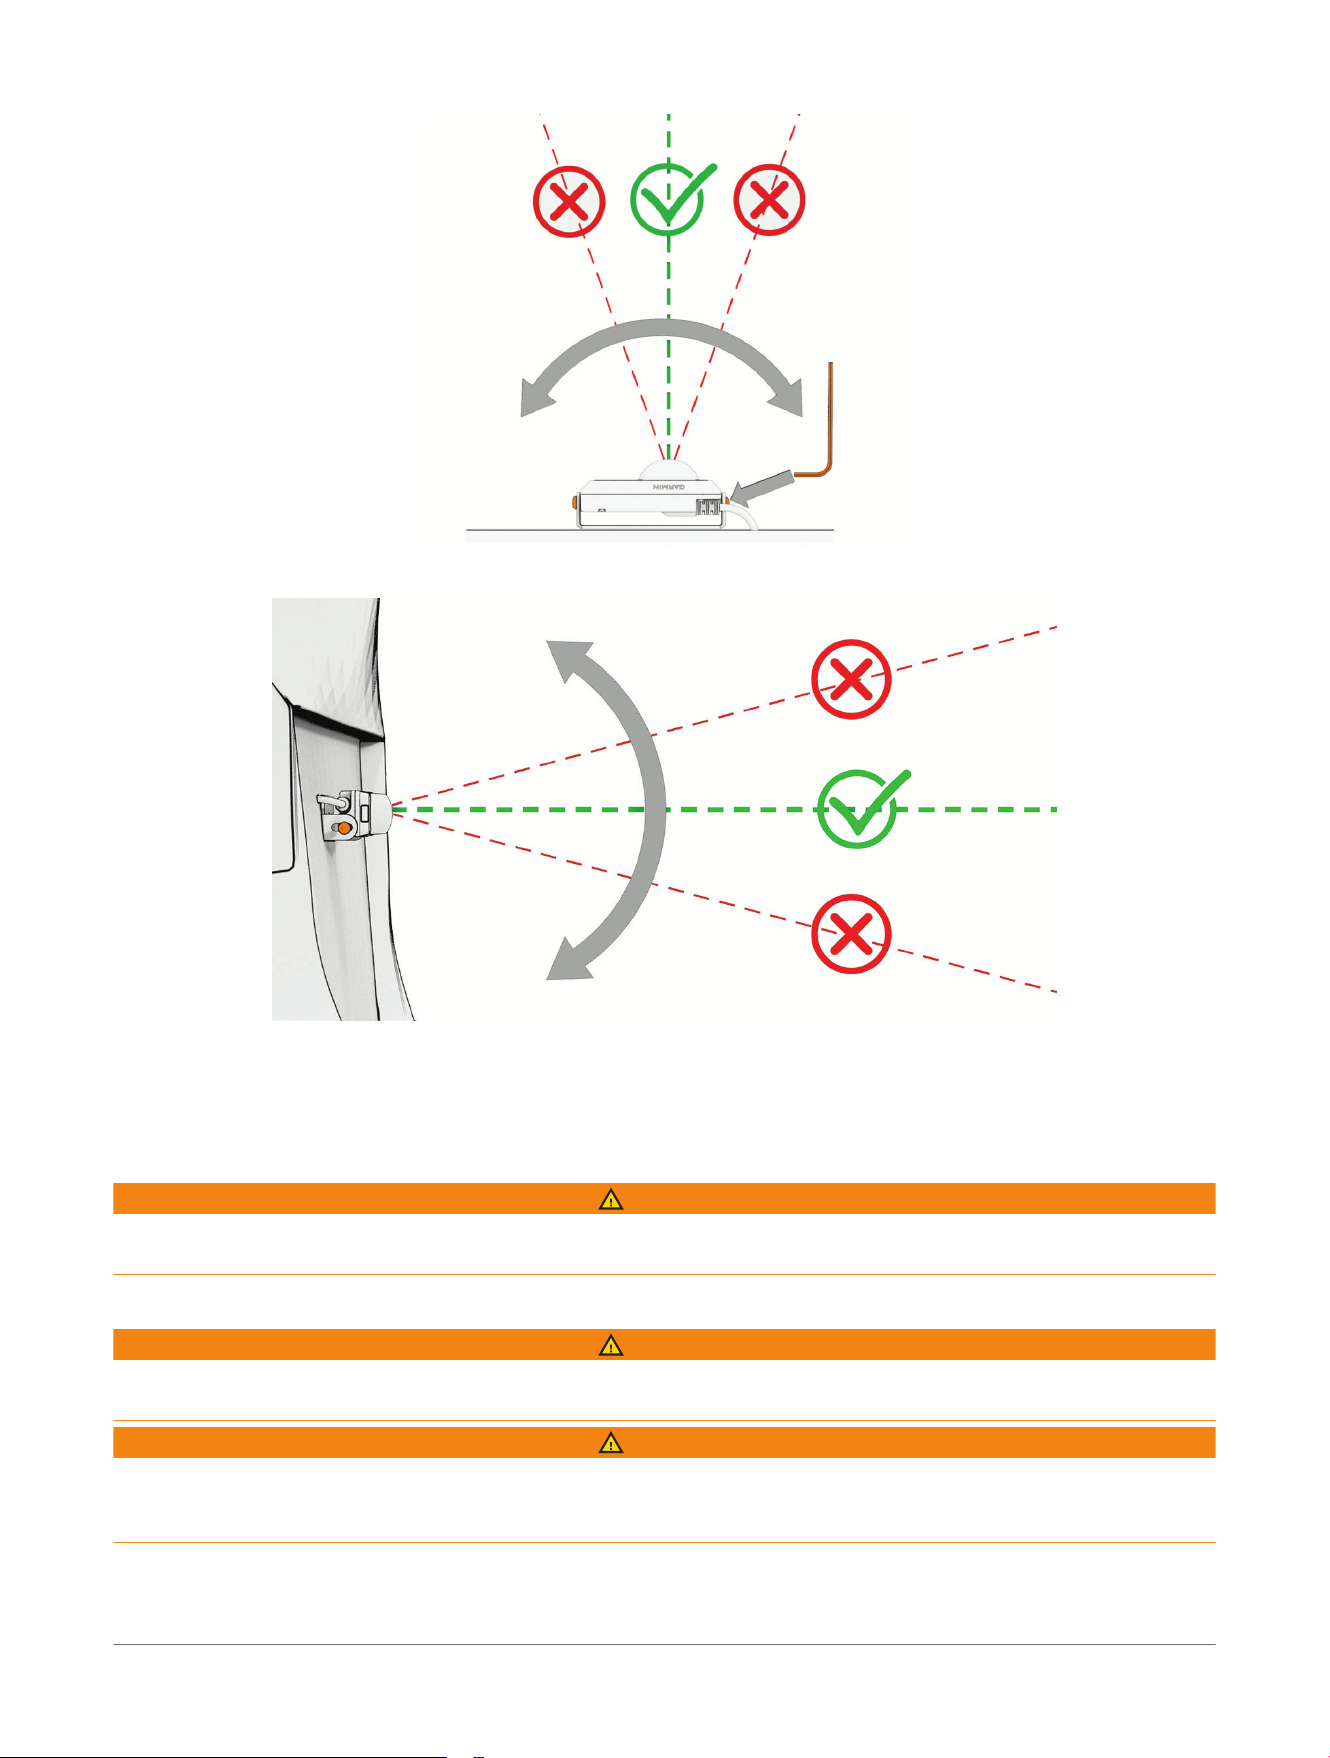
5 Tilt the radar up and down so that it is level and parallel to the road.
6 Tighten the screws to lock the radar in the new position.
7
While on a drive, view the radar from the GarminCatalyst
™
Radar app, and verify the radar angle.
When the radar is angled correctly, vehicles appear accurately on the radar screen (Viewing Radar on the
GarminCatalyst
™
Radar App, page16).
8 If necessary, repeat this procedure until the radar angle is correct.
WARNING
After you adjust the radar angle, you must ensure that vehicles appear as expected. Failure to properly verify the
radar angle could result in an accident or collision, resulting in death, serious injury, or property damage.
Wiring Diagram
WARNING
See the Important Safety and Product Information guide in the product box for product warnings and other
important information.
WARNING
Garmin
®
strongly recommends having an experienced installer with the proper knowledge of electrical systems
install the device. Incorrectly wiring the power cable can result in damage to the vehicle, the battery, or the
device and can cause bodily injury.
The device must be mounted in a suitable and secure location, based on available power sources and safe
cable routing.
Installation
GarminCatalyst™ R1 Racing Radar
Owner's Manual
13
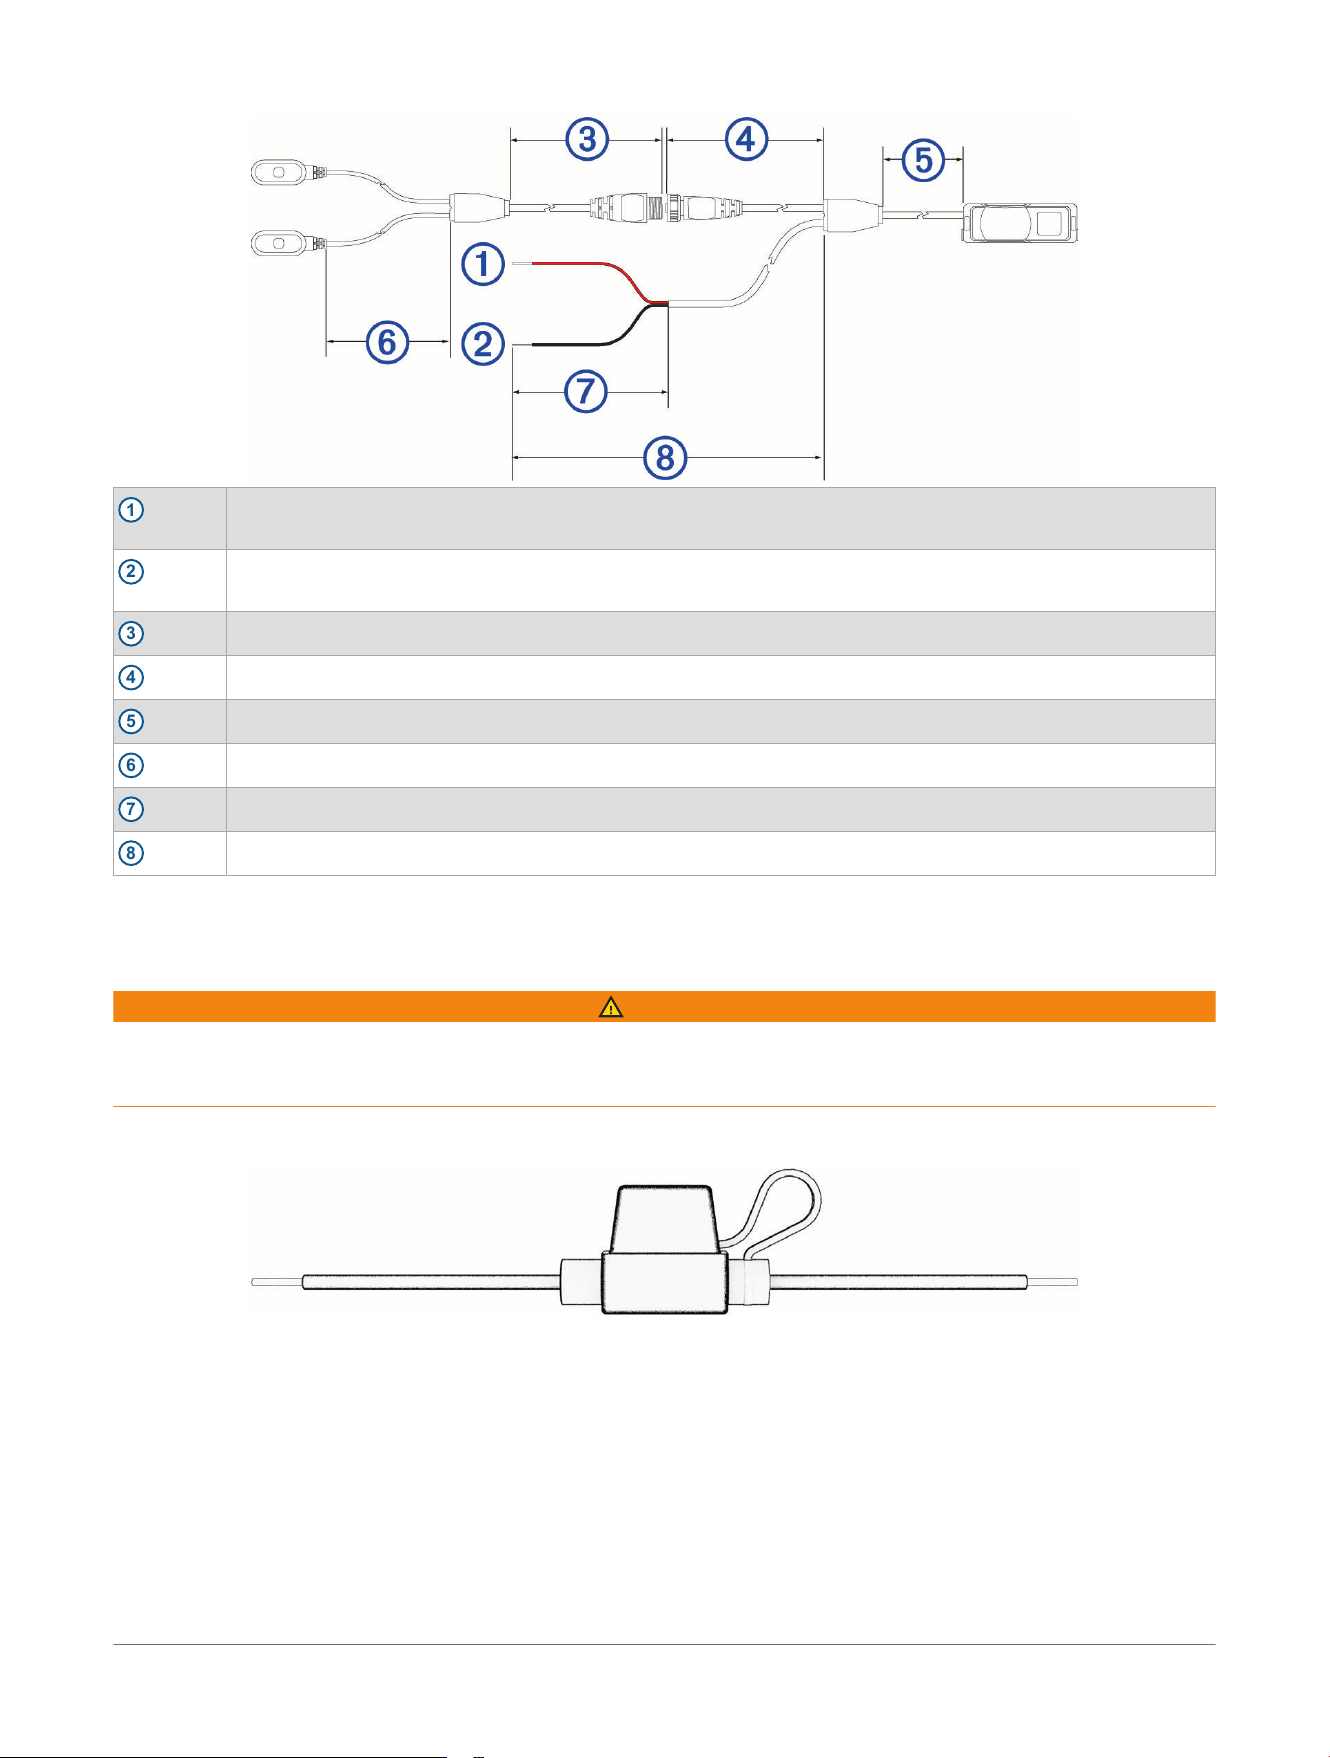
1
10to30 Vdc system power (red)
Cable length: 0.15 m (5.9 in.)
2
System ground (black)
Cable length: 0.15 m (5.9 in.)
3
Cable length: 1.4 m (55.1 in.)
4
Cable length: 3 m (9.8 ft.)
5
Cable length: 1 m (39.3 in.)
6
Cable length: 0.95 m (37.4 in.)
7
Cable length: 0.15 m (5.9 in.)
8
Cable length: 7 m (22.9 ft.)
NOTE: Cable lengths are not to scale.
All measurements may vary by 3 cm (1.2 in.).
In-line Fuse Cable
WARNING
Garmin
®
strongly recommends having an experienced installer with the proper knowledge of electrical systems
install the in-line fuse cable. Incorrectly wiring the power cable or the in-line fuse cable can result in damage to
the vehicle or the battery and can cause bodily injury.
In many cases, you must install the included in-line fuse cable on the device power cable to protect the device
from excessive electrical current.
• You must install the included in-line fuse cable if you are connecting the power cable directly to the vehicle
battery.
• If you are connecting the power cable to an accessory power source or bus bar that already has a suitable
fuse or a protective circuit, installing the included in-line fuse is not necessary.
• When installing the in-line fuse cable, you should connect it to the red system power wire using the included
splice connector.
• Before installing the in-line fuse cable, you should remove the fuse from its socket, and reinstall it when you
are finished.
14
GarminCatalyst™ R1 Racing Radar
Owner's Manual
Installation
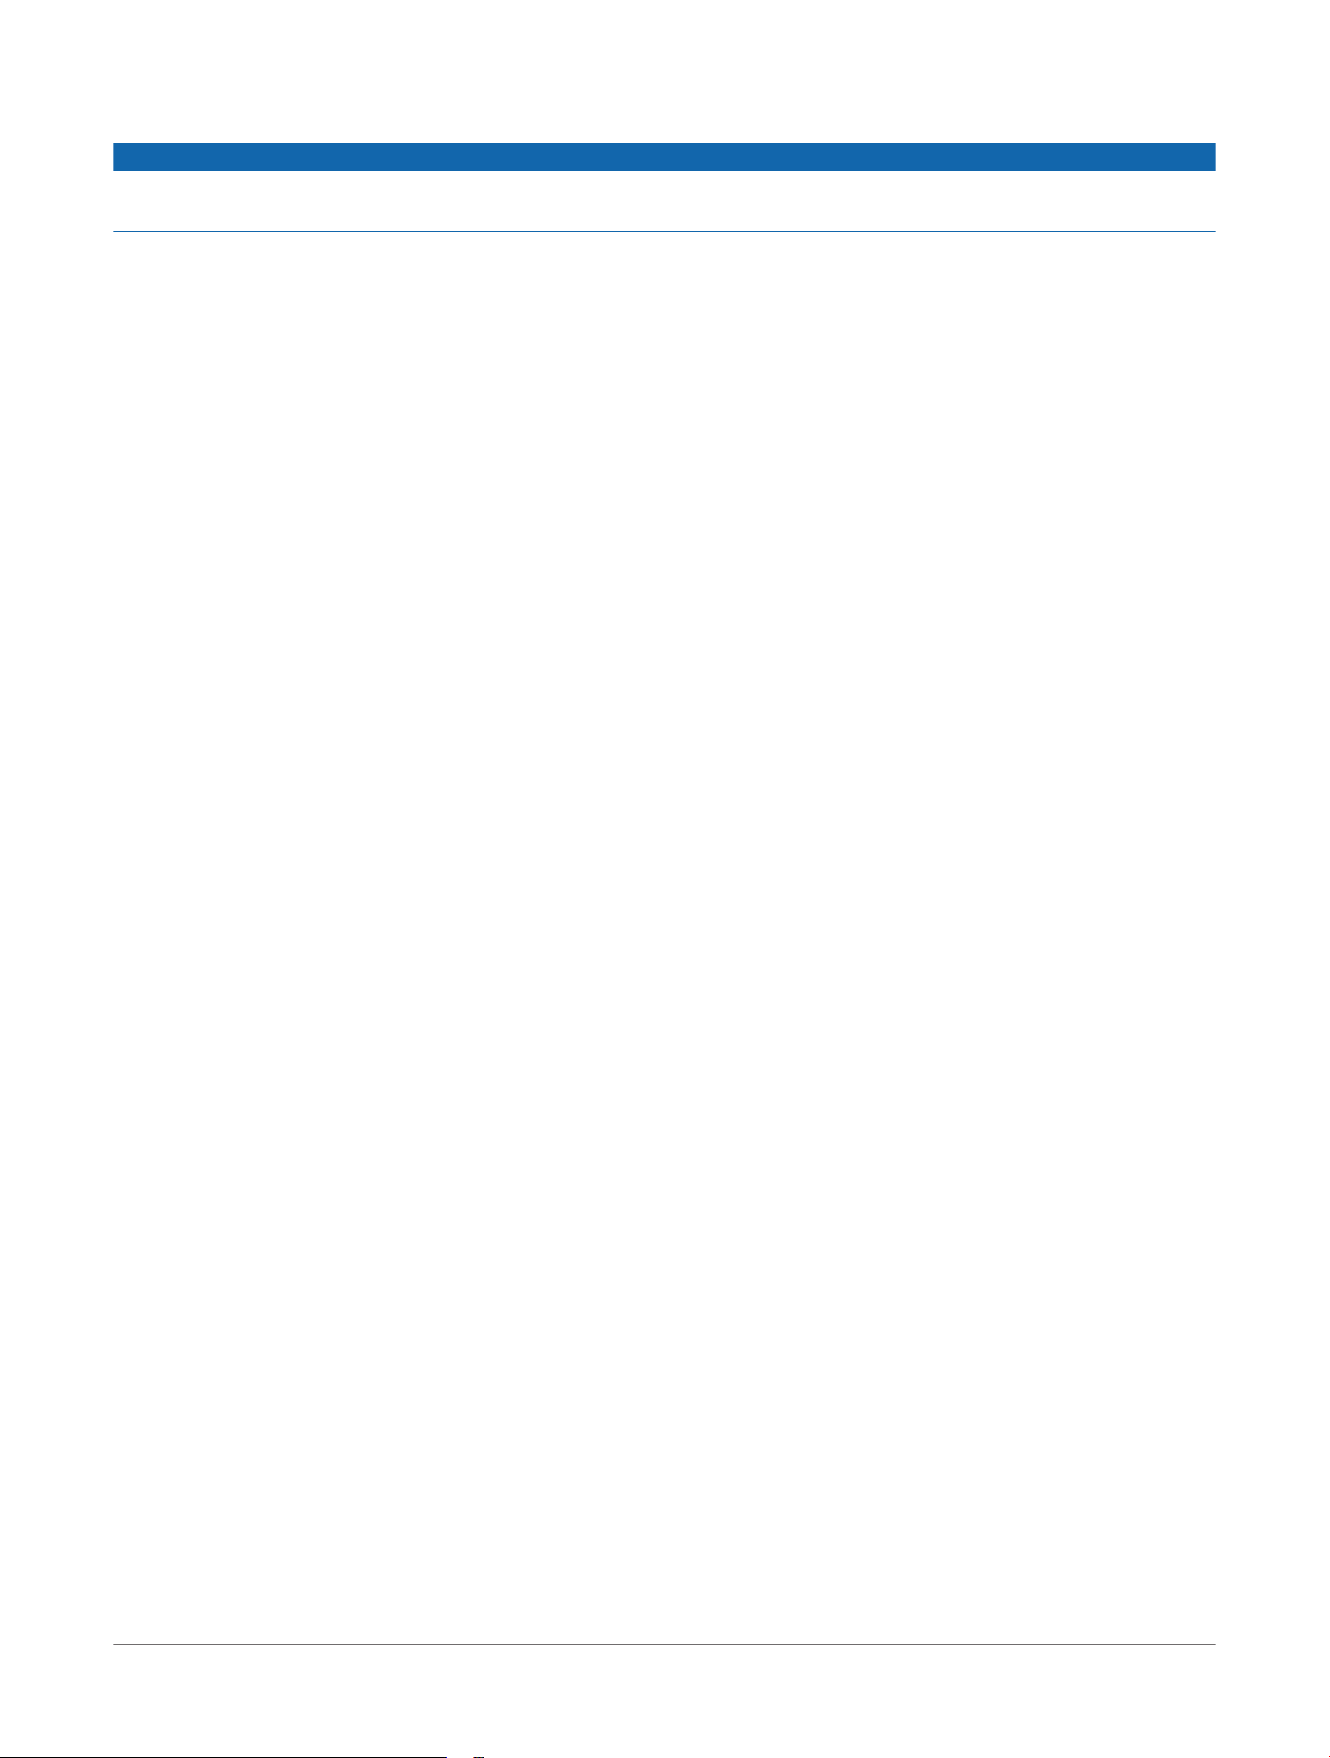
Changing the Fuse in the Fuse Cable
NOTICE
When replacing the fuse, verify the replacement fuse is fully inserted into the fuse housing. The vehicle power
cable does not work unless it is assembled correctly.
1 Lift up the cover from the top of the fuse housing.
2 Insert a new 3 A fuse.
3 Replace the cover on the fuse housing.
Installation GarminCatalyst™ R1 Racing Radar
Owner's Manual
15
The GarminCatalyst
™
R1 racing radar System and the
GarminCatalyst Radar App
The GarminCatalyst Radar app connects to your GarminCatalyst R1 racing radar system using Bluetooth
®
technology. The app displays radar information and settings.
• After pairing, the app displays colored vehicles indicating the threat level posed by approaching vehicles.
• Firmware updates are sent to the GarminCatalyst R1 racing radar system from the GarminCatalyst Radar
app.
Pairing the GarminCatalyst
™
R1 racing radar System with Your Phone
The first time you connect the GarminCatalyst R1 racing radar system to the GarminCatalyst Radar app on
your phone, you must pair both devices. After the initial pairing, the GarminCatalyst Radar app automatically
connects to the GarminCatalyst R1 racing radar system when you open the app and the device is active and
within range.
1 Bring your phone within 3m (10 ft.) of the rear radar sensor on your GarminCatalyst R1 racing radar system.
NOTE: Stay 10m (33 ft.) away from other Bluetooth
®
sensors while pairing.
2 On your compatible phone, enable Bluetooth technology.
3 From the app store on your phone, install and open the GarminCatalyst Radar app.
4 Follow the on-screen instructions.
5 While the GarminCatalyst R1 racing radar system is powered on, hold the device button for 5 seconds until
the status LED flashes blue to enter pairing mode.
If you hold the device button for 8 seconds or longer, the radar enters demo mode (Exiting Demo Mode,
page20).
The device is in pairing mode for 3 minutes or until you press the device button to exit pairing mode.
6 Follow the on-screen instructions.
When the GarminCatalyst R1 racing radar system is paired with your phone, the app displays the current radar
status.
Viewing Radar on the GarminCatalyst
™
Radar App
WARNING
This device is intended only for recreational use on a racetrack. Never use this device on public roadways.
Failure to follow this warning may result in an accident causing property damage, serious personal injury, or
death. You are responsible for using this device in a safe and prudent manner.
You should only use the GarminCatalyst Radar app to adjust radar sensitivity and to familiarize yourself with
indicator light patterns. Use of this app while driving may result in an accident that could cause property
damage, serious personal injury, or death.
1 Go for a test and tune drive using the GarminCatalyst Radar app.
The radar information appears on the active data screen.
16 GarminCatalyst™ R1 Racing Radar
Owner's Manual
The GarminCatalyst
™
R1 racing radar
System and the GarminCatalyst Radar
App
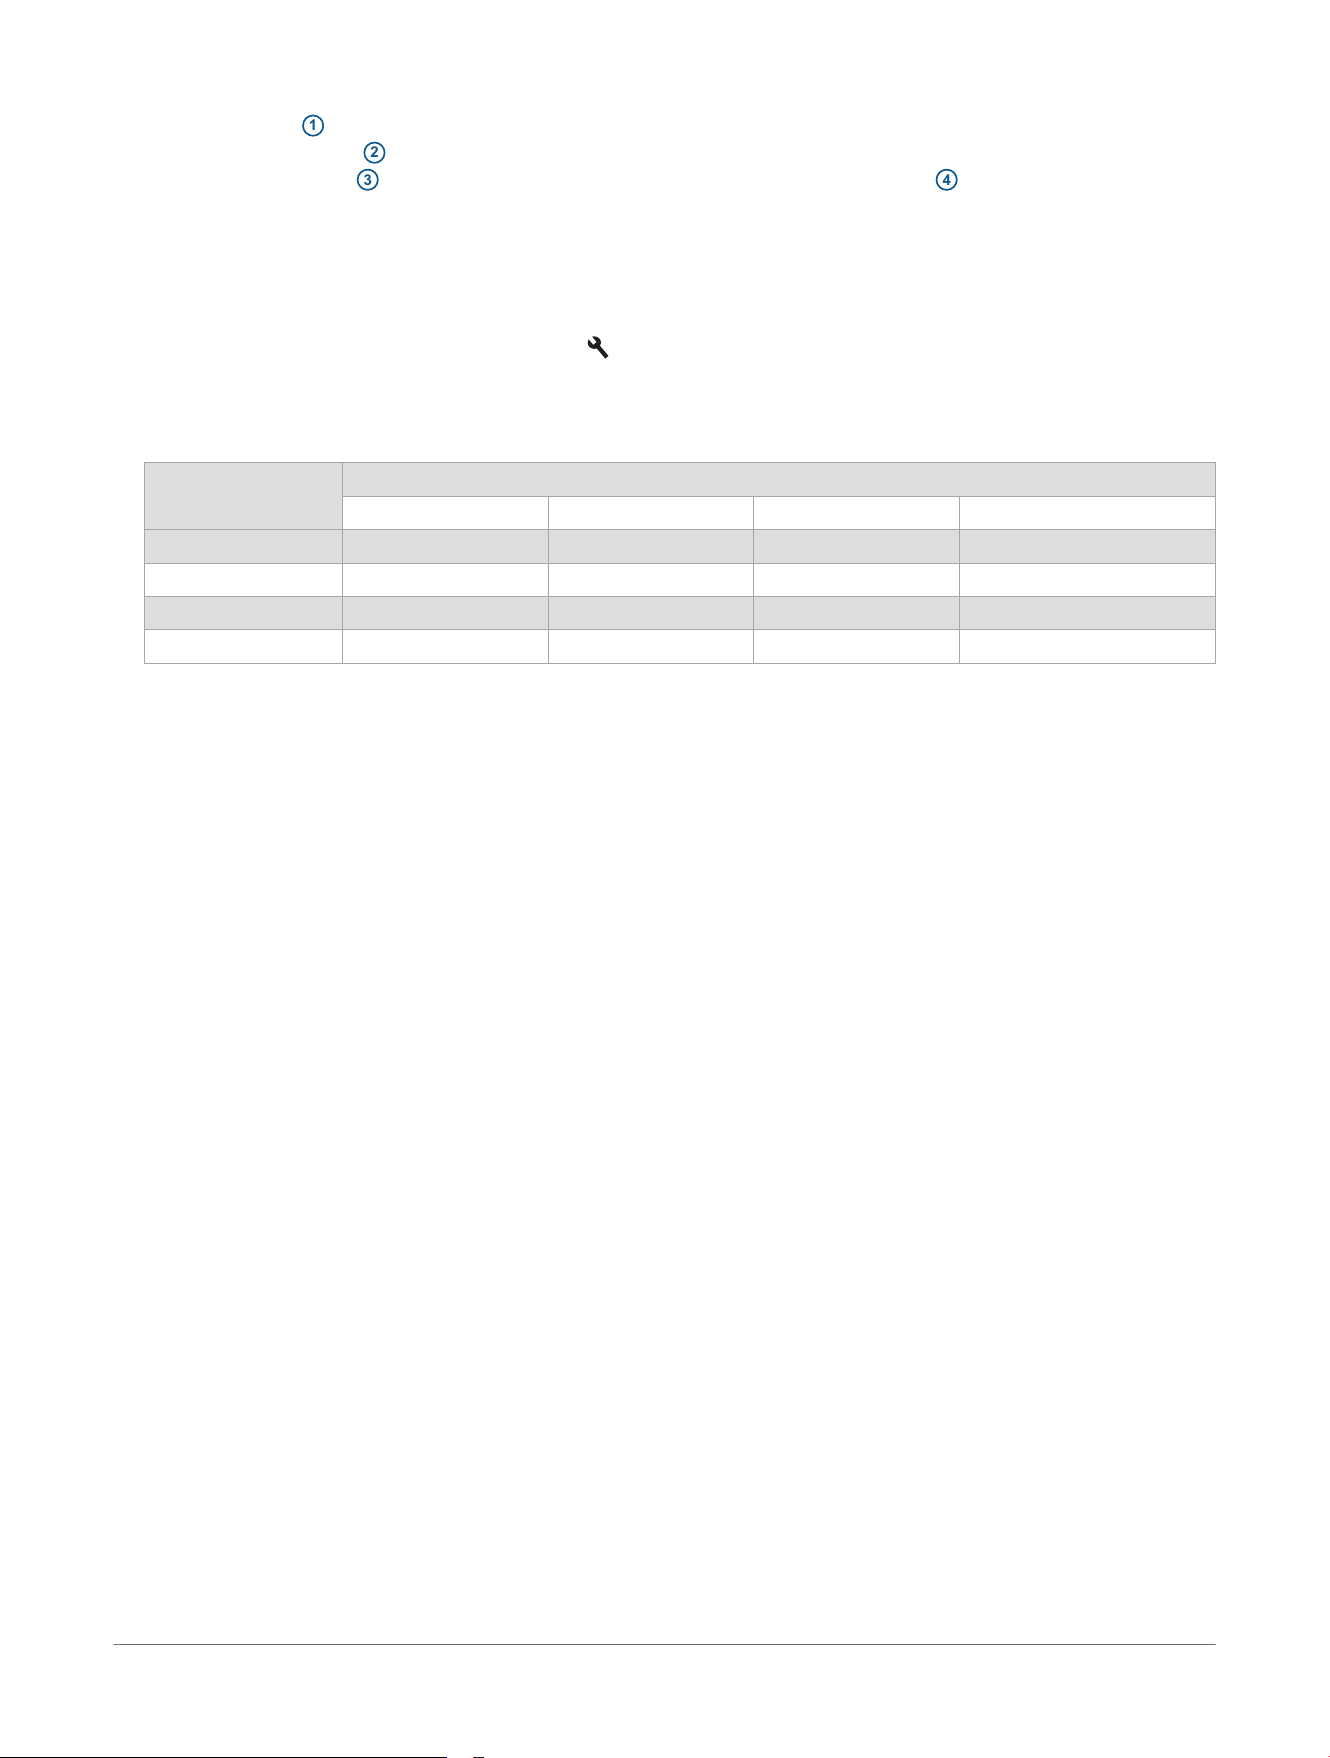
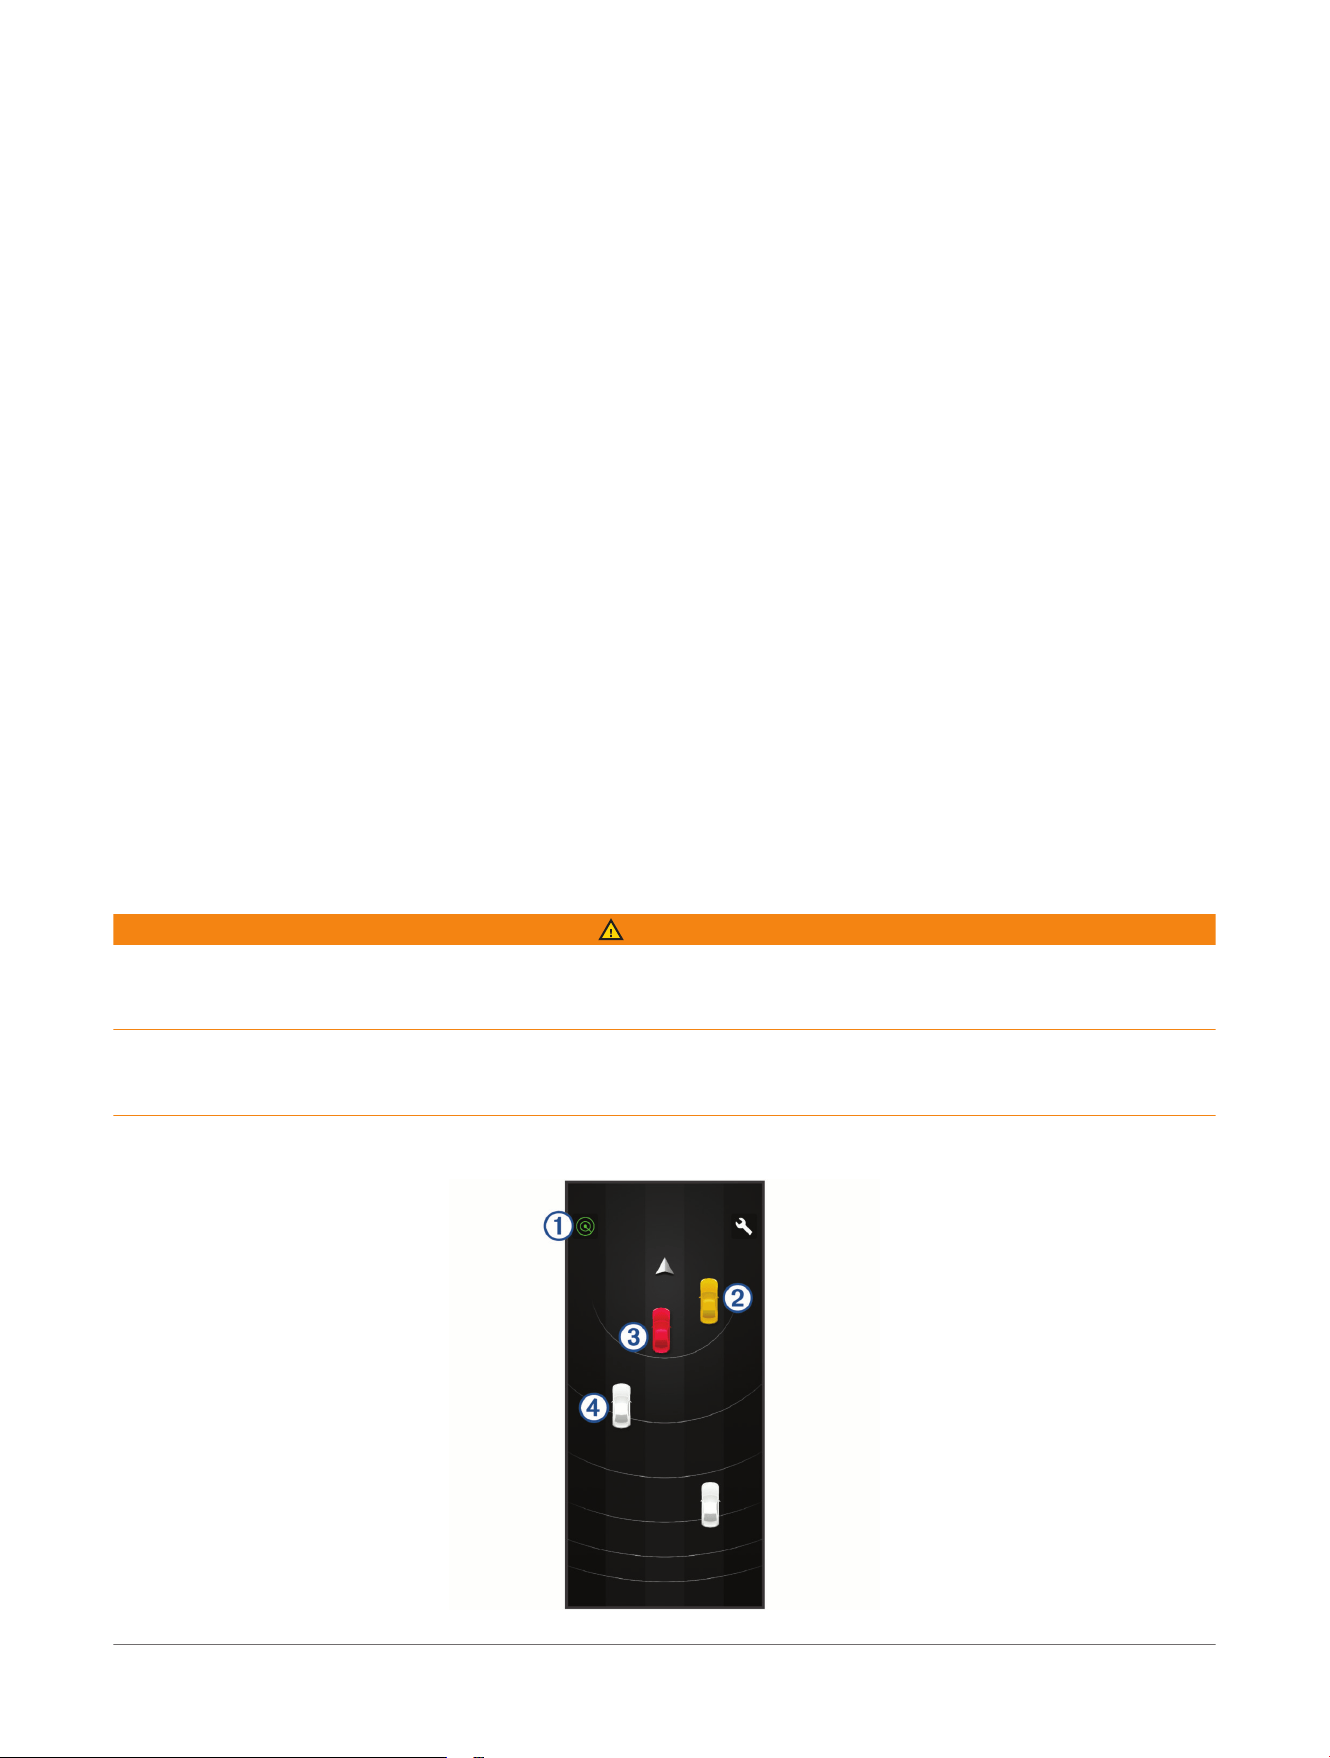
The status icon
1
indicates the radar sensor status. The vehicle positions change color based on threat
level. A yellow vehicle
2
indicates a vehicle is approaching in your blind spot to the left or right of your
vehicle. A red vehicle
3
indicates a vehicle is present behind you. A gray vehicle
4
indicates a vehicle is
approaching from a distance.
2 Compare the app to the indicator lights to become familiar with the light patterns (Indicator Lights, page5).
Adjusting Alert Sensitivity
You can adjust the radar sensitivity to control how many alerts you receive.
1 From the GarminCatalyst
™
Radar app, select .
2 Select your device.
3 Select Rear Alerts.
4 Select an option:
Closest Vehicle Distance
9 Seconds Away 6 Seconds Away 3 Seconds Away Within 9 m of Sensor
More Alerts 3 red flashes 2 red flashes 1 red flash Solid
Standard Alerts Not alerted 2 red flashes 1 red flash Solid
Less Alerts Not alerted Not alerted 1 red flash Solid
Off Not alerted Not alerted Not alerted Solid
The GarminCatalyst
™
R1 racing radar
System and the GarminCatalyst Radar
App
GarminCatalyst™ R1 Racing Radar
Owner's Manual
17
Driver Awareness Features and Alerts
WARNING
The device can improve situational awareness. It is not a replacement for driver attentiveness, good judgement,
or checking mirrors and blind spots. Always maintain awareness of your surroundings, and operate the vehicle
in a safe manner. Failure to do so could result in serious injury or death.
The GarminCatalyst
™
R1 system provides features that can help encourage safer driving by notifying you of
approaching vehicles. When paired with the GarminCatalyst Radar app on your phone, you can customize the
device features and alerts.
Lights: The amber and red LEDs on your indicators illuminate when a vehicle is approaching (Device Overview,
page4).
Alert sensitivity: You can adjust the amount of alerts displayed or turn them off (Adjusting Alert Sensitivity,
page17).
18 GarminCatalyst™ R1 Racing Radar
Owner's Manual
Driver Awareness Features and Alerts
Device Information
Device Care
NOTICE
Avoid contact with chemical cleaners, solvents, gasoline, oil, insect repellents, or sunscreen. These chemicals
can damage plastic components and finish.
Thoroughly rinse the device with fresh water as soon as possible after exposure to chlorine, salt water,
sunscreen, cosmetics, alcohol, or other harsh chemicals. Prolonged exposure to these substances can damage
the plastic components and finish.
Do not store the device where prolonged exposure to extreme temperatures can occur, because it can cause
permanent damage.
Cleaning the Device
NOTICE
Do not use a dry cloth to clean the LED lenses. Use of a dry cloth may damage the LED lenses.
Avoid chemical cleaners and solvents that can damage plastic components.
1 Wipe the outer casing and LED lenses with a soft, non-scratch cloth dampened with water or isopropyl
alcohol.
2 Wipe the outer casing dry, and allow the LED lenses to air dry.
Radar Detection
WARNING
Radar performance may be degraded or vehicles may not be detected when the vehicle is operated outside of
the following range: 25 to 285 km/h (15 to 177 mph). Always maintain awareness of your surroundings and
operate your vehicle in a safe manner. Failure to maintain awareness of your surroundings could result in an
accident, possibly causing property damage, serious injury, or death.
• The radar detects approaching vehicles up to 60 m (197 ft.) away.
• The radar detects approaching vehicle speed from 0 to 70km/h (from 0 to 43mph) relative to your current
speed.
• The radar beam width is 170 degrees.
• The radar can detect up to 8 moving vehicles.
Specifications
Input voltage From 12 to 24Vdc
Current usage 0.5A at 12Vdc
Water rating
IEC 60529 IP67
1
Operating temperature range From -20° to 55°C (from -4° to 131°F)
Wireless frequency 77-81 GHz < 55 dBm / -3 dBm/MHz
2400 - 2483,5 MHz < 13 dBM
1
The device is protected against the ingress of dust and withstands incidental exposure to water of up to 1 m for up to 30 min.
Device Information GarminCatalyst™ R1 Racing Radar
Owner's Manual
19
Troubleshooting
Restarting the Device
If the device stops responding or the status LED is solid red, you may need to restart it. This does not erase any
of your data or settings.
1 Hold the device button for 10 seconds.
2 Release the device button.
The status LED turns off and the device restarts.
Resetting the Device
Before you reset the device, you should try to restart the device to avoid erasing data and settings (Restarting
the Device, page20).
If the device is not responding or the status LED is solid red, you can reset the device.
Press the device button 10 consecutive times.
The status LED turns blue and the device restarts.
Exiting Demo Mode
Demo mode shows a preview of features on your GarminCatalyst
™
R1 racing radar system. The status LED is
solid yellow when the device is in demo mode.
1 Hold the device button for 8 seconds until the status LED changes to orange.
2 Release the device button.
My device is overheating
The operating temperature range specification for the device is from -20° to 55°C (from -4° to 131°F). The status
LED turns red and an icon
is displayed in the GarminCatalyst
™
Radar app when your device is overheating
and could indicate that the device is operating outside this range.
CAUTION
The GarminCatalyst Radar system cannot track and report other vehicles when this icon is displayed and the
status LED is red.
• Ensure your device is mounted as far away from heat sources on the vehicle as possible.
• Avoid parking your vehicle with the device in direct sunlight.
20
GarminCatalyst™ R1 Racing Radar
Owner's Manual
Troubleshooting

support.garmin.com
© 2026 Garmin Ltd. or its subsidiaries
Garmin
®
and the Garmin logo are trademarks of Garmin Ltd. or its subsidiaries, registered in the USA and other countries. GarminCatalyst
™
is a trademark of
Garmin Ltd. or its subsidiaries. These trademarks may not be used without the express permission of Garmin.
The Bluetooth
®
word mark and logos are owned by the Bluetooth SIG, Inc. and any use of such marks by Garmin is under license. Other trademarks and trade
names are those of their respective owners.
M/N: A04811
June 2026 GUID-C6D73EE1-9FE0-494D-A2C7-BF02C3BEDDA6 v1