Retro Bluetooth Turntable
Model: JP-2326
Instruction Manual

2
FCC STATEMENT
This device complies with part 15 of the FCC Rules. Operation is subject to the following two
conditions: (1) This device may not cause harmful interference, and (2) this device must accept any
interference received, including interference that may cause undesired operation.
Note: This equipment has been tested and found to comply with the limits for a Class B digital device,
pursuant to part 15 of the FCC Rules. These limits are designed to provide reasonable protection
against harmful interference in a residential installation. This equipment generates, uses and can
radiate radio frequency energy and, if not installed and used in accordance with the instructions, may
cause harmful interference to radio communications. However, there is no guarantee that interference
will not occur in a particular installation. If this equipment does cause harmful interference to radio
or television reception, which can be determined by turning the equipment o and on, the user is
encouraged to try to correct the interference by one or more of the following measures:
• Reorient or relocate the receiving antenna.
• Increase the separation between the equipment and receiver.
• Connect the equipment into an outlet on a circuit different from that to which the receiver is
connected.
• Consult the dealer or an experienced radio/TV technician for help.
Note: The Grantee is not responsible for any changes or modications not expressly approved by the
party responsible for compliance. Such modications could void the user’s authority to operate the
equipment.
The device has been evaluated to meet general RF exposure requirement.
To maintain compliance with FCC’s RF exposure guidelines, the distance must be at least 20 cm
between the radiator and your body, and fully supported by the operating and installation.
3
PRODUCT OVERVIEW
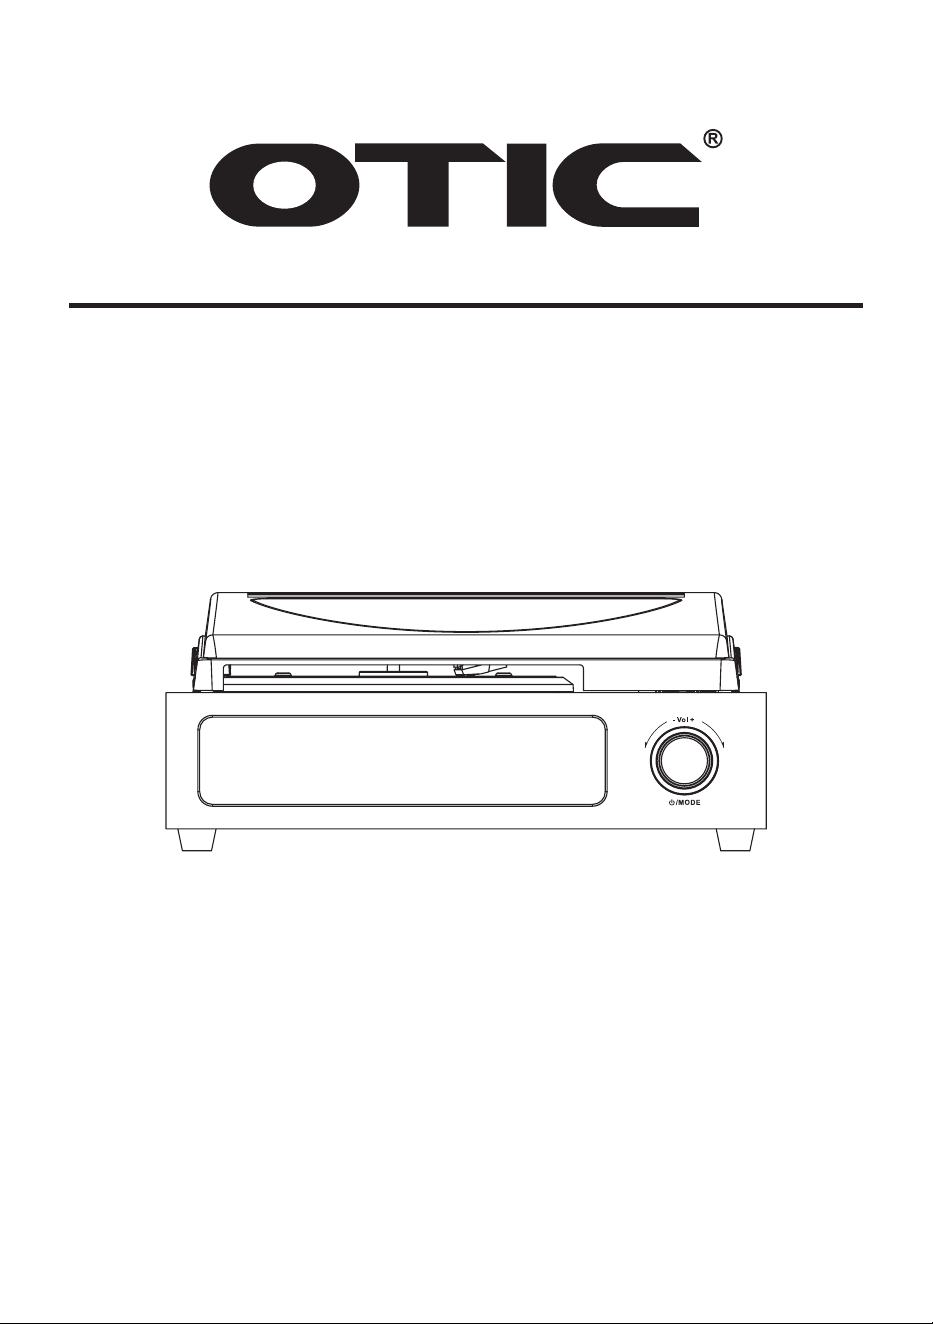
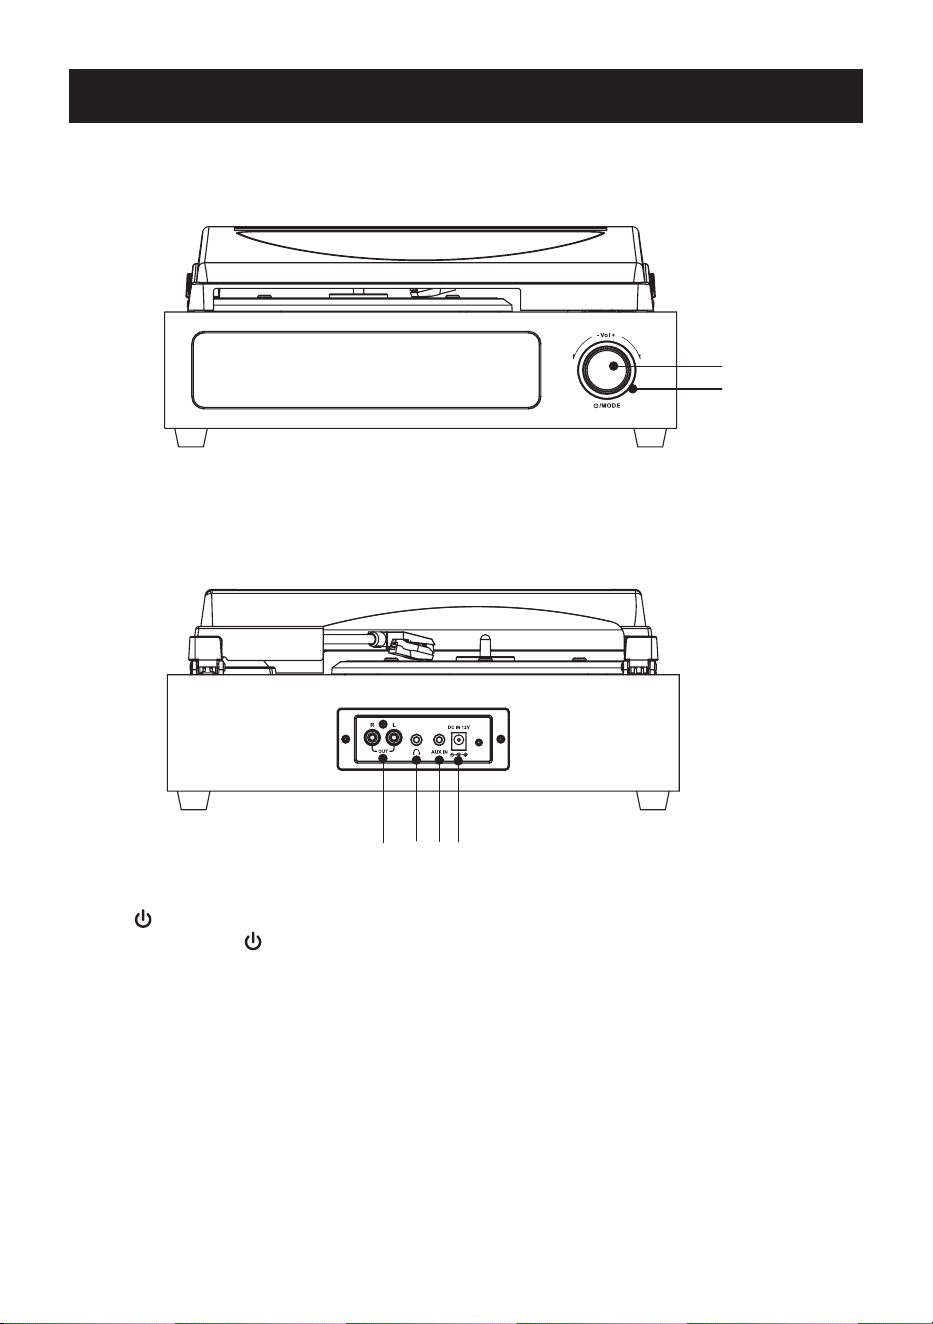
1. /MODE button & Volume knob
• Press the
/MODE button
to turn on the turntable, then press repeatedly
to switch to dierent mode (Bluetooth, Vinyl, Auxiliary), press and hold the
button to turn o the turntable.
• In Bluetooth mode, double press this button to disconnect or reconnect the
Bluetooth connection; in AUX/HDMI mode, double press this button to enter
Bluetooth transmitting state.
• Rotate the
Volume knob
to adjust the music volume.
2. Light ring
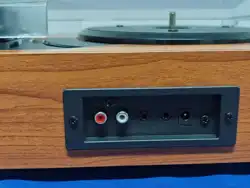
3. LINE OUT jacks
4. Earphone jack
5. AUX IN jack
6. DC IN jack
FRONT VIEW
BACK VIEW
1
2
3 4 5 6
4
PRODUCT OVERVIEW
BACK VIEW
1
2
3
4
5
1. Plug the AC adapter into the DC IN jack to power the turntable.
2. Press the
/MODE button
to turn on the turntable, then press the button repeatedly
to switch to dierent mode; press and hold the
/MODE button
to turn o the
turntable.
3. In Bluetooth mode, double press the
/MODE button
to disconnect the current
Bluetooth connection, then you can connect to another Bluetooth device, or you can
double press again to reconnect the device.
4. In AUX/HDMI mode, double press the
/MODE button
to transmitte the audio signal
to another Bluetooth device via Bluetooth transmission, double press again to stop
the transmitting.
5. The turntable will enter standby mode after 20 minutes without audio signal input (only
for Europe version).
GENERAL OPERATION
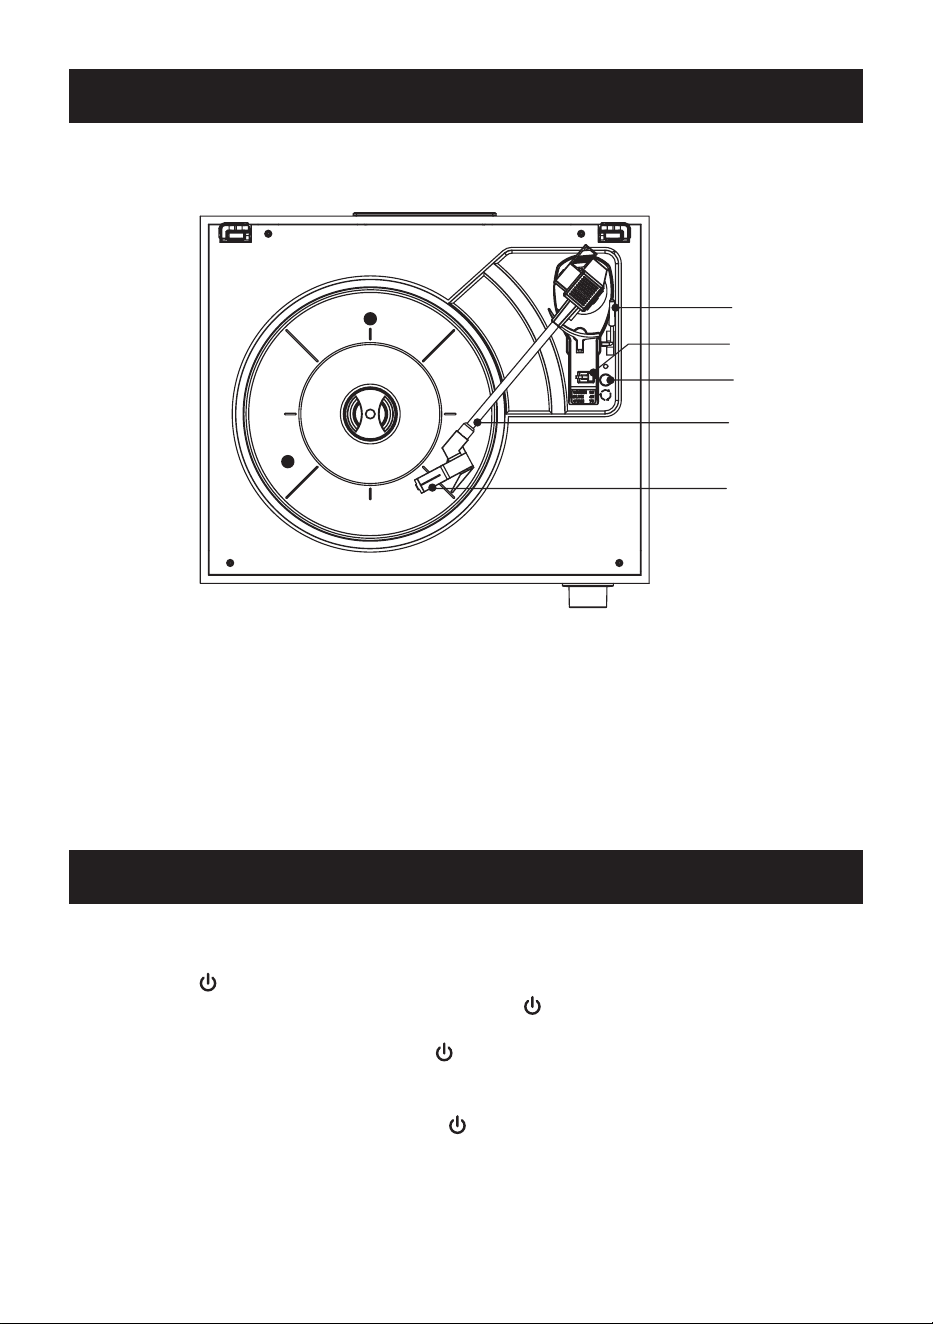
1. Lift lever
2. Hold down clip
3. Speed selector
Press to select the playback speed.(Green 33 ⅓ rpm, Blue 45 rpm, Cyan 78
rpm)
4. Tone arm
5. Stylus
5
Bluetooth Receiver
1. Plug the AC adapter into the DC IN jack of the turntable.
2. Press the
/MODE button
to turn on the turntable, then press the button repeatedly
to switch to Bluetooth mode, and you will hear a sound "Bluetooth" and the Light ring
will ash blue.
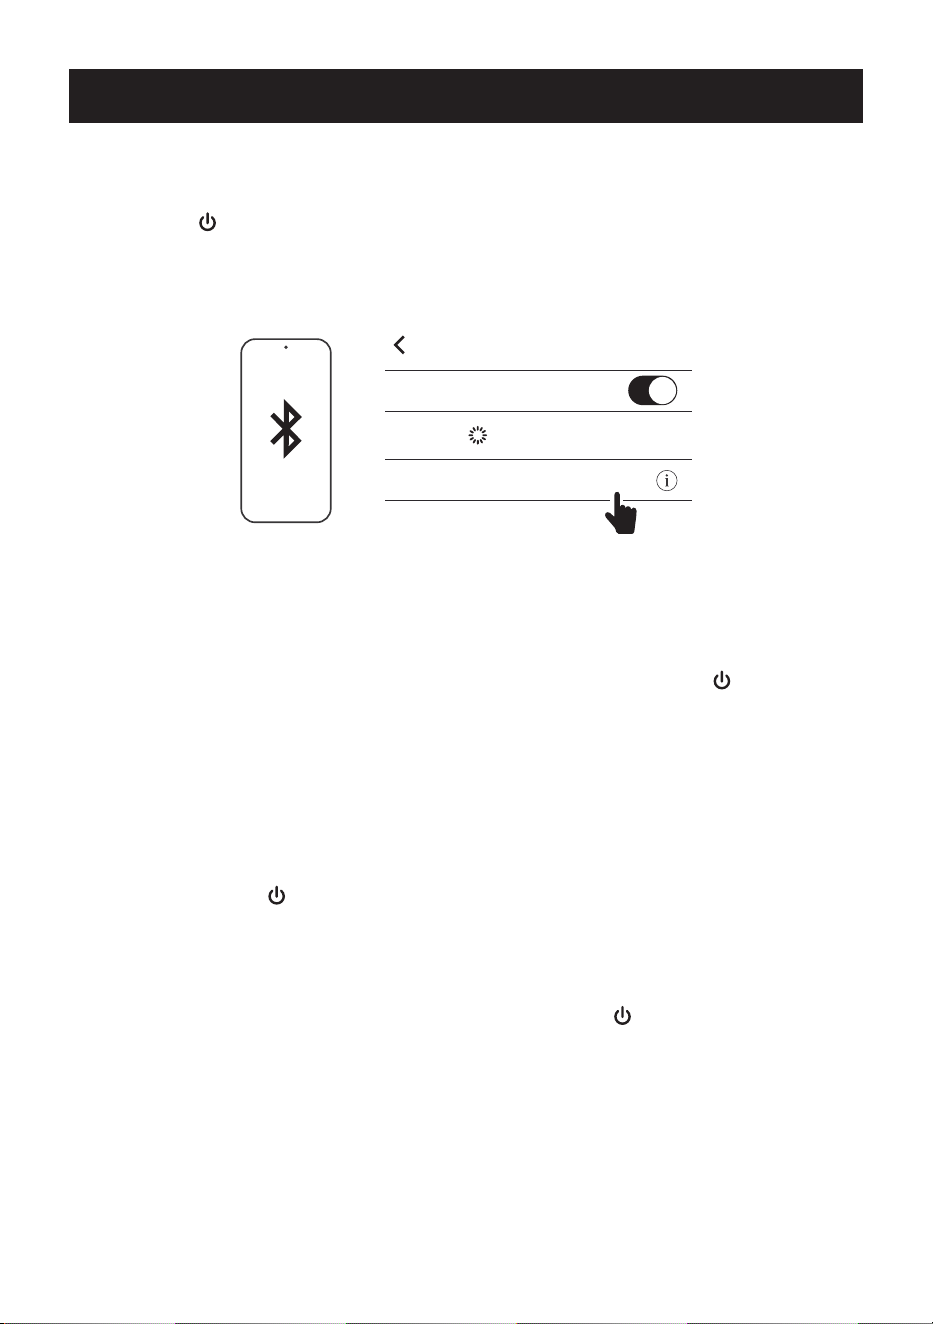
3. Enable the Bluetooth function on your Bluetooth device to search for the turntable.
ON
Settings Bluetooth
Bluetooth
DEVICES
JP-2326
Connected
Now Discoverable
BLUETOOTH RECEIVER AND TRANSMITTER
4. When the pairing name "
JP-2326
" appears in the list, select it to make connection.
5. Once connected, you will hear a conrmation sound and the Light ring stops ashing.
6. Now you can play the music on your Bluetooth device.
Note:
If you want to connect another Bluetooth device, double press the
/MODE button
on the turntable to disconnect the current Bluetooth connection.
Bluetooth Transmitter
You can play music from this turntable to external Bluetooth speaker/soundbar/earbud/
headphone.
1. Start playback in AUX/HDMI mode.
2. Double press the
/MODE button
on the turntable to activate Bluetooth Transmitter
function, the Light ring will ash.
3. Power on the external Bluetooth device and activate its Bluetooth pairing mode.
4. After a few seconds, the external device will connect to the turntable automatically,
then the Light ring will stop ashing.
5. To turn o Bluetooth Transmitter mode, double press the
/MODE button
on the
turntable.
Note:
Make sure there is no other Bluetooth devices near the turntable.
6
VINYL RECORD PLAYBACK
1. Plug the AC adapter into the DC IN jack of the turntable.
2. Press the
/MODE button
to turn on the turntable, then press the button repeatedly
to switch to Vinyl mode, and you will hear a sound "Vinyl" and the Light ring will ash
white.
3. Open the cover of the turntable.
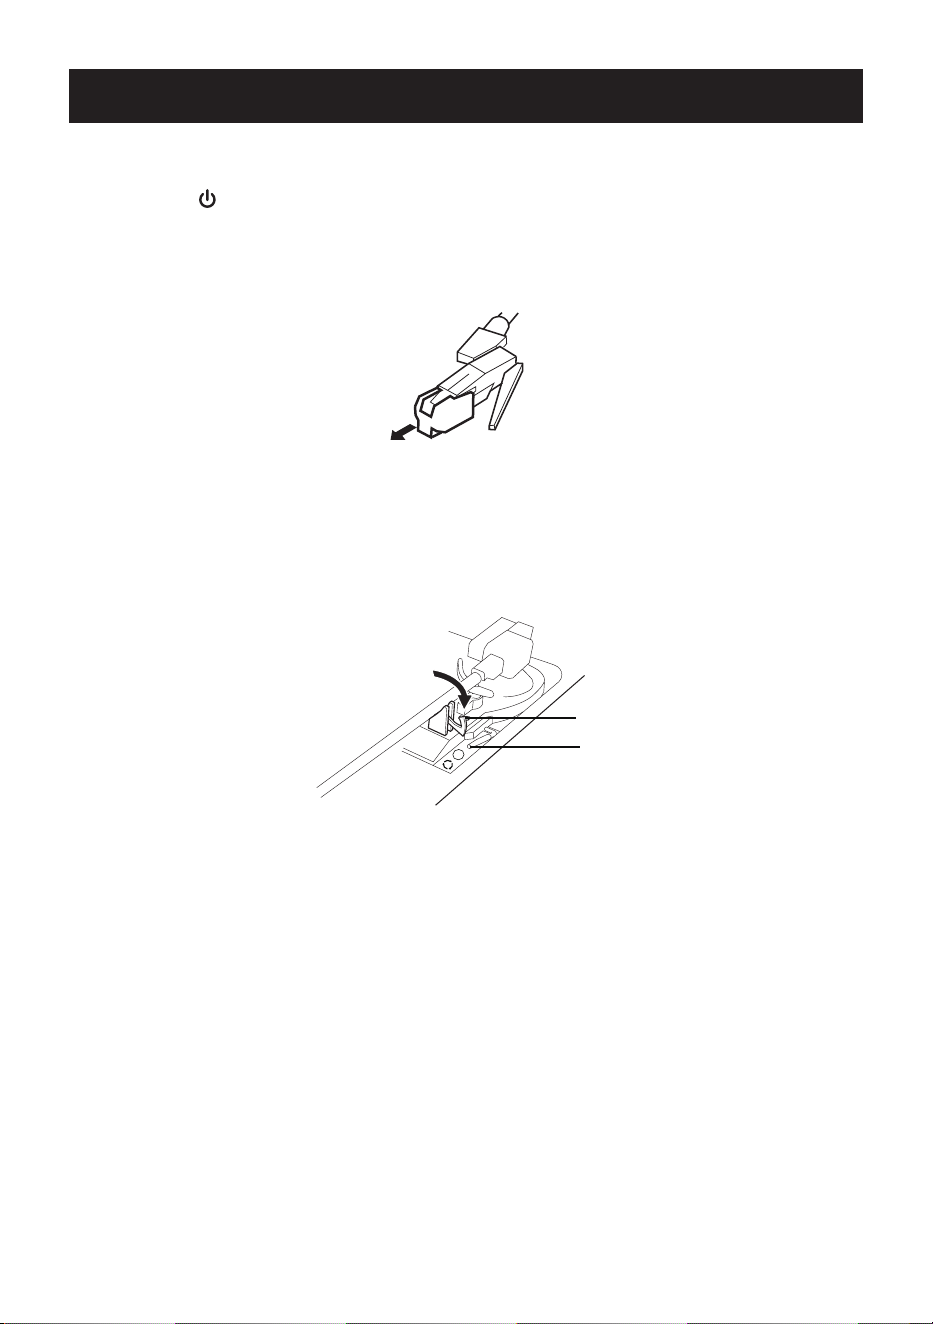
4. Detach the stylus guard by pulling straight in the direction shown.
5. Place a vinyl record (not included) on the turntable by aligning the Turntable Spindle
to the record hole.
6. Press the Speed Selector to select 33, 45 or 78 to match the play speed of the
record.
7. Unlock the Hold Down Clip.
8. Raise the Cue Lever to lift the tone arm o the tone arm support.
9. Gently move the tone arm to the edge of the record (or the starting point of a track).
10. Release the Cue Lever to put the tone arm on the record and it will automatically start
playing.
11. Rotate the
Volume +/- knob
to adjust the volume.
12. To pause/stop during playback, raise the Cue Lever to lift the tone arm o the record.
13. When nished listening, the tone arm will automatically stop after a while and return
to the tone arm holder, then you can lock the Hold Down Clip.
Note:
Put the 45 RPM Adapter across the Turntable Spindle rstly if playing a 45 RPM
record.
Clip
Lever
7
AUX IN AND LINE OUT
AUX IN
1. Plug the AC adapter into the DC IN jack of the turntable.
2. Press the
/MODE button
to turn on the turntable, then press the button repeatedly
to switch to AUX mode and you will hear a sound “Auxiliary”, the Light ring will light
green.
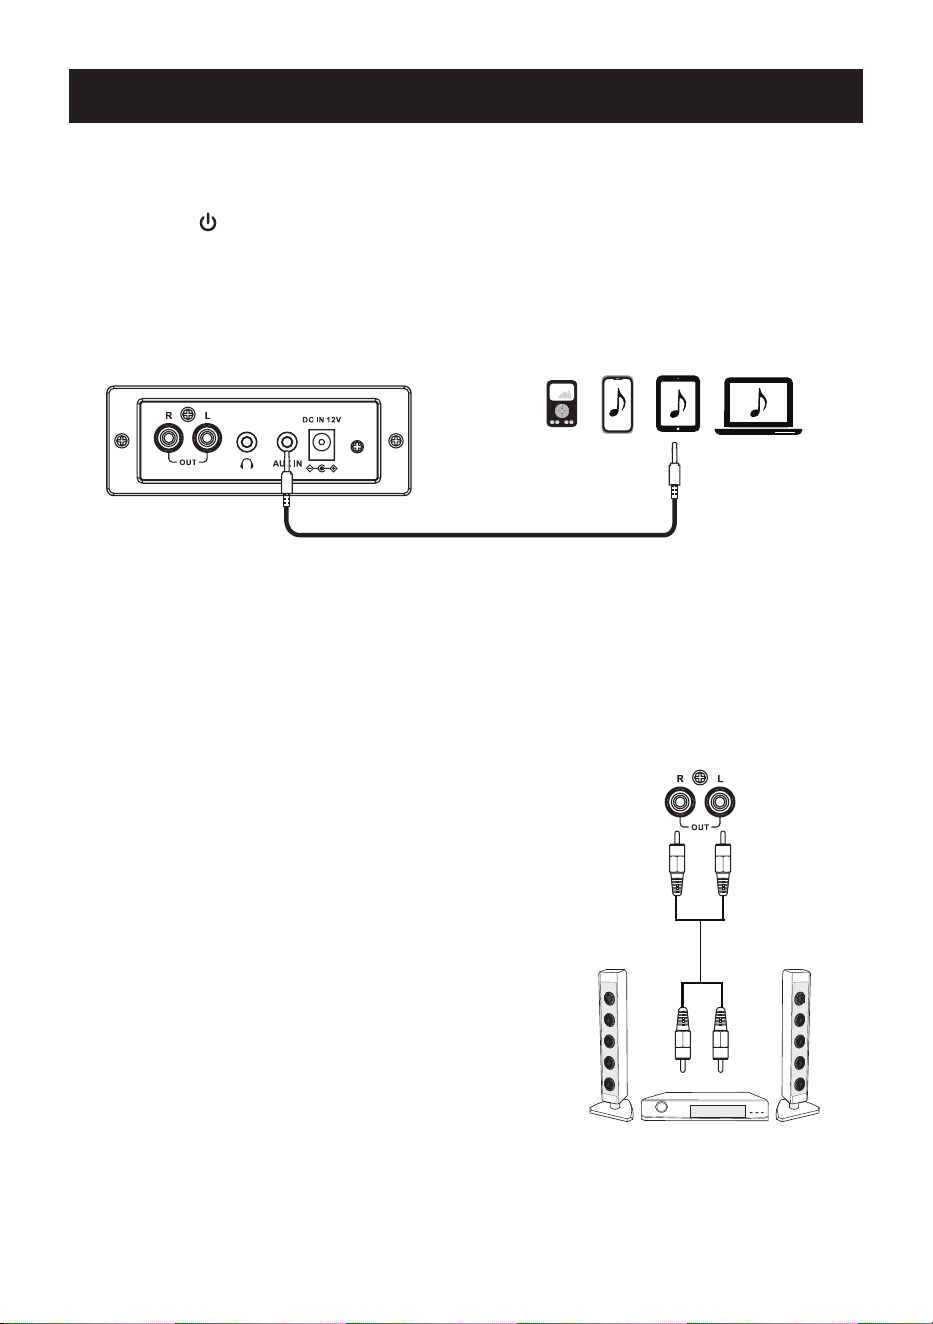
3. Plug one end of the supplied AUX in cable into the AUX IN jack at the rear of the
turntable, plug the other end into the AUX out jack of external audio device (e.g., MP3
player, mobile phone, tablet).
(AUX CABLE INCLUDED)
4. Start playing music on your external audio device.
5. Adjust the volume to the desired level by rotating the
Volume knob
.
6. When nished listening, stop the playback and unplug the AUX in cable from the AUX
IN jack.
LINE OUT
1. Connect one end of the RCA audio connection
cable (not included) to the LINE IN jacks or AUX
IN jacks on the external audio amplier.
2. Connect the other end of the cable to the LINE
OUT jacks on the rear of the turntable as the
illustrated.
3. Power on the external audio amplier and set it to
LINE IN mode.
4. Power on the turntable and play music in any
mode, the sound will be heard through the external
audio amplier.
(To the Line In/AUX In jacks
on the external audio amplifier.)
8
VINYL RECORD PLAYBACK
The stylus should last about 50 hours under normal use. However, it is recommended that
the stylus be replaced as soon as you notice a change in sound quality.
Prolonged use of a worn-out stylus may damage the record. Wear and tear on the stylus
will be accelerated when playing 78 RPM records. The higher speed of 78 RPM records
can wear more quickly.
Caution:
• Do not remove or bend the stylus.
• To avoid injury, do not touch the needle.
• Turn o the unit's power before you replace the stylus.
• Keep out of the reach of children.
• Handle with care, as the stylus is delicate. Use of a bent or broken stylus may damage
the record and cause the turntable stylus to malfunction.
• Do not expose the stylus to extreme heat.
• Contact a qualied repair company if you have trouble changing the stylus.
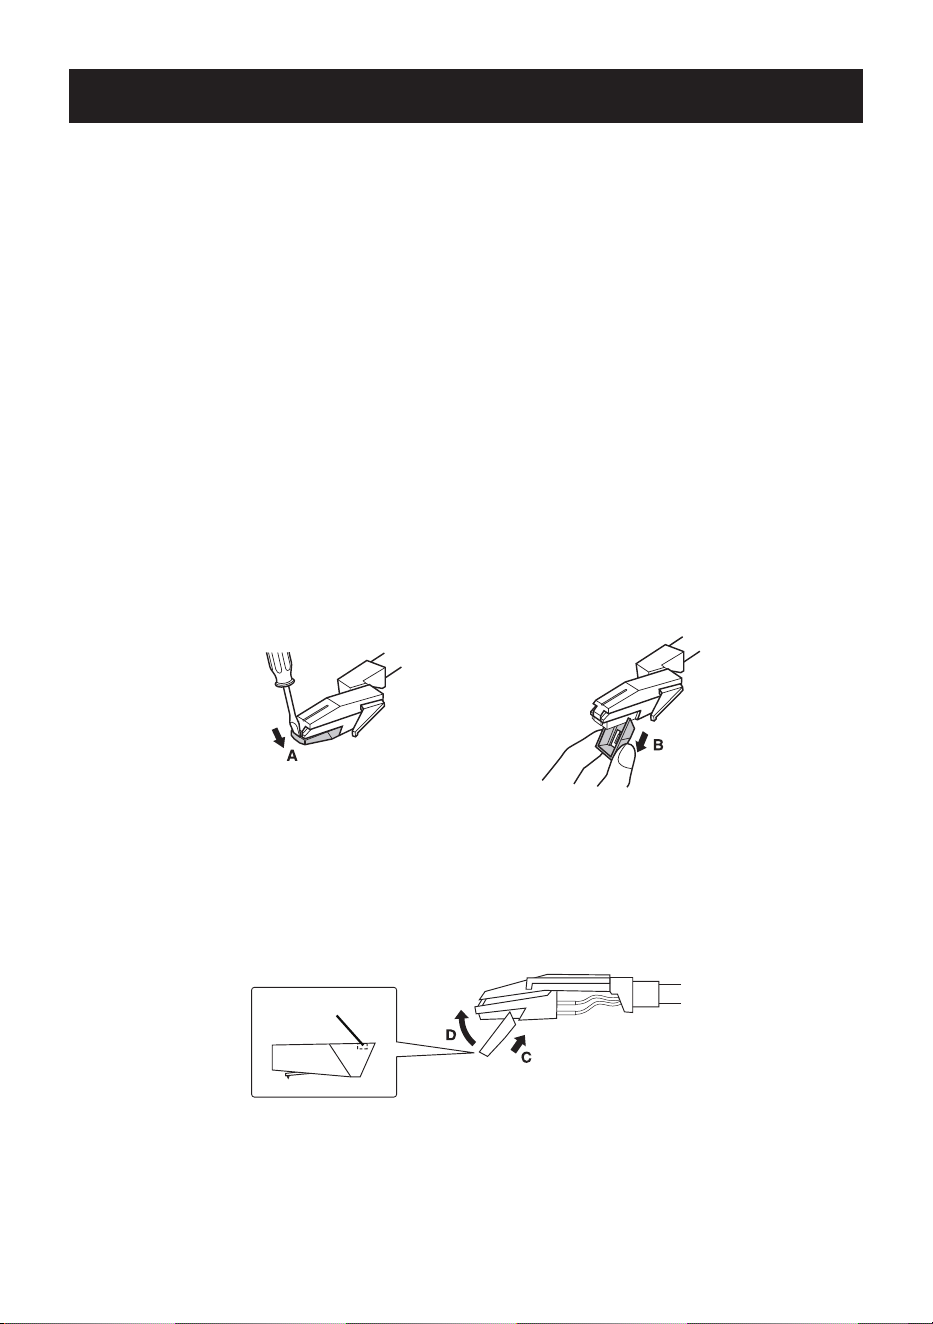
Removing an old stylus:
1. Set a screwdriver at the tip of the stylus and push down to the direction "A".
2. Pull the stylus out toward direction "B".
Installing a new stylus
1. Hold the tip of the stylus and insert the other edge by pressing toward direction "C".
2. Push the stylus up toward direction "D" until it locks at the tip.
Guide Pins(inside)

9
CARE AND MAINTENANCE
Function Problem Solution
General No power. • Plug the power adapter into the wall
outlet and connect its DC plug to the
turntable's DC IN jack.
No sound. • Rotate the Volume knob to adiust the
volume.
There is interference. • Devices near the turntable may cause
interference. Relocate the turntable
further away from them or turn the
other appliances o.
Record Player Will not play. • Detach the stylus guard. The stylus
guard is a white plastic cover
that protects the stylus during
transportation. If you fail to remove this
guard, the needle cannot contact the
grooves of the record and no sound will
be heard.
• If the stylus is worn-out, change the
stylus.
• Select the correct playback speed.
Sound skips. • Place the turntable on a stable surface
to avoid vibration and shock.
• Clean the surface of the record.
• Do not use scratched, damaged or
warped records.
AUX in No sound. • Ensure the AUX cables are securely
connected.
• Rotate the Volume knob to adiust the
volume.
Bluetooth Will not play. • Device is not paired properly, re-pair
the device.
Check the following before requesting service:
10
• Power Source: 12V 1A
• Power Consumption: Max. 12W
• Turntable Speed: 33-1/3, 45, 78 RPM
• Bluetooth
®
Version: 5.3
• Input: AUX In
• Power Source: AC 100-240V~50/60Hz, DC 12V/1A
• Accessories Included: Power Adapter, 45RPM Adapter, AUX In Cable, RCA Cable,
User Manual
Shenzhen Junlan Electronic Ltd.
Add: No. 71 Lijing South Road, Pingshan District , Shenzhen, CHINA
SPECIFICATIONS
The appliance is in compliance with the essential requirements and
other relevant provisions of the following EC directives: 2014/35/EU
LOW voltage directive and the 2014/30/EU EMC directive.
Environment Protection
Waste electrical products should not be disposed of with household
waste. Please recycle where facilities exist. Check with your Local
Authority or retailer for recycling advice.
MADE IN CHINA
For indoor use only