Fuel Your Passion
Ignite Your Fitness
User Manual
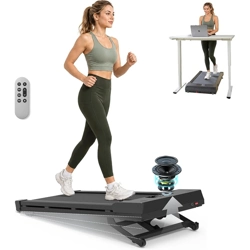
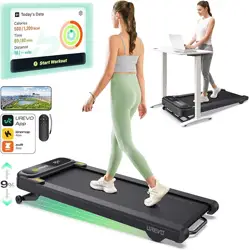
Auto Incline Walking Pad Treadmill
New Model Auto Incline Treadmill
PACEROCKER
with Bluetooth Speaker
CONTENT
Package List ··············································································02
Product Structure ····································································03
Product Specifications ······························································03
Introduction To Display ······························································04
Remote Control Instructions ······················································07
Operation Mode ···········································································09
Running Belt Adjustment ····························································11
Oil Belt Lubricant ·········································································12
Bule-tooth Speaker Connection ··················································14
Trouble Shooting ········································································15
Safety Information ······································································16
Warranty Statemen ···································································18
FCC Warning ·············································································19
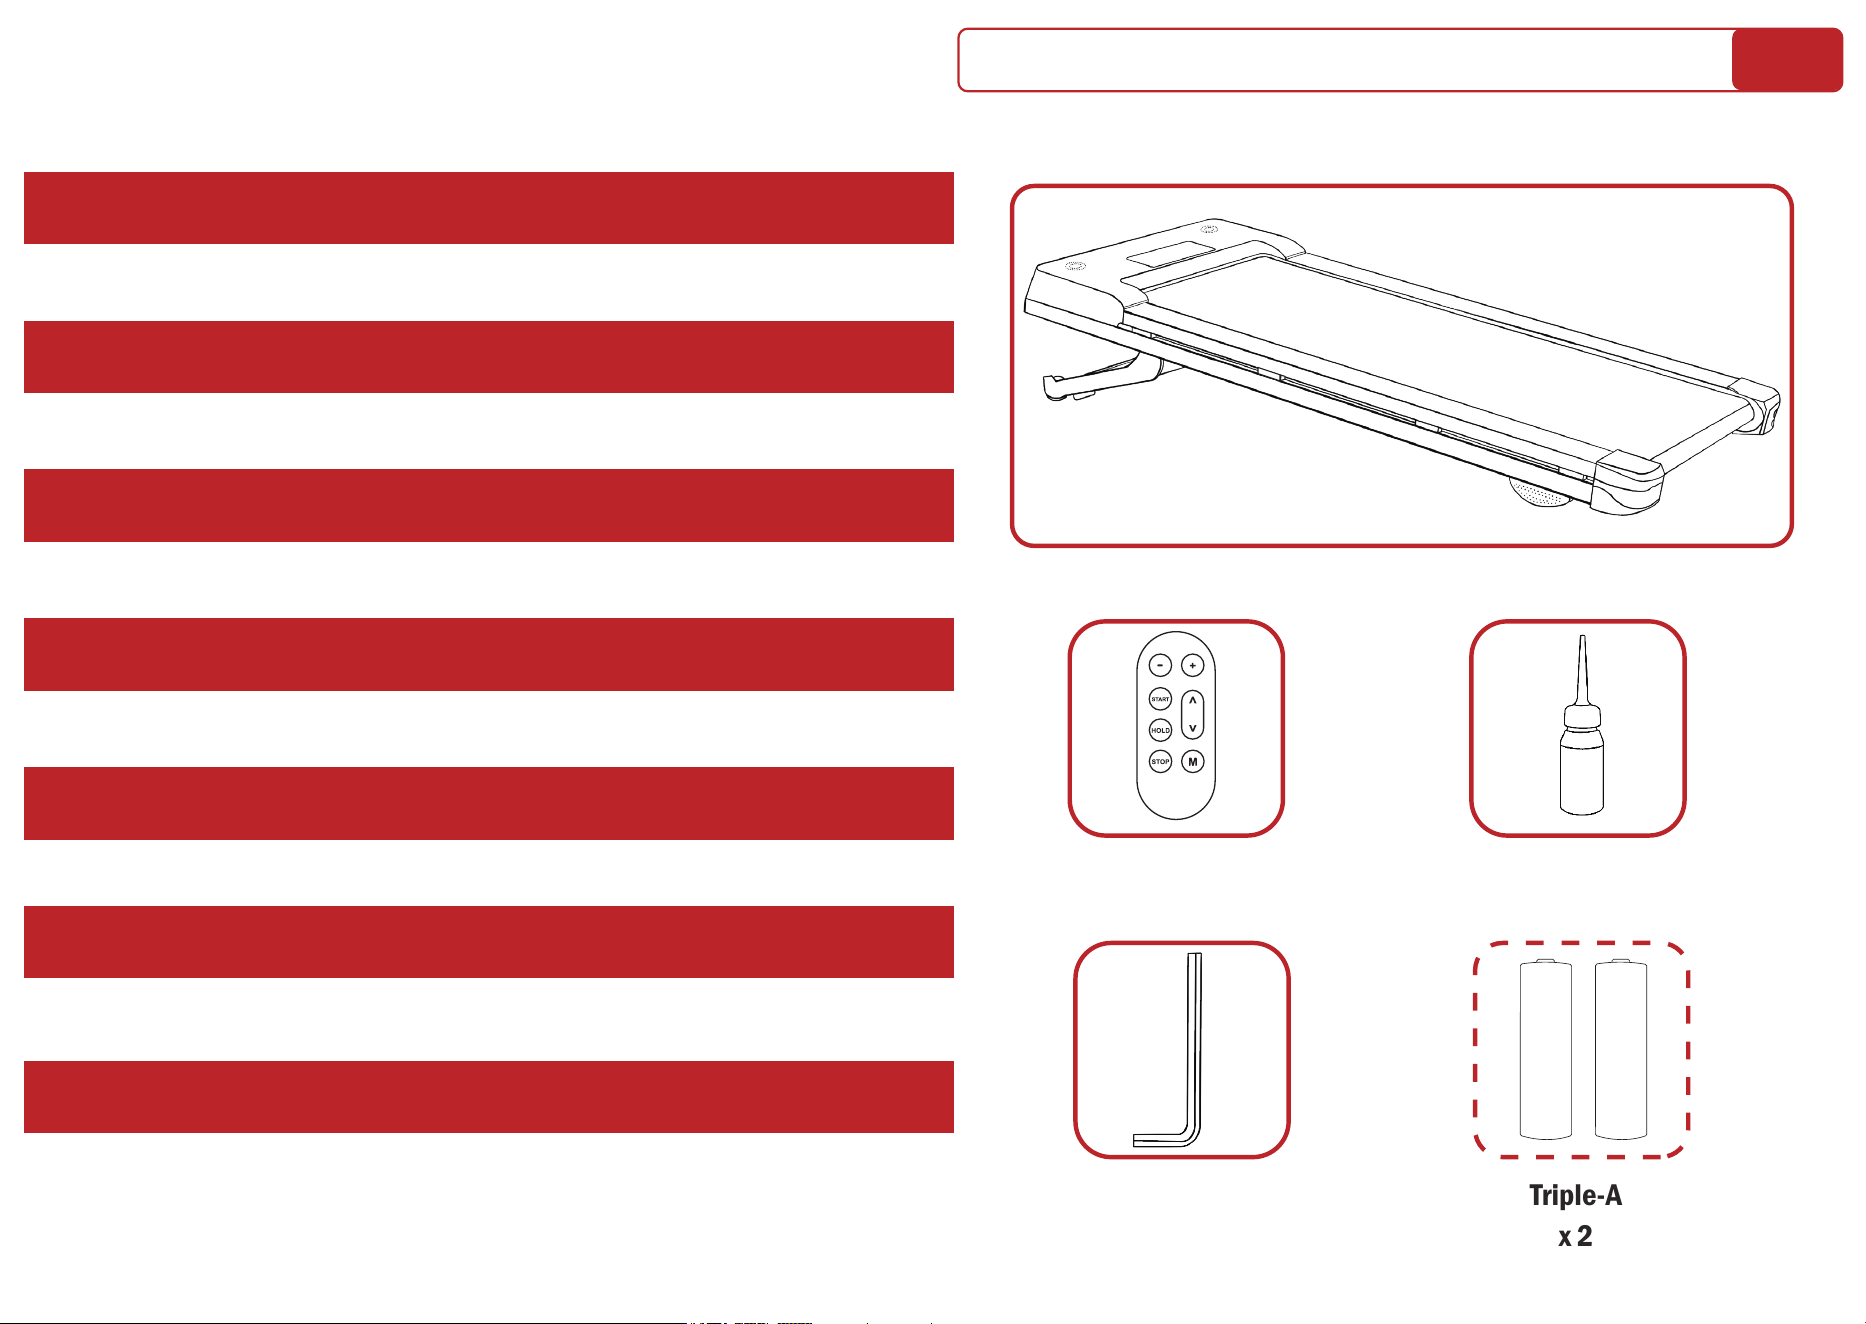
Package List
Treadmill
Remote Controller
x 2
Oil Belt Lubricant
x 1
Triple-A
x 2
L-Shaped Wrench
x 1
02
+ AAA -
+ AAA -
(No battery included for shipping safty,
please prepare it first !)
04
About the Treadmill Belt Seam
You may notice a visible mark or textured line on the treadmill belt. This is
not a defect — it’s a normal result of the heat-welding process used during
manufacturing.
To create a continuous, durable belt, two ends are joined together using
high-frequency heat welding technology. This method fuses the materials
into a strong seam that matches the strength and performance of the rest
of the belt.
Important Notes:
• The visible mark at the seam is purely cosmetic.
• It does not affect how flat, smooth, or stable the belt runs.
• The belt’s performance, safety, and durability are fully maintained.
You can use your treadmill with confidence, knowing that this is part of the
normal manufacturing process and does not impact function or lifespan in
any way.
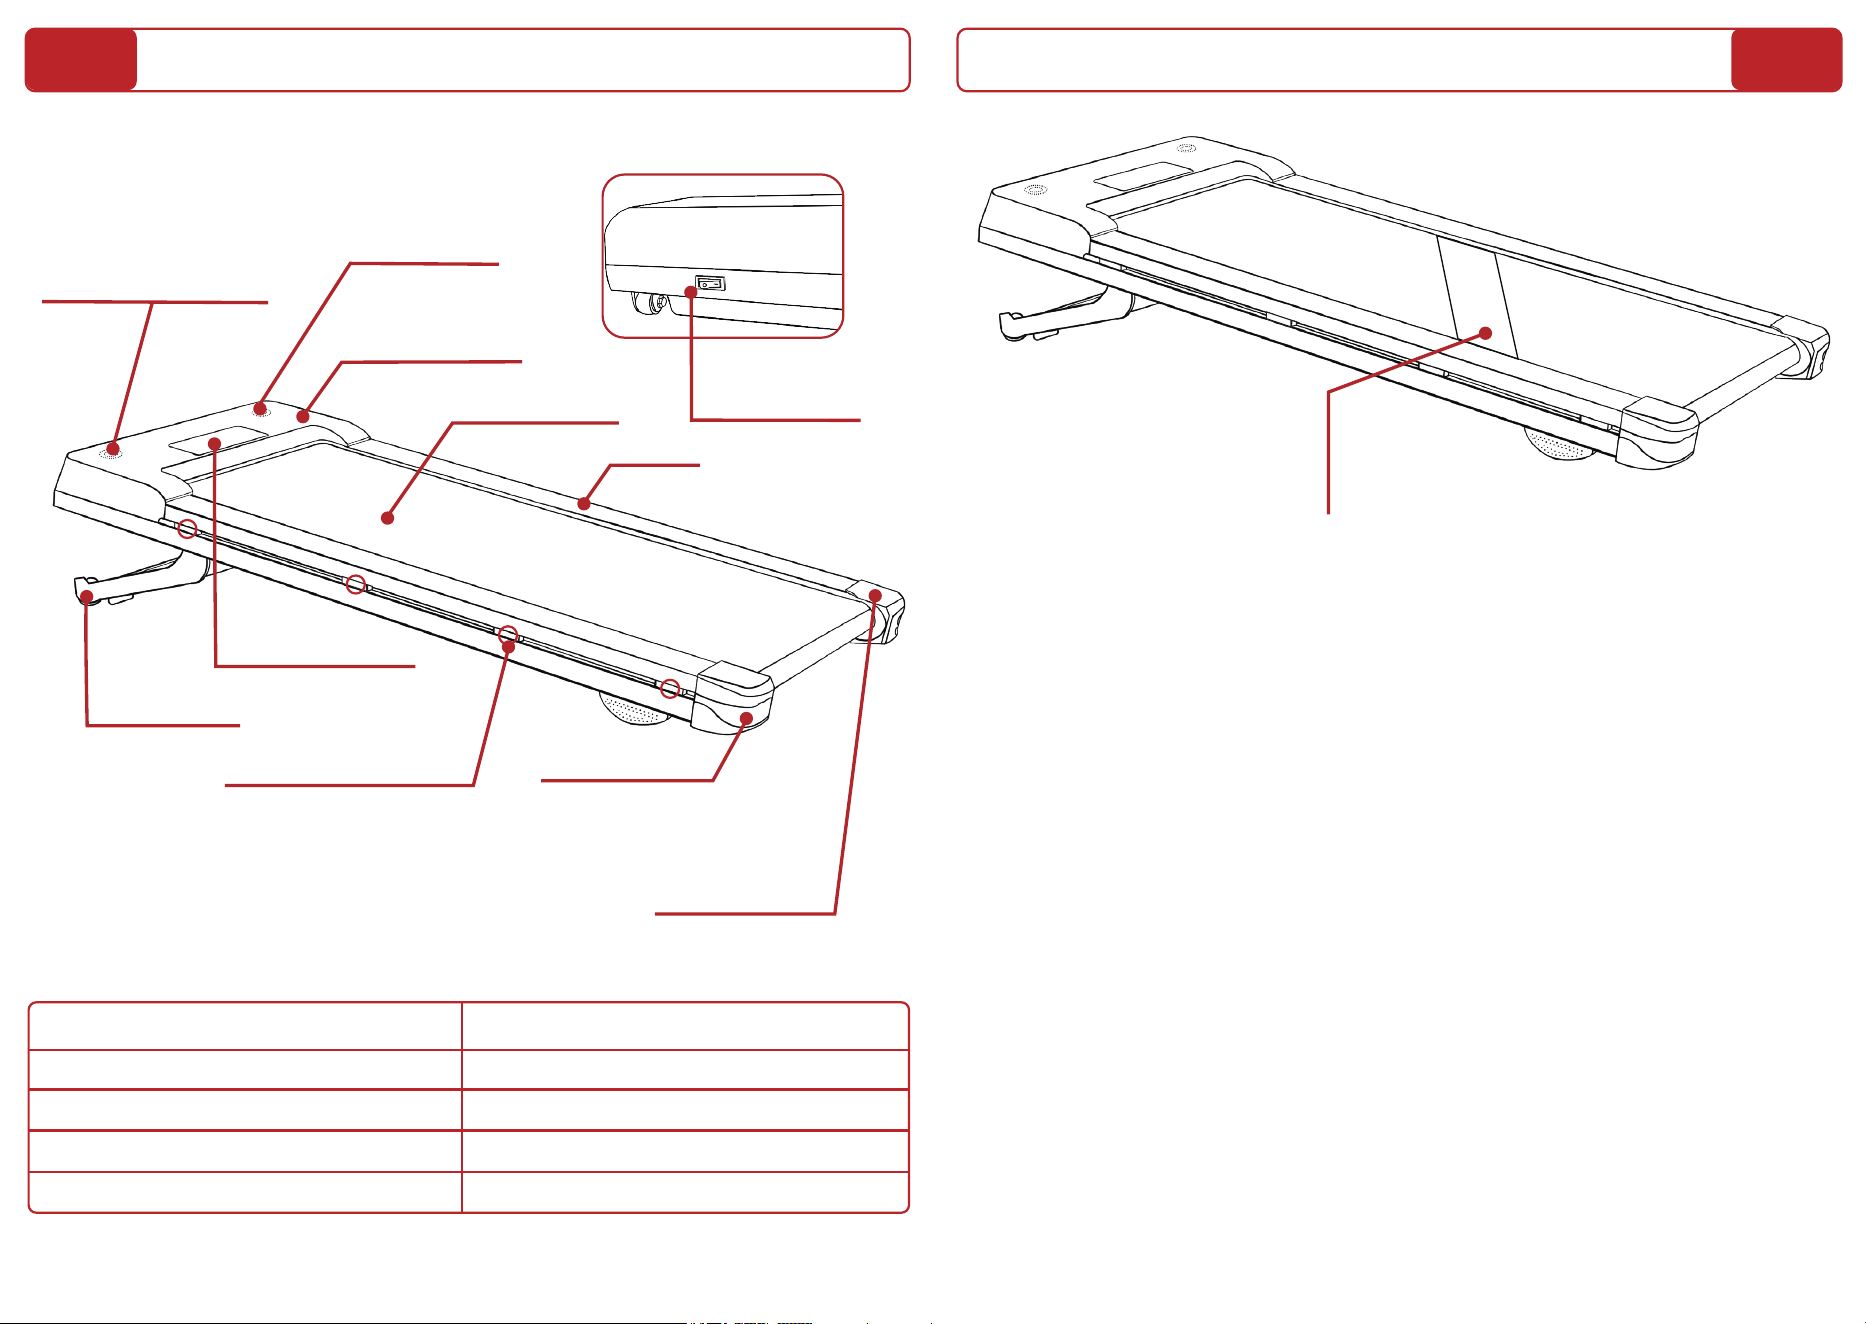
Product Structure
Running Belt
Left Rear Cap
Display Window
Strake
Power Switch
On/Off
8x Shock Absorption
Pad Stands
Right Rear Cap
Motor Top Cap
Sound Vent
Motor Cooling Vent
Product Specifications
Product Configuration Technical Parameters
Speed Range 0-5.0 mph
Maximum Load Bearing 450 lbs
Maximum Horsepower 2.5 hp
Incline 12% 9-level positions
03
1
2
3
4
SPEED INC STEP DIS. TIME CAL.
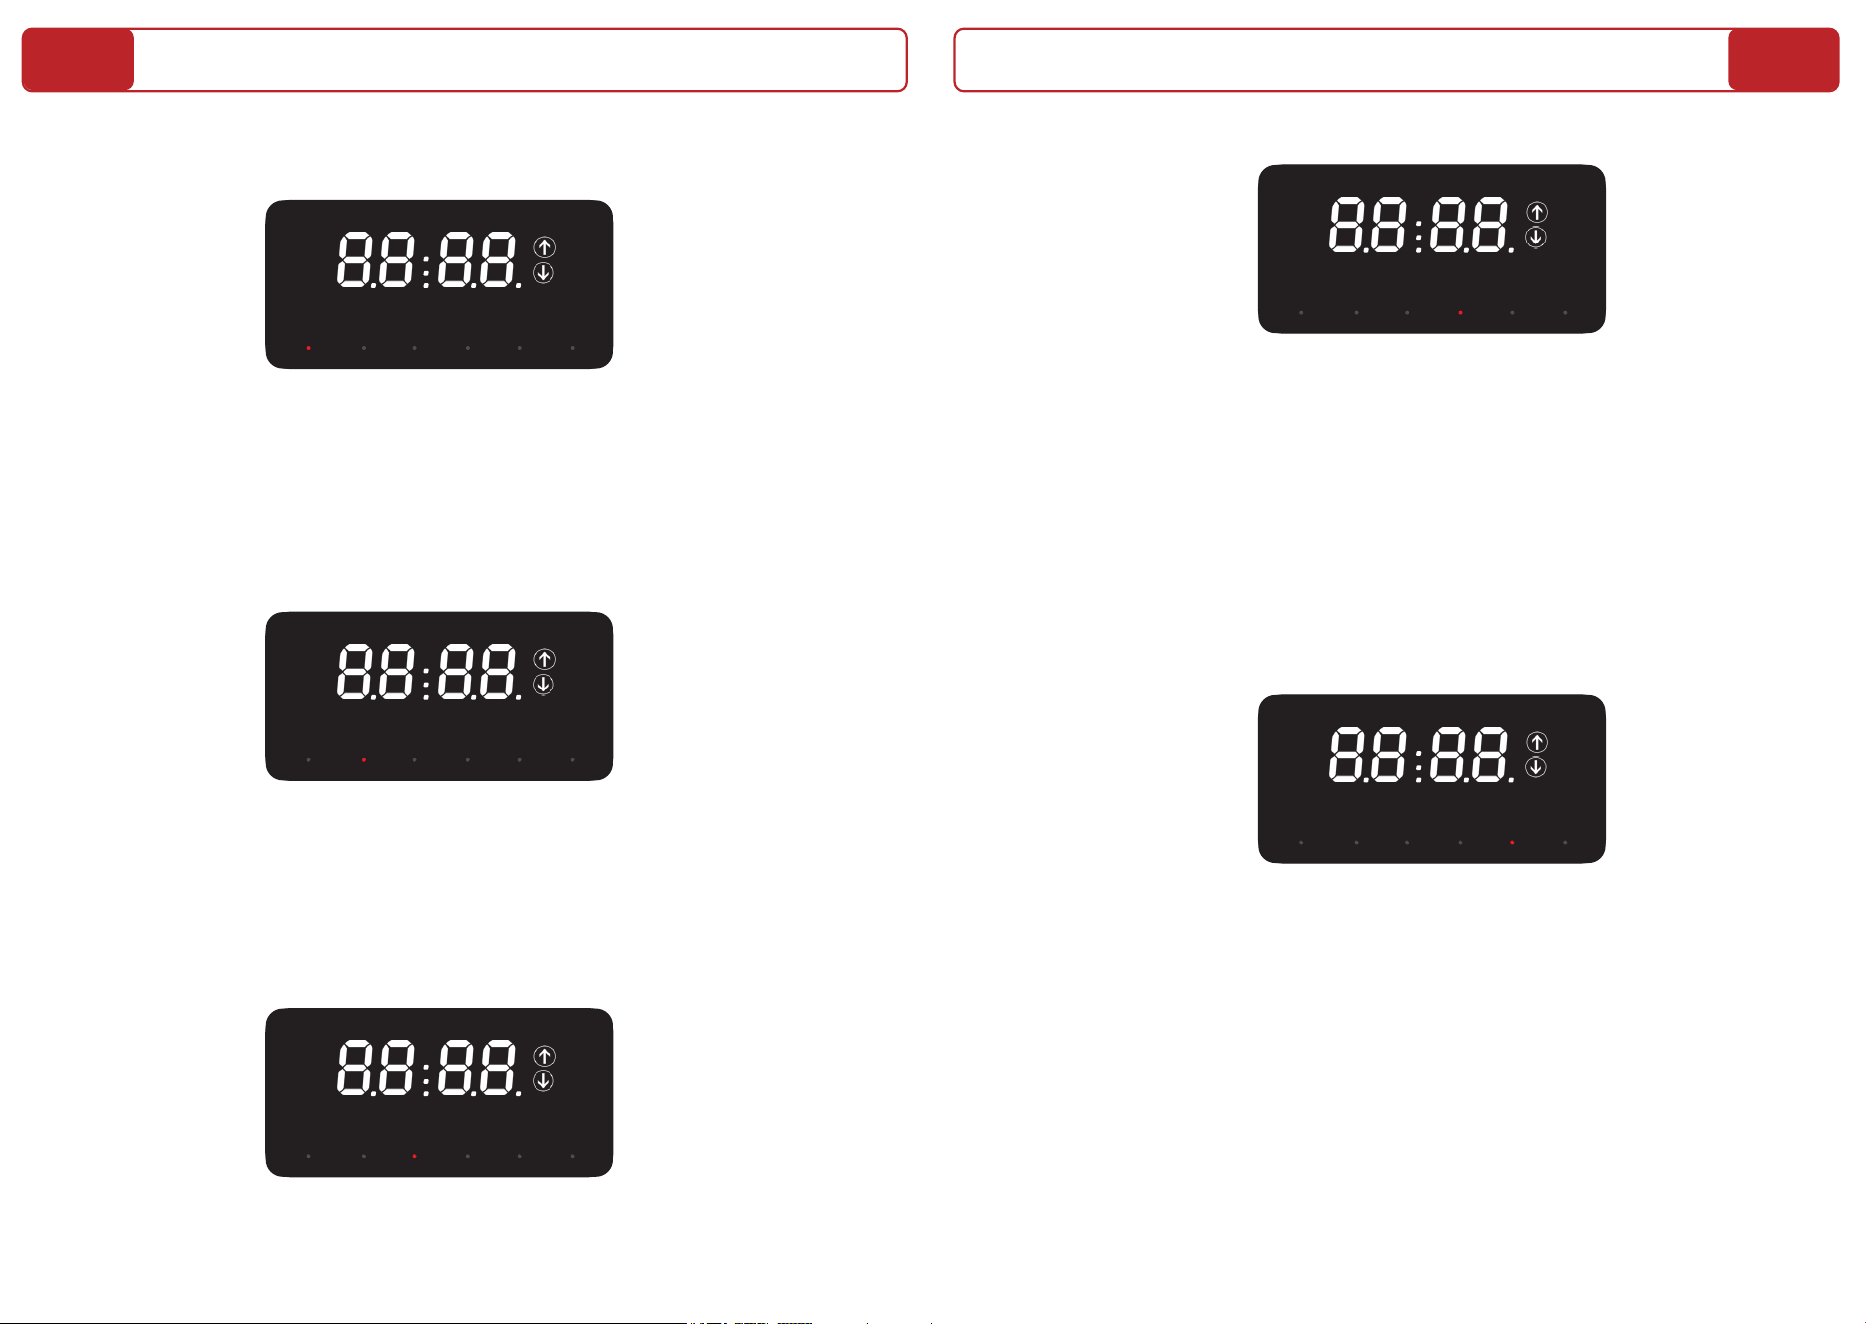
3. STEP (Step Display)
The "STEP" window displays the current step count, ranging from 0 to 9999.
Introduction To Display
1.SPEED (SPEED Display)
The "SPEED" window displays the current speed, ranging from 0.6 to 5.0
mph. The user can adjust the speed in manual mode or after setting it in
"M" mode (countdown setting for speed). Each press of the "+" or "-" button
adjusts the speed by 0.2 mph.
SPEED INC STEP DIS. TIME CAL.
SPEED INC STEP DIS. TIME CAL.
2.INC Incline (Incline Description)
The "INC" window displays the current incline level, ranging from 0 to 9
levels (0% to 12%). In manual mode, the user can use the incline increase
or decrease buttons to adjust the incline across 9 levels. Each time the
incline button is pressed, the corresponding up or down arrow icon will
light up.
SPEED INC STEP DIS. TIME CAL.
SPEED INC STEP DIS. TIME CAL.
4.DISTANCE (Distance Display)
The "DISTANCE" window displays the current walking distance, ranging
from 0 to 99.99 miles, in both manual mode and "M" mode (countdown
setting for distance). While the machine is in standby mode, you can use
the "M" button to select distance as the unit of measurement for the
countdown. By default, it counts down from 1.0 mile, but you can set it
within the range of 1.0 to 99.9 miles. Each press of the "+", "-", " ", or " "
button adjusts the distance countdown by 0.1 mile.
5.TIME (Time Display)
The "TIME" window displays the current walking time, ranging from 0 to
99:59 minutes, in both manual mode and "M" mode (countdown setting for
time). While the machine is in standby mode, you can use the "M" button to
select time as the unit of measurement for the countdown. By default, it
counts down from 30:00 minutes, but you can set it within the range of 5 to
99 minutes. Each press of the "+", "-", " ", or " " button adjusts the time
countdown by 1 minute.
>
>
>
>
06
05
SPEED INC STEP DIS. TIME CAL.
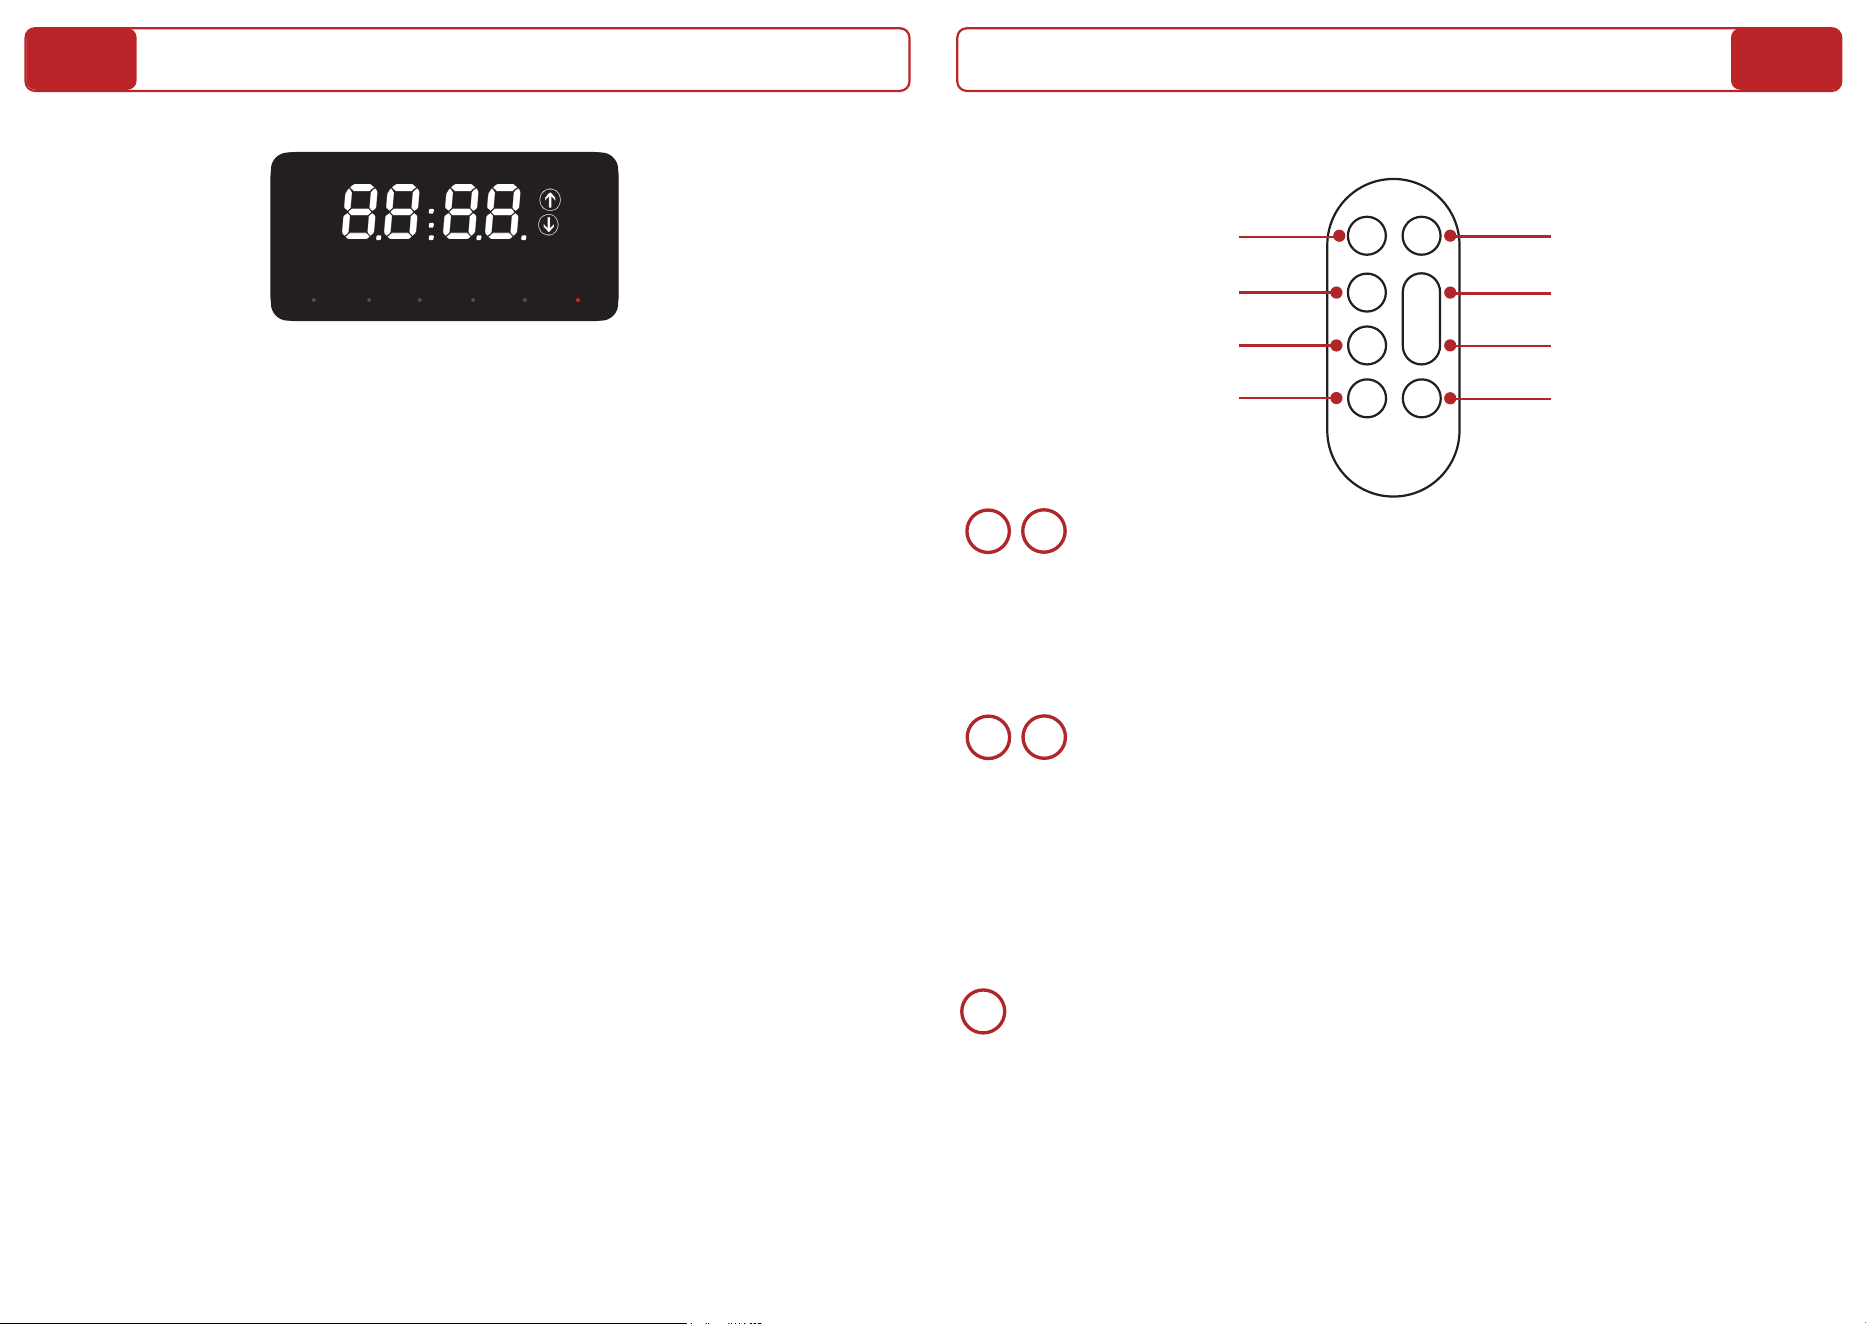
6.Calories Burned (Calorie Consumption Display)
The "CAL" window displays the current calories burned during exercise,
ranging from 0 to 999.9 calories, in both manual mode and "M" mode
(countdown setting for calories). While the machine is in standby mode, you
can use the "M" button to select calories as the unit of measurement for
the countdown. By default, it counts down from 50.0 calories, but you can
set it within the range of 10 to 990 calories. Each press of the "+", "-", " ",
or " " button adjusts the calorie countdown by 10 calories.
Please note that the calories counts on display are estimated based on
average user profiles and movement sensors for reference only, not
individualized inputs, it only helps users gauge their workout intensity. You
can manually track your accurate calorie burn using fitness apps or devices
that allow weight input and heart rate monitor.
>
>
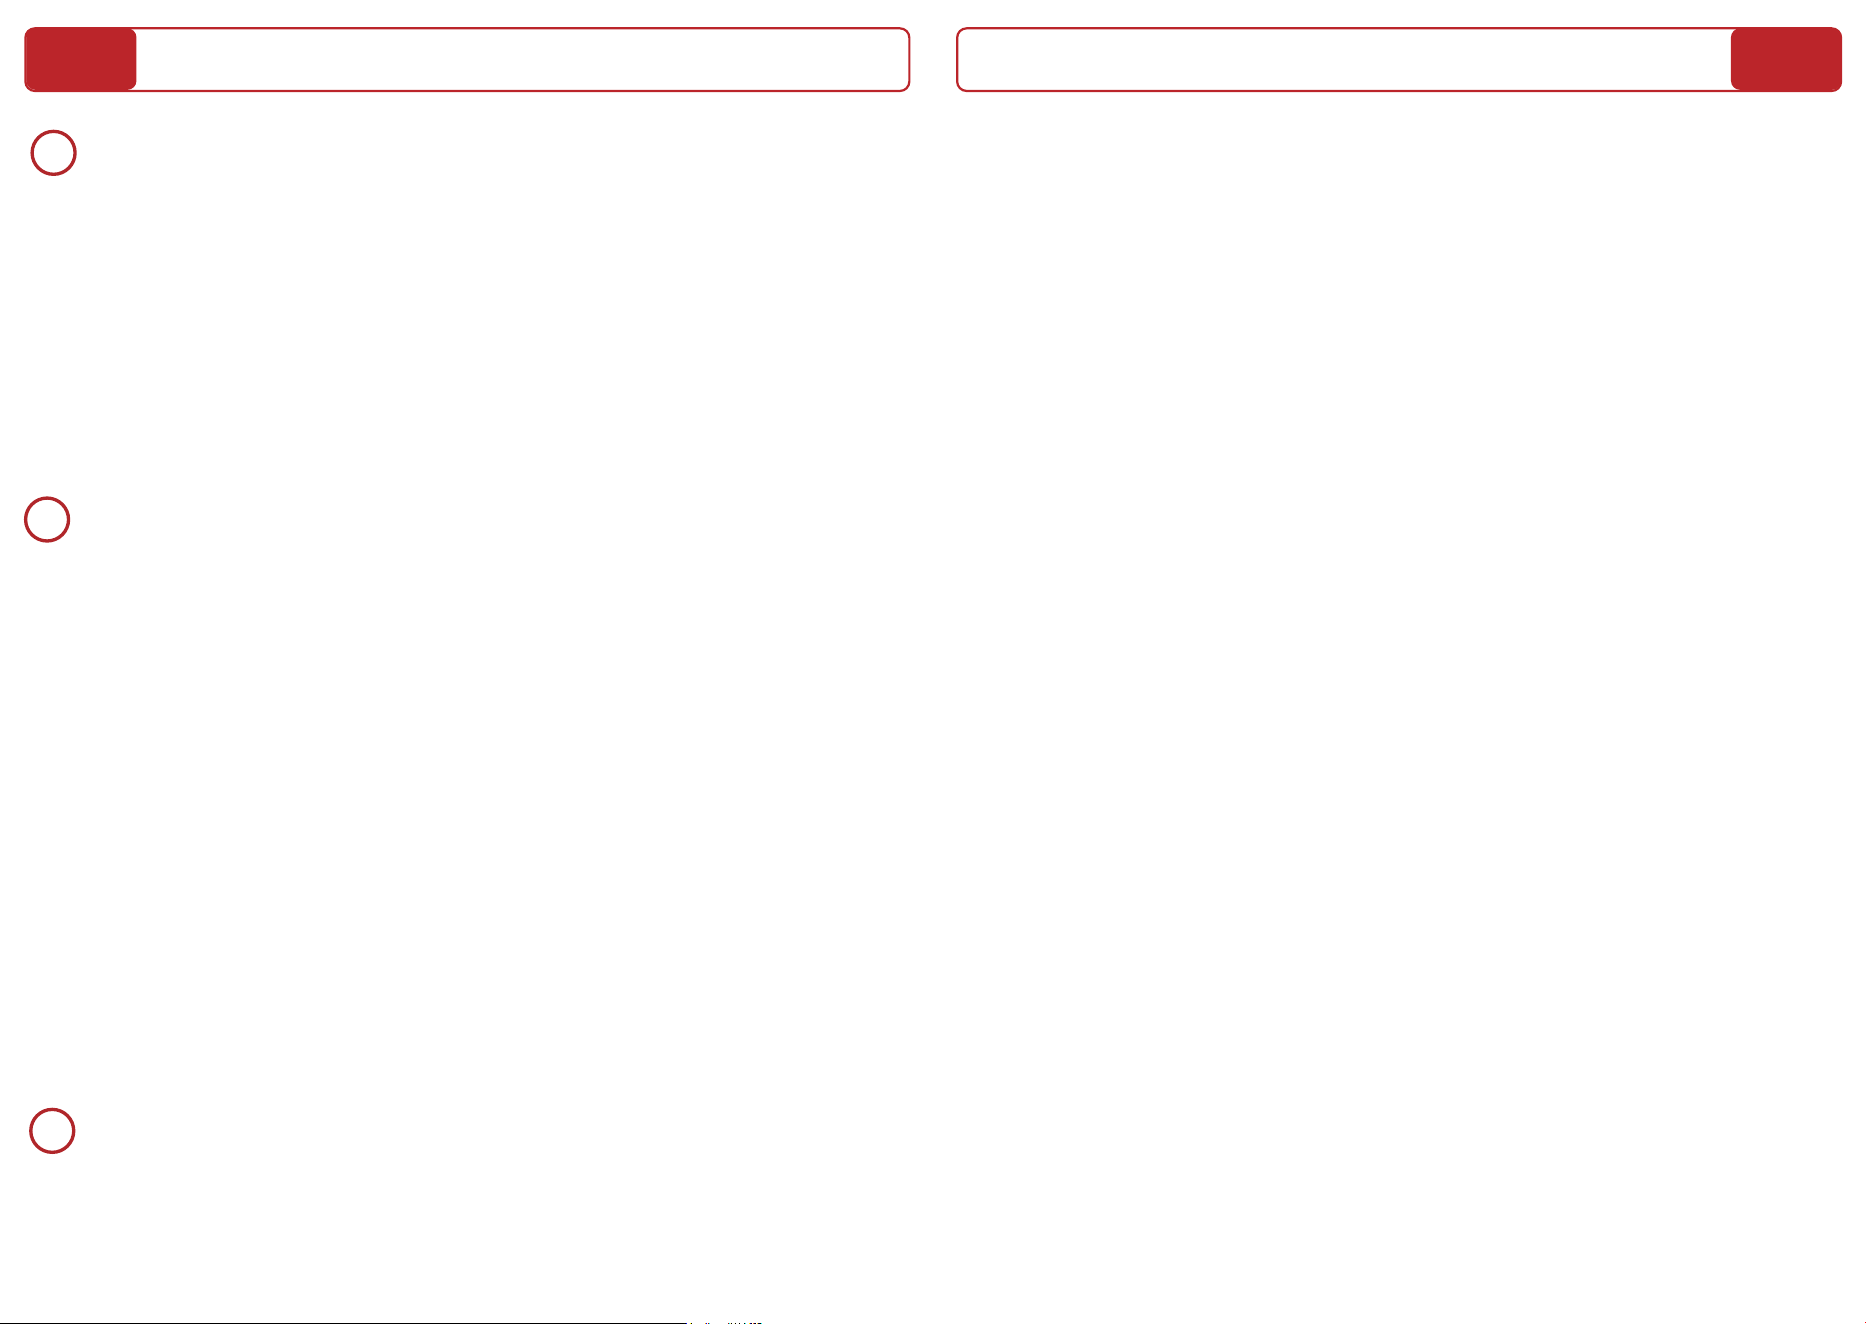
Incline Increase Button
Mode Button
Incline Decrease Button
Speed Increase Button
Remote Control Instructions
Hold Button
Start Button
Stop Button
Speed Decrease Button
M
HOLD
START
STOP
< >
+
-
+
Adjust the speed using the provided buttons in manual mode. In "M" mode
(Countdown Setting), you can also use the "+" or "-" buttons to adjust the
time, distance, or calorie countdown targets for your exercise.
Speed Increase & Decrease Buttons
-
Adjust the incline using the provided buttons. In manual mode, you can select from 1 to
9 incline levels. Each time you adjust the incline level, the corresponding up or down
arrow lights will illuminate to help you clearly see the changes. In "M" mode (Count-
down Setting), you can also use the " " or " " buttons to adjust the time, distance,
or calorie countdown targets for your exercise.
Incline Increase & Decrease Button
>
>
>
>
M
When the machine is in standby mode, press the "M" button to switch
between countdown targets: calories burned, time, or distance. Use the
"+", "-", " ", or " " buttons to set the desired countdown value for the
selected target. Once set, press the "START" button to begin running
according to the countdown target. The treadmill will automatically stop
once the target is reached.
M Button
>
>
08
07
Operation Mode
1. Manual/Free Mode
Start: After turning on the power switch, the machine enters standby mode. Press
"START" to begin using the treadmill directly. The screen will display a 3-2-1 countdown
with sound prompts, and the speed will default to 0.6 mph. The step count, calories
burned, time, and distance will start counting from 0, and the incline will default to
level 0.
1. Speed Setting: The speed ranges from 0.6 to 5.0 mph. Each press of the speed
increase or decrease button adjusts the speed by 0.2 mph.
2. Incline Setting: The incline ranges from 0 to 9 levels. Each press of the incline
increase or decrease button adjusts the incline by 1 level.
During exercise, you can view the current speed, incline, step count, distance, time, and
calories burned, with the corresponding indicators lighting up in sequence.
Hold: Press "HOLD" to pause the treadmill at any time. The speed and incline level will
gradually decrease to 0, and the calories burned, time, steps, and distance will stop
counting. When you press the start button again, the speed and incline level will slowly
return to their previous settings, while the step count, calories burned, time, and
distance will continue to accumulate.
Stop: Press "STOP" to pause the treadmill at any time. The speed and incline level will
gradually decrease to 0, and the calories burned, time, steps, and distance will reset to
0. When you press the start button again, the speed and incline level will not return to
their previous settings, and the step count, calories burned, time, and distance will
start counting from 0.
1 - Manual/Free Mode
During operation, you can adjust the speed and incline at any time:
Press the "Stop" button, and the machine will stop running no matter what
state it’s in. All motion parameters will be reset to zero.
STOP
Stop Button
Start Button
START
HOLD
Hold Button
Press the "START" button to begin exercise. You can set the speed and
incline you want when you walking or jogging. The default speed is 0.6mph,
and the maximum speed is 5.0 mph. The treadmill will stop automatically
after 99:59 minutes of operation.
When the machine enters a paused state, press the ''Start'' button to
resume operation with the same parameters as before the pause, and the
slope will return to its pre-pause value.
When the machine is running, press the "Hold" button to pause it. The
machine will enter a paused state and display "PAU". It will save all current
motion parameters (speed, incline level, steps, distance, time, and calories
burned). For safety, the incline level and speed will gradually decrease to 0.
When you press the start button again, the speed and incline level will
slowly return to their previous settings, while the step count, calories
burned, time, and distance will continue to accumulate.
After the Hold function is activated, you can restart the system by pressing
the start button within a maximum of 1 hour by default, and continue
walking or jogging, during which data will resume and continue accumulat-
ing calculations. If the hold status persists for over 1 hour, historical
records in the system will automatically reset to zero, and numerical accu-
mulation calculations will become irrecoverable.
10
09
Running Belt Adjustment
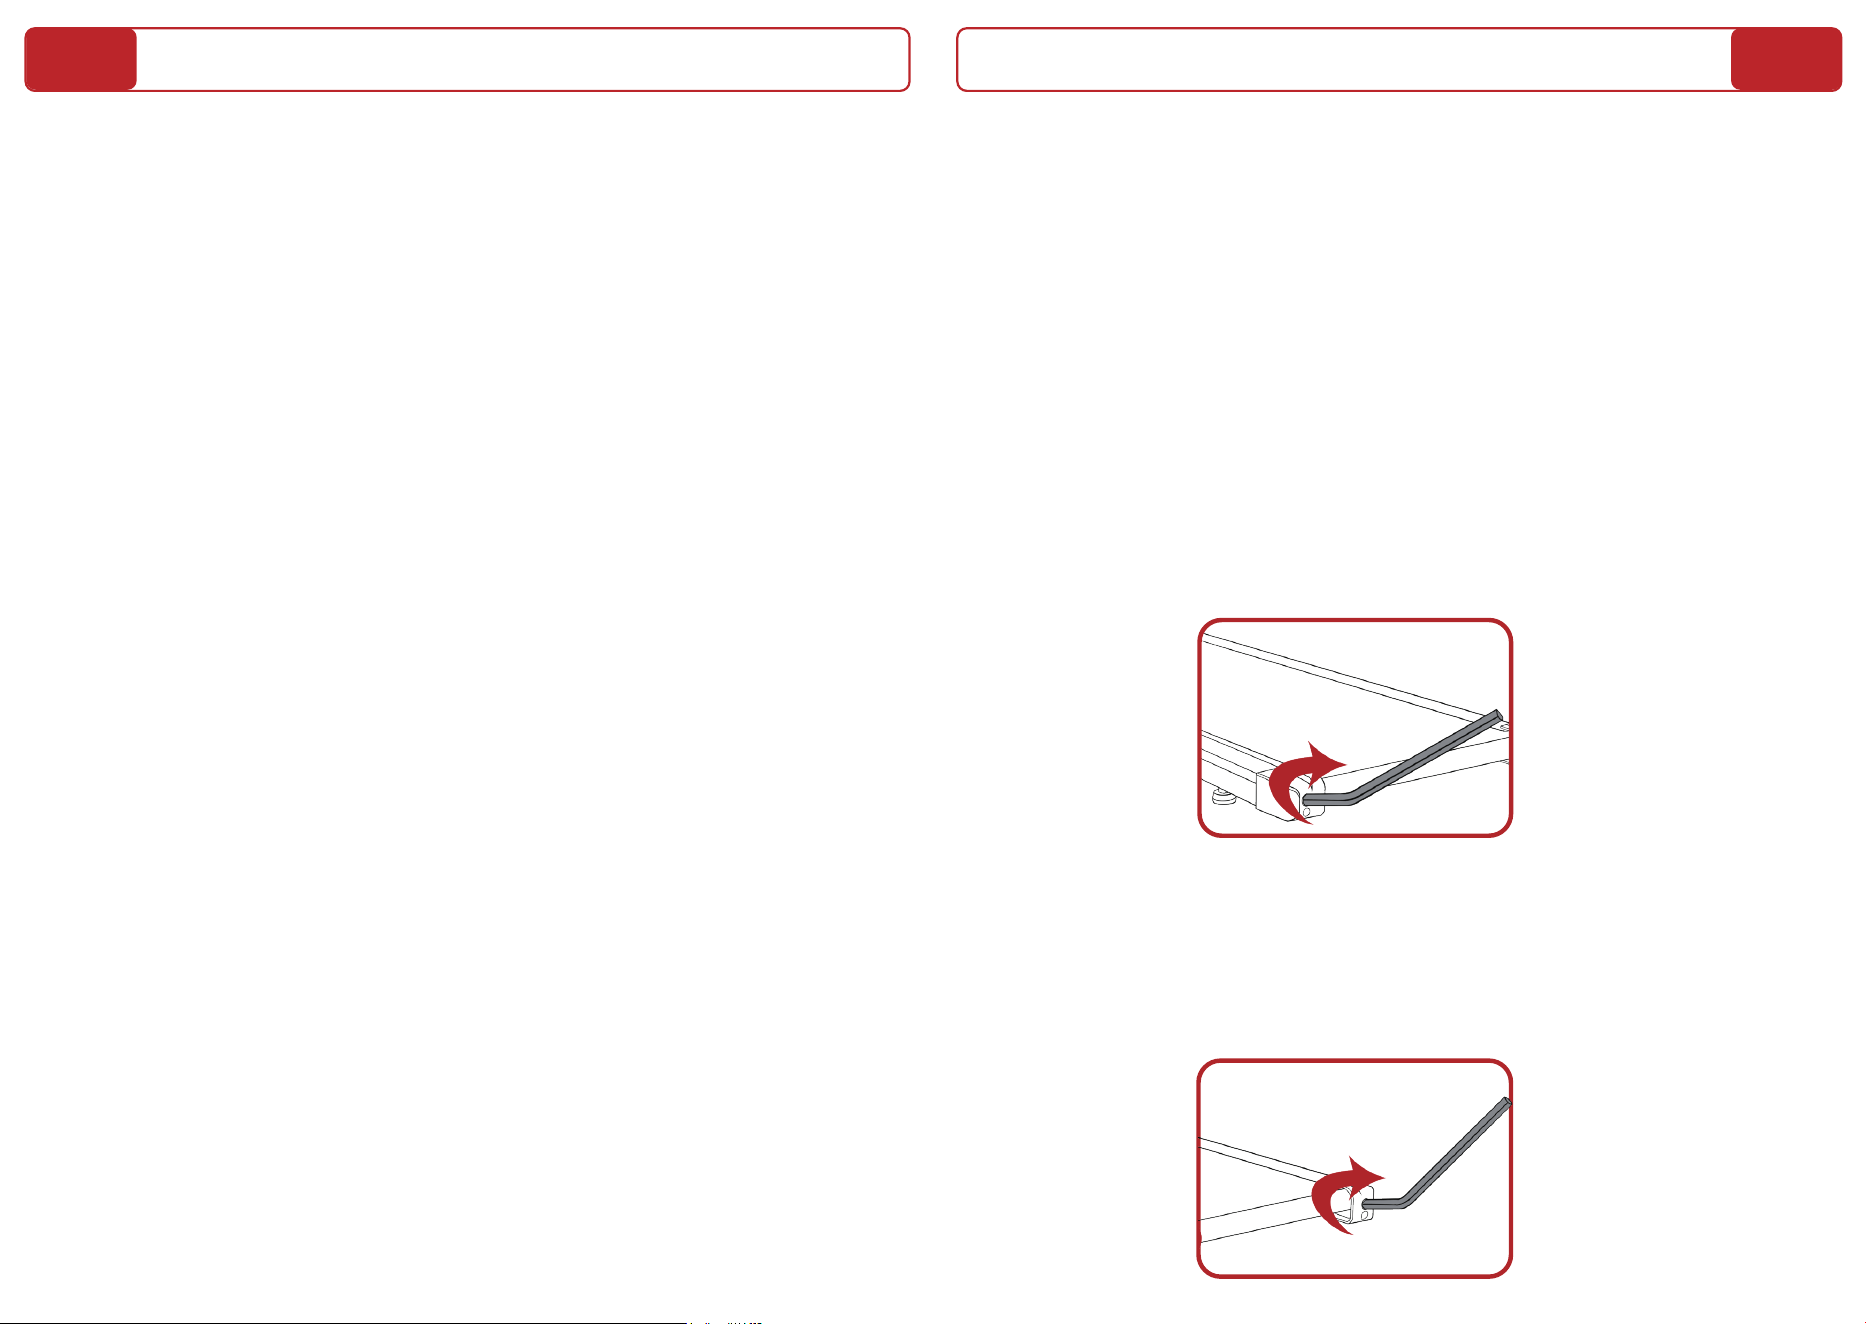
All treadmills have their running belt adjusted at the factory, but after a
while, the running belt may become loose or misaligned. If you notice that
the running belt is slipping, it means that it is loose. You can use an
L-Wrench to adjust.
To adjust the running belt:
1. Running belt shifted to the left:
- Use the L-Wrench wrench to turn the left rear roller bolt clockwise 1/4 of
a turn to tighten the running belt. Then plug in the power cord, and run the
treadmill for 3 minutes. Repeat until the running bet is centered.
2.Running belt shifted to the right:
- Use the L-Wrench to turn the right rear roller bolt clockwise 1/4 of a turn
to tighten the running belt. Then plug in the power cord, and run the
treadmill for 3 minutes. Repeat until the running bet is centered.
2 - Countdown Setting Mode
While the machine is in standby mode, press the "M" button to switch between
calories, time, and distance as your countdown target.
1. Calories: Press the "M" button to select calories as the countdown unit. By default,
it counts down from 50 calories, but you can set it within the range of 10 to 990
calories, adjusting by 10 calories each time.
2. Time: Press the "M" button to select time as the countdown unit. By default, it
counts down from 30 minutes, but you can set it within the range of 5 to 99 minutes,
adjusting by 1 minute each time.
3. Distance: Press the "M" button to select distance as the countdown unit. By default,
it counts down from 1.0 mile, but you can set it within the range of 1.0 to 99.9 miles,
adjusting by 0.1 mile each time.
Once you’ve selected and set a specific target, press "START" to begin using the
treadmill. You can adjust the speed and incline as needed during operation. During
exercise, you can view the current speed, incline, step count, distance, time, and
calories burned, with the corresponding indicators lighting up in sequence.
Note: In Manual/Free Mode, the treadmill will automatically stop after
running for a maximum of 99 minutes and 59 seconds.
Sleep Mode: When the walking pad is powered on, if no remote control
commands are issued (excluding the hold/pause function), the machine
will automatically enter a screen-off state after 5 minutes and switch to
sleep mode to conserve power. You can reactivate the walking pad and
resume usage by performing any remote control operation.
12
11
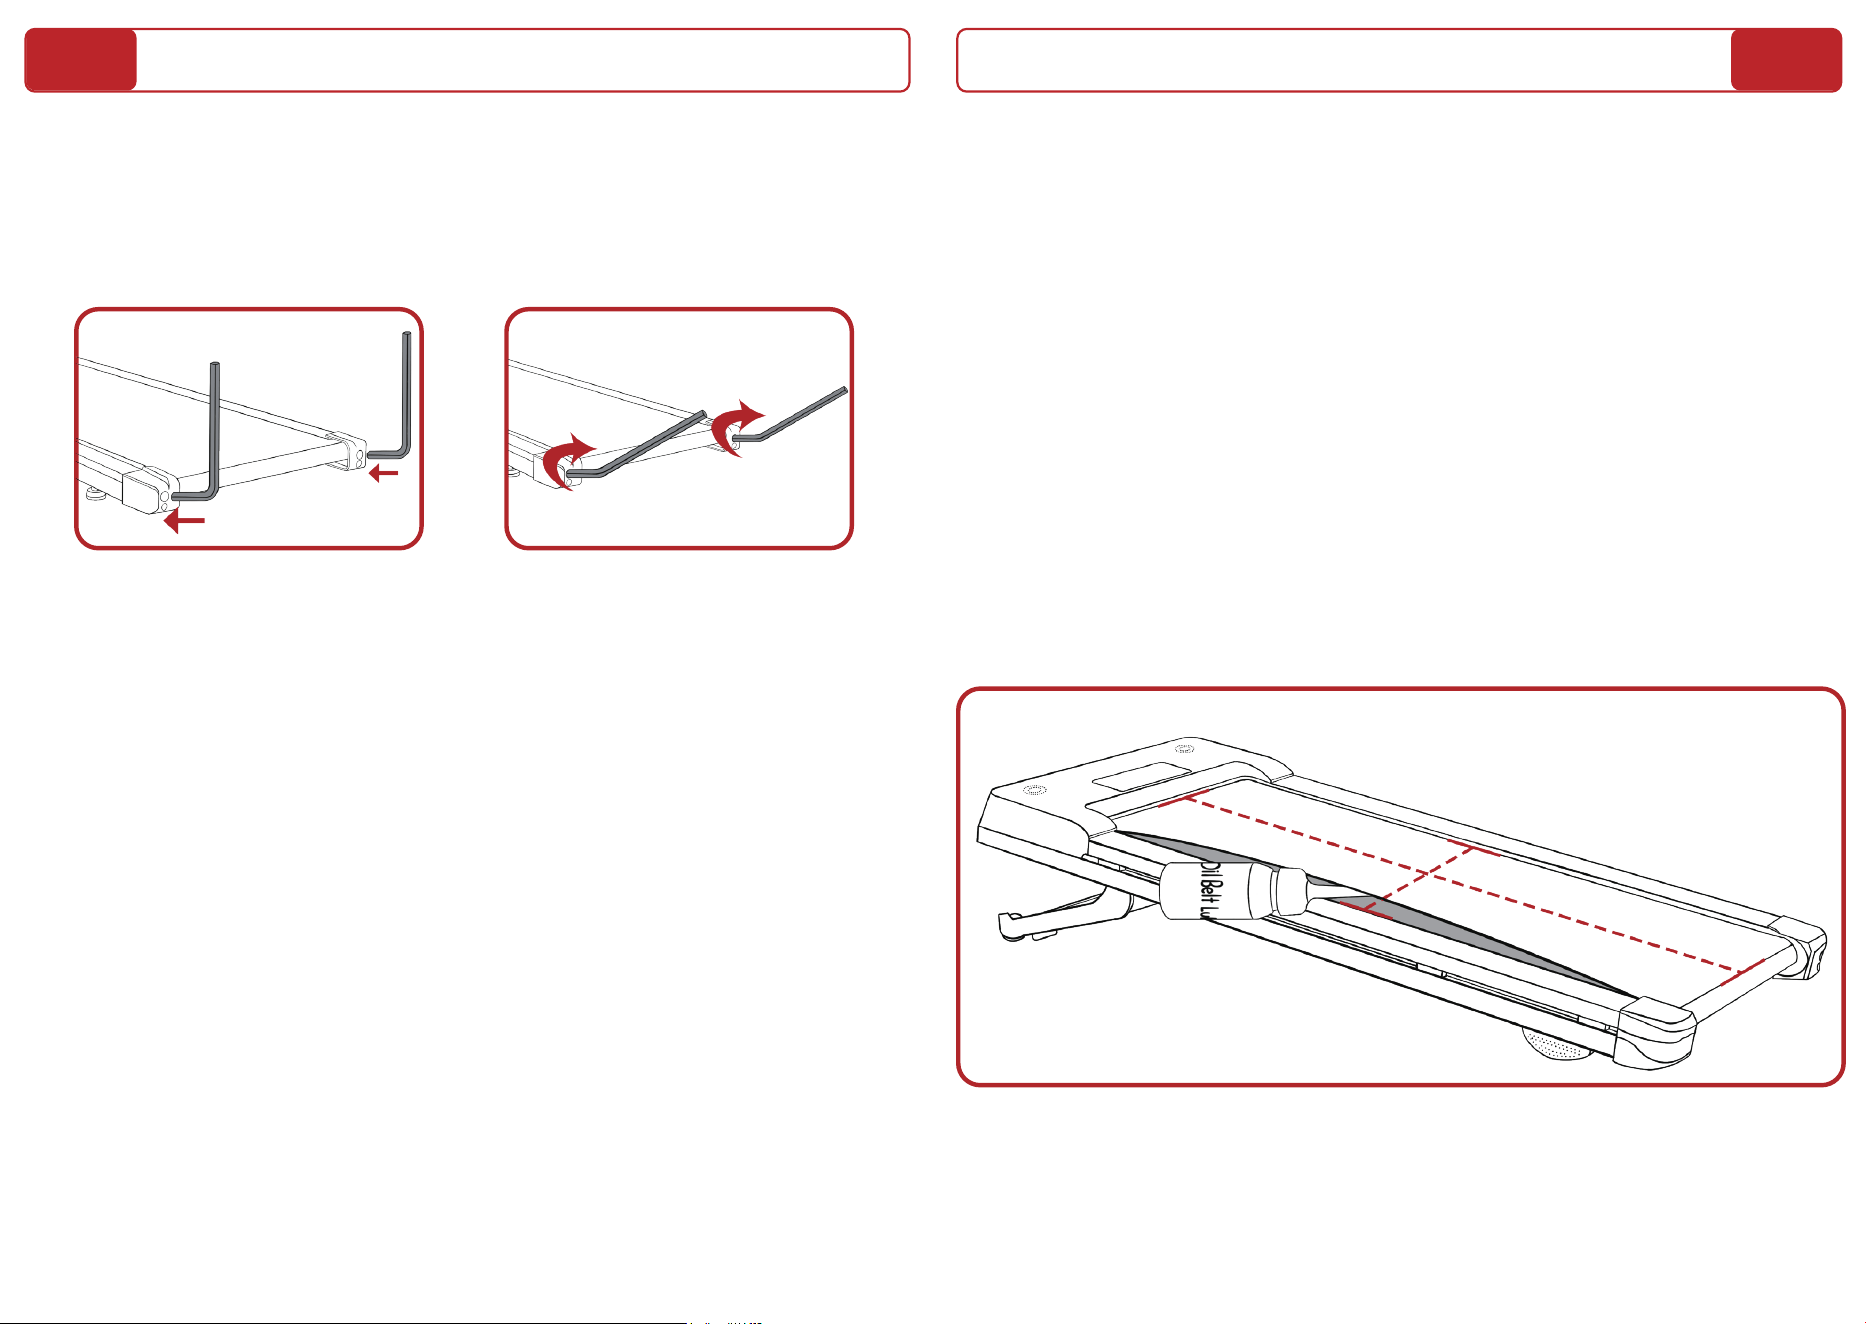
Oil Belt Lubricant
Lubrication:
After using the running belt for a certain period, it is necessary to lubricate
it with a special lubricant. The recommended lubrication frequency
depends on the usage time:
- For less than 3 hours per week, lubricate every 5 months.
- For 4-7 hours per week, lubricate every 2 months.
- For more than 7 hours per week, lubricate once a month.
Note: Do not add too much lubricant at once.
3. Running belt is loose:
- Use the L-Wrench turn both rear idler bolts clockwise 1/4 of a turn to
tighten the running belt. Then plug in the power cord, run the treadmill for
several minutes. Repeat until the running belt is not slipping.
Check for lubrication:
To check if the running belt needs lubrication, grasp it and touch the center
area at the rear as closely as possible. If there is silicone oil on the belt or if
it feels slightly slick, it means that lubrication is not needed. If the running
belt feels dry and there is no silicone oil on your hand, you need to add
lubricant.
To lubricate the running belt, locate the both side of the belt and spray
silicone oil on each side of it. Then, run the treadmill at a speed of 0.6mph,
spreading the silicone oil evenly and lighting the belt from left to right.
After about a minute, the silicone oil will be absorbed into the running belt.
14
13
Blue-tooth Speaker Connection
1- Connect Bluetooth Speaker:
After the walking machine is powered on, you can connect the Bluetooth
speaker of the walking machine through devices such as mobile phones or
Pad.
IOS & Android device: Enter "Settings - Bluetooth", turn on Bluetooth,
search, and select the device "Treadmill", once the connection is
successful, there will be sound prompts.
Blue-tooth Device Name: Treadmill
2- Play Music:
You can directly adjust the music volume through your mobile phone /Pad
device and select and switch your favorite music.
3- Disconnect the Bluetooth Speaker:
You can directly turn off the Bluetooth function of the mobile phone /Pad,
you can disconnect the connection with the Bluetooth speaker of the
walking machine, once the disconnect is successful, the walking machine
will have a sound prompt.
4- Replace the Player Device:
When a new device is waiting to be connected, the currently connected
player device needs to disconnect/turn off the Bluetooth function first,
disconnect the connection with the Bluetooth speaker of the walking
machine, and the new device can be connected.
We have a high-quality Hi-Res Audio Bluetooth speaker built so
you can enjoy great music while working out.
Hi-Res
AUDIO
When there is a problem with the treadmill's lift and it cannot lift
normally:
1-Within 10 seconds of turning on the treadmill's power switch, press and
hold the " " Incline Reduce Button on the remote for about 5 seconds. The
lift motor will automatically rise and then lower.
2-The incline value will dynamically display as a scrolling "0" during this
process. Once the calibration is successful, this scrolling display will
stop.
3- If the scrolling display continues or the lift motor completes its
movement but shows an "E09" error code, it means the calibration failed.
In this case, repeat step 1 to retry the calibration.
Trouble Shooting
If you find that the walking treadmill isn’t available due to error codes
ranging from E01 to E15, or if you’re facing any issues that disrupt its
normal function, please email us immediately!
To ensure we can provide you with the best assistance possible, it would be
wonderful if you could prepare the following information when contacting
us:
1-Your order number.
2-A description and a picture or video of the issue you’re experiencing,
attach an error code if it appears on screen.
3-Recipient's full address and phone number.
We’re here to help and will swiftly send you a replacement walking
treadmill and any necessary accessories. And there is no need to return the
faulty treadmill for your convenience.
>
16
15
Warranty Statement
The PACEROCKER warranty includes the following contents:
1-Free refund or exchange the walking machine within 90 days from
the date of purchase. PACEROCKER VIP members get an additional 9
months of coverage.
2-Free replacement of accessories within 1 year from the date of
purchase. PACEROCKER VIP members get an additional 2 years of
coverage.
3-Get extra discounts, specific discounts on our products for friends,
families and yourself.
Safety Information
TO REDUCE THE RISK OF INJURY,PLEASE READ INSTRUCTIONS IN FULL BEFORE USE.
• Intended for at-home use only. Please only use in an area with 3-6 feet of free space
around your device. Do not operate your device on a carpet more than 0.5 inches thick
or near water.
• Treadmill is not intended for use by children or those with physcial, sensory, or
cognitive impairments.
• To avoid injury, do not dissassemble this machine without guidance of manufacturer.
• This product only works with electrical outlets with a voltage between 100 and
120VAC. If your product’s plug does not fit your home’s outlets, do not attempt to use.
• Check all parts before use to ensure the screws and nuts are not loose.
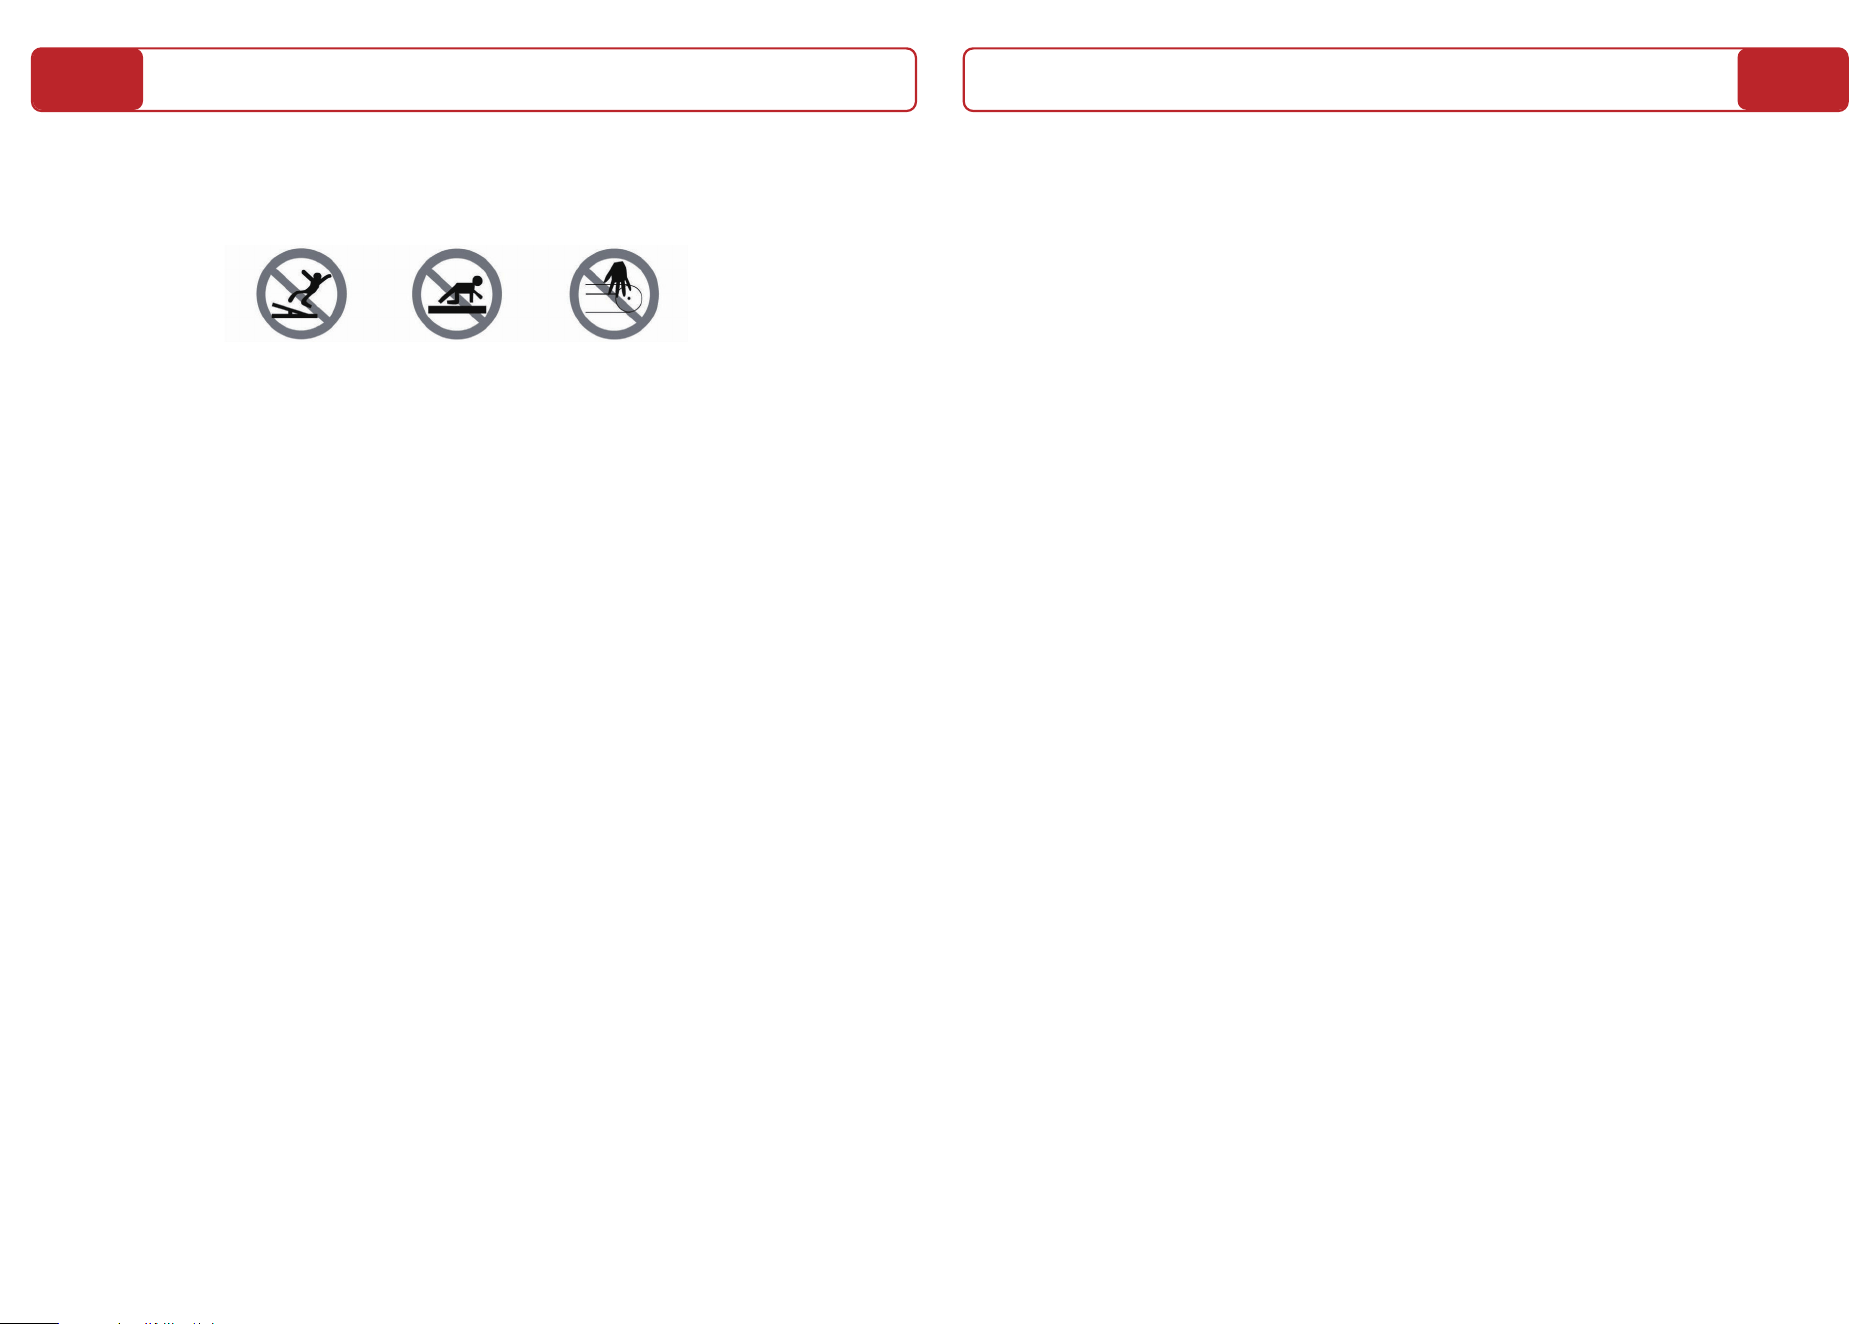
• Keep fingers away from moving parts. Don’t put your hands or feet in the space under
the running belt. Keep children or pets away from the treadmill.
• Wear appropriate exercise clothes and athletic shoes while using the treadmill. Loose
fitting or oversized clothing can get caught in machine.
• Unstable power supply may overload the circuit. Do not plug high-power devices such
as a computer into an outlet on the same circuit.
• This product can only be used by one person at a time.
• Do not place any objects on the machine. Do not stand directly on the belt when the
machine is turned on.
• Always unplug the power cord after use before cleaning and performing maintenance.
• Only use manufacturer’s accessories. Never exceed product’s maximum weight
capacity of 450lbs.
• Moisture and overheating will affect the use of the product. Please keep the machine,
motor, power cord and plug away from water and high temperatures.
• If the treadmill overheats, emits smoke or a burning smell during use, please stop
using it immediately and contact customer service for replacement.
18
17

FCC Warning
This device complies with Part 15 of the FCC Rules. Operation is subject to the
following two conditions:
(1) This device may not cause harmful interference, and (2) this device must accept any
interference received, including interference that may cause undesired operation.
NOTE 1: This equipment has been tested and found to comply with the limits for a Class B
digital device, pursuant to part 15 of the FCC Rules. These limits are designed to provide
reasonable protection against harmful interference in a residential installation. This
equipment generates, uses and can radiate radio frequency energy and, if not installed
and used in accordance with the instructions, may cause harmful interference to radio
communications. However, there is no guarantee that interference will not occur in a
particular installation. If this equipment does cause harmful interference to radio or
television reception, which can be determined by turning the equipment off and on, the
user is encouraged to try to correct the interference by one or more of the following
measures:
- Reorient or relocate the receiving antenna.
- Increase the separation between the equipment and receiver.
-Connect the equipment into an outlet on a circuit different from that to which the
receiver is connected.
-Consult the dealer or an experienced radio/TV technician for help.
NOTE 2: Any changes or modifications to this unit not expressly approved by the party
responsible for compliance could void the user's authority to operate the equipment.
The device has been evaluated to meet general RF exposure requirement. The device can
be used in portable exposure condition without restriction.
19