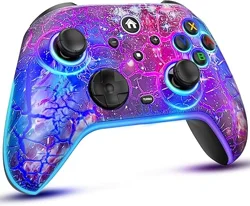

MULTI-ELITE CONTROLLER
(N-S/IOS/Android/PC)
Connect to N-S/IOS/Android/PC
Instruction Manual (NS60)
2-6
Button Llustration
1
Use Method of Wired Earphone
7
Light Effect Adjustment
7
Turbo Setting
7-8
Vibration Intensity Adjustment
8
Customize Back Button Setting
8-9
Setting Up Using The APP
10
Trouble Shooting
11
LB
Y
X
A
B
-
+
RB
Home
Sync
LT RT
Capture
Left Stick
Downward L3
Right Stick
Downward L3
D-pad
Turbo
Type-C port
Smartphone holder
(reserve)
N1 N2
Headphone jack
Set Reset
Button Llustration
1
I.
Connect to N-S Console
Note: 1. Please turn off airplane mode.
2. Do not touch the stick while connected.
Connection Method
①
In the initial menu of N-S/Lite/OLED Console, click on
"Controllers"
option- then click on "Change Grip/Order"
option and enter the
Controller Pairing Mode.
2
Press and hold for
5 seconds
Or
② Press and hold the SYNC button (or HOME button) for
5 seconds to enter the pairing state, the horse race lamp
runs from slow to fast.
③
After the connection is successful, the LED1 is constantly
on.
LED
1
LED
2
LED
4
LED
3
LED
1
LED
2
LED
4
LED
3
LED
1
LED
2
LED
4
LED
3
Note:
if the controller is difficult to pair the Console, there are
maybe the reasons as below:
1.
The controller is out of power: Please fully charge the
controller and try it again.
2. There are too many Blue-tooth devices connected to
the Console: Please manually clear the connected
devices.
(Steps:
System Setting - Controllers and Sensors
- Disconnect Controllers).
After successful connection, the controller will not go to
auto sleep. If you need the controller turn off, just press
the SYNC button.
3
Wake Up The N-S Console
1. Connect to IOS via Blue-tooth
For N-S Console -Wired Mode
Note:
The WAKE UP function can only take effect when the
controller is going to connect the N-S Console that the
last time it was connected to. If it is not the N-S Console
that it was connected to last time, please refer to the step
"Connect to N-S Console".
Press the HOME button can wake up and re-connect the
console after the first connection with the controller.
II. Connect to IOS/Android/PC
Special prompt:
The screenshot, turbo, back button, vibration adjustment,
motion control, etc functions will be unavailable when the
controller is connect to IOS/Android/PC.
3.
Please use the attached USB-C cable to pair for the
first connection.
4. Please reset the controller.
① Press and hold the X button and HOME button at the
same time for 5 seconds, the LED 1 and LED 4 of the
controller flash.
1. Before starting the wired connection, please make sure
that the "Pro controller wired connection" option is turned
on in the system settings of the N-S Console.
2. When the controller is connected to the official dock of
the N-S with the Console sit in through the USB-C cable,
it can be used as a wired controller.
3. Unplug the USB-C cable, the controller turns into the
wireless(Blue-tooth) mode, and automatically reconnects
to the Console.
4.If our controller turns off after unplugging the cable,
please press the HOME button for a few seconds.
+
Press and hold 5 seconds
4
LED 1 and LED 4 flash
② On the Blue-tooth interface of the phone, find and
connect "Xbox Wireless Controller".
Note:
It supports MFI mode games on the IOS devices which is
required IOS 13.0 above system version.
② On the Blue-tooth interface of the phone, find and
connect "Gamepad".
Note:
It supports HID mode games on the Android devices.
2. Connect to Android via Blue-tooth
①
Press and hold the A button and HOME button at the
same time for 5 seconds, the LED 1 and LED 4 of the
controller flash.
+
Press and hold 5 seconds
LED 2 and LED 3 flash
5
Re-Connect
[For N-S/Lite/OLED Console,IOS, Android] pressing the
HOME button after the first connection, but please note
the re-connect only works when the last connected device
is the same as this time.
3. Connect to PC via USB-C Cable
Connect the controller directly to the Windows PC via the
USB-C cable included in the package.
Note:
It supports X-input mode games and gaming platform
like Steam, etc on Windows PC devices which is required
Win 7 above system version.
Interchange X-input And D-input During Wired
Connection To PC
X-input mode and D-input mode interconversion(Default X-input)
+
X-input mode
D-input mode
6
Press and hold - and + button 5 seconds
LED 1 and LED 2 flash
LED 3 and LED 4 flash
Use Method of Wired Earphone
Turbo Setting
The wired earphone can only be used when the controller
is connected to official dock of the N-S Console through
wired connection.
2.Press "Set" button to change another light effect. Press
and hold "Set" button for 3 seconds to close light effect.
Light Effect Adjustment
1.The LED light has a dynamically breathing feature and
has 10 kinds of light effect modes: 8 kinds of fixed color
mode(Red, Blue, Green, Yellow, Cyan, Orange, Purple,
White), dazzling color mode, fixed color loop mode.
1. The Buttons Support Turbo: D-pad(Up, Down, Left,
Right) / A / B / X / Y / LT / LB / RT / RB buttons.
2. Turbo Speeds: The first level is 6 shots/s; the second
level is 10 shots/s; the third level is 20 shots/s.
3. The
Method of Adjusting Turbo Speeds: Press "TURBO"
button,
push up the right joystick will add one level. Press
"TURBO" button, push down the right joystick will downshift
one level.
4. Turbo Mapping Setting: Press "TURBO" button and the
button that you need map turbo function at the same time,
the mapping button will be set to manual turbo, repeat the
operation once, the mapping button will be set to auto turbo,
repeat the operation once more, the mapping button will
cancel turbo function.
T
T
+
+
RIGHT
RIGHT
T
T
7
Press "TURBO" button, push up the right
joystick
will add one level
Press "TURBO" button, push down the right joystick
will
downshift one level
Turbo Setting Method (Take LT button for example)
Semi-auto
model
Fully automatic
mode
Clear the
Turbo function
of this key
Press and hold the
key that requires
Turbo
Press and hold the
key that requires
Turbo
Press and hold the
key that clear
Turbo
Press the
Turbo key
once
Press the
Turbo key a
second time
Press Turbo
for the third time
Vibration Intensity Adjustment
Customize Back Button Setting
1. 4 Levels strength: 0%-30%-75%-100%, Default 75%.
2. Adjust
Method: Press "TURBO" button, push up the left
joystick will add one level. Press "TURBO" button, push
down the left joystick will downshift one level.
1. The Buttons that Support Mapping to Back Button
(N1/N2 Button):
A / B / X / Y / LT / LB / RT / RB buttons / Left Joystick and
Right Joystick (The 8 directions of the joysticks) /
D-pad(Up, Down, Left, Right)
T
T
Strong ↑
Weak ↓
+
+
LEFT
LEFT
T
T
8
2.
One back button can edit and map up to 21 functions
button and record the time interval, the longest time
interval is no more than 60 seconds.
3.
The back button mapping has a memory function and
will not be cleared when the controller is turned off.
5.
The back button is defaulted to have no function and
needed to be set by user.
Steps 1:
Press and hold TURBO button, then press N1
button once, the controller will vibrate once, 4 LED lights
will light up.
4. The
mapping function on the back button can not be
interrupted. If multiple key functions are mapped to N1
button and N2 button, press any other buttons will not
interrupt N1 or N2 button when they release the mapped
function, but will synchronize functions with N1 or N2
button.
Mapping Setting (Take N1 button for example)
Auto Turbo on Back Button Setting
Clear the Back Button Mapping:
On the 3 steps above,
just operate steps 1 and steps 3, and do not map any keys
to the N1 button, then the mapping function on the N1
button can be cleared.
+
Starts programming
T
N1
Steps 2: Choose and press the button you need to map
and notice the time interval.
After mapping any function to the N1 button, Press and
hold N1 button,then press TURBO button once, then Auto
Turbo function will be set to the N1 button, repeat the
operation once, the Auto Turbo function will be closed.
Steps 3:
Press N1 button again, the controller vibrates
once, the LED1 is constantly on, in this case the N1
button has been mapped completely.
T
9
press and hold press once
Six-Axis Somatosensory Mapping
Right Stick
+
TURBO
The TURBO + R3 key enables and
disables six-axis somosensory mapping.
OFF (ON)
T
Use a gyroscope sensor instead of
the right stick for operation
(You can also operate the joystick
during operation)
When activating the
somatosensory mapping
function, apply the response
curve of the right stick in the
keylinker.
An example of the response
curve of a
crystal with adjustable
viewpoint operation
such as APEX
The motion sensing function is set to "smooth" prompt:
The motion function is realized by simulating the right stick
gyroscope, and the smoothness.of operation is related to the
sensitivity of the right stick,so in the application Keylinker, the
right rod responsecurve is set to the right side for smoother
operation.
If APEX is used in a game where the response curve of viewpoint
operation(right stick) can be adjusted, then, after setting it in the
application,The game side is also set,(APEX as an example) enter
the game Settings, and operate according to the detailed view
point at the bottom of the controller page.Enable Custom viewpoint
Settings on the next page and set the response curve to 30 for
precise manipulation.
Setting Up Using The APP
Scan the QR code to download KeyLinker app,You can
also search the keyword"KeyLinker" on the AppStore,
Google Play, Or other AppStore.
10
You can change button position, adjust light mode, etc on
the APP. After set done, please click the "APP" button on
the lower right corner to save. If need to restore the
controller, open the Menu on the upper right corner and
select "factory reset".
I. Six-axis gyro calibration
II. Stick calibration
Trouble Shooting
Please put the controller on the horizontal tabletop.
III.
Resolving disconnected or delayed connections
1.Make sure that there are not too much Blue-tooth
signals in the surroundings.
2.Fully charge the controller.
3.
Please manually clear the devices connected to the N-S
console,then reconnect the controller to the N-S console.
1.
Turn off the controller, press these B, - , HOME 3 buttons
at the same time for 3-5 seconds, the LED 1/4 and LED 2/3
double flash in turns, then press + button.
1.
Turn the controller off and reconnect it to the N-S or other
console,don't touch sticks during the connection.
3.
If the stick is stuck, press down the stick vertically from
the top of the stick.
2.Calibrate through N-S Console: Open "System Settings
- Controllers and Sensors - Calibrate Control sticks",
Select the problematic stick,and then follow the system
prompts for calibration.
++
2.
Another approach:You can also try to calibrate through N-S
Console: Open "System Settings - Controllers and Sensors
-
Calibrate Motion Controls - Calibrate Controllers" by turns,
hold "-" button or "+" button.
11
Charging Tips
1. When the controller is turned on: the LED indicator will
flash rapidly when the battery is in low power status; the
LED indicator will flash in low speed when the battery is
charging; the LED indicator will stop flashing when the
battery is fully charged.
2. When the controller is turned off: the LED indicator will
flash in low speed when the battery is charging; the LED
indicator will go out when the battery is fully charged.
Low Voltage Alarm:
If the lithium battery voltage is lower
than 3.45V±0.1V, the current channel indicator blinks
quickly to indicate low voltage. The lithium-ion battery
automatically sleeps when the voltage is lower than 3.33V±0.1V
Product Specifications
Warning
Package Content
Factory Data Reset
1. Size :L160*W104*H65mm
3. Input voltage/current :DC5V / 500mA
5. Maximum operating current: 200mA
7. Charging time: about 3 hours
9. Battery capacity :1200mah
2. Weight: 320g
4. Working voltage/current: DC3.7V / 80mA
6. Continuous use time :8 hours
8. Bluetooth wave range ≤8m
Use the needles or similar objects to press the reset button
on the back face
of the controller to close the controller to
complete the reset (
Make sure the controller is turned on
when pressing
the reset button in the hole)
1. Do not place the controller under direct sunlight
2. Do not place the controller in water
3. Do not put heavy stuff on the controller
4. Avoid liquid or small particles
5. Do not twist or pull the joysticks
controller x1 Operating instruction x1 Type-C cable x1
12
SERVICE SUPPORT
If you encounter difficulties or product defects in the process
of using the product, please contact our after-sales service
through the purchase platform. We will take analyzing once
receive your feedback, and assist you to solve the problem
or provide replacement of the product. We also welcome your
valuable suggestions to help us continuously optimize this
product. We wish you a pleasant life.