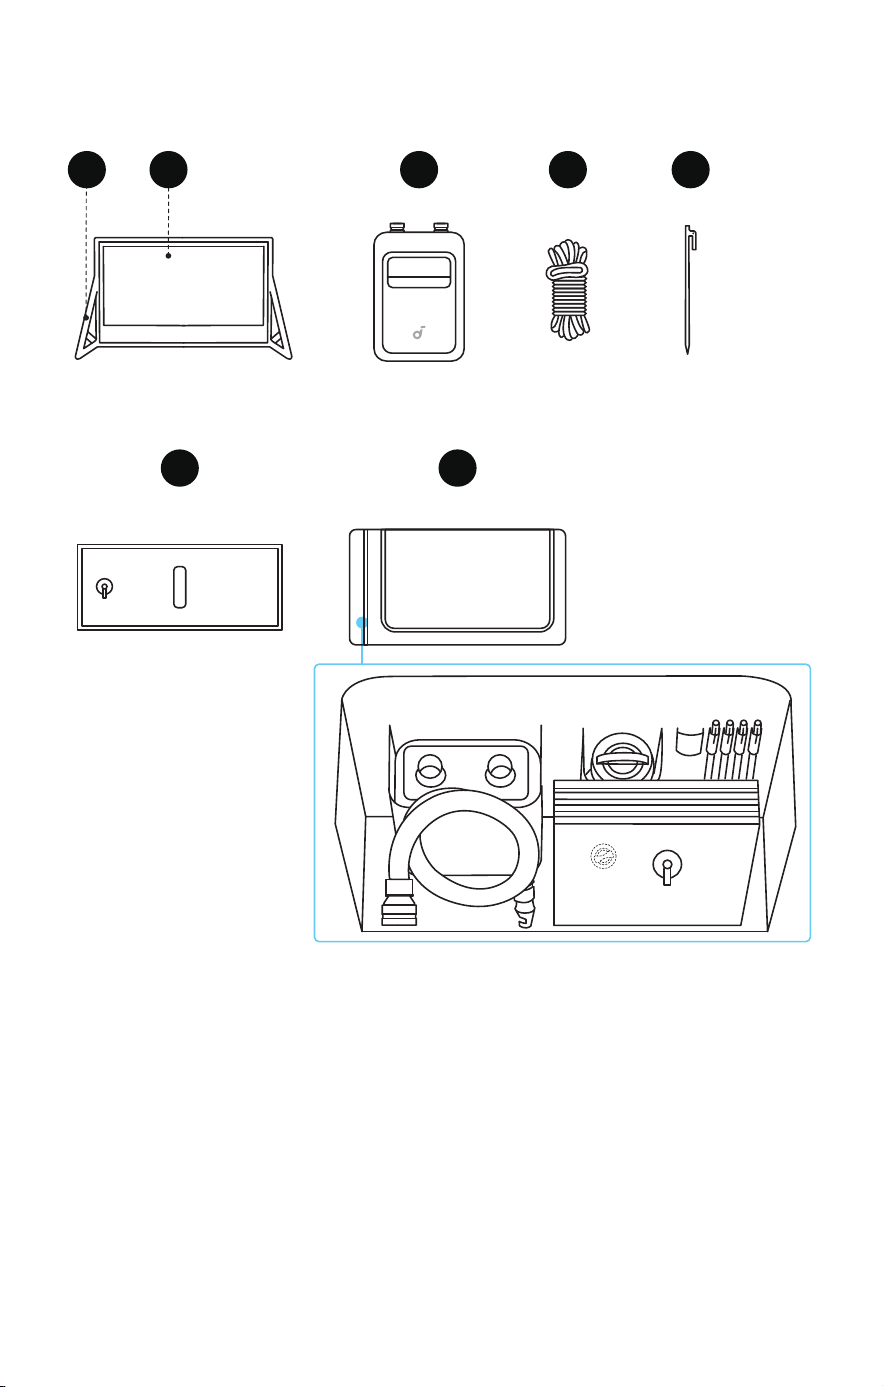
What's in the Box
4
5
6
7
1
2
3
1
.
Inflatable Frame
2
.
Projection Screen
3
.
Air Pump (Includes USB-C Cable, Air Nozzle, and Air Hose)
4
.
Guy Ropes × 4 (Already fixed to the inflatable frame)
5
.
Ground Stakes × 4
6
.
Water Bags × 4
7
.
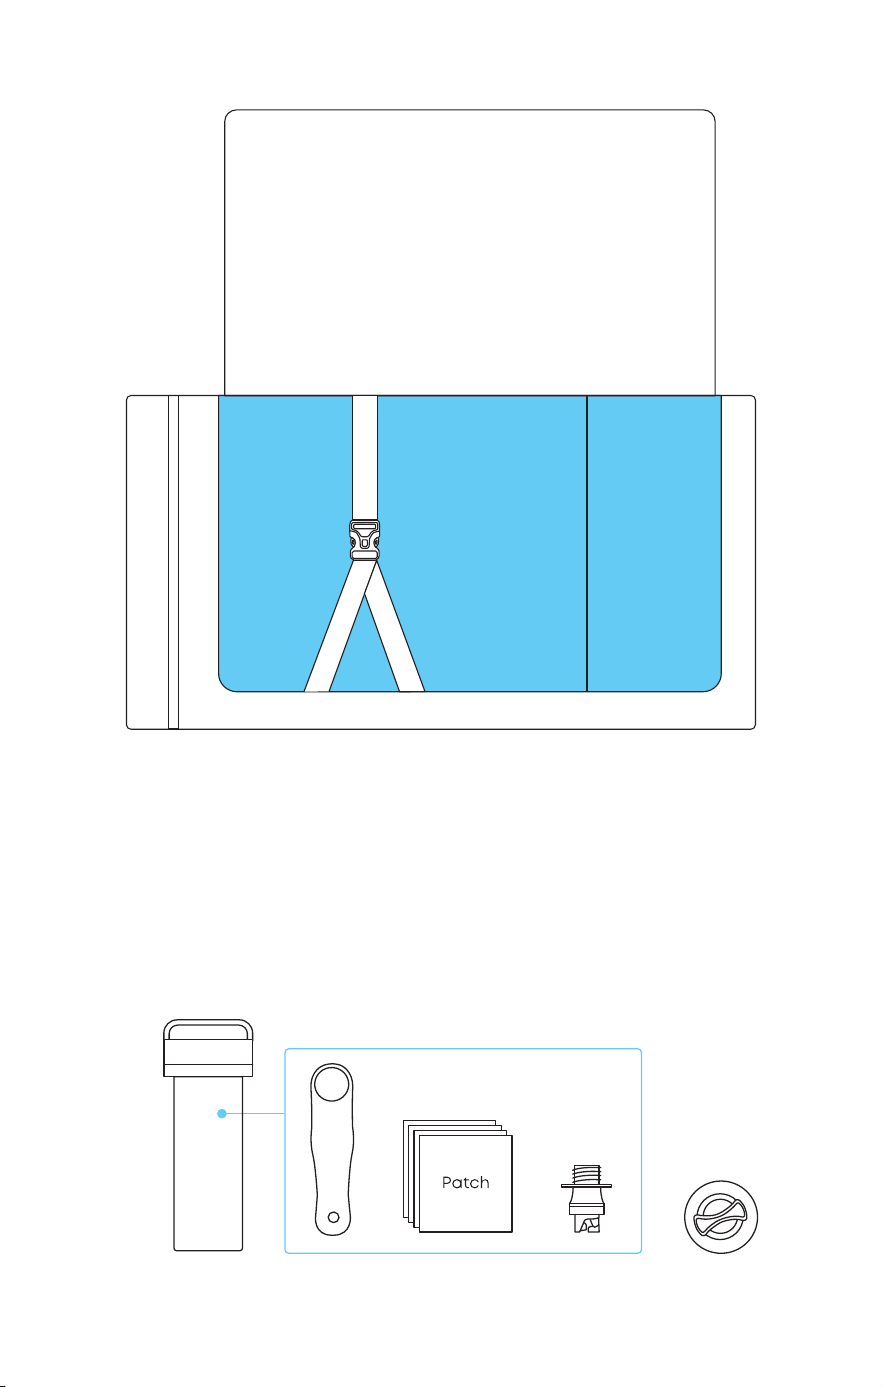
Storage Bag (Includes repair kit)
Getting Started
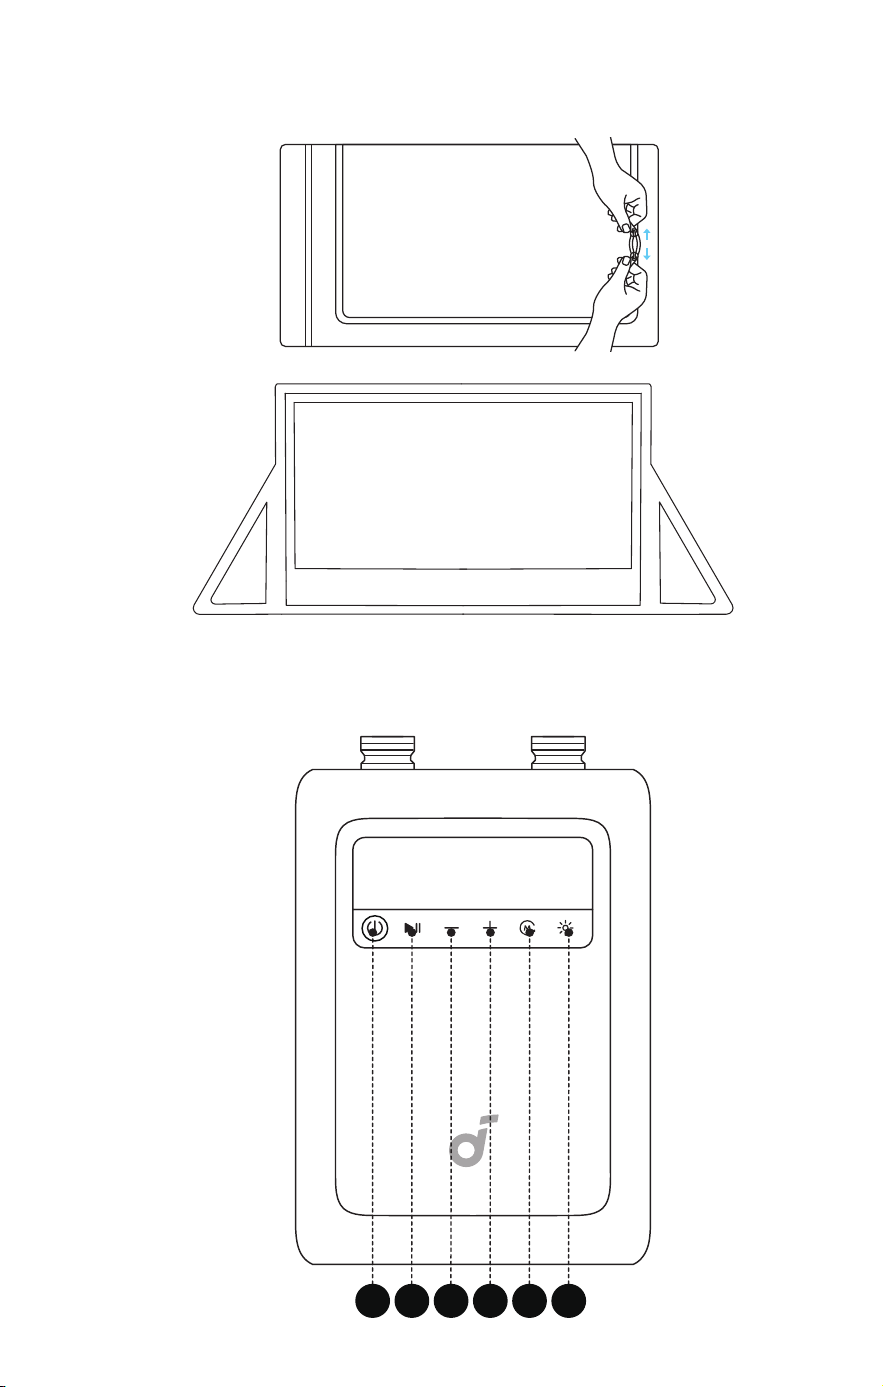
1. Unfolding the Projection Screen
①
Take the screen out of the storage bag.
②
Unfold the screen and lay it flat.
2. Setting Up the Air Pump
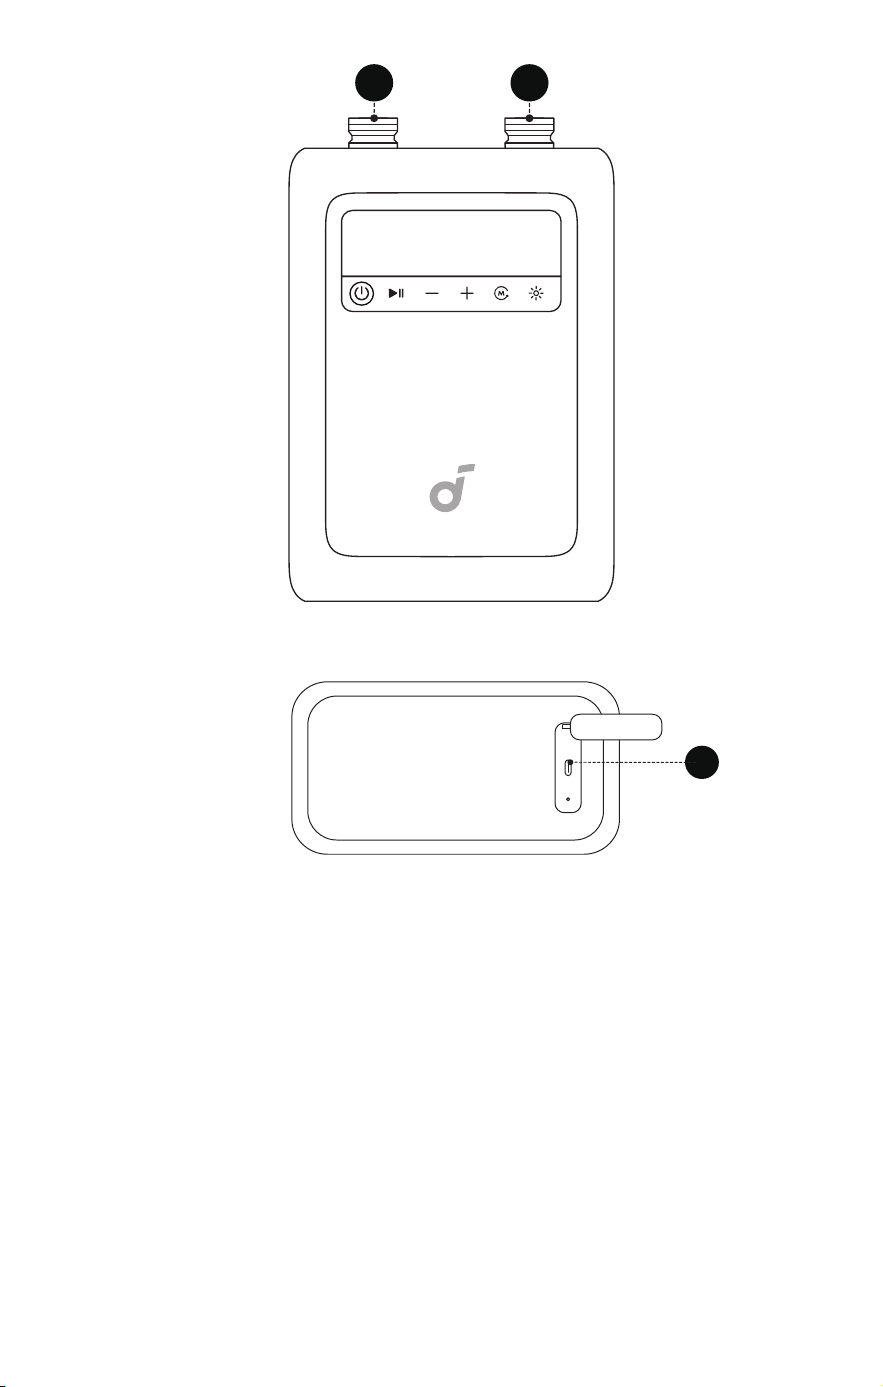
Air Pump Overview
1
2
3
4 6
5
7
8
9
1. Power Button
• Press and hold to power the pump on/o.
• Short press once to check the battery level. The battery icon
will turn red when the pump battery is below 30%. Please stop
using and charge before next use.
2. Start / Pause
3. Reduce Pressure
4. Add Pressure
5. Mode Switch
6. LED Light Switch
• The LED light is for emergency use only.
7. Deflation Port
8. Inflation Port
9. USB-C port (Charging cable included)
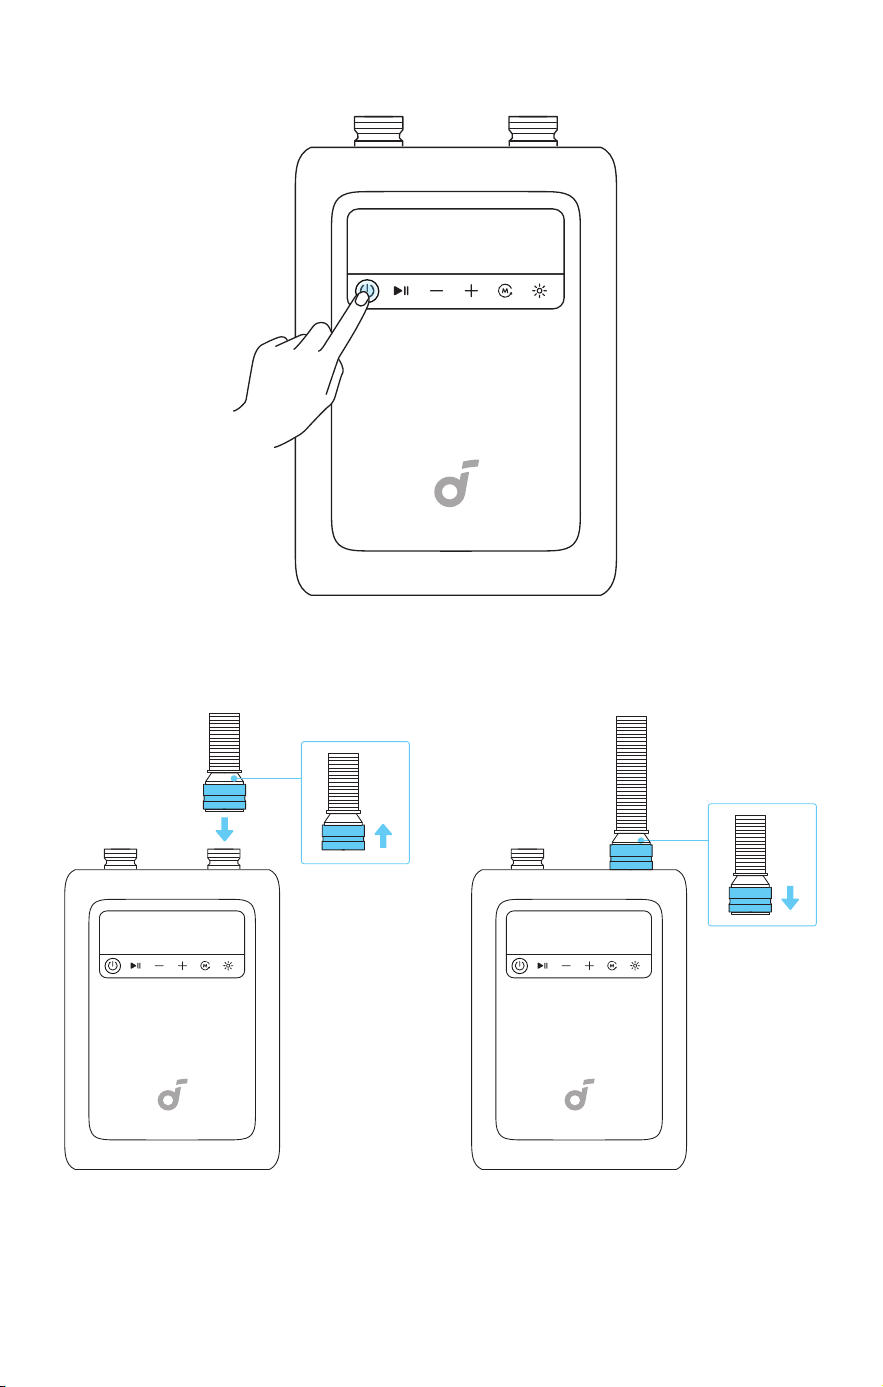
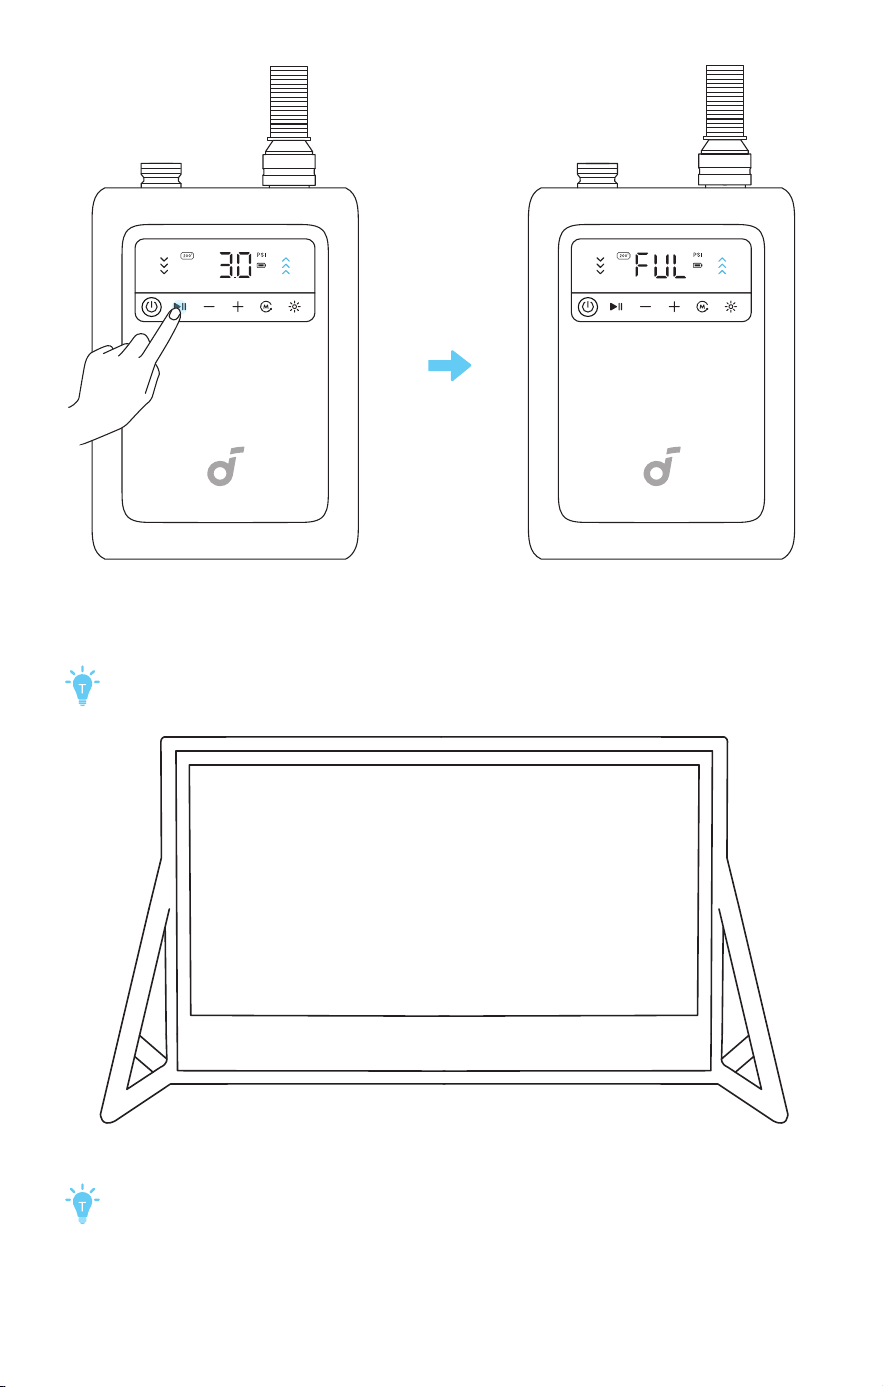
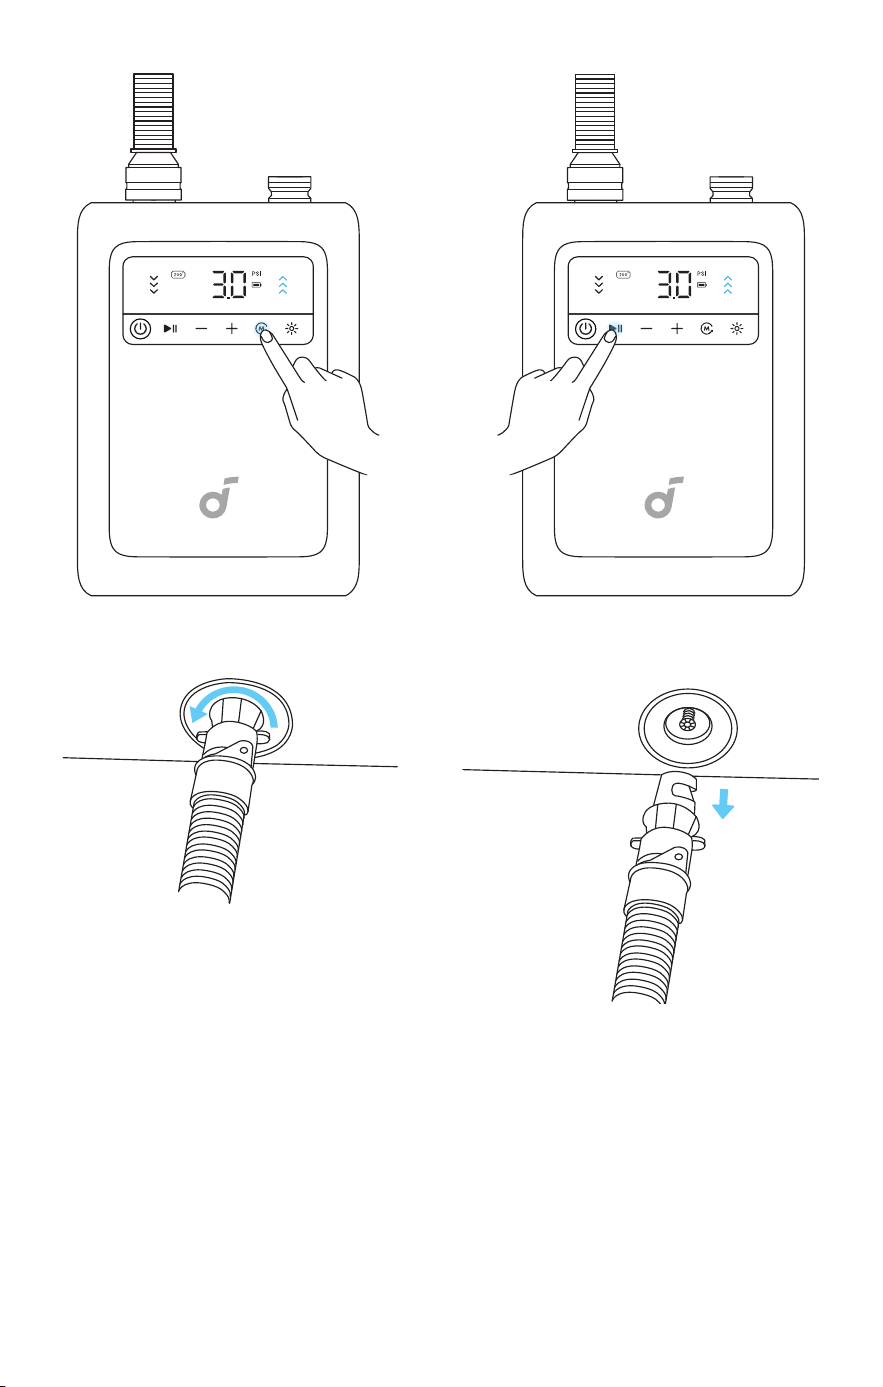
Setting Up Air Pump
①
Press and hold the Power Button to turn it on.
②
Connect the air hose to the inflation port.
③
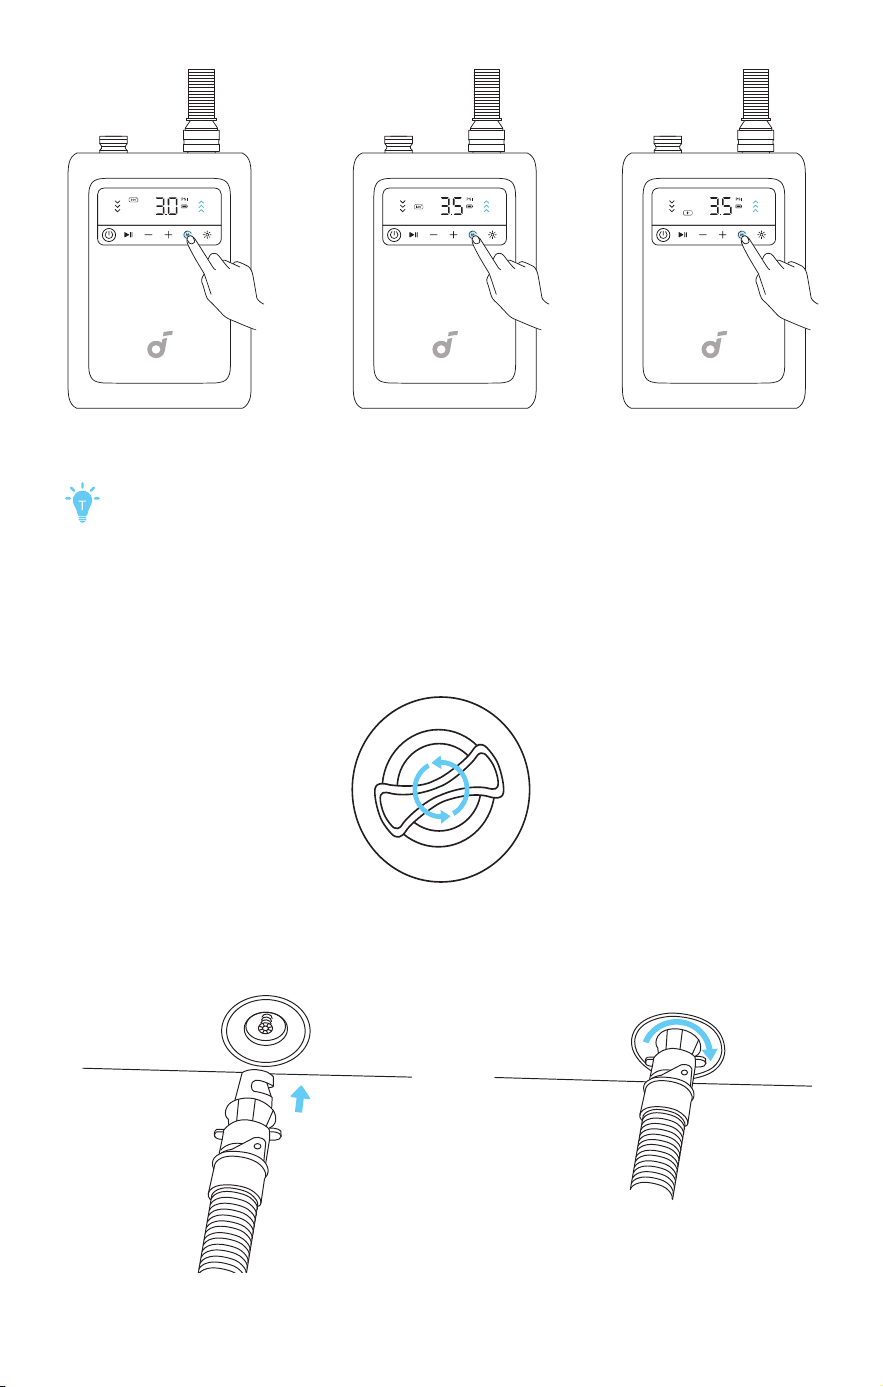
Select the mode: 200" Screen, 120" Screen, or Custom Mode.
200" Mode: Supports 200-inch screens; air pressure: 3.0 PSI.
120" Mode: Supports 120-inch screens; air pressure: 3.5 PSI.
Custom Mode: For inflating other products, switch to Custom
Mode and adjust the air pressure as needed.
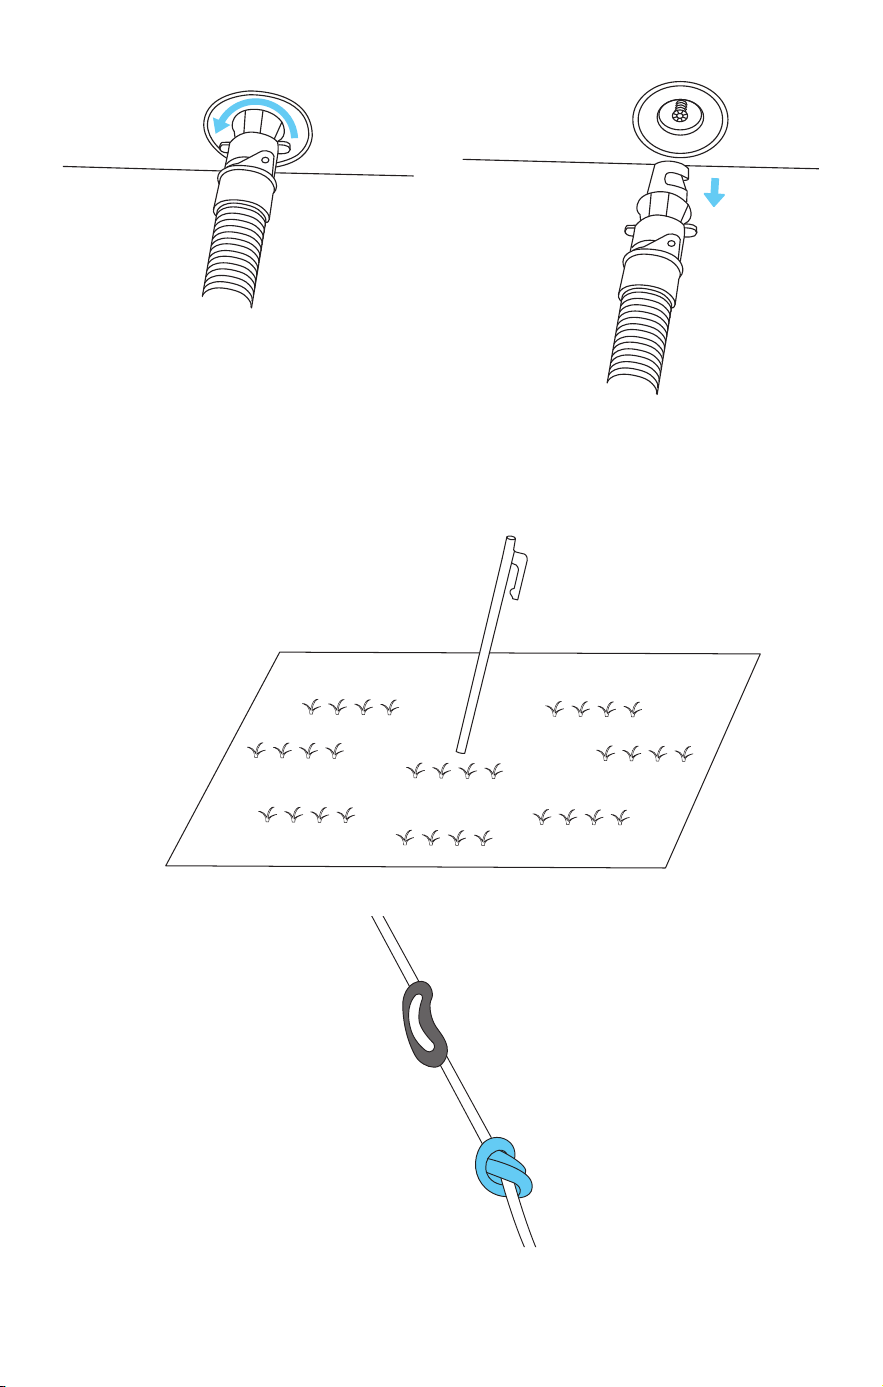
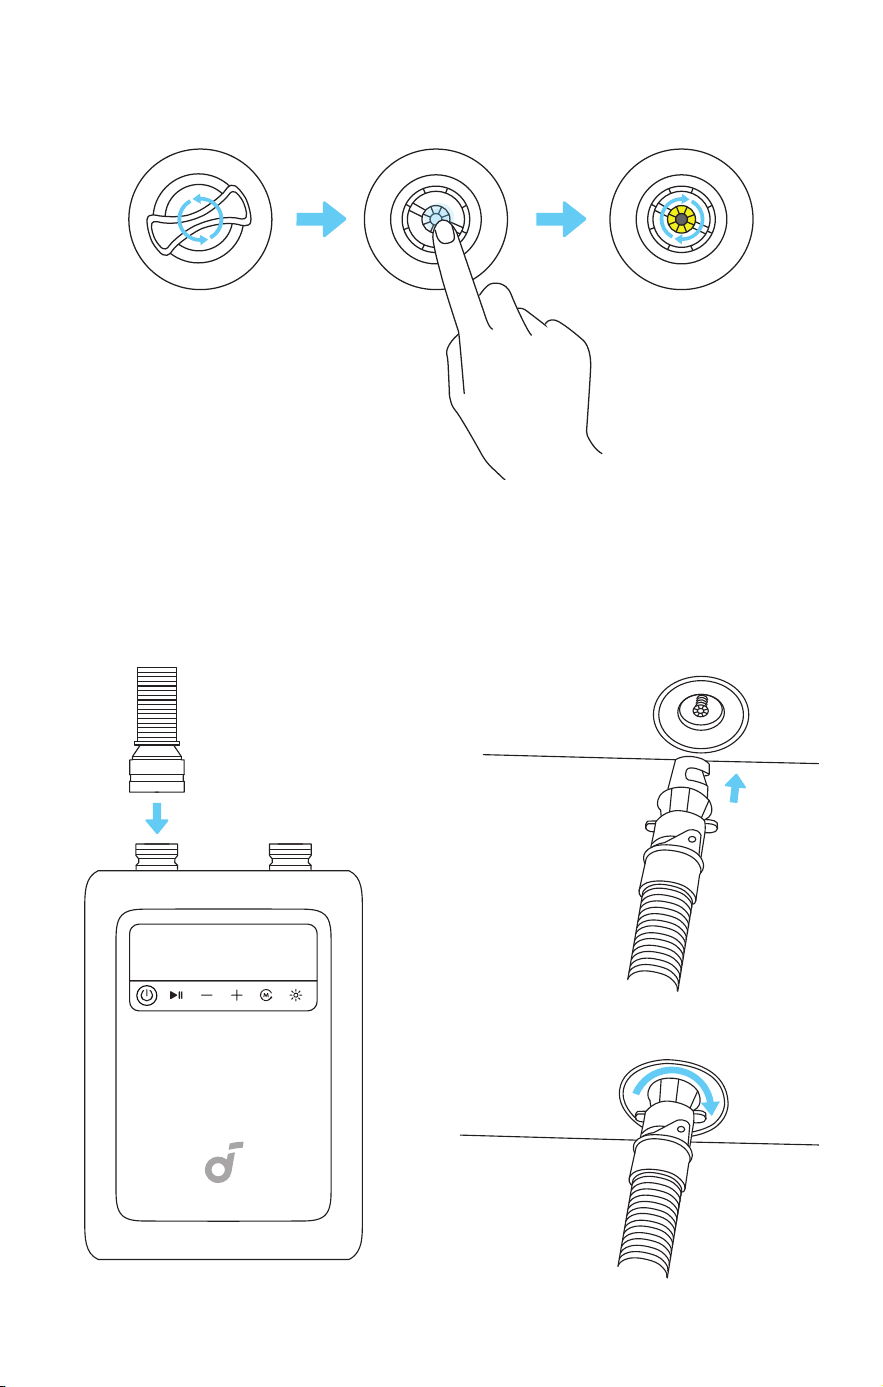
3. Inflating and Setting Up the Screen
Completing inflation takes about 5 minutes.
①
Open the valve cap located at the bottom of the inflatable frame.
②
Insert the air hose into the valve and tighten it by turning to the right.
③
Press the Start / Pause Button on the air pump and inflate until
the pump stops automatically.
When inflation is complete, the pump will automatically stop
and display “FUL” on the digital screen.
④
Gradually raise the screen to the upright position.
The air pump may be suspended during use. Ensure it is stable
and does not dangle.
⑤
Disconnect the hose aer inflation is complete.
4. Additional Secure
Using Guy Ropes and Ground Stakes
①
Insert the ground stake into the appropriate location.
②
Tie a knot at the end of the guy rope, and secure it to the guy
rope buckle.
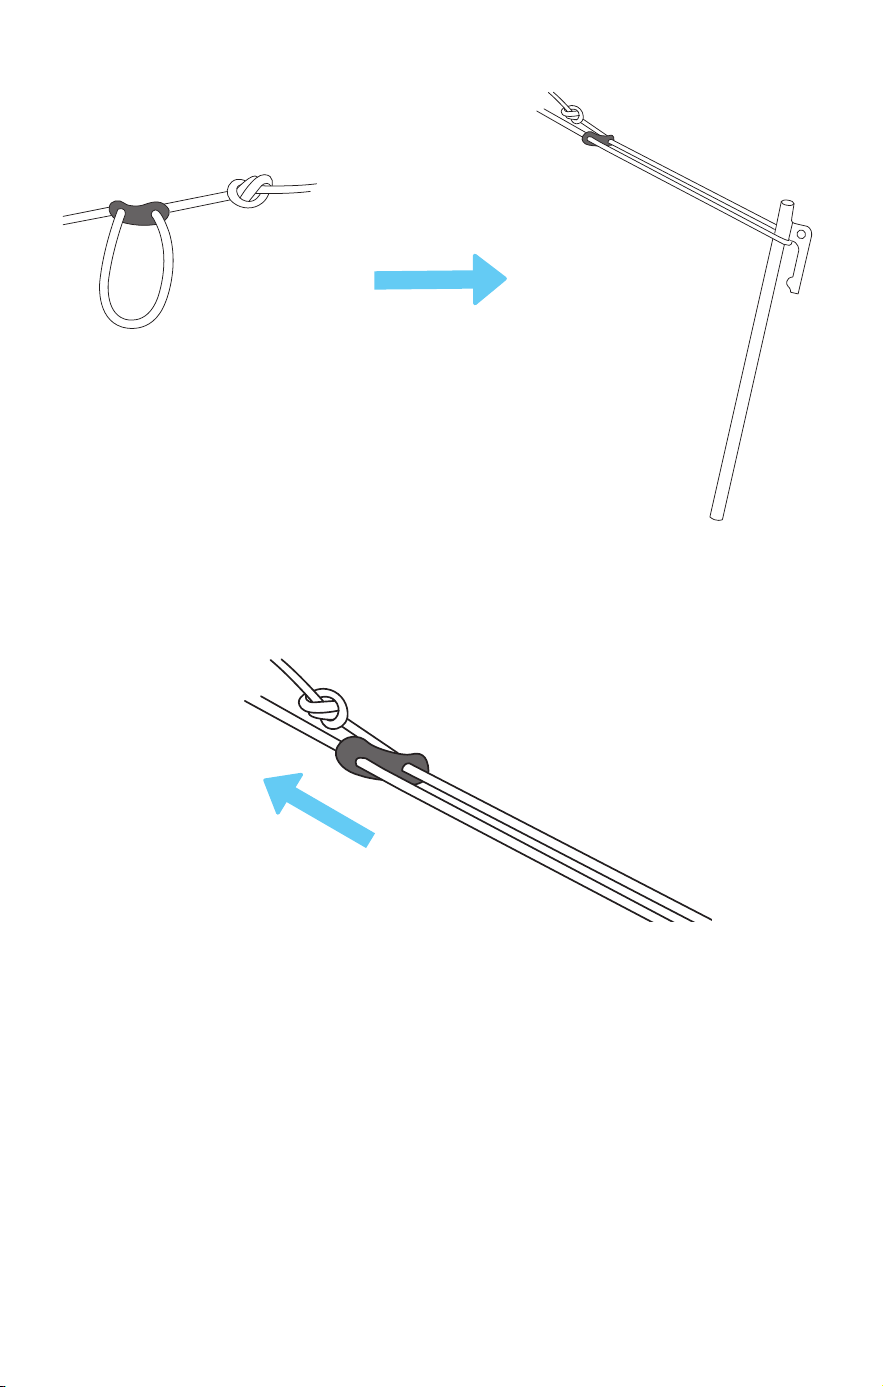
③
Pull out the guy rope from the guy rope buckle and hang it on
the ground stake.
④
Grip the guy rope near the screen end. Pinch and slide the
buckle upward to tighten.
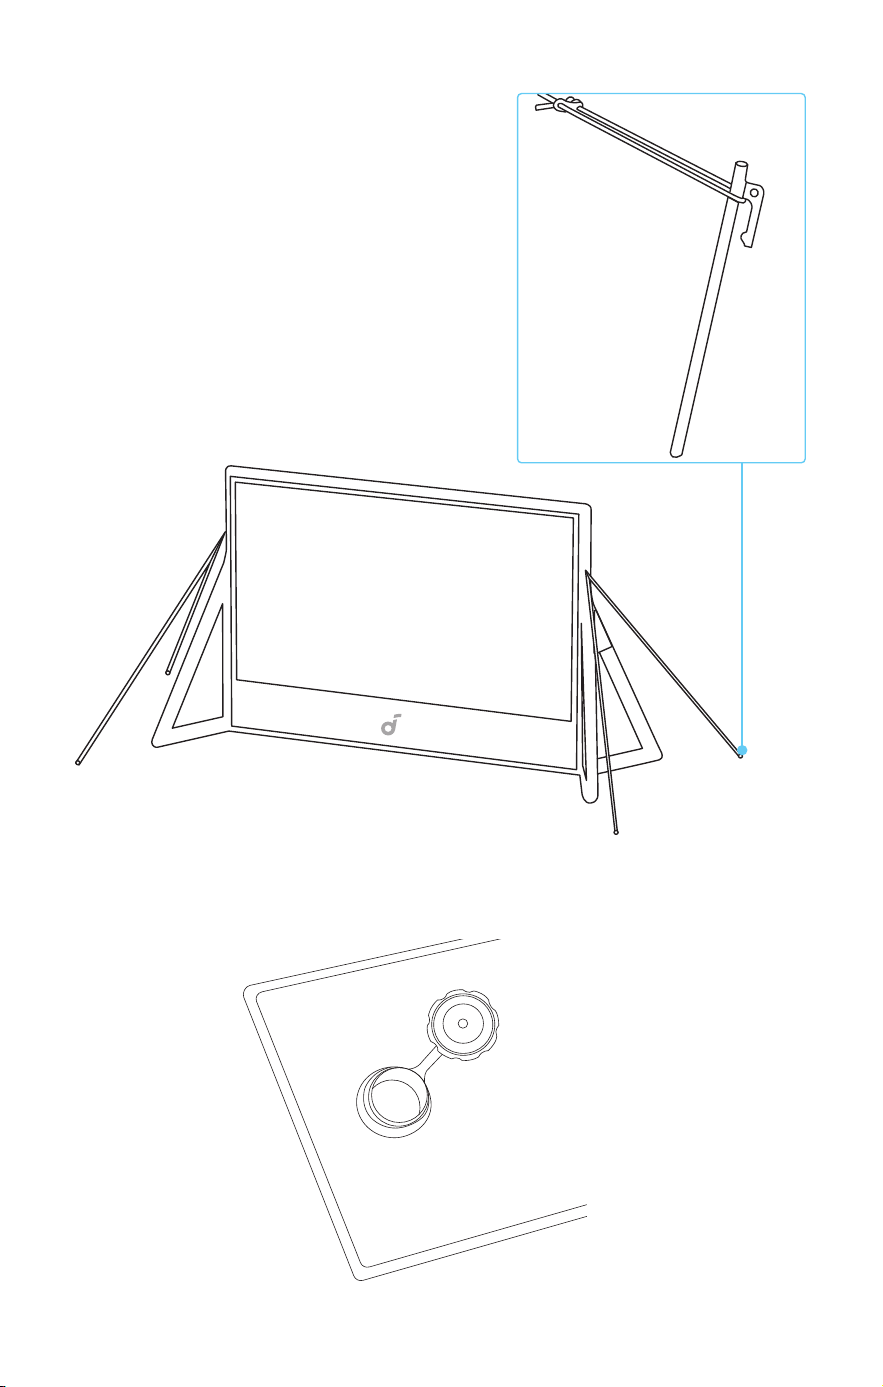
Using Water bags
①
Open the lid and fill the water bag until full.

②
Close the lid, then press it firmly against the base of the screen.
Nebula X1 Pro Front Surround Speaker
Mounting
①
Open the speaker mounting hook.
1
2
PULL
②
Align the mounting slot on the back of the speaker with the hook
and secure it in place.
Storage
Completing deflation takes about 3 minutes.
①
Remove the front surround speaker and close the speaker
mounting hook.
②
Open the valve cap located at the bottom of the inflatable
frame.
③
Press and rotate the yellow valve core to the right to release air
continuously, and let the air out until the screen collapses.
④
Use the air pump to deflate:
• Switch the hose to the deflation port. Insert the other end of the
hose into the valve, select the 200" Mode, and press the Start /
Pause Button. Deflate until the pump stops automatically.
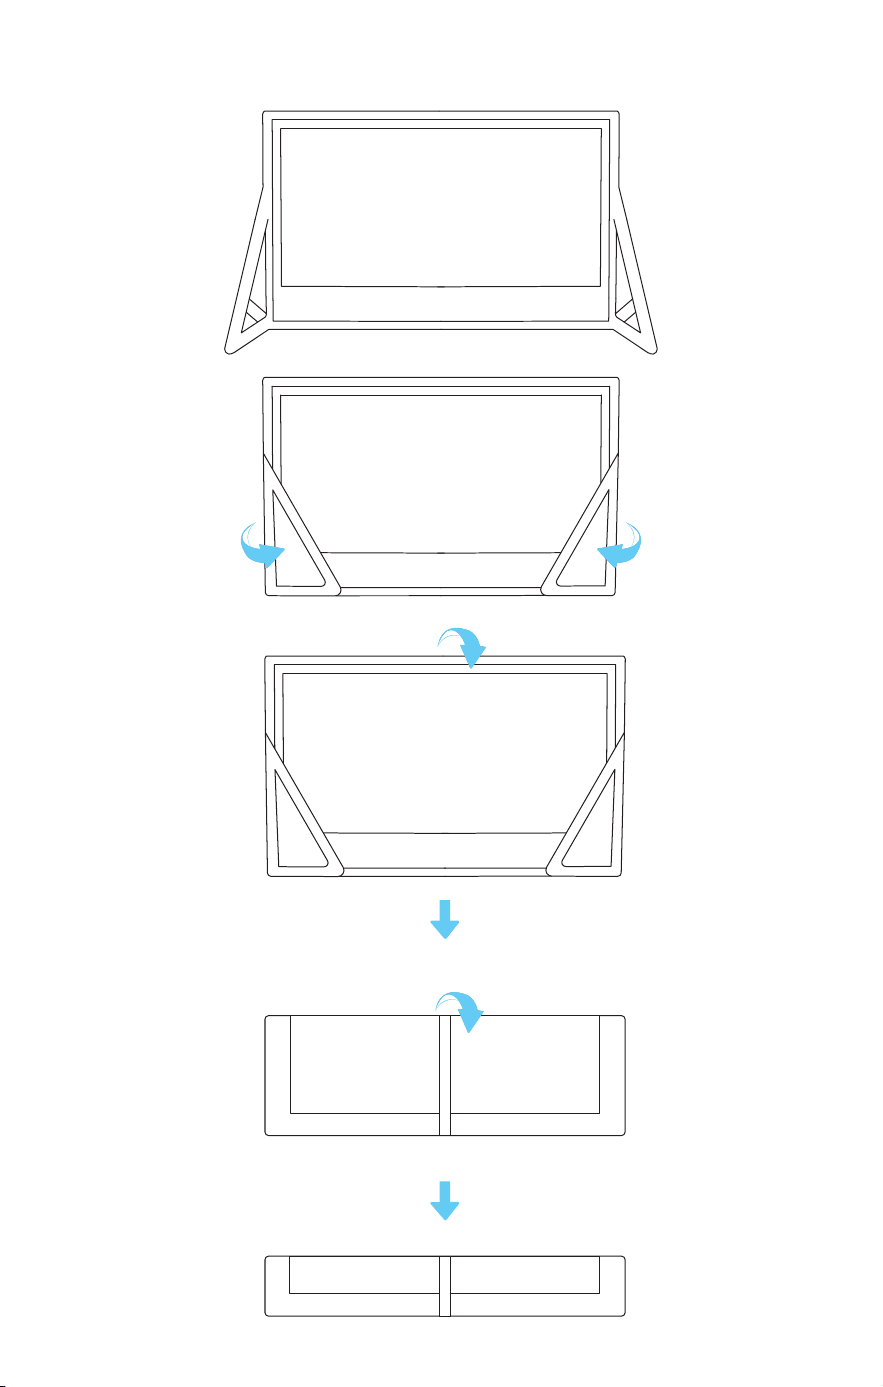
Folding the Projection Screen
①
Fold the short side in half twice.
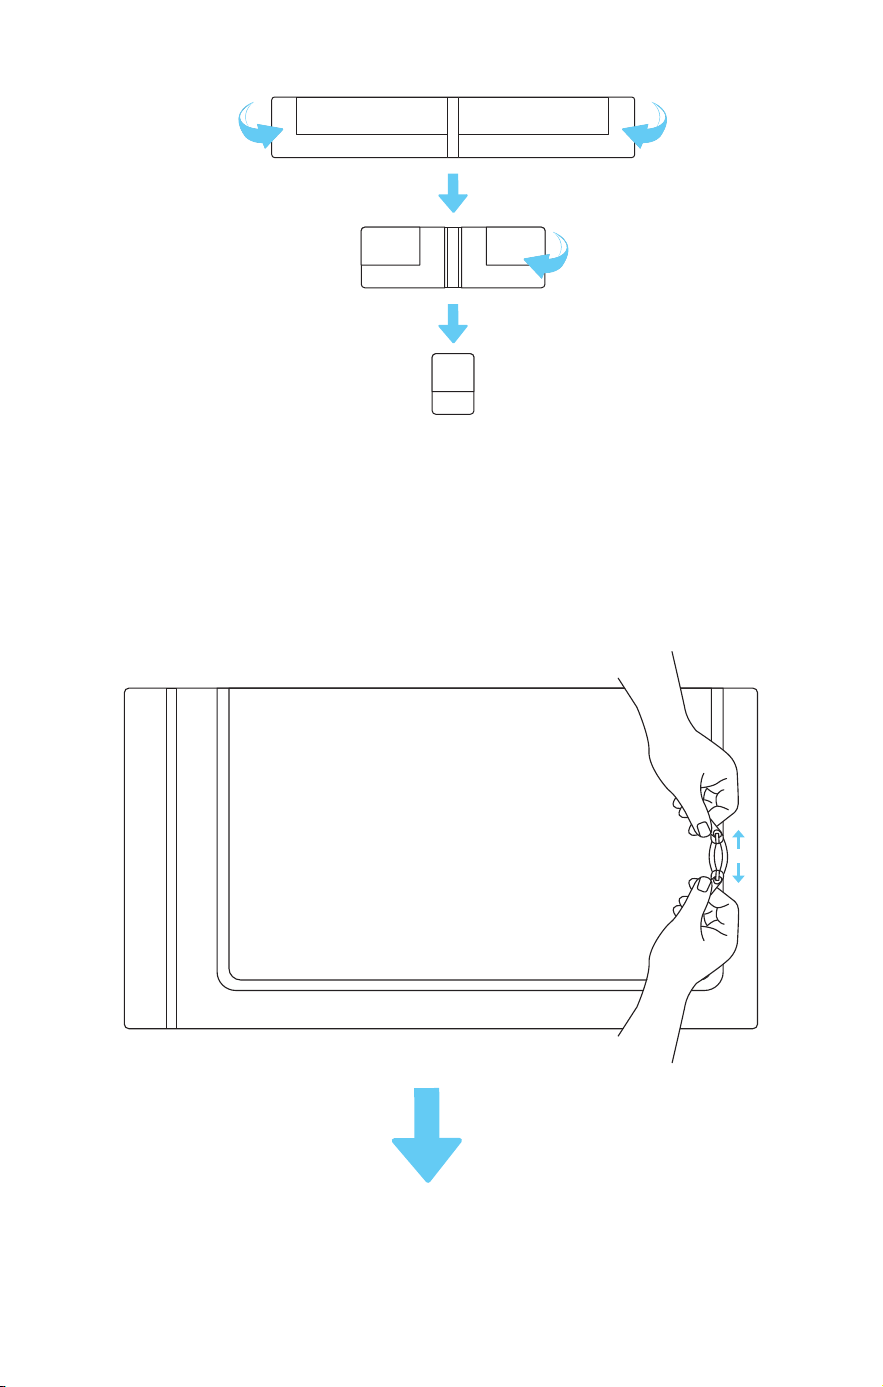
②
Fold each long side toward the center once, then roll up the
screen. When folding, compress it as much as possible to fit it
into the storage bag.
③
Place the screen into the storage bag, secure it with the straps,
and zip it up.
④
Store the air pump, ground stakes, and other accessories inside the
accessory bag, and zip it up.
Using the Repair Kit
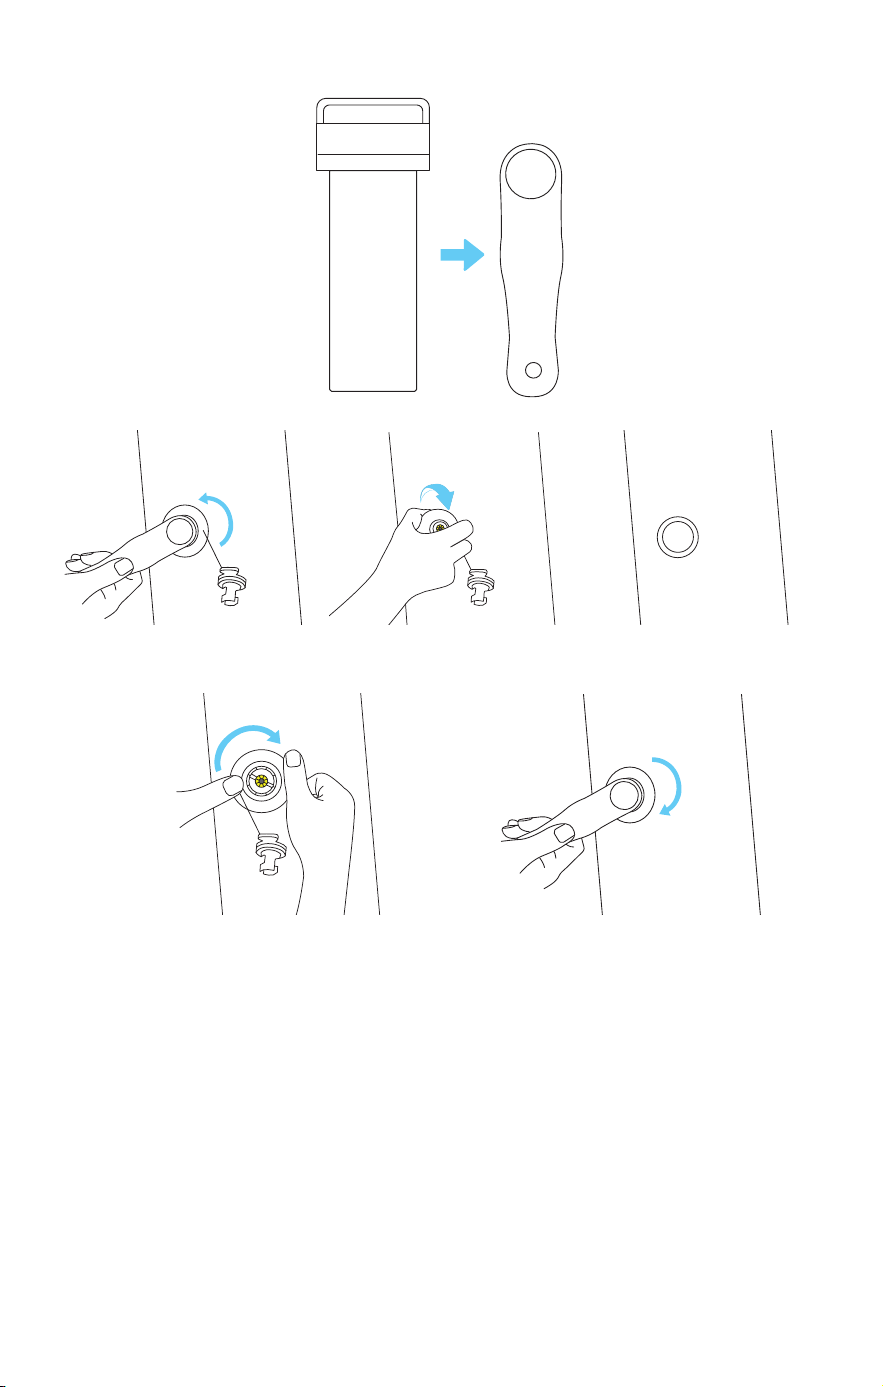
In Case of Valve Damage:
①
Open the repair kit and take out the valve tool.
②
Align the valve tool with the damaged valve, and rotate it
counterclockwise about three times to remove the valve.
③
Insert the spare valve, rotate it clockwise about three times, and
then use the valve tool to tighten securely.
In Case of Inflatable Frame Damage:
①
Open the repair kit and take out a repair patch.
②
Cut the patch to a suitable size according to the damaged area.
③
Apply specialized adhesive (not provided) to both the damaged
area and the patch and wait for about 30 minutes (depending
on the adhesive type).
④
Apply the patch to the damaged area, press firmly to remove
any air bubbles before inflating again.
The repair kit also includes one valve connector for replacement.

Specs
Screen
White screen size: 200 inch
Frame material: PVC coated mesh fabric
Screen material: Polyester
Gain Ratio: 1.0
FOV: Over 160°
Dimension: 5786mm (L)x 3340mm (H) x 2099mm (W)
Air Pump
Size: 206*145*86 mm
Weight: 1.8 kg
Motor Type: High-speed brushless motor
Inflation & Deflation Time: within 8 mins
Inflation Noise: ≤75dB
Battery Life: 5000mAh, 3-rounds full inflation & deflation
Charging Time: PD 2.5 hrs (45W)
Connection: Quick-release hose
Storage Case
Material: Hard Plastic + Polyester
Dimension: 1100 x 650 x550 mm
Extra Securing Accessories
ground stake
Dimension:
⌀
6mm x 25cm
Weight: 204g x 4
Guy Rope
Dimension:
⌀
7mm x 4m
Weight: 48g x4
Water Bag
Dimension: 74 x 37 cm
Max Load: 20kg
Repair Kit
Dimension:
⌀
73 mm x 185 mm
Spare air valve x 1
Valve tool x 1
Fabric patches x 4
valve connector x 1

Accessibility & Compatibility Features
1. Physical Accessibility
•
The air pump and valve ports are designed with large, easy-grip
suaces suitable for users with limited dexterity.
•
The setup process requires no fine motor skills beyond basic
alignment and hose connection.
2. Visual Accessibility
•
Printed labels and screen markings are high-contrast (black on
white) and at least 4.5:1 contrast ratio.
•
The LED indicator light has distinct color states (green / red)
indicating operation and low-battery status.
•
The Quick Start Guide and User Manual are available in large-print
PDF format and accessible screen-reader versions (tagged PDF).
3. Auditory Accessibility
•
Support videos include descriptive audio tracks for all key
assembly steps.
•
The product emits only non-continuous sounds below 75 dB,
avoiding auditory discomfort.