USE + CARE
MANUAL
REV.062026
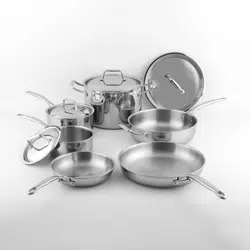
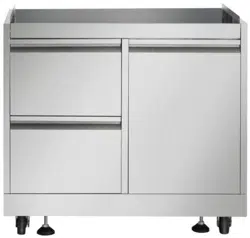
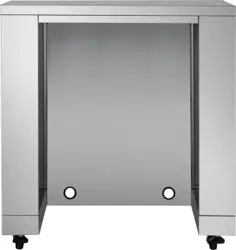
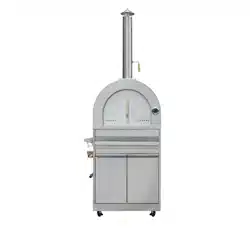
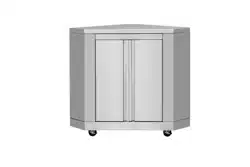
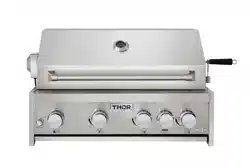
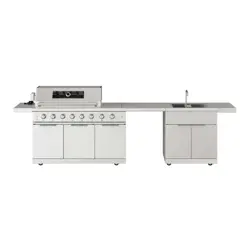
3 PIECE MODULAR KITCHEN
ISLAND-BBQ WITH BOTTOM CABINET
TBG573P | TBG573PB

USE AND CARE MANUAL
TBG573P
TBG573PB
3 Piece Modular
Kitchen Island-BBQ
With Bottom
Cabinet

3
TABLE OF CONTENTS
SAFETY WARNINGS
...................................................................................................................................
4
OUTDOOR GRILL SAFETY
..........................................................................................................................
6
IMPORTANT SAFETY INSTRUCTION
........................................................................................................
7
PRODUCT DIMENSION
............................................................................................................................
9
GAS REQUIREMENTS
..............................................................................................................................
11
PRE-OPERATION LEAK TESTING
........................................................................................................
12
LP GAS CONNECTION
.............................................................................................................................
14
INSTALL PROPANE TANK
.......................................................................................................................
15
GRILL INSTRUCTIONS
.............................................................................................................................
17
USING ROTISSERIE BURNER
...............................................................................................................
21
COOKING TIPS
........................................................................................................................................
24
COOKING
RECIPES
..............................................................................................................................
26
OUTDOOR GRILL CARE
.........................................................................................................................
30
TROUBLESHOOTING
..............................................................................................................................
33
SINK INSTRUCTIONS
.............................................................................................................................
20

4
WARNING
READ THIS MANUAL CAREFULLY and completely before using your grill to reduce the risk of:
1.Fire.
2.Burn hazard, personal injury or property damage.
3.Ruined steaks or other unpleasant cooking experiences.
4.Unapproved installation or servicing.
THIS PRODUCT IS DESIGNED FOR OUTDOOR USE ONLY. Improper installation, adjustment, alteration, service or maintenance
can cause property damage, injury or death. Read this manual thoroughly before installation, use, or servicing of this product.
DANGER
IF YOU SMELL GAS:
1.Shut off all gas supply lines to the grill.
2.Extinguish any open flames.
3.Carefully open the lid. Remember, it may be extremely hot!
4.If odor continues, keep everyone away from the grill and immediately call your gas supplier or your fire department.
WARNING
1.DO NOT store or use gasoline or other flammable vapors and liquids in the vicinity of this or any other appliance.
2.An LP cylinder not connected for use shall not be stored in the vicinity of this or any other appliance.
SAFETY WARNINGS
DANGER
S’ILYA UNE ODEUR DE GAZ:
1.
Coupex l’admision de gaz de l’appareil.
2.Éteindre toute flamme nue.
3.Ouvir le couvercle!
4.Si l’odeur persiste, éloignez-vous de l’appareil et appelez immédiatement le fournisseur de gaz ou le service d’incendie.
AVERTISSMENT
1.
NE PAS entreposer ni ut ilioser de i’essence ni d’autres vapeurs ou liquides inflamma-bles dans le voisinage del’appare il,ni
2.Cordée en vue de son utilisation, ne doit pas être entreposée dans le voisinage de cet appareil ou de tout autre appareil.
de tout autre appareil.

5
WARNING
1.Always maintain the required clearances from combustible construction as detailed. The grill is designed for outdoor use
only. Never use in a garage, building, shed, breezeway or other enclosed area. This grill shall not be used under any
unprotected overhead combustible construction.
2.Gas grills are not design certified for and are not to be installed in or on recreational vehicles, portable trailers, boats or any
other moving installation.
3.Keep any electrical supply cord and the fuel supply hose away from any heated surfaces. Electrical cords should be placed
away from walkways to avoid creating a tripping hazard.
4.Do not repair or replace any part of the grill unless specifically recommended in this manual. Other service should be
performed by a qualified technician.
5.All gas lines must have a shut-off that is readily and easily accessible. Be sure the owner knows where the shut-off is located.
If you smell gas, check for gas leaks immediately. Check only with a soap and water solution. Never check for gas leaks with an
open flame.
6.Never locate the grill under a roof or overhang, in a building, garage, shed or other such enclosed area.
7.Never locate the grill under unprotected combustible construction.
WARNING
1.The outdoor cooking gas appliance and its individual shutoff valve must be disconnected from the gas supply piping system
during any pressure testing of that system at test pressures in excess of 0.39 psi (2.74kPa)/NG 0.145 psi (0.99 kPa).
2.The outdoor cooking gas appliance must be isolated from the gas supply piping system by closing its individual manual
shutoff valve during any pressure testing of the gas supply piping system at test pressures equal to or less than LP 0.39 psi
(2.74 kPa)/NG 0.145 psi (0.99 kPa).
STATE OF MASSACHUSETTS
1. Massachusetts requires all gas be installed using a plumber or gas fitter carrying the appropriate Massachusetts license.
2. All permanently-installed natural gas or propane installations require a “T” handle type manual gas valve be installed in the
gas supply line to this appliance.
3. This does not apply to portable propane installations using a 20 pound cylinder.
CALIFORNIA PROPOSITION 65 - WARNING:
This product can expose you to Carbon Monoxide, which is on the list of substances known by the state of California to cause
cancer, birth defects or reproductive harm. For more information go to: www.p65warnings.ca.gov. California law requires
businesses to warn customers of potential exposure to such substances. To minimize exposure to these substances, always
operate this unit according to the Use and Care Manual, ensuring you provide good ventilation when cooking with gas.
SAFETY WARNINGS
6
6
Your safety and the safety of others are very important.
We have provided many important safety messages in this manual and on your appliance. Always read and obey all safety
messages.
This is the safety alert symbol.
This symbol alerts you to potential hazards that can kill or hurt you and others.
All safety messages will follow the safety alert symbol and either the word "DANGER" or "WARNING."
These words mean:
Failure to comply with these instructions could result in a fire or explosion that could cause serious bodily injury,
death, property damage.
You can be killed or seriously injured if you don't follow Instructions.
All safety messages will tell you the potential hazard, how to reduce the risk of injury, and the result of failing to follow
WARNING
1.Use outdoors only.
2.Read the instructions before using the appliance.
3.Warning: accessible parts may be very hot. keep young children away.
4.This appliance must be kept away from flammable materials during use.
5.Do not move the appliance during use.
6.Turn off the gas supply at the gas container after use.
7.Do not modify the appliance.
WARNING
Explosion Hazard
Securely tighten all gas connections.Have a qualified technician to ensure that the gas pressure does not exceed the maximum
rated pressure.Examples of a qualified technician include:Licensed heating personnel.Authorized gas company personnel, and
Authorized service personnel.Failure to do so can result in explosion, fire hazard, or death.
WARNING
Keep any electrical supply cord and the fuel supply hose away from any heated surfaces.
Electrical Grounding InstructionsThis outdoor cooking gas appliance is equipped with a three-prong (grounding) plug for your
protection against shock hazard and should be plugged directly into a properly grounded three-prong receptacle.
Do not cut or remove the grounding prong from this plug.
OUTDOOR GRILL SAFETY
instructions.

7
WARNING:
To reduce the risk of fire, electrical shock, injury to person, or damage when using the outdoor cooking gas appliance, follow
basic precautions, including the following:
An outdoor cooking gas appliance is not intended to be installed in or on boats.
Always maintain minimum clearance from combustible construction.
The outdoor cooking gas appliance shall be used only outdoors and shall not be used in building, garage, or any other
enclosed area.
Keep any electrical supply cord and fuel supply hose away from any heated surface.
Keep outdoor cooking gas appliance clear and free from combustible material, gasoline and other flammable vapors and
liquids.
Do not obstruct the flow of combustion and ventilation air. Keep the ventilation opening of the cylinder enclosure free and
clear from debris.
Inspect the gas cylinder supply hose before each use of the outdoor cooking gas appliance. If the hose shows excessive
abrasion or wear, or is cut, it must be replaced before using the outdoor cooking gas appliance. Contact your dealer and
use only replacement hoses specified for use with the outdoor cooking gas appliance by the manufacturer.
Visually check the burner flames. They should be blue or slightly yellow.
Check and clean burner/venturi tube for insects and insect nest. A clogged tube can lead to fire under the outdoor cooking
gas appliance.
This model is designed for use with a standard 20lb liquid petroleum gas tank.
A 20lbs tank of approximately 305mm in diameter by 393mm high.
Provided with a cylinder connection device compatible with the connection for outdoor cooking gas appliances.
Always check connections for leaks each time you connect the gas supply cylinder.
When the outdoor cooking gas appliance is not in use, the gas must be turned off at the supply cylinder.
Storage of an outdoor cooking gas appliance indoors is Permissible only if the cylinder is disconnected and removed from
the outdoor cooking gas appliance.
Cylinders must be stored outdoors and out of the reach of children and must not be stored in a building, garage or any
enclosed area.
The pressure regulator and hose assembly supplied with the outdoor cooking as appliance must be used. A replacement
gas regulator & hose assembly must comply with the manufacturer.
•
•
••
••
•
•
••
•••••
•••••
•••••
•
•
••
•
••
•
••
•
••
•
••
•
••
••••••••
••••••••••••••••
••••••••
••••••••••••••••
Place a dust cap on cylinder valve outlet whenever the cylinder is not in use. Onlyinstall the type of dust cap on the
cylinder valve outlet that is provided with cylinder valve. Othertype of capsule or plugs may result in leakage of gas.
If the following information is not followed exactly, a fire causing death or serious injury may occur.
Do not store a spare gas cylinder under or near this outdoor cooking gas appliance.
•
••
•••••
IMPORTANT SAFETY INSTRUCTIONS

8
Never fill the cylinder beyond 80 percent full.
The LP gas cylinder must be constructed and marked in accordance with the Specifications for LP Gas Cylinders of the
The cylinder used must include a collar to protect the cylinder valve.
If the information in above is not followed exactly, a fire causing death or serious injury may occur.
IMPORTANT SAFETY INSTRUCTIONS
•••
•
••
•••••
•••••
U.S. Department of Transportation (DOT) or the Standard for Cylinders, Spheres and Tubes for Transportation of Dangerous
Goods and Commission, CAN/CSA-B339.
9
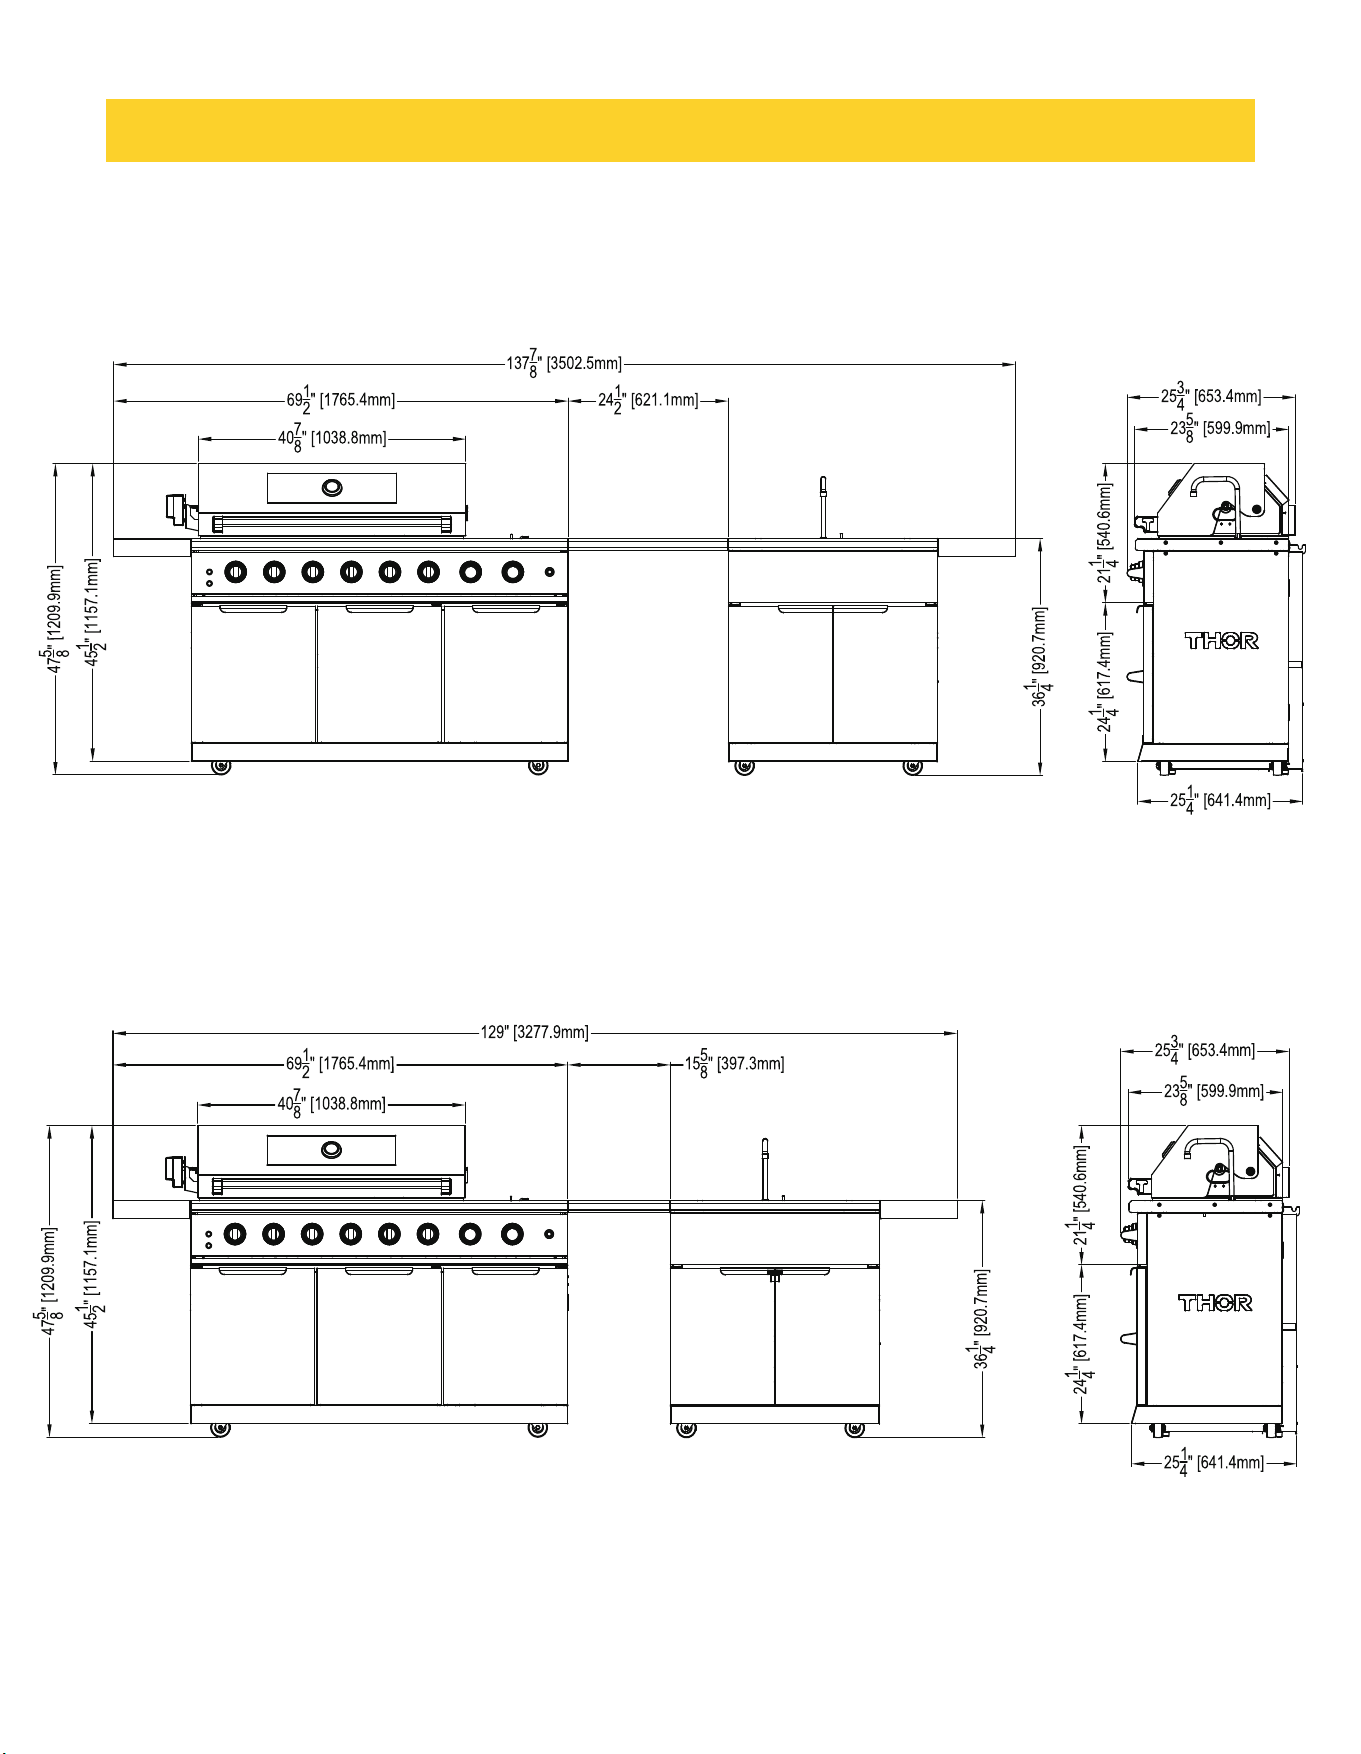
Product dimensions
BBQ with Bottom Cabinet
(此分需要研发据产品不同而进行减或更换调整)
PRODUCT DIMENSION
TBP573P Optional Refrigerator Countertop
TBP573P Optional Ice Maker Countertop
(The refrigerator is not included in the package)
(The ice maker is not included in the package)
10
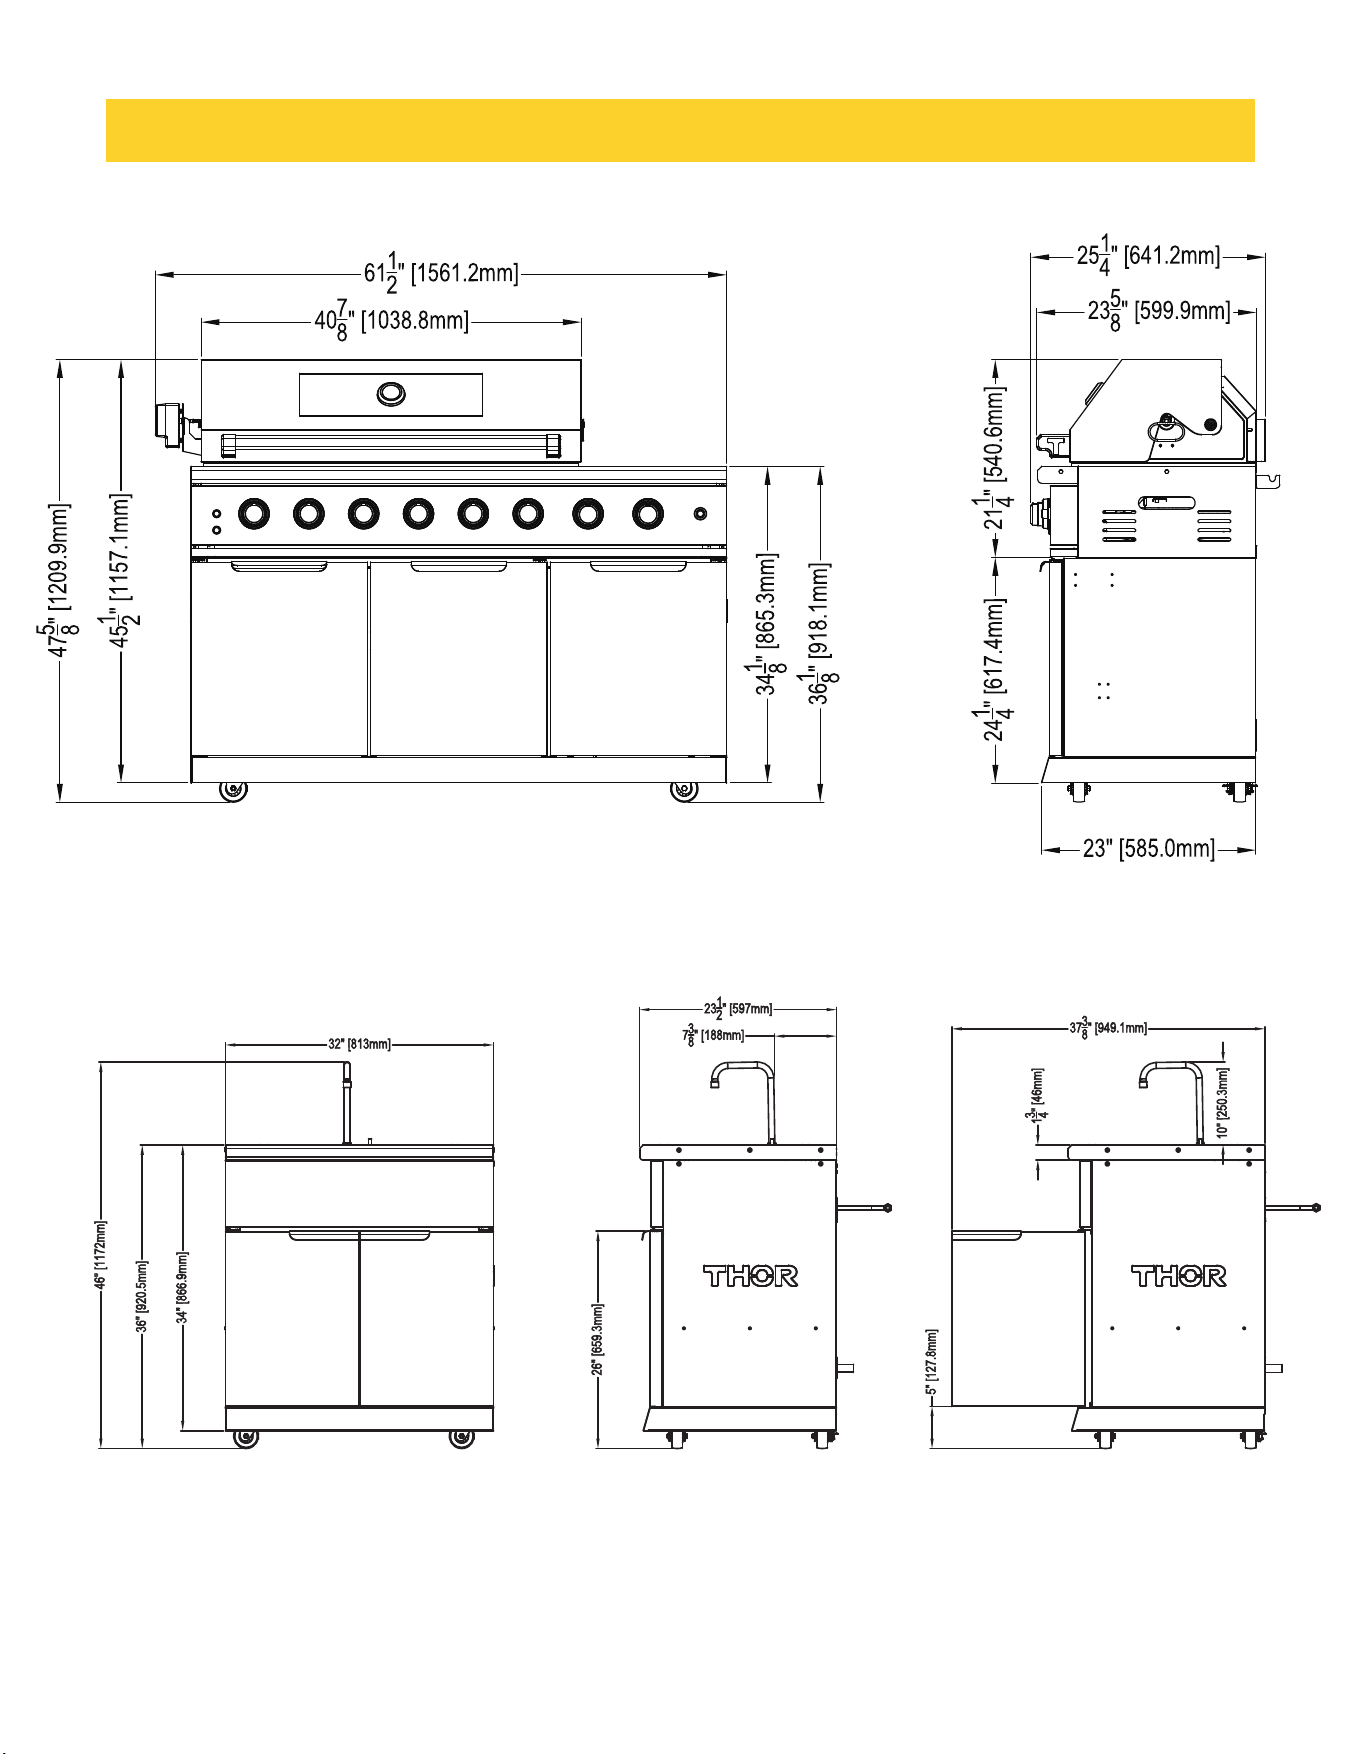
PRODUCT DIMENSION
Sink Cabinet
Grill
11
CAUTION
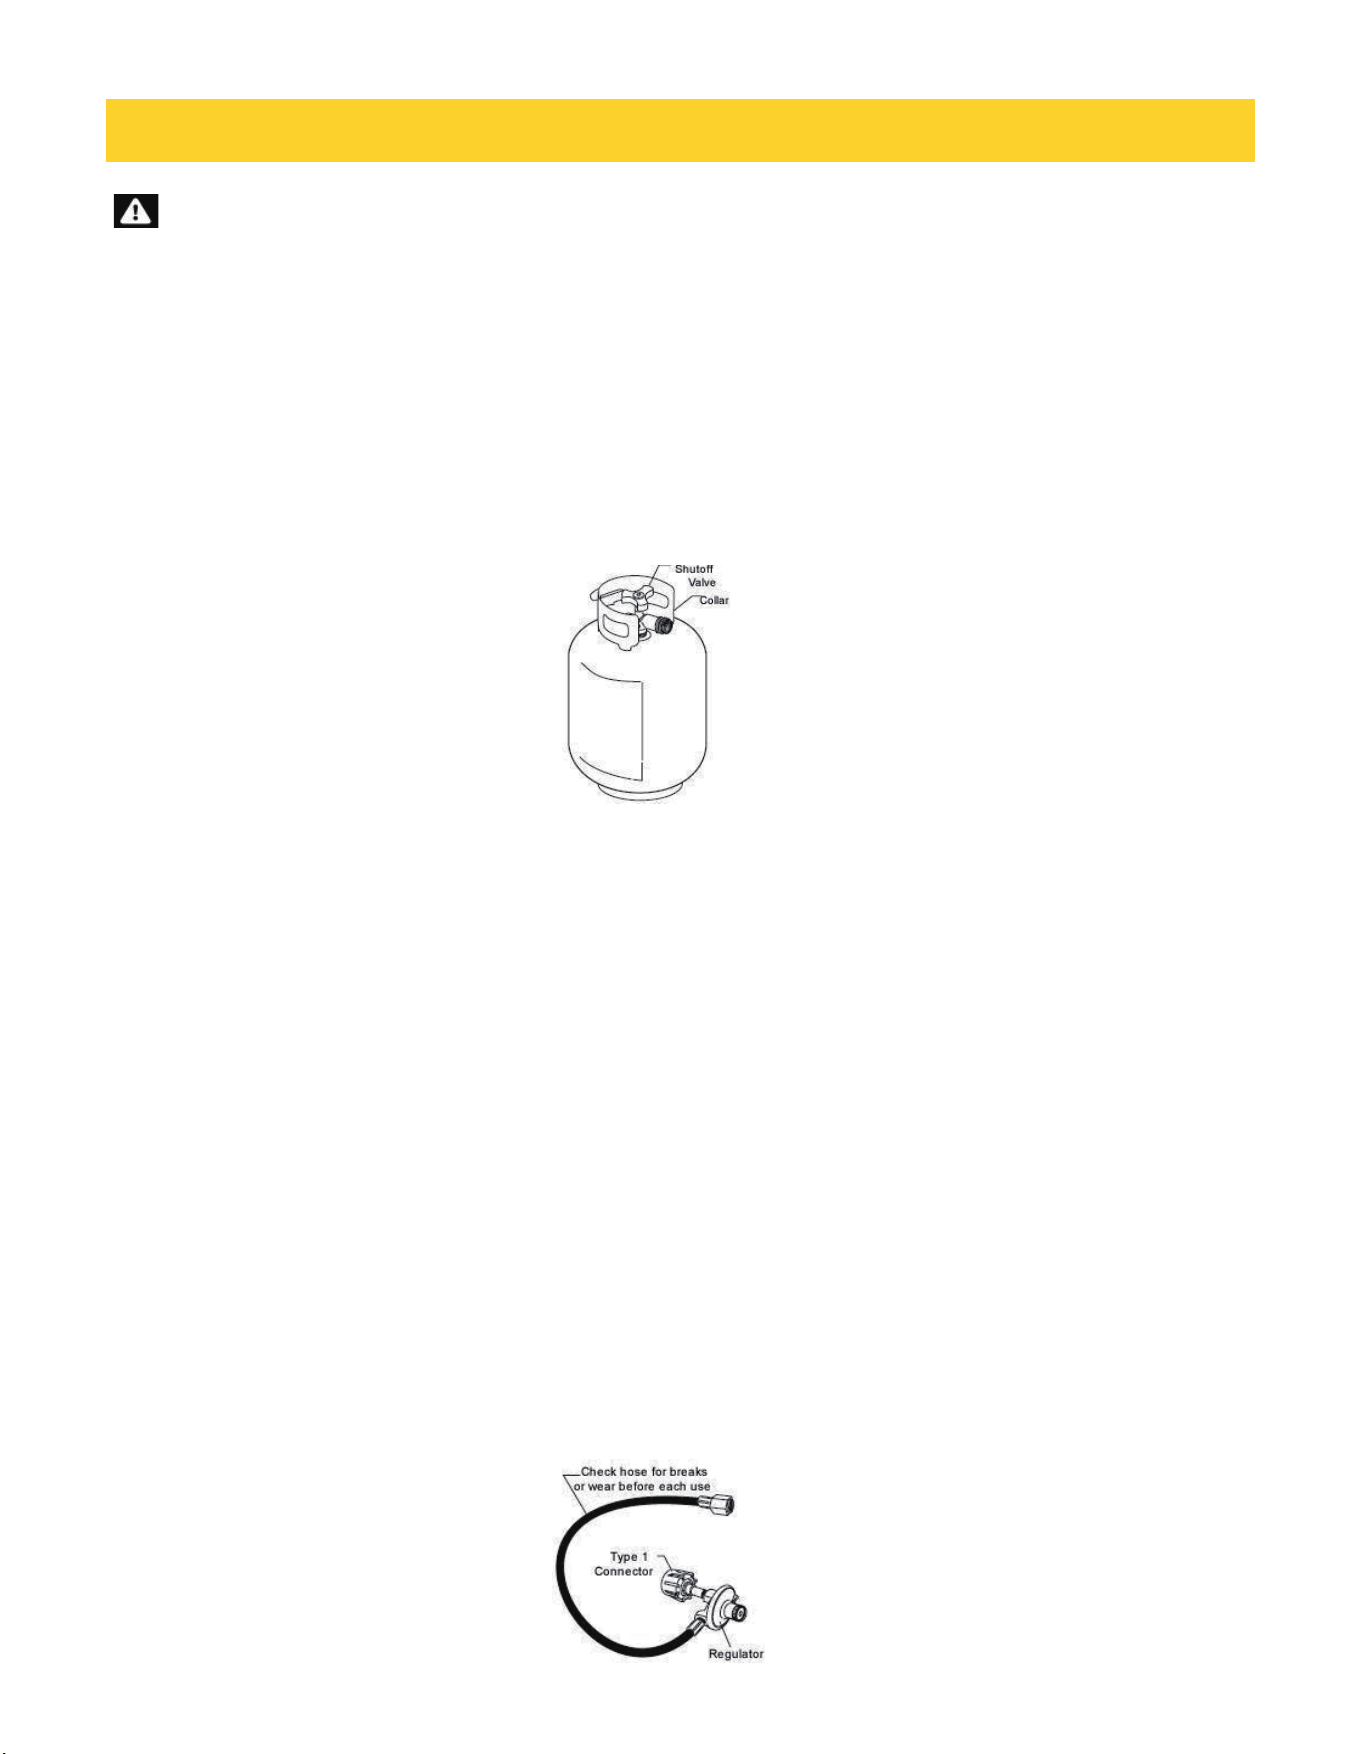
Gas Tank Specications
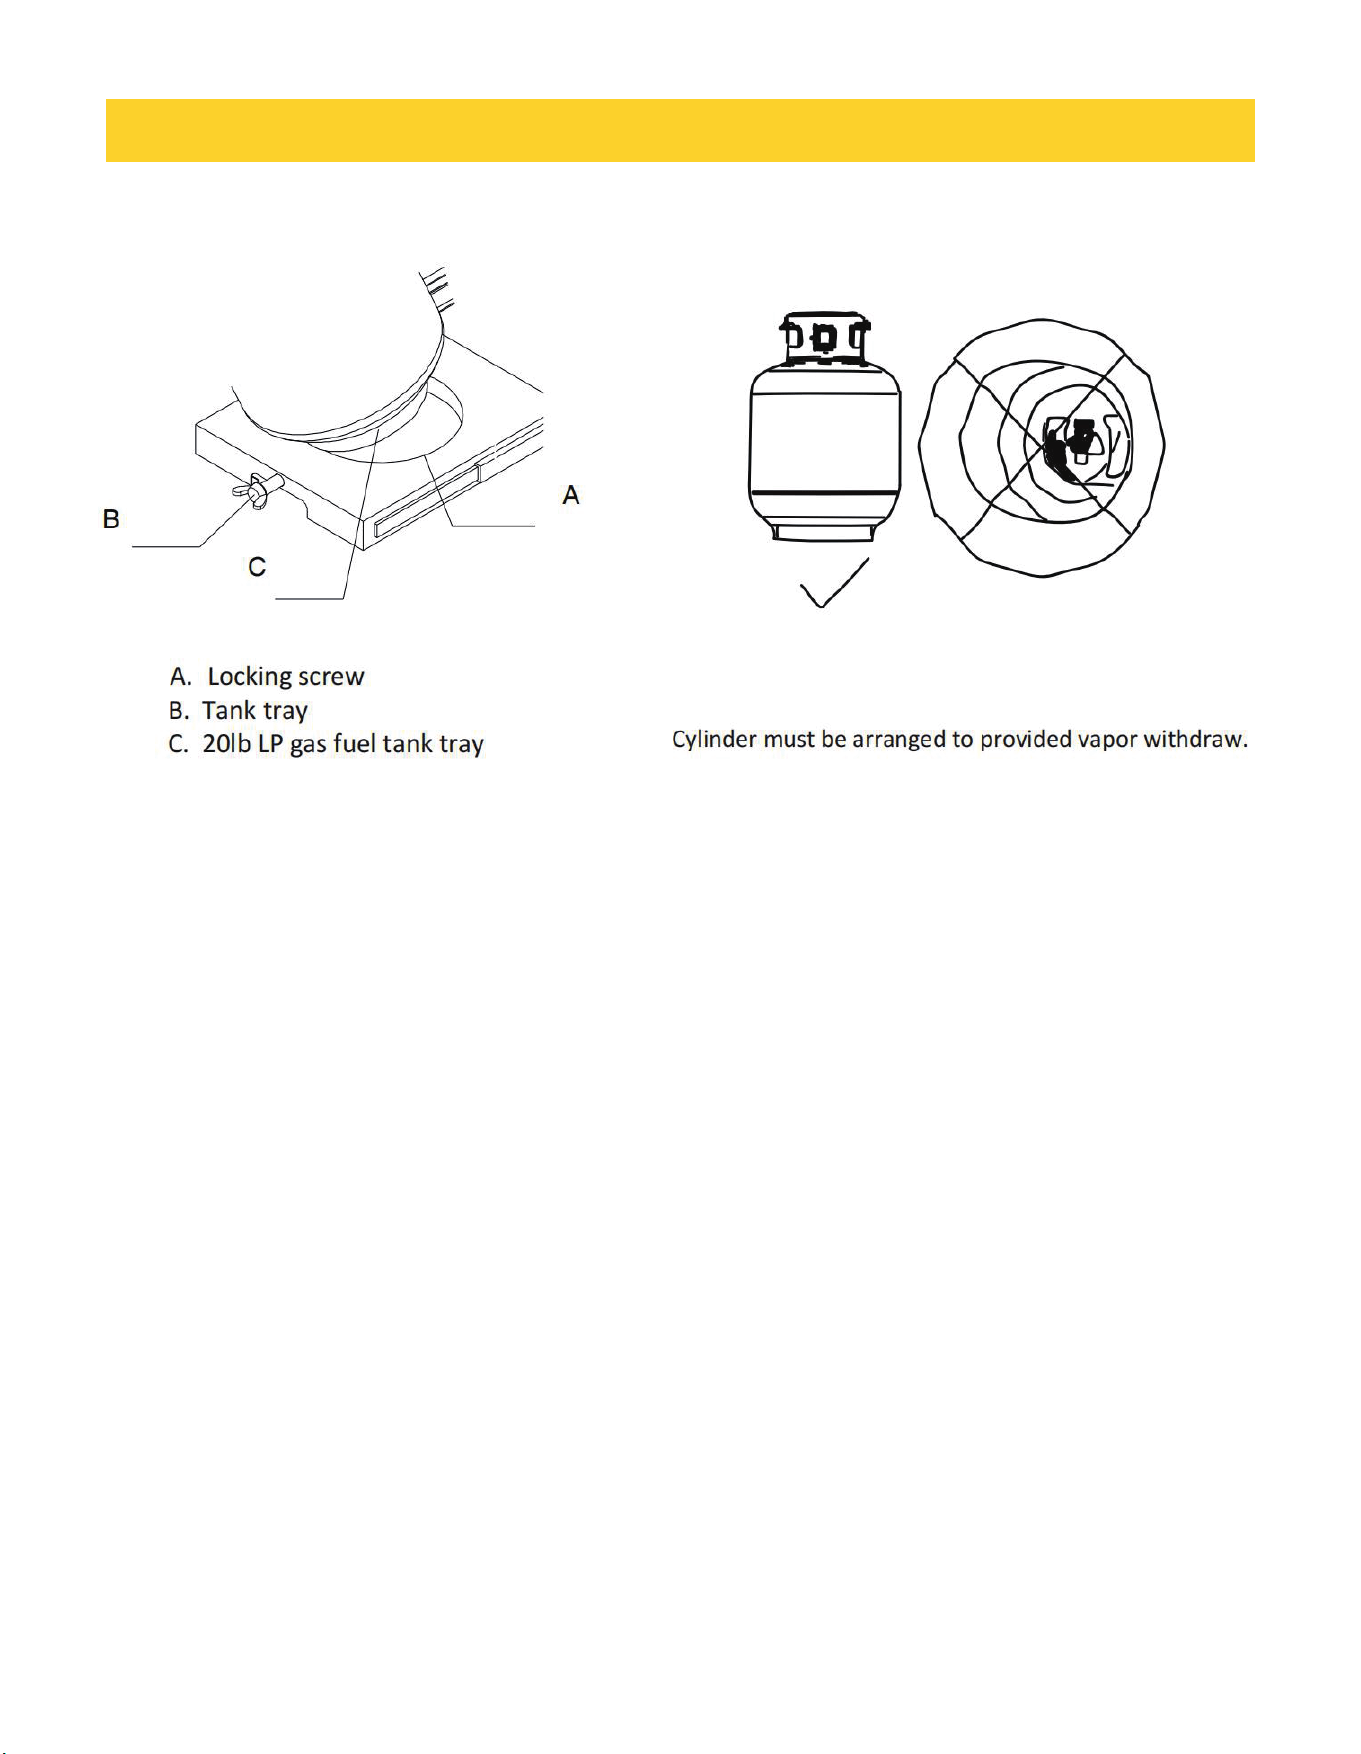
Any L.P. gas supply cylinder used with this gas BBQ Grill must be approximately 12 inches diameter and 18 inches high.
The maximum fuel capacity is 80% and is approximately 20 pounds of propane.
The L.P. cylinder must have a shut-off valve terminating in a Type 1.
The cylinder must be equipped with a Type 1 valve with
valve. A safety relief device having
direct communication with the vapor space of cylinder must be provided.
All L.P. gas cylinders used with this appliance shall be constructed and marked in accordance with the specifications for
L.P. gas cylinders of the US Department of Transportation (DOT) or the National Standard of Canada, CAN/CsA-8339,
Cylinders, Spheres and Tubes for Transportation of Dangerous Goods; and Commission, as applicable; and shall be
provided with a listed overfilling prevention device.
Read labels on the L.P. Gas Supply Cylinder. New cylinders are always shipped empty for safety.
Allow only qualified L.P. gas dealers to fill or repair your LP gas supply cylinder.Inform the gas dealer if it is a new or used
cylinder to be filled.
After filling, have the gas dealer check for leaks and to see that the relief valve remains effective and in good condition.
Hose and Regulator (Comes standard with the Gas BBQ Grill)
The Type 1 connection system has the following features:
The rear burner will not allow gas to flow until a positive connection has been made. The cylinder control valve must be
turned off before any connection is made or removed.
The rear burner has a thermal element that will shut off the flow of gas in the event of a fire.
The rear burner has a flow limiting device which, when activated, will limit the flow of gas to 4 cubic feet per hour.
NEVER use gas BBQ Grill without leak testing this connection.
GAS REQUIREMENTS
•
••
•
••
••
••
••
••
••
••
(此分需要研发据产品不同而进行减或更换调整)
The cylinder must be
arranged for vapor withdrawal. It must also include a collar to protect the cylinder
back-check function.
12
DANGER
1.Do not insert any tool into the valve outlet or safety relief valve. You may damage the valve and cause a leak. Leaking propane
may result in explosion, fire, severe personal injury, or death.
2.If a leak is detected at any time, or you cannot stop a gas leak, immediately close the tank's shut-off valve (gas supply from
LP tank to the gas BBQ Grill) and call LP gas supplier or your fire department.
3.Check all gas supply fittings before each use and each time the gas supply cylinder is connected to the regulator. Have a
qualified service technician leak test the gas BBQ Grill any time a part of the gas system is replaced.
WARNING
Never attempt to attach this gas BBQ Grill to the self-contained LP gas system.
Do not use the gas BBQ Grill until leak testing
has been completed.
Leak Testing for Valves, Hose and Regulator.
1.NEVER smoke while leak testing.
2.Extinguish all open flames. Never leak test with an open flame.
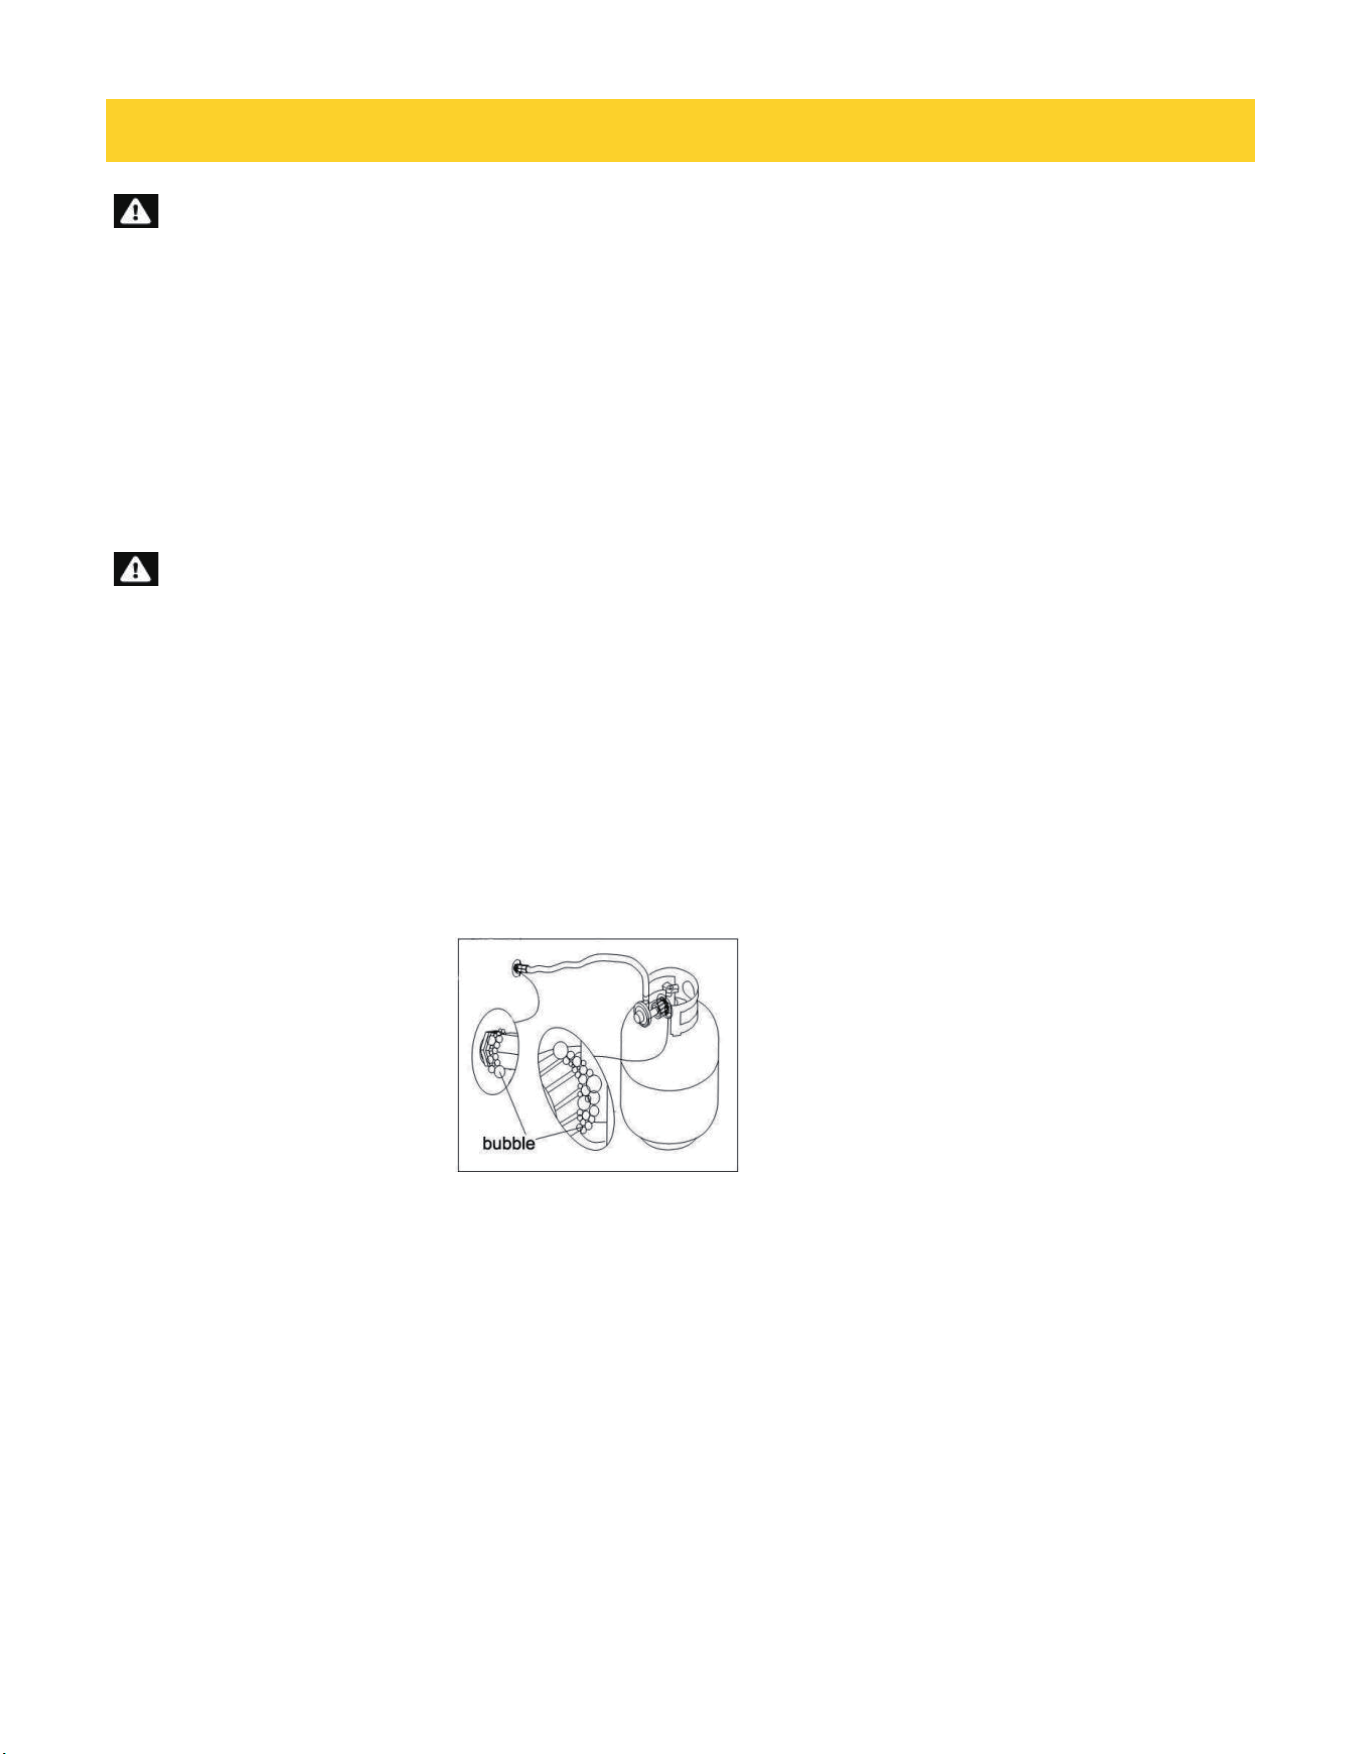
3.Mix a solution of equal parts mild detergent or liquid soap and water.
4.Turn control knobs to OFF.
5.Ensure that the connections from the regulator to the gas BBQ Grill and tank are tight and secure
6.Completely open LP tank valve by turning cylinder valve knob counterclockwise. If you hear a rushing sound, turn gas off
immediately. There is a major leak at the connection.
7.If no rushing sound, brush soapy solution onto areas where bubbles are shown in Lp tank.
8.If "growing" bubbles appear, there is a leak. Close LP tank valve immediately and retighten connections.
9.Always close LP tank valve after performing leak test by turning cylinder valve knob clockwise.
PRE-OPERATION LEAK TESTING
(此分需要研发据产品不同而进行减或更换调整)
13
WARNING
NOTE: When doing leak testing this appliance, make sure to tighten and test all loose connections. As light leak in the system
can result in a low flame, or a hazardous condition that could result in a fire explosion.
LP Gas Supply Cylinder Disconnection
In order to disconnect the LP tank from the gas BBQ Grill:
1.Turn the burner valves off.
2.Turn the tank valve off. (Turn shut-off clockwise to stop).
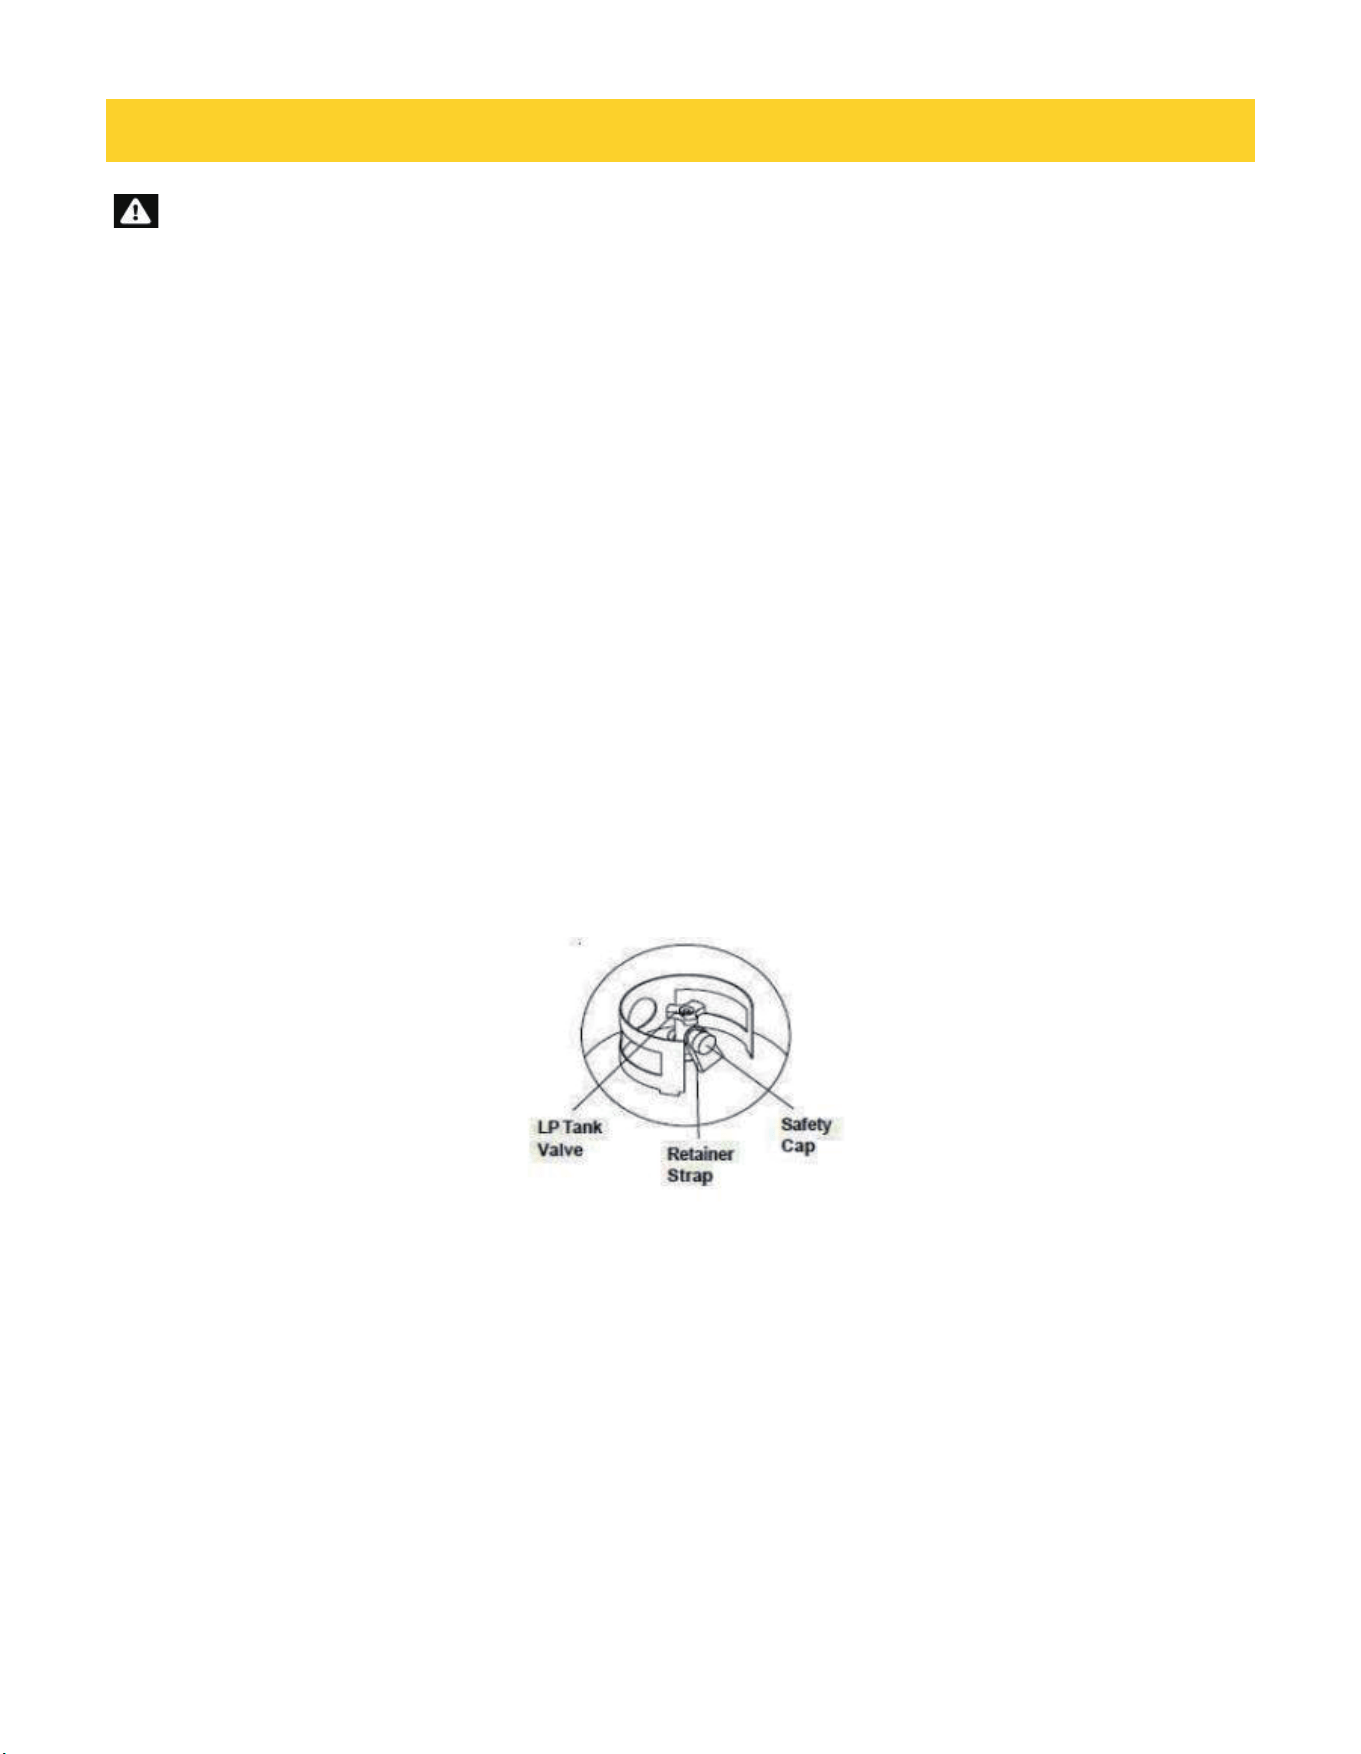
3.Detach the regulator assembly from the tank valve by turning the quick coupling nut counterclockwise.
LP Tank Removal, Transportation and Storage
1.Turn OFF all control knobs and LP tank valve. Turn coupling nut counterclockwise by hand only. Do not use tools to
disconnect. Install safety cap onto LP tank valve. Always use cap and strap supplied with valve.
2.Place dust cap on cylinder valve outlet whenever the cylinder is not in use. Only install the type of dust cap on the cylinder
valve outlet that is provided with the cylinder valve.
3.Never leave a LP tank inside a motor vehicle.
4.Do not store an LP tank in enclosed spaces such as a carport, garage, porch, covered patio or other building.
5.Do not store LP tank in an area where children play.
LP Tank Exchange
1.Exchange your Type 1 cylinder for OPD safety feature-equipped replacement tank ONLY.
2.Always keep new and exchanged LP tanks in upright position during use, transit or storage. Leak test new and exchanged LP
tanks BEFORE connecting to gas BBQ Grill.
3.Never connect the gas BBQ Grill to an unregulated gas supply.
PRE-OPERATION LEAK TESTING
(此分需要研发据产品不同而进行减或更换调整)
14
Gas Pressure Regulator
The gas pressure regulator supplied with this grill must be used.
The inlet (supplied) pressure to the regulator should be as follows for proper operation.
Connect Regulator with Hose to your LP Gas Tank
Turn all control knobs to the OFF position.
Inspect the valve connection port and regulator assembly for damage or debris. Remove any debris. Never use damaged
equipment.
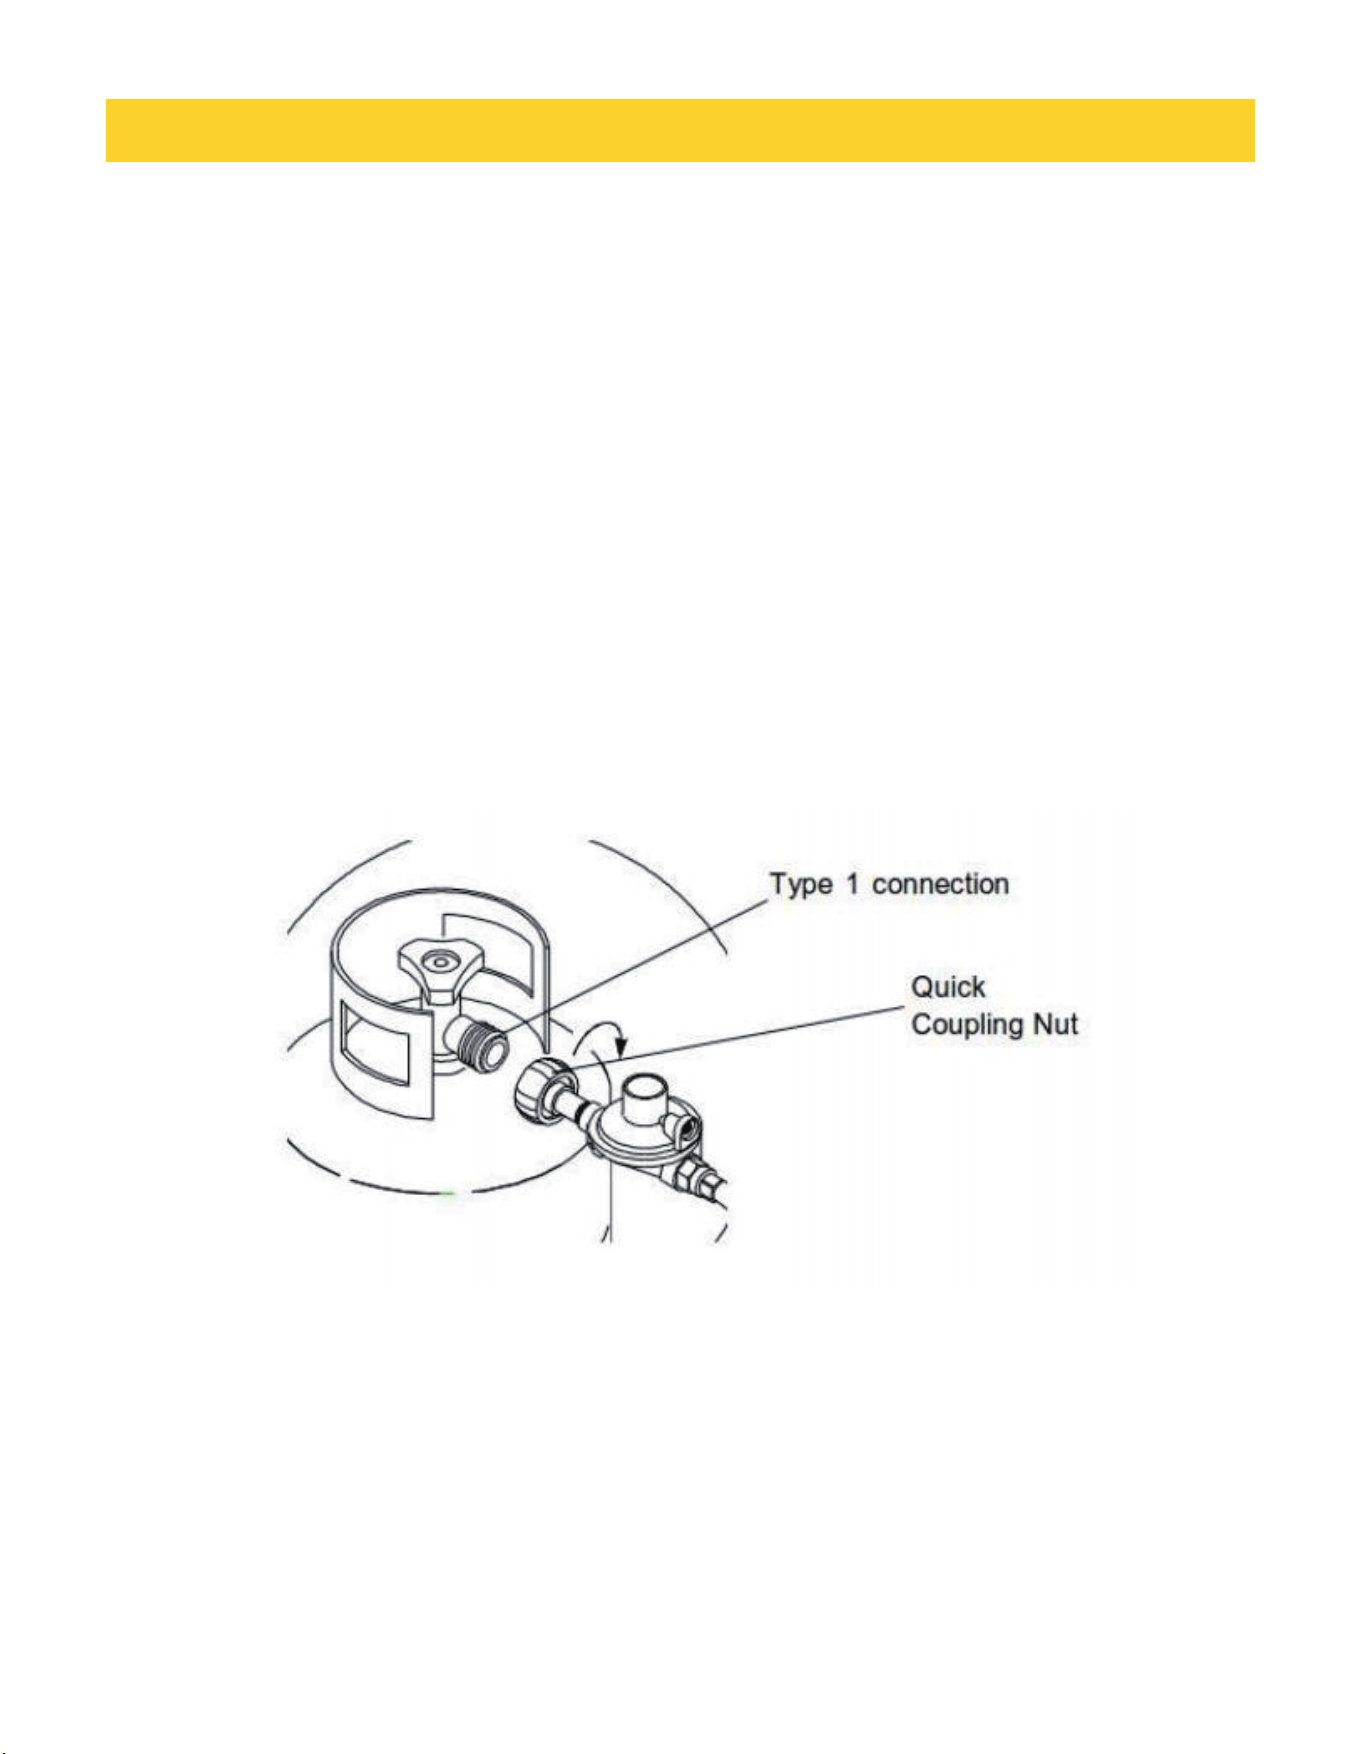
Connect the regulator assembly to the tank valve and HAND TIGHTEN nut clockwise to a full stop. DO NOT use a wrench
to tighten because it could damage the Quick Coupling Nut and result in a gas leak/fire hazard.
Open the tank valve 1/4 to 1/2 of a full turn (counterclockwise) and use a soapy water solution to check all connections for
leaks before attempting to light your grill. If a leak is found, turn the tank valve off and do not use your grill until the leak
is repaired.
LP GAS CONNECTION
••
••
••
••
••
••
(此分需要研发据产品不同而进行减或更换调整)
15
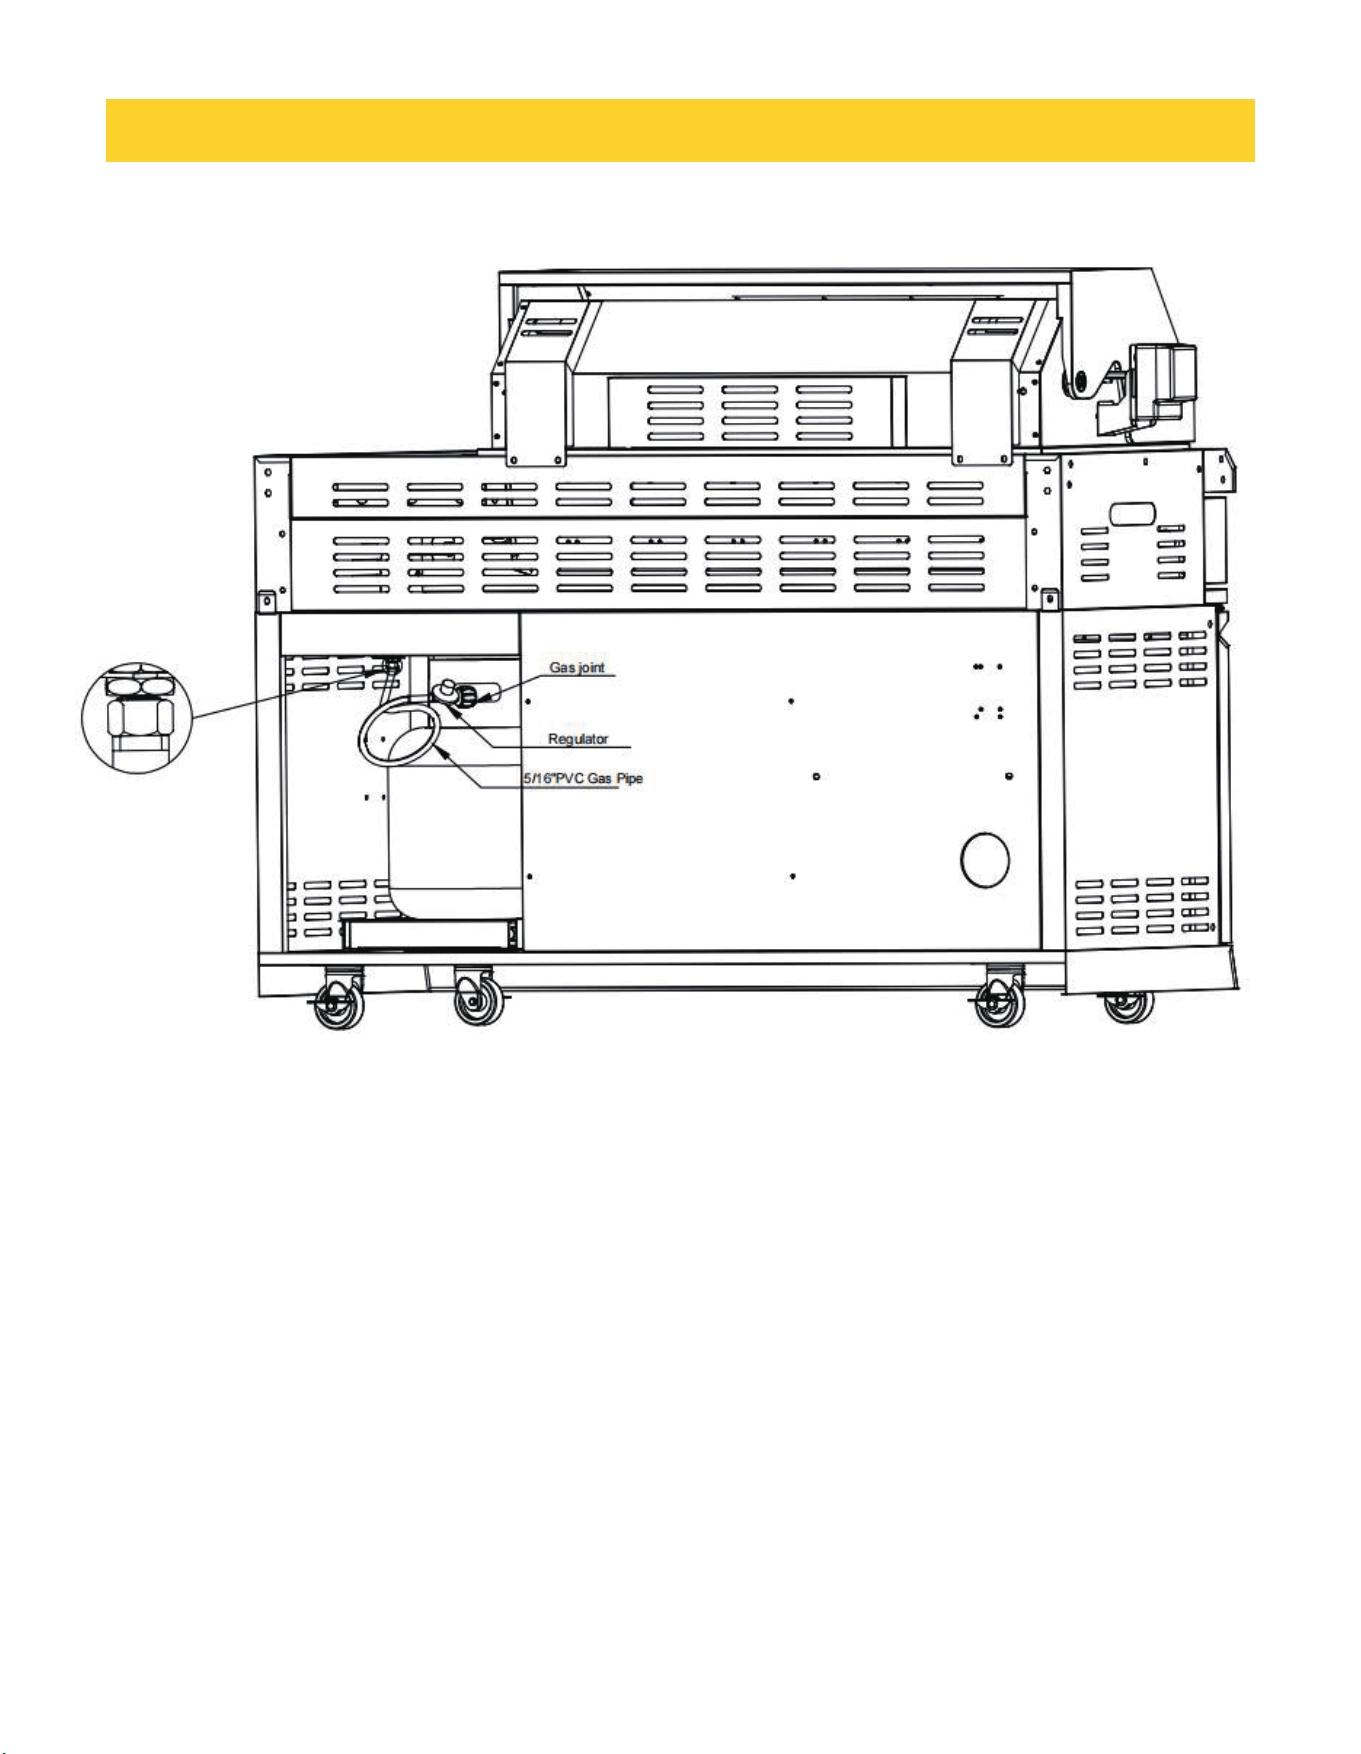
LP Tank installation Layout
1.This grill is equipped with a propane tank (not supplied). A gas pressure regulator / hose assembly is supplied.
2.Grill tank tray is compatible with most of the propane tank in the market. The propane tank must be mounted and secured.
3.Open cabinet doors.
4.Loosen the tank tray locking screw.
5.Put propane tank into the tank tray under the grill.
6.Tighten the locking screw clockwise against the bottom collar of the propane tank to secure the tank.(detailed info please see
above picture-LP Tank Installation Layout).
7.For easy installation, the tank liquid withdrawal valve is suggested to face right side.
INSTALL PROPANE TANK
LP Tank
I
nstallation Layout
(此分需要研发据产品不同而进行减或更换调整)
16
Electrical Safety
Electrical equipment provided with the outdoor cooking gas appliance shall have the following instructions:
a) To protect against electric shock, do not immerse cord or plugs in water or other liquid.
b) Unplug from the outlet when not in use and before cleaning. Allow to cool before putting on or taking off parts.
c) Do not operate any outdoor cooking gas appliance with a damaged cord, plug, or after the appliance malfunctions or has
been damaged in any manner. Contact the manufacturer for repair.
d) Do not let the cord hang over the edge of a table or touch hot surfaces.
e) Do not use an outdoor cooking gas appliance for purposes other than intended.
f) When connecting, first connect plug to the outdoor cooking gas appliance then plug appliance into the outlet.
Use only a Ground Fault interrupter (GFI) protected circuit with this outdoor cooking gas appliance.
h) Never remove the grounding plug or use with an adapter of 2 prongs.
i) Use only extension cords with a 3-prong grounding plug, rated for the power of the equipment, and approved for outdoor use
with a W-A marking.
INSTALL PROPANE TANK
(此分需要研发据产品不同而进行减或更换调整)
g)
17
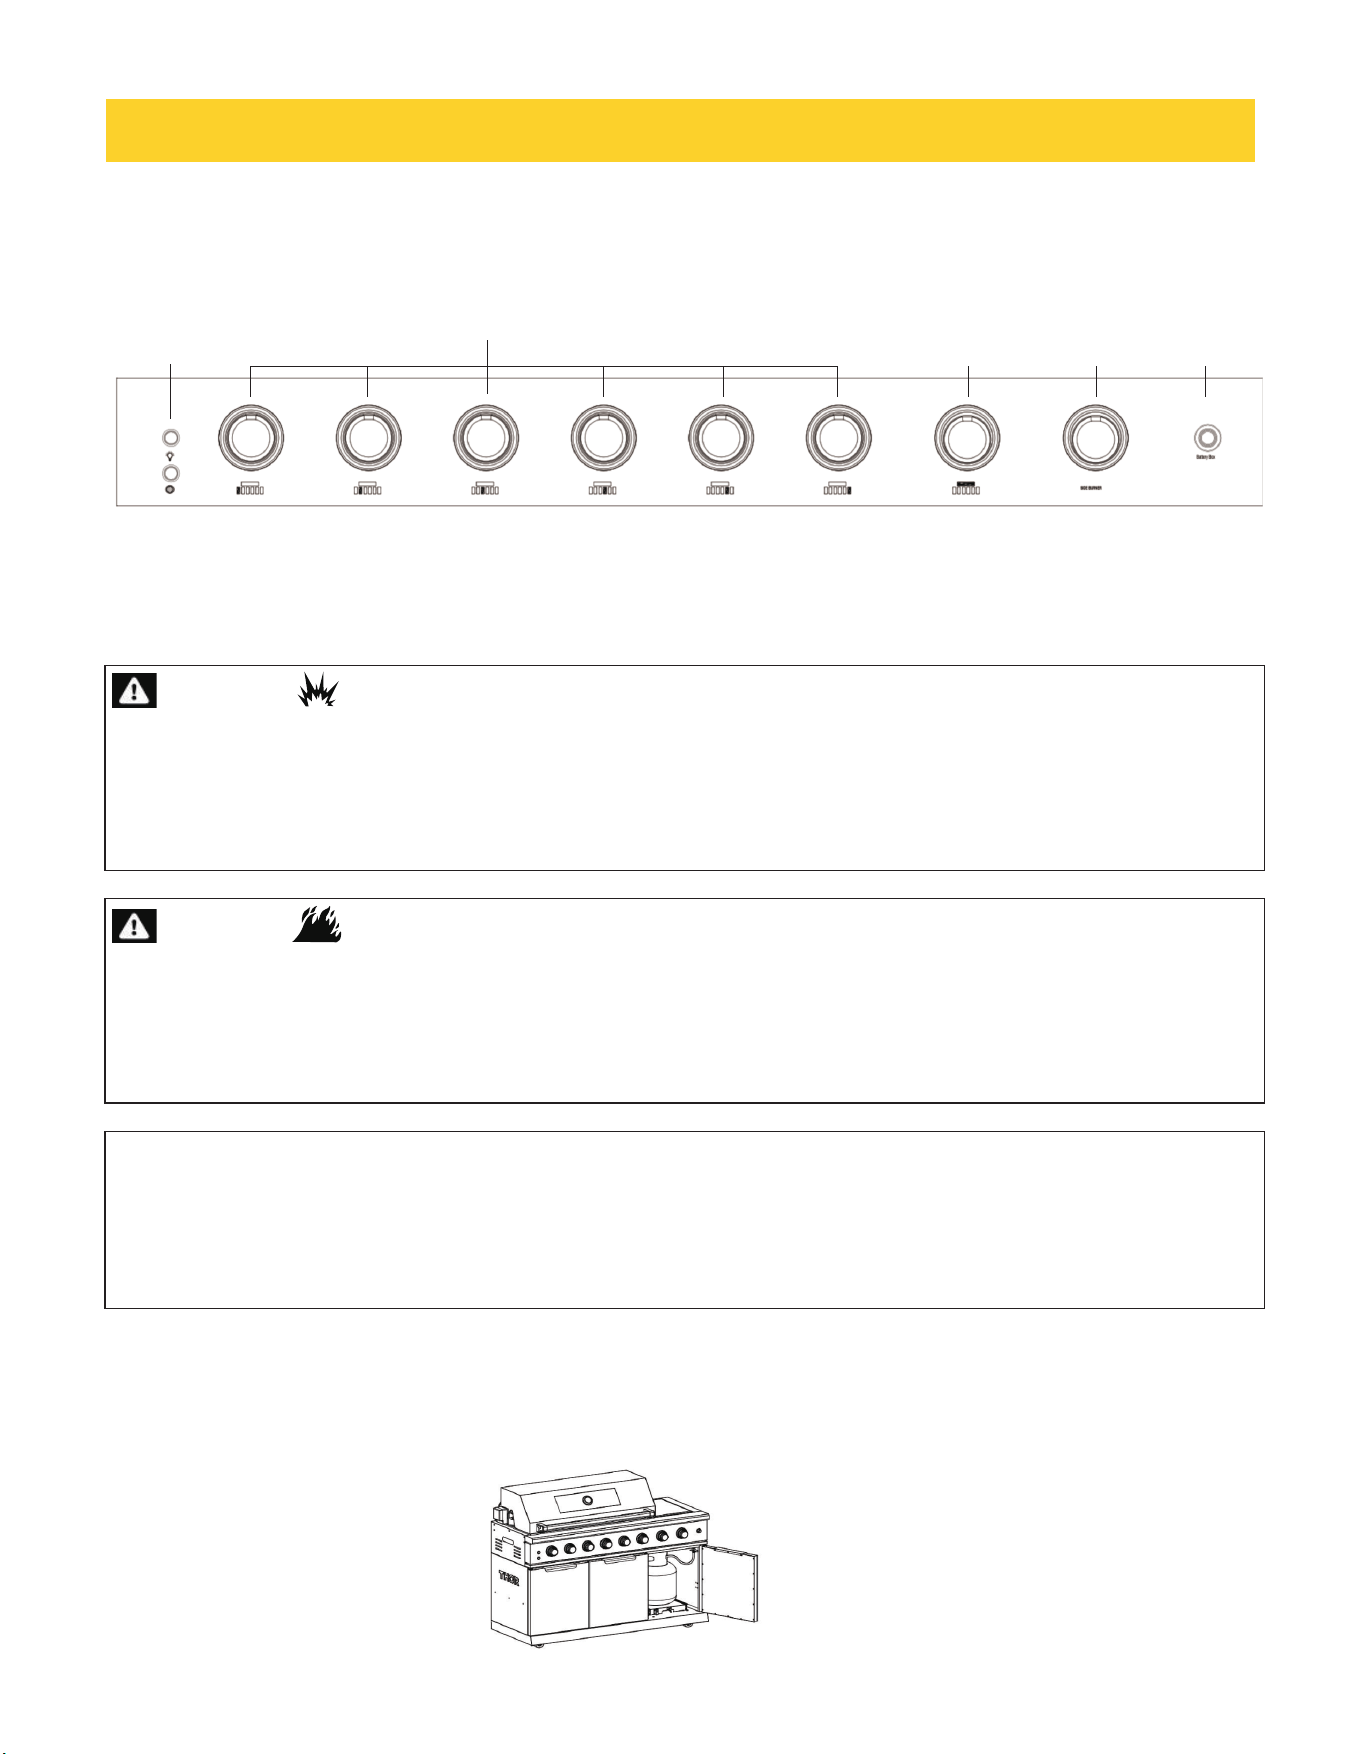
The grill you have purchased may have some or all the feature listed below. The locations and appearances of the features
shown here may not match what you are having on your model.
Control panel
A. Grill Knob Light Switch
B. Front Left Tube Burner Knob
E. Battery (for Ignition) Box
C.
Back Broil Burner Knob (Rotisserie Burner)
D. Side Burner Knob
WARNING
Explosion Hazard
Do not store fuel tank in a garage or indoors.
Do not store grill with fuel tank in a garage or indoors.Failure to follow these instructions can result in death , explosion , or
fire.
Fire Hazard
Do not use grill near combustible materials.
Do not store combustible materials near grill.
Doing so can result in death or fire.
WARNING
Food Poisoning Hazard
Do not let food sit for more than one hour before or after cooking.
Doing so can result in food poisoning or sickness.
Inspect the Gas Fuel Tank Supply Hose
Inspect the gas pressure regulator/hose assembly before each use.
If it is evident there is excessive abrasion or wear, or the hose is cut, it must be replaced prior to the outdoor cooking gas
appliance being put into operation.The replacement hose assembly shall be that specified by the manufacturer.
GRILL INSTRUCTIONS
WARNING
••
••
••
••
••
••
••
(此分需要研发据产品不同而进行减或更换调整)
A
C
D
E
B
18
Prepare the Gas Supply
Make sure control knobs are turned to OFF. The drip tray must be in place and pushed all the way to the back.
Turn the Gas Supply On
For outdoor grills using a propane tank. Slowly open the tank valve.
NOTE:
1.If flow limiting device activates, your grill may not light. If your grill does light, the flames will be low and will not heat
properly. Turn tank valve and all control knobs off and wait 30 seconds. After shutting off the tank, very slowly open tank valve
and wait 5 seconds before lighting.
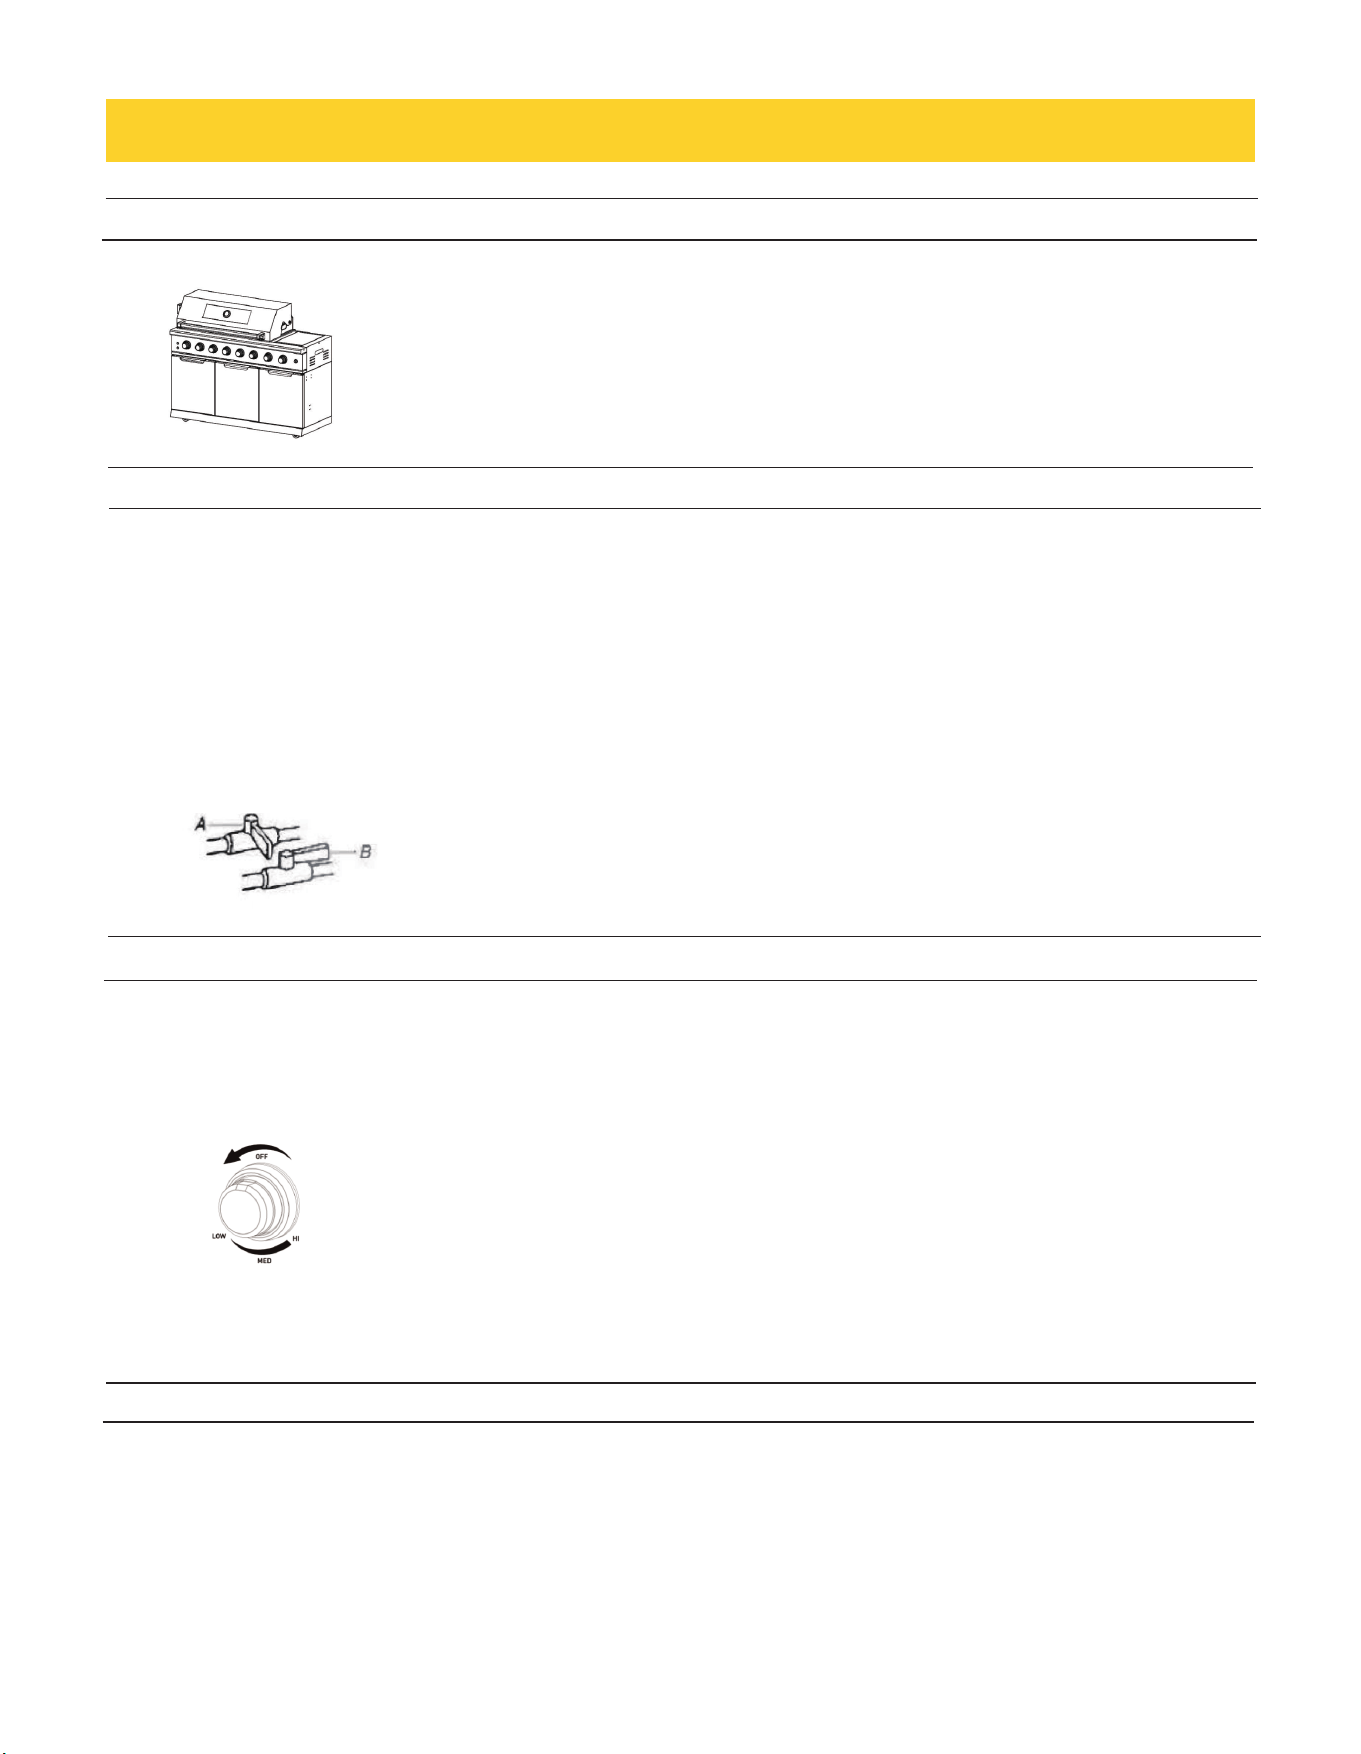
2.For outdoor grills using natural gas supply source (if applicable) Open the manual shutoff valve in the gas supply line. The
valve is open when the handle is parallel to the gas pipe.
Lighting the Main Grill
IMPORTANT:
If
burner does not light immediately, turn the burner knob to OFF and wait 5 minutes before relighting.
1.Do not lean over the grill. Select the burner you want to light. Press and hold the pulse igniter button. Then, push in and turn the
2.Push in and turn the grill burner control knob to IGNITE/HI, while continuing to hold it in.
3.You will hear the "snapping" sound of the spark. When burner is lit, release the knob. Turn knob to desired setting.
4.Repeat for each of the other burners as needed.
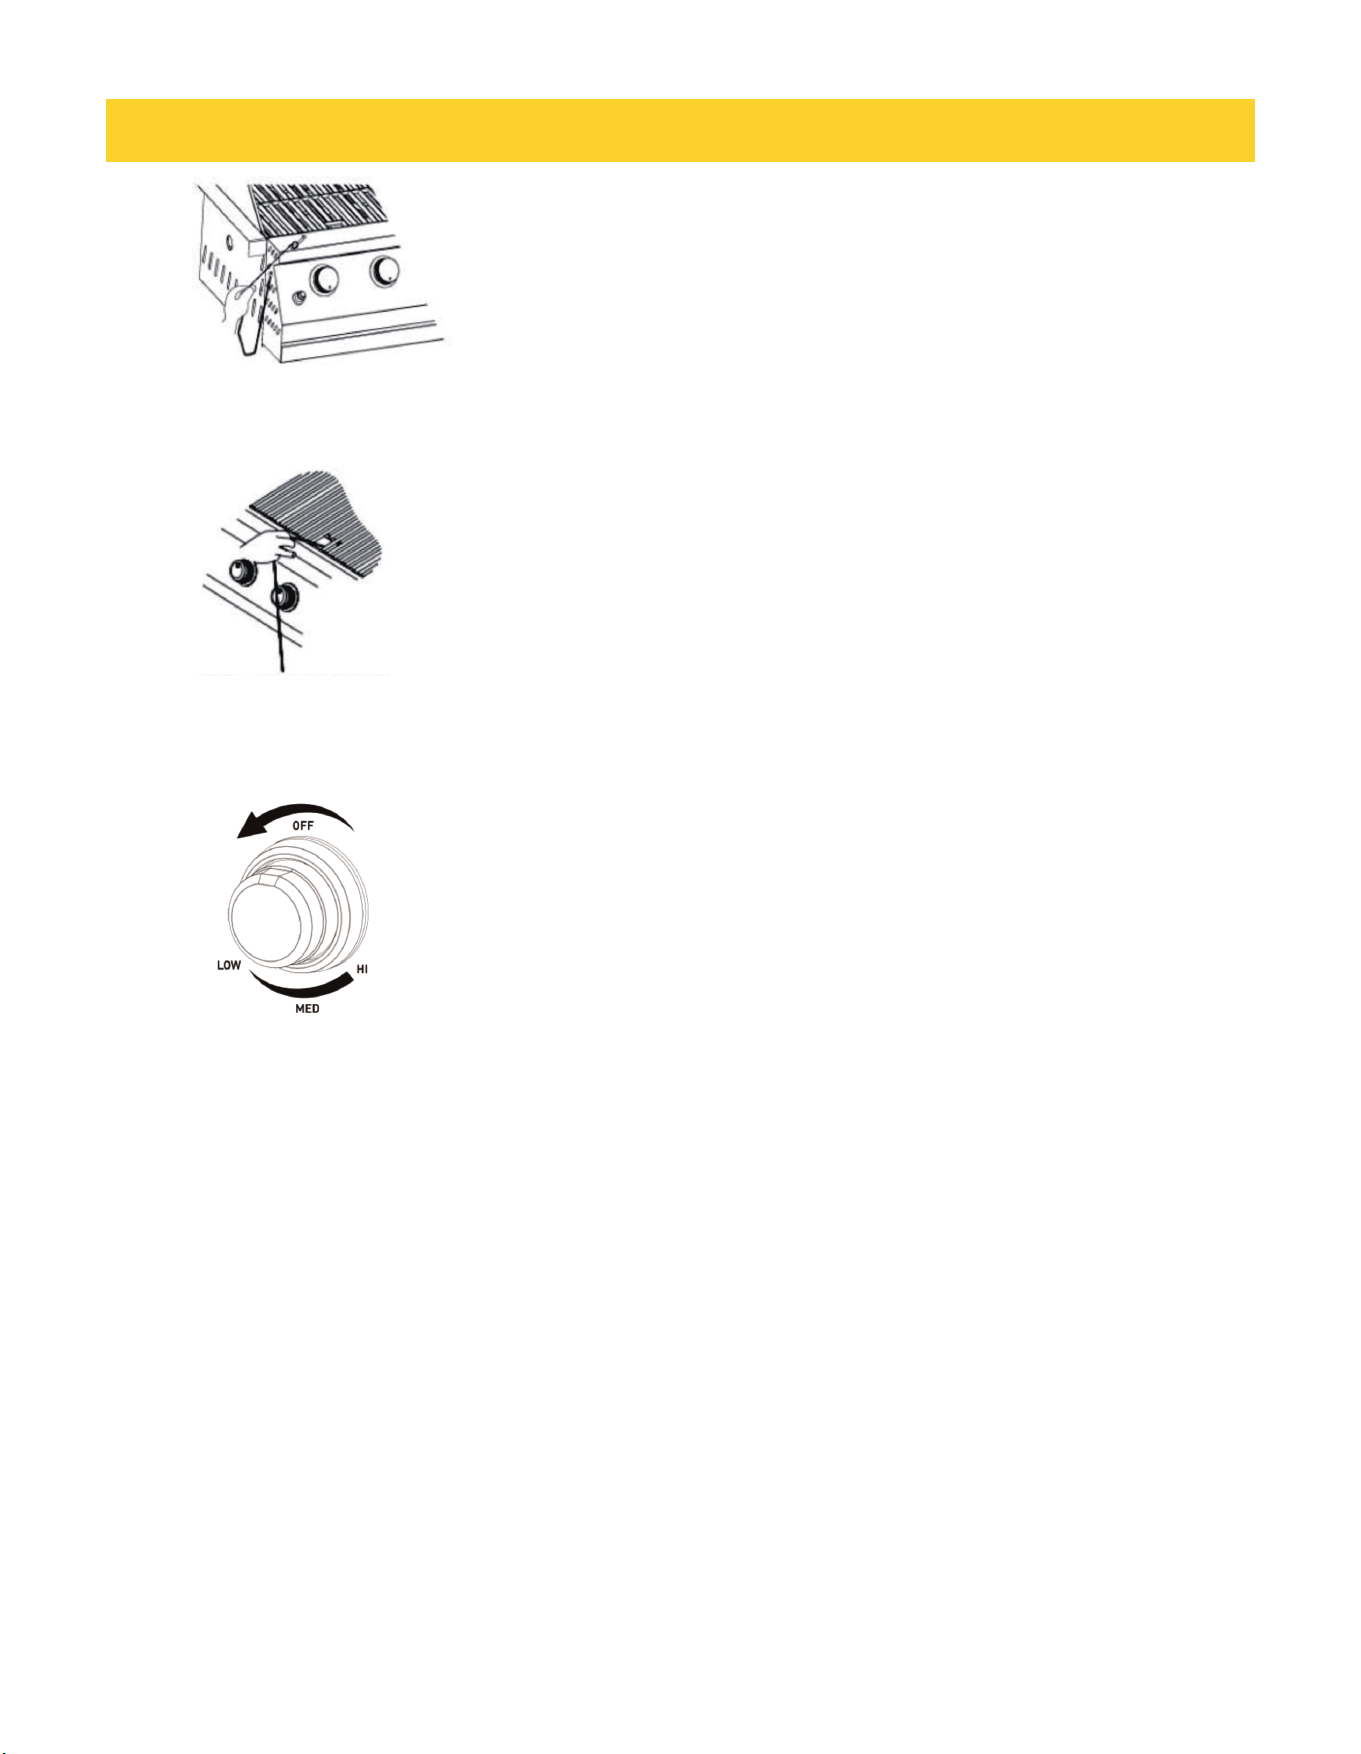
Manually Lighting the Main Grill
1.Do not lean over the grill.
2.
Remove the manual lighting extension (see following illustration) and attach a match to the split ring
GRILL INSTRUCTIONS
A. Closed valve
B. Open valve
(此分需要研发据产品不同而进行减或更换调整)
control knob to IGNITE/ON.
19
3.Strike the match to light it.
4.Guide the lit match under the grill grate.
5.Press and hold the pulse igniter button, push in and turn the burner knob to IGNITE/HI for the burner closest to the lit match. The
burner will light immediately. When the burner is lit, turn the knob to the desired setting.
6.Repeat steps 2 through 5 for each main burner.
7.Remove match and replace manual lighting extension on the right side panel.
IMPORTANT
: If burner does not light immediately, turn the burner knob to OFF and wait 5 minutes before relighting.
If any
burners do not light after attempting to light them manually , contact the Customer Service Center.
Warning (After use):Storage of an outdoor cooking gas appliance indoors is permissible only if the
cylinder is
disconnected
and removed from the outdoor cooking gas appliance.
GRILL INSTRUCTIONS
(此分需要研发据产品不同而进行减或更换调整)
20
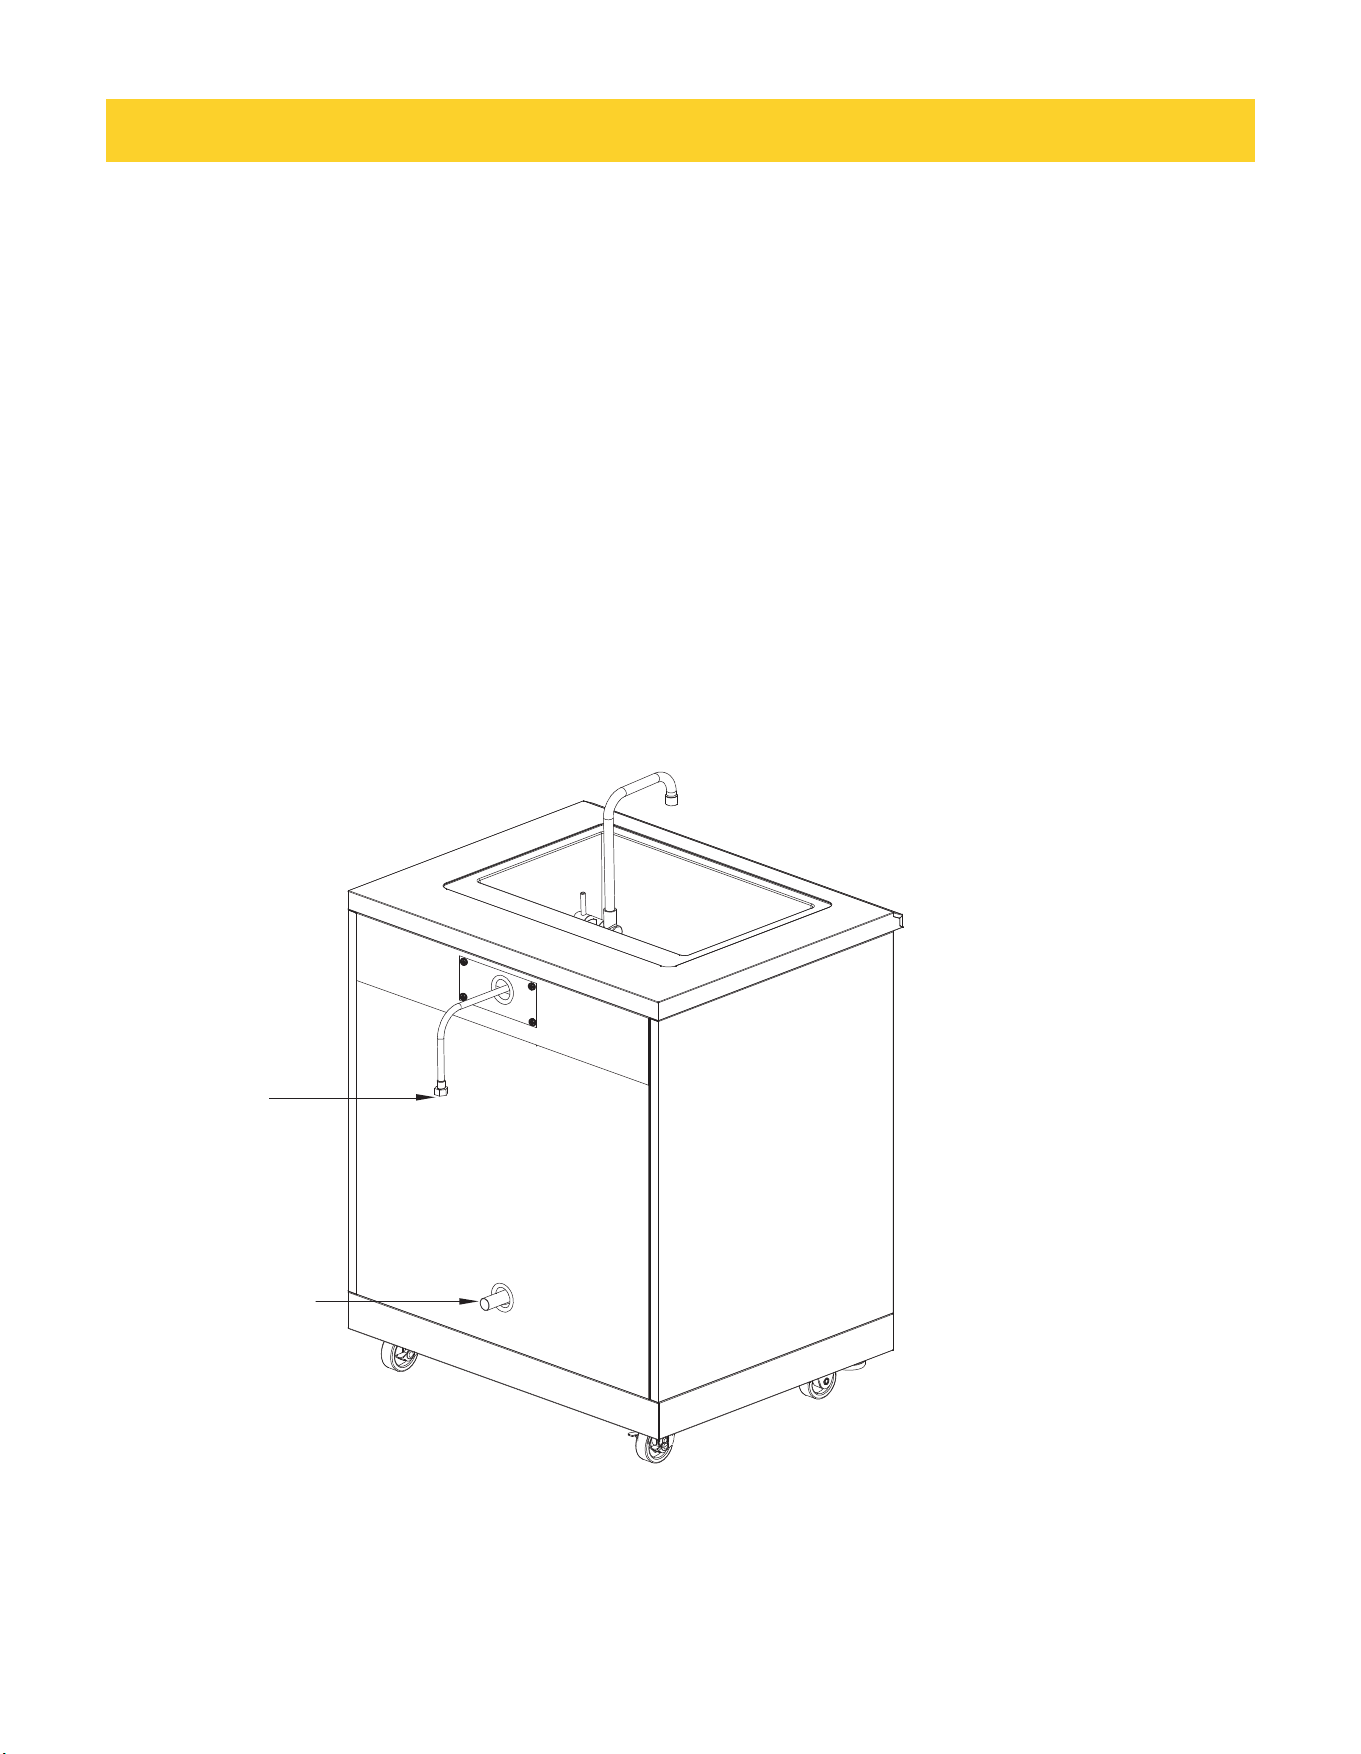
SINK
INSTRUCTIONS
Use
Connect to water source.Ensure connections are tight.
Drainage
Keep drain clear.Do not block.
Winter Care
Drain before freezing.In freezing temperatures, it is crucial to disconnect the water hose and ensure all water is completely drained
Cleaning
Use mild detergent.Do not use abrasive cleaners.
Initial Use
Before first use, turn on the water supply and allow water to run through the faucet and sink for a few minutes to flush out any
manufacturing residue. Carefully check all connection points for any signs of leaks.
from the faucet and hoses to prevent freezing and potential damage to the plumbing components.
After each use, clean the stainless steel surfaces (sink and countertop) with a mild detergent and a soft, non-abrasive cloth or sponge.
Water inlet
Drain pipe
21
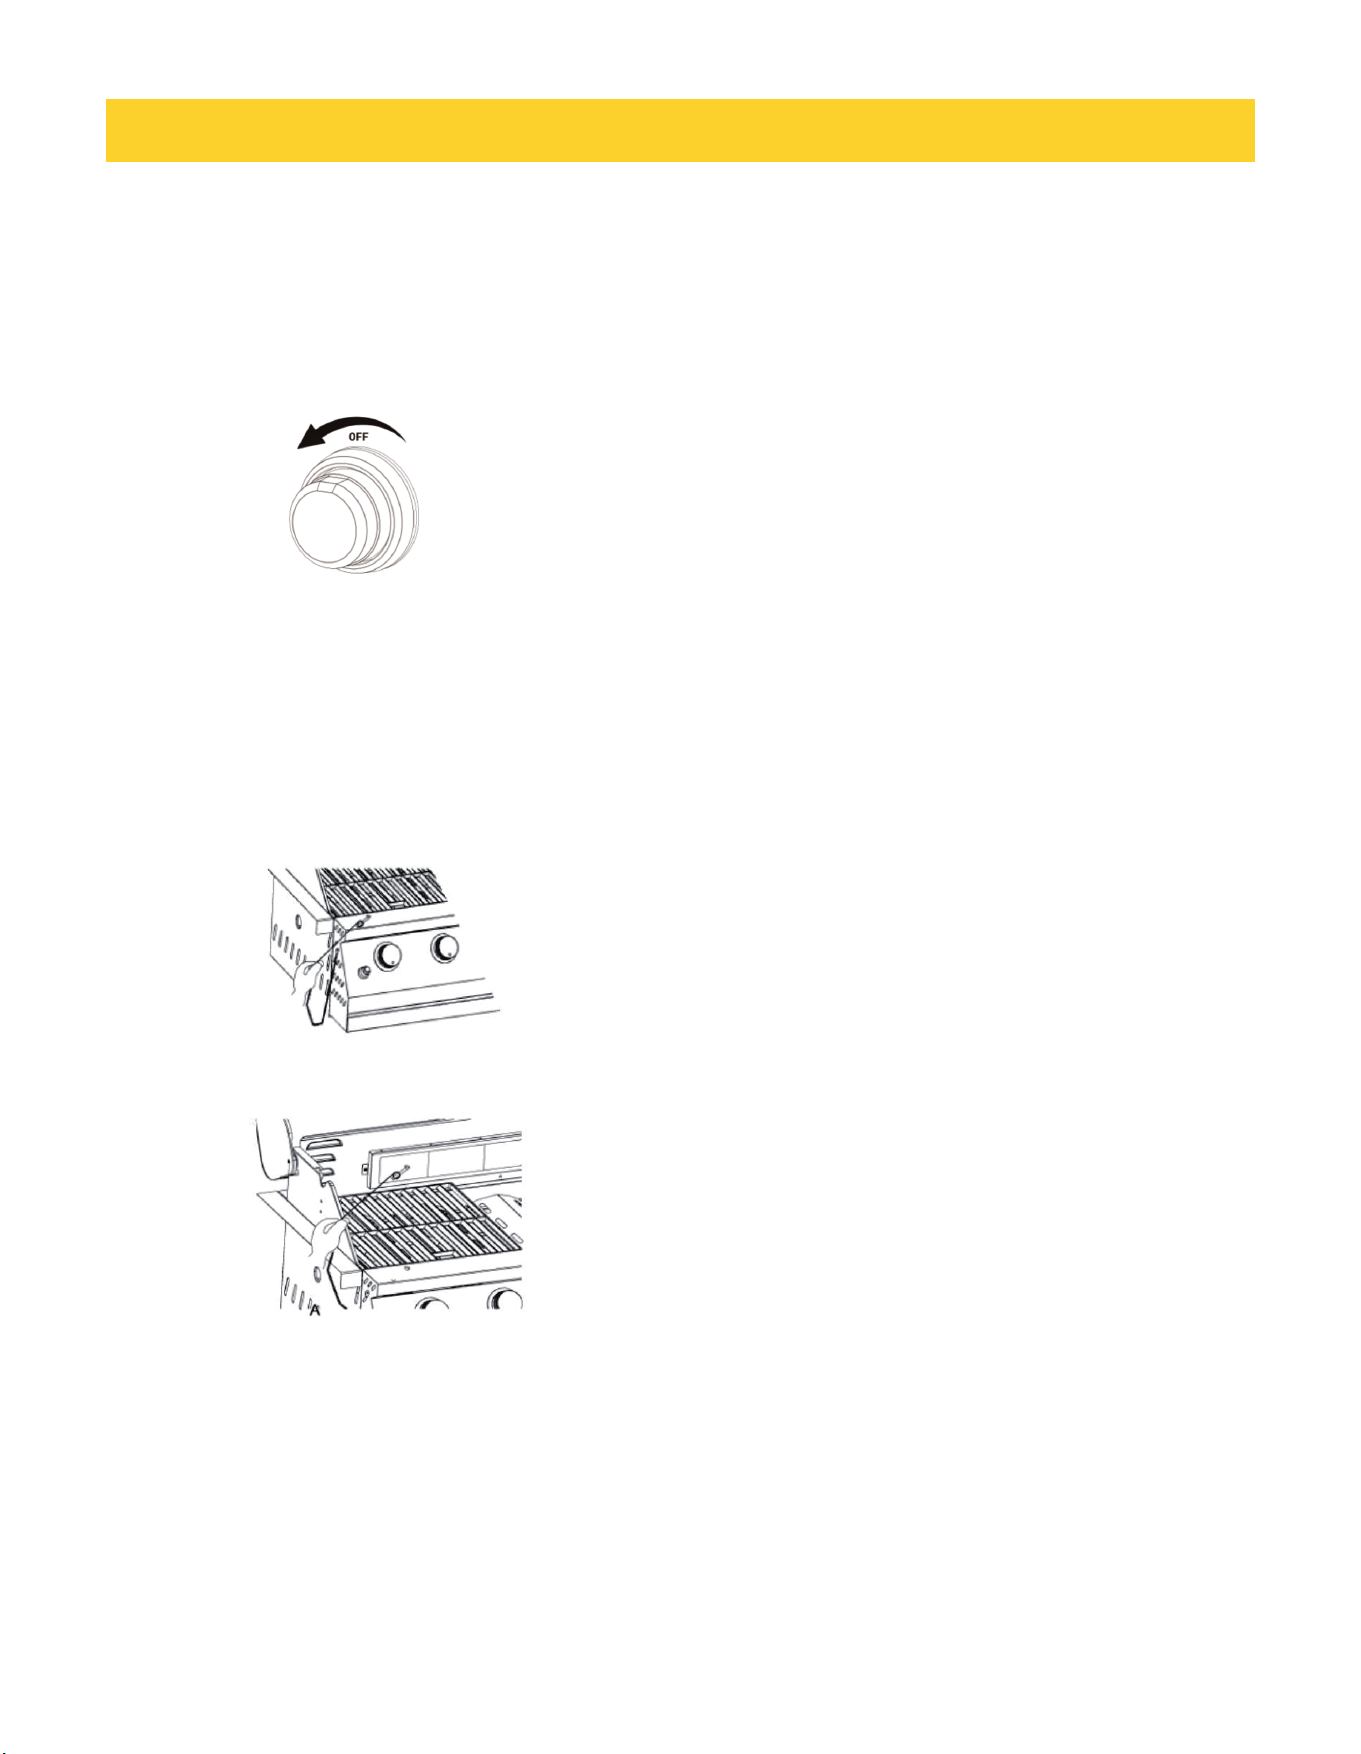
To avoid damage to the warming rack, remove from grill when using the rotisserie burner. Do not use the main burners when
the rotisserie burner is in use.
Lighting the Rotisserie Burner
1.Do not lean over the grill.
2.Press and hold the pulse igniter button. Then, push in and turn the control knob to IGNITE/ON.
3.When the rotisserie burner lights , continue to hold the knob in for another 15 seconds , then release the knob and burner
will stay lit. You will hear the "snapping" sound of the spark until the knob is released. IMPORTANT: If the rotisserie burner
does not light immediately , turn the burner knob to OFF and wait 5 minutes before relighting.
4.Please note that: rotisserie burner has high setting only.
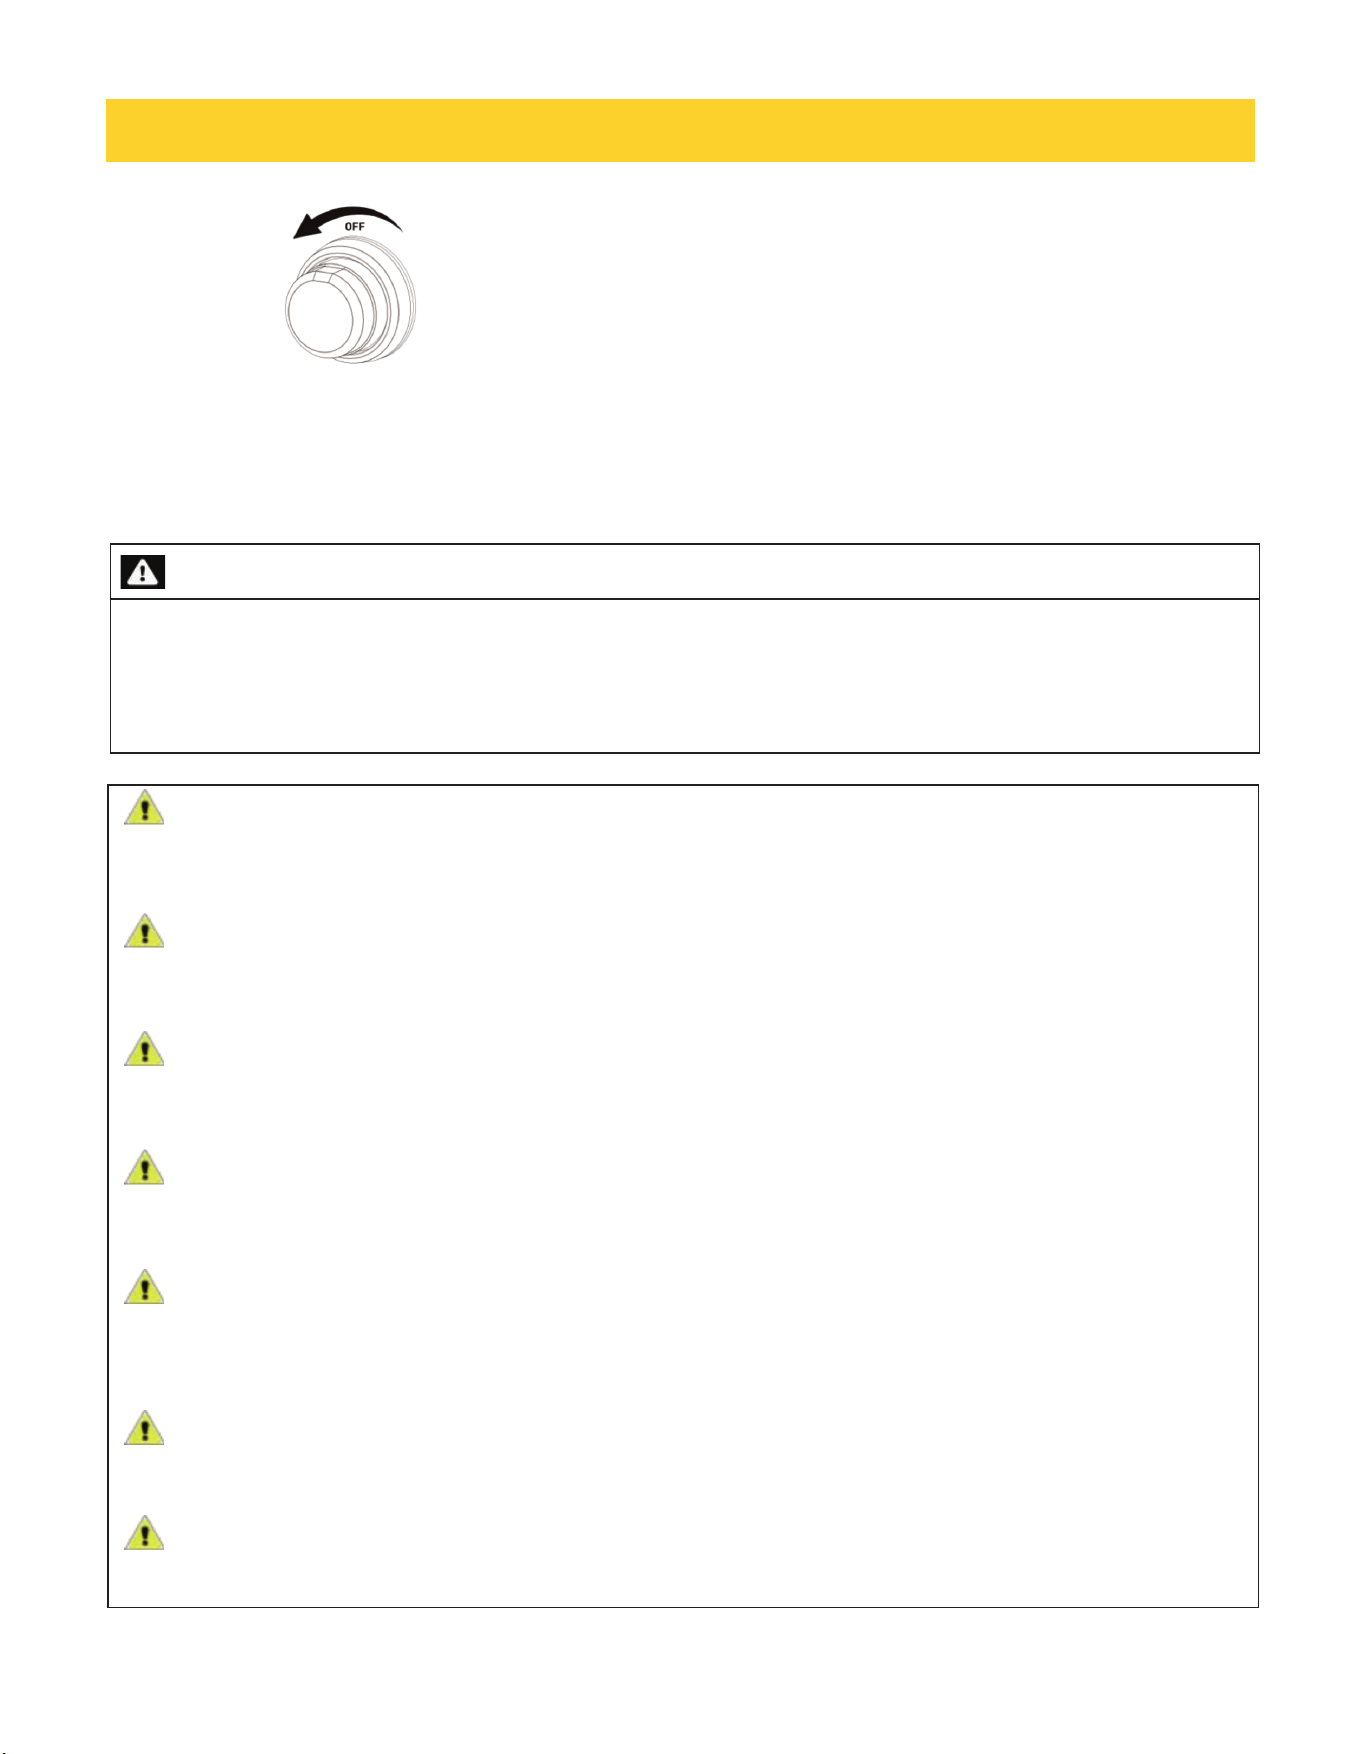
Manually Lighting the Rotisserie Burner
1.Do not lean over the grill.
2.Remove the manual lighting extension (see following
illustration)
and attach a match to the split ring.
3.Strike the match to light it.
4.Gently hold the lit match close to the rotisserie burner.
A. Lighting extension B.
Rotisserie
burner
5.Press and hold the pulse igniter button. Then, push in and turn the control knob to IGNITE/ON.
Hold this knob in for 15 seconds
after the
burner is lit.You will hear the“snapping"sound of the spark until after the knob is released.
USING ROTISSERIE BURNER
(此分需要研发据产品不同而进行减或更换调整)
B
22
IMPORTANT: if the rotisserie burner does not light immediately, turn the rotisserie burner control knob to OFF and wait 5
minutes before relighting.
6.Remove the match and replace the manual lighting extension inside the cabinet door.
WARNING
Do not let food stay for more than one hour before or after cooking. Doing so can result in food poisoning or sickness.
It's suggested to use protective gloves when handling particularly hot components. Parts sealed by the manufacturer
must not be altered or changed by the end user."
USING ROTISSERIE BURNER
(此分需要研发据产品不同而进行减或更换调整)
CAUTION
When using a match to light the grill make sure to use the attached lighting rod.
WARNING
Before lighting, please check the connection with proper procedure if leak turn the gas off.
WARNING
Do not store a spare LP-Gas cylinder under or near the appliance.
WARNING
When lighting, keep your face and hands as far away from the grill as possible.
WARNING
This appliance will be hot during and after use. Use insulated oven mitts or gloves for protection from hot surfaces or splatter
from cooking liquids.
WARNING
Never fill the cylinder beyond 80 percent full.
WARNING
If the information in above warning is not followed exactly, a fire causing death or serious injury may occur.

23
WARNING
Failure to open the lid prior to igniting the barbecue's burners, or not waiting 5 minutes to allow the gas to clear if the
barbecue does not light, may result in an explosive flame-up which can cause serious injury or death.
NEVER use the grill if gas odor is present.
NEVER stand with head, body, or arms over the grill when lighting.
ALWAYS inspect the hose before using the grill. If there is excessive abrasion or wear , or if the hose is cut , it must be
replaced prior to the outdoor cooking gas appliance being put into operation. The replacement hose assembly shall be
that specified by the manufacturer..
ALWAYS ensure the area around the barbecue is clear of flammable substances such as gasoline , yard debris , wood ,
etc.
ALWAYS ensure there is no blockage of the airflow through the vent space located below the face of the unit. Keeping the
ventilation opening(s) of the cylinder enclosure free and clear from debris.
••
••
••
••
••
••
(此分需要研发据产品不同而进行减或更换调整)
USING ROTISSERIE BURNER
24
Use a portable meat thermometer to check internal doneness of the food.
Turn off rotisserie burner when meat thermometer reads 5°F/3°C lower than desired internal temperature. Continue rotating,
hood closed, for 10 minutes before carving.
Cooking Time can be affected by weather conditions such as wind and outside temperature.
Food Weight Internal Doneness or Temperature (°F/°C) Approximate Grilling Time (min/lb)
Beef
Roasts Rib Eye 4-6 lbs (1.5-2.2 kg) Medium-rare (145°F/63°C) 15-20
Sirloin Tip Rib, boneless Medium (160°F/71°C) 20-25
Poultry
Chicken
(1.1-2.2 kg) Breast (170°F/77°C) Thigh (180°F/82°C) 25-30
Turkey, whole 7-10 lbs (2.6-3.7 kg) Breast (170°F/77°C) Thigh (180°F/82°C) 11-20
Lamb
Boneless leg 4-7 lbs (1.5-2.6 kg) Medium (160°F/71°C) 20-25
Pork
Loin roast, boneless 4-6 lbs (1.5-2.2 kg) Medium (160°F/71°C) 20-23
TIPS FOR OUTDOOR GRILLING
WARNING
Food Poisoning Hazard
Do not let food sit for more than one hour before or after cooking.
Doing so can result in food poisoning or sickness.
Before Grilling
Thaw food items before grilling.
Preheat grill on high (use all grill burners)for 10 minutes.The hood must be closed during preheating.Preheating
provides the high heat needed to brown and seal the juices.
Shorten the preheat time when grilling high-fat cuts of meat or poultry,such as chicken thighs.This will help
reduceflare-ups. Lightly oil the grill grates or the food when cooking low-fat cuts of meat,fish or poultry,such as lean
hamburger patties,shrimp or skinless chicken breasts.
Using too much oil can cause gray ash to deposit on food.
Trim excess fat from meats prior to cooking to reduce flare-ups.
Make vertical cuts at 2"(5.0 cm)intervals around the fat edgeof meat to avoid curling.
Add seasoning or salt only after the cooking is finished.
••
••
••
••
••
••
••
(此分需要研发据产品不同而进行减或更换调整)
ROTISSERIE CHART
COOKING TIPS

25
Turn foods only once.Juices are lost when meat is turned several times.
Turn meat just when juices begin to appear on the surface.
Avoid puncturing or cutting the meats to test doneness.This allows juices to escape.
It may be necessary to lower the heat setting for foods thatcook a long time or are marinated or basted in a sugary sauce.
If using a high flame,add barbecue sauce only during the last 10 minutes of cooking to avoid buming the sauce.
The degree of doneness is influenced by the type of meat,cutof meat(sizeshape and thickness)heat seting selected,and
length of time on the grill.
Cooking time will be longer with an open grill cover.
Cooking Methods
Direct Heat
Cooking by direct heat means the food is placed on grill grates directly above lighted burners. Hood position can be up or down.
Indirect Heat
For best results,do not select the indirect heat cooking method when it is windy.
Cooking by indirect heat means the food is placed on the grillgrate above an unheated burner,allowing heat from
lighted burner(s)
If possible,turn on 2 burners. Cook with the hood down.This will shorten the cooking time.
During Grilling
••
••
••
••
••
••
••
(此分需要研发据产品不同而进行减或更换调整)
If hood is in the up position, total cooking times may be longer.Direct heat sears the food. Searing is a process that seals natural
juices in food by cooking with intense heat for a short period of time. While juices stay inside, the outside is browned with a flavorful
grilled coating.
lighted burner(s)on either side to cook the food.
COOKING TIPS

26
Grilling Chart
Knobs have High, Medium and Low settings for flame adjustment.
Heat settings indicated are approximate.
Grilling times are affected by weather conditions.
When 2 temperatures are listed,for example:Medium to Medium-Low,start with the first and adjust based on cooking
progress.
Cooking times may vary from chart times depending on the type of fuel,Natural or LP gas.
FOOD
COOKING METHOD/
BURNER SETTING
INTERNAL TEMP.
TIME
(total
minutes)
SPECIAL INSTRUCTIONS
Beef
Hamburgers
0.5"
to 3/4" thick DIRECT Medium
Medium
(160°F/71°C)
10-15 Grill, turning once.
Roasts Rib Eye, Sirloin
INDIRECT
Medium/OFF/Medium
Med-Rare
(145°F/63°C) to
Medium
(160°F/71°C)
32-40 per
lb
Tent with foilfirst 45-60 minutesof
cooking time.
Steaks,1"
Porterhouse,Rib,T-bone,Top
Loin,Sirloin
DIRECT Medium
Med-Rare
(145°F/63°C) to
Medium
(160°F/71°C)
11-16
Rotate steaks 1/4 turn to create criss-
Steaks,
1.5"Porterhouse,Rib,T-bone,Top
Loin,Sirloin
DIRECT Medium
Med-Rare
(145°F/63°C) to
Medium
(160°F/71°C)
18-25
Top Round or
Shoulderl/Chuck(London Broil)
1.5"thick
DIRECT Medium
Med-Rare
(145°F/63°C) to
Medium
(160°F/71°C)
22-29
COOKING RECIPES
Flank 1/2" thick DIRECT Medium
Med-Rare
(145°F/63°C)
11-16
••
••
••
••
••
(此分需要研发据产品不同而进行减或更换调整)
cross grill marks.

27
FOOD
COOKING METHOD/
BURNER SETTING
INTERNAL TEMP.
TIME
(total
minutes)
SPECIAL INSTRUCTIONS
Pork
Chops 1" DIRECT
Medium
(160°F/71°C)
12-22
1.5" thick
DIRECT Medium to
Med-Low
Medium
(160°F/71°C)
30-40
Ribs 1.5-4 lbs(0.9-1.5 kg) INDIRECT Med/OFF/Med
Medium
(160°F/71°C)
40-60
Grill,turning occasionally.During last
few minutes brush with barbecue
sauce if desired.When done,wrap in
foil.
Roast boneless tenderloin,1Ib(0.37
kg)
DIRECT Medium
Medium
(160°F/71°C)
18-22
Turn during cooking to brown on all
sides.
Ham half,8-10 Ibs(3-3.7 kg) INDIRECT Med/OFF/Med
Reheat
(140°F/60°C)
2-2.5
hours
Wrap entire ham in foil and put on
grill
without pan or drip pan.
Ham steak precooked 0.5"(1.3
cm)thick
DIRECT Preheat
Medium
Reheat
(145°F/63°C)
7-10
Hot Dogs DIRECT Medium
Reheat
(145°F/63°C)
5-10
Slit skin if desired.
Chicken
Breast boneless DIRECT Medium 170°F/77°C 15-22
For even cooking, pound the breast to
Pieces,2-3 Ibs(0.75-1.1 kg) DIRECT Med-Low to
Medium
Breast
170°F/77°C Thigh
180°F/82°C
Start bone side down.
(此分需要研发据产品不同而进行减或更换调整)
COOKING RECIPES
2.0 cm thick.

28
FOOD
COOKING METHOD/
BURNER SETTING
INTERNAL TEMP.
TIME
(total
minutes)
SPECIAL INSTRUCTIONS
Lamb
Chops and Steaks,Loin,Rib,Sirloin
1" thick DIRECT Medium
Med-rare
(145°F/63°C) to
Medium
(160°F/71°C)
10-20
thick
DIRECT Medium
Med-rare
(145°F/63°C) to
Medium
(160°F/71°C)
16-20
FOOD
COOKING METHOD/
BURNER SETTING
INTERNAL
TEMP.
TIME (total
minutes)
SPECIAL INSTRUCTIONS
Fish and Seafood
Fillets,Steaks,Chunks
Halibut,Salmon,Swordfish,8
oz(0.25 kg)
DIRECT
Medium
4-6 per
1/2"
thickness
Grill,turning once.Brush grill with oil to keep fish
from sticking. Remove when inside isopaque and
flaky with skin easily removed.
Whole,Catfish,Rainbow
Trout,8-11 oz(0.25-0.34 kg)
DIRECT High
5-7 per
side
Shellfish,Scallops,Shrimp DIRECT Medium 4-8
Turkey
Whole breast (bone-in) INDIRECT HI/OFF/HI 170°F/77°C
14-18 per
lb
30 minutes of cooking time.
Half breast bone-in
INDIRECT
Medium/OFF/Medium
170°F/77°C
25-30 per
lb
Start skin side down.
Whole 7-12 lbs INDIRECT HI/OFF/HI
Breast
170°F/77°C
Thigh
180°F/82°C
11-16 per
lb
Less than 11 Ibs.
(此分需要研发据产品不同而进行减或更换调整)
1.5"
of fish
Tent with foil until last
COOKING RECIPES

29
FOOD
COOKING METHOD/
BURNER SETTING
INTERNAL
TEMP.
TIME (total
minutes)
SPECIAL INSTRUCTIONS
Fresh Vegetables
Corn on the cob DIRECT Medium 20-25
Soak in cold water 20 minutes. Do not husk. Shake off
excess water.
Eggplant DIRECT Medium 7-10
Wash and cut into 0.5" slices or
lengthwise. Brush with olive oil.
Onion 0.5"thick
DIRECT Medium 8-20
Grill,turning once.Brush with olive oil. Put a skewer
through several slices to hold together.
Potatoes,
Sweet,whole DIRECT Medium 40-70
Individually wrap in heavy-dutyfoil. Grill,rotating
occasionally.
Baking,whole DIRECT High 45-90
Peppers Roasted DIRECT High 15-22
Wash and place on grill whole. Char skin all
around. Cool in a paper bag or plastic wrap to loosen
blackened skin. Peel and remove seeds.
Squash,
Summer,Zucchini DIRECT Medium 7-10
Wash and cut into 0.5" slices or
lengthwise Brush with olive oil.
Garlic Roasted DIRECT Medium 20-25
Cut off top,drizzle with olive oil and wrap in double
layer of foil.
(此分需要研发据产品不同而进行减或更换调整)
COOKING RECIPES
30
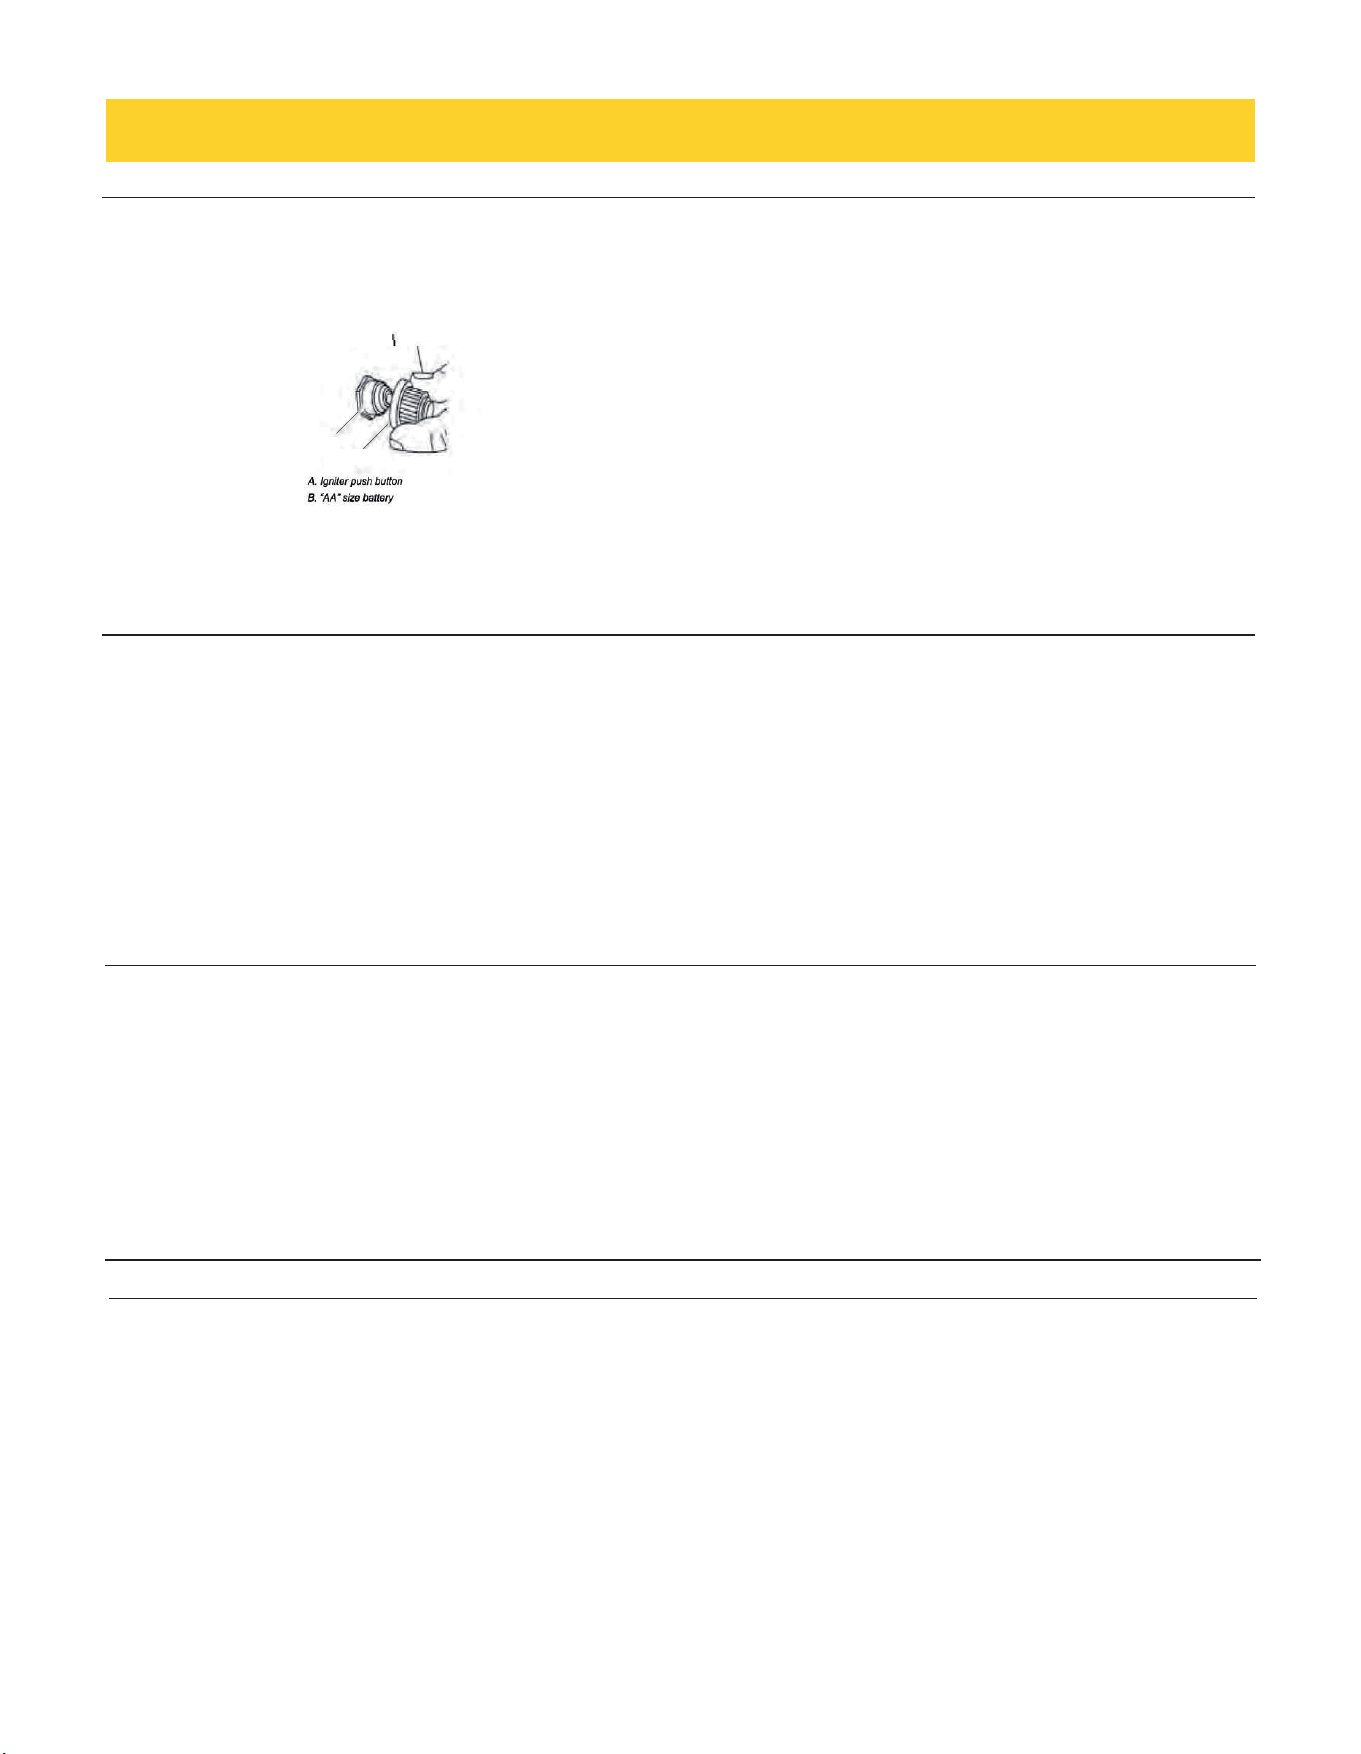
Replacing the IgniterBattery
If igniters stop sparking, the battery should be replaced.
1.Unscrew igniter button cap counterclockwise to remove.
2.Remove battery from the battery compartment.
3.Replace with a new alkaline "AA" size battery. Install battery with negative end in first.
4.Screw igniter button cap clockwise into place.
General Cleaning
IMPORTANT:Before cleaning,make sure all controls are off and the grillis cool. Always follow label instructions on
cleaning products.
For routine cleaning,wash with soap and water using a soft cloth or sponge. Rinse with clean water and dry at once with a
softlint-free cloth to avoid spots and streaks.
Do not use steel wool to clean the grill,as it will scratch the surface.
GRILL GRATES
WARMING RACK
Cleaning Method:
Liquid detergent or an all-purpose cleaner.
Rinse with clean water and dry with soft, lint-free cloth.
For tough spots or baked-on grease,use a commercial degreaser designed for stainless steel.
IMPORTANT:Make sure gas supply is off and all control knobs are in the
off
position.
OUTDOOR GRILL CARE
••
••
••
(此分需要研发据产品不同而进行减或更换调整)
B
A
IMPORTANT: To avoid damage to grill grates, do not use a steel or fiber scraper. Immediately after you are finished cooking,
loosen food soil with a brass bristle brush. Turn all burners to HI for 10
-15 minutes with the hood closed to burn off food soil.
Turn off al l burners, raise the hood and let grates cool. Use the brass bristle brush to remove ash from the grill grates. When
completely cool, grill racks can be removed for thorough cleaning. Clean them with a mild detergent and warm water. For
baked-on food, prep are a solution of 1 cup (250 ml) ammonia to 1 gal. (3.75 L) water. Soak grates for 20 minutes, then rinse
with water and dry completely.
31
EXTERIOR
The quality of this material resists most stains and pitting providing that the surface is kept clean,polished and covered
Apply stainless steel polish to all non-cooking areas before first use. Reapply after each cleaning to avoid
damage to surface.
BURNERS
Cleaning Method:
Clean the exterior of the burner with a wire brush.
Clear any clogged burner ports with a straightened paper clip.
Do not use a toothpick as it may break off and clog the port.
Check and clean burner/venturitubes.
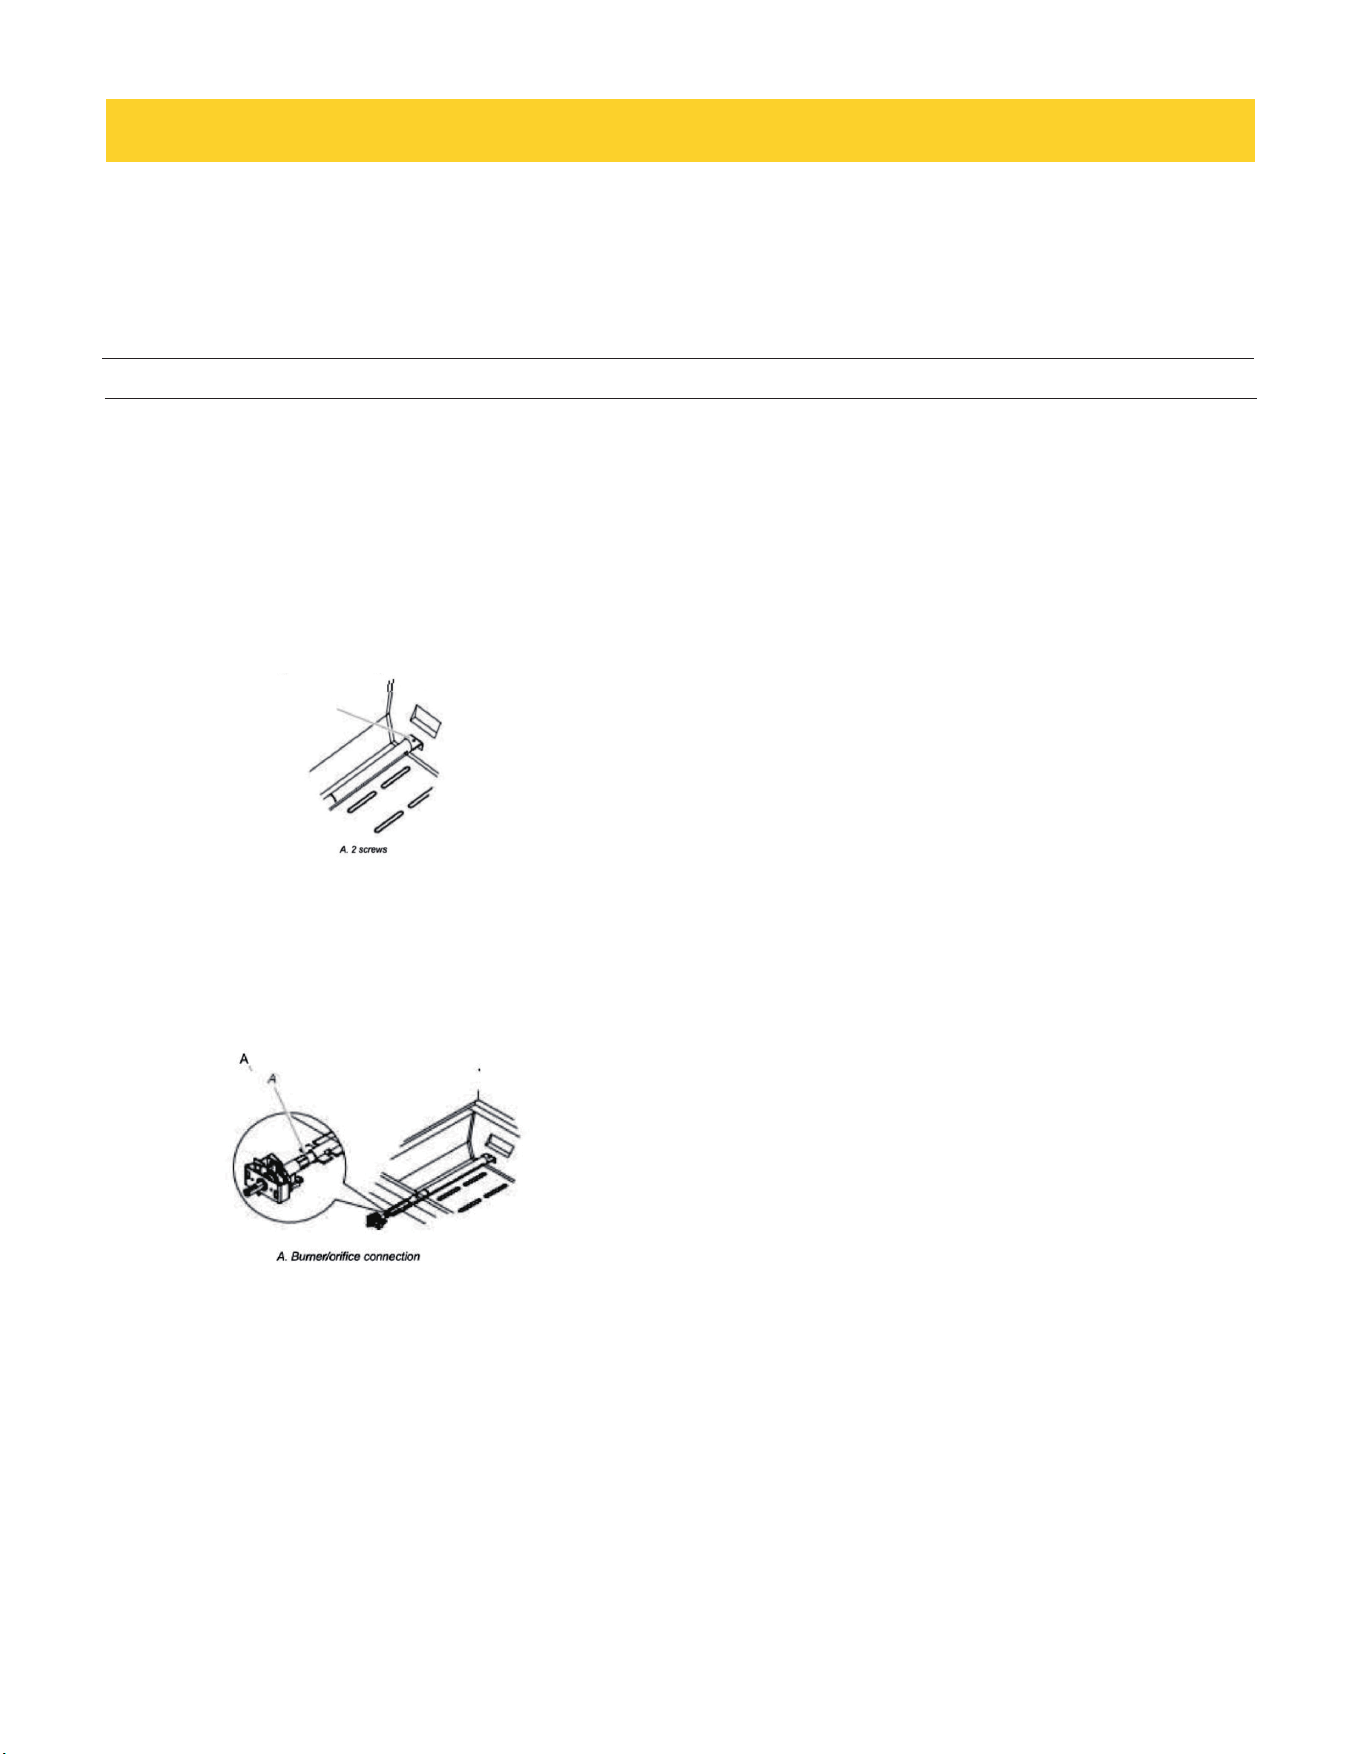
1. Remove grill grates and flame tamers.
2. Remove the 2 screws that hold the burner in place. Remove gas burner from the grill.
3.Use a flashlight to inspect into the burner through the burner inlet to ensure there is no blockage. If any obstruction is
seen,use a metal coat hanger that has been straightened to clear them.
4.After inspecting the inside of burner for blockage,reassemble burner by sliding the middle tube of the gas burner over the gas
orifice.
5. Reattach gas burner using 2 screws.
OUTDOOR GRILL CARE
••
••
••
••
••
(此分需要研发据产品不同而进行减或更换调整)
permanent
A

32
Cleaning Method:
1.Light the rotisserie burner.
2.Close the grill hood.
3.Leave the burner on high for approximately 30 minutes.
4.Turn knob to OFF and let cool completely.
5.Brush off ash particles from the rotisserie burner.
DRIP TRAY
IMPORTANT:The drip tray should only be removed when grill is completely cool.
The full-width drip tray collects grease and food particles that fall through the grill. Clean often to avoid grease build up.
Cleaning Method:
Remove tray and set on a flat surface.
Wipe excess grease with paper towels.
Mild detergent and warm water. Rinse and dry thoroughly.
Replace tray.
KNOBS AND FLANGE AREA AROUND KNOBS
IMPORTANT:To avoid damage to knobs or flange area aroundknobs,do not use steel wool,abrasive cleaners,or oven cleaner. Do
not soak knobs.
Cleaning Method:
Mild detergent,a soft cloth and warm water.
Rinse and dry.
CONTROL PANEL GRAPHICS
IMPORTANT:To avoid damage to control panel graphics,do not use steel wool,abrasive cleaners or oven cleaner.
Do not spray cleaner directly onto panel.
Cleaning Method:
Clean around the burner labels gently;scrubbing may remove printing.
Mild detergent,soft cloth and warm water.
Rinse and dry.
OUTDOOR GRILL CARE
ROTISSIERE BURNER
••
••
••
••
••
••
••
••
••
(此分需要研发据产品不同而进行减或更换调整)
33
Grill does not light.
Is the propane tank valve turned off?
Turn on the valve.
Is the grill properly connected to the gas supply?
Check installation instructions. For further inquiries,please contact Thor Kitchen Technical Support at 877-288-8099 or email
service@thorinternational.com
Is there any gas in propane tank?
Check the gas level before using the grill.
Is the igniter working?
Check if the igniter battery is properly installed also check if the battery needs to be replaced.
Check if the grill will be lit by match.
Check if there's any debris blocking the electrode.
If the igniter is not sparking at the tip of the electrode, you might need to replace the igniter.
Flame is noisy, low or erratic
Is the gas supply fully turned on?
Check if the propane tank valve is fully open.
Is the gas supply in the propane tank low?
Does only one burner appear low?
Check and clean the burner if it's clogged or dirty.
Is the gas supply hose bent or kinked?
Straighten the gas supply hose.
Is the noisy or lifting away from the burner?
Burner may be getting too much air. Check the air shutter adjustment.
Grill may be in an area that is too windy, or not receiving enough air. Check the burner air inlets for obstructions.Check the air
shutter adjustment.
Is there excessive fat in the food being grilled?
Keep flame on low or turn one burner off. Keep the hood up when grilling to avoid excessive flare-ups. Move food to the warming
rack until flames subside.To avoid damage to the grill, do not spray water on gas flames.
TROUBLESHOOTING
Check the gas level.
34
Low heat LP Gas
For outdoor grills using a propane tank,slowly open the tank valve.
NOTE: If flow Limiting device activates,your grill may not light. If your grill does Light, the flames will be low and will not heat
properly.
1. Turn tank valve and all control knobs off and wait 30 seconds.
2. After shutting off the tank, slowly open the tank valve and wait 5 seconds before lighting.
3. Light one burner at a time.
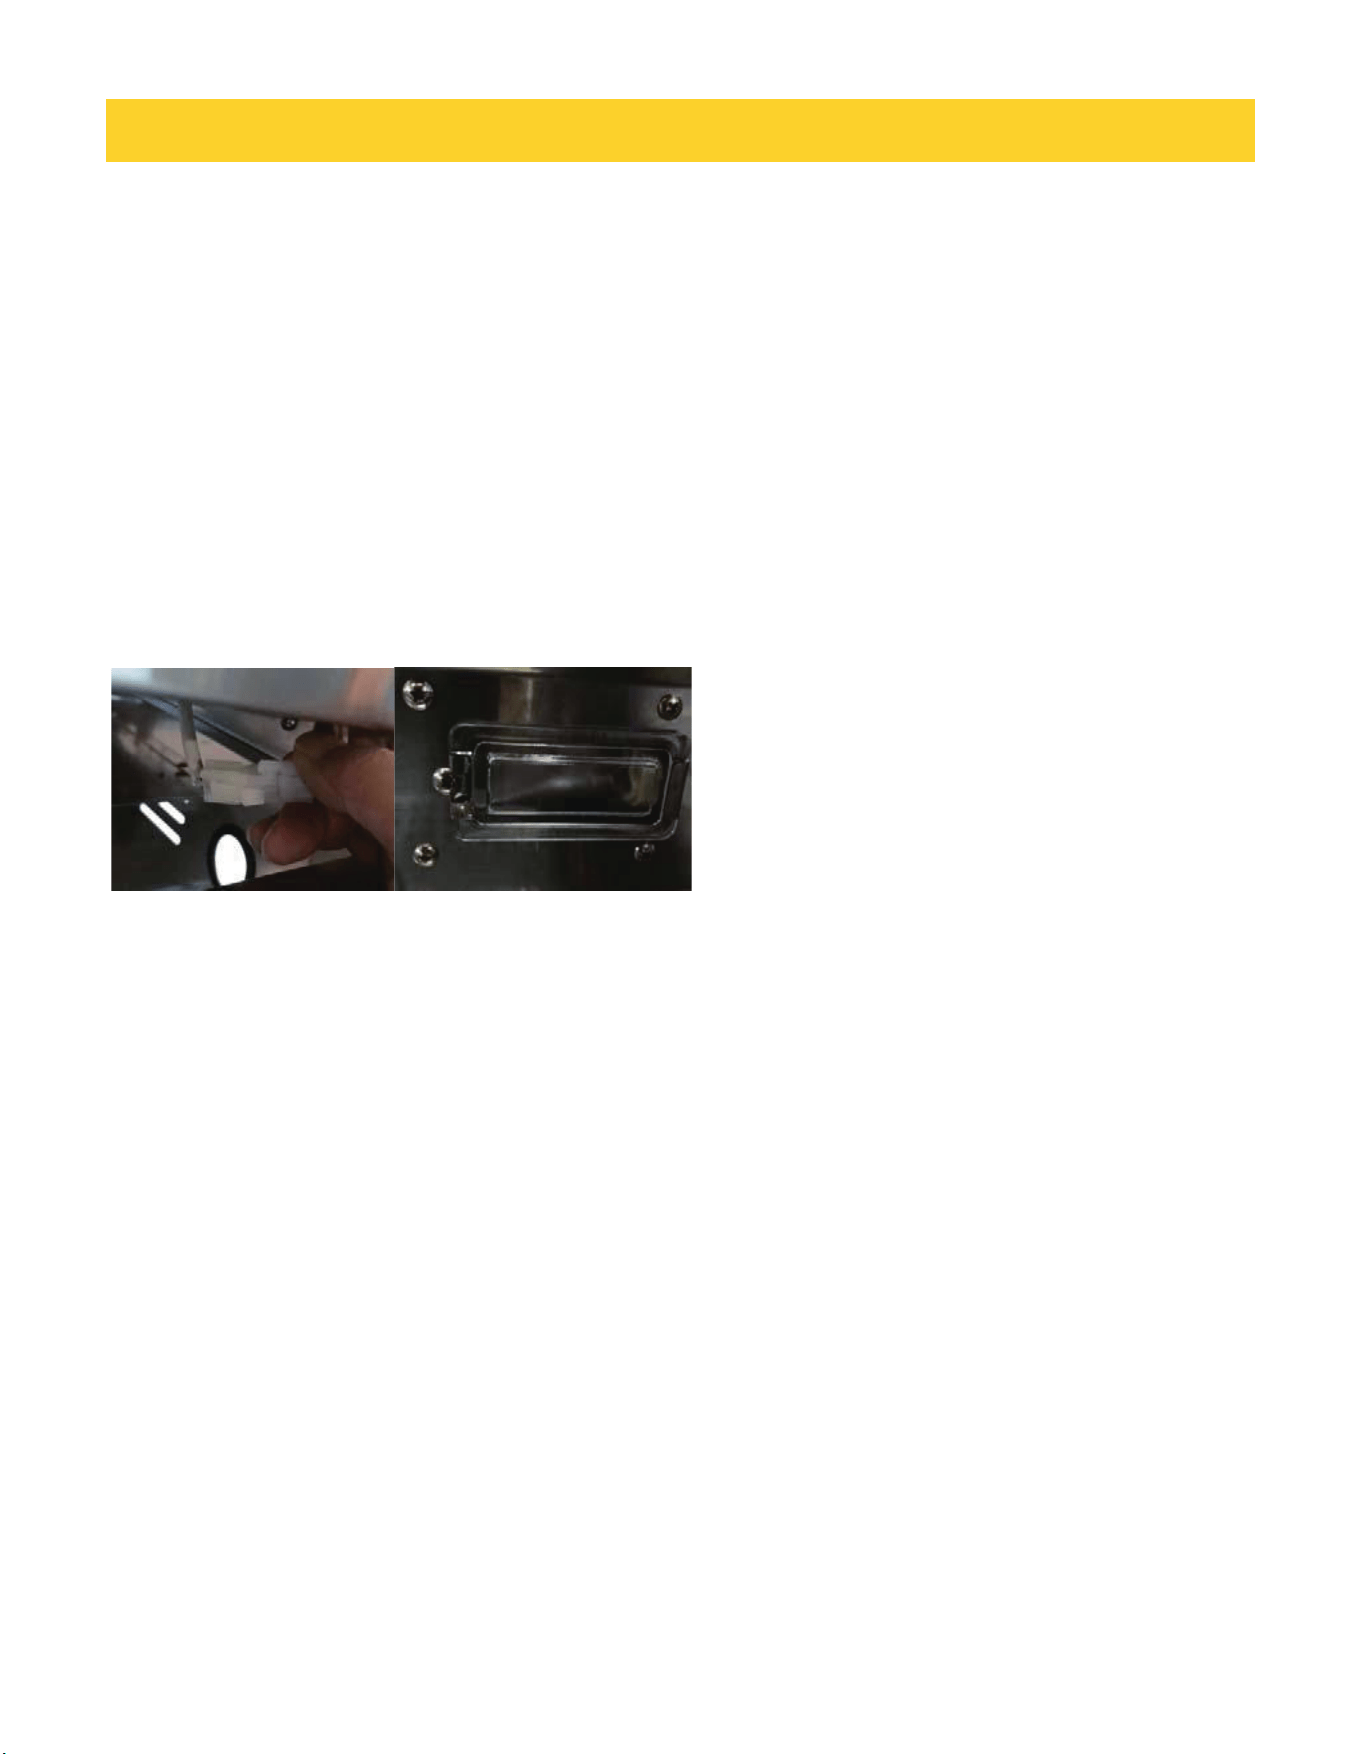
Replacing light bulb
1. Take out the grease tray and find the connect or of grill Light
bulb.
2. Take out the 5 screws on the lamp cover to get access to the bulb.
TROUBLESHOOTING

35
WARRANTY
Warranty&Service
This appliance has been manufactured by Thor International, 10830 Ada Ave, Montclair, CA 91763 United
States.
For Customer Service, please call (877) 288 - 8099
For the most up to date warranty and service policy, please refer to our website
WWW.THORKITCHEN.COM/WARRANTY-REGISTRATION
For in-warranty service requests, please visit our website at
WWW.THORKITCHEN.COM/SERVICE
Please Note: You must provide proof of purchase or installation date for any in-warranty service
requests

Warranty Registration
Made Easy.
We Stand Behind
the Quality of Our
Appliances.
Reliability and customer satisfaction are our top priorities. We offer a
solid two-year warranty on both parts and labor. Enjoy professional-grade
performance with the condence that we’ve got you covered.
01
02
03
Scan the QR Code or visit thorkitchen.
com/register-your-product.
Input your purchase and product
information and select register.
That’s it. You’re all set.
Enjoy!
WARRANTY
PARTS
Questions: [email protected]