Read all instructions before assembling and using product.
IMPORTANT - Keep Instructions for future use.
1224R1-SKU 6587
Owner’s Manual
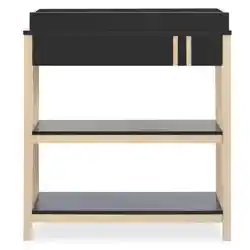
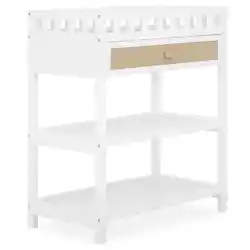
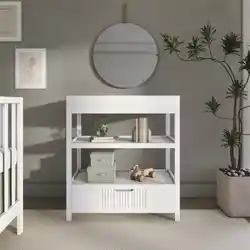
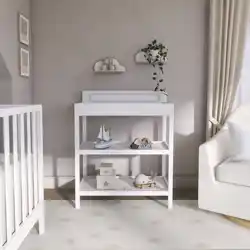
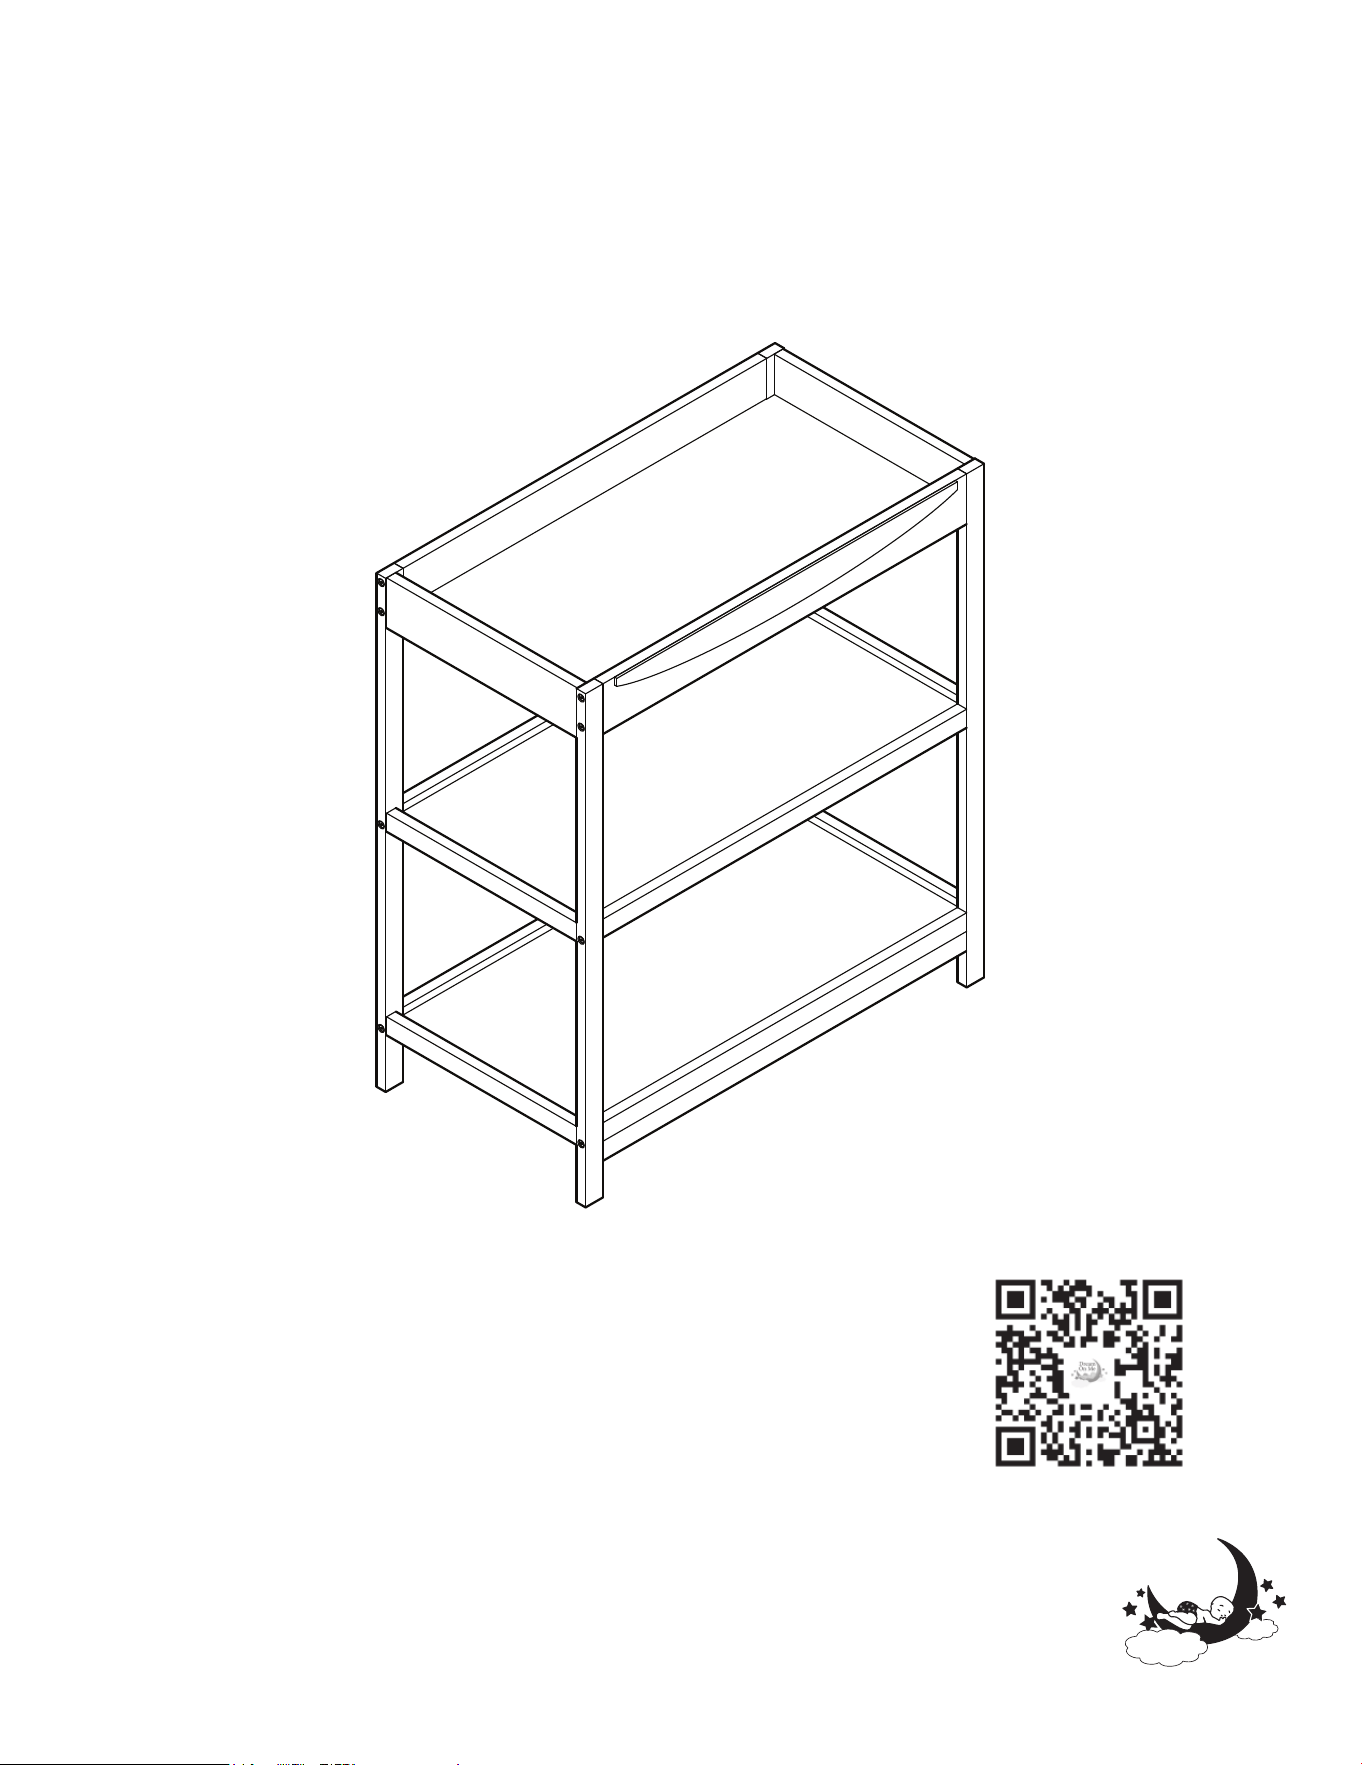
Emerson Changing Table
Scan the QR code to register your product
Scannez le code QR pour enregistrer votre produit
Escanee el código QR para registrar su producto
https://dreamonme.com/customercare/registration/
Manuel du propriétaire
Lisez toutes les instructions avant avant
d'assembler et d'utiliser le produit.
IMPORTANT - Conservez les instructions
pour pour une utilisation ultérieure.
Lea todas las instrucciones antes de
montar y utilizar el producto.
IMPORTANTE - Guarde las
instrucciones para uso futuro.
Manual del usuario
2
www.dreamonme.com/help
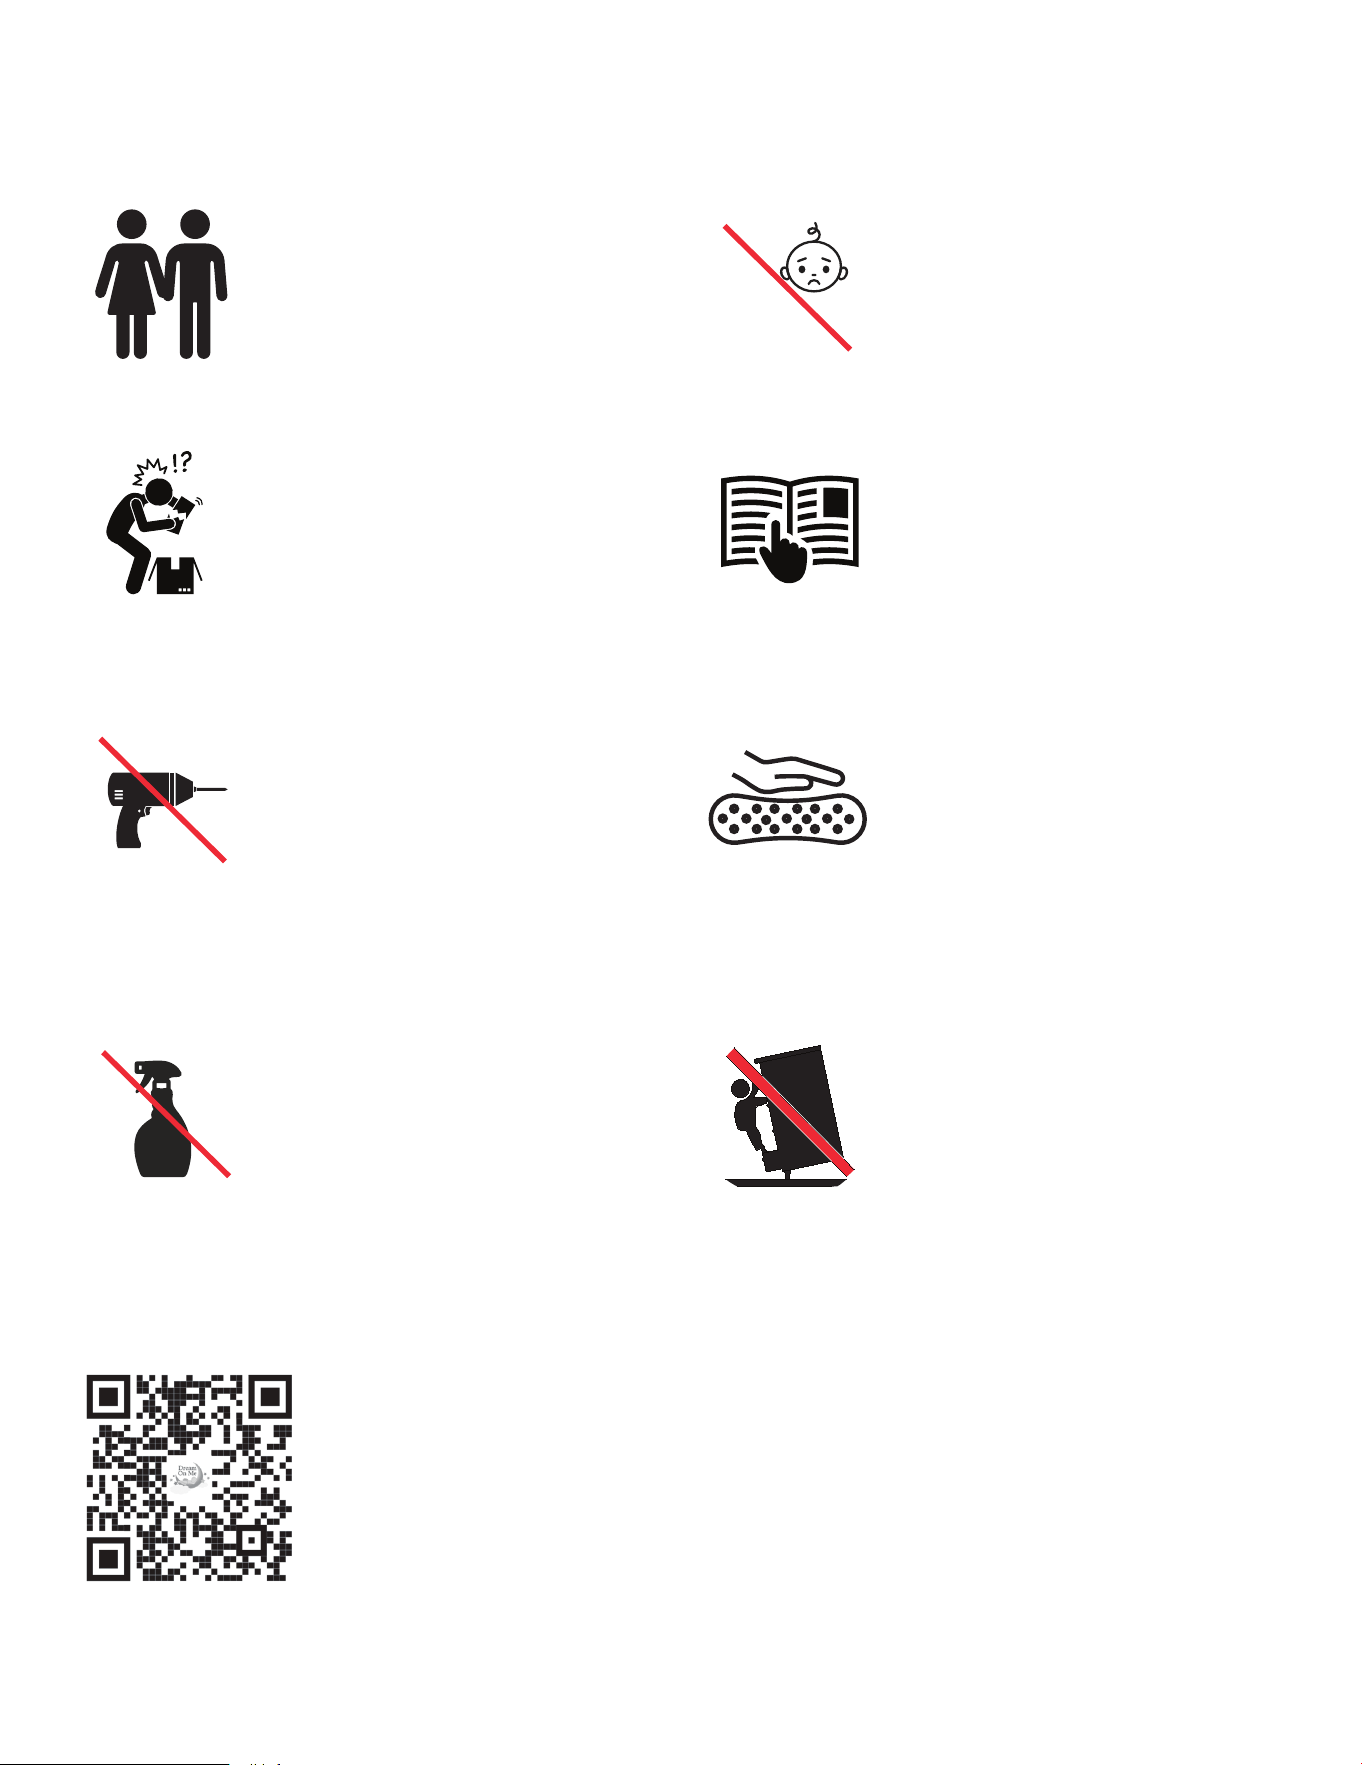
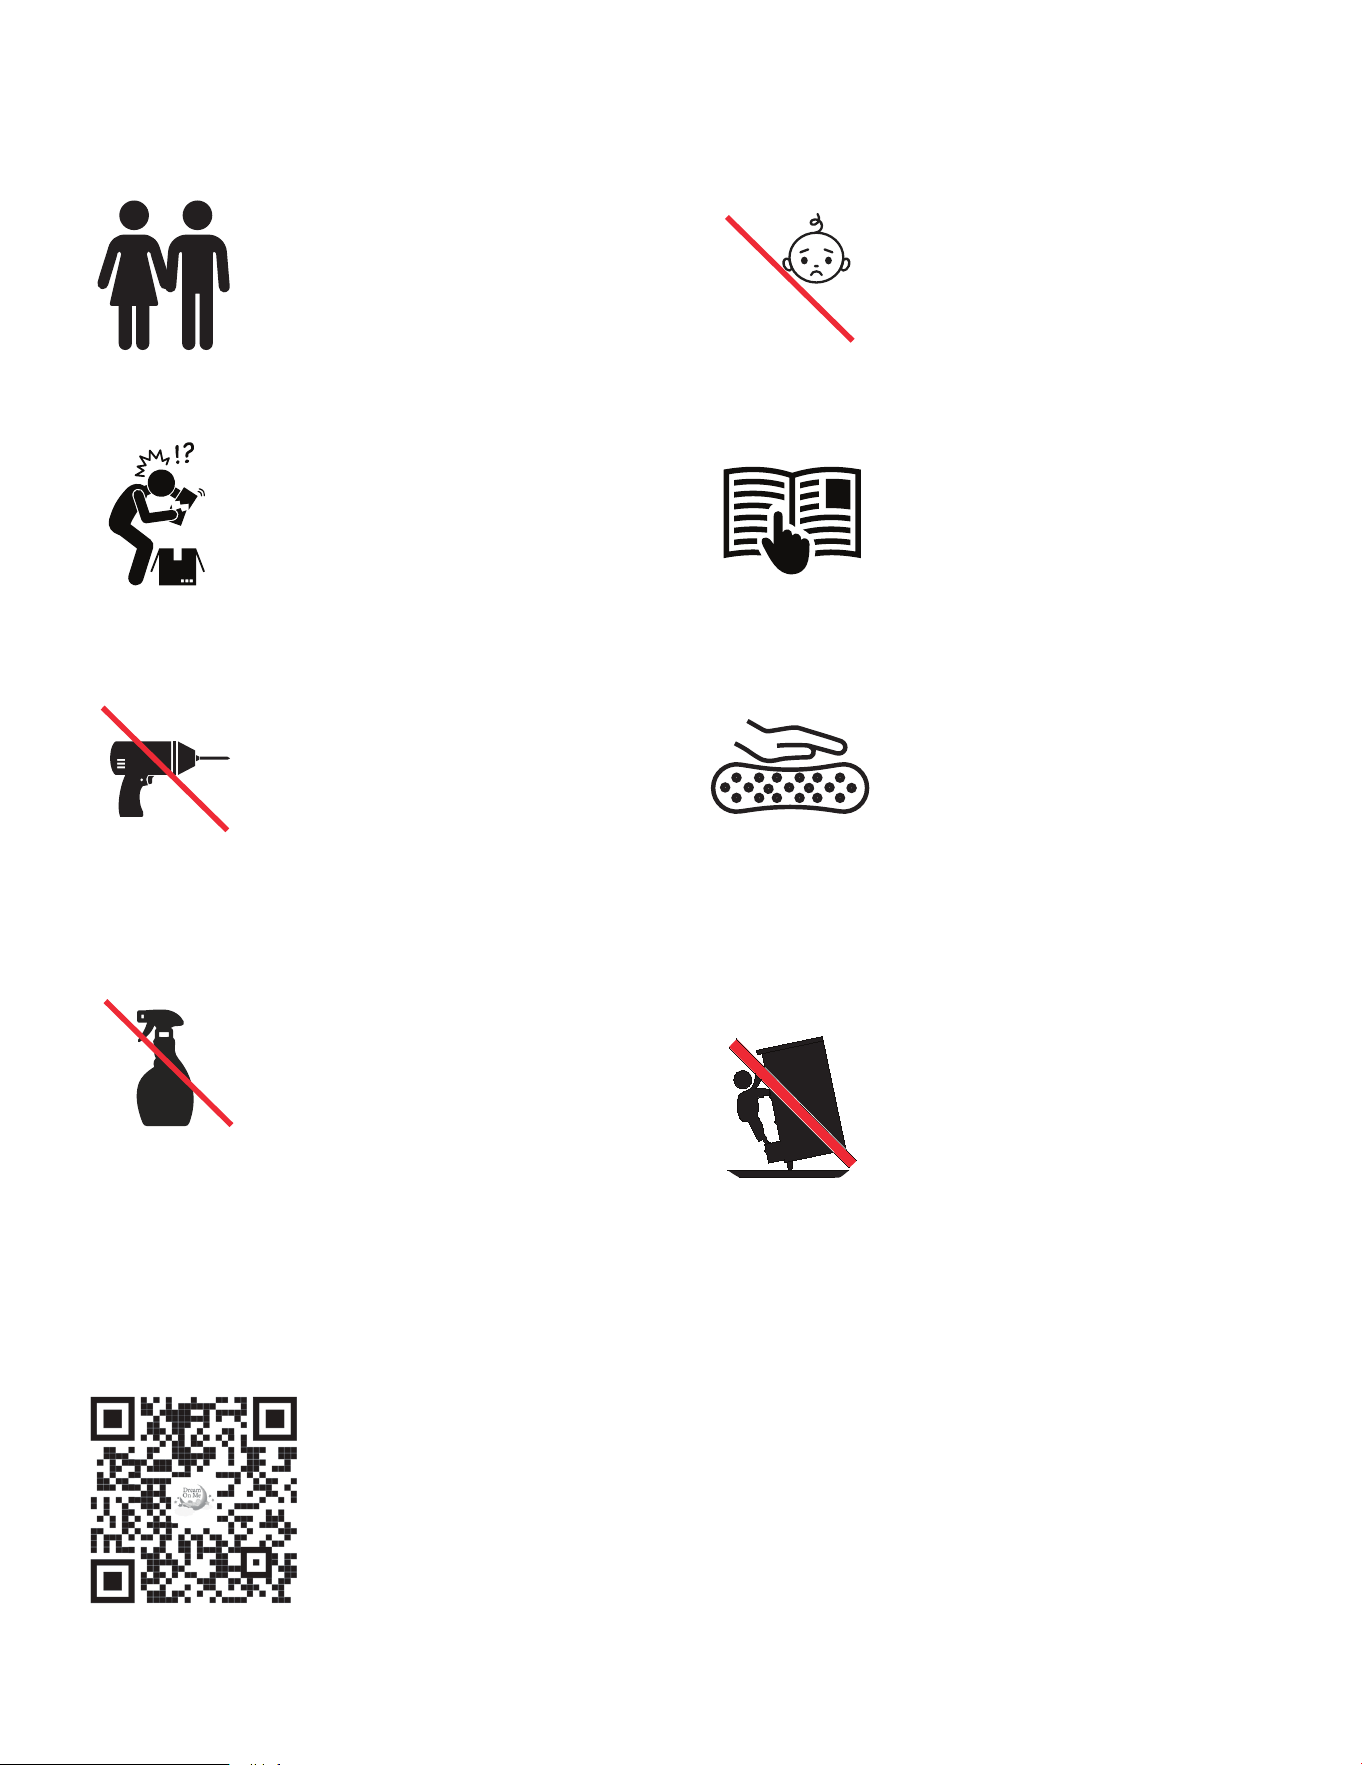
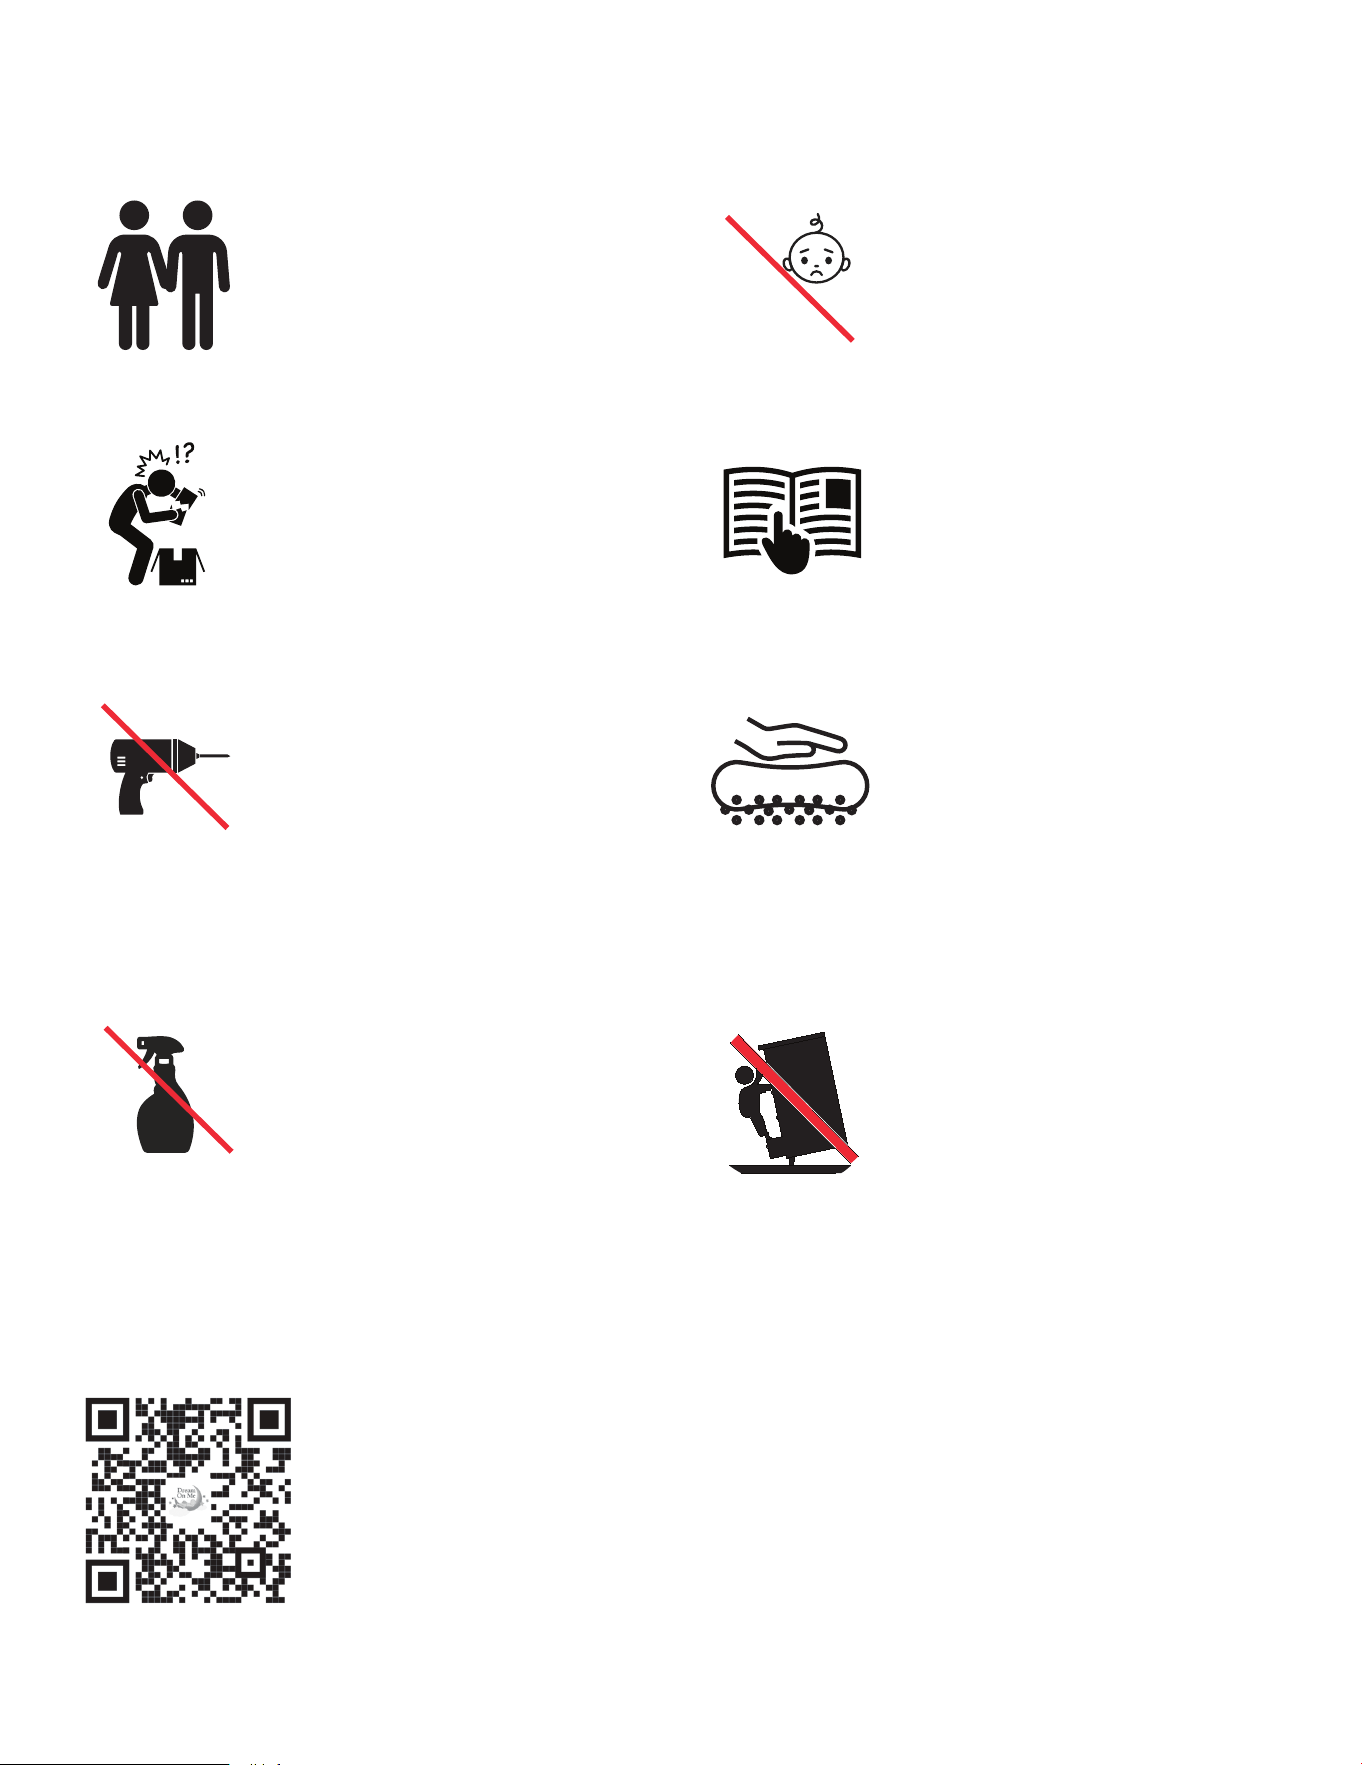
SAFETY TIPS
Contact Dream On
Me Inc in case of
any assistance
needed.
Adult Assembly
Required.
DO NOT use the
product if it is
damaged, broken,
and/or components are
missing or broken.
To protect your parts
during assembly,
please place them on a
soft surface.
Small parts may
present choking
hazard prior to
assembly.
Please read the
instructions
thoroughly. Identify all
parts & hardware.
Do Not Use Power
Drills or Drivers.
To clean surface, use
only water on a damp
cloth. Do not use
window cleaner or
cleaning abrasive as it
will scratch the surface
and could damage the
protective coating.
0-6
Always monitor your
child’s activity in the
nursery or near
furniture.
3
www.dreamonme.com/help
Contactez Dream On
Me Inc en cas de besoin
d'assistance.
L'assemblage par un
adulte est
nécessaire.
N'utilisez PAS le produit
s'il est endommagé,
cassé, et/ou si des
composants sont
manquants ou cassés.
Pour protéger vos
pièces pendant
l'assemblage, veuillez
les placer sur une
surface souple.
Les petites pièces
peuvent présenter un
risque d'étouffement
avant l'assemblage.
Veuillez lire
attentivement les
instructions. Identifiez
toutes les pièces et le
matériel.
N'utilisez pas de
perceuse ou de
visseuse électrique.
Pour nettoyer la
surface, utilisez
uniquement de l'eau sur
un chiffon humide.
N'utilisez pas de
nettoyant pour vitres ou
d'abrasif de nettoyage,
car cela rayerait la
surface et pourrait
endommager le
revêtement protecteur.
0-6
Surveillez toujours
l'activité de votre
enfant dans la
chambre d'enfant ou à
proximité des meubles.
CONSEILS DE SÉCURITÉ
4
www.dreamonme.com/help
Contacte con Dream On
Me Inc en caso de
necesitar ayuda.
Se requiere el
montaje por parte de
un adulto.
NO utilice el producto si
está dañado, roto y/o
faltan componentes o
están rotos.
Para proteger las
piezas durante el
montaje, colóquelas
sobre una superficie
blanda.
Las piezas pequeñas
pueden presentar
peligro de asfixia
antes del montaje.
Lea detenidamente las
instrucciones.
Identifique todas las
piezas y herrajes.
No utilice taladros o
atornilladores
eléctricos.
Para limpiar la
superficie, utilice sólo
agua en un paño
húmedo. No utilice
limpiacristales ni
productos abrasivos de
limpieza, ya que rayarán
la superficie y podrían
dañar el revestimiento
protector.
0-6
Vigile siempre la
actividad de su hijo en
la guardería o cerca de
los muebles.
CONSEJOS DE SEGURIDAD

5
www.dreamonme.com/help
WARNINGS
• FOLLOW INSTRUCTIONS: READ ALL INSTRUCTIONS BEFORE ASSEMBLING THE CHANGING
TABLE. KEEP INSTRUCTIONS FOR FUTURE USE. DO NOT USE THIS CHANGING TABLE IF THE
INSTRUCTIONS CANNOT BE STRICTLY FOLLOWED.
• INSPECTION BEFORE USE: BEFORE EACH USE OR ASSEMBLY, INSPECT THE UNIT FOR
DAMAGED HARDWARE, LOOSE JOINTS, MISSING PARTS, OR SHARP EDGES. DO NOT USE THE
UNIT IF ANY PARTS ARE MISSING OR DAMAGED.
• PART REPLACEMENT: REACH DREAM ON ME FOR REPLACEMENT PARTS AND INSTRUCTIONAL
LITERATURE IF NEEDED. DO NOT SUBSTITUTE PARTS.
• ASSEMBLY PRECAUTIONS: DURING THE ASSEMBLY PROCESS WHENEVER USING SCREWS OR
BOLTS, CHECK EACH BY PLACING THE SCREW/BOLT ON THE DIAGRAM OF THE ITEM THAT IS
DRAWN TO THE ACTUAL SIZE AND DESIGN. BE SURE TO USE THE PROPER SIZE AND SHAPE
SPECIFIED IN THE INSTRUCTIONS.
• ASSEMBLY SURFACE: IT IS STRONGLY RECOMMENDED THAT ASSEMBLY BE DONE ON A
SOFT, NON-ABRASIVE SURFACE TO AVOID DAMAGING THE FINISH.\
• KEEP CHILDREN AND OTHERS SAFE BY FOLLOWING THESE SIMPLE RULES:
• DO NOT ALLOW ANY CHILD TO PLAY ON FURNITURE.
• DO NOT ALLOW CLIMBING ON ANY PIECE OF FURNITURE.
• DO NOT ALLOW HANGING FROM ANY PIECE OF FURNITURE.
• ALWAYS MONITOR YOUR CHILD'S ACTIVITY WHEN IN THE NURSERY.
• CHOKING HAZARD: CHOKING HAZARD: KEEP UNASSEMBLED PARTS OUT OF THE REACH OF
SMALL CHILDREN.
• FALL HAZARD: CHILDREN HAVE SUFFERED SERIOUS INJURIES AFTER FALLING FROM
CHANGING TABLES. FALLS CAN HAPPEN QUICKLY.
• STAY WITHIN ARM'S REACH OF YOUR CHILD.
• TO PREVENT DEATH OR SERIOUS INJURY, ALWAYS KEEP THE CHILD WITHIN ARM'S REACH.
• NEVER LEAVE THE CHILD UNATTENDED.
• USE ONLY THE PAD PROVIDED BY THE MANUFACTURER.
• MAXIMUM WEIGHT OF CHILD: 30 POUNDS (13.6 KG).
• DO NOT ALLOW ANY CHILDREN TO CLIMB OR PLAY ON THE TABLE.
• SUFFOCATION HAZARD: BABIES HAVE SUFFOCATED WHILE SLEEPING IN CHANGING TABLES:
CHANGING TABLES ARE NOT DESIGNED FOR SAFE SLEEP. NEVER ALLOW THE BABY TO SLEEP
ON THE CHANGING TABLE.
• STRANGULATION HAZARD: STRINGS CAUSE STRANGULATION!
• DO NOT PLACE ITEMS WITH A STRING AROUND A CHILD'S NECK, SUCH AS HOOD STRINGS OR
PACIFIER CORDS.
• DO NOT SUSPEND STRINGS OVER A CHANGING TABLE OR ATTACH STRINGS TO TOYS.
• TO HELP PREVENT STRANGULATION, TIGHTEN ALL FASTENERS. A CHILD CAN TRAP PARTS OF
THE BODY OR CLOTHING ON LOOSE FASTENERS.
• DO NOT PLACE THE CHANGING TABLE NEAR THE WINDOW WHERE CORDS FROM BLINDS OR
DRAPES MAY STRANGLE A CHILD.
• INFANTS CAN SUFFOCATE ON SOFT BEDDING. NEVER ADD A PILLOW, COMFORTER, OR
PADDING. NEVER PLACE ADDITIONAL PADDING UNDER THE INFANT.
• NEVER USE PLASTIC SHIPPING BAGS OR ANY PLASTIC FILM AS MATTRESS COVERS,
BECAUSE THEY CAN CAUSE SUFFOCATION. C
• CAUTION: USE ONLY THE CONTOURED CHANGING PAD PROVIDED BY DREAM ON ME WHICH
IS 32” (813MM) LONG BY 16" (406MM) WIDE, WITH A THICKNESS NOT EXCEEDING 1" (25MM).

6
www.dreamonme.com/help
• SUIVRE LES INSTRUCTIONS : LISEZ TOUTES LES INSTRUCTIONS AVANT D'ASSEMBLER LA TABLE À
LANGER. CONSERVEZ LES INSTRUCTIONS POUR UN USAGE ULTÉRIEUR. N'UTILISEZ PAS CETTE
TABLE À LANGER SI LES INSTRUCTIONS NE PEUVENT PAS ÊTRE SUIVIES À LA LETTRE.
• INSPECTION AVANT UTILISATION : AVANT CHAQUE UTILISATION OU ASSEMBLAGE, INSPECTEZ
L'APPAREIL POUR VÉRIFIER QU'IL N'Y A PAS DE PIÈCES ENDOMMAGÉES, DE JOINTS DESSERRÉS, DE
PIÈCES MANQUANTES OU D'ARÊTES VIVES. NE PAS UTILISER L'APPAREIL SI DES PIÈCES SONT
MANQUANTES OU ENDOMMAGÉES.
• REMPLACEMENT DES PIÈCES : FAITES APPEL À DREAM ON ME POUR OBTENIR DES PIÈCES DE
RECHANGE ET DE LA DOCUMENTATION D'INSTRUCTION SI NÉCESSAIRE. NE PAS REMPLACER LES
PIÈCES.
• PRÉCAUTIONS D'ASSEMBLAGE : PENDANT LE PROCESSUS D'ASSEMBLAGE, LORSQUE VOUS UTILISEZ
DES VIS OU DES BOULONS, VÉRIFIEZ-LES EN LES PLAÇANT SUR LE DIAGRAMME DE L'ARTICLE QUI
EST DESSINÉ À LA TAILLE ET À LA CONCEPTION RÉELLES. ASSUREZ-VOUS D'UTILISER LA TAILLE ET
LA FORME APPROPRIÉES SPÉCIFIÉES DANS LES INSTRUCTIONS.
• SURFACE D'ASSEMBLAGE : IL EST FORTEMENT RECOMMANDÉ D'EFFECTUER L'ASSEMBLAGE SUR
UNE SURFACE DOUCE ET NON ABRASIVE AFIN D'ÉVITER D'ENDOMMAGER LA FINITION.
• ASSUREZ LA SÉCURITÉ DES ENFANTS ET DES AUTRES PERSONNES EN SUIVANT CES RÈGLES
SIMPLES :
• NE PAS LAISSER LES ENFANTS JOUER SUR LES MEUBLES.
• NE PAS PERMETTRE AUX ENFANTS DE GRIMPER SUR LES MEUBLES.
• NE PAS PERMETTRE AUX ENFANTS DE SE SUSPENDRE À UN MEUBLE.
• SURVEILLEZ TOUJOURS L'ACTIVITÉ DE VOTRE ENFANT LORSQU'IL SE TROUVE DANS LA CRÈCHE.
• RISQUE D'ÉTOUFFEMENT : RISQUE D'ÉTOUFFEMENT : GARDEZ LES PIÈCES NON ASSEMBLÉES HORS
DE PORTÉE DES JEUNES ENFANTS.
• RISQUE DE CHUTE : DES ENFANTS ONT SUBI DE GRAVES BLESSURES APRÈS ÊTRE TOMBÉS D'UNE
TABLE À LANGER. LES CHUTES PEUVENT SURVENIR RAPIDEMENT.
• RESTEZ À PORTÉE DE MAIN DE VOTRE ENFANT.
• POUR ÉVITER LA MORT OU DES BLESSURES GRAVES, GARDEZ TOUJOURS L'ENFANT À PORTÉE DE
MAIN.
• NE LAISSEZ JAMAIS L'ENFANT SANS SURVEILLANCE.
• N'UTILISEZ QUE LE COUSSIN FOURNI PAR LE FABRICANT.
• POIDS MAXIMUM DE L'ENFANT : 30 LIVRES (13,6 KG).
• NE LAISSEZ PAS LES ENFANTS GRIMPER OU JOUER SUR LA TABLE.
• RISQUE DE SUFFOCATION : DES BÉBÉS SE SONT ÉTOUFFÉS EN DORMANT DANS DES TABLES À
LANGER : LES TABLES À LANGER NE SONT PAS CONÇUES POUR UN SOMMEIL SÛR. NE LAISSEZ
JAMAIS LE BÉBÉ DORMIR SUR LA TABLE À LANGER.
• RISQUE DE STRANGULATION : LES FICELLES SONT UN FACTEUR DE STRANGULATION !
• NE PLACEZ PAS D'OBJETS MUNIS D'UNE FICELLE AUTOUR DU COU DE L'ENFANT, TELS QUE LES
CORDONS DE CAPUCHE OU DE SUCETTE.
• NE SUSPENDEZ PAS DE FICELLES AU-DESSUS DE LA TABLE À LANGER ET N'ATTACHEZ PAS DE
FICELLES AUX JOUETS.
• POUR ÉVITER LA STRANGULATION, SERREZ TOUTES LES ATTACHES. UN ENFANT PEUT COINCER DES
PARTIES DE SON CORPS OU DE SES VÊTEMENTS DANS DES ATTACHES MAL SERRÉES.
• NE PLACEZ PAS LA TABLE À LANGER PRÈS D'UNE FENÊTRE OÙ LES CORDONS DES STORES OU DES
RIDEAUX PEUVENT ÉTRANGLER UN ENFANT.
• LES NOURRISSONS PEUVENT SUFFOQUER SUR UNE LITERIE MOLLE. N'AJOUTEZ JAMAIS D'OREILLER,
DE COUETTE OU DE REMBOURRAGE. NE PLACEZ JAMAIS DE REMBOURRAGE SUPPLÉMENTAIRE
SOUS LE NOURRISSON.
• N'UTILISEZ JAMAIS DE SACS D'EXPÉDITION EN PLASTIQUE OU DE FILMS PLASTIQUES COMME
HOUSSES DE MATELAS, CAR ILS PEUVENT PROVOQUER UNE SUFFOCATION. C
• ATTENTION : N'UTILISEZ QUE LE MATELAS A LANGER FOURNI PAR DREAM ON ME, QUI MESURE 813
MM DE LONG SUR 406 MM DE LARGE ET DONT L'ÉPAISSEUR NE DÉPASSE PAS 25 MM.
AVERTISSEMENTS

7
www.dreamonme.com/help
• SIGA LAS INSTRUCCIONES: LEA TODAS LAS INSTRUCCIONES ANTES DE MONTAR EL CAMBIADOR.
CONSERVE LAS INSTRUCCIONES PARA USO FUTURO. NO UTILICE ESTE CAMBIADOR SI NO PUEDE
SEGUIR ESTRICTAMENTE LAS INSTRUCCIONES.
• INSPECCIÓN ANTES DEL USO: ANTES DE CADA USO O MONTAJE, INSPECCIONE LA UNIDAD PARA
VER SI HAY HERRAJES DAÑADOS, UNIONES SUELTAS, PIEZAS FALTANTES O BORDES AFILADOS.
NO UTILICE LA UNIDAD SI FALTA ALGUNA PIEZA O ESTÁ DAÑADA.
• SUSTITUCIÓN DE PIEZAS: SOLICITE A DREAM ON ME LAS PIEZAS DE REPUESTO Y LOS MANUALES
DE INSTRUCCIONES EN CASO NECESARIO. NO SUSTITUYA LAS PIEZAS.
• PRECAUCIONES DE MONTAJE: DURANTE EL PROCESO DE MONTAJE, SIEMPRE QUE UTILICE
TORNILLOS O PERNOS, COMPRUEBE CADA UNO DE ELLOS COLOCANDO EL TORNILLO/PERNO EN
EL DIAGRAMA DEL ARTÍCULO QUE ESTÁ DIBUJADO CON EL TAMAÑO Y DISEÑO REALES.
ASEGÚRESE DE UTILIZAR EL TAMAÑO Y LA FORMA ADECUADOS ESPECIFICADOS EN LAS
INSTRUCCIONES.
• SUPERFICIE DE MONTAJE: SE RECOMIENDA ENCARECIDAMENTE QUE EL MONTAJE SE REALICE
SOBRE UNA SUPERFICIE BLANDA Y NO ABRASIVA PARA EVITAR DAÑAR EL ACABADO.
• MANTENGA A SALVO A LOS NIÑOS Y A OTRAS PERSONAS SIGUIENDO ESTAS SENCILLAS REGLAS:
• NO PERMITA QUE NINGÚN NIÑO JUEGUE SOBRE LOS MUEBLES.
• NO PERMITA QUE SE SUBAN A NINGÚN MUEBLE.
• NO PERMITA QUE SE CUELGUEN DE NINGÚN MUEBLE.
• VIGILE SIEMPRE LA ACTIVIDAD DE SU HIJO CUANDO ESTÉ EN LA GUARDERÍA.
• PELIGRO DE ASFIXIA: PELIGRO DE ASFIXIA: MANTENGA LAS PIEZAS DESMONTADAS FUERA DEL
ALCANCE DE LOS NIÑOS PEQUEÑOS.
• PELIGRO DE CAÍDA: LOS NIÑOS HAN SUFRIDO LESIONES GRAVES TRAS CAERSE DE LOS
CAMBIADORES. LAS CAÍDAS PUEDEN PRODUCIRSE RÁPIDAMENTE.
• MANTÉNGASE AL ALCANCE DE LA MANO DE SU HIJO.
• PARA EVITAR LA MUERTE O LESIONES GRAVES, MANTENGA SIEMPRE AL NIÑO AL ALCANCE DE LA
MANO.
• NO DEJE NUNCA AL NIÑO DESATENDIDO.
• UTILICE ÚNICAMENTE EL COJÍN SUMINISTRADO POR EL FABRICANTE.
• PESO MÁXIMO DEL NIÑO: 13,6 KG (30 LIBRAS).
• NO PERMITA QUE NINGÚN NIÑO SE SUBA O JUEGUE SOBRE LA MESA.
• PELIGRO DE ASFIXIA: LOS BEBÉS SE HAN ASFIXIADO MIENTRAS DORMÍAN EN LOS CAMBIADORES:
LOS CAMBIADORES NO ESTÁN DISEÑADOS PARA DORMIR DE FORMA SEGURA. NO PERMITA
NUNCA QUE EL BEBÉ DUERMA EN EL CAMBIADOR.
• PELIGRO DE ESTRANGULAMIENTO: ¡LAS CUERDAS PROVOCAN ESTRANGULAMIENTO!
• NO COLOQUE OBJETOS CON CORDÓN ALREDEDOR DEL CUELLO DEL NIÑO, COMO CORDONES DE
CAPUCHAS O CHUPETES.
• NO CUELGUE CUERDAS SOBRE EL CAMBIADOR NI FIJE CUERDAS A LOS JUGUETES.
• PARA EVITAR LA ESTRANGULACIÓN, APRIETE TODOS LOS CIERRES. UN NIÑO PUEDE ATRAPAR
PARTES DEL CUERPO O DE LA ROPA EN CIERRES SUELTOS.
• NO COLOQUE EL CAMBIADOR CERCA DE LA VENTANA, DONDE LAS CUERDAS DE LAS PERSIANAS
O CORTINAS PUEDEN ESTRANGULAR AL NIÑO.
• LOS NIÑOS PUEDEN ASFIXIARSE CON ROPA DE CAMA BLANDA. NO AÑADA NUNCA UNA
ALMOHADA, UN EDREDÓN O UN RELLENO. NO COLOQUE NUNCA RELLENO ADICIONAL DEBAJO
DEL BEBÉ.
• NO UTILICES NUNCA BOLSAS DE PLÁSTICO DE TRANSPORTE NI LÁMINAS DE PLÁSTICO PARA
CUBRIR EL COLCHÓN, YA QUE PUEDEN PROVOCAR ASFIXIA. C
• PRECAUCIÓN: UTILICE ÚNICAMENTE EL CAMBIADOR CONTORNEADO SUMINISTRADO POR DREAM
ON ME, QUE MIDE 813 MM DE LARGO POR 406 MM DE ANCHO Y TIENE UN GROSOR NO SUPERIOR
A 25 MM.
ADVERTENCIAS

8
www.dreamonme.com/help
…. for choosing Dream On Me and congratulations on joining our family;
a family that has been transforming lives for over 30+ years!
We appreciate your feedback and wish you the very best in the
coming years with your new addition. If you have any questions
or concerns please don’t hesitate to reach out to us. One of our
trusted Customer Care representatives will be happy to assist you.
Thank you again for entrusting us to provide you with safe
and affordable baby products and accessories.
THANK YOU...
LIMITED WARRANTY:
• Dream On Me warrants its product to be free from defects in material and
workmanship and agrees to remedy any such defect.
• This warranty covers 1 year from the date of original purchase.
• This warranty is valid only upon presentation of proof of purchase.
• This is solely limited to the repair or replacement of defective furniture
components and no assembly labor is included.
• This warranty does not apply to any product which has been improperly
assembled, subjected to misuse or abuse or which has been altered or
repaired in any way.
• This warranty gives you specific legal rights and you may also have other
rights which vary from State to State.

9
www.dreamonme.com/help
.... pour avoir choisi Dream On Me et félicitations pour avoir rejoint notre
famille ; une famille qui transforme des vies depuis plus de 30 ans ! Nous
apprécions vos commentaires et vous souhaitons le meilleur pour les années
à venir avec votre nouveau bébé. Si vous avez des questions ou des
préoccupations, n'hésitez pas à nous contacter. L'un de nos représentants
du service clientèle se fera un plaisir de vous aider. Merci encore de nous
avoir fait confiance pour vous fournir des produits et accessoires pour bébés
sûrs et abordables.
MERCI...
GARANTIE LIMITÉE :
• Dream On Me garantit que son produit est exempt de tout défaut de
matériel et de fabrication et s'engage à remédier à tout défaut de ce type.
• Cette garantie couvre 1 an à partir de la date d'achat originale.
• Cette garantie n'est valable que sur présentation d'une preuve d'achat.
• Elle est uniquement limitée à la réparation ou au remplacement des
composants défectueux du meuble et aucune main d'œuvre de montage
n'est incluse.
• Cette garantie ne s'applique pas à un produit qui a été mal assemblé,
soumis à une mauvaise utilisation ou à un abus ou qui a été modifié ou
réparé de quelque façon que ce soit.
• Cette garantie vous donne des droits légaux spécifiques et vous pouvez
également avoir d'autres droits qui varient d'un État à l'autre. droits qui
varient d'un État à l'autre.

10
www.dreamonme.com/help
.... por elegir a Dream On Me y enhorabuena por unirse a nuestra familia;
¡una familia que lleva más de 30 años transformando vidas! Apreciamos sus
comentarios y le deseamos lo mejor en los próximos años con su nueva
incorporación. Si tiene alguna pregunta o duda, no dude en ponerse en
contacto con nosotros. Uno de nuestros representantes de atención al
cliente de confianza estará encantado de ayudarle. Gracias de nuevo por
confiar en nosotros para proporcionarle productos y accesorios para bebés
seguros y asequibles.
GRACIAS...
GARANTIE LIMITÉE :
• Dream On Me garantiza que su producto está libre de defectos de
material y mano de obra y se compromete a remediar cualquier defecto.
• Esta garantía cubre 1 año a partir de la fecha de compra original.
• Esta garantía sólo es válida si se presenta el comprobante de compra.
• Se limita únicamente a la reparación o sustitución de los componentes
defectuosos del mueble y no se incluye la mano de obra de montaje.
• Esta garantía no se aplica a ningún producto que haya sido montado
incorrectamente, sometido a un mal uso o abuso o que haya sido
alterado o reparado de alguna manera.
• Esta garantía le otorga derechos legales específicos y también puede
tener otros derechos que varían de un estado a otro.
11
www.dreamonme.com/help
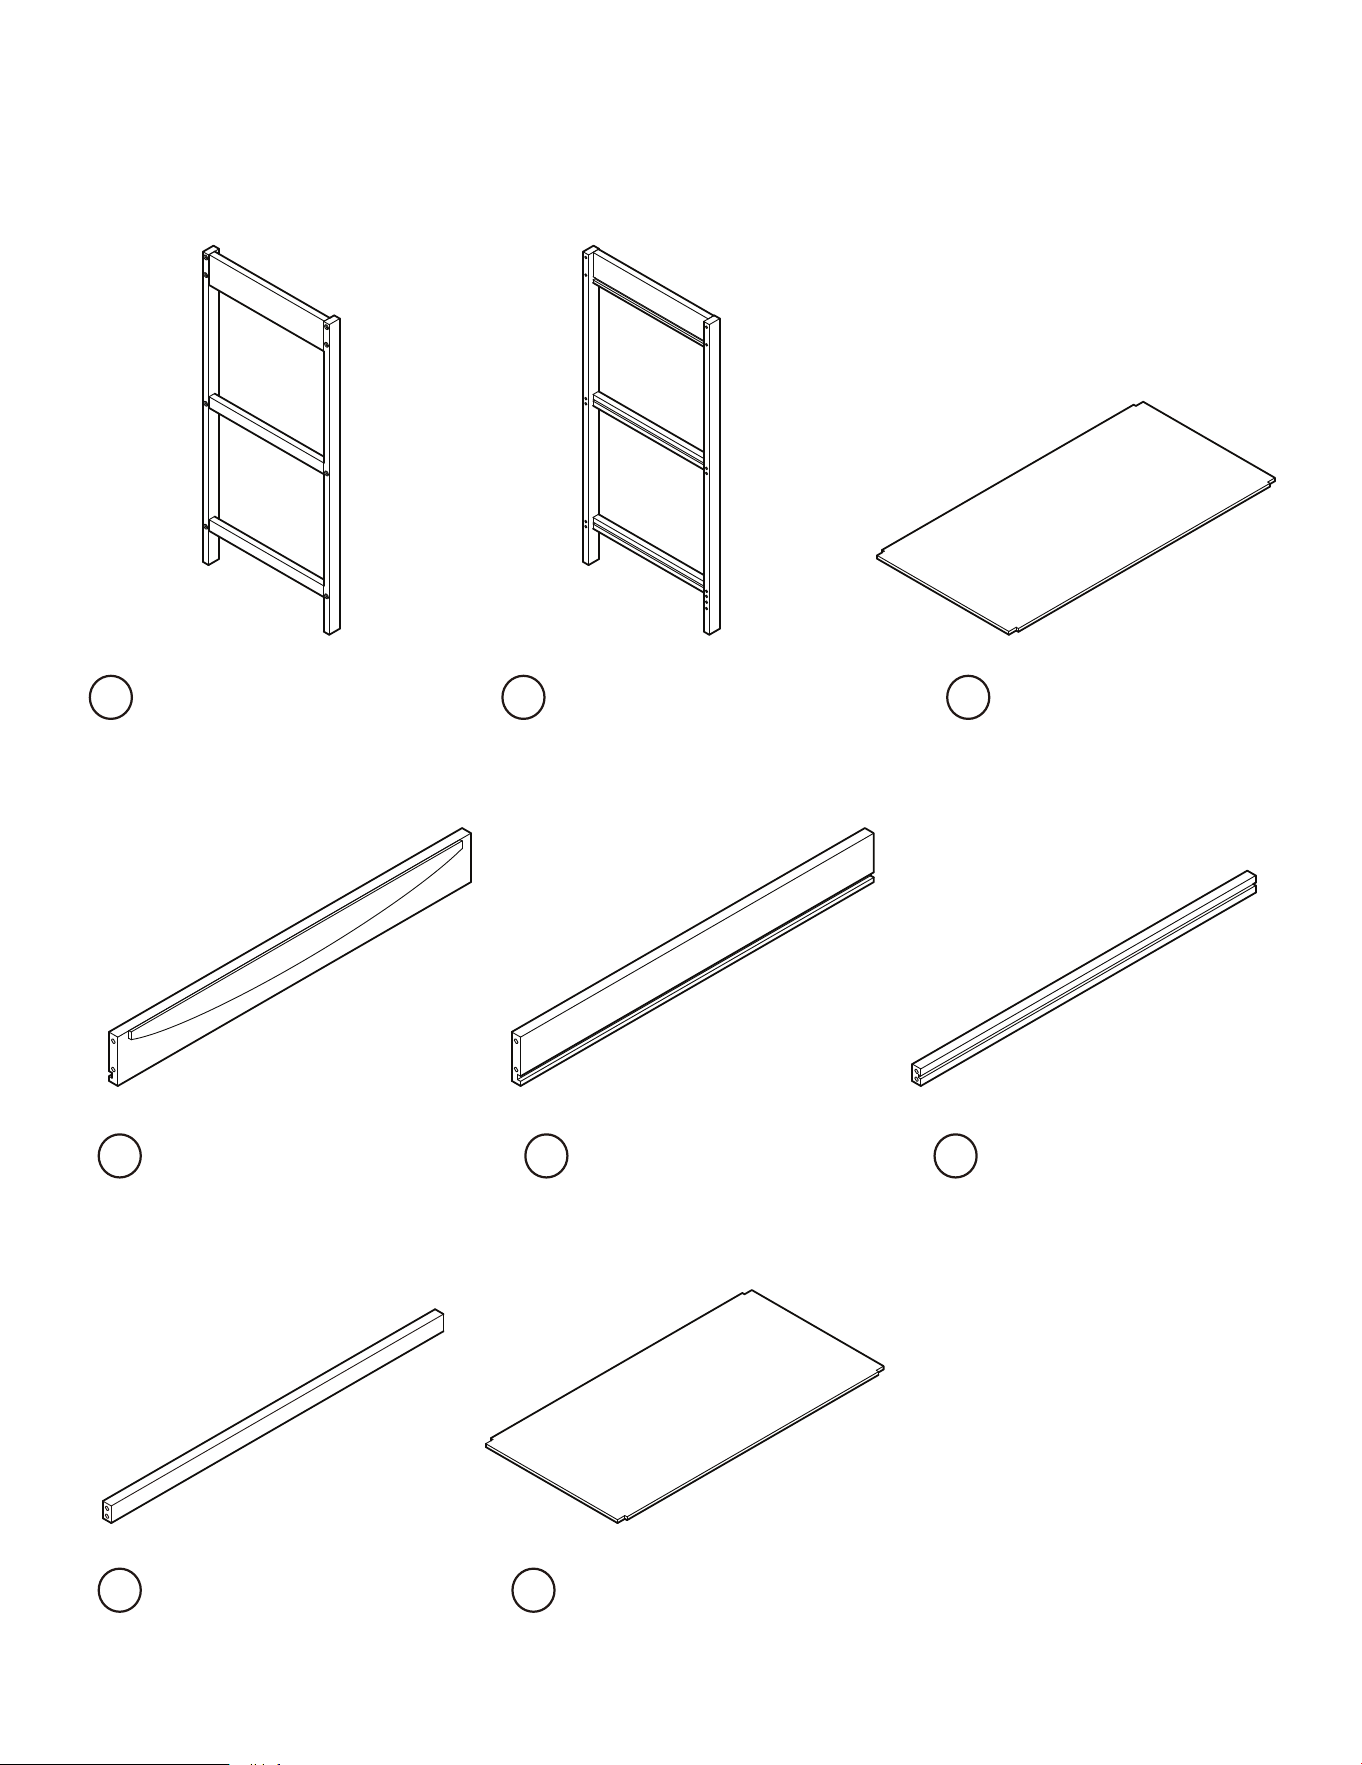
PARTS
PIÈCES `PARTES
If there are any missing parts, please contact Dream On Me before using the product.
S'il y a des pièces manquantes, veuillez contacter Dream On Me avant d'utiliser le produit.
Si falta alguna pieza, póngase en contacto con Dream On Me antes de utilizar el producto.
Left End Frame
Cadre de l'extrémité gauche
Marco final a la izquierda
1
Right End Frame
Cadre de l'extrémité droite
Marco final a la derecha
Top Panel
Panneau supérieur
Panel superior
2
Top Front Rail
Rail avant supérieur
Carril delantero superior
3
Shelf Rail 1 (x4)
Rail d'étagère 1 (x4)
Riel de estantería 1 (x4)
4 Top Rear Rail
Rail arrière supérieur
Raíl trasero superior
5 6
Shelf Rail 2
Rail d'étagère 2
Riel de estantería 2
7 Shelf Inserts (x2)
Inserts d'étagères (x2)
Insertos de estantería (x2)
8
12
www.dreamonme.com/help
If there are any missing parts, please contact Dream On Me before using the product.
S'il y a des pièces manquantes, veuillez contacter Dream On Me avant d'utiliser le produit.
Si falta alguna pieza, póngase en contacto con Dream On Me antes de utilizar el producto.
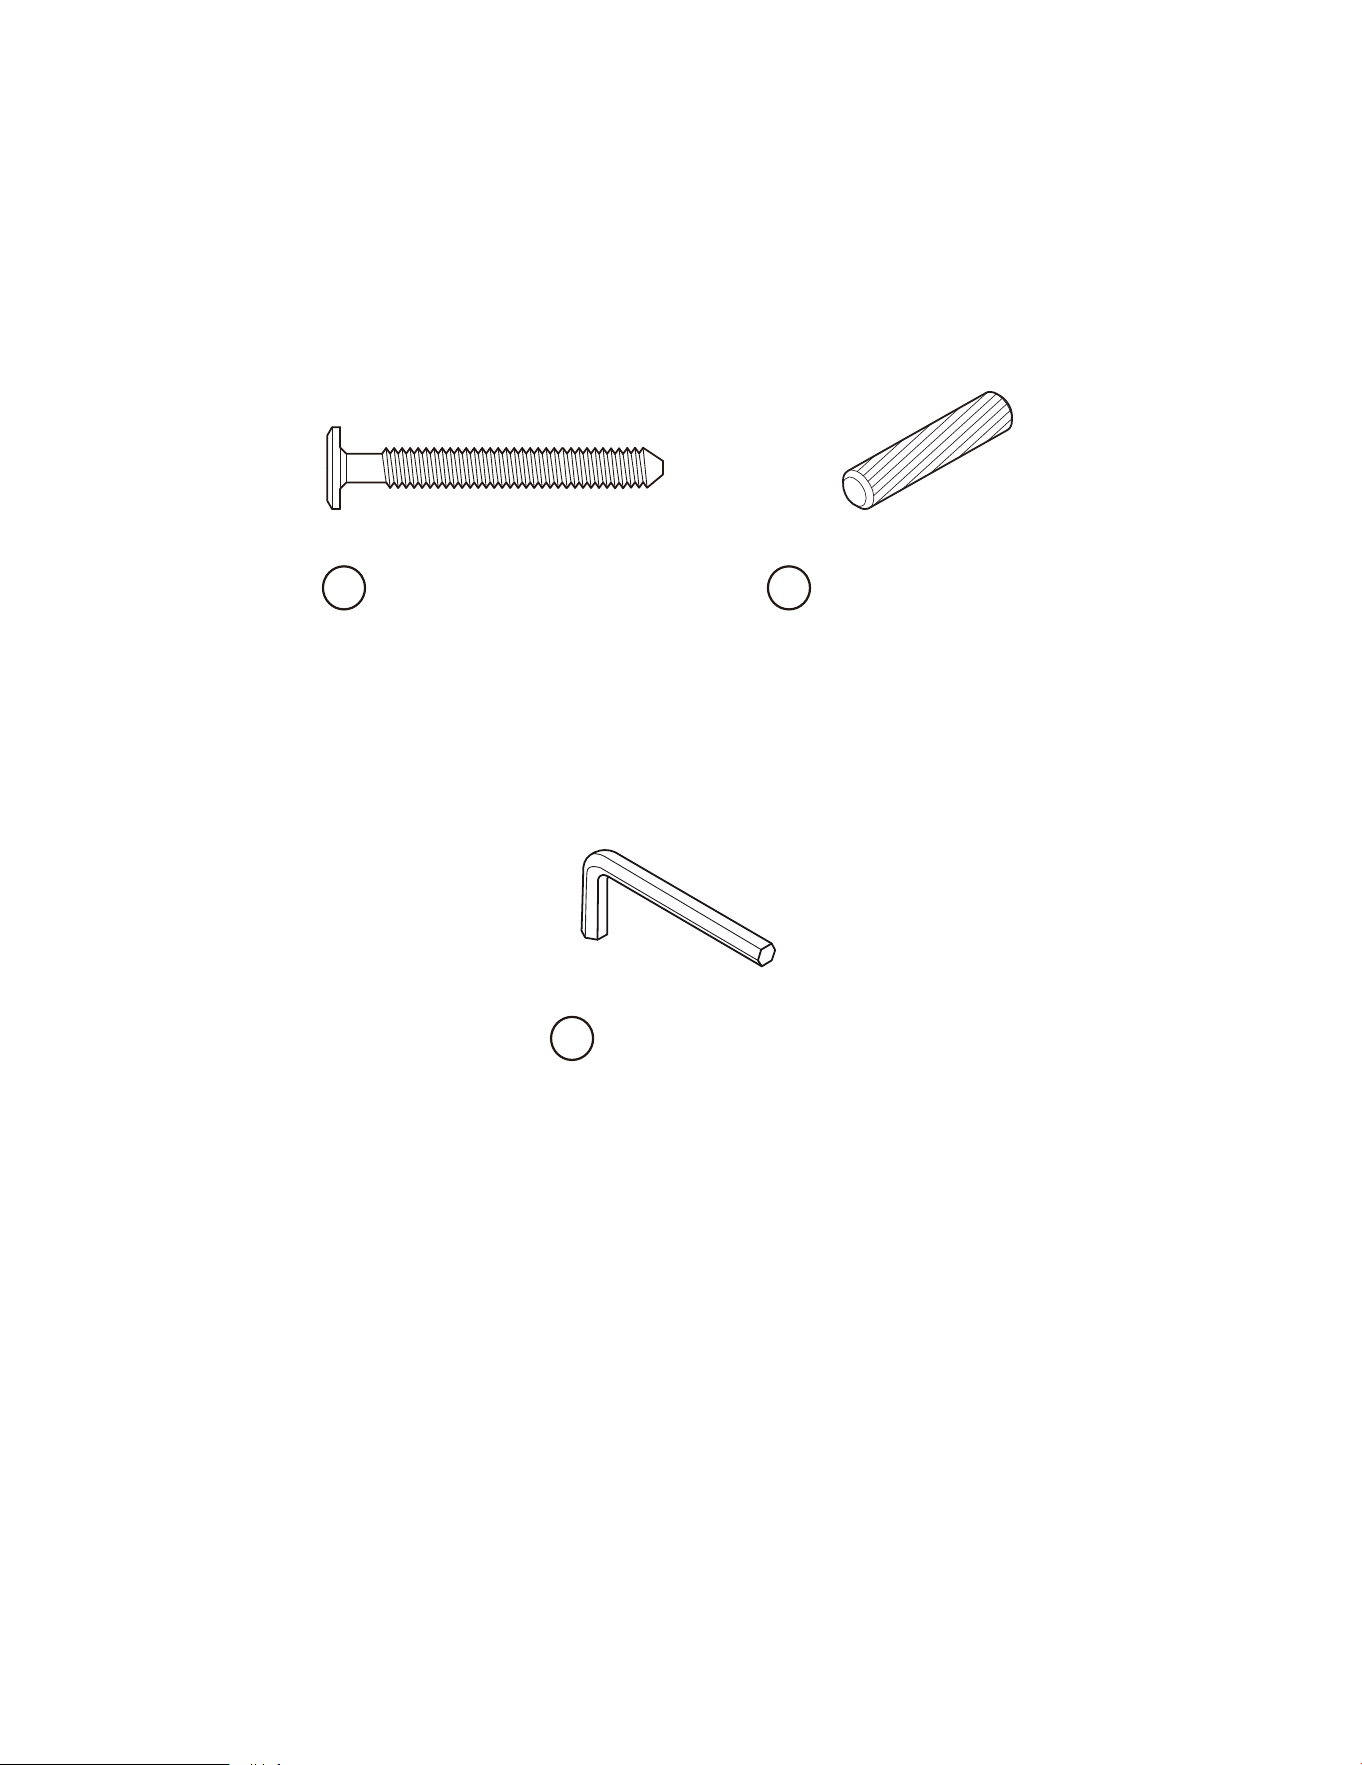
HARDWARE MATÉRIEL
Allen Key (x1)
Clé Allen (x1)
Llave Allen (x1)
C
Bolt M6 X 50 MM (x16)
Boulon M6 X 50 MM (x16)
Perno M6 X 50 MM (x16)
A
Wooden Dowel (x12)
Cheville en bois (×12)
Clavija de madera (×12)
B
13
www.dreamonme.com/help
Bolt M6 X 50 MM (x8)
Boulon M6 X 50 MM (x8)
Perno M6 X 50 MM (x8)
A
Wooden Dowel (x4)
Cheville en bois (×4)
Clavija de madera (×4)
B
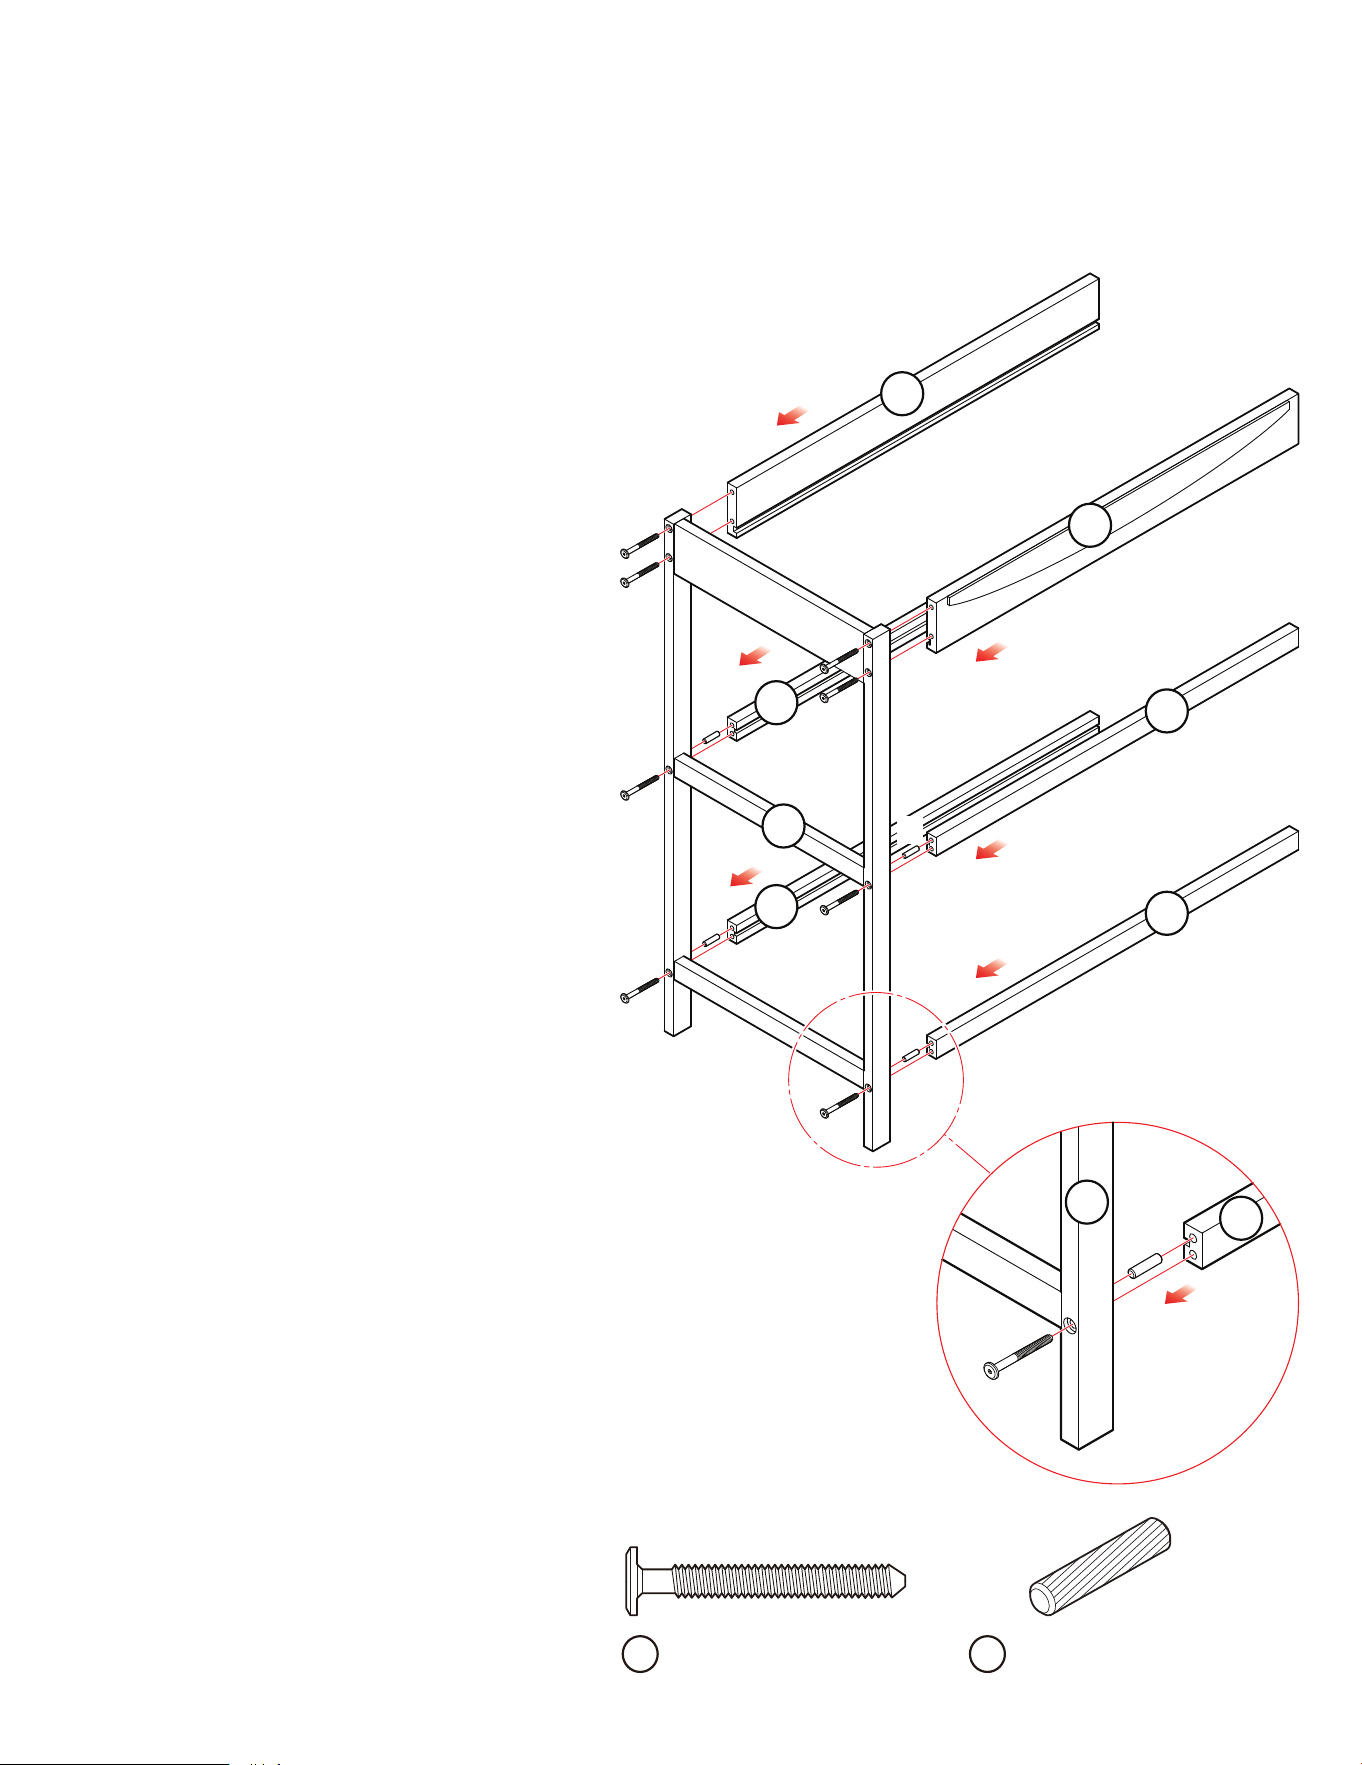
1
CHANGING TABLE ASSEMBLY - SHELF RAIL ASSEMBLY
ASSEMBLAGE DE LA TABLE À LANGER - ASSEMBLAGE DU RAIL DE L'ÉTAGÈRE
MONTAJE DEL CAMBIADOR - MONTAJE DEL BASTIDOR DEL ESTANTE
4
5
6
6
6
6
1
B
B
B
A
A
A
A
A
A
A
A
1
6
1a. Place all parts on a soft, clean surface to prevent any damage.
1b. Place four Wooden Dowels (Part B) into the pre-drilled holes on
the Left End Frame (Part 1) as marked in the diagram.
1c. Use Bolts M6 X 50 MM (Part A) to attach the four Shelf Rails
(Part 6) to the Left End Frame (Part 1).
1d. Secure each bolt with the Allen Key (Part C)
1e. Position the Top Rear Rail (Part 5) across the top back
edge of the assembled frames and secure with Bolts
M6 X 50 MM (Part A). Refer Diagram.
1f. Position the Top Front Rail (Part 4) across the top
front edge of the assembled frames and secure it
with Bolts M6 X 50 MM (Part A). Refer Diagram.
1g. Ensure all parts are tightly secured and check for
stability.
1a. Placez toutes les pièces sur une surface douce et
propre afin de ne pas les endommager.
1b. Placez quatre chevilles en bois (partie B) dans les
trous pré-percés sur le cadre d'extrémité gauche
(partie 1), comme indiqué sur le schéma.
1c. Utiliser les boulons M6 X 50 MM (partie A) pour fixer
les quatre rails de l'étagère (partie 6) au cadre de
l'extrémité gauche (partie 1).
1d. Fixer chaque boulon à l'aide de la clé Allen (partie C).
1e. Positionner le rail arrière supérieur (partie 5) sur le
bord arrière supérieur des cadres assemblés et le
fixer avec les boulons M6 X 50 MM (partie A). Se
référer au schéma.
1f. Positionner la traverse supérieure avant (partie 4) en
travers du bord supérieur avant des cadres
assemblés et la fixer avec des boulons M6 X 50 MM
(partie A). Se référer au schéma.
1g. S'assurer que toutes les pièces sont bien fixées et
vérifier la stabilité.
1a. Coloque todas las piezas sobre una superficie suave y limpia para evitar
cualquier daño.
1b. Coloque cuatro clavijas de madera (pieza B) en los orificios pretaladrados del
marco del extremo izquierdo (pieza 1), tal como se indica en el diagrama.
1c. Utilice pernos M6 X 50 MM (pieza A) para fijar los cuatro raíles de las baldas
(pieza 6) al marco del extremo izquierdo (pieza 1).
1d. Asegure cada perno con la llave Allen (pieza C).
1e. Coloque el riel trasero superior (pieza 5) a través del borde trasero superior
de los marcos ensamblados y asegúrelo con pernos M6 X 50 MM (pieza A).
Consulte el diagrama.
1f. Coloque el riel frontal superior (pieza 4) a través del borde frontal
superior de los marcos ensamblados y asegúrelo con pernos M6 X
50 MM (pieza A). Consulte el diagrama.
1g. Asegúrese de que todas las piezas estén bien sujetas y
compruebe la estabilidad.
14
www.dreamonme.com/help
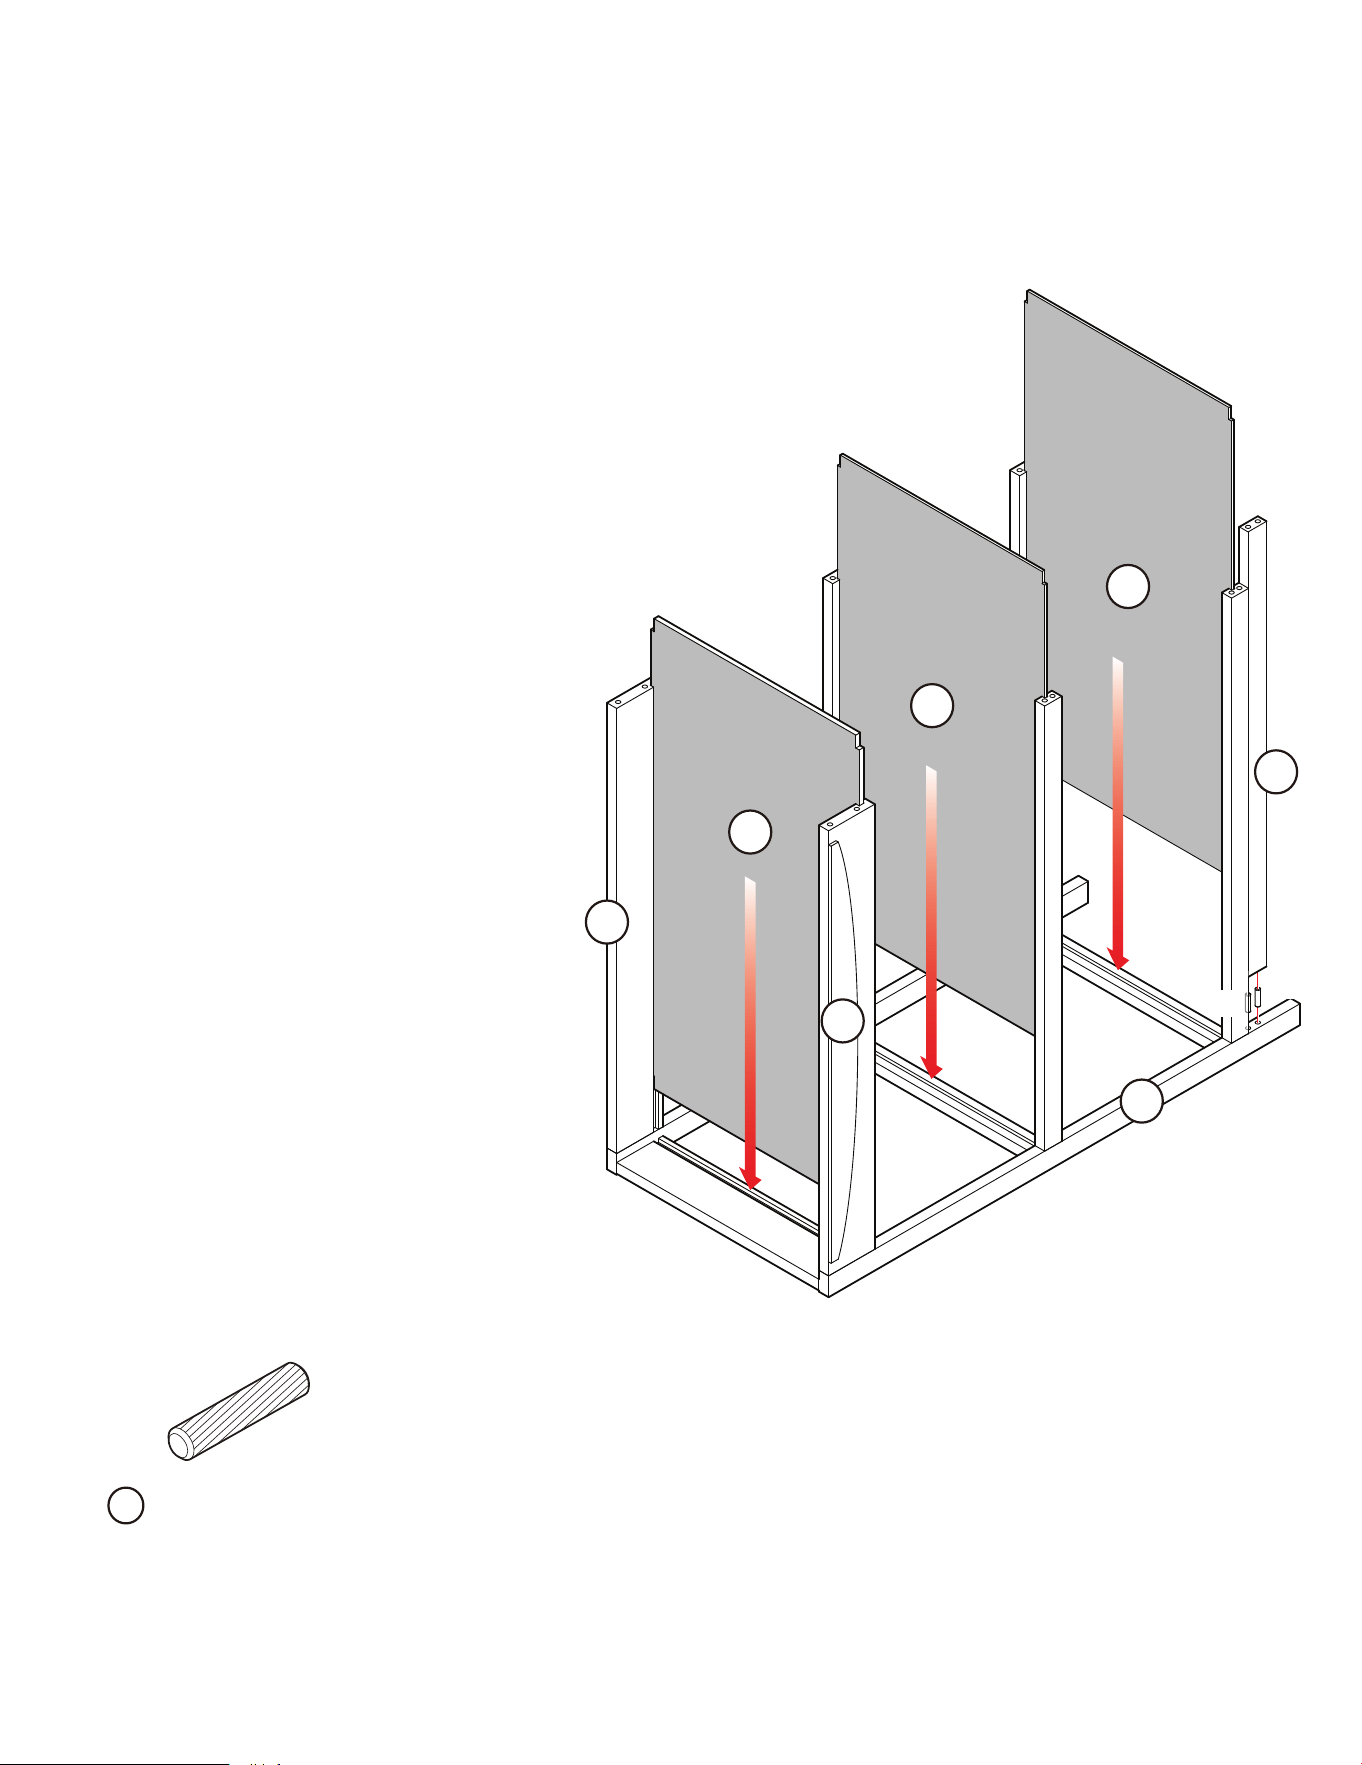
Wooden Dowel (x2)
Cheville en bois (×2)
Clavija de madera (×2)
B
1
7
5
4
8
3
8
B
B
2
CHANGING TABLE ASSEMBLY - SHELF ASSEMBLY
ASSEMBLAGE DE LA TABLE À LANGER - ASSEMBLAGE DE L'ÉTAGÈRE
MONTAJE DEL CAMBIADOR - MONTAJE DEL ESTANTE
2a. Insert two Wooden Dowels (Part B) into the pre-drilled holes
on the Left End Frame (Part 1) as shown in the diagram.
2b. Attach the Shelf Rail (Part 7) to the Left End Frame with
these dowels.
2c. Slide the Shelf Inserts (Part 8) in the grooves as
shown in the diagram.
2d. Slide the Panel (Part 3) in the grooves as shown
in the diagram.
2a. Insérez deux chevilles en bois (partie B)
dans les trous pré-percés du cadre
d'extrémité gauche (partie 1), comme
indiqué sur le schéma.
2b. Fixer le rail de l'étagère (partie 7) au cadre
d'extrémité gauche à l'aide de ces chevilles.
2c. Glisser les inserts d'étagère (partie 8) dans
les rainures comme indiqué sur le schéma.
2d. Glisser le panneau (pièce 3) dans les
rainures comme indiqué sur le schéma
2a. Inserte dos clavijas de madera (pieza B) en
los orificios pretaladrados del marco del
extremo izquierdo (pieza 1) como se muestra
en el diagrama.
2b. Fije el riel del estante (pieza 7) al marco del
extremo izquierdo con estas espigas.
2c. Deslice los insertos del estante (pieza 8) en
las ranuras como se muestra en el diagrama.
2d. Deslice el Panel (Pieza 3) en las ranuras
como se muestra en el diagrama.
B
15
www.dreamonme.com/help
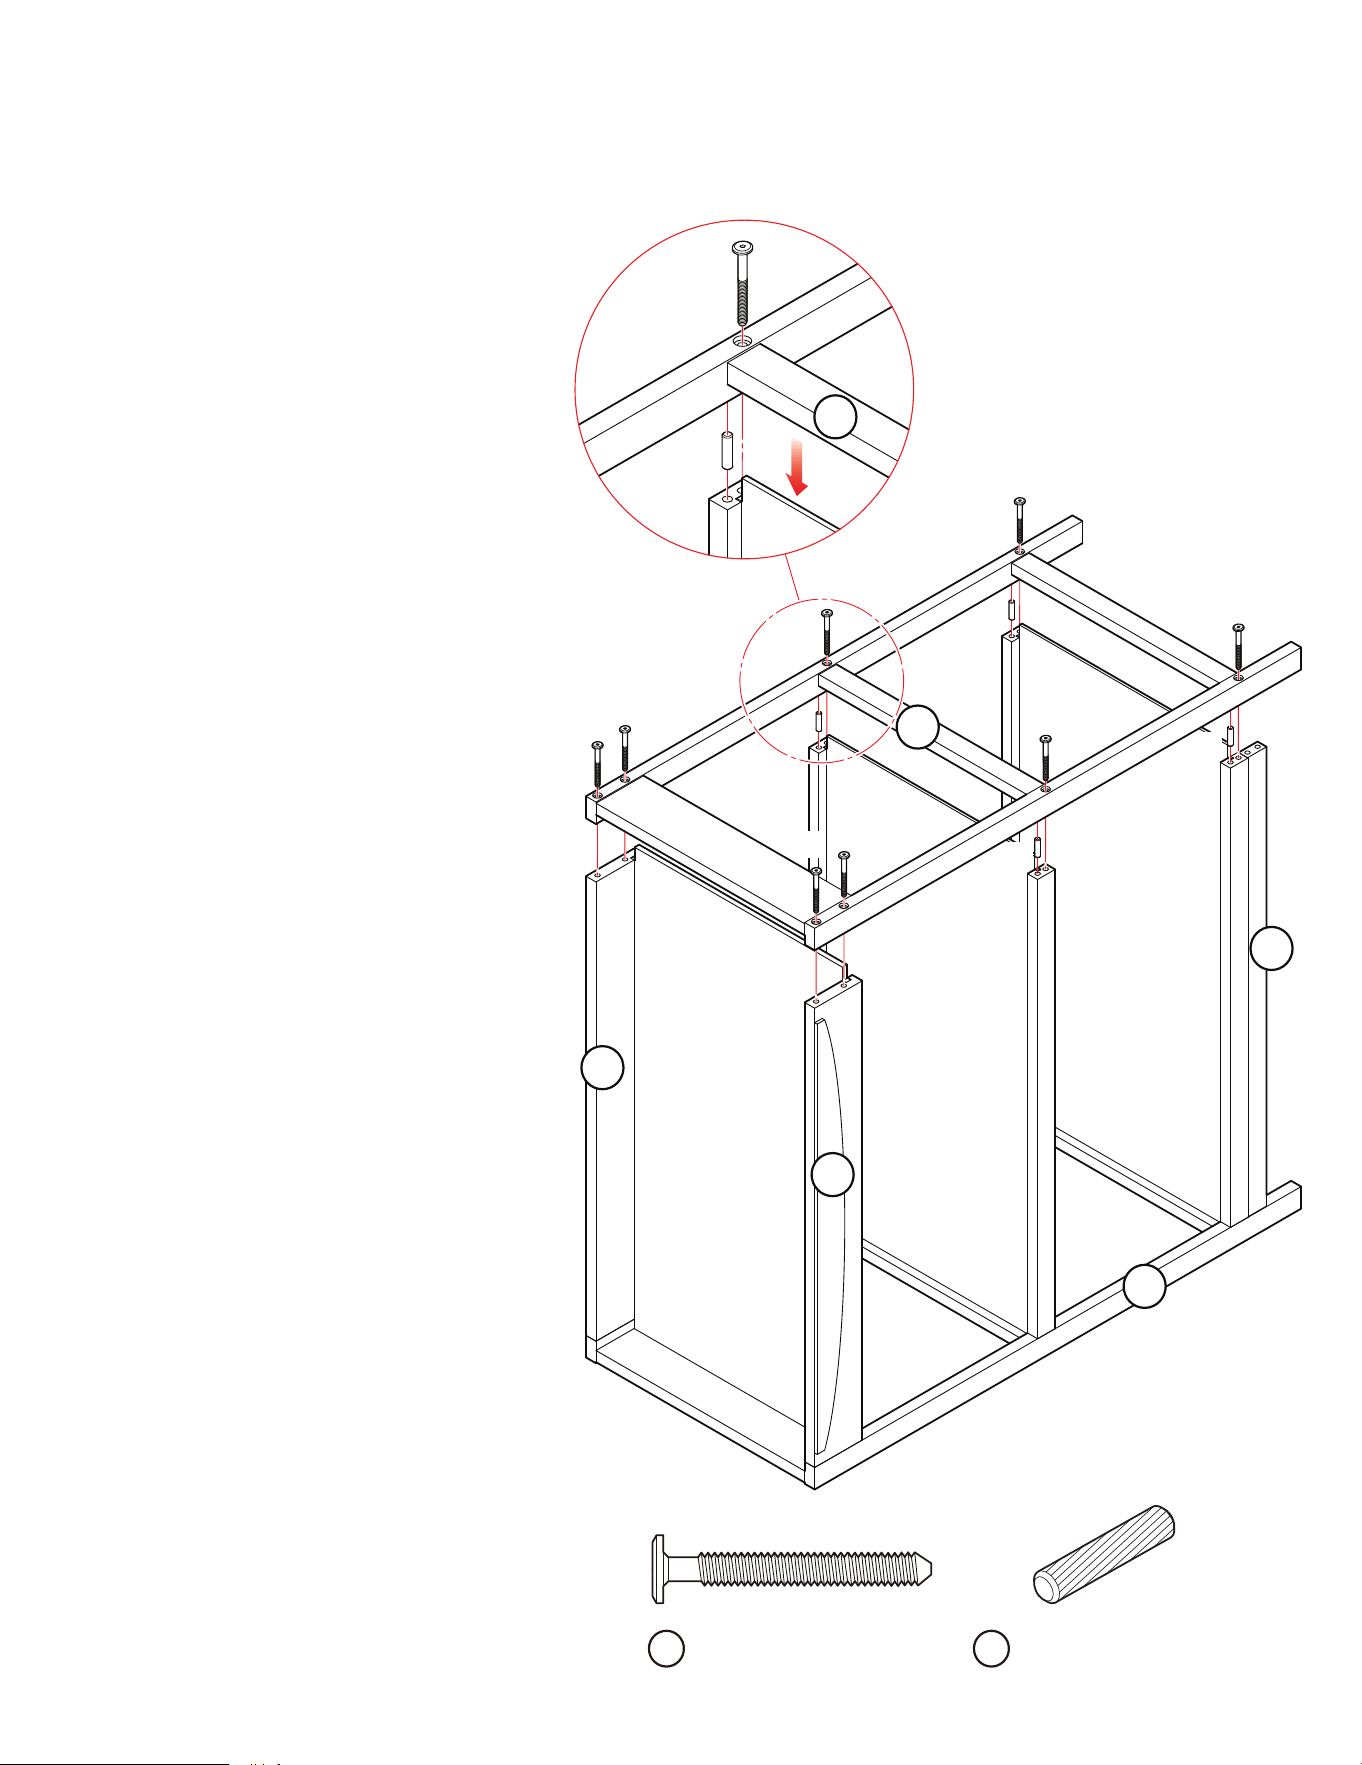
Bolt M6 X 50 MM (x8)
Boulon M6 X 50 MM (x8)
Perno M6 X 50 MM (x8)
A
Wooden Dowel (x4)
Cheville en bois (×4)
Clavija de madera (×4)
B
3
CHANGING TABLE ASSEMBLY - SHELF RAIL ASSEMBLY
ASSEMBLAGE DE LA TABLE À LANGER - ASSEMBLAGE DU RAIL DE L'ÉTAGÈRE
MONTAJE DEL CAMBIADOR - MONTAJE DEL BASTIDOR DEL ESTANTE
7
1
4
5
2
2
B
B
B
A
A
A
A
A
A
A
A
3a. Position the Right End Frame (Part 2) as
shown in the diagram.
3b. Insert Wood Dowels (Part B) into the Shelf
Rails (Part 6) and Shelf Rails (Part7)
3c. Use Bolts M6 X 50 MM (Part A) to attach the
Shelf Rails (Part 6 & 7) to the Right End
Frame (Part 2).
3d. Attach the Top Front Rail (Part 4) to the Top
Rear Rail (Part 5) to the Right End Frame
(Part 2), using Bolts M6 X 50 MM (Part A).
As shown in the diagram.
3e. Secure each bolt with the Allen Key (Part C)
3f. check all bolts are firm and the stable is stable.
3a. Positionnez le cadre d'extrémité droit (partie
2) comme indiqué sur le schéma.
3b. Insérez les chevilles en bois (partie B) dans
les rails de l'étagère (partie 6) et les rails de
l'étagère (partie 7).
3c. Utiliser des boulons M6 X 50 MM (partie A)
pour fixer les rails de l'étagère (parties 6 et
7) au cadre de l'extrémité droite (partie 2).
3d. Fixer le rail avant supérieur (partie 4) au rail
arrière supérieur (partie 5) au cadre
d'extrémité droit (partie 2), à l'aide de
boulons M6 X 50 MM (partie A). Comme
indiqué sur le schéma.
3e. Fixer chaque boulon à l'aide de la clé Allen
(partie C).
3f. Vérifier que tous les boulons sont bien
serrés et que l'étable est stable.
3a. Coloque el marco del extremo derecho
(pieza 2) como se muestra en el diagrama.
3b. Inserte los Pasadores de Madera (Parte B)
en los Rieles del Estante (Parte 6) y los
Rieles del Estante (Parte 7).
3c. Utilice pernos M6 X 50 MM (pieza A) para
fijar los raíles de los estantes (piezas 6 y 7) al
marco del extremo derecho (pieza 2).
3d. Fije el riel delantero superior (pieza 4) al riel
trasero superior (pieza 5) al marco del extremo
derecho (pieza 2), utilizando pernos M6 X 50
MM (pieza A). Como se muestra en el diagrama.
3e. Asegure cada perno con la llave Allen (Parte C)
3f. Compruebe que todos los pernos estén firmes y
que el establo esté estable.

16
www.dreamonme.com/help
• Wipe surfaces with a soft, clean cloth slightly dampened with water.
• Do not use harsh chemicals or abrasive cleaners to prevent damage.
• Clean spills immediately to prevent staining or damage.
• Inspect products regularly for any loose screws, worn parts, or any signs of
wear. Tighten or replace as necessary to maintain safety and functionality.
• Keep products out of direct sunlight to prevent fading and warping over time.
• Keep in a dry environment to prevent the wood from swelling, warping, or
cracking.
• Essuyez les surfaces avec un chiffon doux et propre légèrement humidifié avec
de l'eau.
• N'utilisez pas de produits chimiques agressifs ou de nettoyants abrasifs afin
d'éviter tout dommage.
• Nettoyez immédiatement les liquides renversés pour éviter de les tacher ou de
les endommager.
• Inspectez régulièrement les produits pour vérifier qu'il n'y a pas de vis
desserrées, de pièces usées ou de signes d'usure. Serrez ou remplacez les
pièces si nécessaire pour maintenir la sécurité et la fonctionnalité.
• Conserver les produits à l'abri de la lumière directe du soleil pour éviter qu'ils ne
se décolorent ou ne se déforment avec le temps.
• Conservez-les dans un environnement sec pour éviter que le bois ne gonfle, ne
se déforme ou ne se fissure.
Care and maintenance
Entretien et maintenance
• Limpie las superficies con un paño suave y limpio ligeramente humedecido con
agua.
• No utilice productos químicos agresivos ni limpiadores abrasivos para evitar
daños.
• Limpie inmediatamente los derrames para evitar manchas o daños.
• Inspeccione los productos con regularidad en busca de tornillos sueltos, piezas
desgastadas o cualquier signo de desgaste. Apriételos o sustitúyalos según sea
necesario para mantener la seguridad y funcionalidad.
• Mantenga los productos alejados de la luz solar directa para evitar que se
decoloren o deformen con el tiempo.
• Manténgalos en un entorno seco para evitar que la madera se hinche, deforme
o agriete.
Entretien et maintenance
Courriel : [email protected]
Suivez-nous @dreamonmeinc
pour que votre crèche soit présentée sur nos médias sociaux.
Participez à notre concours mensuel !
Scannez le code QR pour vous inscrire.
Chattez avec nous !
Scannez le code QR pour accéder au Live Chat.
Siga con nosotros @dreamonmeinc
para que su guardería aparezca en nuestras redes sociales.
Participa en nuestro sorteo mensual.
Escanee el código QR para registrarse.
Chatea con nosotros.
Escanee el código QR para el chat en vivo.
Correo electrónico: [email protected]
45 VERONICA AVENUE
SOMERSET NEW JERSEY 08873
5375 BOUL DES GRANDES-PRAIRIES
SAINT-LEONARD, QC H1R 1B1
www.dreamonme.com
Follow Us @dreamonmeinc
to get your nursery featured on our social media.
Enter our monthly giveaway!
Scan the QR code to register.
Chat with us!
Scan the QR code to Live Chat.
E-mail: [email protected]